|
|
 Posted - November 01 2014 : 7:49:14 PM Posted - November 01 2014 : 7:49:14 PM


|
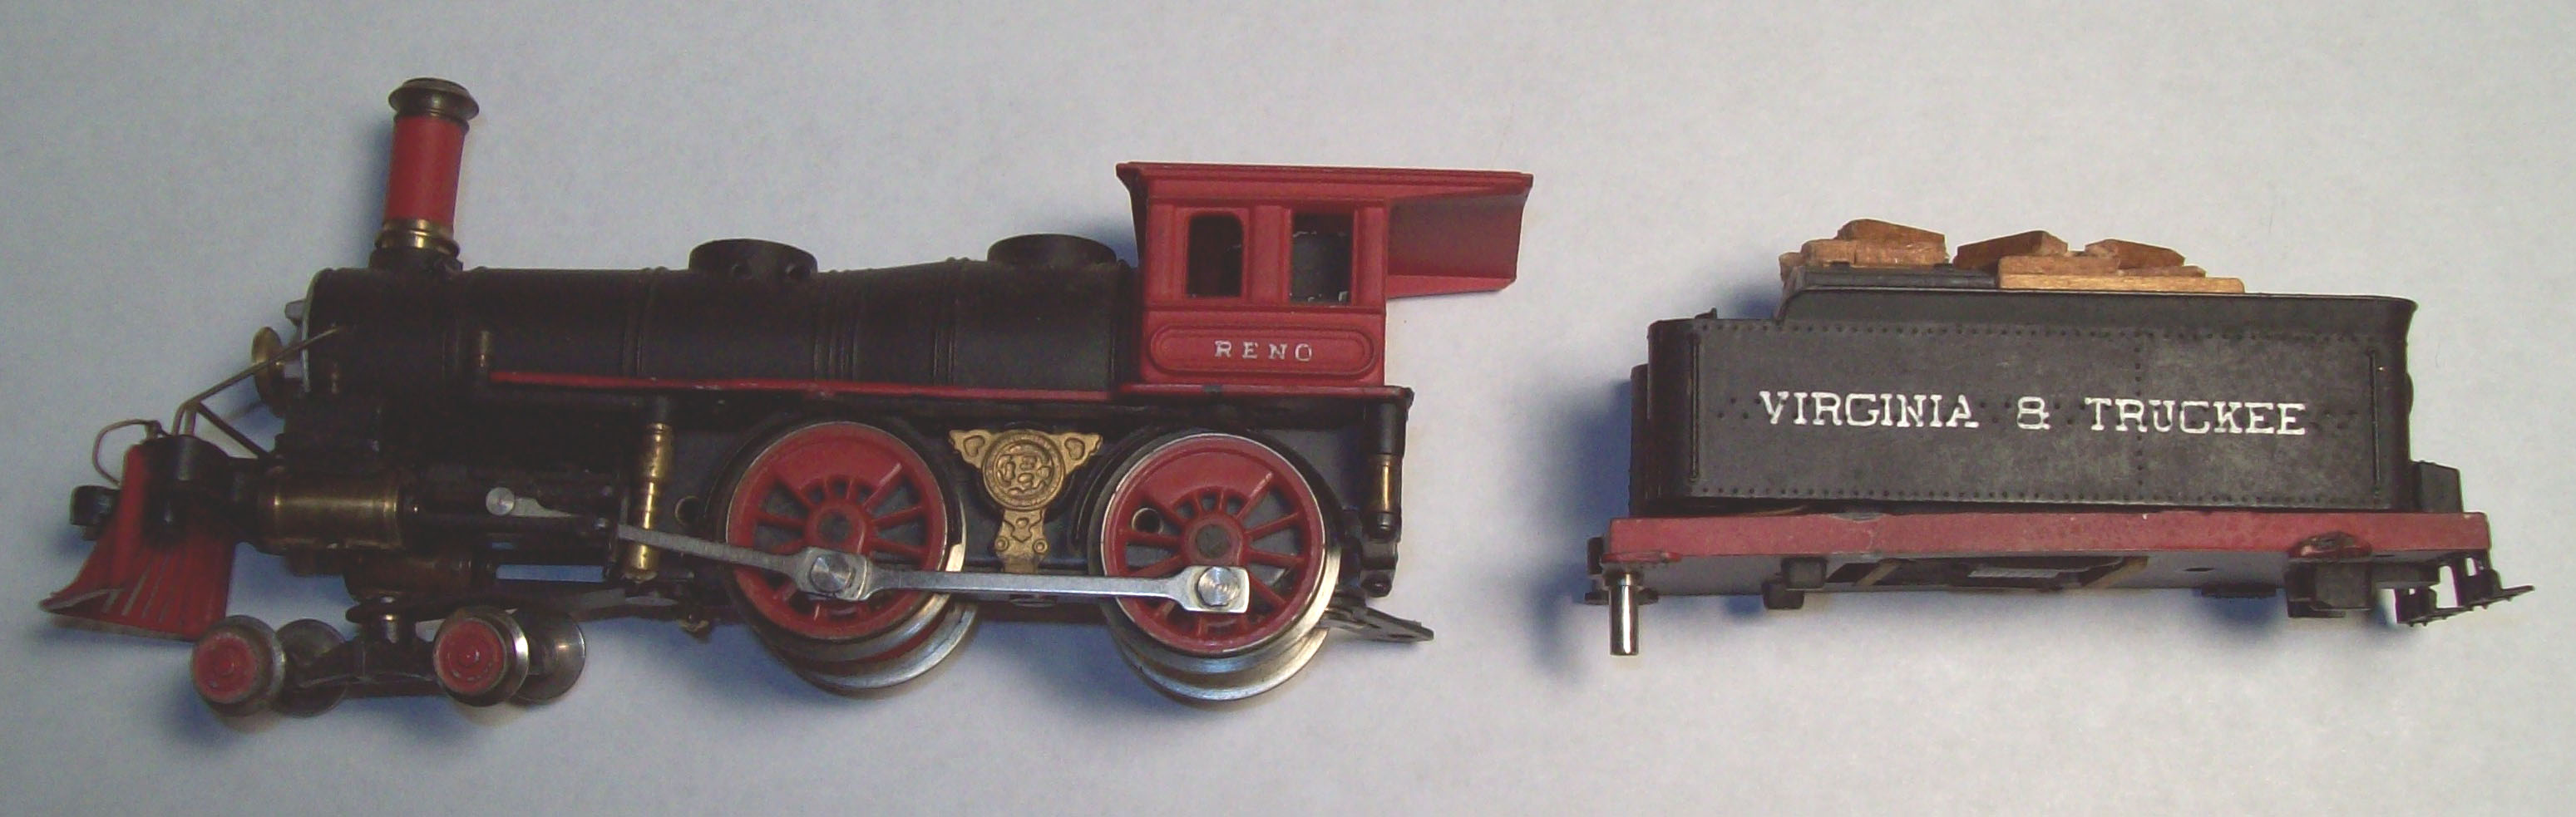
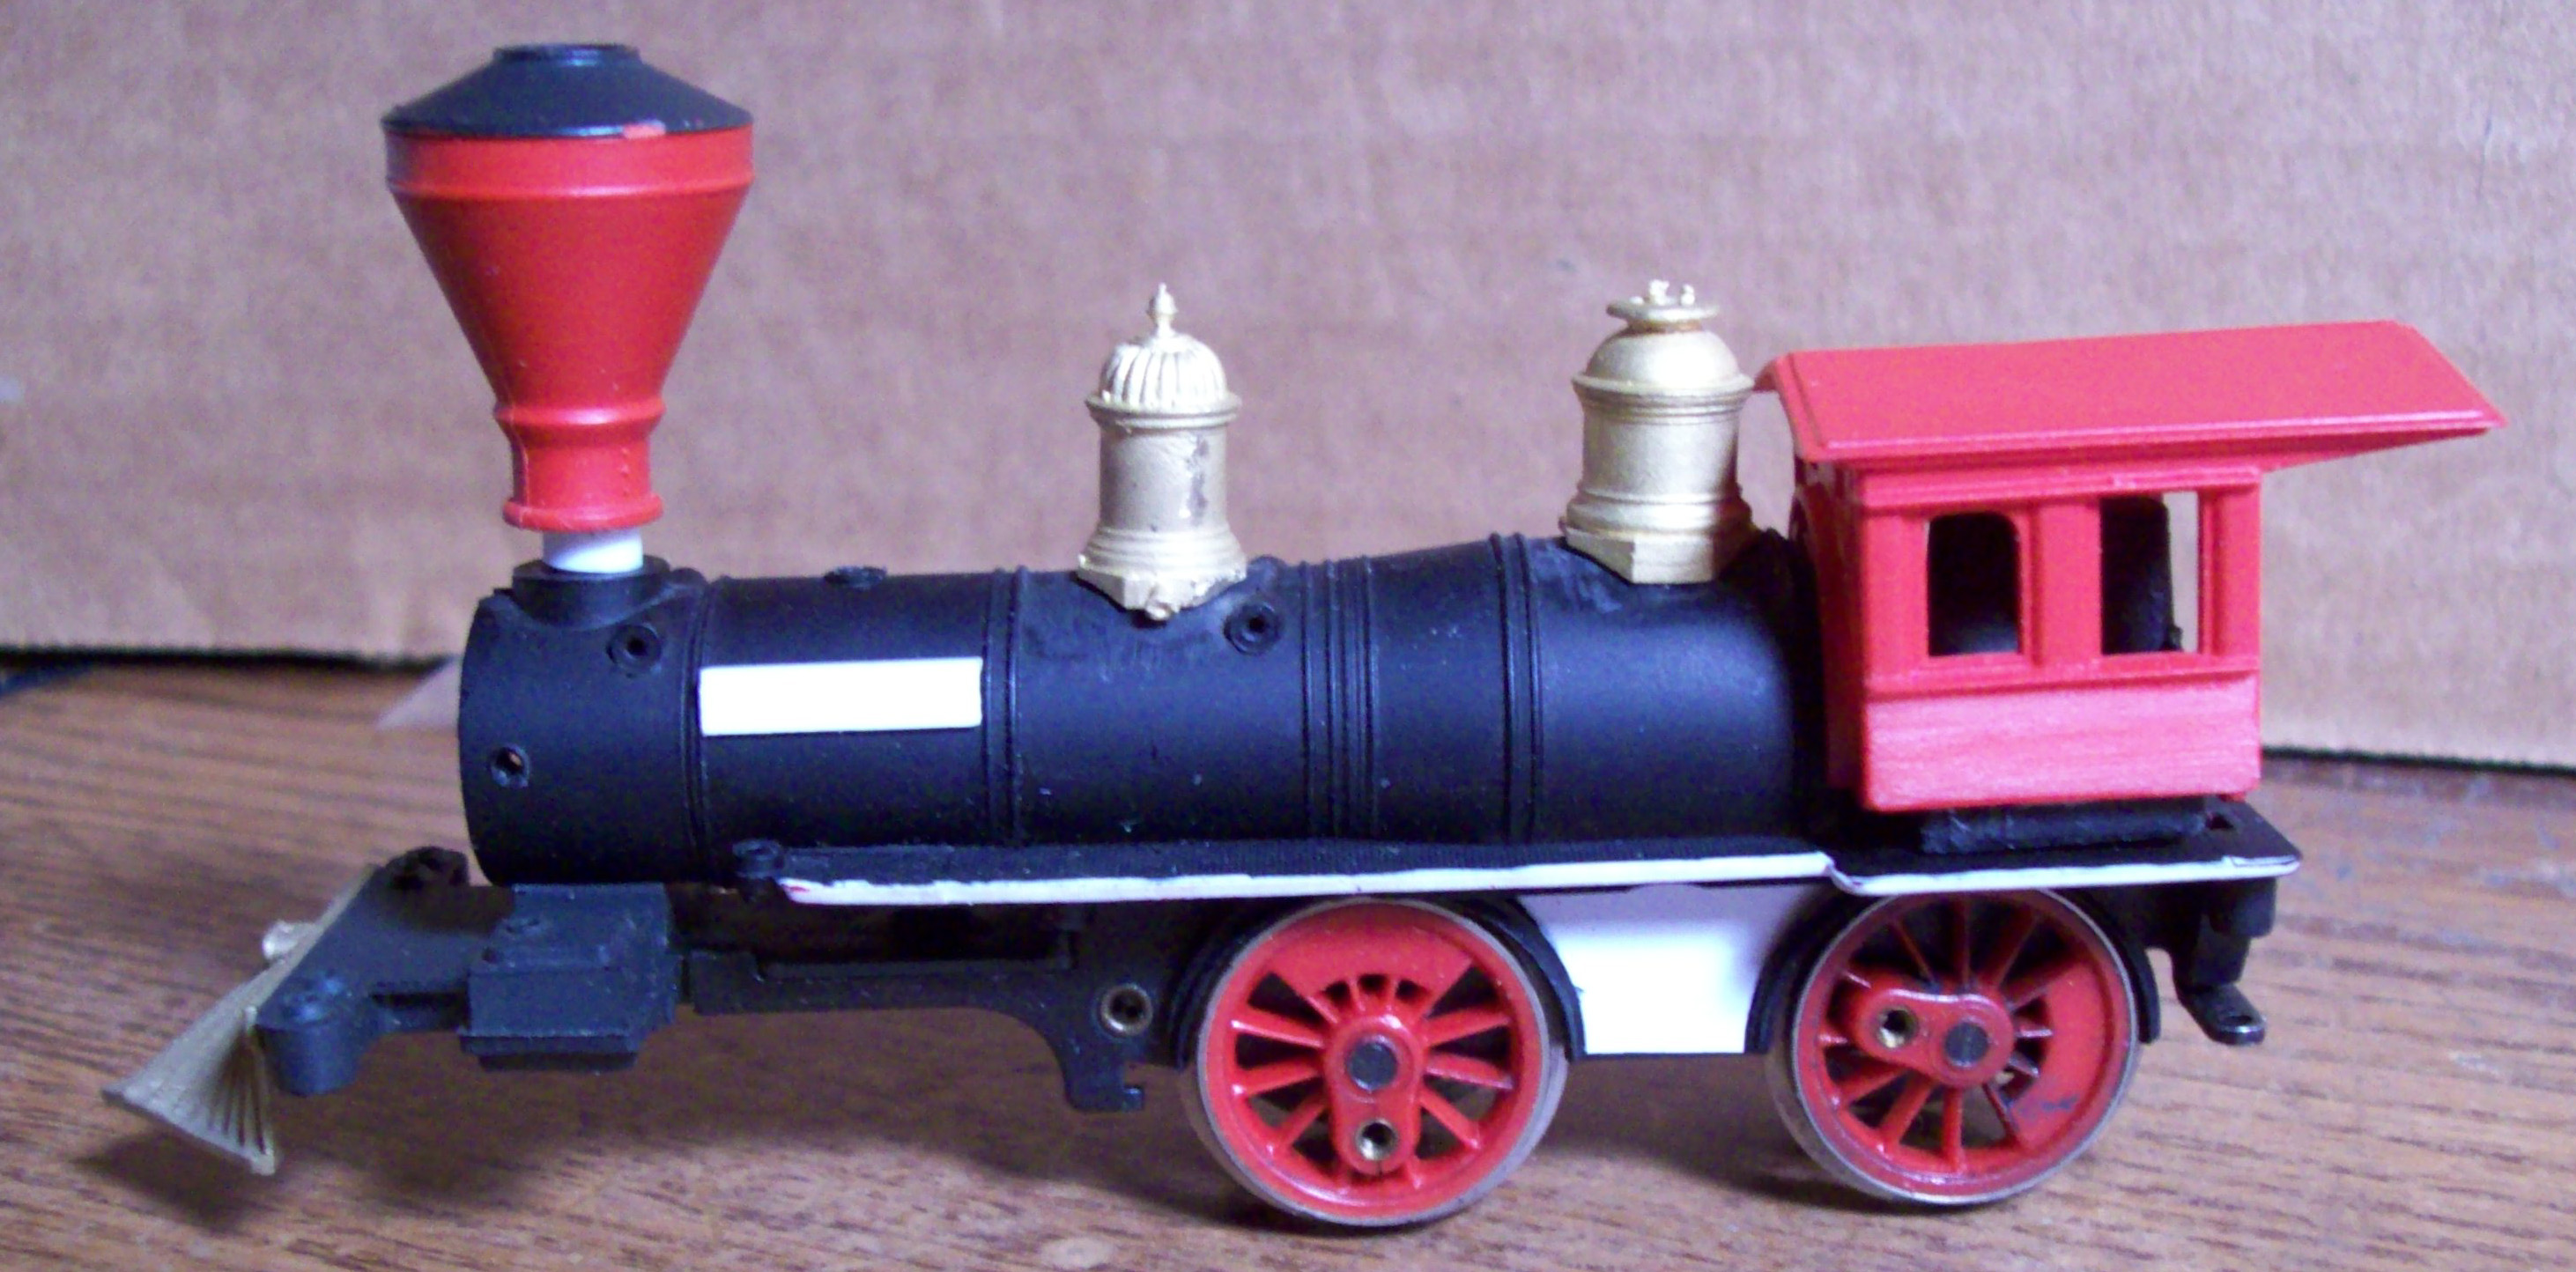
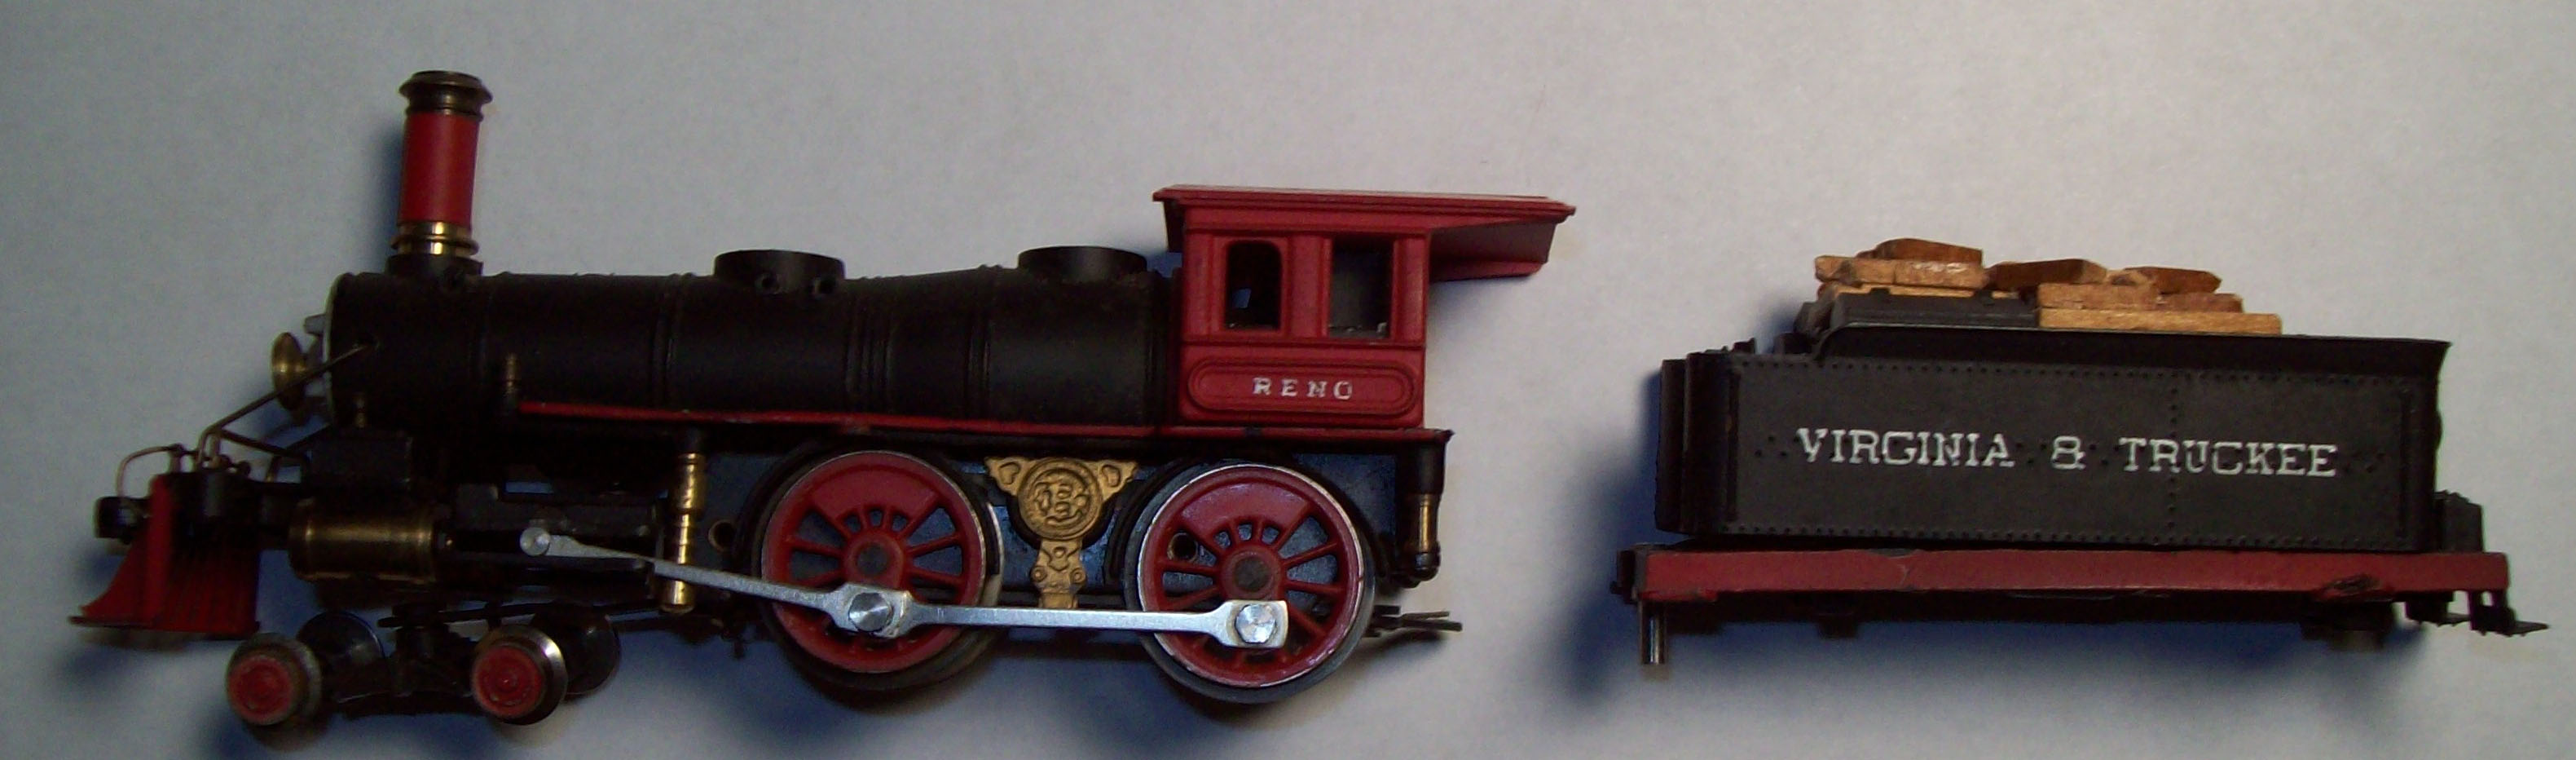
I am kitbashing the General using a 1968 production Rivarossi Reno as the starting point. If anyone has a photo/drawing of the General from the 1869-1871 period, I would appreciate a copy of it. As it is, I'm going on what I've been able to find so far.
Basic locomotive
Cab modification: had to get rid of the "oval" on the sides
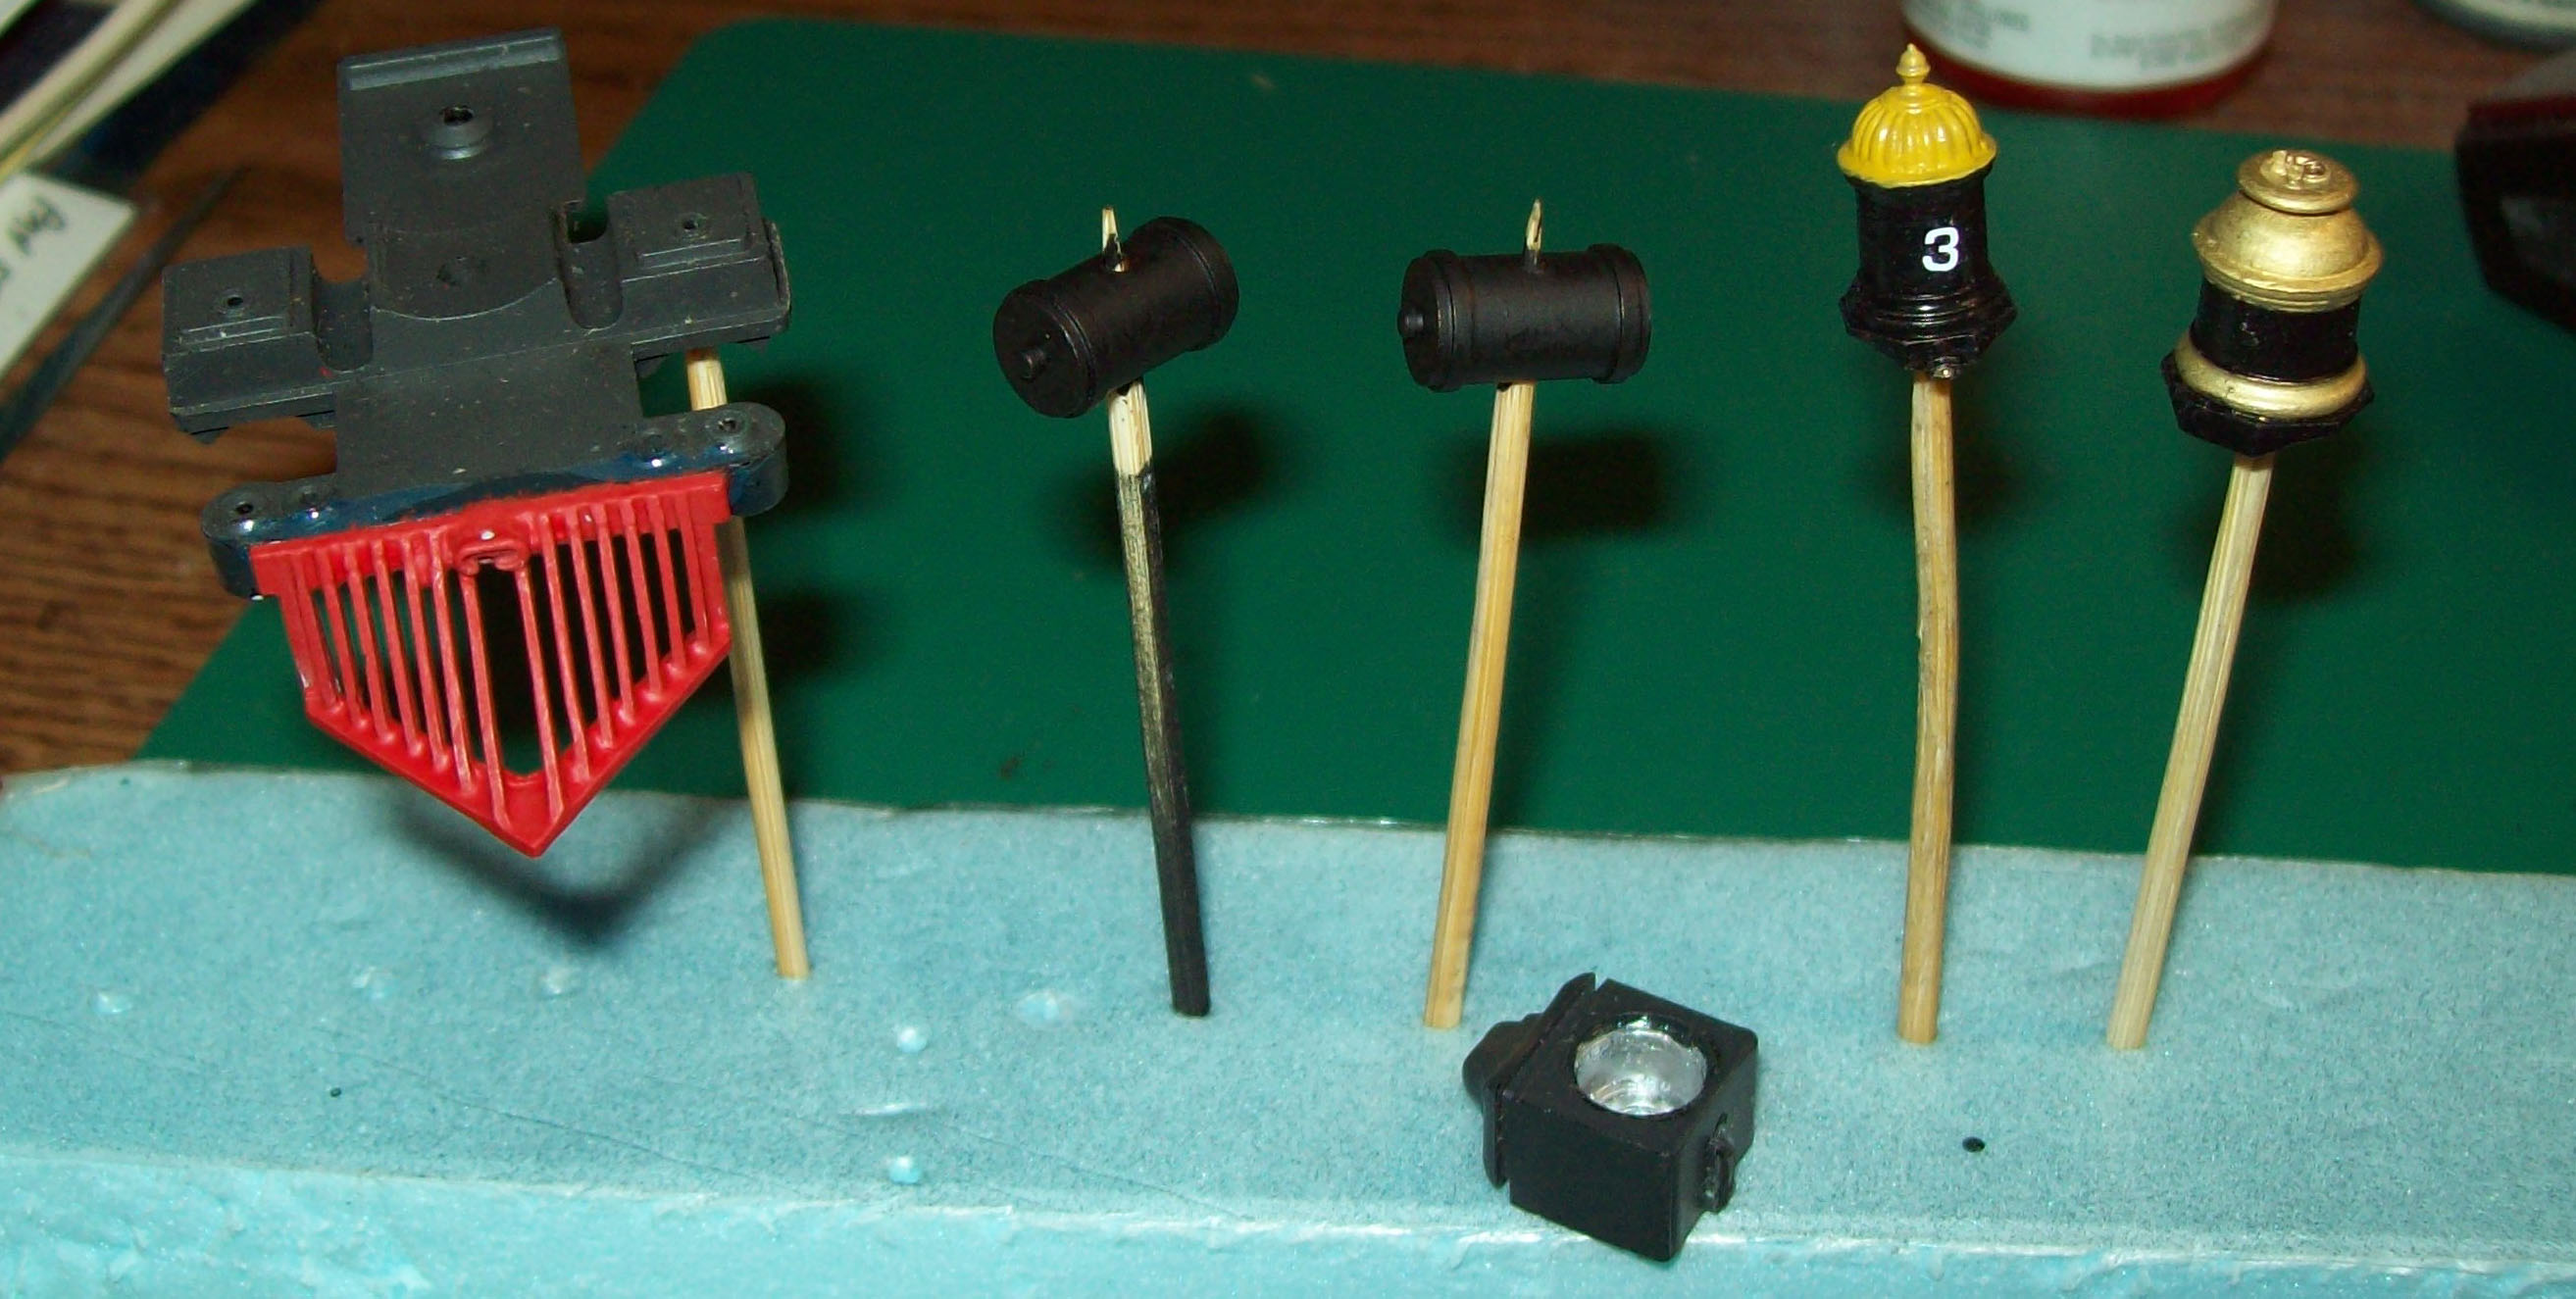
Pilot modification: original pilot was damaged, so I had to install a new brass one
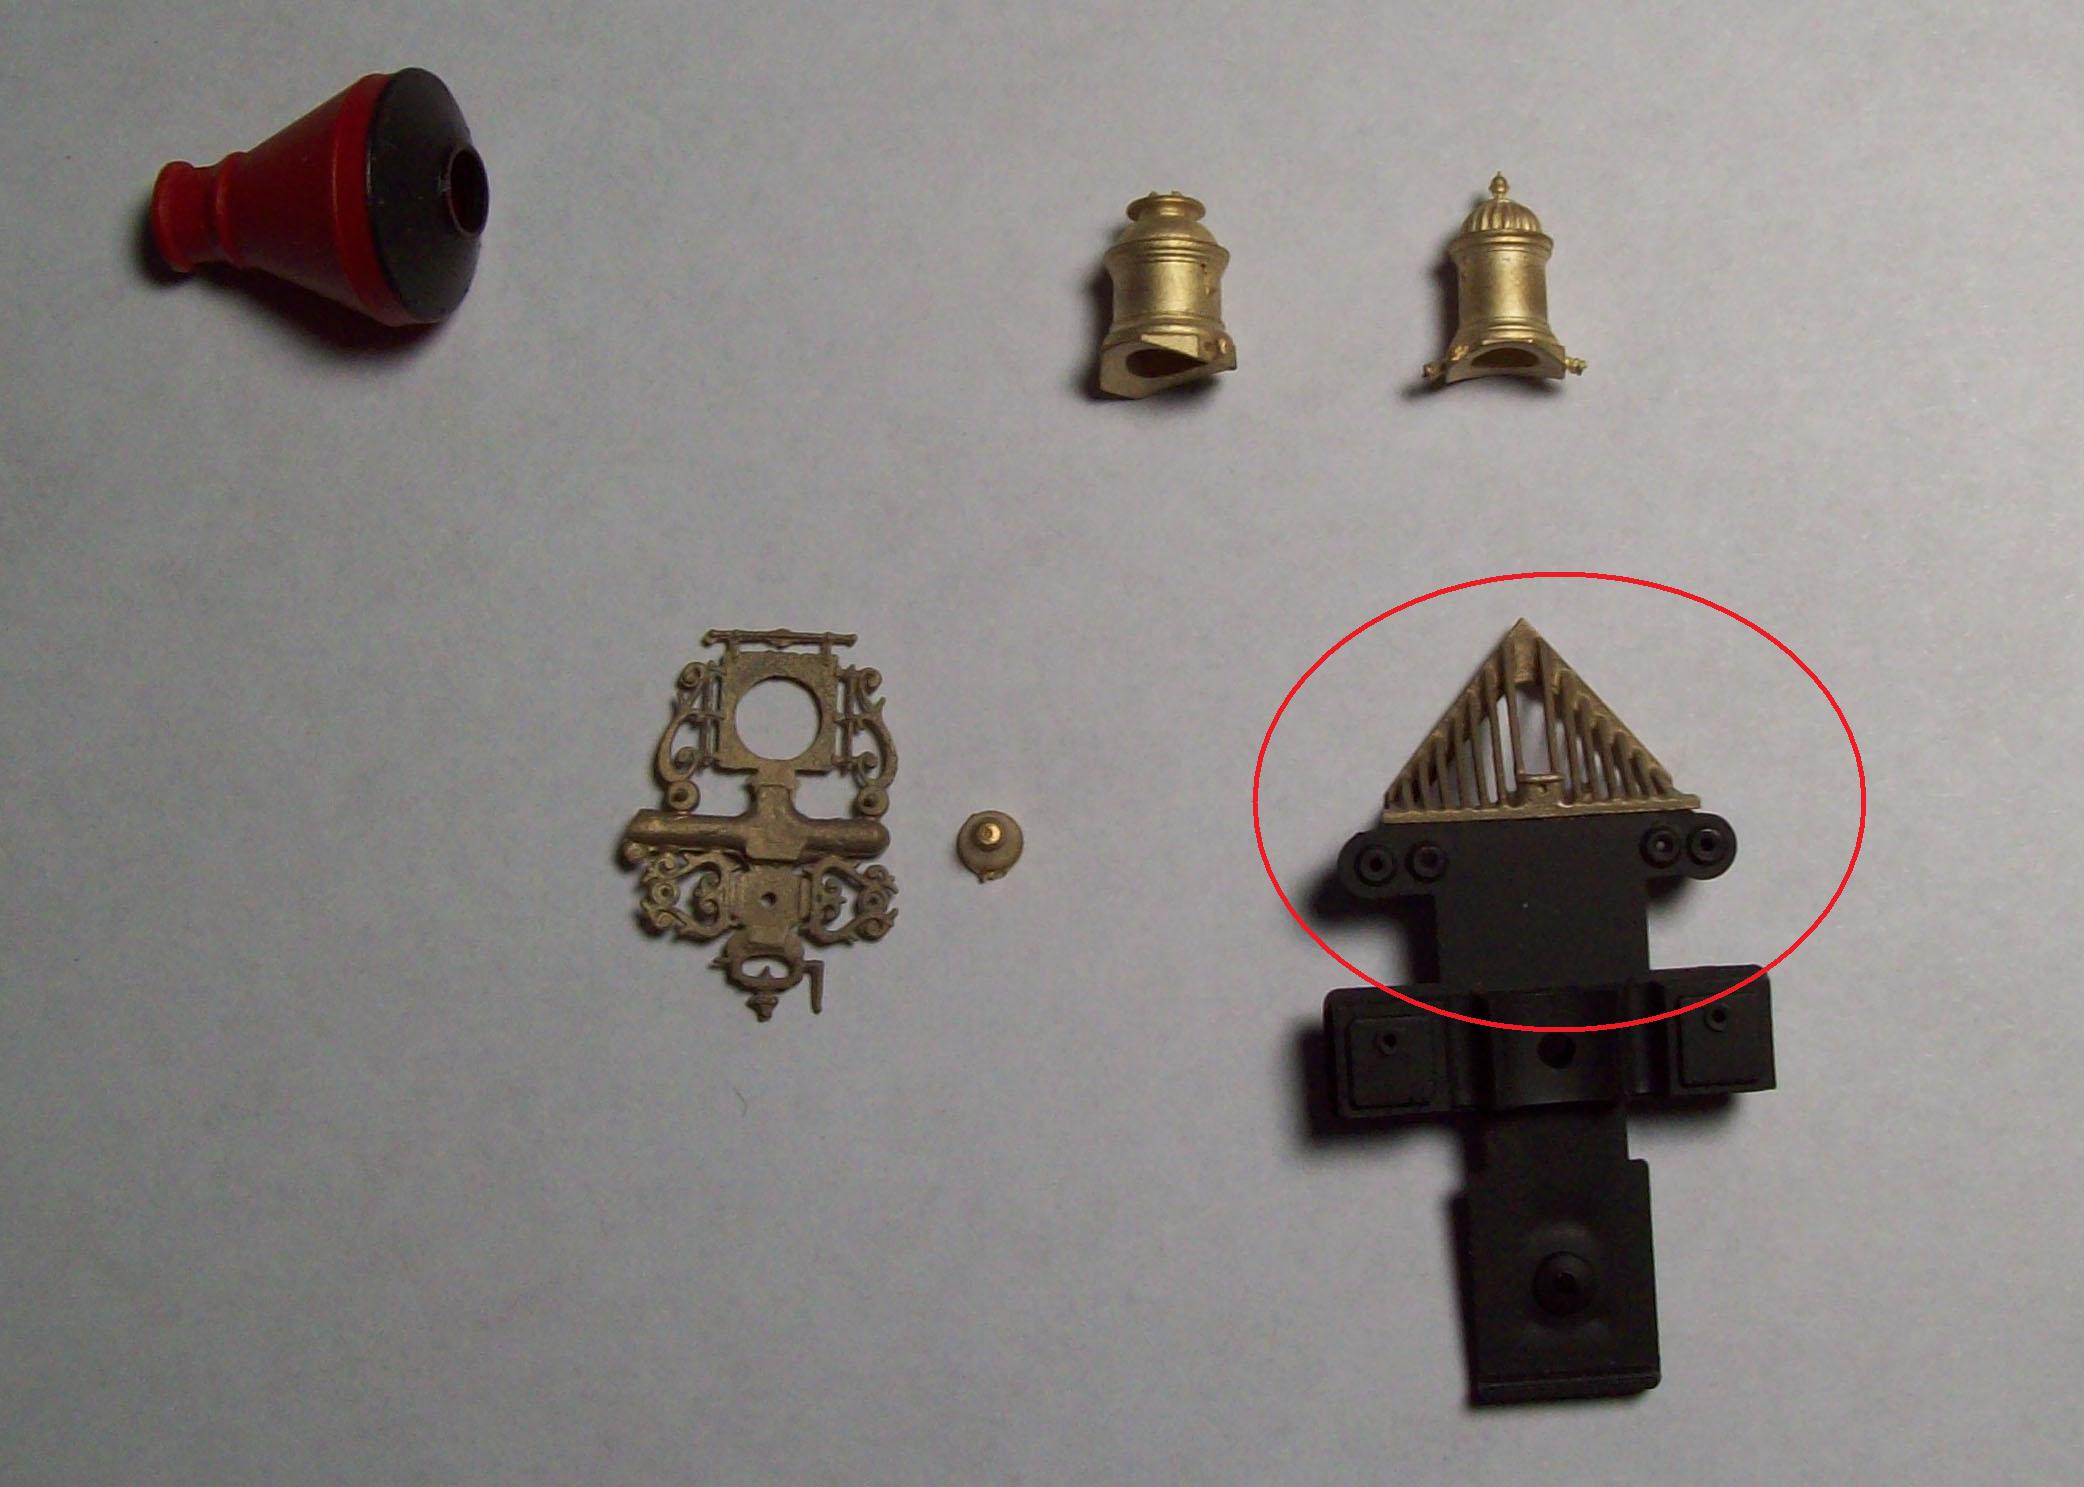
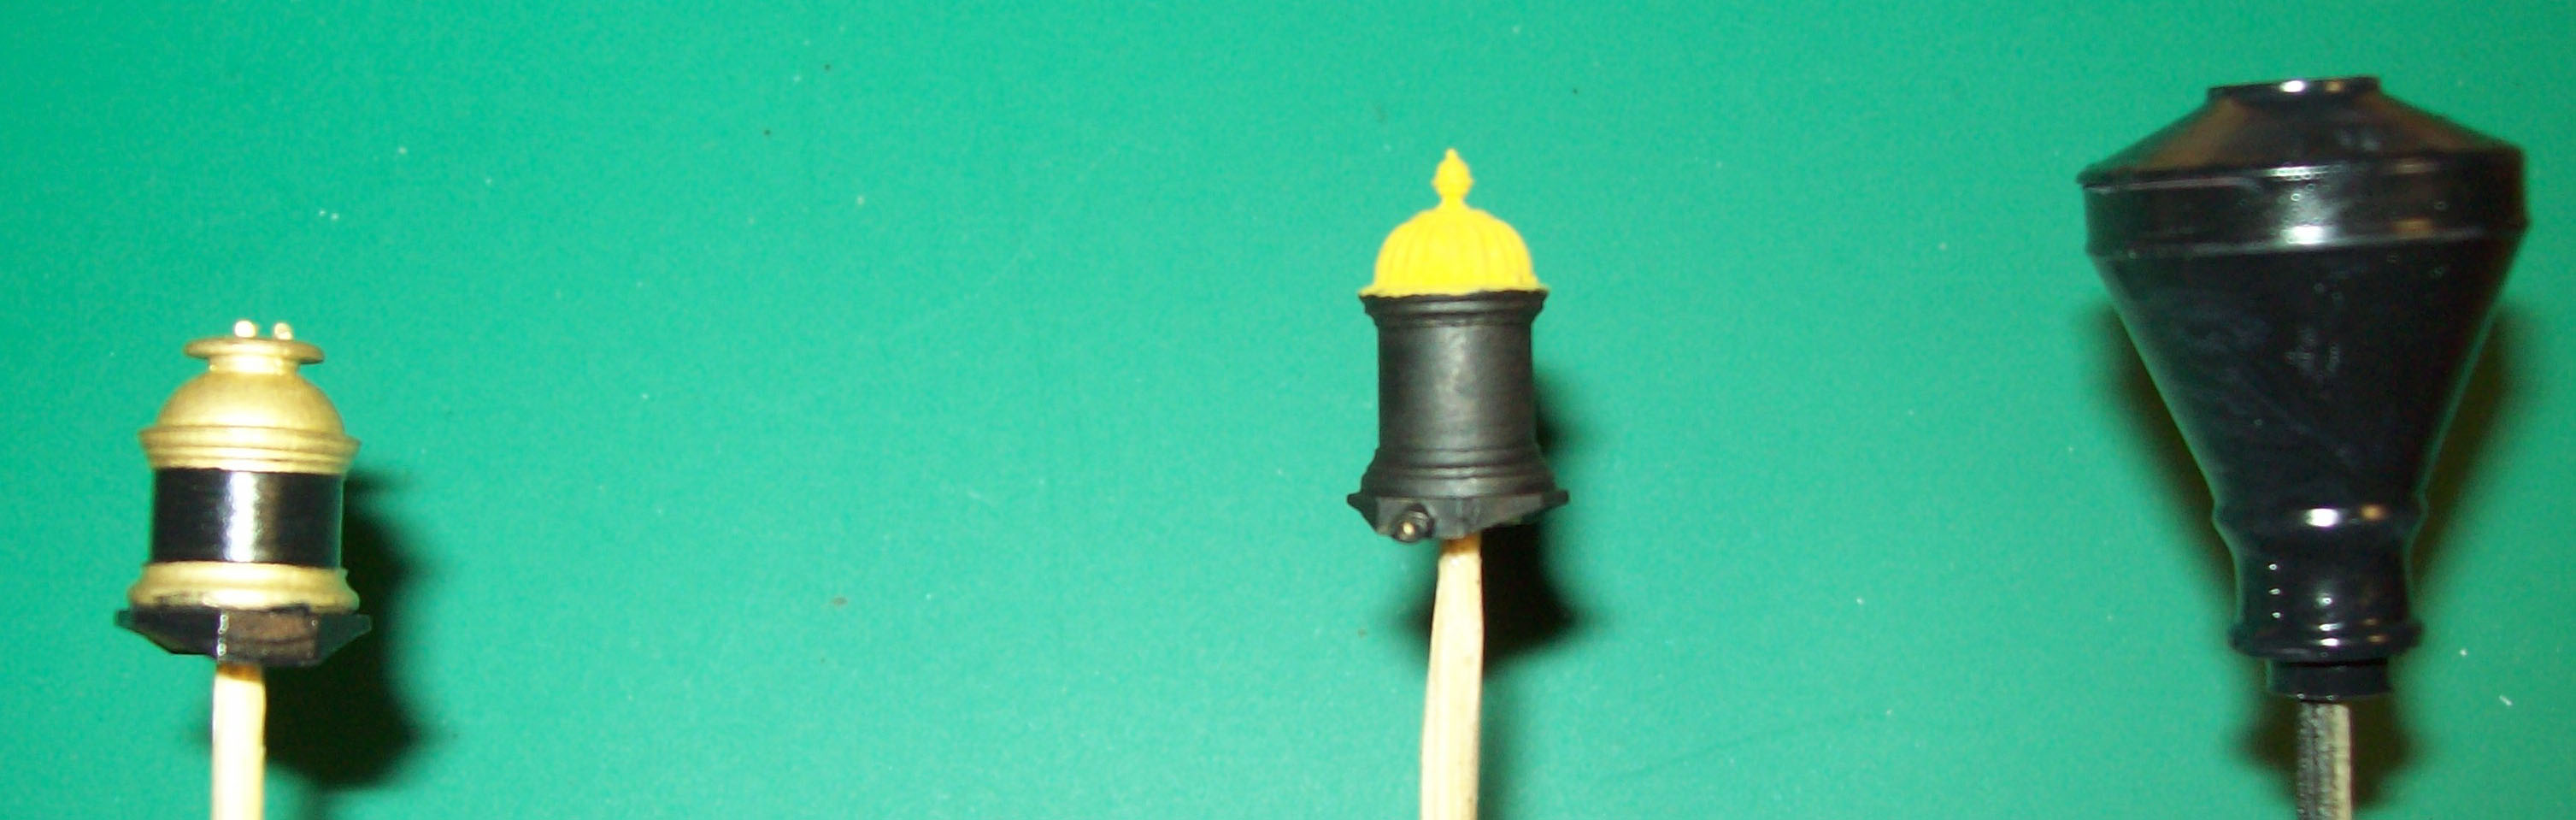
Found a new set of domes that were more period for the General.
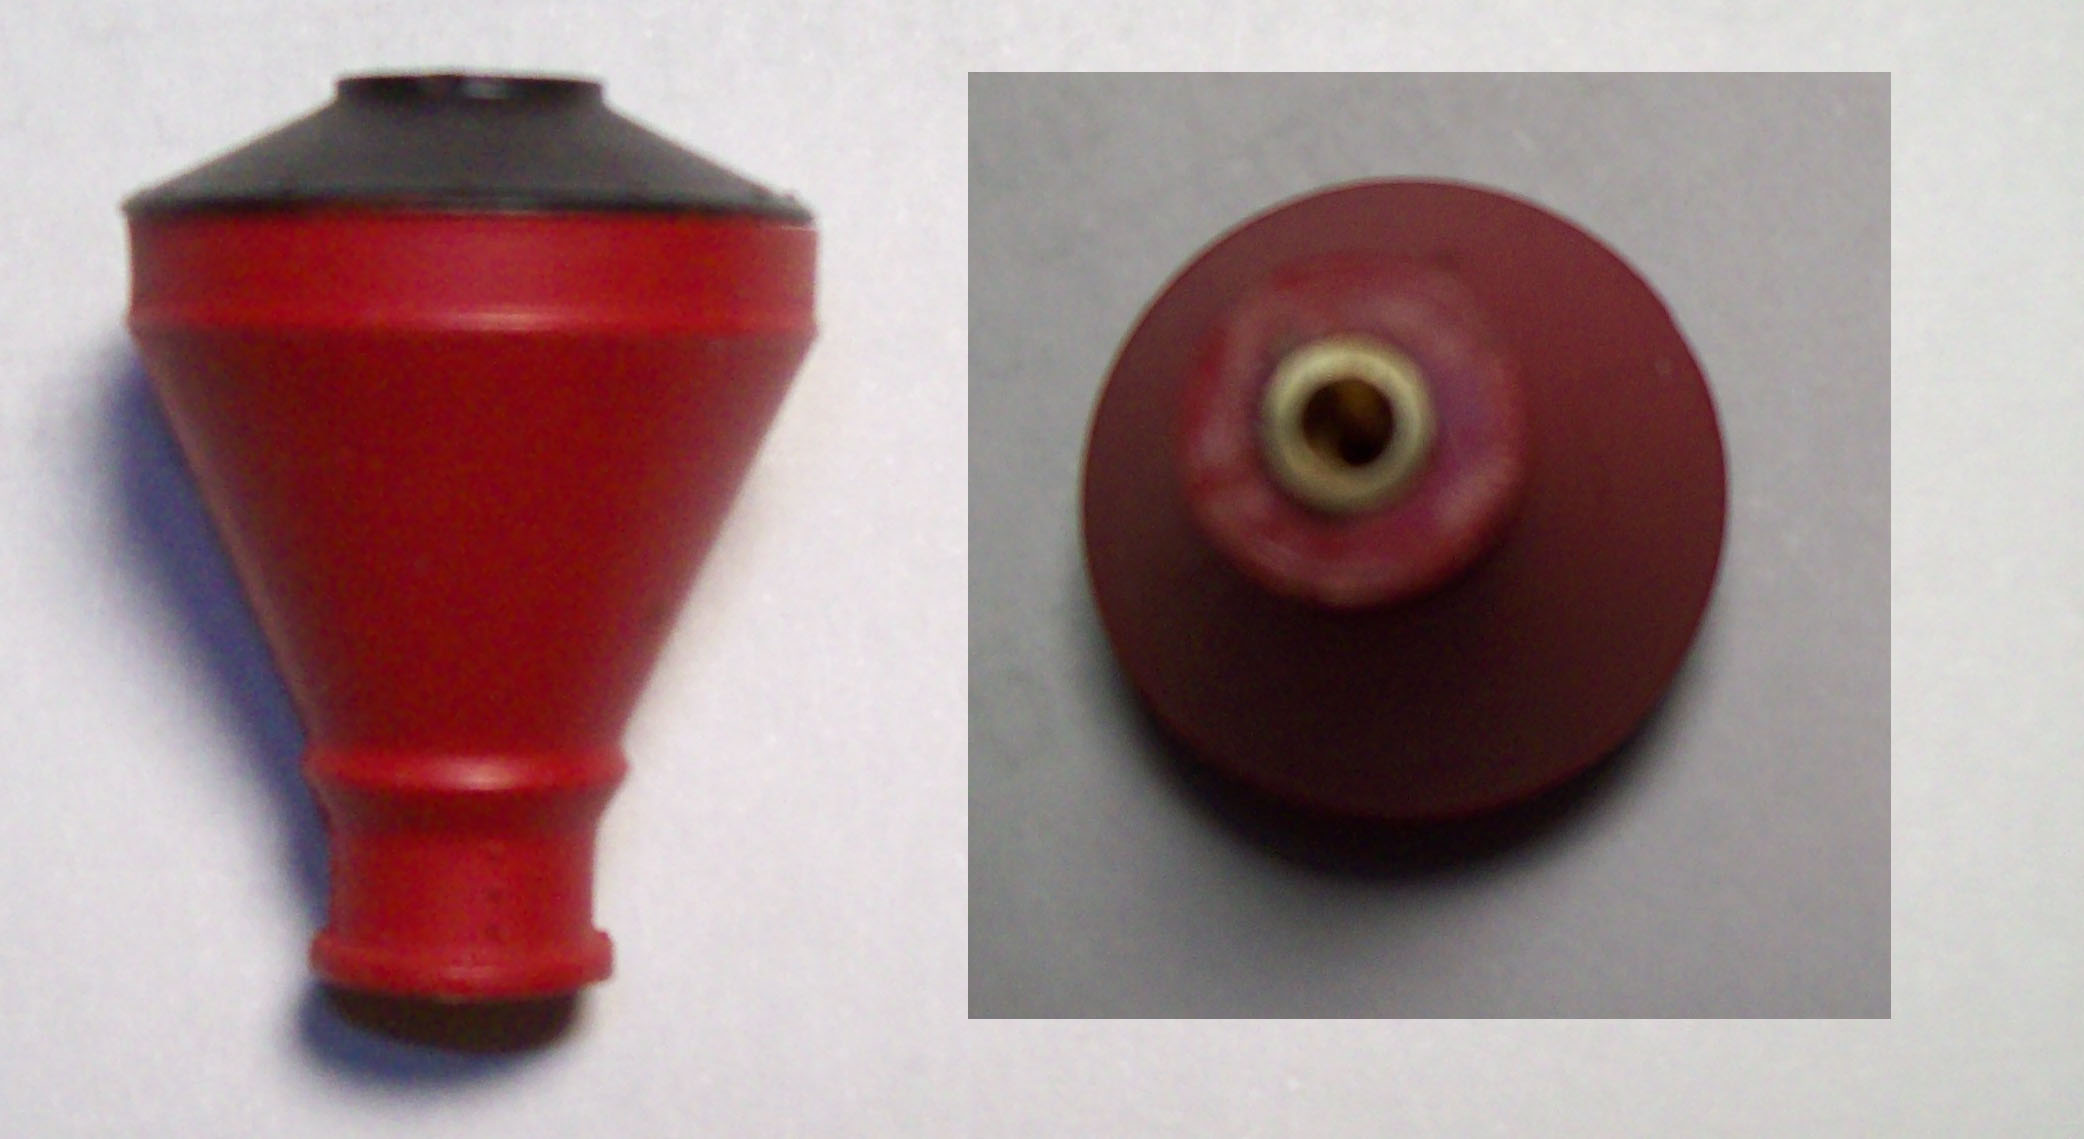
The smoke stack is a modified Bowker stack. I inserted a brass fixture, which was drilled
and tapped for the screw used to hold the frame and stack from the Reno.
Found a fancier headlamp bracket and bell and will install them.
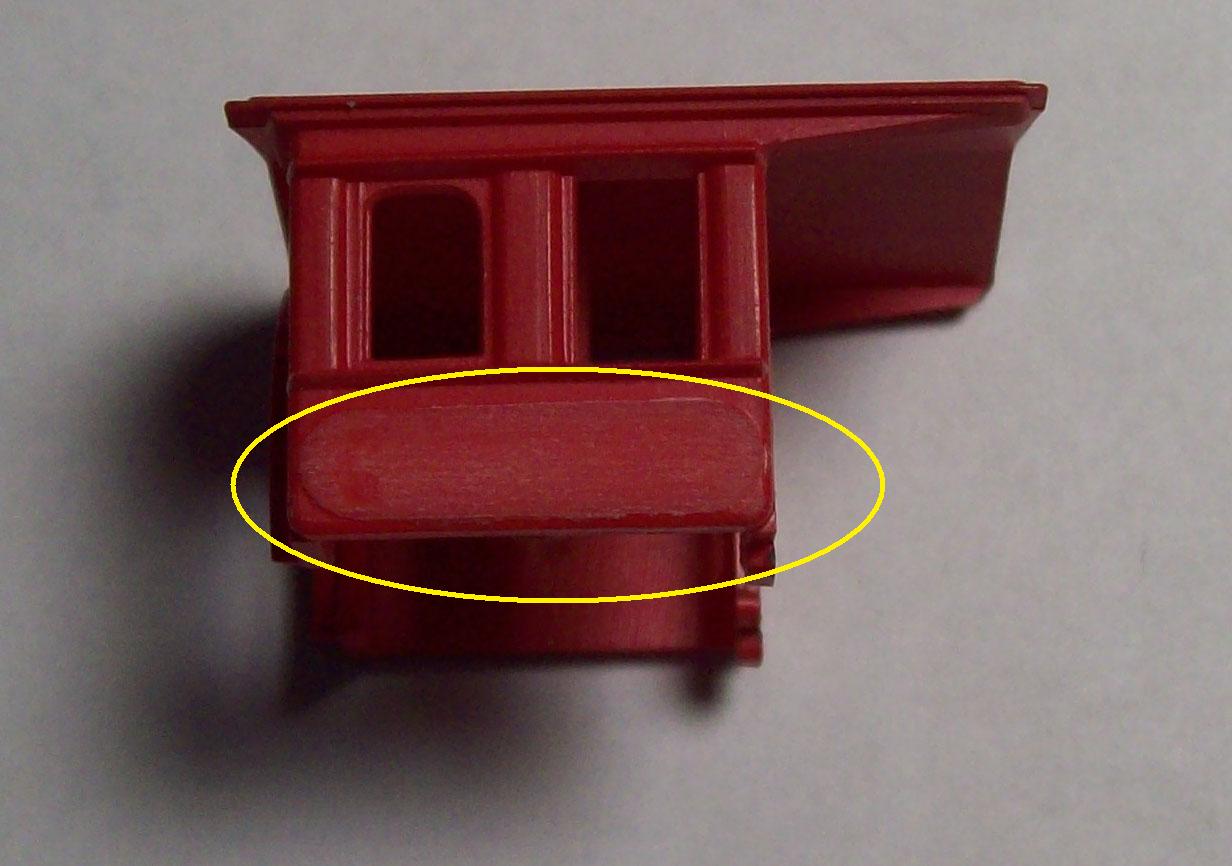
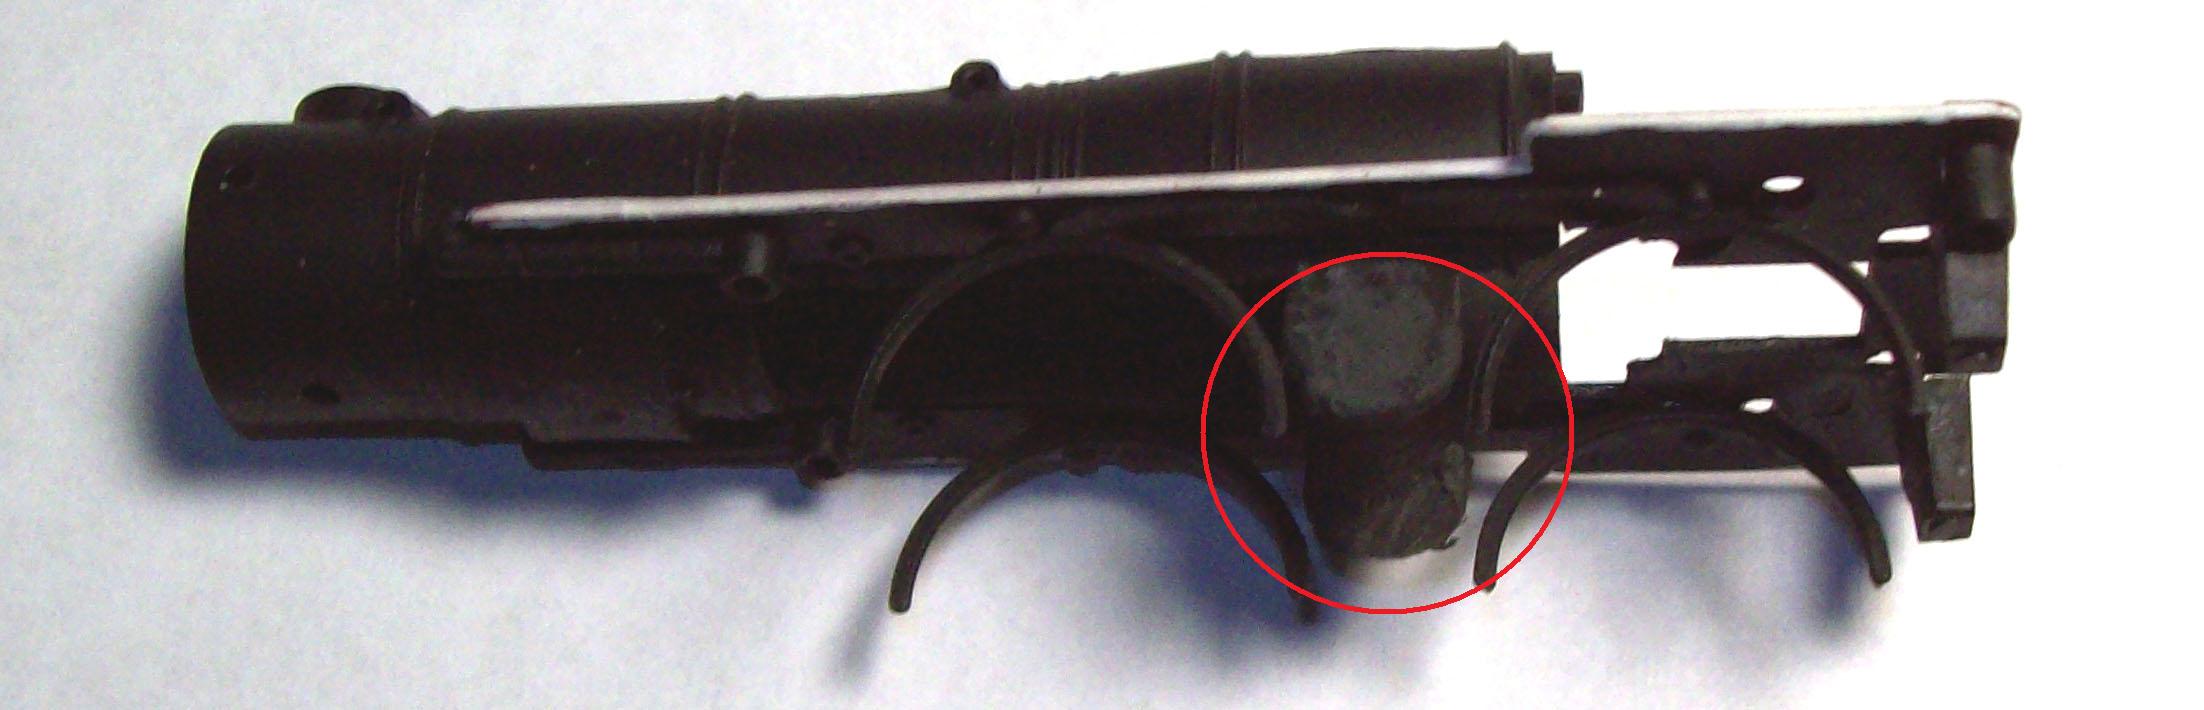
Boiler modification, the rough part.
Step 1: remove the plastic makers plate and level the holder for a replacement piece for the
decal.
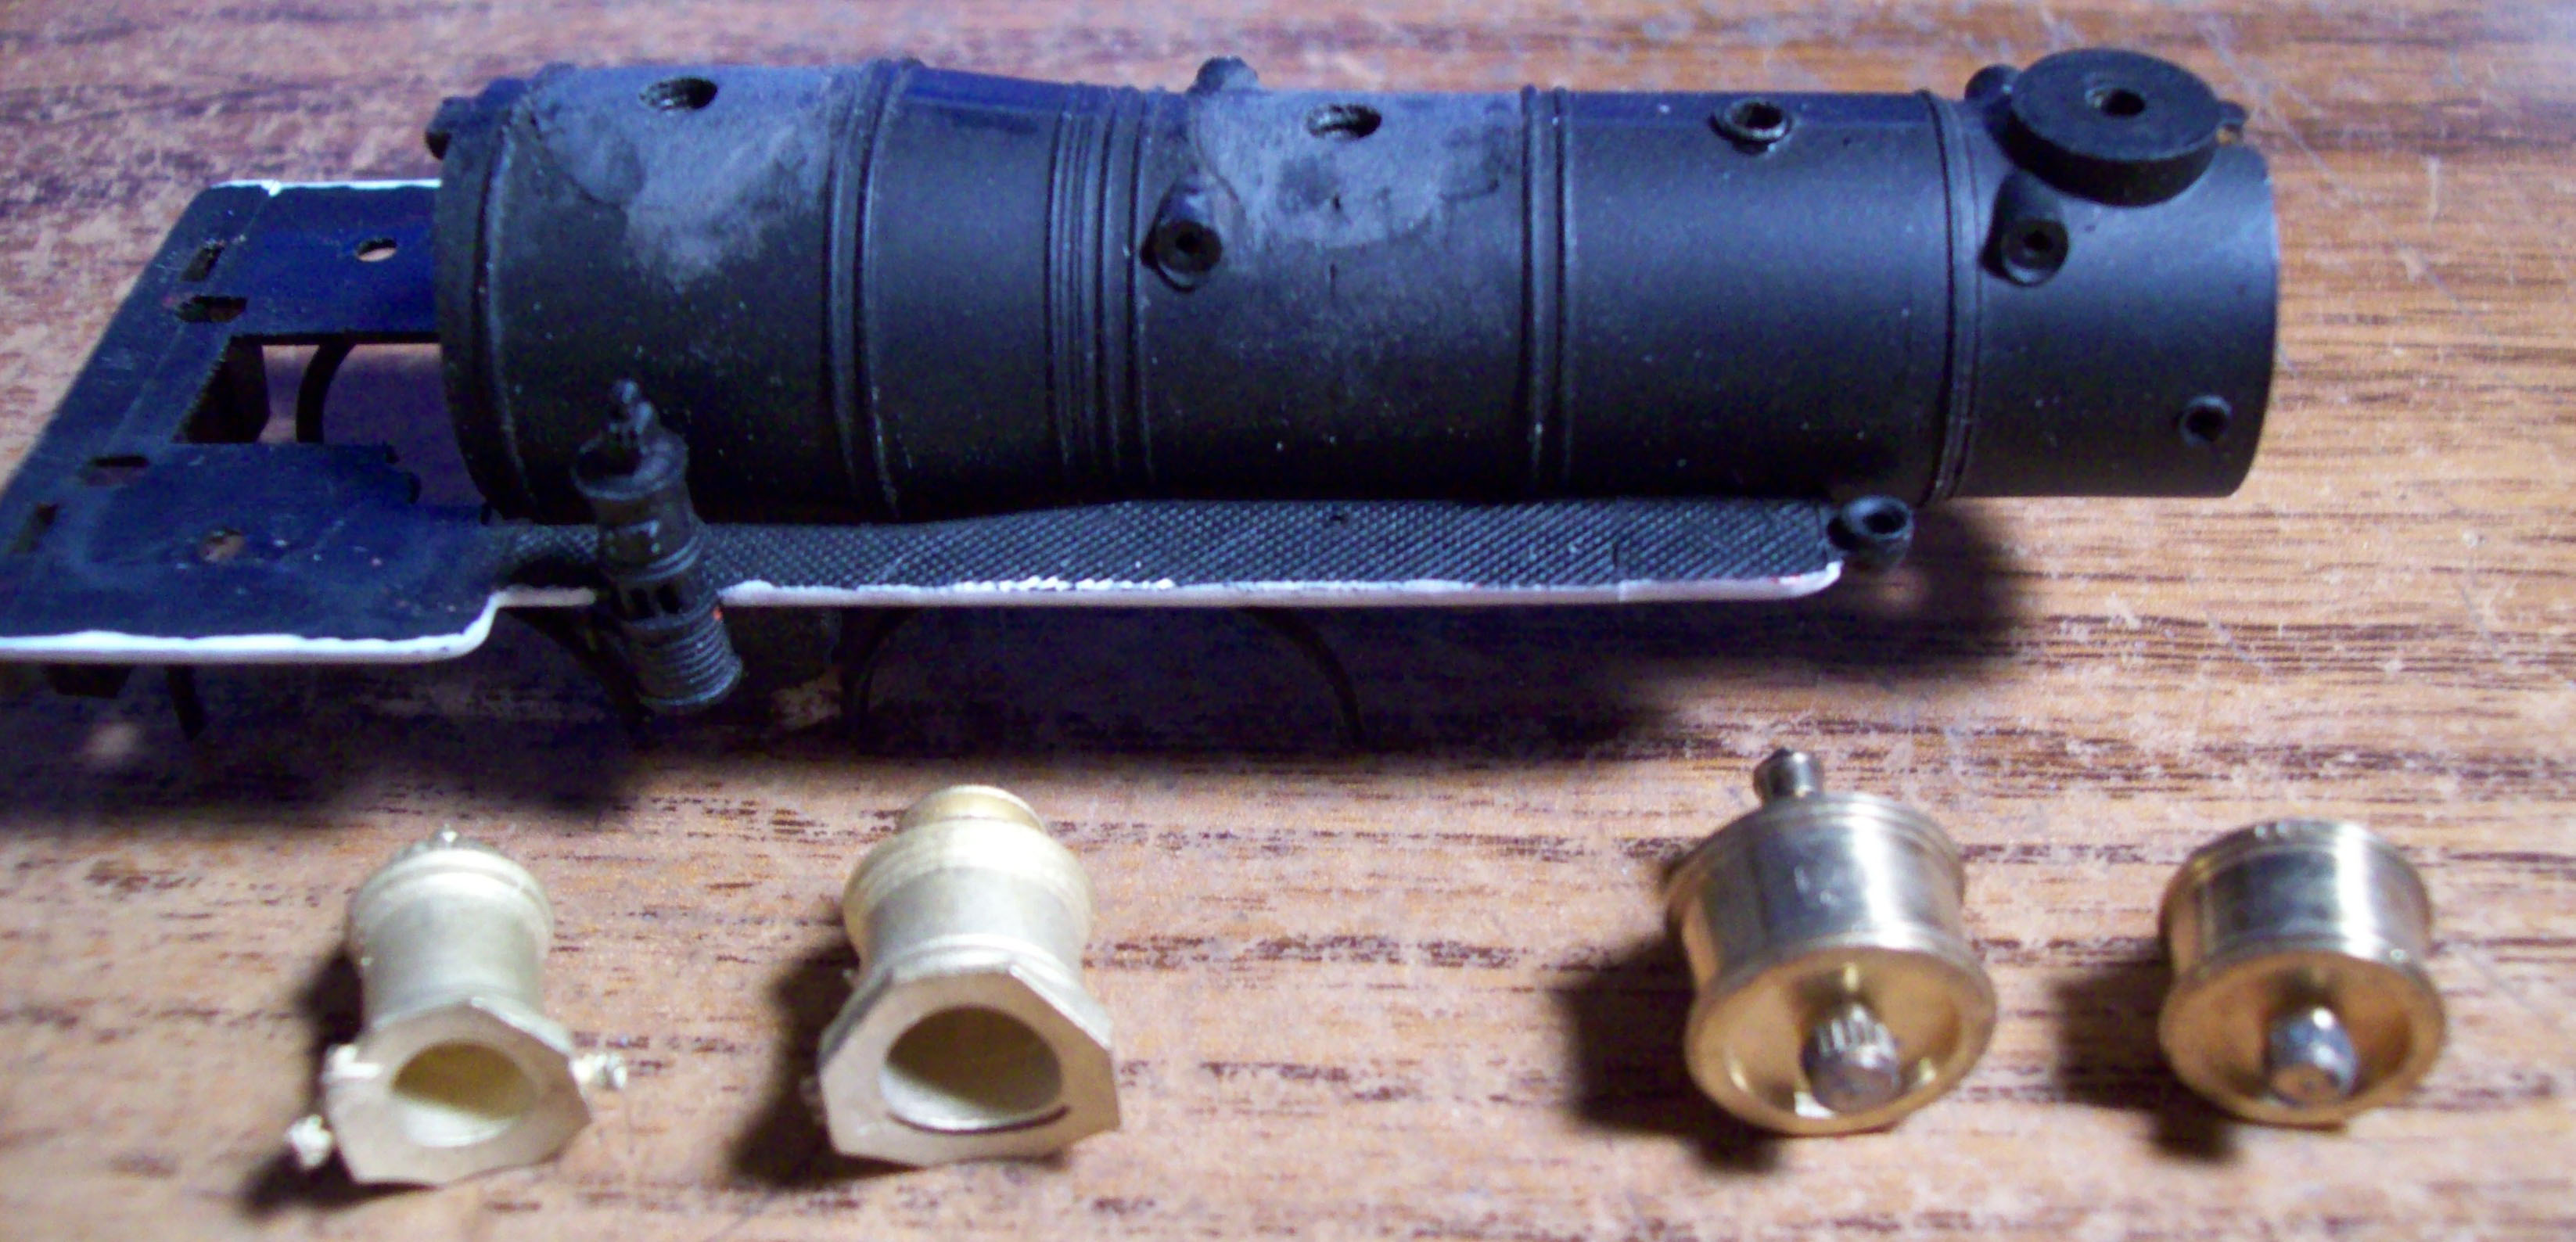
Step 2: remove the dome bases in order for the new domes to fit. Rivarossi uses a wierd type
of plastic and this has become a real pain.
For anyone who is interested, here is a list of additional parts I am using.
Domes - Cal Scale 190-342, 1870 Rogers Domes
Headlamp Bracket/Bell - Precision Scale 31071, Old Time Bell and Head Lamp Brackets
Pilot - probably a Cal Scale, found them on eBay, unpackaged
Smoke Stack - from a Pocher 2-4-0 Bowker locomotive.
Decals - Microscale 87-1173, Western & Atlantic Locomotives (1860-1866)
Microscale 87-1168, Ornate Striping for Steam Locomotives (1860+)
I went with the 1968 production of the Reno because of the brass detailing and there were no parts
riveted other than the frame which gave me more leway for modification, if needed.
Sorry this is so long winded, but thought I would give what info there is for now. Will post progress photos
as I get the work done.
George
Edited by - oldtimer52 on November 01 2014 8:05:50 PM
|
Country:  USA ~
Posts: 865 ~
Member Since: September 23 2014 ~
Last Visit: May 01 2023 USA ~
Posts: 865 ~
Member Since: September 23 2014 ~
Last Visit: May 01 2023
|
 Alert Moderator
|
|
|
|
Posted - November 01 2014 : 8:11:25 PM
|
quote:
Sorry this is so long winded, but thought I would give what info there is for now.
Originally posted by oldtimer52 - November 01 2014 : 7:49:14 PM
|
Don't apologize; detail is good! For those really interested in construction, perhaps for building their own, the more details the better! For those with only a passing interest, they won't read all the details anyway. So keep the info coming!
Glenn
I was thinking of the immortal words of Socrates, who said, "... I drank what?"
|
|
Country: USA ~
Posts: 1709 ~
Member Since: December 13 2008 ~
Last Visit: May 10 2026
|
Alert Moderator

|
|
|
|
Posted - November 01 2014 : 8:24:08 PM
|
Was worried about that. Thanks. I have decided to go with the pre-rebuild colors for the paint.
Smokebox and stack - black
Boiler jacket and dome barrels/bases - gunmetal
Drivers, pilot - red
Headlight, sand dome top, cab, tender and tender truck frames - bronze green.
Boiler bands, valve box - bright gold
Cylinder ends, flag holders - polished brass
Edited by - oldtimer52 on November 01 2014 8:27:12 PM
|
|
Country: USA ~
Posts: 865 ~
Member Since: September 23 2014 ~
Last Visit: May 01 2023
|
Alert Moderator
|
|
|
|
Posted - November 02 2014 : 11:11:17 AM
|
| Yes. Good photo story posting George. Detail is great. Since seeing Ken Catford's posting a while back about this guy who "does" Generals, it has perked my interest in what can be done with them.
|
|
Country: USA ~
Posts: 2087 ~
Member Since: March 16 2013 ~
Last Visit: July 05 2018
|
Alert Moderator
|
|
|
|
Posted - November 02 2014 : 11:31:34 AM
|
the REAL General still exists in a museum
http://en.wikipedia.org/wiki/The_General_(locomotive)#mediaviewer/File:W%26A_No3.JPG
its here: http://www.southernmuseum.org/
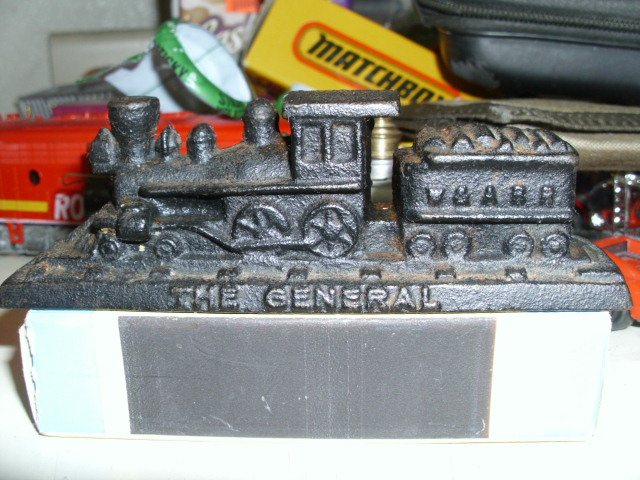
I may have a paperweight of The General 
|
|
Country: USA ~
Posts: 15026 ~
Member Since: February 23 2009 ~
Last Visit: May 25 2026
|
Alert Moderator
|
|
|
|
Posted - November 02 2014 : 12:14:31 PM
|
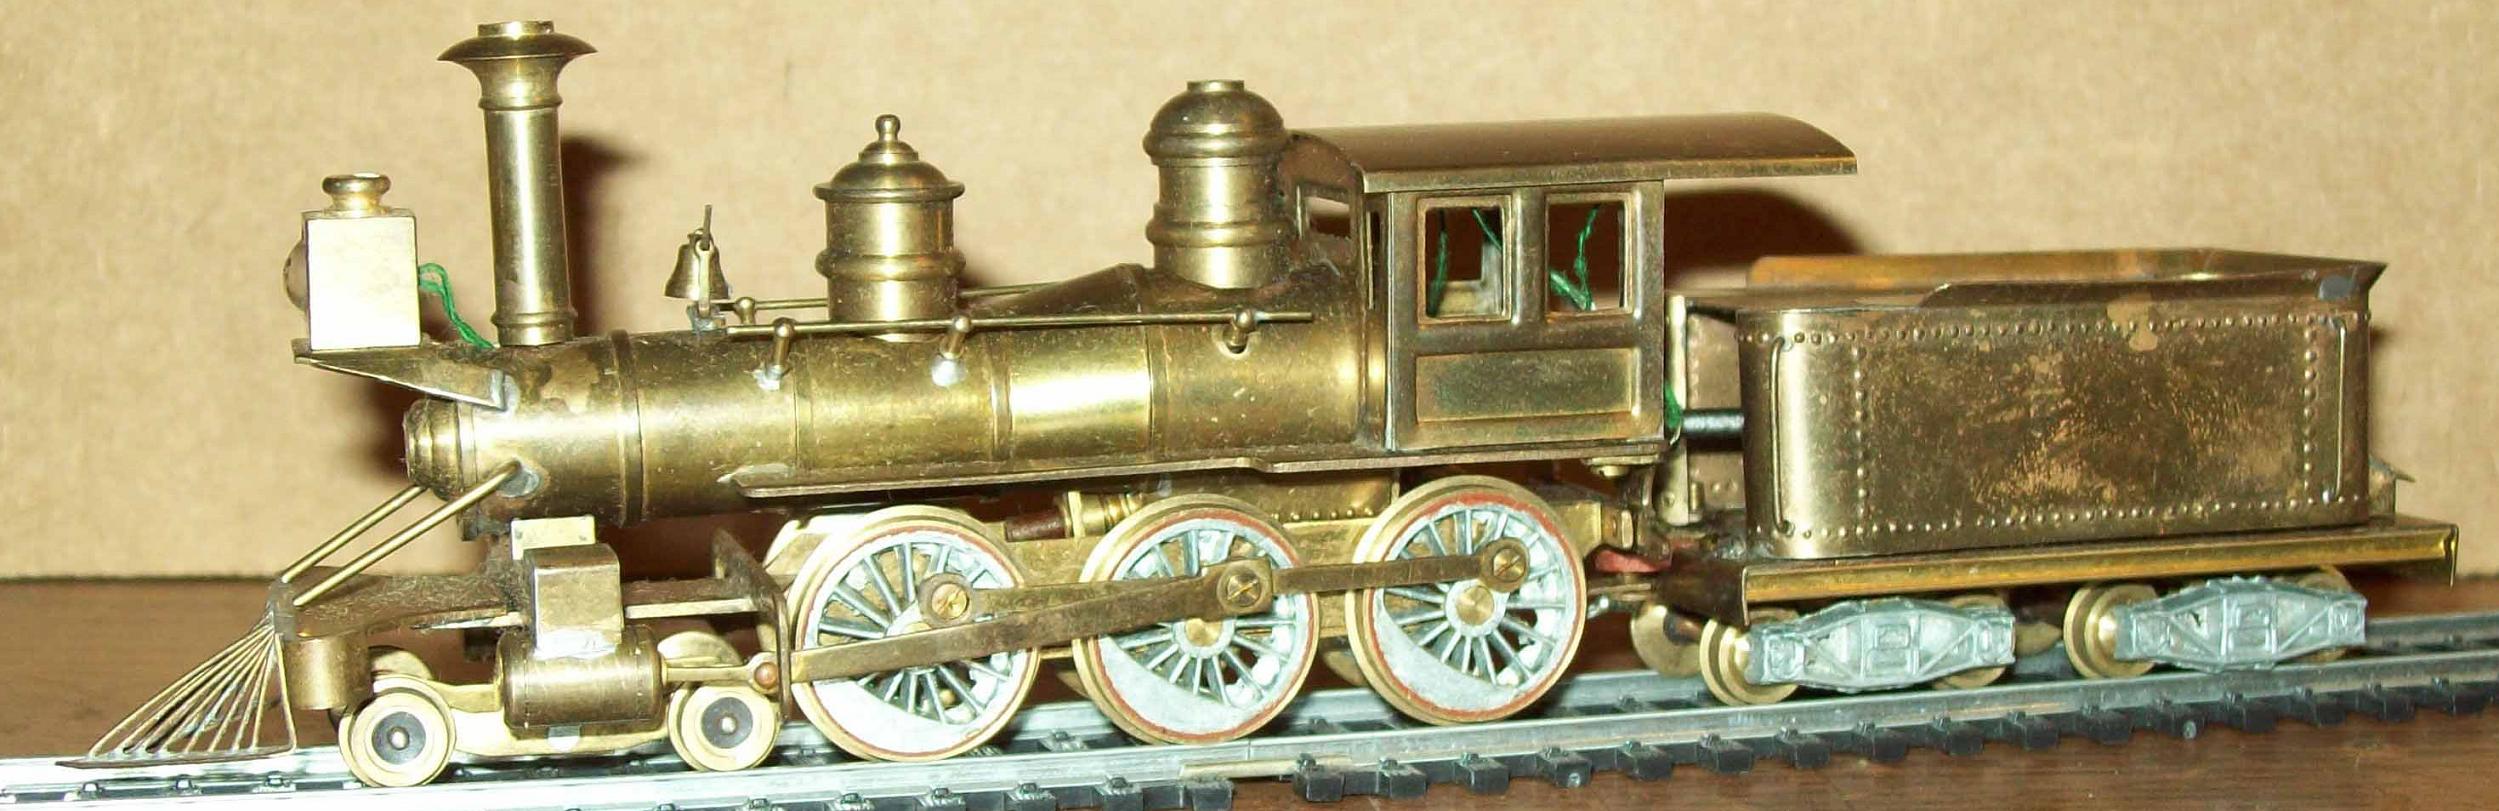
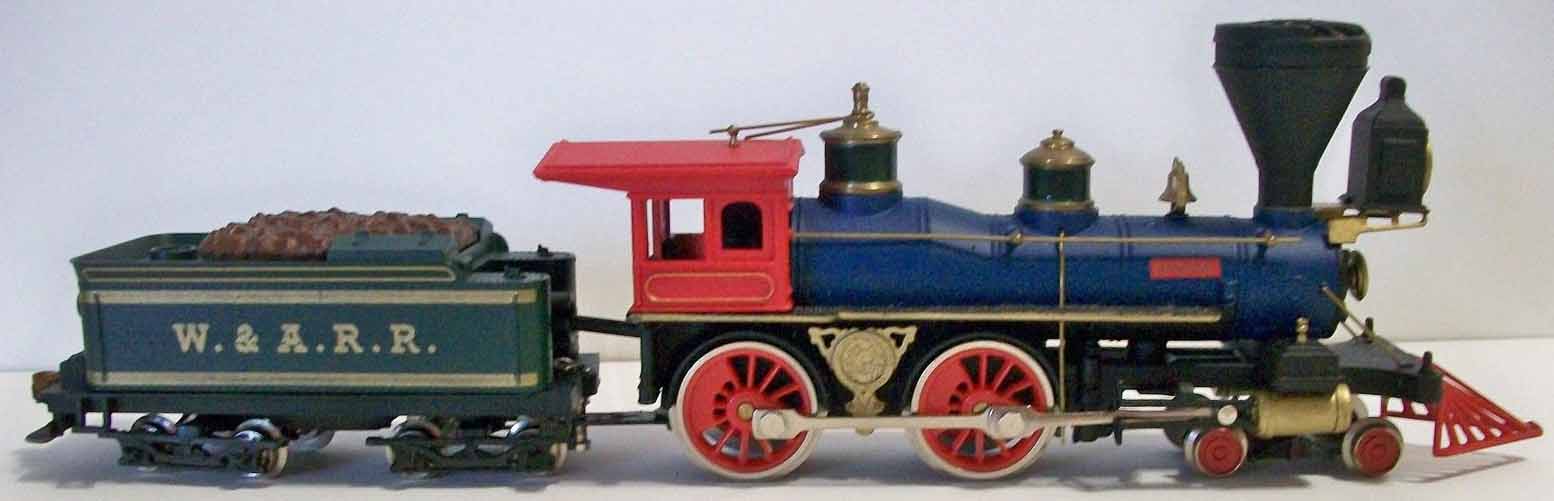
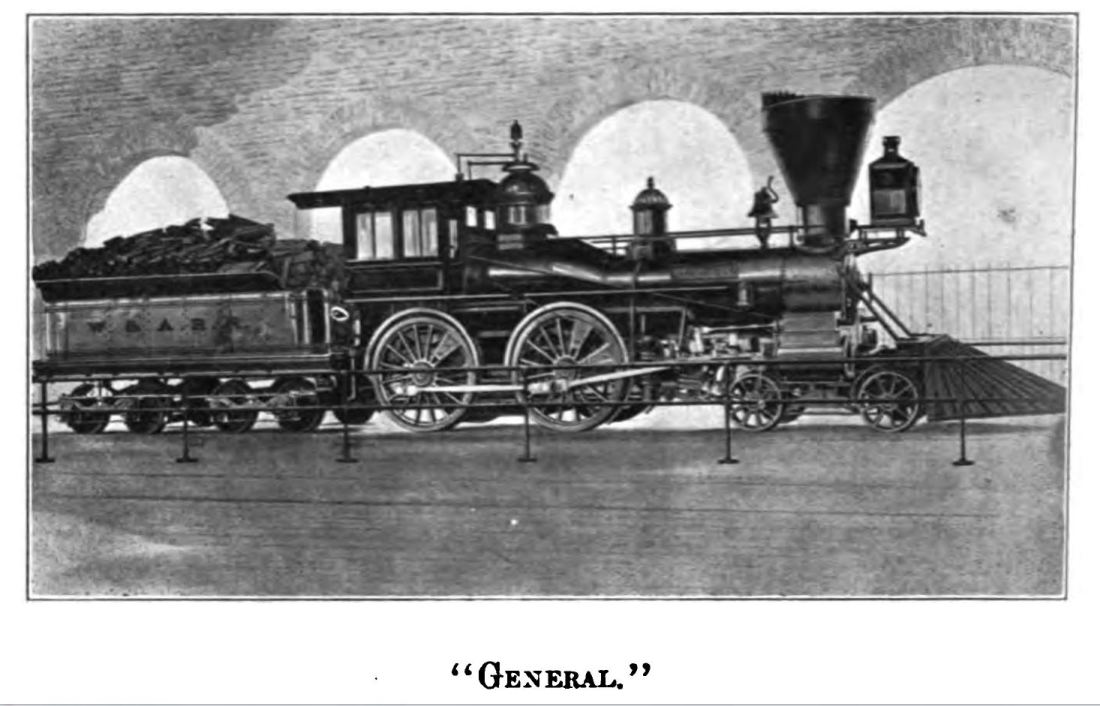
Here are some photos I have found concerning the General. The first three are commercial models that have been made and then there are some photos of the actual general.
AHM/Rivarossi 1974-77 representation:
Atlas (date unknown) representation:
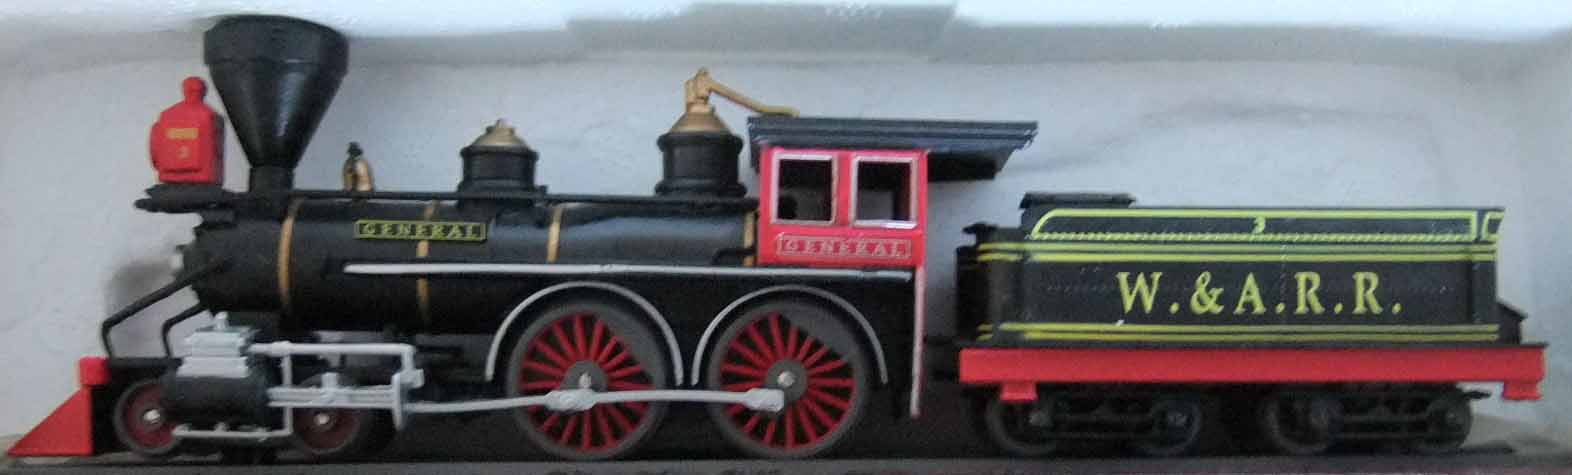
Mantua 1959/60 representation: (You may recognize this one)

The next photos are of the actual General.
The general after Sherman got done in 1864. This is what was left of the original.

This is a photo of the General in 1887
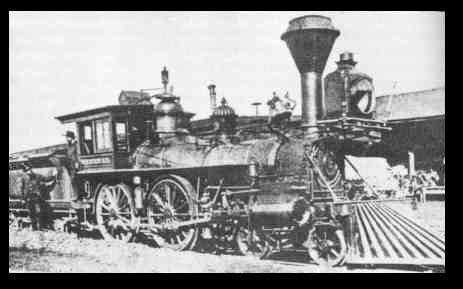
The General as it is today.

Edited by - oldtimer52 on November 02 2014 8:08:27 PM
|
|
Country: USA ~
Posts: 865 ~
Member Since: September 23 2014 ~
Last Visit: May 01 2023
|
Alert Moderator
|
|
|
|
Posted - November 02 2014 : 8:23:35 PM
|
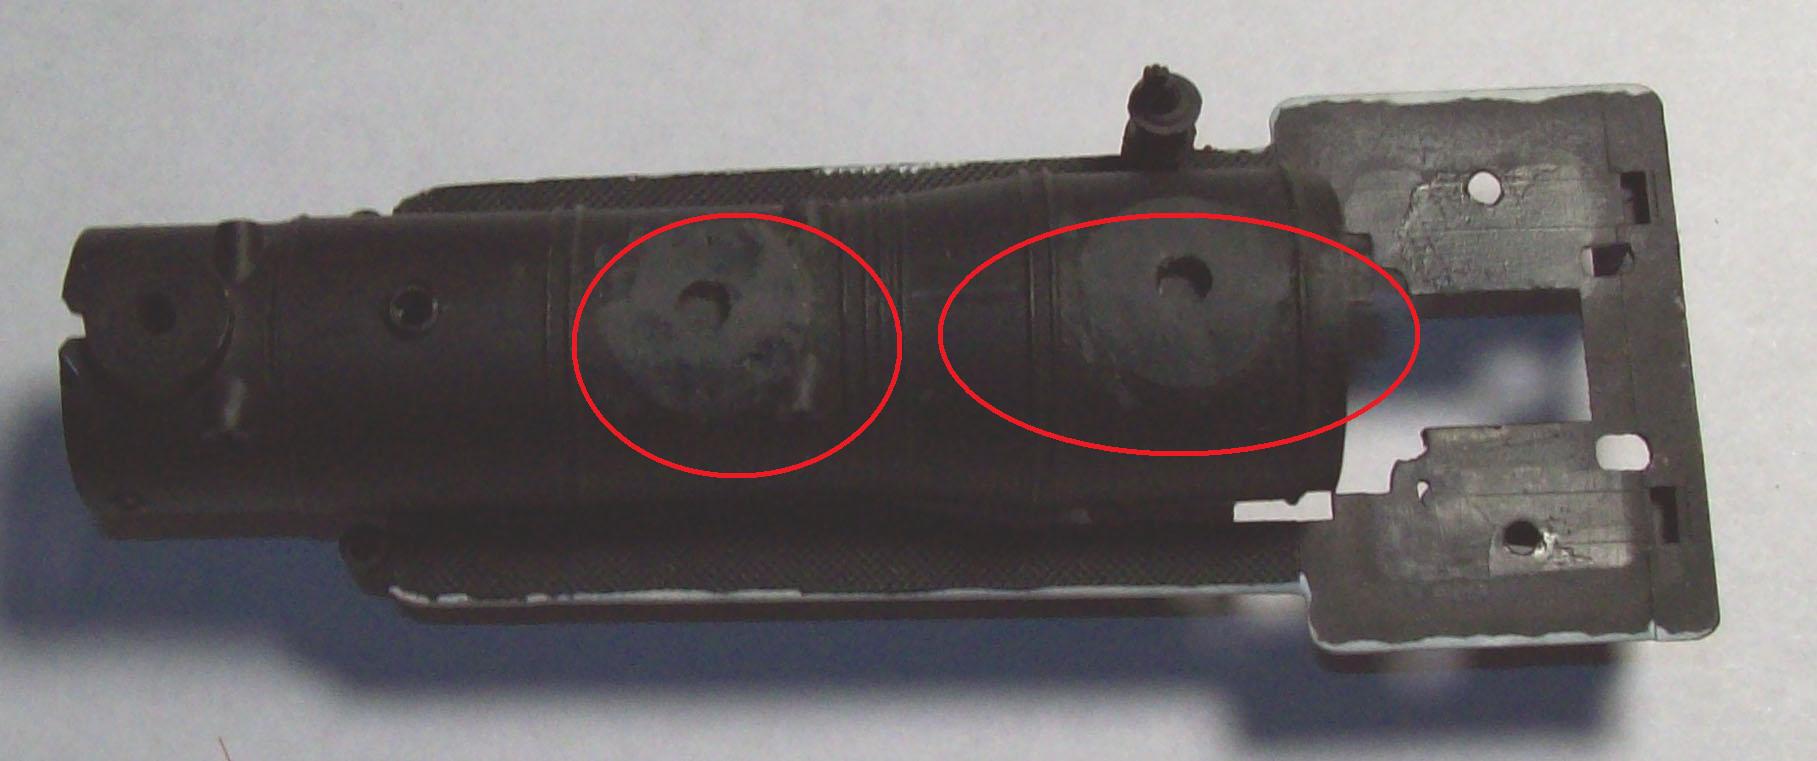
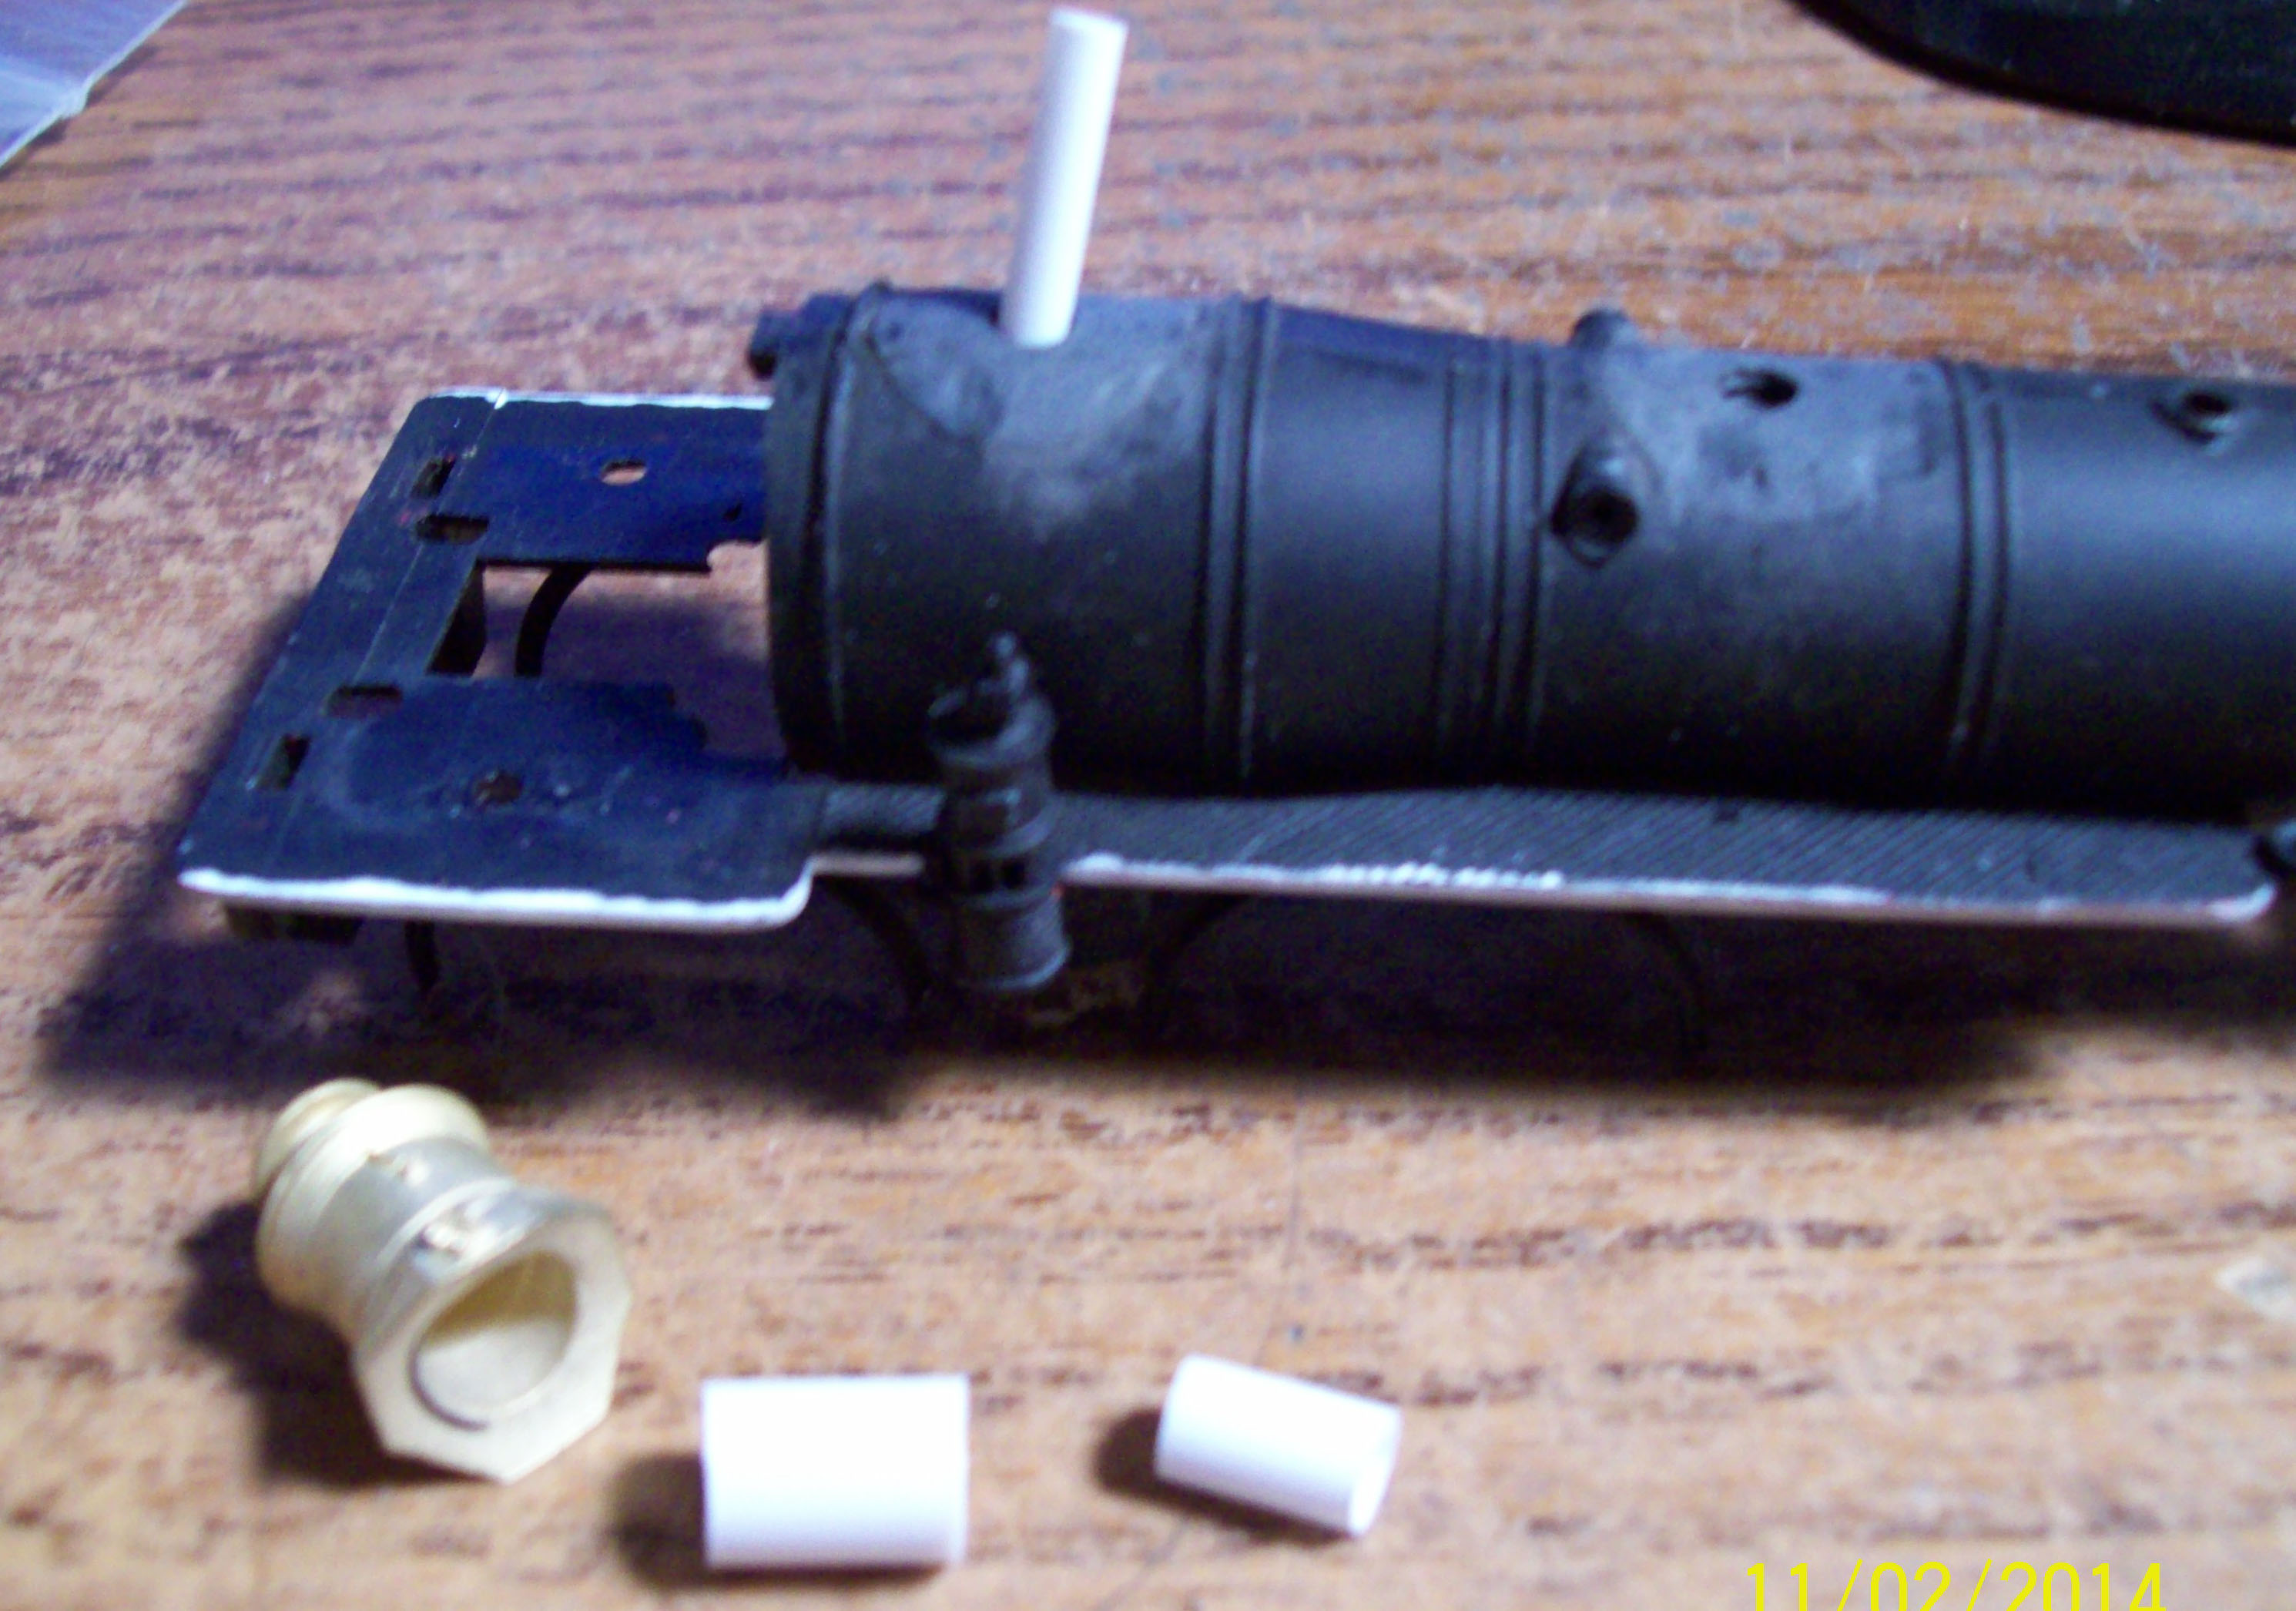
Got back to working on the boiler domes. Attaching them has been a little bit of a problem. The old domes have a peg that was inserted into a pre-made hole in the base. Well, now there is no base and the hole remains. I see three choices here.
1. Fill in the holes with putty and then super glue the new domes on. Will have to be fast to get them lined up properly (like about 1 second). No screw ups allowed.
2. Make inserts for the new domes to take advantage of the pre-made hole for alignment. Less chance for a screw up.
3. Get another boiler and just use the original domes. Nope, want something more period than that. Anyway, theses boilers are too bloody hard to come by and expensive to boot.
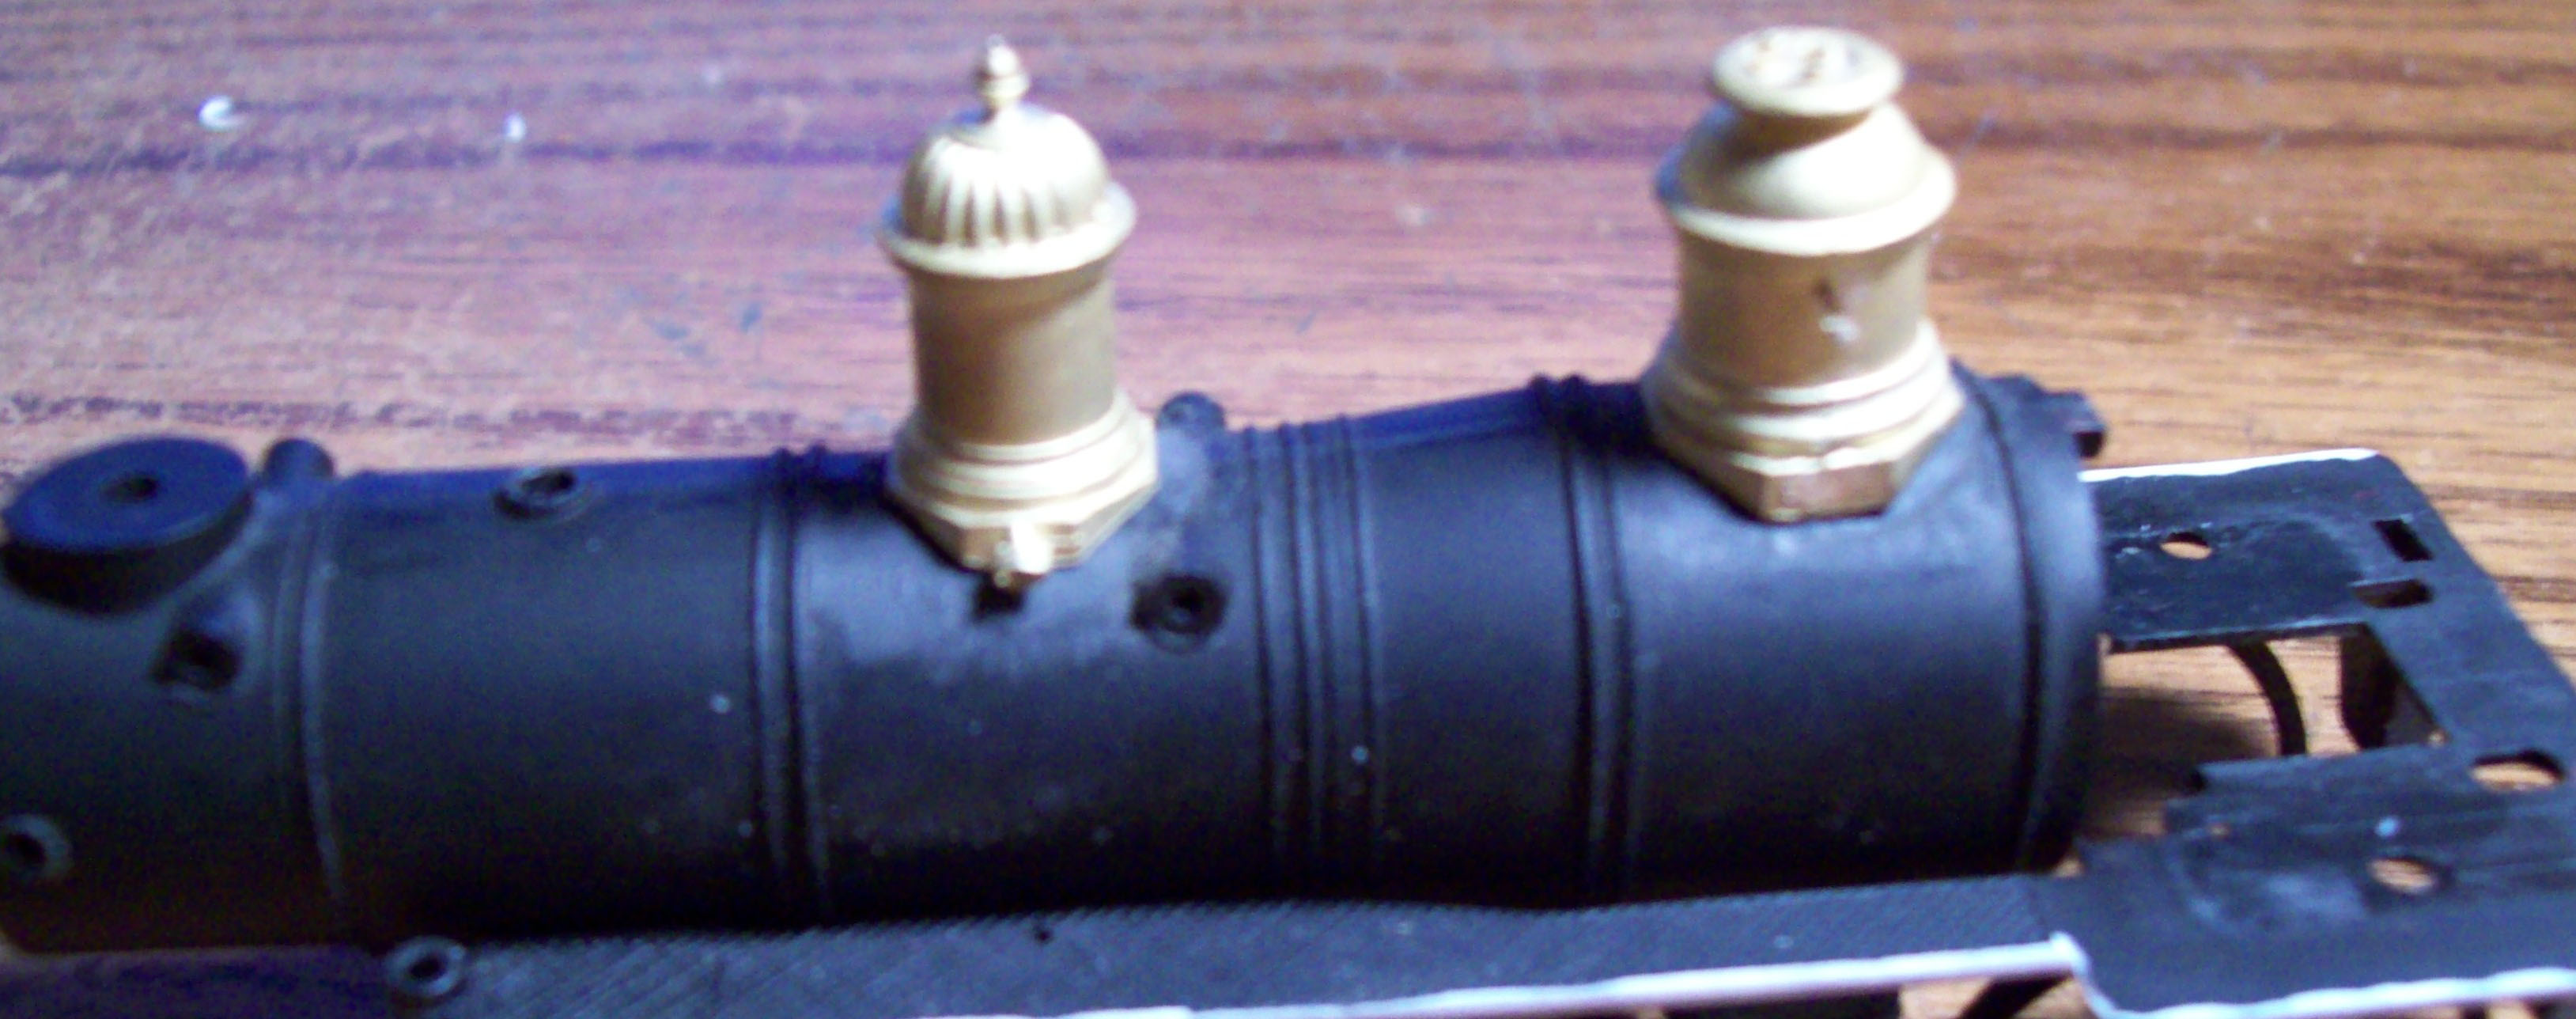
Well.......Decided to make inserts out of styrene tubing with a peg to make things easier. More time, but well worth it. Used three different sizes of tube, one inside the other , to build it up and make the peg.

Results. Not bad if I say so myself. Even got the sand dome outlets to line up with the holes in the running board for the sand pipes. Don't have to make new holes for them.
Edited by - oldtimer52 on November 02 2014 9:16:19 PM
|
|
Country: USA ~
Posts: 865 ~
Member Since: September 23 2014 ~
Last Visit: May 01 2023
|
Alert Moderator
|
|
|
|
Posted - November 03 2014 : 07:42:17 AM
|
* Hi George, I found your general build. Great set of domes. They look correct to me. A good start, those first steps, are always important. Good luck George.
* May your hands be steady. and you eyes sharp.
frank
toptrain
" It's a Heck of a Day " !!!
|
|
Country: USA ~
Posts: 7538 ~
Member Since: August 07 2008 ~
Last Visit: December 06 2025
|
Alert Moderator
|
|
|
|
Posted - November 03 2014 : 10:49:04 AM
|
Tyco made The General & Texas for the 100th Anniversary of the Civil War 
Will look for them at train show
Anyway here is the paperweight I has 
Also the Texas loco still exists too!
|
|
Country: USA ~
Posts: 15026 ~
Member Since: February 23 2009 ~
Last Visit: May 25 2026
|
Alert Moderator
|
|
|
|
Posted - November 06 2014 : 10:29:23 PM
|
Well, if my job would slow down a little, I could get more done. However, I have gotten more done on the boiler. Got the Name plates put on and the pieces for the maker plate installed. It's starting to look like a locomotive again. Added a small piece between the smoke stack and the boiler body. Noticed that the original had it, so, on it goes. I hope to start getting it ready for paint this week.
Still have a little more work on the smoke stack addition after looking at this photo. Still a little too tall.
|
|
Country: USA ~
Posts: 865 ~
Member Since: September 23 2014 ~
Last Visit: May 01 2023
|
Alert Moderator
|
|
|
|
Posted - November 07 2014 : 04:16:48 AM
|
Well George you are a lot neater than I am. Good to see someone else got the old time sprite. When my detailing is done I'll try a 2-6-0 type. I have a real good drawing of one. I like when your done and you place the model on top of the HO scale drawing, and its the same size.
frank
toptrain
" It's a Heck of a Day " !!!
|
|
Country: USA ~
Posts: 7538 ~
Member Since: August 07 2008 ~
Last Visit: December 06 2025
|
Alert Moderator
|
|
|
|
Posted - November 07 2014 : 09:36:00 AM
|
So far, so good. Even if it doesn't turn out as a good looking model of the General, you could still make it into some other 4-4-0 out there. The ironic part of this posting is that it's my 1860th posting which is five years after the General in real life was built. The ironic part of this posting is that it's my 1860th posting which is five years after the General in real life was built.
-Steve
"A lot of modellers out there who go to these train shows see broken HO stuff and go, 'This is useless' when, in reality, they can still be used for modeling whether it's as a prop on your layout or a cool project to make something old new again."
Edited by - kovacste000 on November 07 2014 09:37:51 AM
|
|
Country: USA ~
Posts: 3533 ~
Member Since: February 17 2014 ~
Last Visit: January 11 2023
|
Alert Moderator
|
|
|
|
Posted - November 08 2014 : 3:17:58 PM
|
Hadn't thought of turning the Rivarossi model into the General before. Hope it turns out well!
I'm working on a Tyco model right now. I'm finding that Tyco didn't maintain the quality of even the metal kits so well in the 70's, so it's taking more work than expected. It was thumping while it ran, and I found the drive wheels had about a 110 degree offset instead of the proper 90 degrees!
Darth Santa Fe, doing weird and challenging projects for the fun of it!

|
|
Country: USA ~
Posts: 259 ~
Member Since: September 13 2011 ~
Last Visit: February 28 2026
|
Alert Moderator
|
|
|
|
Posted - November 08 2014 : 6:46:54 PM
|
| Actually, they're really very close to the type to begin with. I also have the Texas and General Haupt on the list to do after the General is completed.
|
|
Country: USA ~
Posts: 865 ~
Member Since: September 23 2014 ~
Last Visit: May 01 2023
|
Alert Moderator
|
|
|
|
Posted - November 08 2014 : 8:00:42 PM
|
| Keep the photos coming George. It's cool to watch your project progress.
|
|
Country: USA ~
Posts: 2087 ~
Member Since: March 16 2013 ~
Last Visit: July 05 2018
|
Alert Moderator
|
|
|
|
Posted - November 11 2014 : 10:18:14 PM
|
Update on build. I was trying to drill the sand dome valves for the wire, and my bit broke. Am having to wait for a new one to arrive. Day didn't start out very well.
New bits should be here this week and I'll finally be able to complete the bloody boiler.
|
|
Country: USA ~
Posts: 865 ~
Member Since: September 23 2014 ~
Last Visit: May 01 2023
|
Alert Moderator
|
|
|
|
Posted - November 11 2014 : 11:47:52 PM
|
Broken bits are the worst! Do you oil the tip before doing each hole? This can extend the life of the bits, as well as make the drilling go quicker and more smoothly.
Darth Santa Fe, doing weird and challenging projects for the fun of it!
|
|
Country: USA ~
Posts: 259 ~
Member Since: September 13 2011 ~
Last Visit: February 28 2026
|
Alert Moderator
|
|
|
|
Posted - November 12 2014 : 12:03:11 PM
|
I use a product called "Bur-Life". It's designed for bits, burs and blades to help them cut better with less chance of damage. I really can't complain about the broken bit tho, it WAS about 30 years old.
The new set got here today and I can resume work tonight. Finally!!
|
|
Country: USA ~
Posts: 865 ~
Member Since: September 23 2014 ~
Last Visit: May 01 2023
|
Alert Moderator
|
|
|
|
Posted - November 12 2014 : 11:20:45 PM
|
That's longer than I can get out of some bits! Of course, the ones that break on me are usually in the #70 to #78 range. 
Darth Santa Fe, doing weird and challenging projects for the fun of it!
|
|
Country: USA ~
Posts: 259 ~
Member Since: September 13 2011 ~
Last Visit: February 28 2026
|
Alert Moderator
|
|
|
|
Posted - November 14 2014 : 6:12:28 PM
|
Got the domes and the stack finished. Did the colors in the scheme that the General currently has (couldn't find a decent bronze green).
Also scored some neat items to make the couplers period as well.
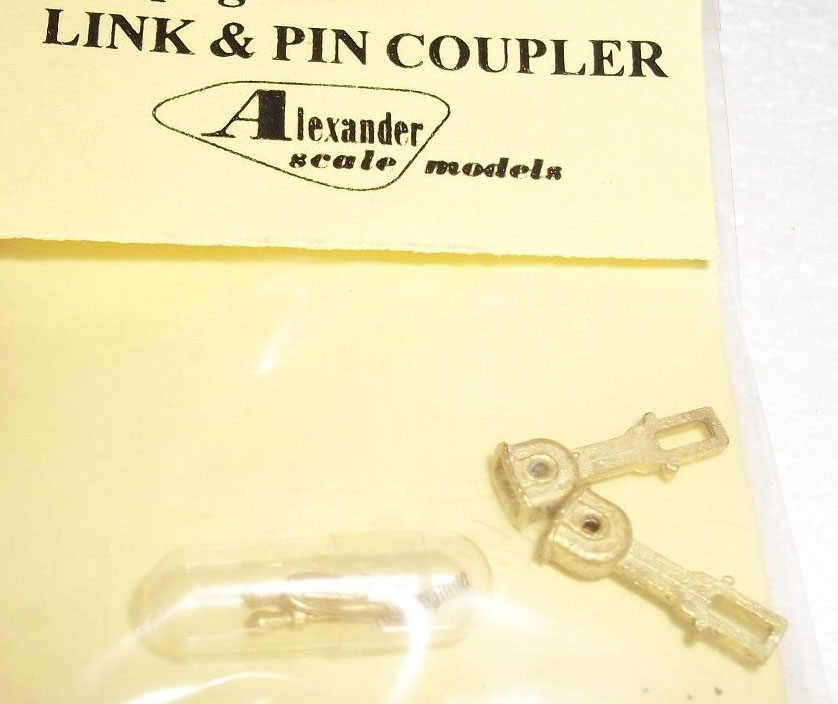
Gonna be a real pain hooking up the cars, but it will be period for the General.
|
|
Country: USA ~
Posts: 865 ~
Member Since: September 23 2014 ~
Last Visit: May 01 2023
|
Alert Moderator
|
|
|
|
Posted - November 20 2014 : 7:40:46 PM
|
Ok. Back at it after a bout with idiots and pink eye. Have gotten the domes finished, the pilot half done and the headlamp almost done.
|
|
Country: USA ~
Posts: 865 ~
Member Since: September 23 2014 ~
Last Visit: May 01 2023
|
Alert Moderator
|
|
|
|
Posted - November 20 2014 : 8:05:24 PM
|
Here is another view of the Gerneral. I think very old from when first it went on display.
frank
toptrain
" It's a Heck of a Day " !!!
|
|
Country: USA ~
Posts: 7538 ~
Member Since: August 07 2008 ~
Last Visit: December 06 2025
|
Alert Moderator
|
|
|
|
Posted - November 20 2014 : 8:53:32 PM
|
| It looks like they have made a few cosmetic changes since it first went on display.
|
|
Country: USA ~
Posts: 865 ~
Member Since: September 23 2014 ~
Last Visit: May 01 2023
|
Alert Moderator
|
|
|
|
Posted - November 20 2014 : 9:42:37 PM
|
| Hey George, Yeah, I read a bit of the history of the General at one time and it seems there have been a number of changes over the years, including a change from wood burning . . . for a while. Regarding those link and pin couplers, I'd like to see how that process goes (e.g., mounting, how one car connects to the next, etc.) . . . if you feel like taking a couple photos? Thanks. Barry You're gonna have a working headlight?
|
|
Country: USA ~
Posts: 2087 ~
Member Since: March 16 2013 ~
Last Visit: July 05 2018
|
Alert Moderator
|
|
|
|
Posted - November 20 2014 : 10:00:18 PM
|
quote:Also scored some neat items to make the couplers period as well.
Gonna be a real pain hooking up the cars, but it will be period for the General.
Originally posted by oldtimer52 - November 14 2014 : 6:12:28 PM
|
Real pain (and lasting harm) are uppermost in your mind when you're using the full-size link and pin couplers, too.
Those shanks look like they fit in the draft gear boxes for the discontinued Kadee #4. Do you have draft gear boxes or do you need to rig something?
Carpe Manana!
|
|
Country: USA ~
Posts: 2416 ~
Member Since: September 17 2013 ~
Last Visit: February 09 2026
|
Alert Moderator
|
|
|
|
Posted - November 20 2014 : 10:34:12 PM
|
| I'll keep ya'll posted when I do the link and pin install, with photos. They do use the old Kadee #4 draft gear boxes. I have about 20 of them coming along with the centering springs and dowels. As soon as the draft gear boxes get here, I'm going to do one of the passenger cars to see how well the couplers install.
|
|
Country: USA ~
Posts: 865 ~
Member Since: September 23 2014 ~
Last Visit: May 01 2023
|
Alert Moderator
|
|
|
|
Posted - November 21 2014 : 02:36:43 AM
|
I hate to go off topic, but my curiosity has gotten the best of me...what was this "bout with idiots" of which you speak?
Glenn
I was thinking of the immortal words of Socrates, who said, "... I drank what?"
|
|
Country: USA ~
Posts: 1709 ~
Member Since: December 13 2008 ~
Last Visit: May 10 2026
|
Alert Moderator
|
|
|
|
Posted - November 21 2014 : 03:10:08 AM
|
| I manage an apartment complex. Got more than my fair share of low common sense (HA, try like No common sense) tenants.
|
|
Country: USA ~
Posts: 865 ~
Member Since: September 23 2014 ~
Last Visit: May 01 2023
|
Alert Moderator
|
|
|
|
Posted - November 21 2014 : 03:44:49 AM
|
You could have stopped with "I manage an apartment complex." I would have inferred the rest!
Glenn
I was thinking of the immortal words of Socrates, who said, "... I drank what?"
|
|
Country: USA ~
Posts: 1709 ~
Member Since: December 13 2008 ~
Last Visit: May 10 2026
|
Alert Moderator
|
|
|
|
Posted - November 21 2014 : 08:00:50 AM
|
quote:It looks like they have made a few cosmetic changes since it first went on display.
Originally posted by oldtimer52 - November 20 2014 : 8:53:32 PM
|
Hey George: That picture is from a old train magazine printed in the 1890s. It seems to me it is on display someplace.
frank
toptrain
" It's a Heck of a Day " !!!
|
|
Country: USA ~
Posts: 7538 ~
Member Since: August 07 2008 ~
Last Visit: December 06 2025
|
Alert Moderator
|
|
|
|
Posted - November 21 2014 : 4:33:05 PM
|
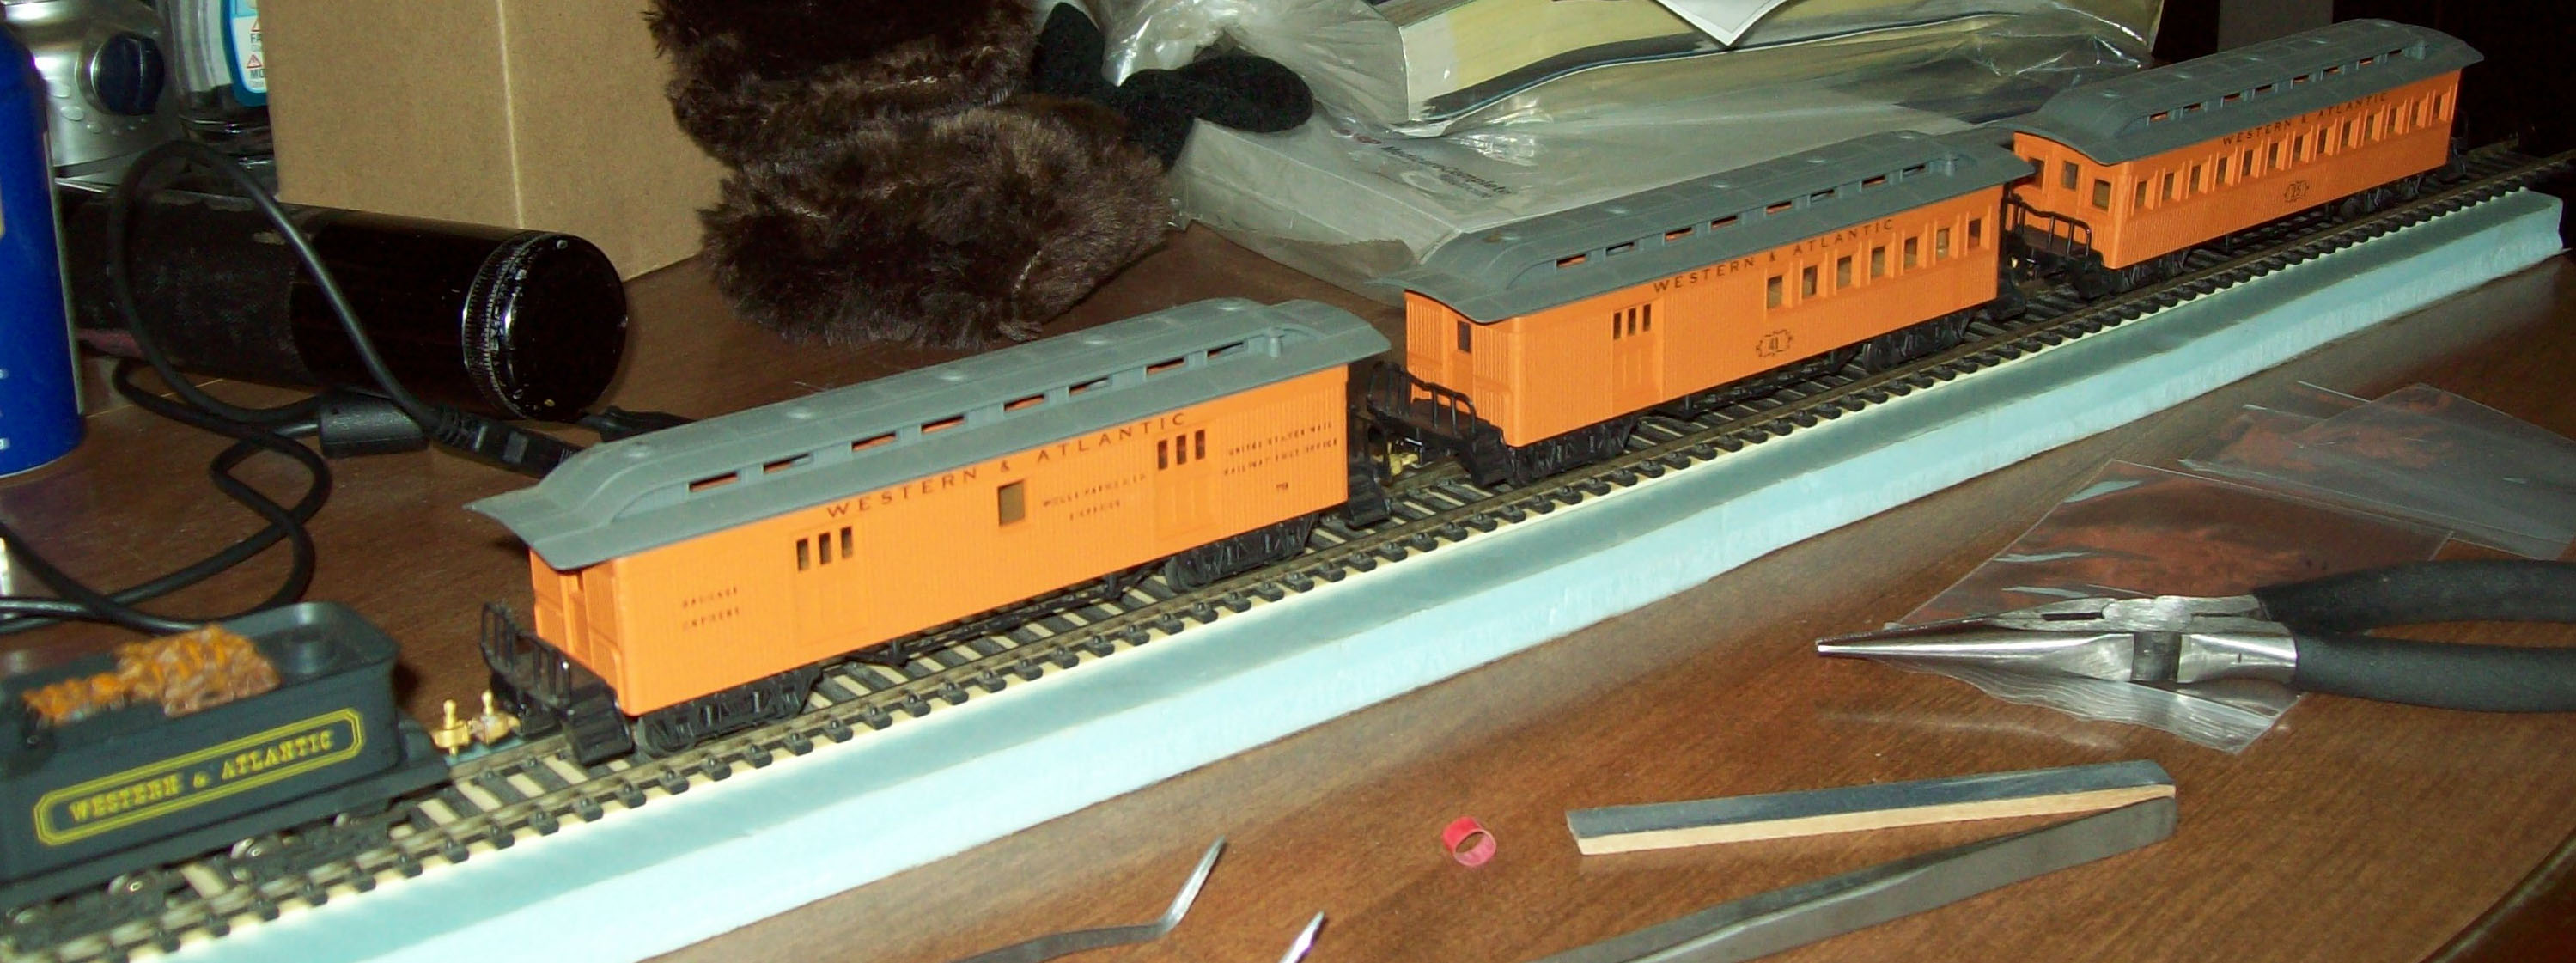
Ok. To start, the tender frame is a 1968 production Rivarossi and the passenger car is a Roundhouse 50'.
To get the link and pin coupler installed on the tender frame, I had to remove the factory supplied mount.
Step 1: Remove factory coupler mount.
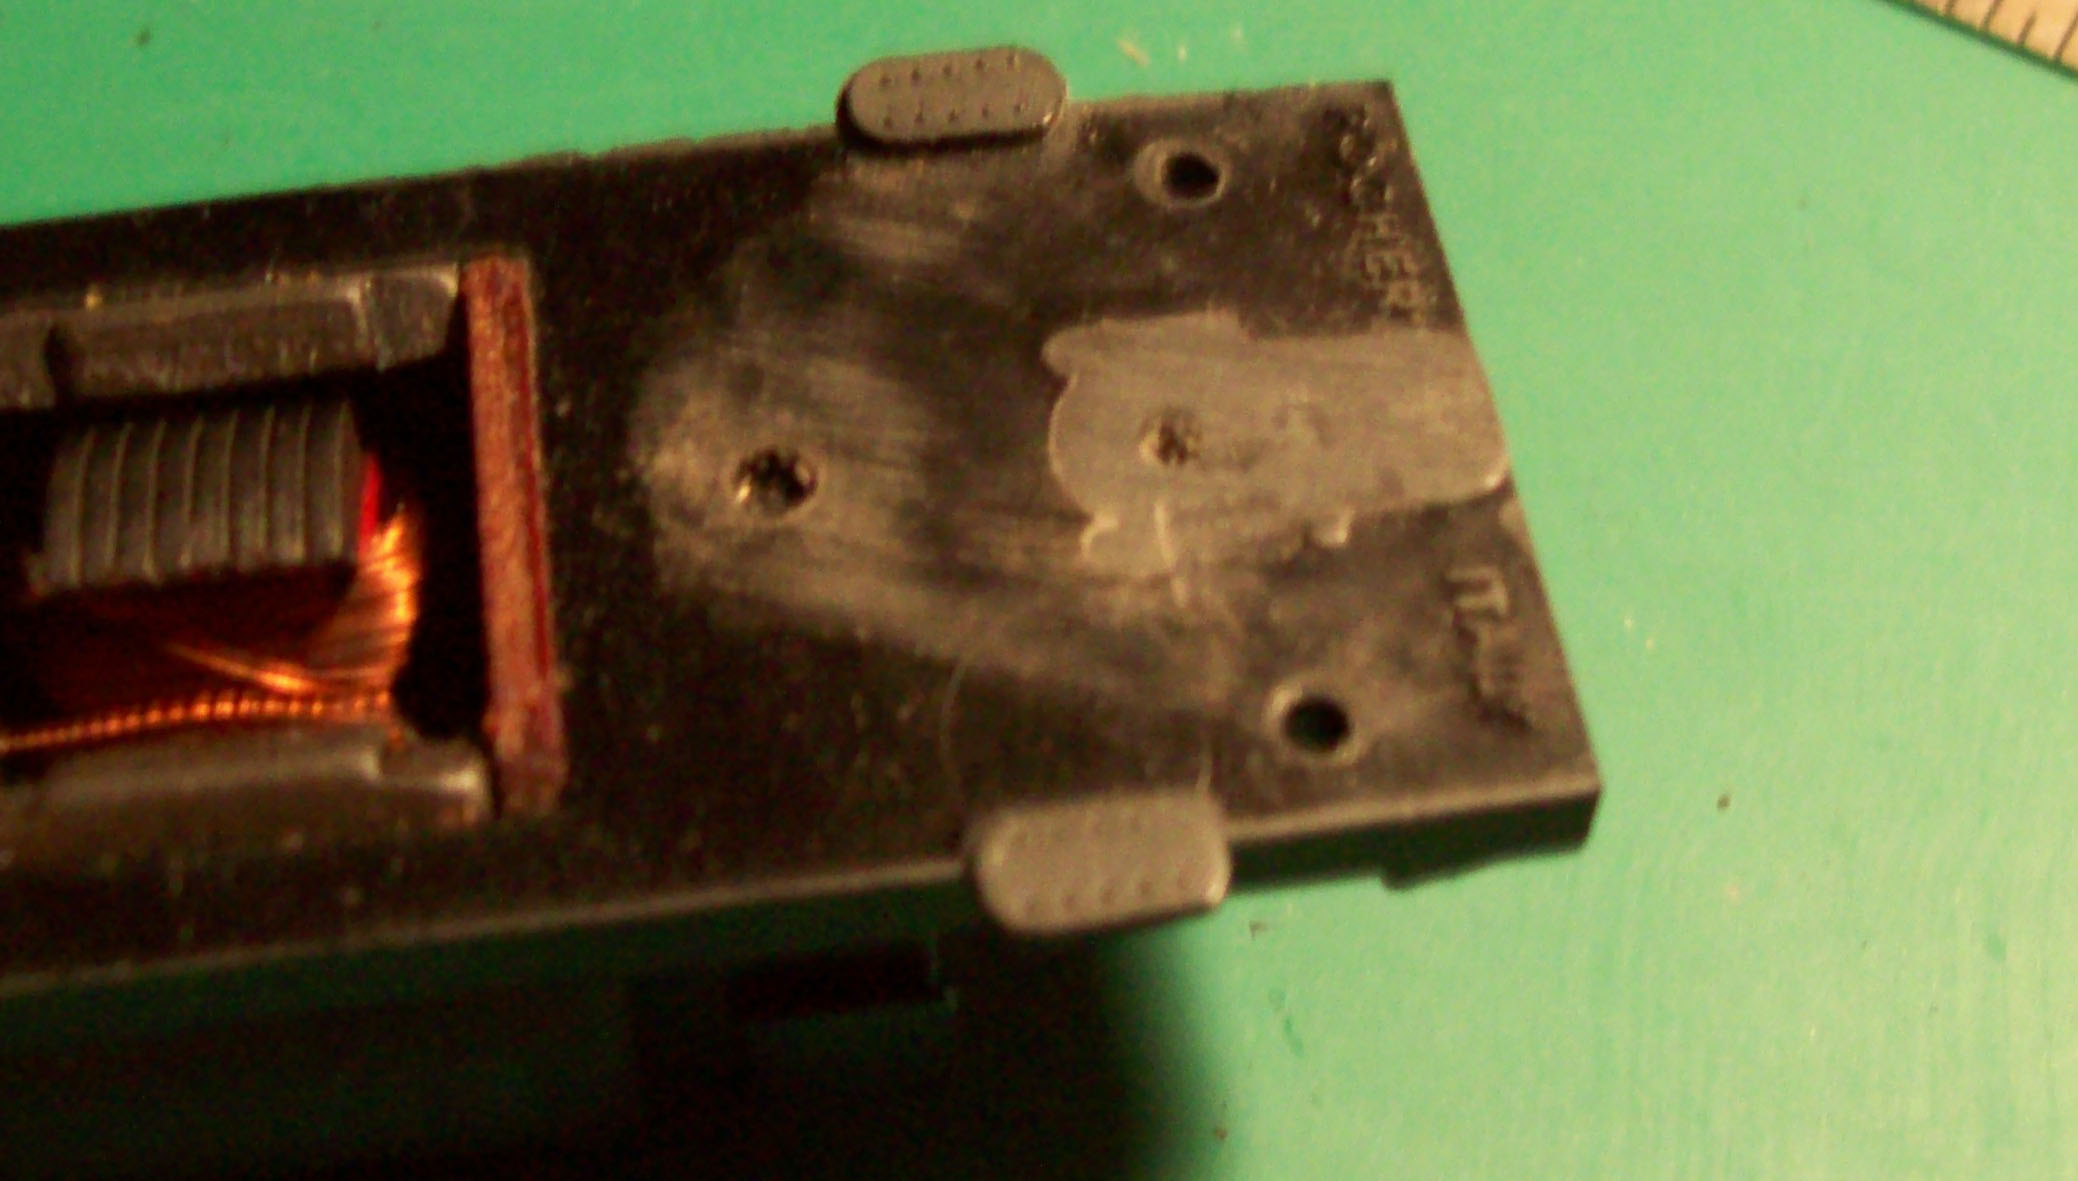
Step 2: Route out a slot for the Kadee #4 gear box.
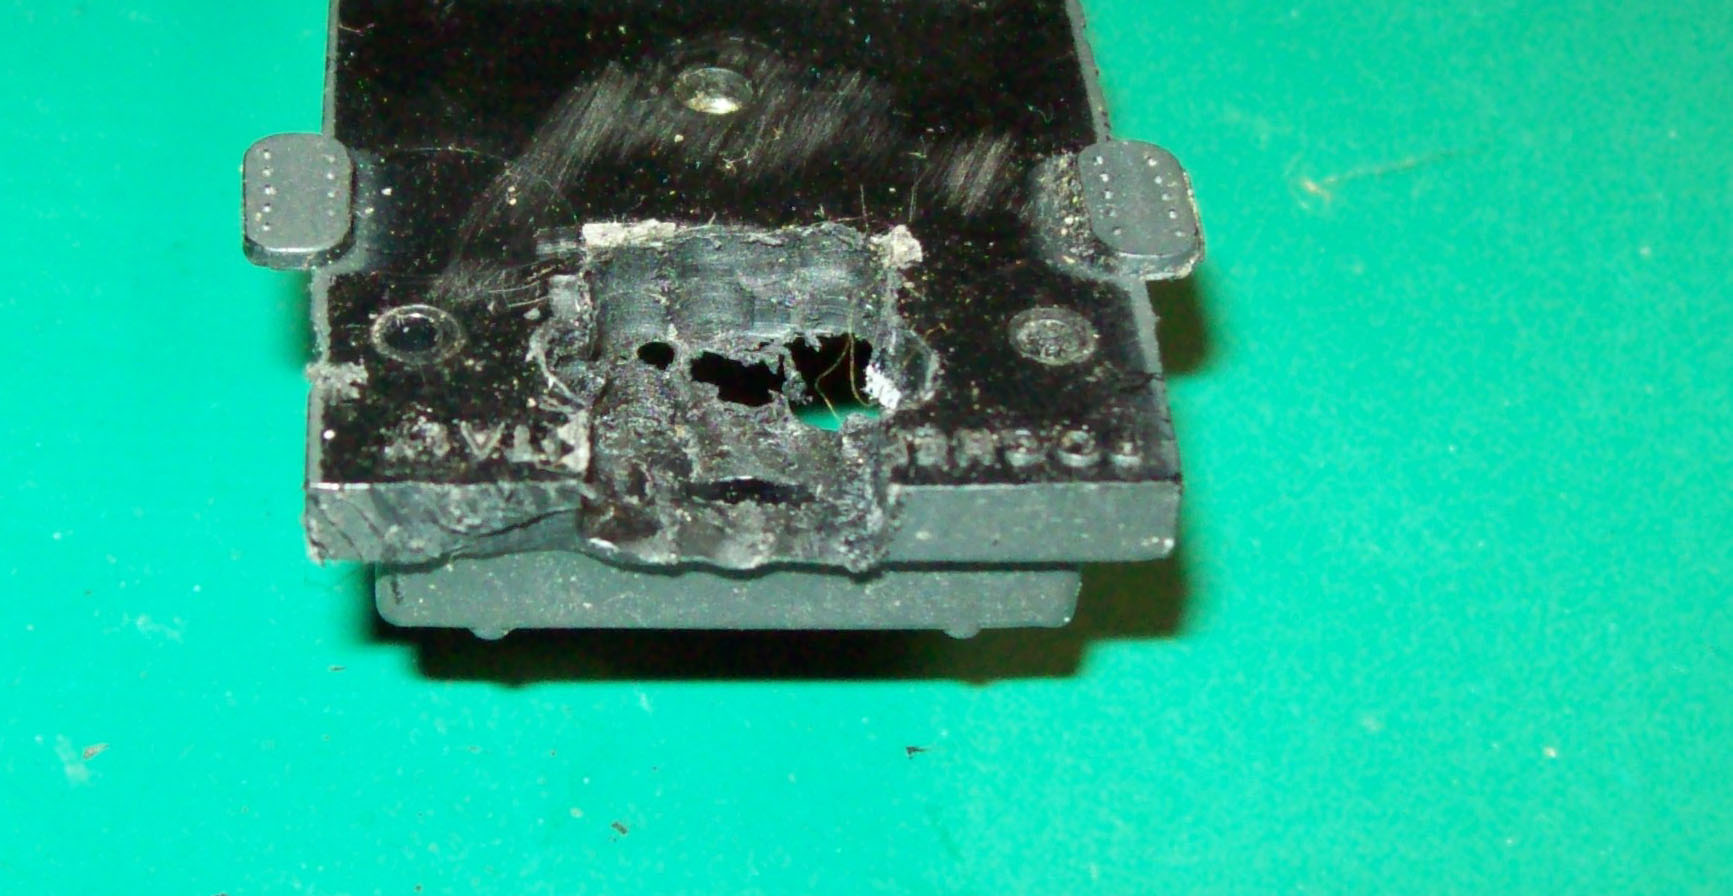
Sorry about the sloppy job on the route, but I had to use a drill press as I don't have a router adapter for the Dremel.
Step 3: Fit the gear box/coupler to the tender frame.
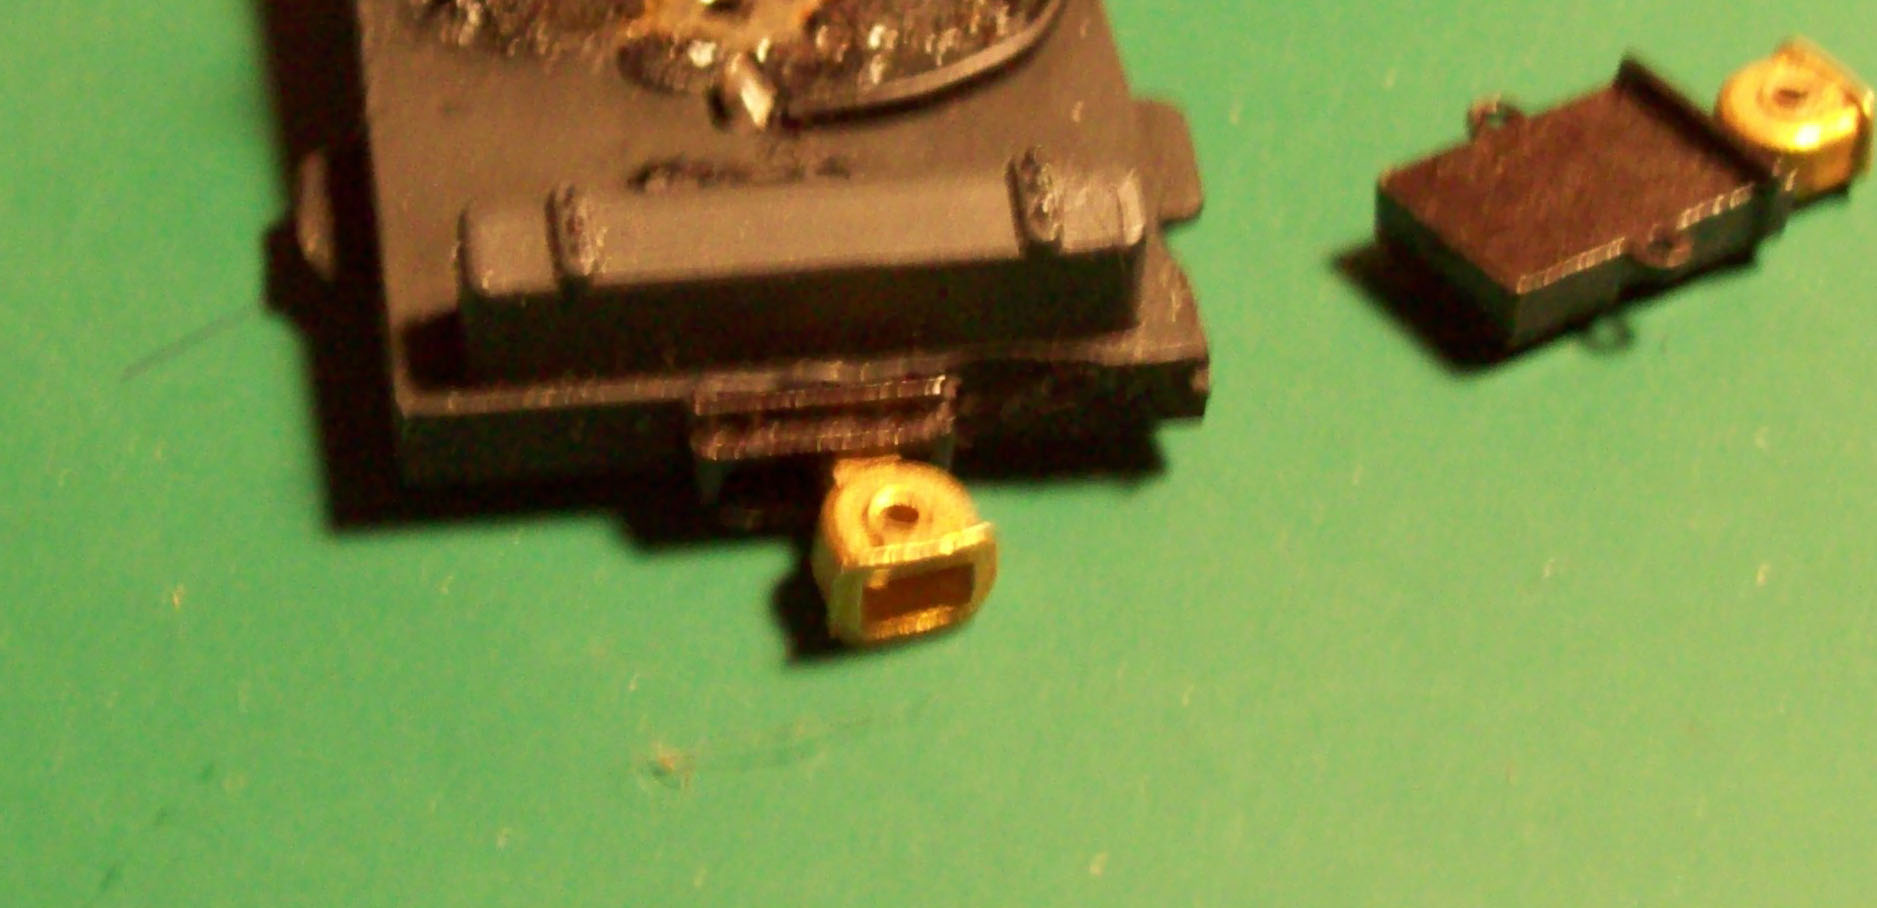
Installing a link and pin gear box directly to the car frame.
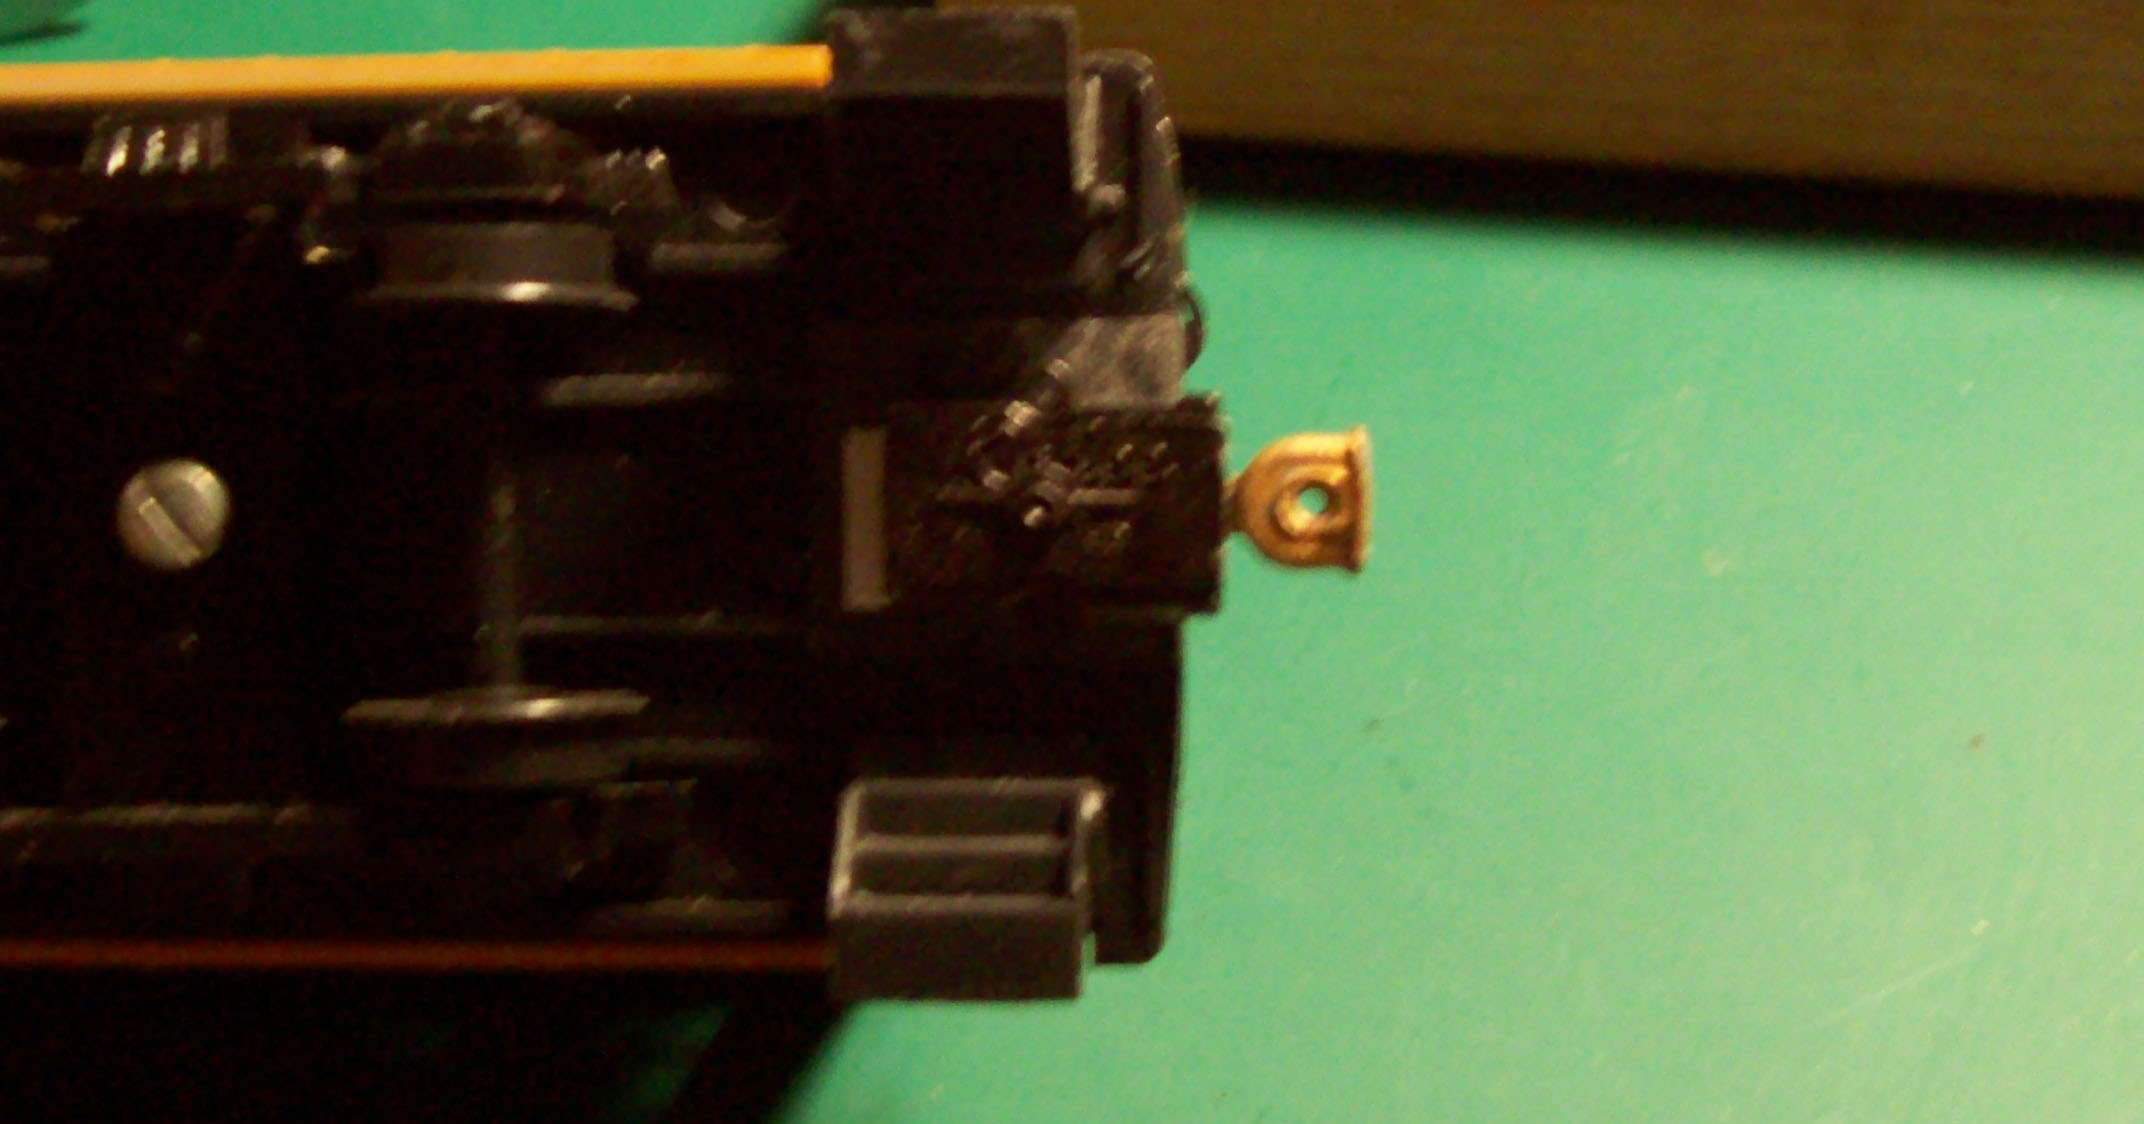
I then checked it against the tender frame to check again for height. It was a tad low, so I had to add a 0.035" thick styrene shim to drop the gear box a little.
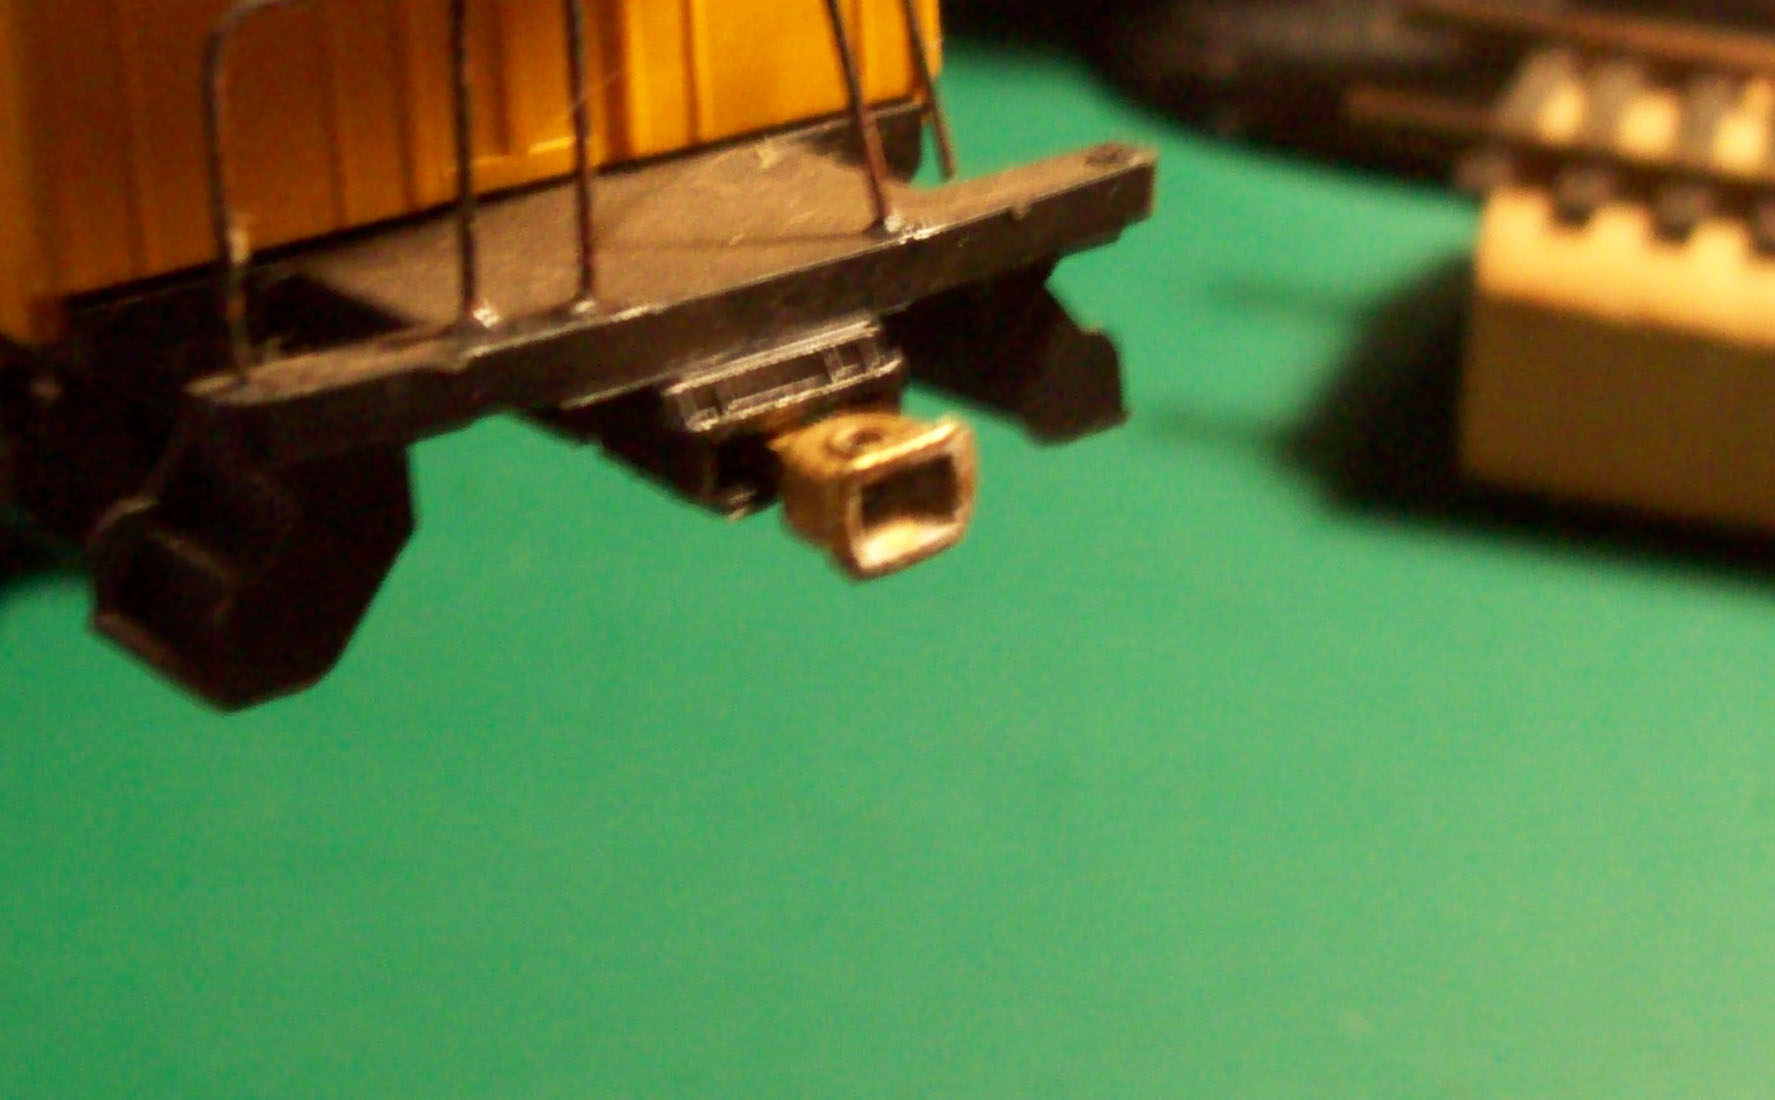
Now, a final check of the tender frame coupler and the passenger car body coupler. They matched up perfectly!!!!!!!!
When I rolled them along my test track, the couplers would move out from the gear box and then retract, just like the real setup would have. I'm gonna have a really cool construct when finished (I hope). At least it will be more period than the knuckle couplers (and a REAL Pain to hook and unhook).
Edited by - oldtimer52 on November 21 2014 4:35:17 PM
|
|
Country: USA ~
Posts: 865 ~
Member Since: September 23 2014 ~
Last Visit: May 01 2023
|
Alert Moderator
|
|
|
|
Posted - November 21 2014 : 6:50:48 PM
|
That is a really cool setup. I'd never personally seen that done in HO before.
Carpe Manana!
|
|
Country: USA ~
Posts: 2416 ~
Member Since: September 17 2013 ~
Last Visit: February 09 2026
|
Alert Moderator
|
|
|
|
Posted - November 21 2014 : 6:56:44 PM
|
| They haven't had the couplers available since the 60s. I got lucky and found a bunch on evilbay. I always wanted period couplers but could never find them available in HO. These are New Old Stock that someone found from an old hobby shop from long ago. Hooking up a construct of these is going to be a real adventure for sure.
|
|
Country: USA ~
Posts: 865 ~
Member Since: September 23 2014 ~
Last Visit: May 01 2023
|
Alert Moderator
|
|
|
|
Posted - November 22 2014 : 12:27:52 PM
|
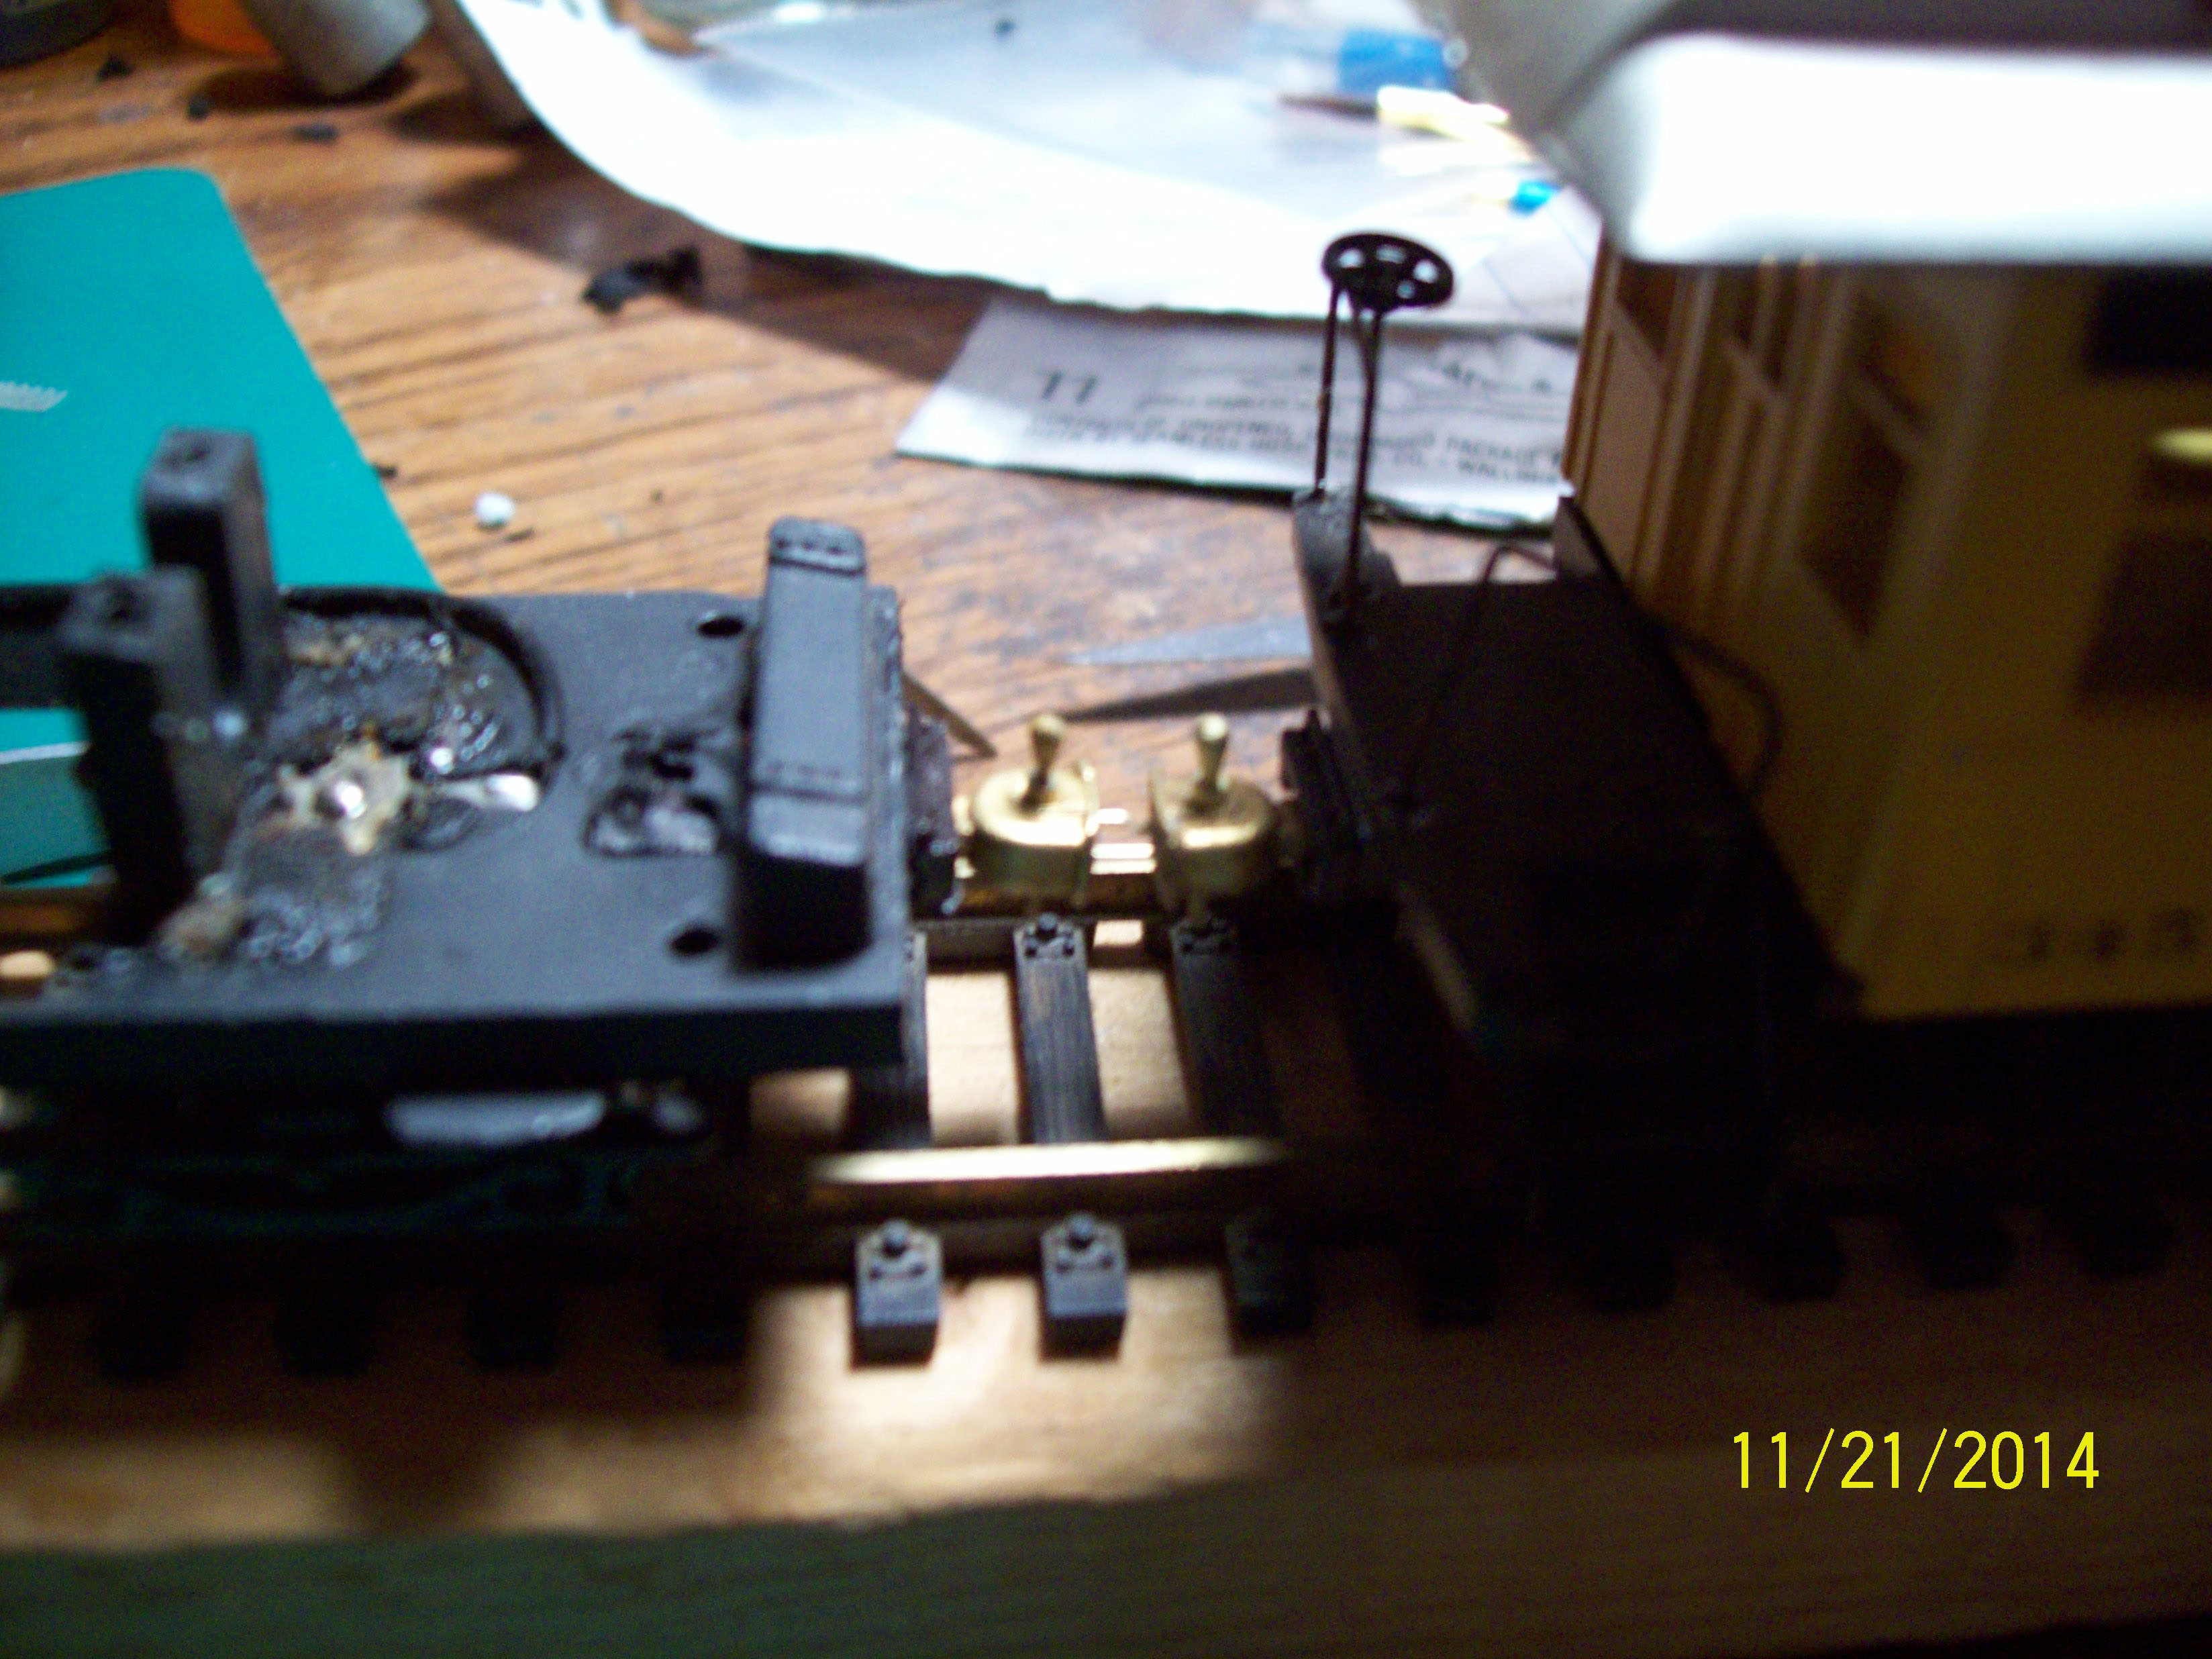
For those interested, here is the train put together using the link and pin coupler system. I tried painting the couplers black, BIG mistake. I couldn't see the bloody holes to put the pins in. So much for aging gracefully...
Tender to Baggage car link.
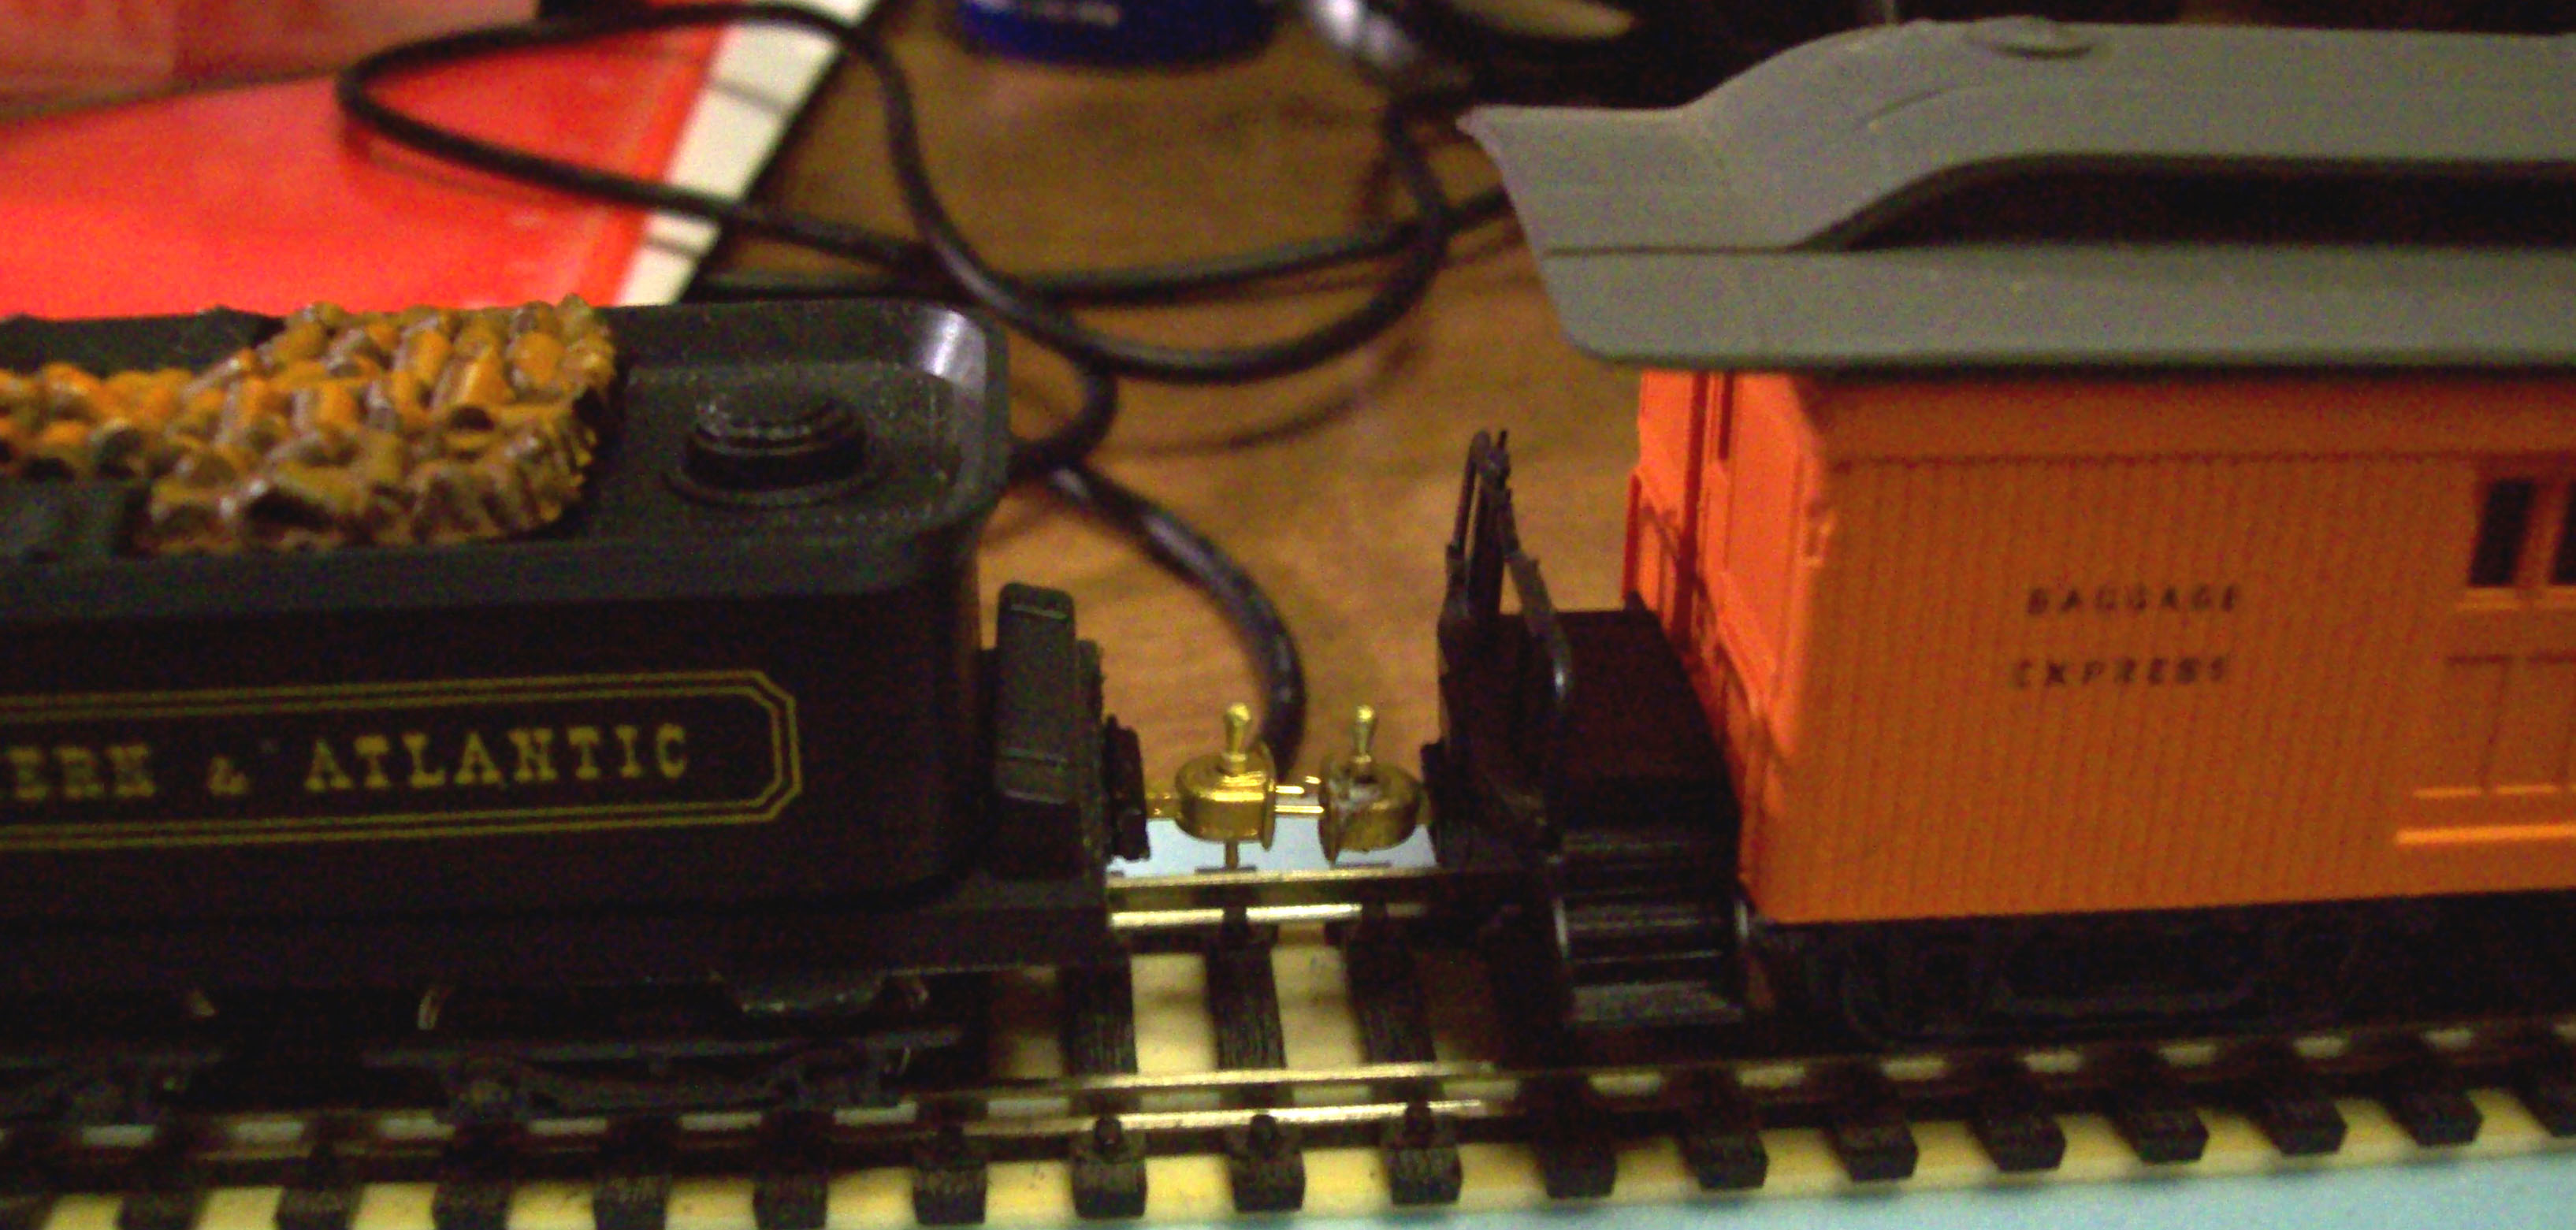
Baggage to Combine car link.

Combine to Passenger car link.
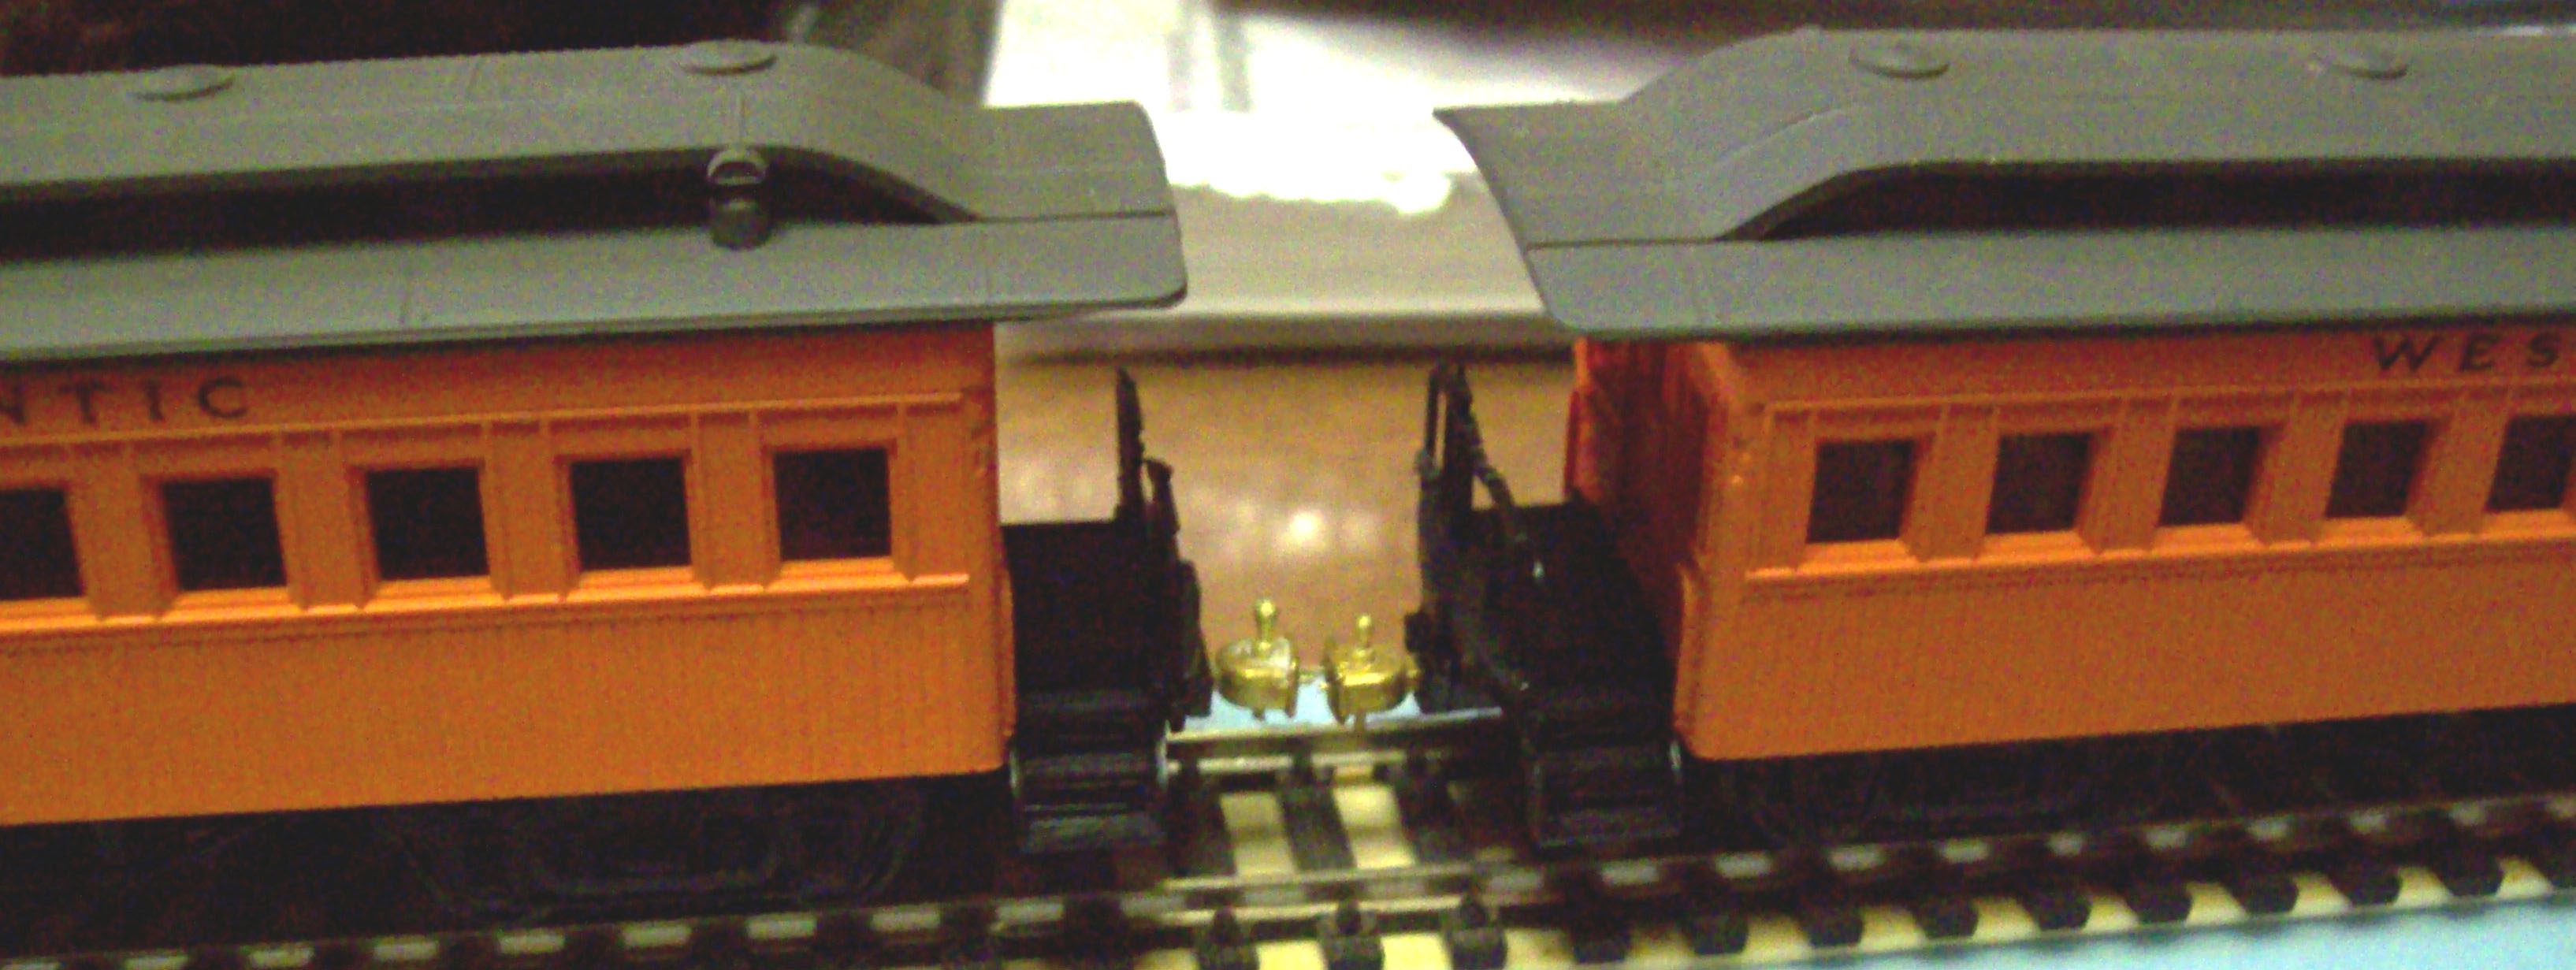
I did a few forward and backward tests with the locomotive and the couplers worked pretty well on moving the cars. Overall, I' really with the results.
Now you have shaggy. Next test, the cargo consist.
Edited by - oldtimer52 on November 22 2014 12:29:50 PM
|
|
Country: USA ~
Posts: 865 ~
Member Since: September 23 2014 ~
Last Visit: May 01 2023
|
Alert Moderator
|
|
|
|
Posted - November 22 2014 : 6:12:42 PM
|
| That's pretty fine George. Thanks for posting the photos. Looks like a good exercise in patience and steady hands. That's a shame you can't see them when they're painted black, but I know what you mean. I have a magnifying lamp pretty much permanently clamped to my layout/workbench.
|
|
Country: USA ~
Posts: 2087 ~
Member Since: March 16 2013 ~
Last Visit: July 05 2018
|
Alert Moderator
|
|
|
|
Posted - November 25 2014 : 3:53:20 PM
|
Update on progress. Have gotten most of the boiler done. Even found some brass strapping material to do the boiler straps with. Will polish it up, coat it and install it on the boiler. Will look better than just painting them on.
|
|
Country: USA ~
Posts: 865 ~
Member Since: September 23 2014 ~
Last Visit: May 01 2023
|
Alert Moderator
|
|
|
|
Posted - November 25 2014 : 4:53:55 PM
|
That's really starting to take shape.
Carpe Manana!
|
|
Country: USA ~
Posts: 2416 ~
Member Since: September 17 2013 ~
Last Visit: February 09 2026
|
Alert Moderator
|
|
|
|
Posted - November 25 2014 : 9:18:50 PM
|
| Hey George, Where did you find the brass strapping? I've been looking; wanting to get some about 1 mm wide to use on tank cars.
|
|
Country: USA ~
Posts: 2087 ~
Member Since: March 16 2013 ~
Last Visit: July 05 2018
|
Alert Moderator
|
|
|
|
Posted - November 25 2014 : 11:52:42 PM
|
I found this strapping on eBay. Here is a photo of the package with the part number, manufacturer and the address. I don't know if they're still in business or not. The package also shows the size of the strapping inclosed which is the size you are looking for.
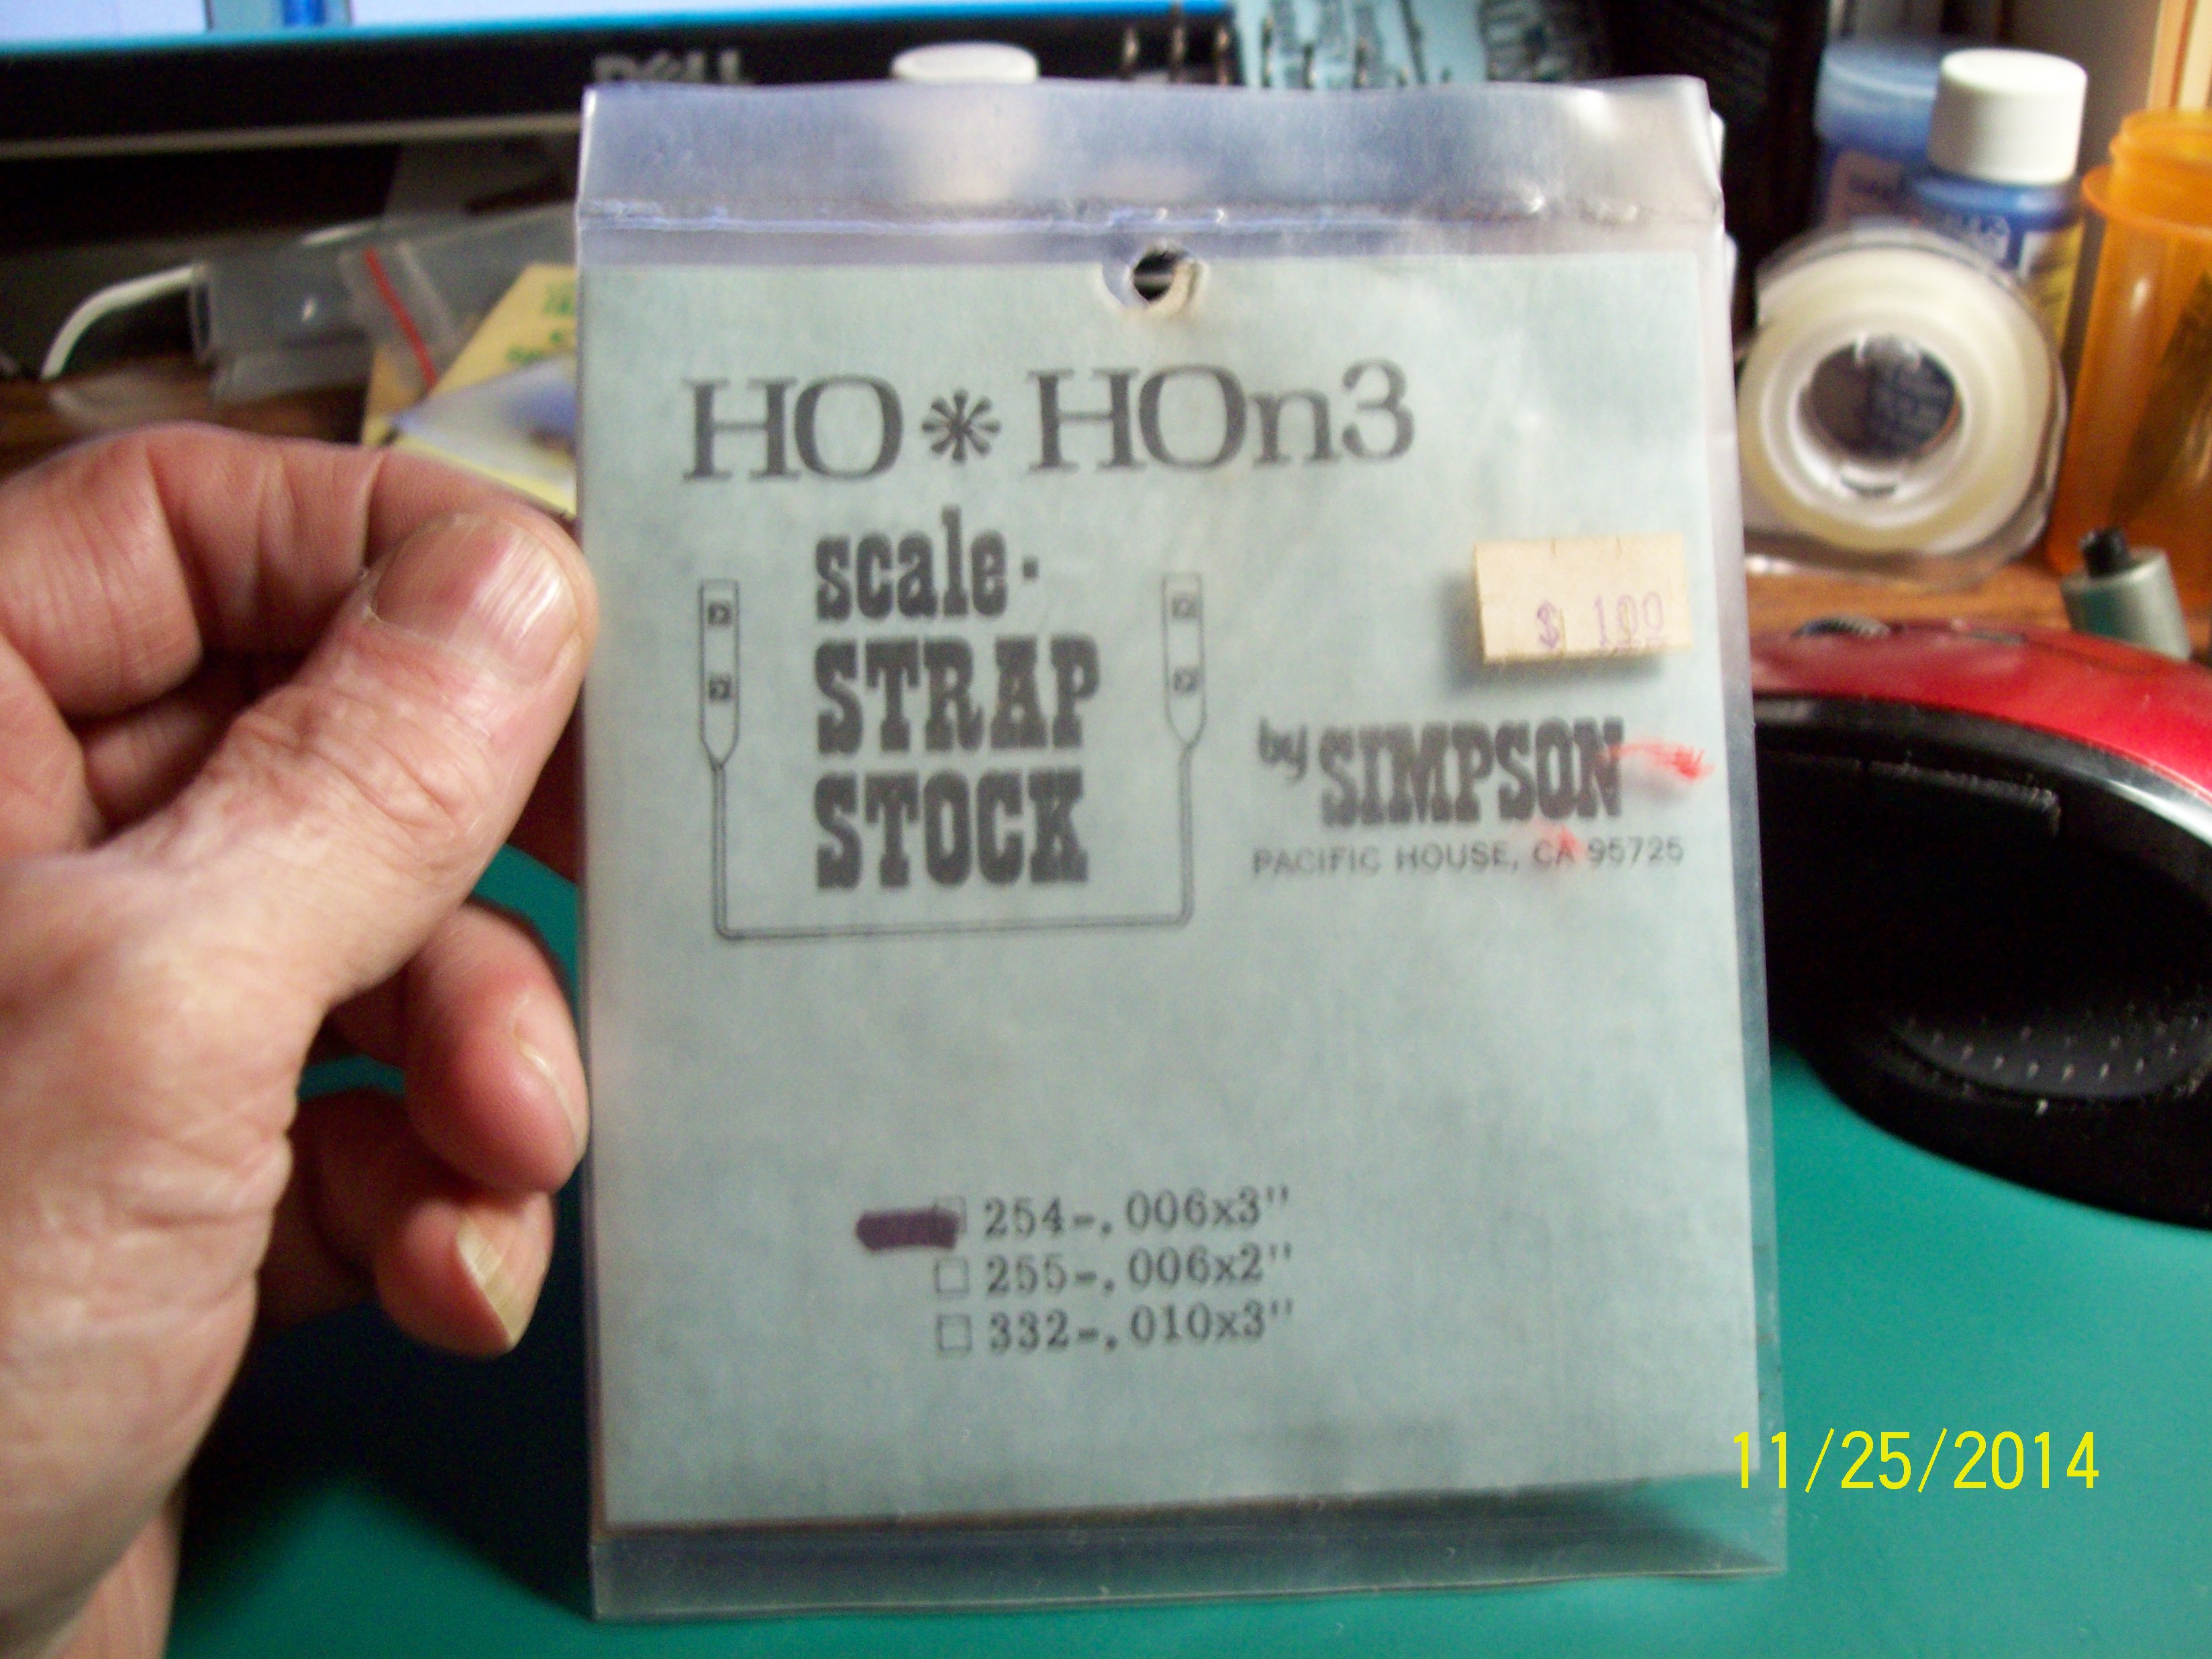
I hope this helps.
George
|
|
Country: USA ~
Posts: 865 ~
Member Since: September 23 2014 ~
Last Visit: May 01 2023
|
Alert Moderator
|
|
|
|
Posted - November 26 2014 : 09:35:14 AM
|
quote:Update on progress. Have gotten most of the boiler done. Even found some brass strapping material to do the boiler straps with. Will polish it up, coat it and install it on the boiler. Will look better than just painting them on.
Originally posted by oldtimer52 - November 25 2014 : 3:53:20 PM
|
That's really starting to look good.
-Steve
"A lot of modellers out there who go to these train shows see broken HO stuff and go, 'This is useless' when, in reality, they can still be used for modeling whether it's as a prop on your layout or a cool project to make something old new again."
|
|
Country: USA ~
Posts: 3533 ~
Member Since: February 17 2014 ~
Last Visit: January 11 2023
|
Alert Moderator
|
|
|
|
Posted - November 26 2014 : 8:07:13 PM
|
| Thanks George. I'll take a look and see if I can find some of that.
|
|
Country: USA ~
Posts: 2087 ~
Member Since: March 16 2013 ~
Last Visit: July 05 2018
|
Alert Moderator
|
|
|
|
Posted - November 27 2014 : 8:16:35 PM
|
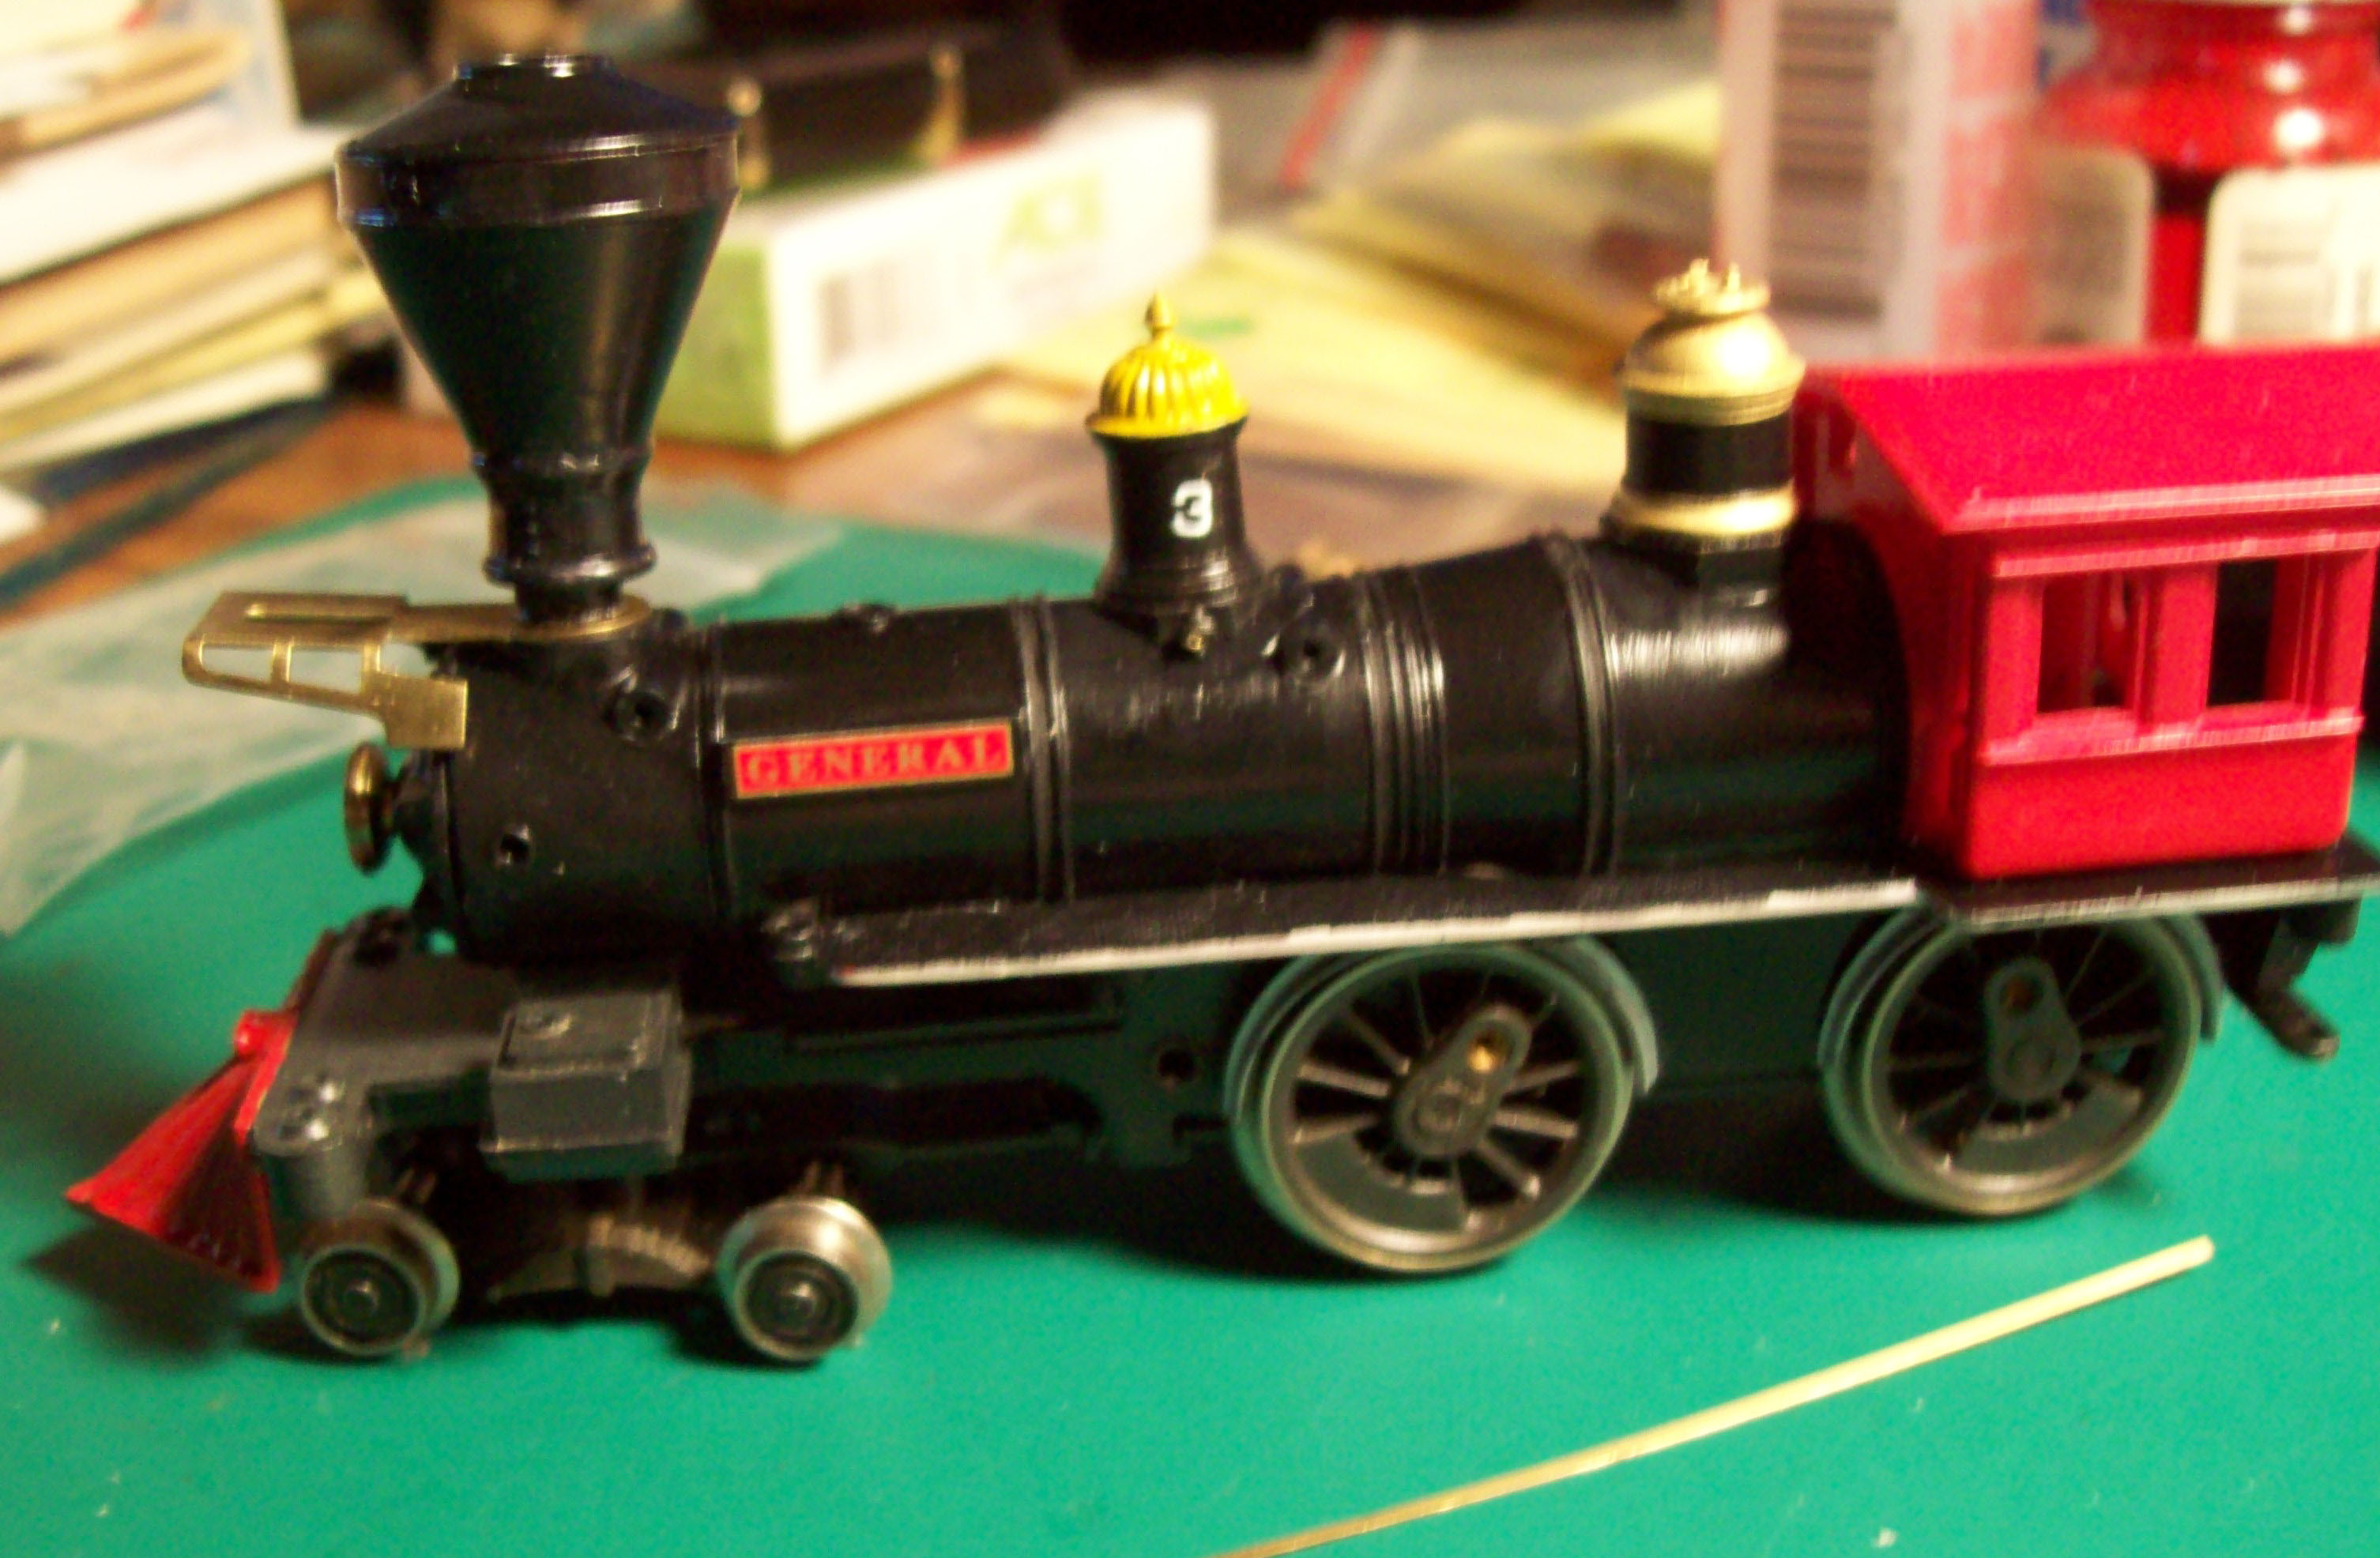
Another update on the boiler. Have completed most of it and am getting the lead truck, handrails and other detail parts finished.
Barry, this is what those brass straps look like when they are installed on the boiler. I polished them, installed them and coated them with Micro Satin to keep the tarnish down. They fit like a glove and installed very easy.
George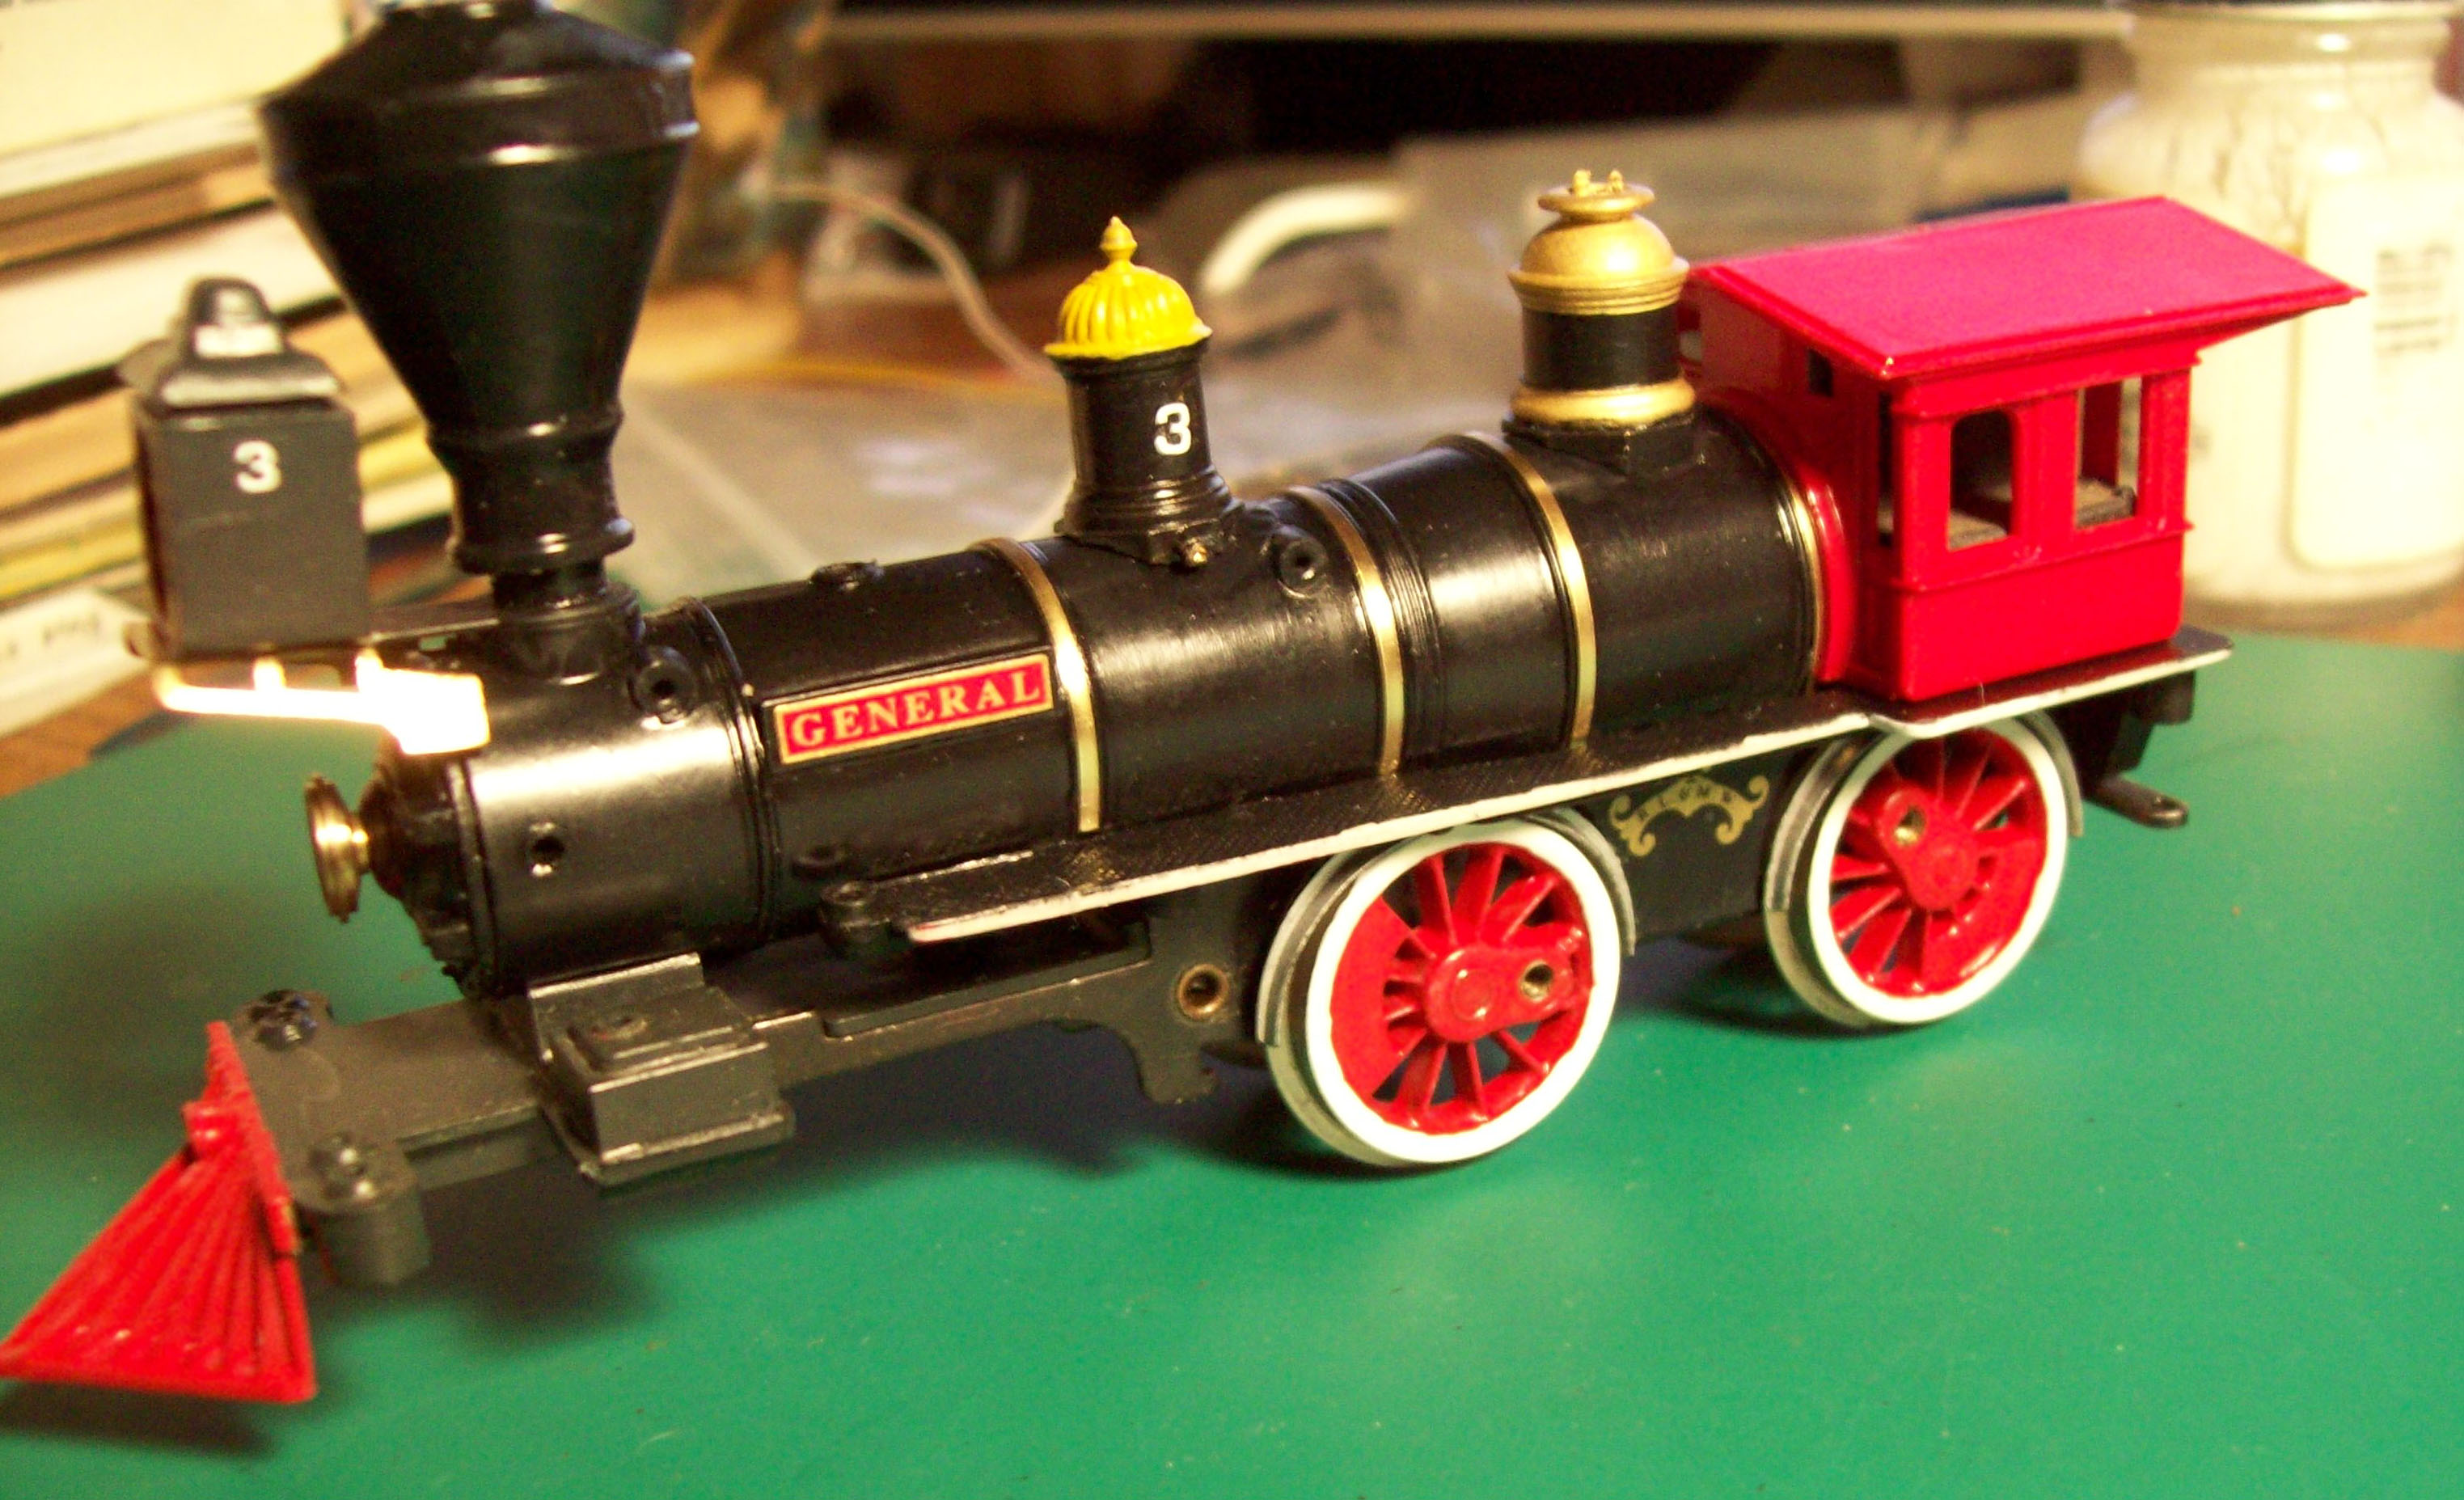
|
|
Country: USA ~
Posts: 865 ~
Member Since: September 23 2014 ~
Last Visit: May 01 2023
|
Alert Moderator
|
|
|
|
 Posted - November 27 2014 : 8:51:39 PM Posted - November 27 2014 : 8:51:39 PM
|
next project is.....The Texas!
Will look for these at show Saturday hehe
|
|
Country: USA ~
Posts: 15026 ~
Member Since: February 23 2009 ~
Last Visit: May 25 2026
|
Alert Moderator
|
|
|
|
Posted - November 28 2014 : 12:23:50 AM
|
| If you're going to look for the AHM 4-4-0, be sure to make sure it is the 1968 production run. Turn the tender over and look for an open frame motor and check the loco frame for a screw holding the crosshead on. Good luck.
|
|
Country: USA ~
Posts: 865 ~
Member Since: September 23 2014 ~
Last Visit: May 01 2023
|
Alert Moderator
|
|
|
|
Posted - November 28 2014 : 7:34:43 PM
|
| That strapping does look nice and tidy George. What, do you kind of just guide it around with your finger holding it flat against the boiler as you pull it around? What kind of adhesive? I think I may have found some ( https://www.nscalesupply.com/DET/DET-Details.html ) but I need to check it out further; they're calling it "flat brass wire".
|
|
Country: USA ~
Posts: 2087 ~
Member Since: March 16 2013 ~
Last Visit: July 05 2018
|
Alert Moderator
|
|
|
|
Posted - November 28 2014 : 10:56:54 PM
|
If you look closely, there are two ridges that Rivarossi used to simulate straps. On the underside of the boiler, it is cut out for the drive mechanism. On the front most band, I had to cut small holes in the walk to put the strap thru. I then used CA to glue the ends under the boiler. On the next two straps I bent the end of the strap around the edge and placed the strap between the two ridges, it fits very well. Then I placed the other end of the strap under the other side edge and bent it back. Holds very well. The last strap, partially covered by the cab, was done the same way as the middle two and then I used CA to hold the ends along with bending them over the edges. After they were in place, I used Micro Satin to coat the straps to help keep them nice and shiny. The strap is actually .006 thick brass sheet cut into 0.038 strips. You could call it flat wire, I suppose.
I checked the site out. Looking at what they have to offer, the 0.010 x 0.030 are close to the size that I have.
Edited by - oldtimer52 on November 28 2014 11:02:36 PM
|
|
Country: USA ~
Posts: 865 ~
Member Since: September 23 2014 ~
Last Visit: May 01 2023
|
Alert Moderator
|
|
|
|
Posted - November 30 2014 : 6:10:52 PM
|
Finally, FINISHED!!!!!! Spent the Thanksgiving holiday weekend getting the finishing touches done. Now I only have to get the light circuit designed and built. I also looked at the re-magneting(sp) and have ordered new neomydium magnets for the motor. Will do that when they get here.
Now for the photos.
Before:
After:
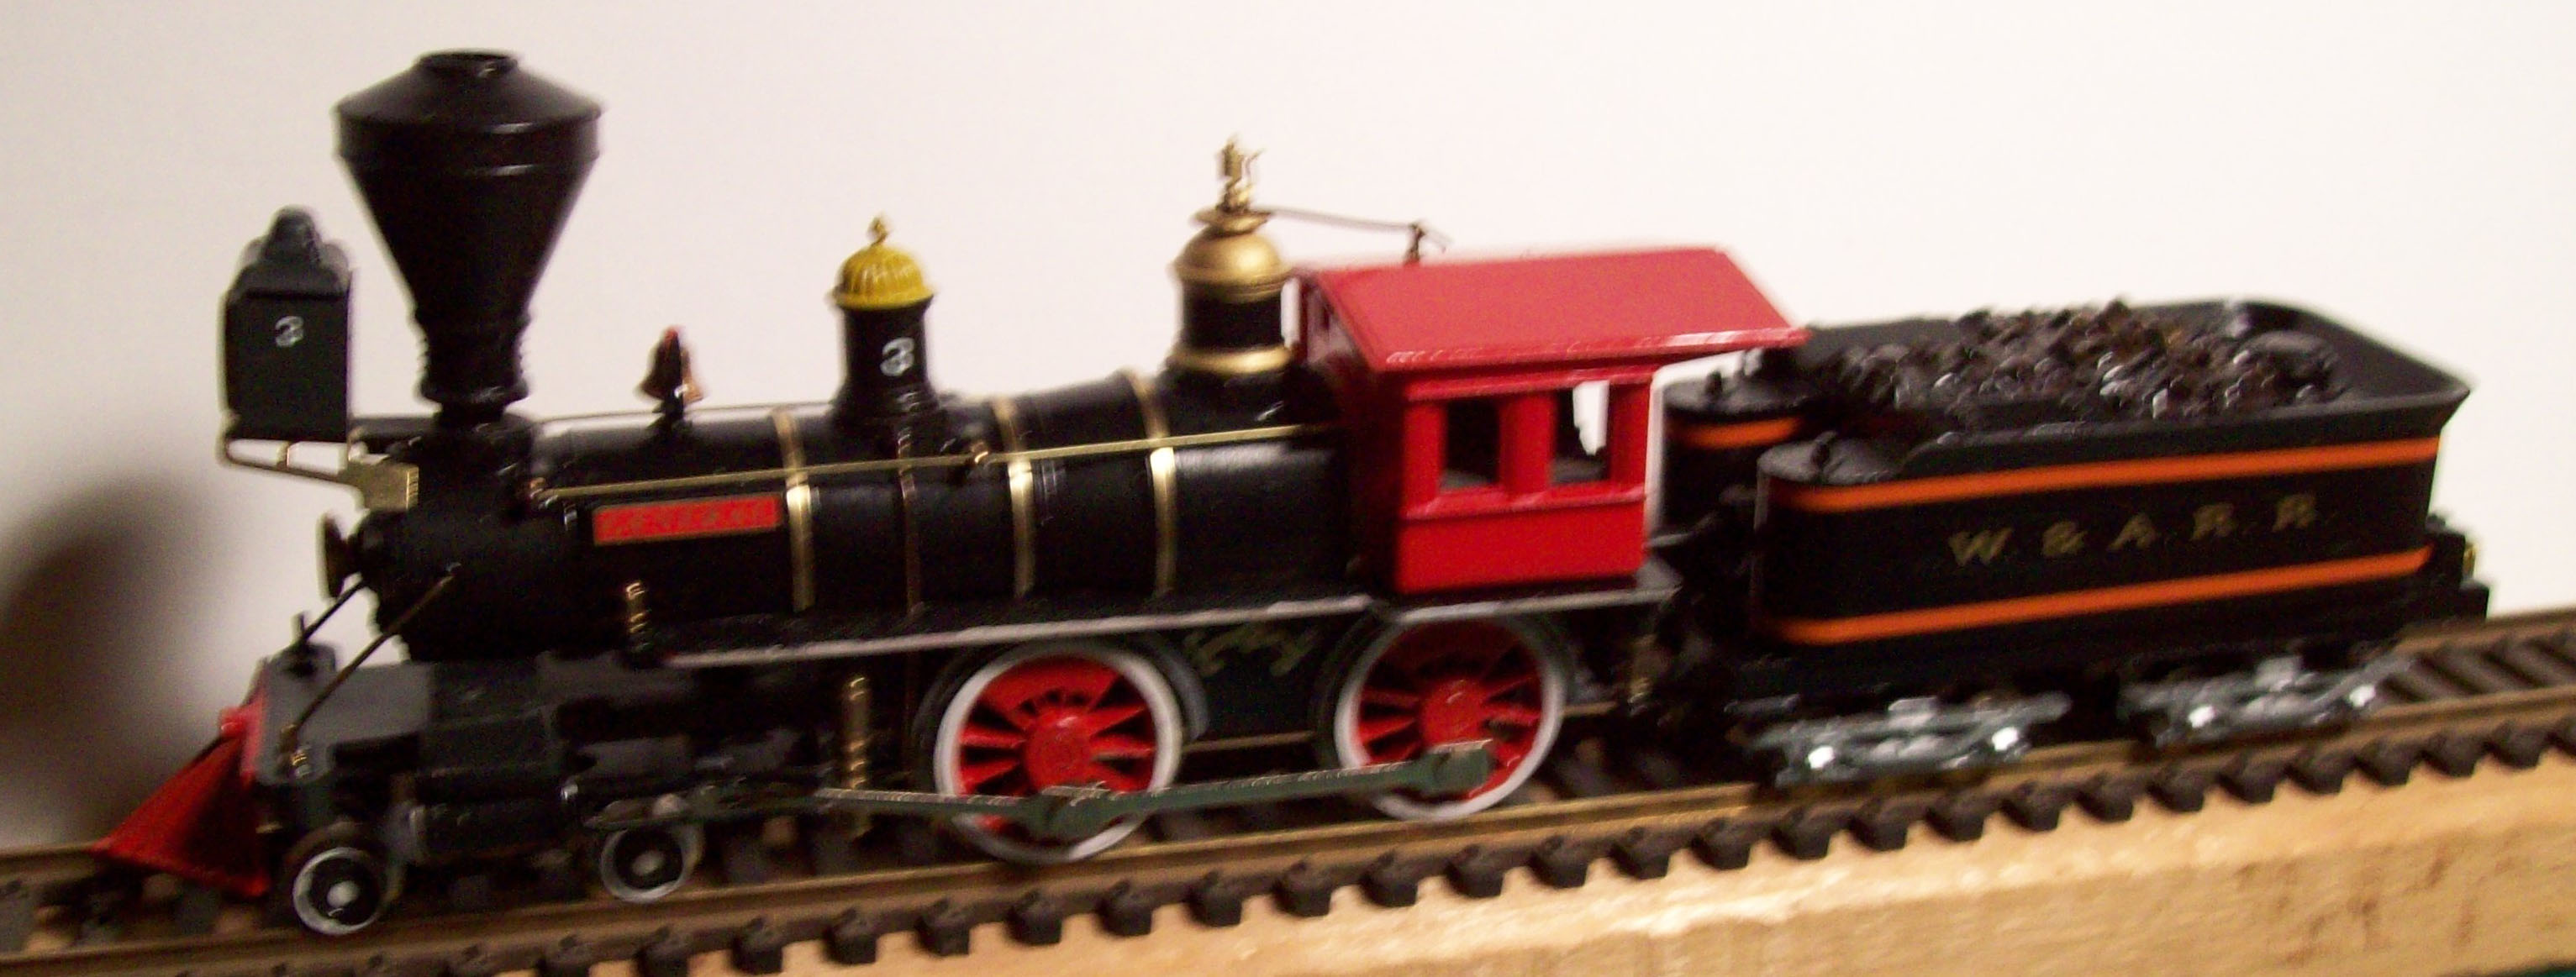
View of the link and pin coupler on the tender.
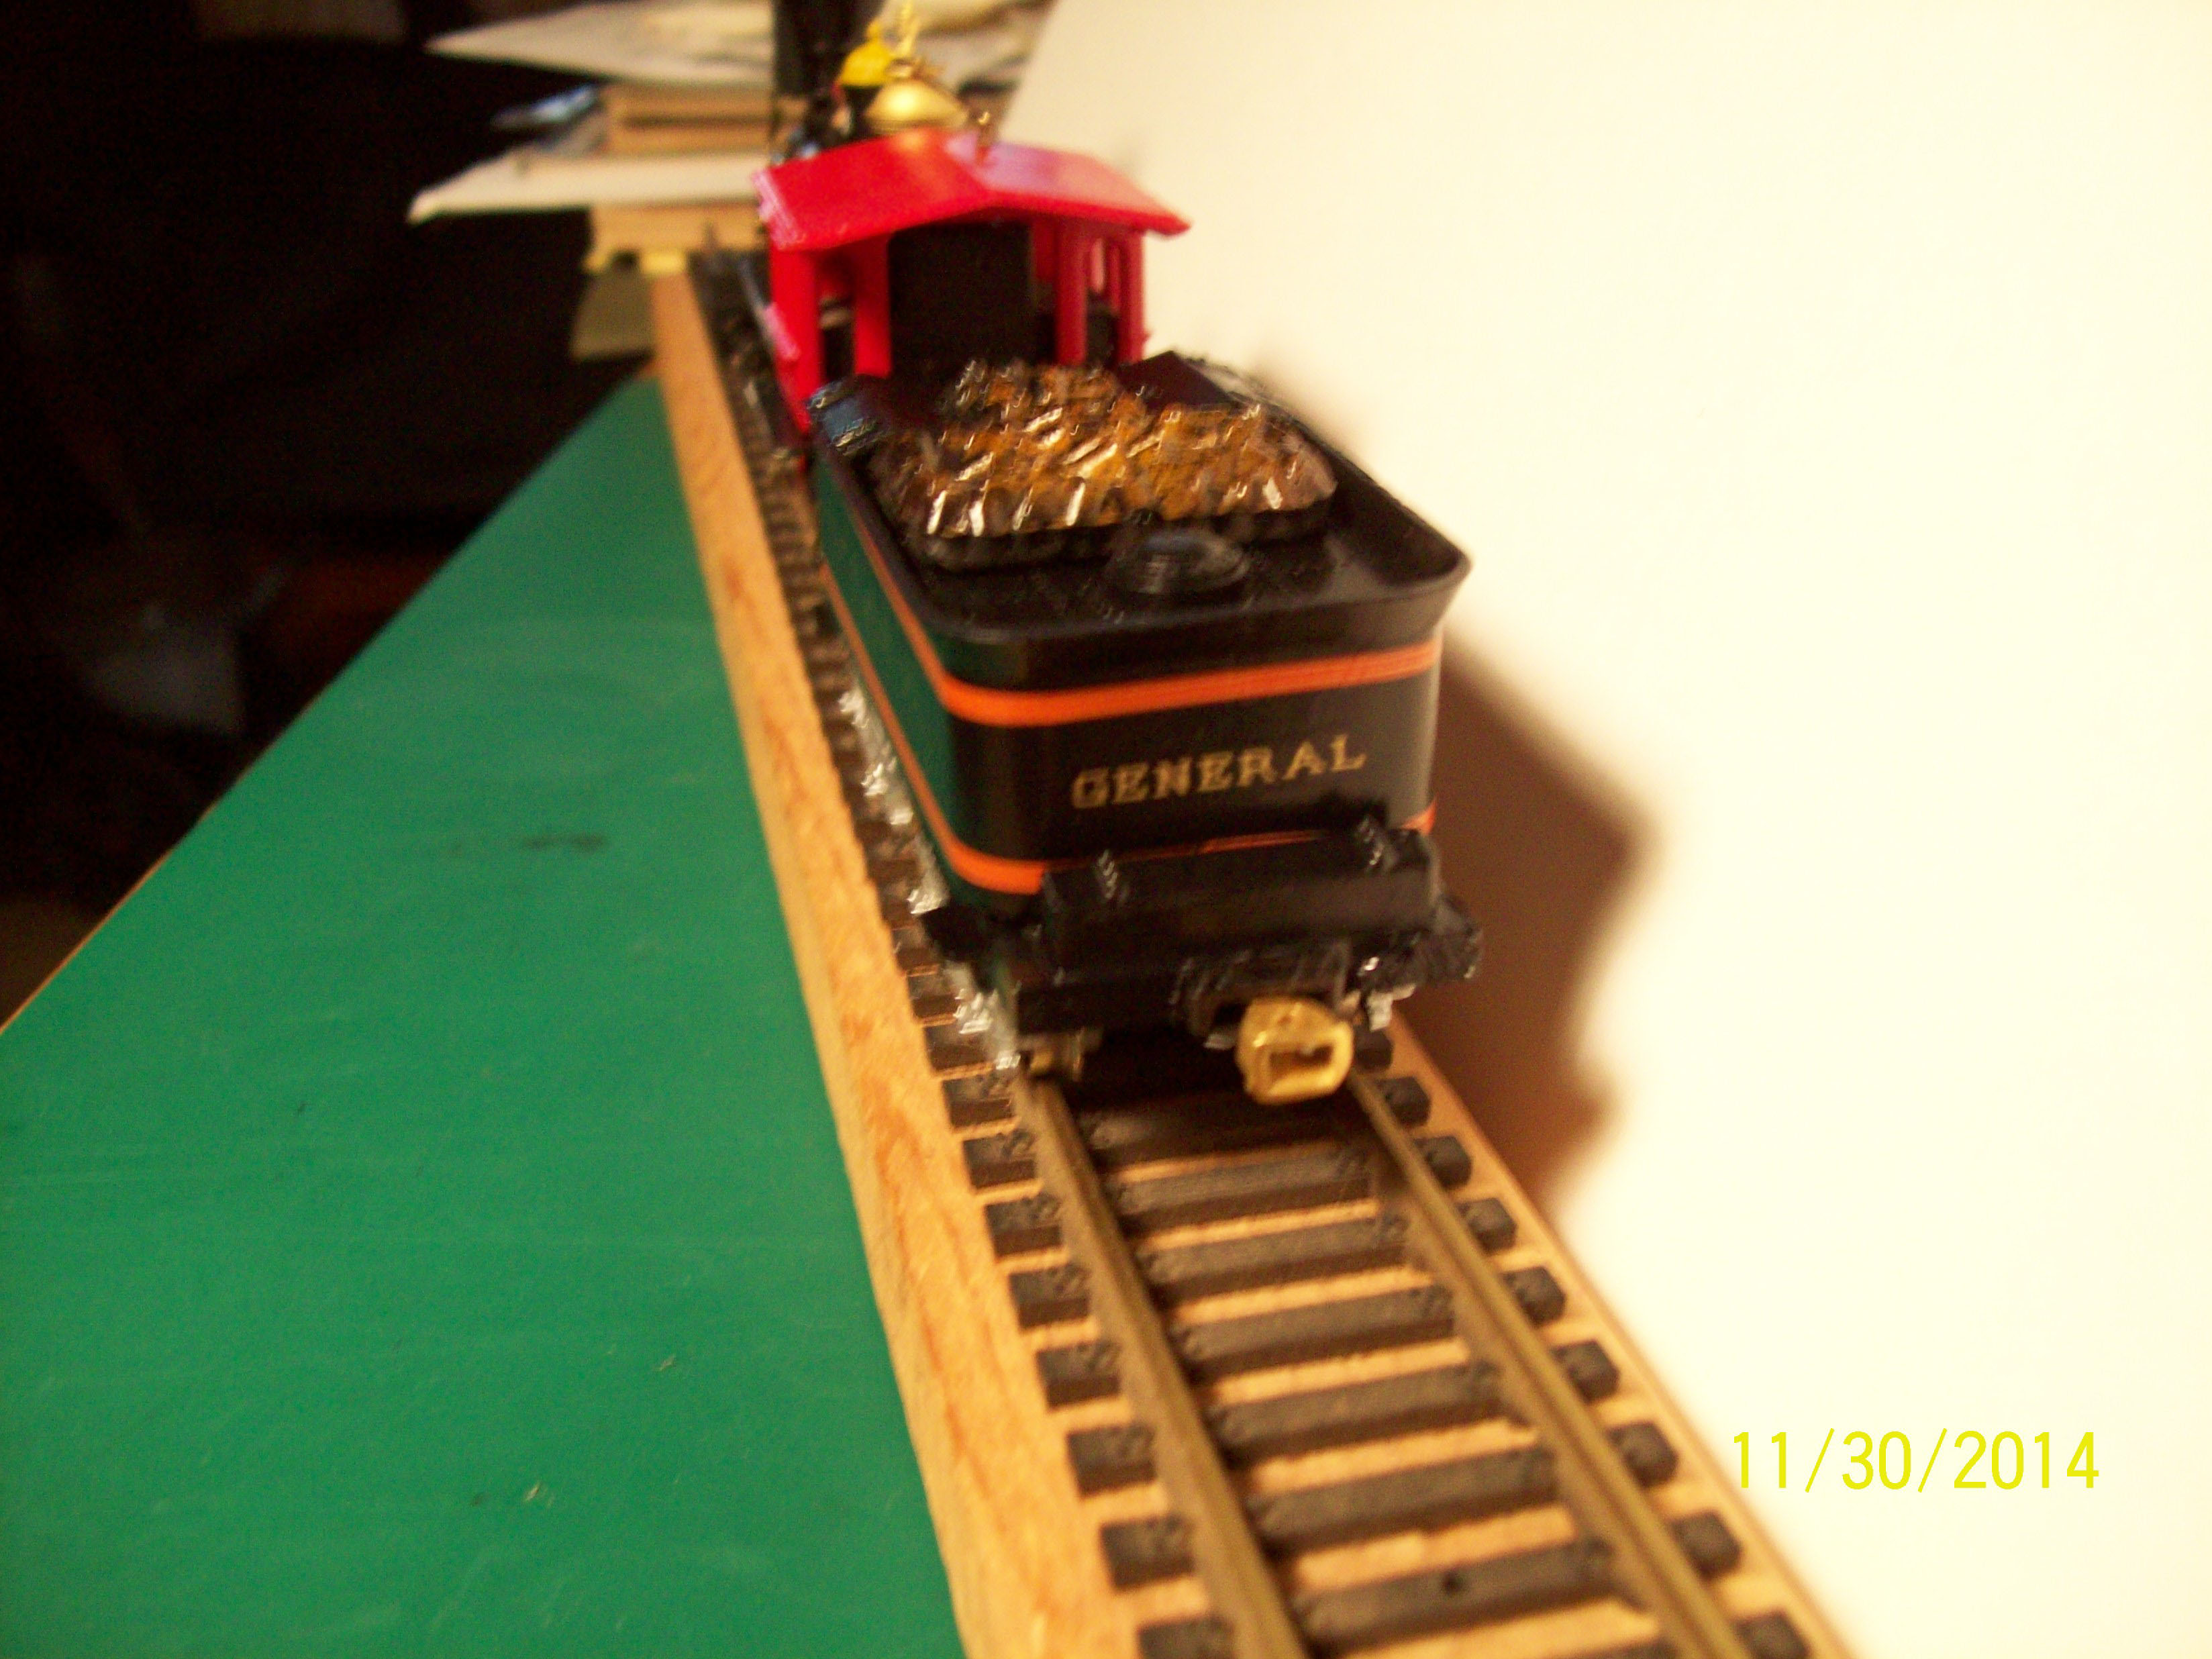
Sorry about the shaky photos. My "photo" hands aren't quite as steady any more.
George
|
|
Country: USA ~
Posts: 865 ~
Member Since: September 23 2014 ~
Last Visit: May 01 2023
|
Alert Moderator
|
|
|
|
Posted - November 30 2014 : 6:33:33 PM
|
quote:
BEAUTIFUL. That loco has been transformed! Your work sure paid off
http://tycodepot.com/
|
|
|
|
|
Posted - November 30 2014 : 6:40:11 PM
|
| Thanks. Now to marry it to my Roundhouse old time W & A car set.
|
|
Country: USA ~
Posts: 865 ~
Member Since: September 23 2014 ~
Last Visit: May 01 2023
|
Alert Moderator
|
|
|
|
Posted - November 30 2014 : 8:07:48 PM
|
quote:My "photo" hands aren't quite as steady any more.
Originally posted by oldtimer52 - November 30 2014 : 6:10:52 PM
|
The important thing is that your modeling hands are doing quite well! That's a sharp looking engine!
Carpe Manana!
|
|
Country: USA ~
Posts: 2416 ~
Member Since: September 17 2013 ~
Last Visit: February 09 2026
|
Alert Moderator
|
|
|
|
Posted - November 30 2014 : 9:34:43 PM
|
| Thank you. I just hope my "modeling hands" hang on for a while longer. Got a few more to restore and kitbash.
|
|
Country: USA ~
Posts: 865 ~
Member Since: September 23 2014 ~
Last Visit: May 01 2023
|
Alert Moderator
|
|