|
|
 Posted - February 17 2009 : 4:28:49 PM Posted - February 17 2009 : 4:28:49 PM


|
Hello everyone, I've just about completed work on a Walthers warehouse kit. It has been an excellent project, but I've hit a bit of a snag.
It seems no matter what I try, I cannot get the four walls to stay together! 
I've tried every sort of glue on hand, and I've tried various objects to hold everything in a makeshift clamp.
So how do you guys do it? Do you make a jig of some sort? Or is it as simple as buying really heavy duty glue?
Thanks in advance!
    
- Matt -
|
Country:  Canada ~
Posts: 1021 ~
Member Since: August 24 2008 ~
Last Visit: January 05 2020 Canada ~
Posts: 1021 ~
Member Since: August 24 2008 ~
Last Visit: January 05 2020
|
 Alert Moderator
|
|
|
|
 Posted - February 17 2009 : 4:46:07 PM Posted - February 17 2009 : 4:46:07 PM

|
hi mm1498 check this link out it might be of use ken
http://www.modelgeeks.com/Uwe/Forum.aspx/rail/4894/Kit-building-adhesive-question
|
Country:  United Kingdom ~
Posts: 8294 ~
Member Since: September 28 2006 ~
Last Visit: October 20 2021 United Kingdom ~
Posts: 8294 ~
Member Since: September 28 2006 ~
Last Visit: October 20 2021
|
Alert Moderator

|
|
|
|
Posted - February 17 2009 : 5:37:26 PM
|
Interesting, Ken.
Sounds like this MEK stuff would do the trick, now the problem is buying it!
- Matt -
|
|
Country: Canada ~
Posts: 1021 ~
Member Since: August 24 2008 ~
Last Visit: January 05 2020
|
Alert Moderator
|
|
|
|
Posted - February 17 2009 : 9:30:11 PM
|
Which kit is it?
For plastic models - especially the type most buildings are made of - white glue won't work. You're going to need some plastic model cement. I use Testor's, but other brands are likely equally good. If you go for Testor's try to get the "Model Master" brand with the precision needle-point tip. I've built several DPM and Walthers kits using nothing more than this, without issue.
As for squaring and clamping, you can try shoring the walls with a small sturdy box from the inside, then use rubberbands to keep the pressure on. But if you use plastic cement they should start to tack together fairly quickly.
From what I recall, MEK is fairly hazardous and might be hard to come by.
|
Country:  USA ~
Posts: 2175 ~
Member Since: July 15 2006 ~
Last Visit: January 31 2010 USA ~
Posts: 2175 ~
Member Since: July 15 2006 ~
Last Visit: January 31 2010
|
Alert Moderator
|
|
|
|
Posted - February 17 2009 : 10:46:45 PM
|
Tony, MEK is available from Home Depot, and I bought it to use as solvent glue based on the recommendations of some guys on the Model Railroader forum. I was underwhelmed at it's gluing abilities, since it seems to take a lot to melt the plastic enough to form a bond. I use Abroid Proweld, which bonds fast and strong. It's methylene chloride, so I guess it's the same as Tenax.
The Tyco Depot
|
|
Country: USA ~
Posts: 3927 ~
Member Since: June 20 2007 ~
Last Visit: November 19 2015
|
Alert Moderator
|
|
|
|
Posted - February 18 2009 : 6:20:55 PM
|
I've used Testors Model Cement (the clear liquid stuff) and Krazy Glue.
Good idea on the box, I'll just need to find one the right size first!
Anyway, here's the kit I'm building:
http://www.walthers.com/exec/productinfo/933-2917
Nothing to it but four big ol' walls. 
- Matt -
|
|
Country: Canada ~
Posts: 1021 ~
Member Since: August 24 2008 ~
Last Visit: January 05 2020
|
Alert Moderator
|
|
|
|
Posted - February 18 2009 : 7:31:59 PM
|
May also recommend lightly sanding the the areas where the 2 sides come together. This will help by removing any chemicals leftover from the molding process and giving something for the glue to grab onto.
Russ
|
|
Country: USA ~
Posts: 100 ~
Member Since: June 18 2006 ~
Last Visit: January 01 2010
|
Alert Moderator
|
|
|
|
Posted - February 19 2009 : 08:05:30 AM
|
i always wash my models in a mild washing liquid then rinse and dry,try not to handle the parts to much as you will leave a greasy patch there,ken
Edited by - catfordken on February 19 2009 11:45:13 AM
|
|
Country: United Kingdom ~
Posts: 8294 ~
Member Since: September 28 2006 ~
Last Visit: October 20 2021
|
Alert Moderator
|
|
|
|
Posted - February 19 2009 : 11:40:13 AM
|
Hmm... that particular building could be a mild challenge, I bet the walls are thin but their large surface area will make them relatively heavy against the joints as they set. Still, I built the old, similarly-large Backshop kit using Testor's cement and while there are other glues that might be "better", the Testor's should be adequate.
Use a steady hand to bind only two sections at a time and hold them for a few seconds until the glue begins to set. Given the size of the walls, I'd say a brace from behind (box or book or something) while they set would be a definite plus.
Once you get one corner done, the rest will be easy.
|
|
Country: USA ~
Posts: 2175 ~
Member Since: July 15 2006 ~
Last Visit: January 31 2010
|
Alert Moderator
|
|
|
|
Posted - February 19 2009 : 5:35:53 PM
|
Hey GIC, I have been using Testors model cement so far, and it is a VAST improvement over that Testors stuff you buy in the orange tube.
So yes, that should be working, but isn't.
- Matt -
|
|
Country: Canada ~
Posts: 1021 ~
Member Since: August 24 2008 ~
Last Visit: January 05 2020
|
Alert Moderator
|
|
|
|
Posted - February 19 2009 : 9:12:56 PM
|
Yeah, the orange tube stuff sucks and is only good for making spiderwebs. The blue "for idiots who just have to sniff and eat it" version is even worse! I must have 3 or 4 unopened packs of the stuff that was included with other kits.
I'm not sure of the problem in your case. Either they're using different plastic or you have a bad batch of cement? I'm curious to build one of my Ford Assembly Plants now to see what's up. Can't do that just yet though.
Are they just falling apart after being glued? It should want to keep its shape once all four walls are assembled. Try taping them a little from the inside while the glue sets.
Or just try a different brand of cement. I'm not a Testor's Model Master salesman but I'm surprised that it wouldn't work. I've never had to use anything else except for CA now and then 
|
|
Country: USA ~
Posts: 2175 ~
Member Since: July 15 2006 ~
Last Visit: January 31 2010
|
Alert Moderator
|
|
|
|
Posted - February 19 2009 : 10:10:12 PM
|
Ahh the blue stuff smelled like oranges if I remember correctly...almost made you want to smell it...
Anyway, it just seems that the glue won't dry. I know it's not a problem with the plastic or glue on their own, because both worked extremely well so far.
I'll give it another go this weekend. Surely you guys have given me enough tips to get this thing done! 
Oh, just to beat this topic to death even more, here's what I've been using:

- Matt -
Edited by - MM 1498 on March 24 2009 9:31:41 PM
|
|
Country: Canada ~
Posts: 1021 ~
Member Since: August 24 2008 ~
Last Visit: January 05 2020
|
Alert Moderator
|
|
|
|
Posted - February 20 2009 : 4:20:25 PM
|
| I have tried that Testors liquid glue you are using. It works OK, but I found Plastruct Plastic Weld to be far better. It is a "general purpose plastic solvent cement". That means it works on many types of plastic such as ABS, Styrene, butyrate and acrylic. I have yet to find a plastic model/kit/part that this glue doesn't work on. But you have to get the hard to find orange labled bottle. The newer, enviro-friendly, white labled bottle is only about as good as the Testors stuff you are currently using.
|
|
Country: USA ~
Posts: 715 ~
Member Since: May 03 2006 ~
Last Visit: July 15 2026
|
Alert Moderator
|
|
|
|
Posted - March 14 2009 : 11:22:50 AM
|
Hey everyone, I got the walls together today. It took a lot of patience, and Krazy Glue.
It's not quite done yet, I still have to add the roof and smaller details.
I'm also building a custom Christmas bulb lighting system, I didn't think those worked on DC power until I tried. 
I'll have to put up some pictures of it once it's done...
- Matt -
|
|
Country: Canada ~
Posts: 1021 ~
Member Since: August 24 2008 ~
Last Visit: January 05 2020
|
Alert Moderator
|
|
|
|
Posted - March 14 2009 : 10:23:27 PM
|
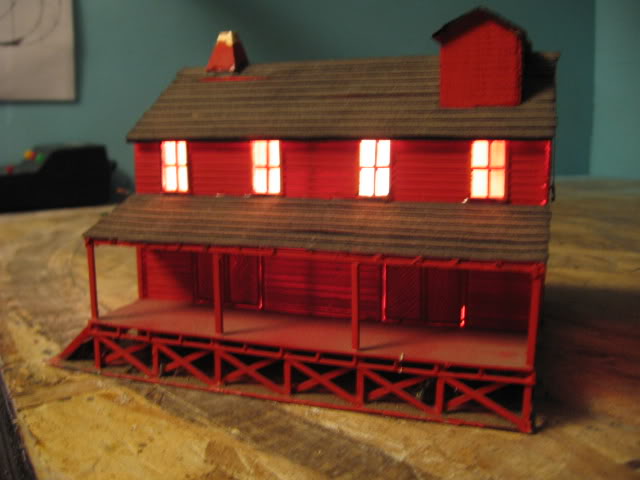
Finished the lights, almost done of the entire building.
It turns out that the Christmas bulbs I'm using must be different than normal, because I tried bulbs from another string and they burned out fairly quickly.
The ones I found don't burn out, even at full power.
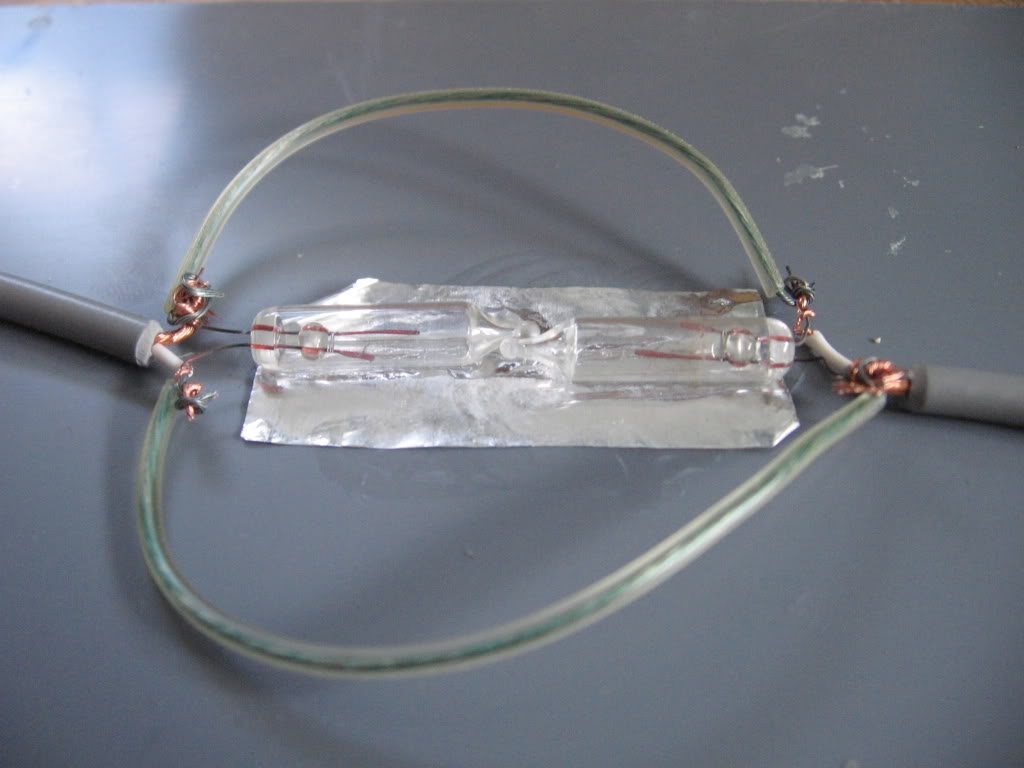
I glued two bulbs to a piece of aluminum foil to deflect heat and light. I made four of these pairs, one for each corner. Then I just wired them all in series. Quite simple really.
I did not want to solder the wires, just because of the plastic roof. I probably should've though.

Here's a close-up:
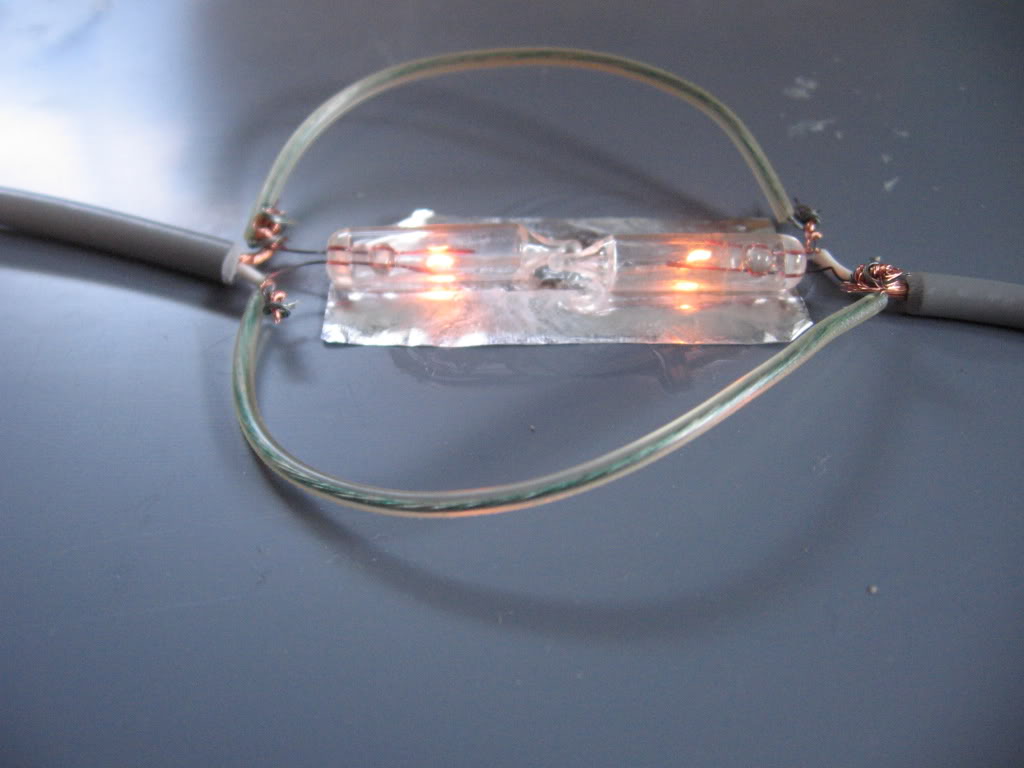
At a low power setting:
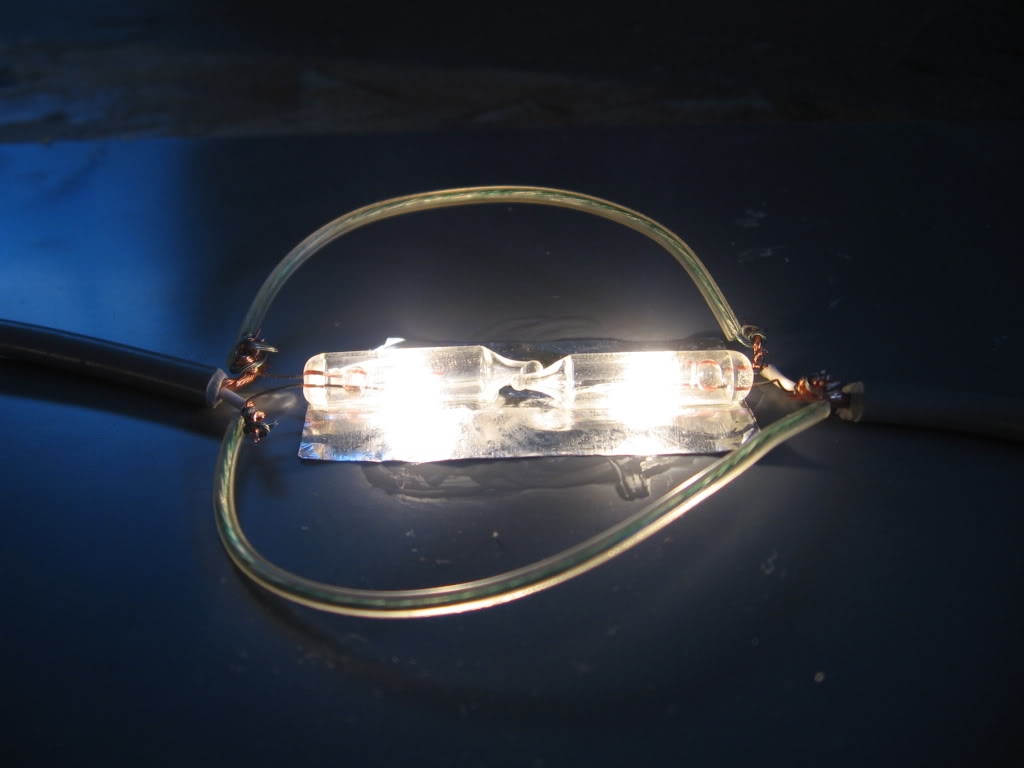
And at full power:
Becuase I found bulbs that won't burn out, I went into assembly mode and quickly made building lights out of all the working bulbs. I also tried these lights in all my buildings, and only a couple worked well at all.
This Heljan one was perfect (didn't even know I had any Heljan stuff ) :
As well as an ancient craftsmen kit, witch already had a hole for a bulb.
Also, I finished ripping up all my track today. Everything's quite barren, as Woody demonstrates so well!

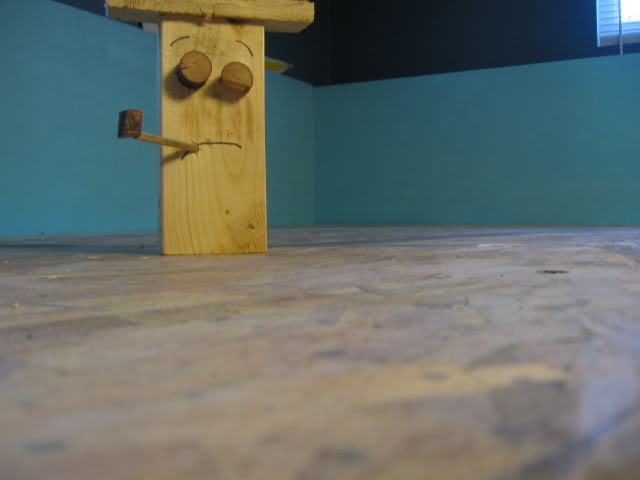
Heck, I even tidied up underneath my layout. It really feels like when I first built this thing. I was, and still am excited to get working!
- Matt -
Edited by - MM 1498 on March 14 2009 10:41:13 PM
|
|
Country: Canada ~
Posts: 1021 ~
Member Since: August 24 2008 ~
Last Visit: January 05 2020
|
Alert Moderator
|
|
|
|
Posted - March 23 2009 : 6:44:22 PM
|
Okay, finally got it together, just waiting to make a small trip out to building very similar to the kit...gonna study how it's weathered and such.
- Matt -
|
|
Country: Canada ~
Posts: 1021 ~
Member Since: August 24 2008 ~
Last Visit: January 05 2020
|
Alert Moderator
|
|
|
|
Posted - March 23 2009 : 8:03:23 PM
|
Ahhh ...I remember when my layout looked like that. Actually, you'd be amazed how messy it was when there was no layout there. As the scenery progressed from one end of the layout to the other, all the spray bottles, and paint and such were slowly forced down to the very end of the layout Good luck with your new layout. ...I remember when my layout looked like that. Actually, you'd be amazed how messy it was when there was no layout there. As the scenery progressed from one end of the layout to the other, all the spray bottles, and paint and such were slowly forced down to the very end of the layout Good luck with your new layout.
Nice job with the lighted buildings. What are you using to power them??
-cheez
|
|
Country: Canada ~
Posts: 3448 ~
Member Since: September 22 2006 ~
Last Visit: April 03 2026
|
Alert Moderator
|
|
|
|
Posted - March 23 2009 : 8:25:14 PM
|
Just a cheap-o Life-Like power pack. Because I'm running the lights on DC power, I will be able to adjust the amount of light the bulbs give off.
Say Cheez, did you use some sort of foam as a base for your layout?
I think that's what I'm going to do, but then how would the track stay in place...
Because you can't really put nails into the foam, can you?
- Matt -
|
|
Country: Canada ~
Posts: 1021 ~
Member Since: August 24 2008 ~
Last Visit: January 05 2020
|
Alert Moderator
|
|
|
|
Posted - March 23 2009 : 9:10:36 PM
|
I used a foam base on the STC. To get the track to stick you have a few options.
Actually, you need to think about a roadbed first (ballast profile). That goes on the foam. Then the track goes on the roadbed.
Pre-shaped cork or foam roadbeds are available. What I used was a sort of adhesive tar product sold as "AMI Instant Roadbed"... it was alright and it worked well but I'd probably use something else next time.
Anyway, glue the roadbed down with Liquid Nails.
Then you can use either track nails, liquid nails, or likely both to affix the track to the roadbed.
|
|
Country: USA ~
Posts: 2175 ~
Member Since: July 15 2006 ~
Last Visit: January 31 2010
|
Alert Moderator
|
|
|
|
Posted - March 23 2009 : 9:17:17 PM
|
Thank ya Mr. GIC, I guess it was putting down the roadbed and not the track that was confusing me!
- Matt -
|
|
Country: Canada ~
Posts: 1021 ~
Member Since: August 24 2008 ~
Last Visit: January 05 2020
|
Alert Moderator
|
|
|
|
Posted - March 24 2009 : 7:26:29 PM
|
quote:Say Cheez, did you use some sort of foam as a base for your layout?
|
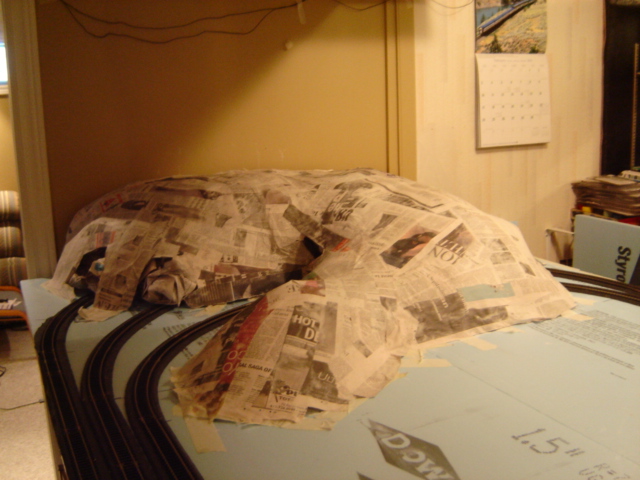
I used foam insulation board as my base, and woodland scenics track foam as the roadbed. To glue it down I just used plain white school glue. It seems to have worked well as everything is still glued down. The only thing I would change is the trackbed I used. On my next layout, I plan on using cork roadbed, as the combination of a foam base and foam trackbed seems to have caused some warping. Nothing serious...yet
It's too bad the HOseeker forum isn't still up. I had a nice thread going there where I was posting pics of my progress and the guys were giving me pointers. Here's a pic of my layout before I started the scenery.
|
|
Country: Canada ~
Posts: 3448 ~
Member Since: September 22 2006 ~
Last Visit: April 03 2026
|
Alert Moderator
|
|
|
|
 Posted - March 24 2009 : 8:31:07 PM Posted - March 24 2009 : 8:31:07 PM
|
Right on! I was thinking of using the foam so I could sculpt out small ditches or things like that, just so the whole layout isn't on completely flat ground.
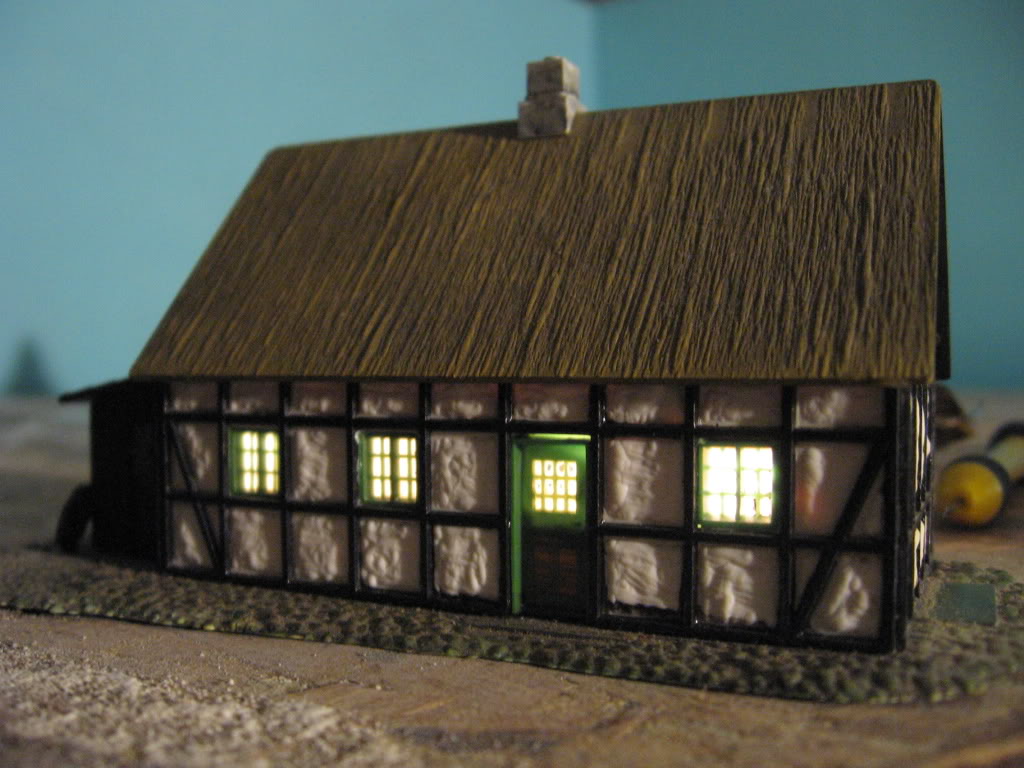
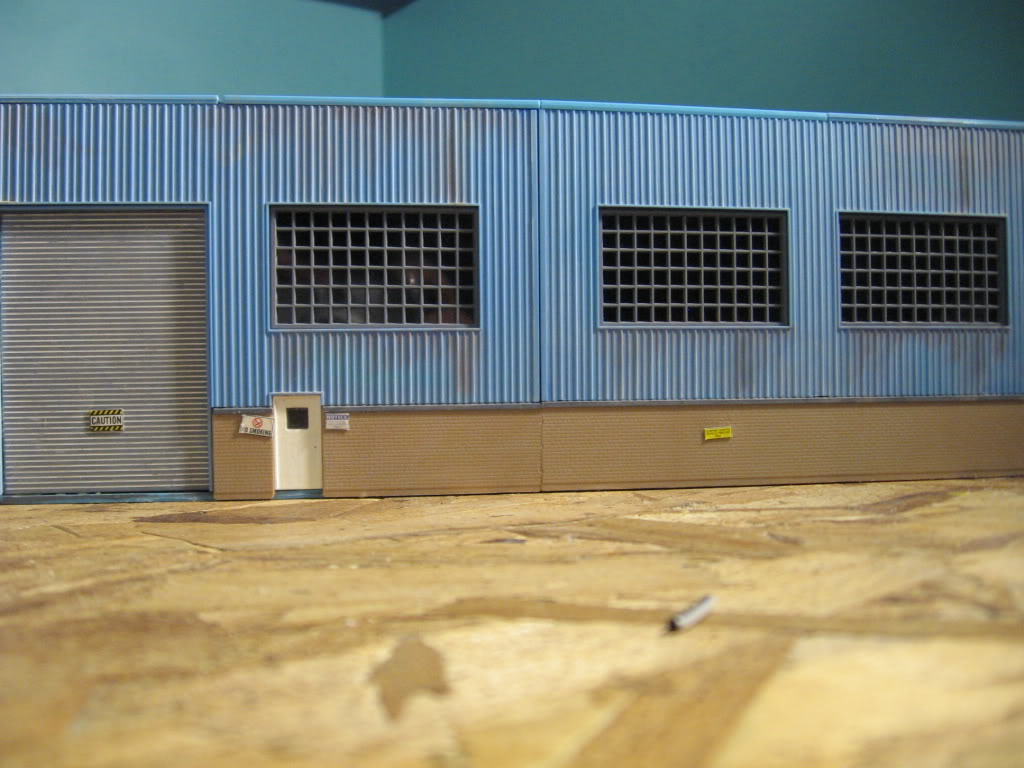
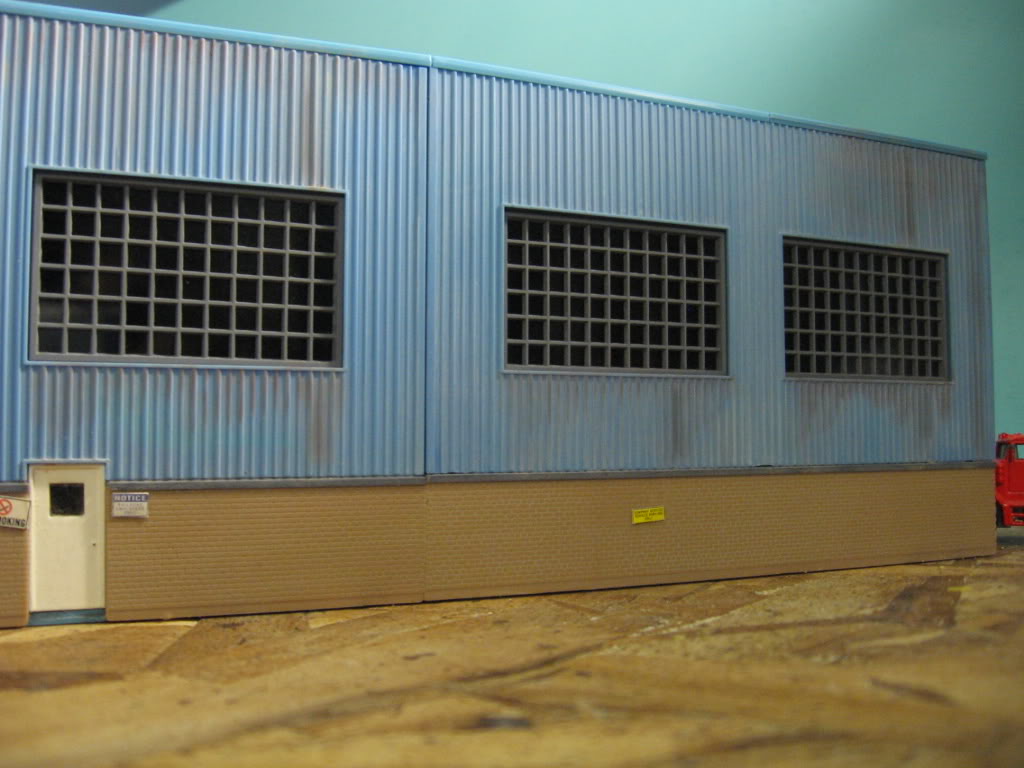
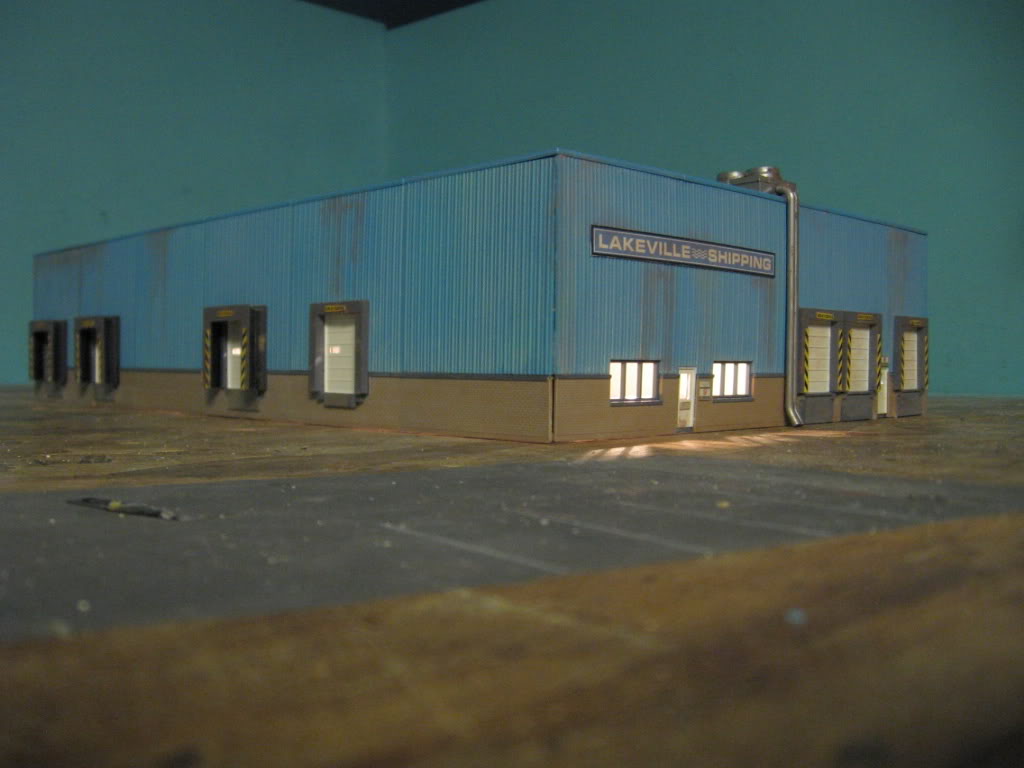
I suppose that would also mean building a small pond or stream would be a snap...anyway, here's the building.
My only beef with it is that, again, I may have overdone the weathering. I suppose the more lenient eye would not notice, but anywho...picture time!
Here are the walls just after I got them together, and added "wallpaper" to trap any escaping light.

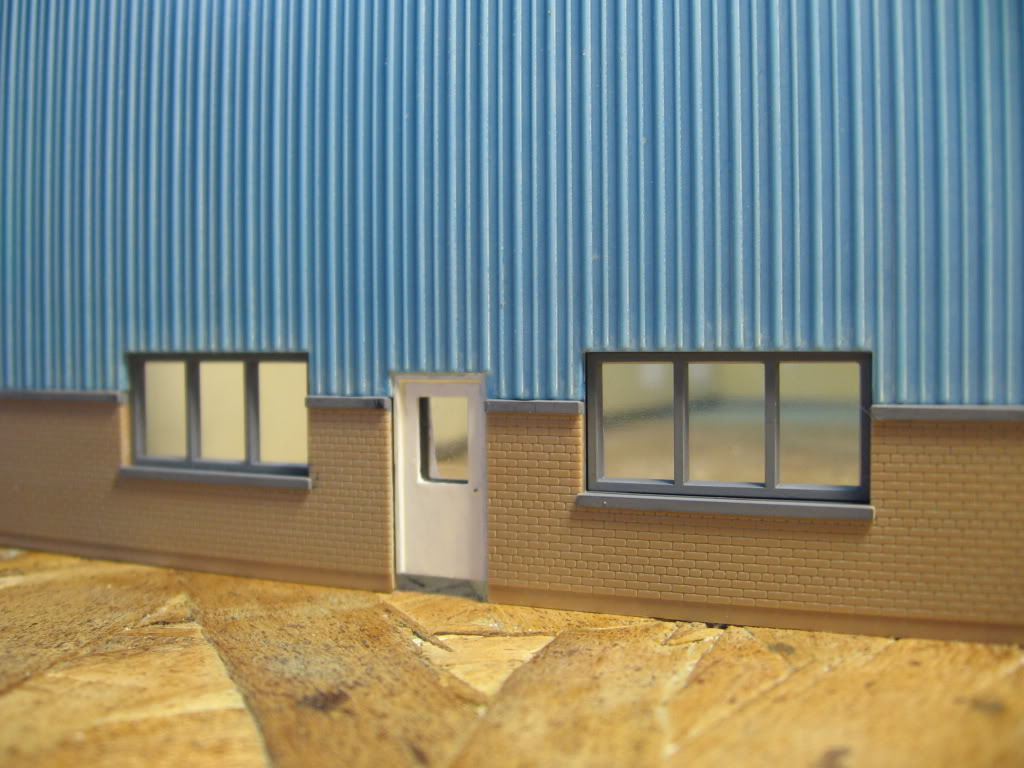
And now the finished product. I had some trouble with gaps in the corners, I'll have to fill them in with putty or something like that later...
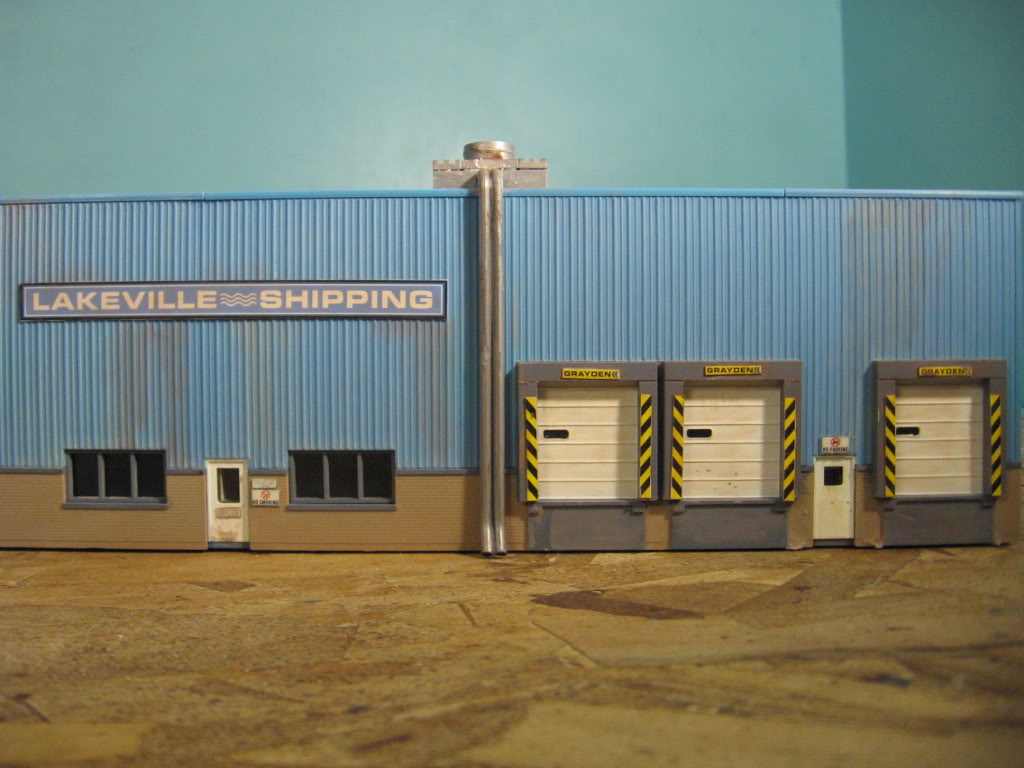
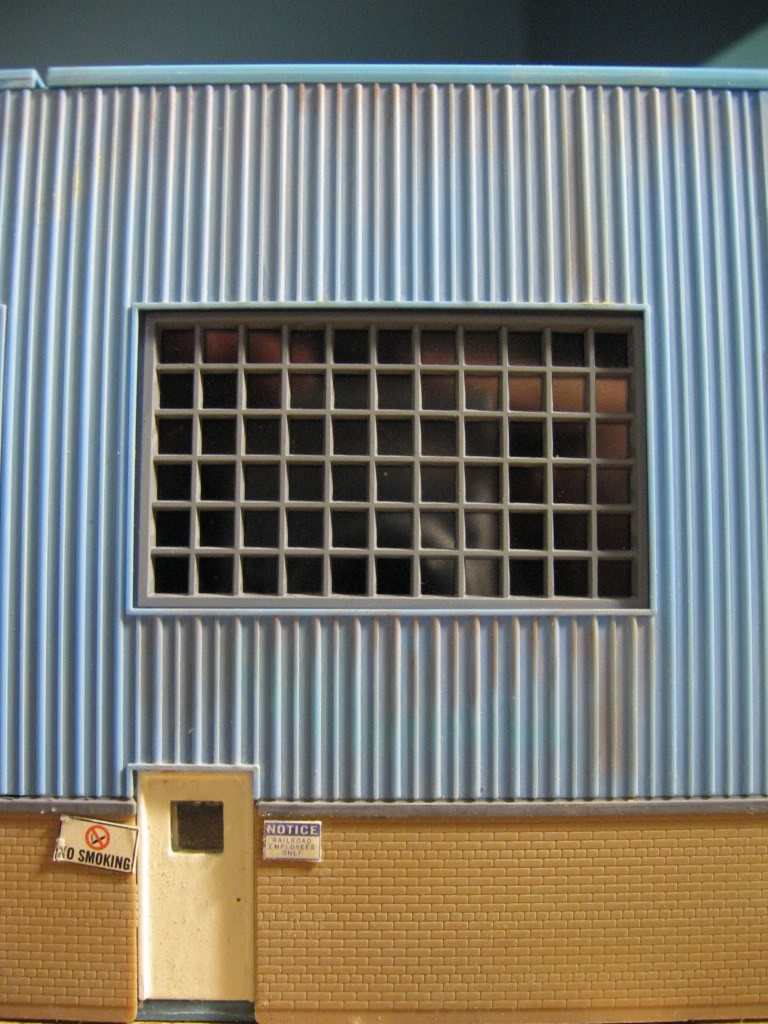
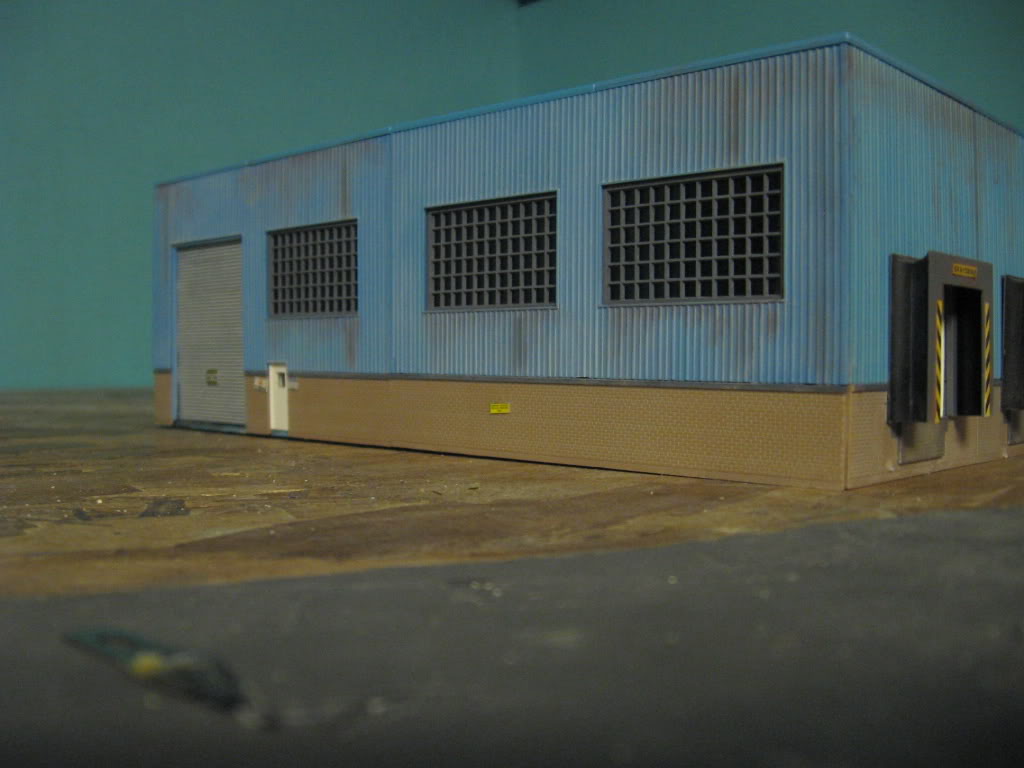
Oh no! I accidentally built my camera into the walls!
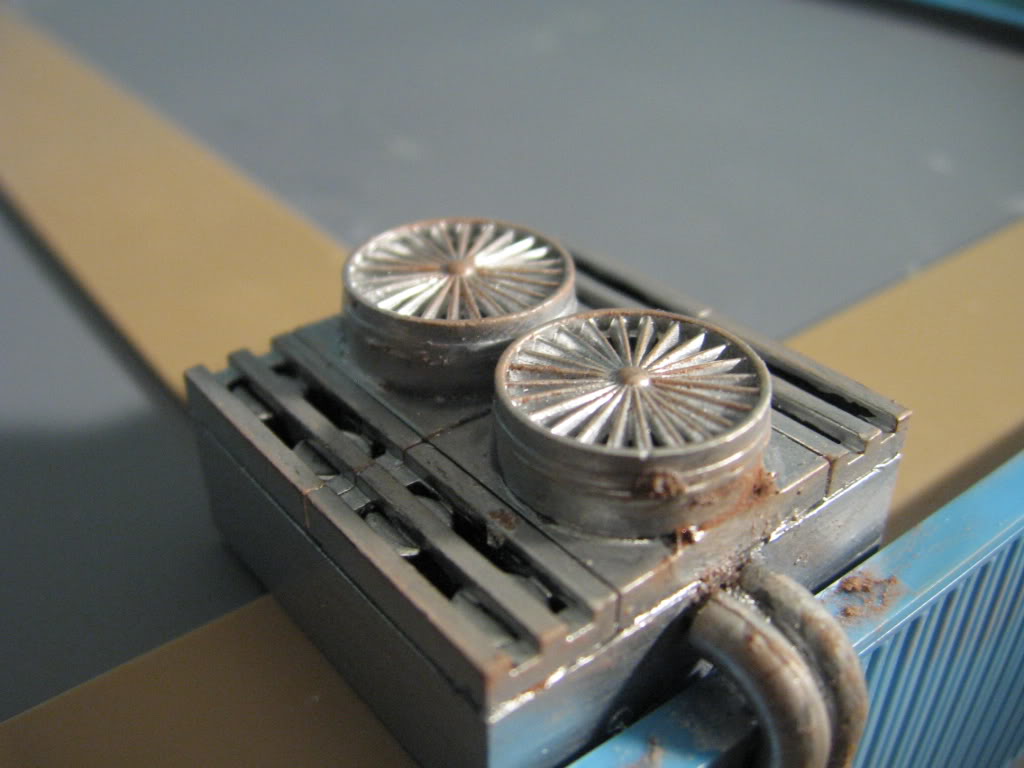
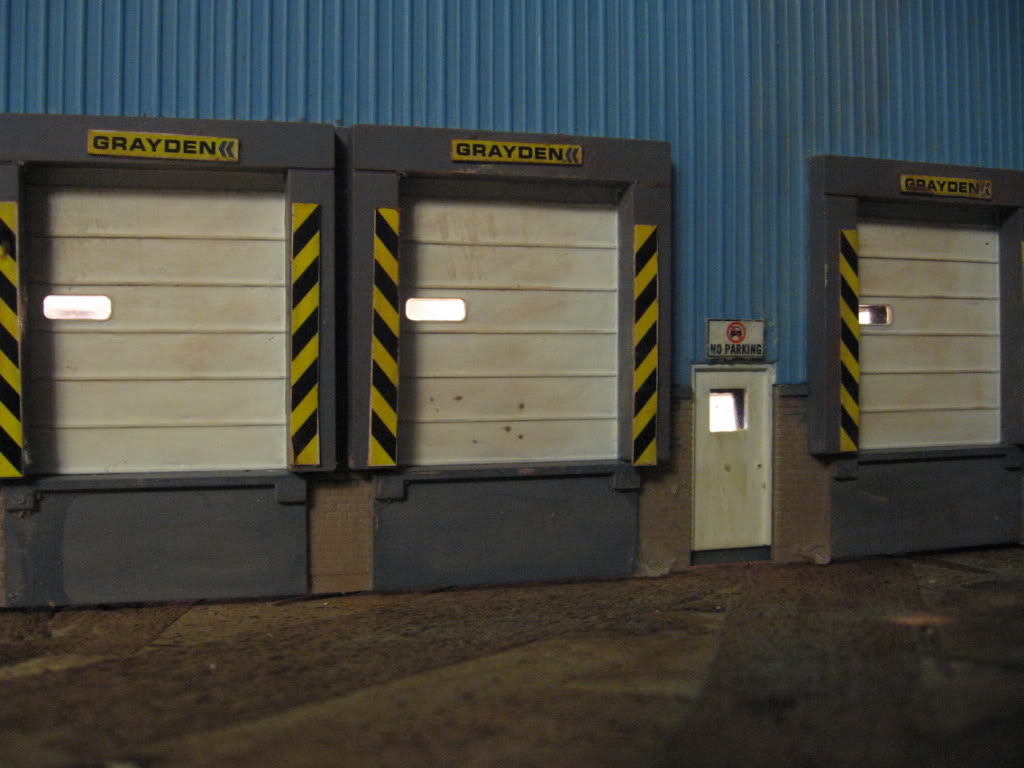
Oh, and this "air conditioner," if you can guess that's what it's supposed to be, is nothing more than the fans out of a Life-Like geep (I was surprised that they popped out! ), and Lego pieces!
The lights are easily my favourite part...
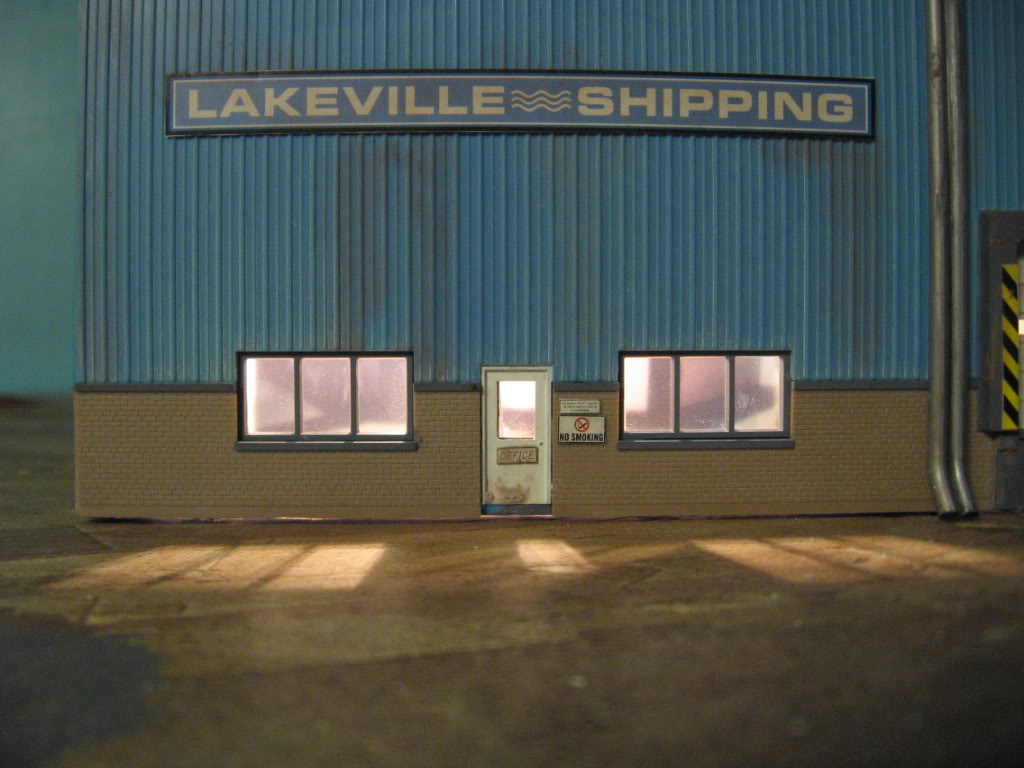


Anyway, it's not pretty, but I really like it. Once I get the gaps filled it'll be better.
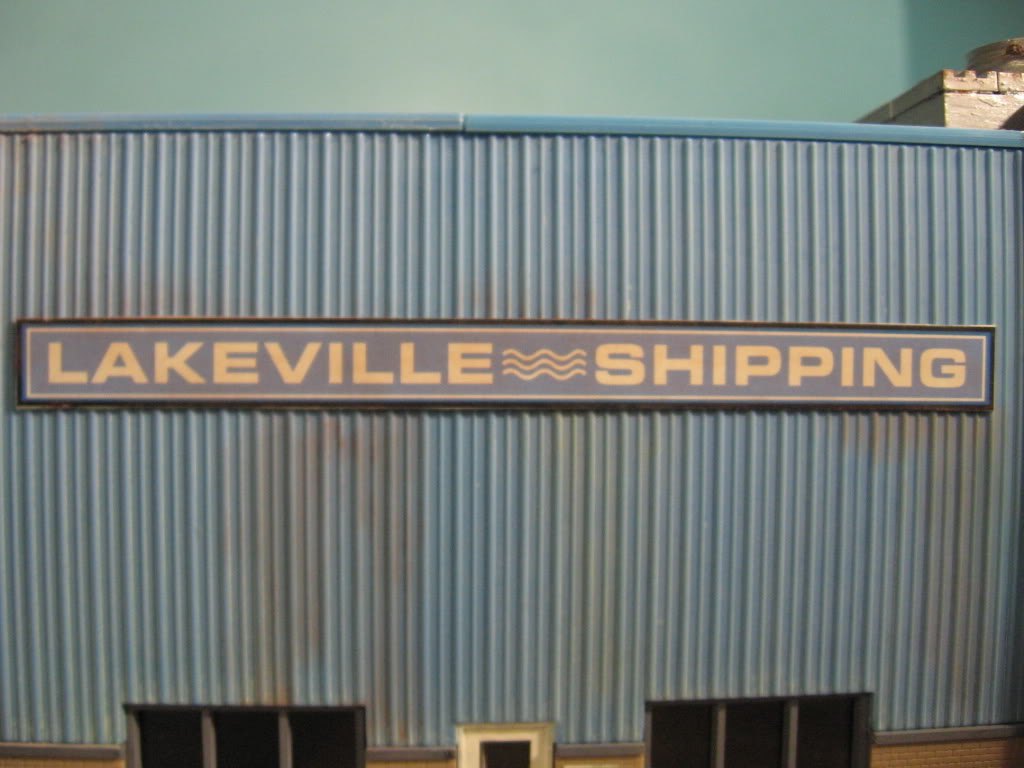
Oh, and one thing I learned:
While the eye shadow weathering I've become addicted to can look good, it is easily overdone...especially in areas with glue, as it just became a mess there.
BTW, this stuff was a godsend...it's like Krazy Glue on steroids!
/tyco/forum/uploaded/MM 1498/InstaCureIndex.png
What does everyone else think?
- Matt -
Edited by - MM 1498 on March 24 2009 8:33:51 PM
|
|
Country: Canada ~
Posts: 1021 ~
Member Since: August 24 2008 ~
Last Visit: January 05 2020
|
Alert Moderator
|
|
|
|
Posted - March 24 2009 : 9:35:44 PM
|
No such thing as too much weathering....well maybe, but I think your weathering looks great. The lighting looks really cool too. Great work! The lighting looks really cool too. Great work!
|
|
Country: Canada ~
Posts: 3448 ~
Member Since: September 22 2006 ~
Last Visit: April 03 2026
|
Alert Moderator
|
|
|
|
Posted - March 24 2009 : 9:59:18 PM
|
| yes lighting is cool but bulbs are old sckool I'd rather use LEDs
|
|
Country: USA ~
Posts: 15032 ~
Member Since: February 23 2009 ~
Last Visit: July 15 2026
|
Alert Moderator
|
|
|
|
Posted - March 24 2009 : 10:20:19 PM
|
I think it looks great Matt, nice job...
Mike
|
|
Country: Canada ~
Posts: 1586 ~
Member Since: December 07 2007 ~
Last Visit: June 13 2026
|
Alert Moderator
|
|
|
|
Posted - March 24 2009 : 10:23:18 PM
|
Don't go knocking the old school until you've tried it...
LEDs are better at pinpoint and effects lighting. But to quickly illuminate a building as massive as that one, a bulb works just as well and is probably cheaper to come by.
AWESOME WORK MATT. Love it. The weathering looks like a great start to me... that's right I said "start" as I would probably go little further. Excellent work on the AC unit too!
|
|
Country: USA ~
Posts: 2175 ~
Member Since: July 15 2006 ~
Last Visit: January 31 2010
|
Alert Moderator
|
|
|
|
Posted - March 25 2009 : 09:22:05 AM
|
| Matt your eye shadow weathering crushes anything I've managed to do with acrylics haha. I love the effect of the lighting too, the it gives off the right look IMO. Bonus points for the use of Lego's on the AC unit!
|
|
Country: USA ~
Posts: 531 ~
Member Since: January 29 2009 ~
Last Visit: July 10 2020
|
Alert Moderator
|
|
|
|
Posted - March 25 2009 : 10:19:40 AM
|
| true I agree but I got a friend he been getting his LEDs for less than a dollar factory direct from China
|
|
Country: USA ~
Posts: 15032 ~
Member Since: February 23 2009 ~
Last Visit: July 15 2026
|
Alert Moderator
|
|
|
|
Posted - March 25 2009 : 3:43:39 PM
|
Hey guys, thanks for all the lovely comments...maybe I shouldn't put down my own work like that!
Oh, and there are a few reasons I went with normal bulbs over LEDs:
-they were unused bulbs in a box nobody would ever open for 20 years
-LEDs are a little trickier to wire, I'd probably need some resisitors
-most buildings in real life aren't lighted with LEDs! 
I'm surprised everyone likes the Lego AC unit too! That was just a last minute thing I thought of, the roof just loked really plain.
Speaking of the roof, I'm planning on buying some sandpaper to cover it with. Again, the roof of this building is extremely plain and that bugs me!
Anyway, thanks again for the kind comments, and the help with different glue. Try out the eye shadow weathering too! It's a blast!
- Matt -
|
|
Country: Canada ~
Posts: 1021 ~
Member Since: August 24 2008 ~
Last Visit: January 05 2020
|
Alert Moderator
|
|
|
|
Posted - March 25 2009 : 3:54:20 PM
|
Wow, sandpaper would make it look like real roofing material! Thanks for the tip...
You also have me digging through my sons' lego imagining what I can make out of it...
Mike
|
|
Country: Canada ~
Posts: 1586 ~
Member Since: December 07 2007 ~
Last Visit: June 13 2026
|
Alert Moderator
|
|
|
|
 Posted - March 25 2009 : 4:11:35 PM Posted - March 25 2009 : 4:11:35 PM
|
MM, one word... whoa.
...and it looks a lot like buildings that I've seen around, and no, there is no such thing as too much wethering, just train cars and buildongs that really look like they need to be sprayed clean with a firehose, and don't worry, you don't seem to be anywhere near that point!
D.J. (Yeah, I'm "that kid"... Deal.)
http://railroadrandomness.blogspot.com/
Look; a new blog...
Yippee!
|
|
Country: USA ~
Posts: 157 ~
Member Since: February 05 2009 ~
Last Visit: June 05 2017
|
Alert Moderator
|
|
|
|
Posted - March 25 2009 : 5:10:07 PM
|
quote:Wow, sandpaper would make it look like real roofing material! Thanks for the tip...
You also have me digging through my sons' lego imagining what I can make out of it...
Mike
Originally posted by Mike-March 25 2009: 3:54:20 PM
|
I've used sandpaper before, but I've always had trouble getting it to stick.
Thing is, I haven't tried that Super-super glue yet!
But yeah, it does look great when it's on there.
- Matt -
|
|
Country: Canada ~
Posts: 1021 ~
Member Since: August 24 2008 ~
Last Visit: January 05 2020
|
Alert Moderator
|
|


