|
|
 Posted - January 15 2020 : 10:49:18 AM Posted - January 15 2020 : 10:49:18 AM


|
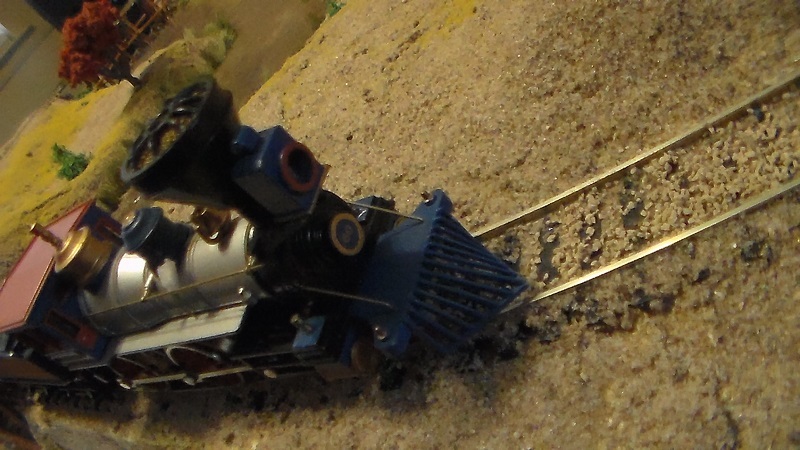
One of my favorite locomotives, a purchase from the TF's own RP Model Railroads, ran
for about a total of 24 hours when the drive shaft started to slip. At first I thought it was
a cracked gear, but no, it is the little nubbin on one end of the shaft that wore down just
a few micrometers and will not engage the sleeve.
I might have an extra one, but failing that, any ideas how to replace or repair
such an item? Various ideas I have considered is a twisted fine piece of electrical wire,
looped on the end to engage the sleeve slots, rubber cement blob on the end of the
worn drive shaft. Not thinking either will work awfully well.
Got a show coming up, and have a big job of long hours for this locomotive.
|
Country:  USA ~
Posts: 11600 ~
Member Since: December 09 2013 ~
Last Visit: January 29 2026 USA ~
Posts: 11600 ~
Member Since: December 09 2013 ~
Last Visit: January 29 2026
|
 Alert Moderator
|
|
|
|
 Posted - January 15 2020 : 2:00:42 PM Posted - January 15 2020 : 2:00:42 PM


|
Ah yes, the old drive shaft problem.
Just send it in to Bachmann and get a new shaft back. Tell them it wore down. I'm sure they will replace it. If they don't, you could try the cement method, and put a bit around the end where it wore off. I don't think there could be any other solutions.
|
Country:  USA ~
Posts: 1549 ~
Member Since: October 10 2019 ~
Last Visit: January 04 2024 USA ~
Posts: 1549 ~
Member Since: October 10 2019 ~
Last Visit: January 04 2024
|
 Alert Moderator

|
|
|
|
 Posted - January 15 2020 : 9:56:45 PM Posted - January 15 2020 : 9:56:45 PM


|
| Funny, Jeff... Remember the wheel trucks that the little nub breaks off and lets it fall out of the train car when you pic it up? I remembered that happening as a kid too. I found that the professional plastic bumper repair made for automobile use is an unbelievably strong plastic repair. I mixed a tiny bit of this and tried it on a wheel truck. It's stronger than the part ever was. Problem for the hobbyist is that it is quite expensive. I want to get more of it for future plastic car bumper cover repairs. Sticks like napalm! Hard to believe that you can actually glue a quarter panel on a car today!
|
Country:  USA ~
Posts: 6279 ~
Member Since: February 18 2009 ~
Last Visit: March 04 2022 USA ~
Posts: 6279 ~
Member Since: February 18 2009 ~
Last Visit: March 04 2022
|
 Alert Moderator

|
|
|
|
 Posted - January 15 2020 : 11:08:01 PM Posted - January 15 2020 : 11:08:01 PM


|
Thank you all, I got a reply and ordered a new pair,
The Jupiter shall be running 40hours a week at a
Museum display for five months. Any ideas how to
Wire in a intermittent timer one sees on museum
Displays? This is going to be a real acid test!
|
Country:  USA ~
Posts: 11600 ~
Member Since: December 09 2013 ~
Last Visit: January 29 2026 USA ~
Posts: 11600 ~
Member Since: December 09 2013 ~
Last Visit: January 29 2026
|
 Alert Moderator

|
|
|
|
 Posted - January 19 2020 : 10:47:28 AM Posted - January 19 2020 : 10:47:28 AM


|
| Came in the mail today!
|
Country:  USA ~
Posts: 11600 ~
Member Since: December 09 2013 ~
Last Visit: January 29 2026 USA ~
Posts: 11600 ~
Member Since: December 09 2013 ~
Last Visit: January 29 2026
|
 Alert Moderator

|
|
|
|
 Posted - January 19 2020 : 12:02:32 PM Posted - January 19 2020 : 12:02:32 PM


|
quote:Came in the mail today!
Originally posted by Chops124 - January 19 2020 :  10:47:28 AM
|
Great! Keep us posted!
|
Country:  USA ~
Posts: 1549 ~
Member Since: October 10 2019 ~
Last Visit: January 04 2024 USA ~
Posts: 1549 ~
Member Since: October 10 2019 ~
Last Visit: January 04 2024
|
 Alert Moderator

|
|
|
|
 Posted - January 21 2020 : 12:00:59 AM Posted - January 21 2020 : 12:00:59 AM


|
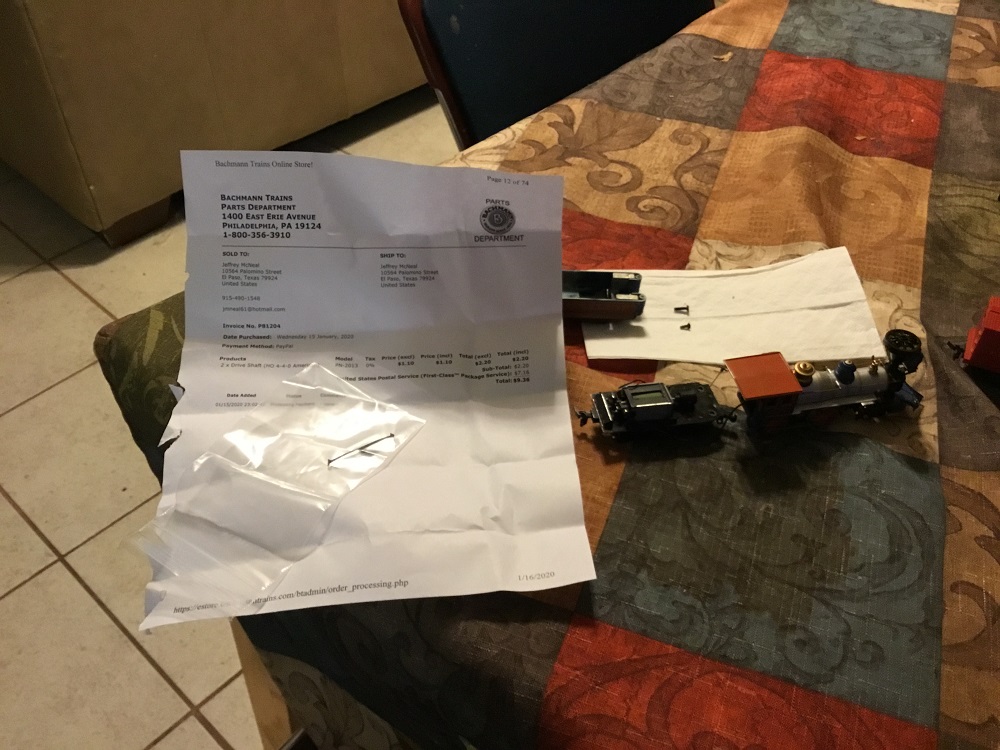
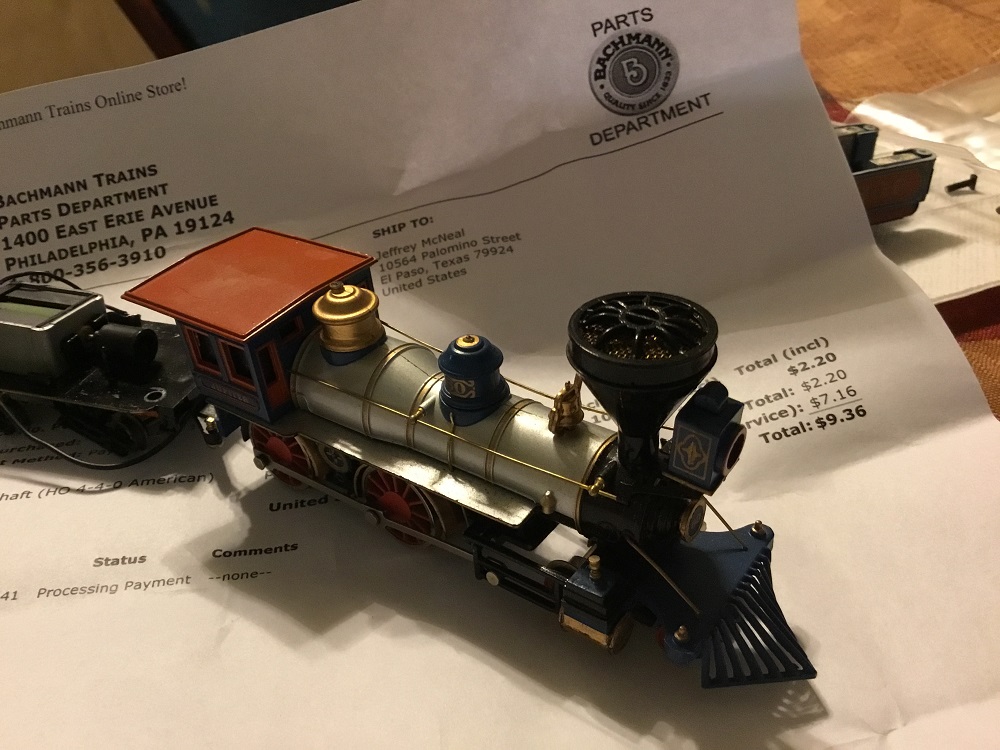 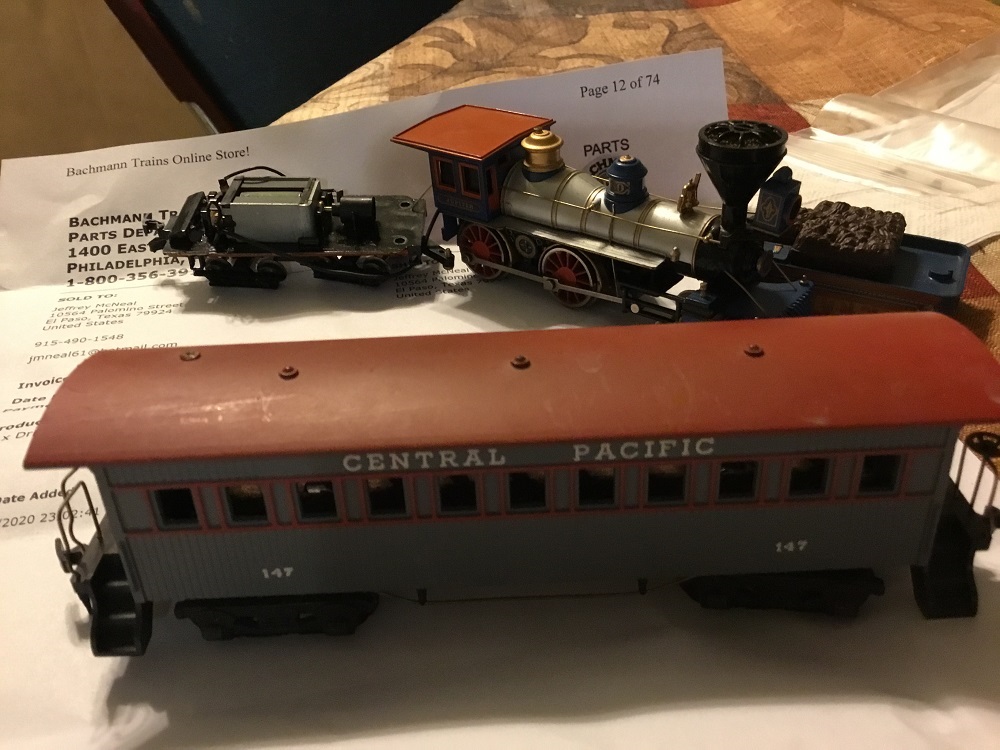
Got the drive shafts, should be a quick fix. This locomotive ran 20 hours before I burned up on
drive shaft. Since I need the locomotive workable for the next five months, 40 hours a week,
I need to find one of those buttons you press at a museum that makes the thing operate for
two minutes and then stop. I've tried an internet search, but am falling way short of what it
is I need- a simple button and a simple timer. Any ideas??
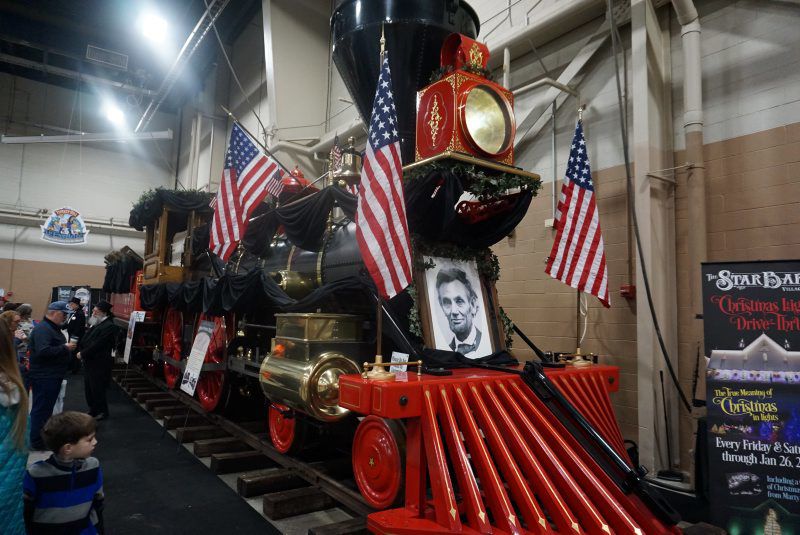 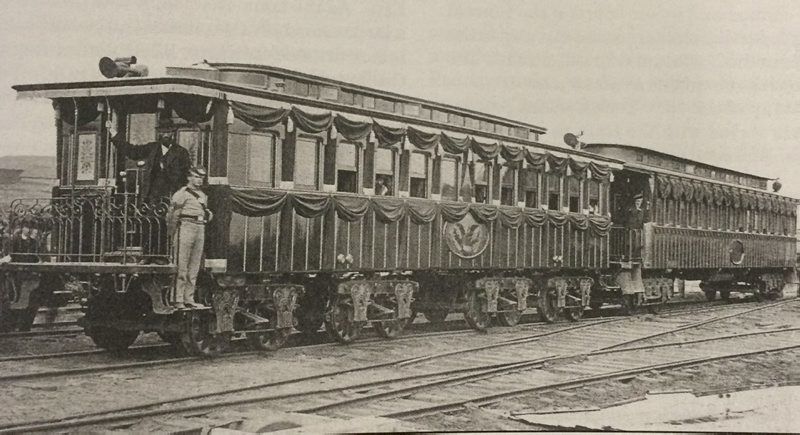
Now I got, ordered at least, won't believe it 'till I see it, the Pocher Lincoln Funeral
Car, this sweet American Type (Central Pacific) is going to look amazing. Going to
download and shrink the Lincoln portrait down to 1/87, and make some black bunting
out of a strip of old cloth. Download and print a couple of American flags into 1/87, too.
Edited by - Chops124 on January 21 2020 12:02:49 AM
|
Country:  USA ~
Posts: 11600 ~
Member Since: December 09 2013 ~
Last Visit: January 29 2026 USA ~
Posts: 11600 ~
Member Since: December 09 2013 ~
Last Visit: January 29 2026
|
 Alert Moderator

|
|
|
|
 Posted - January 21 2020 : 12:31:33 AM Posted - January 21 2020 : 12:31:33 AM


|
A real acid test is right.
I recommend you get a brother for the Jupiter before it all starts. For a long-running exhibit like this I wouldn't do it without a backup loco.
That would let you run one for a set period of time and service repair the other one at the same time - and cut your overall wear & tear by 50%.
|
Country:  USA ~
Posts: 101 ~
Member Since: June 26 2019 ~
Last Visit: January 30 2026 USA ~
Posts: 101 ~
Member Since: June 26 2019 ~
Last Visit: January 30 2026
|
 Alert Moderator

|
|
|
|
 Posted - January 21 2020 : 11:57:42 PM Posted - January 21 2020 : 11:57:42 PM


|
quote:Came in the mail today!
Originally posted by Chops124 - January 19 2020 :  10:47:28 AM
|
Sounds like you got the shaft !
|
Country:  USA ~
Posts: 6279 ~
Member Since: February 18 2009 ~
Last Visit: March 04 2022 USA ~
Posts: 6279 ~
Member Since: February 18 2009 ~
Last Visit: March 04 2022
|
 Alert Moderator

|
|
|
|
 Posted - January 22 2020 : 01:10:04 AM Posted - January 22 2020 : 01:10:04 AM


|
Glad it worked out for you!
" Heck with counting 'em rivets, TRAINS ARE FOR FUN! Not called the Mad Scientist for nothing either!"
|
Country:  USA ~
Posts: 3147 ~
Member Since: May 07 2007 ~
Last Visit: January 29 2026 USA ~
Posts: 3147 ~
Member Since: May 07 2007 ~
Last Visit: January 29 2026
|
 Alert Moderator

|
|
|
|
 Posted - January 22 2020 : 5:27:23 PM Posted - January 22 2020 : 5:27:23 PM


|
While you could get fairly complex with wiring up raspberry pi (?) controllers and other odd circuitry to create an on/off timer for train operation, one easy way to provide "one lap and then stop" operation is by wiring up two DC blocks. One block is only a little longer than the locomotive, and is activated by a viewer-accessible push button. The other block is the rest of the loop, and is always live. Viewer pushes the button, activates the first block, train starts up, leaves the first block. Viewer lets go of button while train makes full lap. When train re-enters the first block, the power is already cut (unless someone is pressing the button), and the train stops.
Museum/exhibit service is hard on model equipment. Even Kato can motors are no match for it (they wear out within a year or so in 7 hour per day, 6 day per week, year round service). The only motors and drives I've found that will put up with that kind of service are Athearn Blue Box/RTR motors. If I were you, I'd be refitting a coach with the chassis of an Athearn switcher, and converting the 4-4-0 to a free-rolling dummy. Get a few bottles of Labelle, and a supply of spare Athearn motor brushes and springs, and even a spare motor or two. The locomotive and layout will still need maintenance once a week.
If you are set on timed operation, try contacting the California State Rail Museum in Sacramento. They have a set up for their O gauge/Standard Gauge Lionel Layout which will shut off a loop after its been run a time or two for a few minutes. The push buttons which run the layout will also go dark. When the system is ready for a few more laps, the push buttons will light up, indicating that the system is ready.
My Youtube Channel: http://www.youtube.com/user/weekendrailroader?blend=1&ob=video-mustangbase
Edited by - weekendrailroader on January 22 2020 5:32:34 PM
|
Country:  USA ~
Posts: 189 ~
Member Since: March 07 2012 ~
Last Visit: March 13 2024 USA ~
Posts: 189 ~
Member Since: March 07 2012 ~
Last Visit: March 13 2024
|
 Alert Moderator

|
|
|
|
 Posted - February 03 2020 : 12:02:50 PM Posted - February 03 2020 : 12:02:50 PM


|
Thank you for that Weekend, we'll see how it holds up to this acid test.
The factory Bachmann replacement drive shaft lasted for ten seconds, then
SCREEEEEEEEEEEEEEEEEEEEEEEEEE    . .
In the meantime, the minimum charge for doing a stupid Bachmann drive shaft
in something like brass is $100 as a 3D copy, so I am back to seeing if I can fit it with
a simple length of RC fuel hose. The hard part is not damaging the Bachmann
unit, which appears to be mostly press fit.
Going to try to gently yank off those hubs and apply the hose to the axle ends.
Wish me luck. Lots of luck.
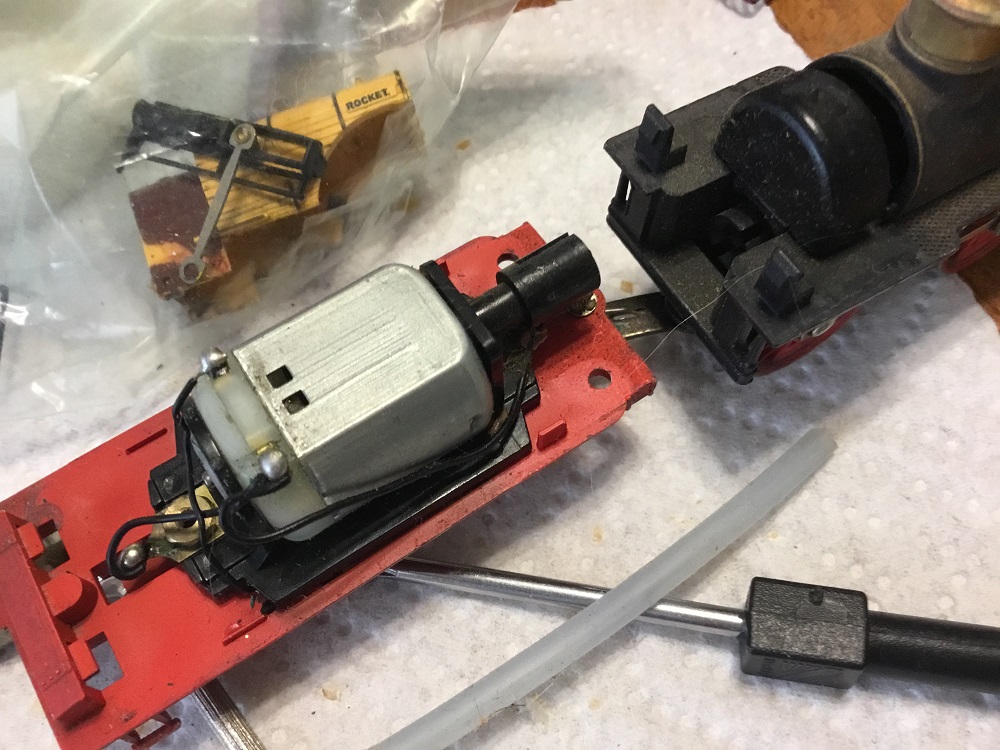
RP, how is your attempt going on your old Mantua? I found that Model Railroad HQ in Denver will
do an entire remotor with a can motor and improved drive shaft for $50, and that is specifically
for vintage Mantua. Of course, you'd probably rather DIY, I get that.
Edited by - Chops124 on February 03 2020 12:06:53 PM
|
Country:  USA ~
Posts: 11600 ~
Member Since: December 09 2013 ~
Last Visit: January 29 2026 USA ~
Posts: 11600 ~
Member Since: December 09 2013 ~
Last Visit: January 29 2026
|
 Alert Moderator

|
|
|
|
 Posted - February 04 2020 : 07:35:07 AM Posted - February 04 2020 : 07:35:07 AM


|
quote:
That looks like the first release 119 in your picture, modified with a can motor. I thought you were working on the second release jupiter? The hubs on the ends for the shaft are very easy to remove. Just give a slow tug, and it should come right off the shaft. Then, use your tubing. I'm not sure how that will fare around curves, however. It will have to be quite flexible, or else the tender will derail.
|
Country:  USA ~
Posts: 1549 ~
Member Since: October 10 2019 ~
Last Visit: January 04 2024 USA ~
Posts: 1549 ~
Member Since: October 10 2019 ~
Last Visit: January 04 2024
|
 Alert Moderator

|
|
|
|
 Posted - February 04 2020 : 4:11:28 PM Posted - February 04 2020 : 4:11:28 PM


|
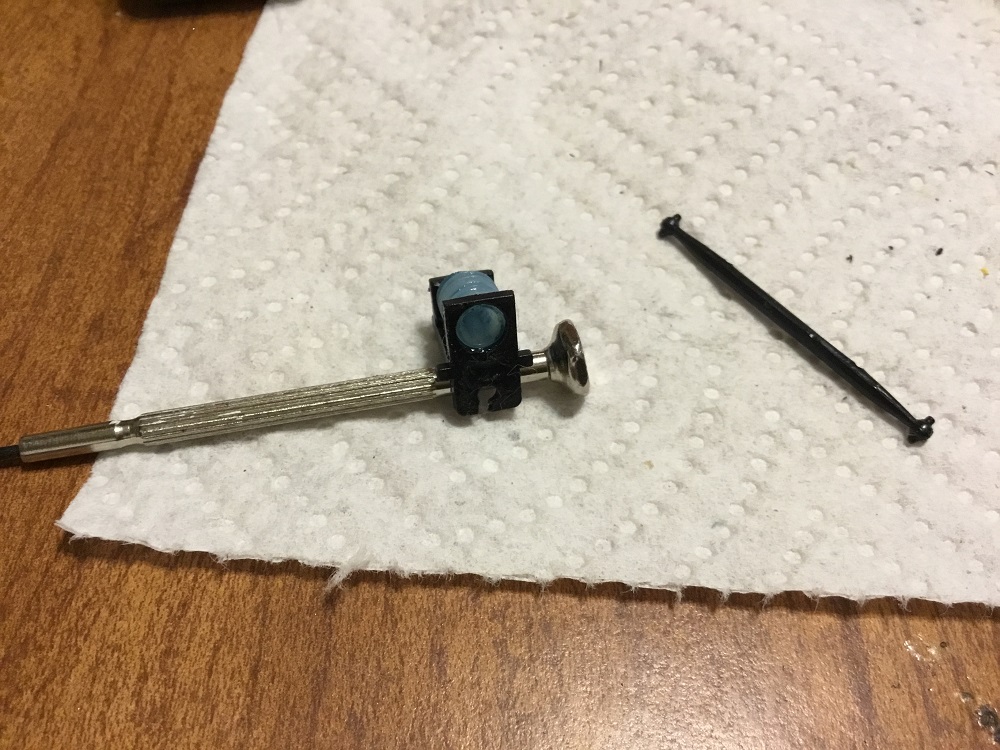
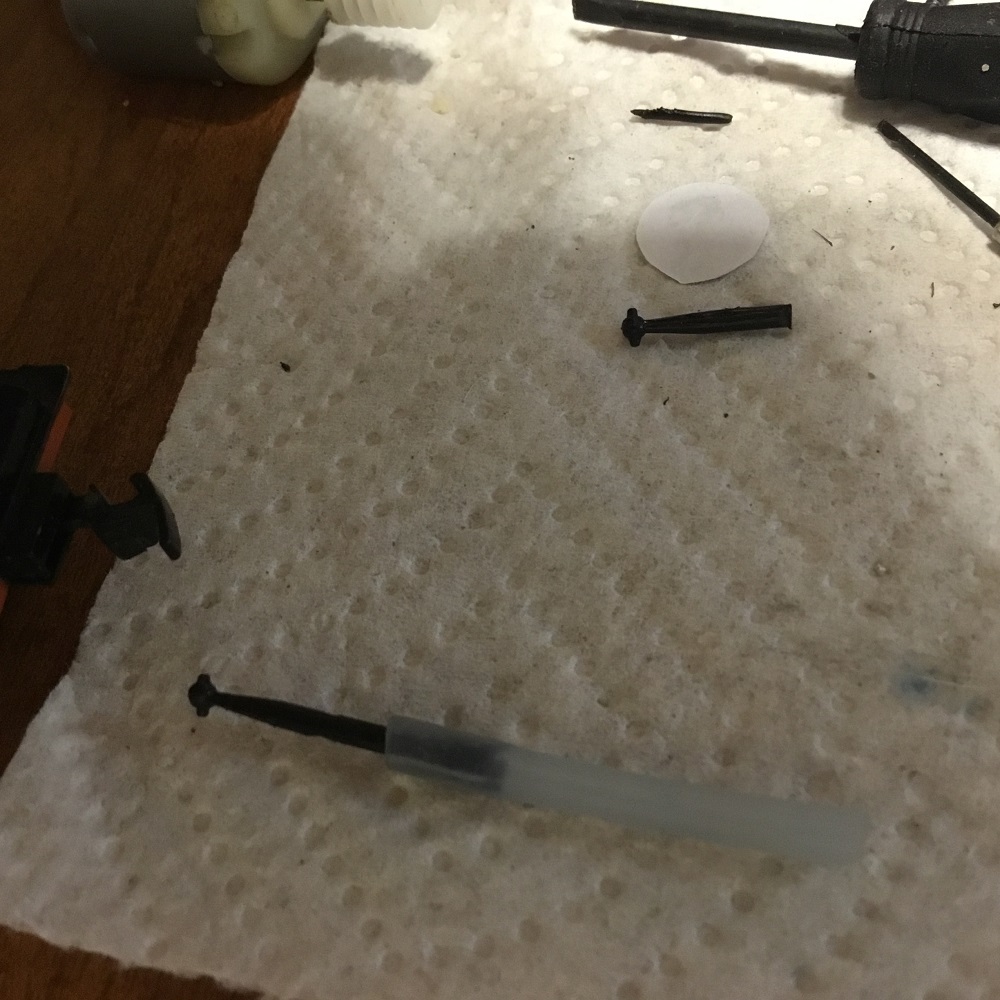
So, in taking apart Jupiter, I found that the worm gear box did not allow for any
axle extension at all. So, I figured to chop on of the failed drive shafts in half
and install it with the rubber tube, hoping that the pressure of the tube would
force the spline deep enough into the gear hub to hold fast. The other end of
the tube fitted snuggly over the motor drive axle.
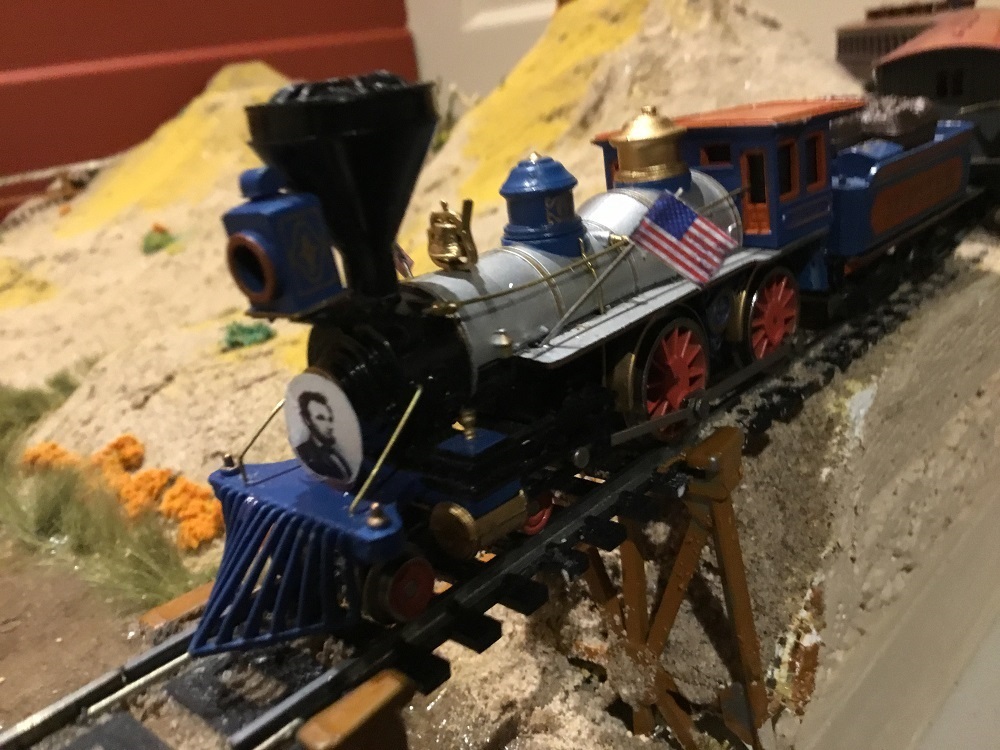
And to add a few details, taken off the internet, shrunken down to 15%, printed in color.
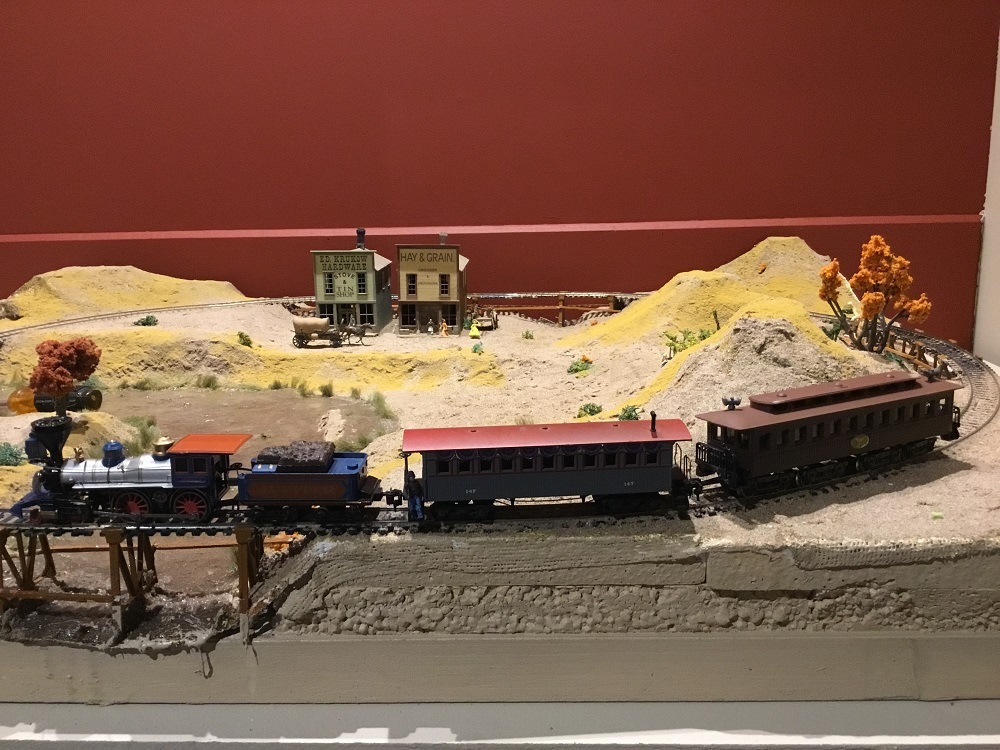
And did it work? You'll have to see the latest posting of "Tracks Across the Desert" to
see for yourself.
|
Country:  USA ~
Posts: 11600 ~
Member Since: December 09 2013 ~
Last Visit: January 29 2026 USA ~
Posts: 11600 ~
Member Since: December 09 2013 ~
Last Visit: January 29 2026
|
 Alert Moderator

|
|
|
|
 Posted - February 09 2020 : 6:35:07 PM Posted - February 09 2020 : 6:35:07 PM


|
So, this is a video of the Bachmann piece, a wonderful get from RP Model Railroads, my
hobby store of choice, and her new rubber fuel line replacement for the drive shaft.
There is a little wobble transmitted through the shaft into the train, but otherwise
runs rather well. The curves on this micro layout are 15 inches, and you can see her
bind a little in the curves, but she keeps going. I'd like to run her a little more slowly,
but less than 4.5 volts she binds and stalls on the curves.
https://youtu.be/rQepbJlG5OE
|
Country:  USA ~
Posts: 11600 ~
Member Since: December 09 2013 ~
Last Visit: January 29 2026 USA ~
Posts: 11600 ~
Member Since: December 09 2013 ~
Last Visit: January 29 2026
|
 Alert Moderator

|
|

