|
|
 Posted - January 19 2015 : 9:25:13 PM Posted - January 19 2015 : 9:25:13 PM


|
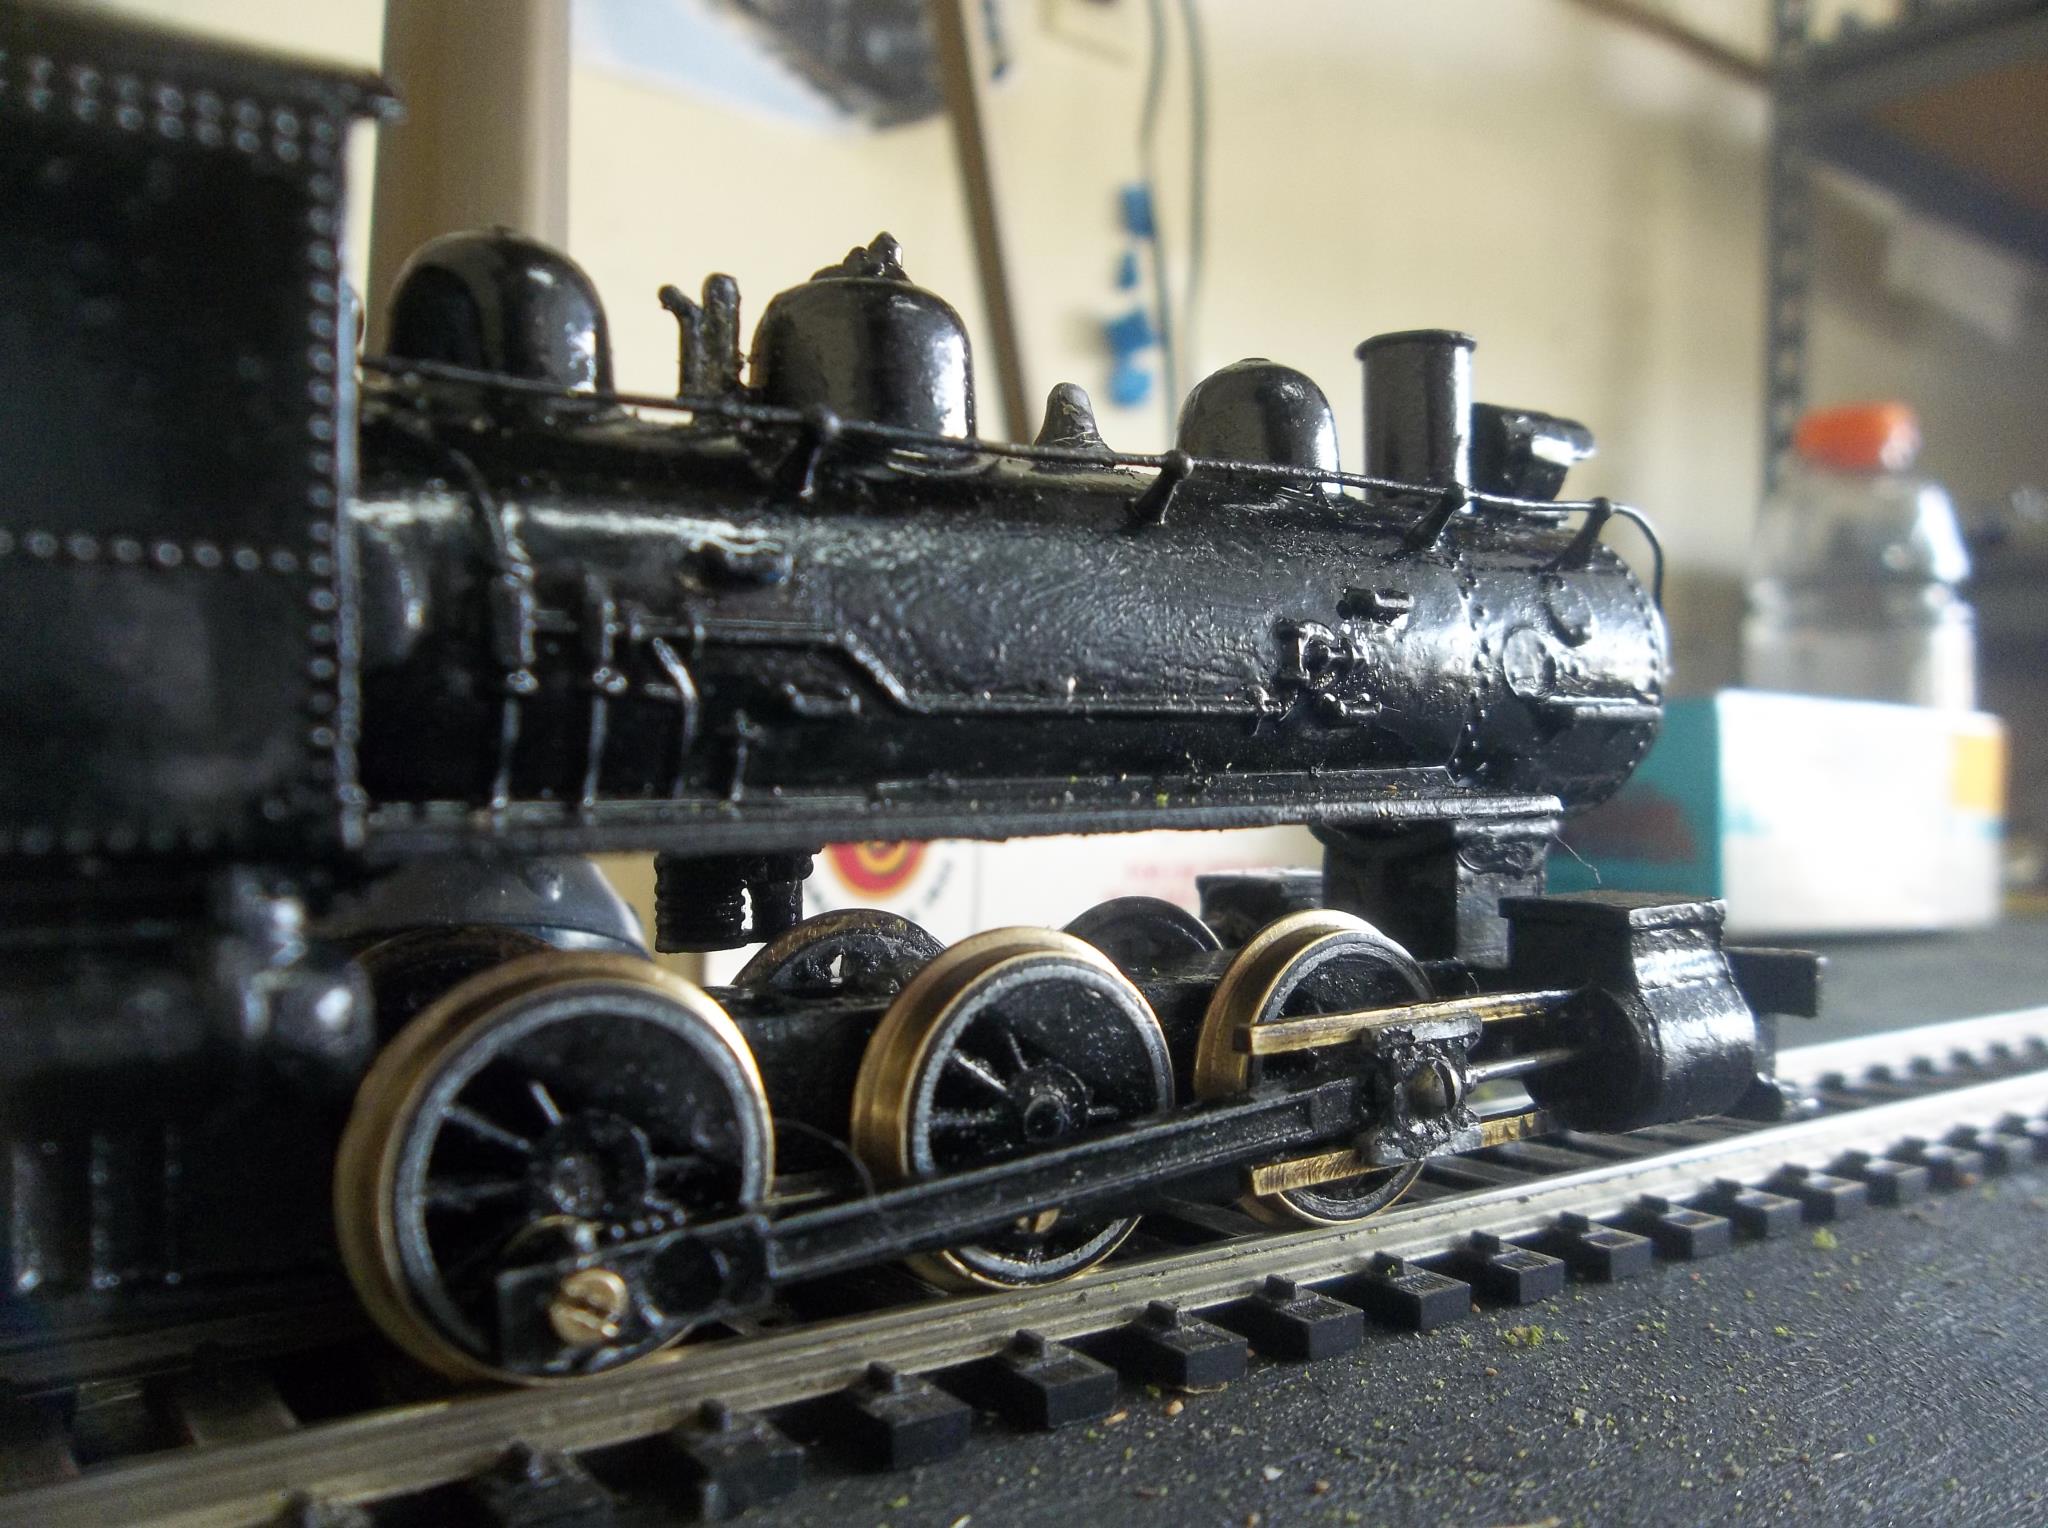
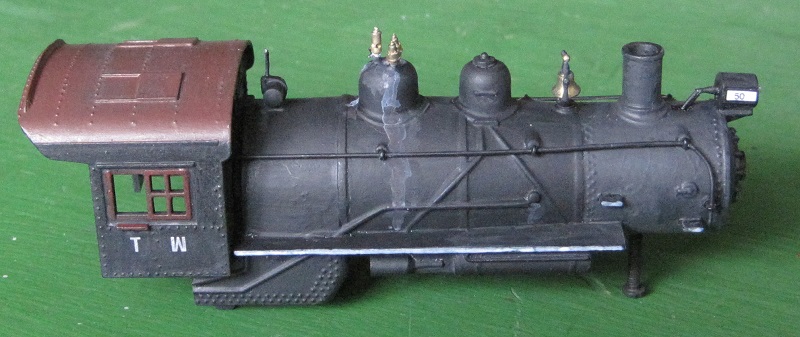
After I put the a Mantua 0-6-0 chassis under a Booster shell, I had the 0-6-0's shell left over and figured I'd detail it some. I plan to keep my eyes open for a Mantua Prairie at the swap meets, and I like to replace their plastic boilers with a metal one for better traction and electrical pickup.
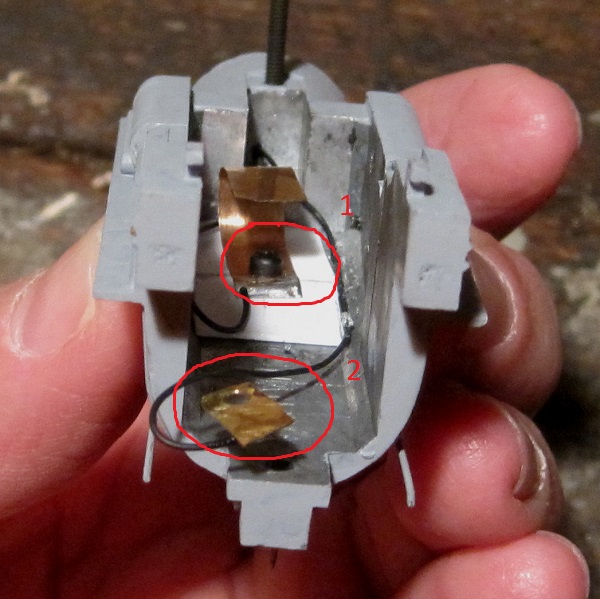
Here's the boiler with the added details circled:
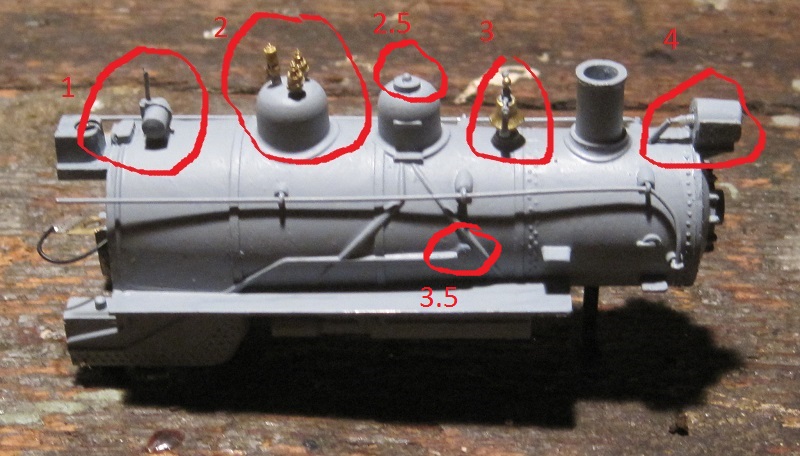
1) The exhaust pipe was broken off of the turbine on the cast-on dynamo. I drilled a .020" hole and glued in a wire to represent the exhaust pipe.
2) I cut off the crude cast-on whistle and put a nicer whistle and two safety valves on top of the steam dome.
2.5) The sand dome has a lid. There's a hole drilled through and tapped out for a 2-56 screw. The bottom of the hole holds a screw for the light wiring and another screw on top is filed down to look like a lid. The knob on the lid is a "bug pin" like bug collectors use to fasten dead bugs to a framed plaque and display them (and people think model railroaders are eccentric). 
3) I added a bell with a bracket on it.
3.5) At the end of the cast-on injector lines I drilled a hole and glued in a very small nail so the head would look a little like the valve where an injector line enters the boiler instead of the injector line just coming to an end on the side.
4) The original cast-on headlight now has two brass rectangles glued on the sides to represent number boards and is drilled through and a light bulb is added.
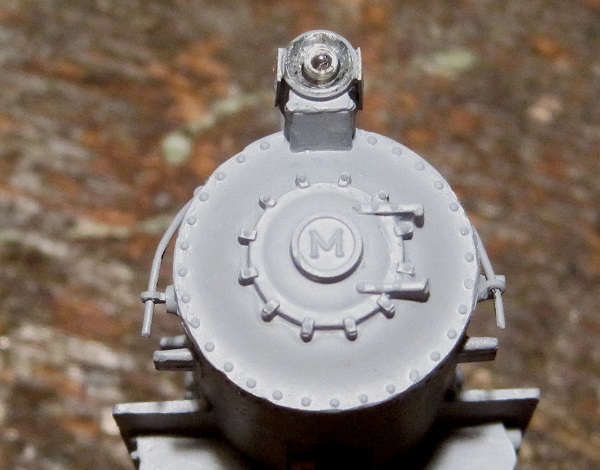
Here's the headlight from the front:
Here's the headlight wiring:
The headlight wires come through a hole drilled through the smoke box. One is for the polarity that is not grounded to the shell and frame of the locomotive. That goes to a bronze spring (1) that is isolated from the shell with a piece of plastic and fastened with a plastic screw. The spring touches the part of the motor that is wired to the tender.
The other wire is grounded to the shell using a terminal (2) that is screwed to the shell using the screw that holds on the roof.
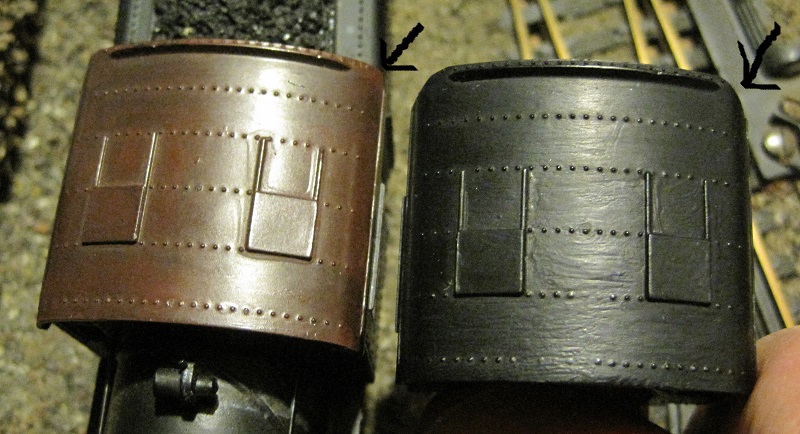
Speaking of the roof, it had a chunk broken out of the rear corner. I had no good replacement cab and the chip was pretty small, so the simplest approach was to file both rear corners into a more curved shape that made it look like the roof was supposed to be that way. The black roof is the modified one. The brown roof is a normal, unmodified one:
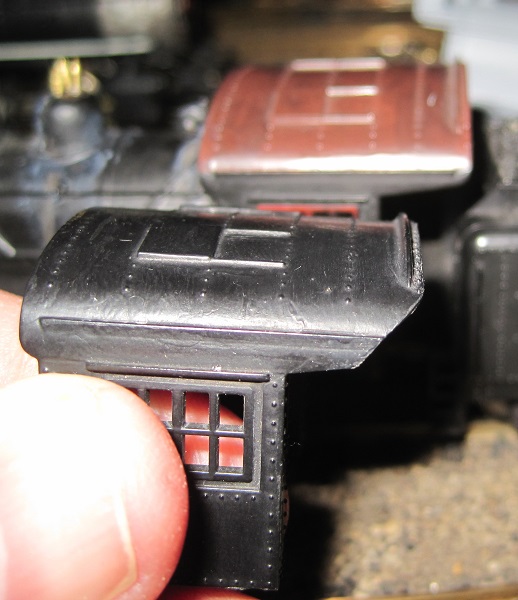
Here's a side view of the same modification:
While I had the Epoxy mixed, it seemed appropriate to do another modification I've had in mind for a while. Years back, I modified a Bowser Pennsy H9 to look more like a typical generic consolidation. At the time, I went with the original safety valves and whistle, which were mounted straight to the boiler shell. I thought mounting them on an auxiliary steam turret would look more typical, and I had a Cal Scale turret. The mounting holes for the old appliances were filled with little plastic plugs and the turret was mounted and primed. When the primer is fully dry, I'll paint and weather it:
Carpe Manana!
Edited by - scsshaggy on January 23 2015 1:21:20 PM
|
Country:  USA ~
Posts: 2417 ~
Member Since: September 17 2013 ~
Last Visit: June 16 2026 USA ~
Posts: 2417 ~
Member Since: September 17 2013 ~
Last Visit: June 16 2026
|
 Alert Moderator
|
|
|
|
Posted - January 19 2015 : 9:34:02 PM
|
Nice work! Hope to get my 2-6-0 finished. The main reason why I like Mantua as it allows for a lot of detailing.
" Heck with counting 'em rivets, TRAINS ARE FOR FUN! Not called the Mad Scientist for nothing either!"
|
|
Country: USA ~
Posts: 3147 ~
Member Since: May 07 2007 ~
Last Visit: June 01 2026
|
Alert Moderator

|
|
|
|
Posted - January 19 2015 : 10:03:57 PM
|
quote:The main reason why I like Mantua as it allows for a lot of detailing.
Originally posted by Redneck Justin - January 19 2015 : 9:34:02 PM
|
Years ago, they used to advertise that. There were ads with pictures of people's detailing projects in them.
Carpe Manana!
|
|
Country: USA ~
Posts: 2417 ~
Member Since: September 17 2013 ~
Last Visit: June 16 2026
|
Alert Moderator
|
|
|
|
Posted - January 23 2015 : 1:19:32 PM
|
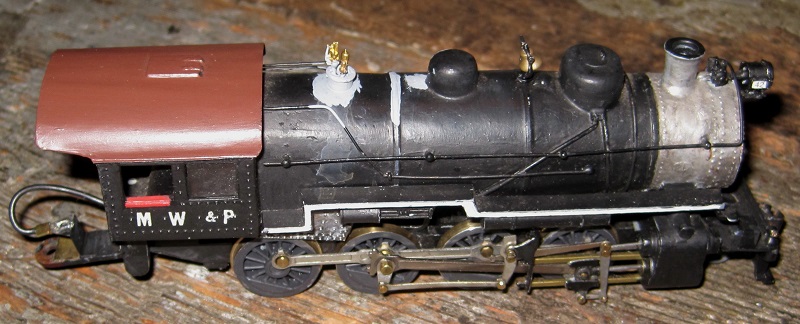
The finished product awaits my finding a Prairie:
Carpe Manana!
|
|
Country: USA ~
Posts: 2417 ~
Member Since: September 17 2013 ~
Last Visit: June 16 2026
|
Alert Moderator
|
|
|
|
Posted - January 23 2015 : 1:36:23 PM
|
Great work!
Where did you get the pop valves??
I buy, repair, and collect
http://scvr.weebly.com/
http://seyboldlocomotiveworks.weebly.com/
http://www.youtube.com/user/TheDeputation?feature=watch
Hyde.
|
|
Country: USA ~
Posts: 1352 ~
Member Since: January 15 2012 ~
Last Visit: July 25 2021
|
Alert Moderator
|
|
|
|
Posted - January 23 2015 : 6:02:49 PM
|
quote:Where did you get the pop valves??
Originally posted by SCVR66 - January 23 2015 : 1:36:23 PM
|
I'm pretty sure I ordered them from Bowser some time back. If so, they're Cal Scale.
Carpe Manana!
|
|
Country: USA ~
Posts: 2417 ~
Member Since: September 17 2013 ~
Last Visit: June 16 2026
|
Alert Moderator
|
|
|
|
Posted - January 24 2015 : 4:16:18 PM
|
| Once again I learned something about locomotives. "Exhaust pipe on the dynamo". Great photo posting Don. Nice work.
|
|
Country: USA ~
Posts: 2087 ~
Member Since: March 16 2013 ~
Last Visit: July 05 2018
|
Alert Moderator
|
|