|
|
 Posted - November 12 2013 : 9:00:52 PM Posted - November 12 2013 : 9:00:52 PM


|
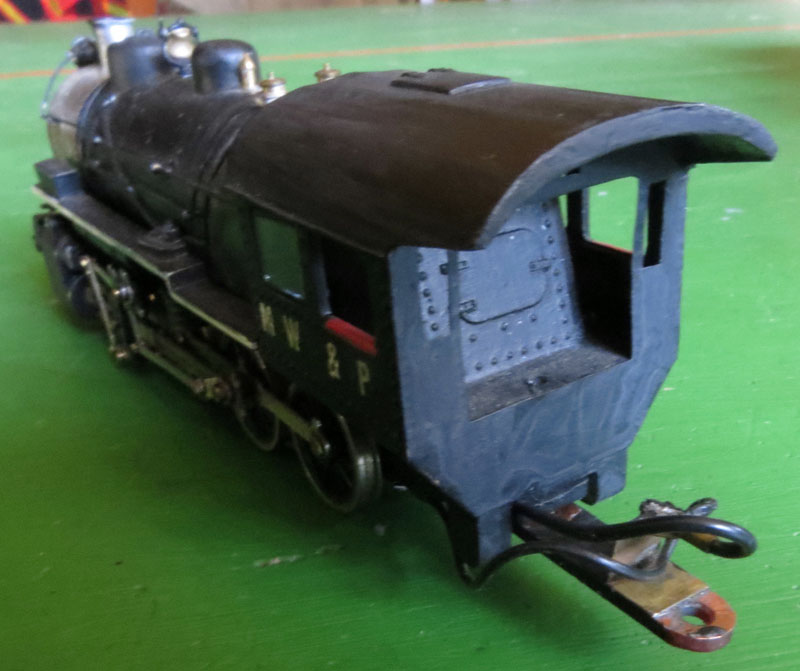
I liked the general proportions of the Bowser Pennsy H9 consolidation, but I'm no fan of Belpaire fire boxes and, being a freelance modeler, I didn't want an engine that proclaims its unique pedigree to all who see it. Some time ago, a like-minded soul published an article on converting the H9 to something more generic. I forgot in which magazine, but I loosely followed his inspiration with these results:
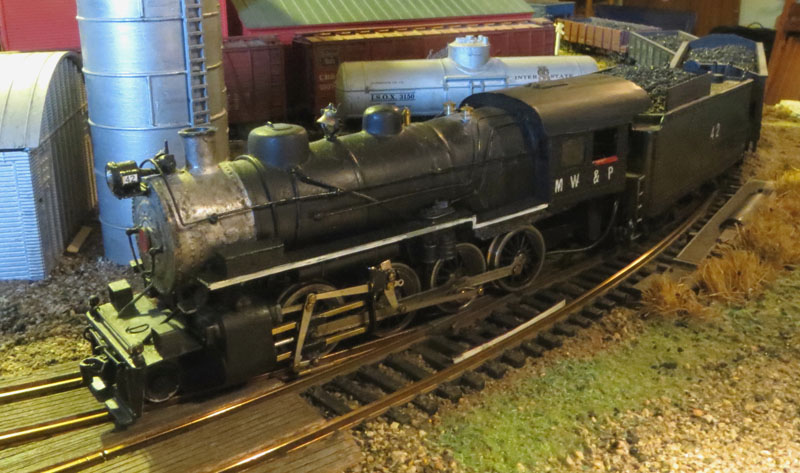

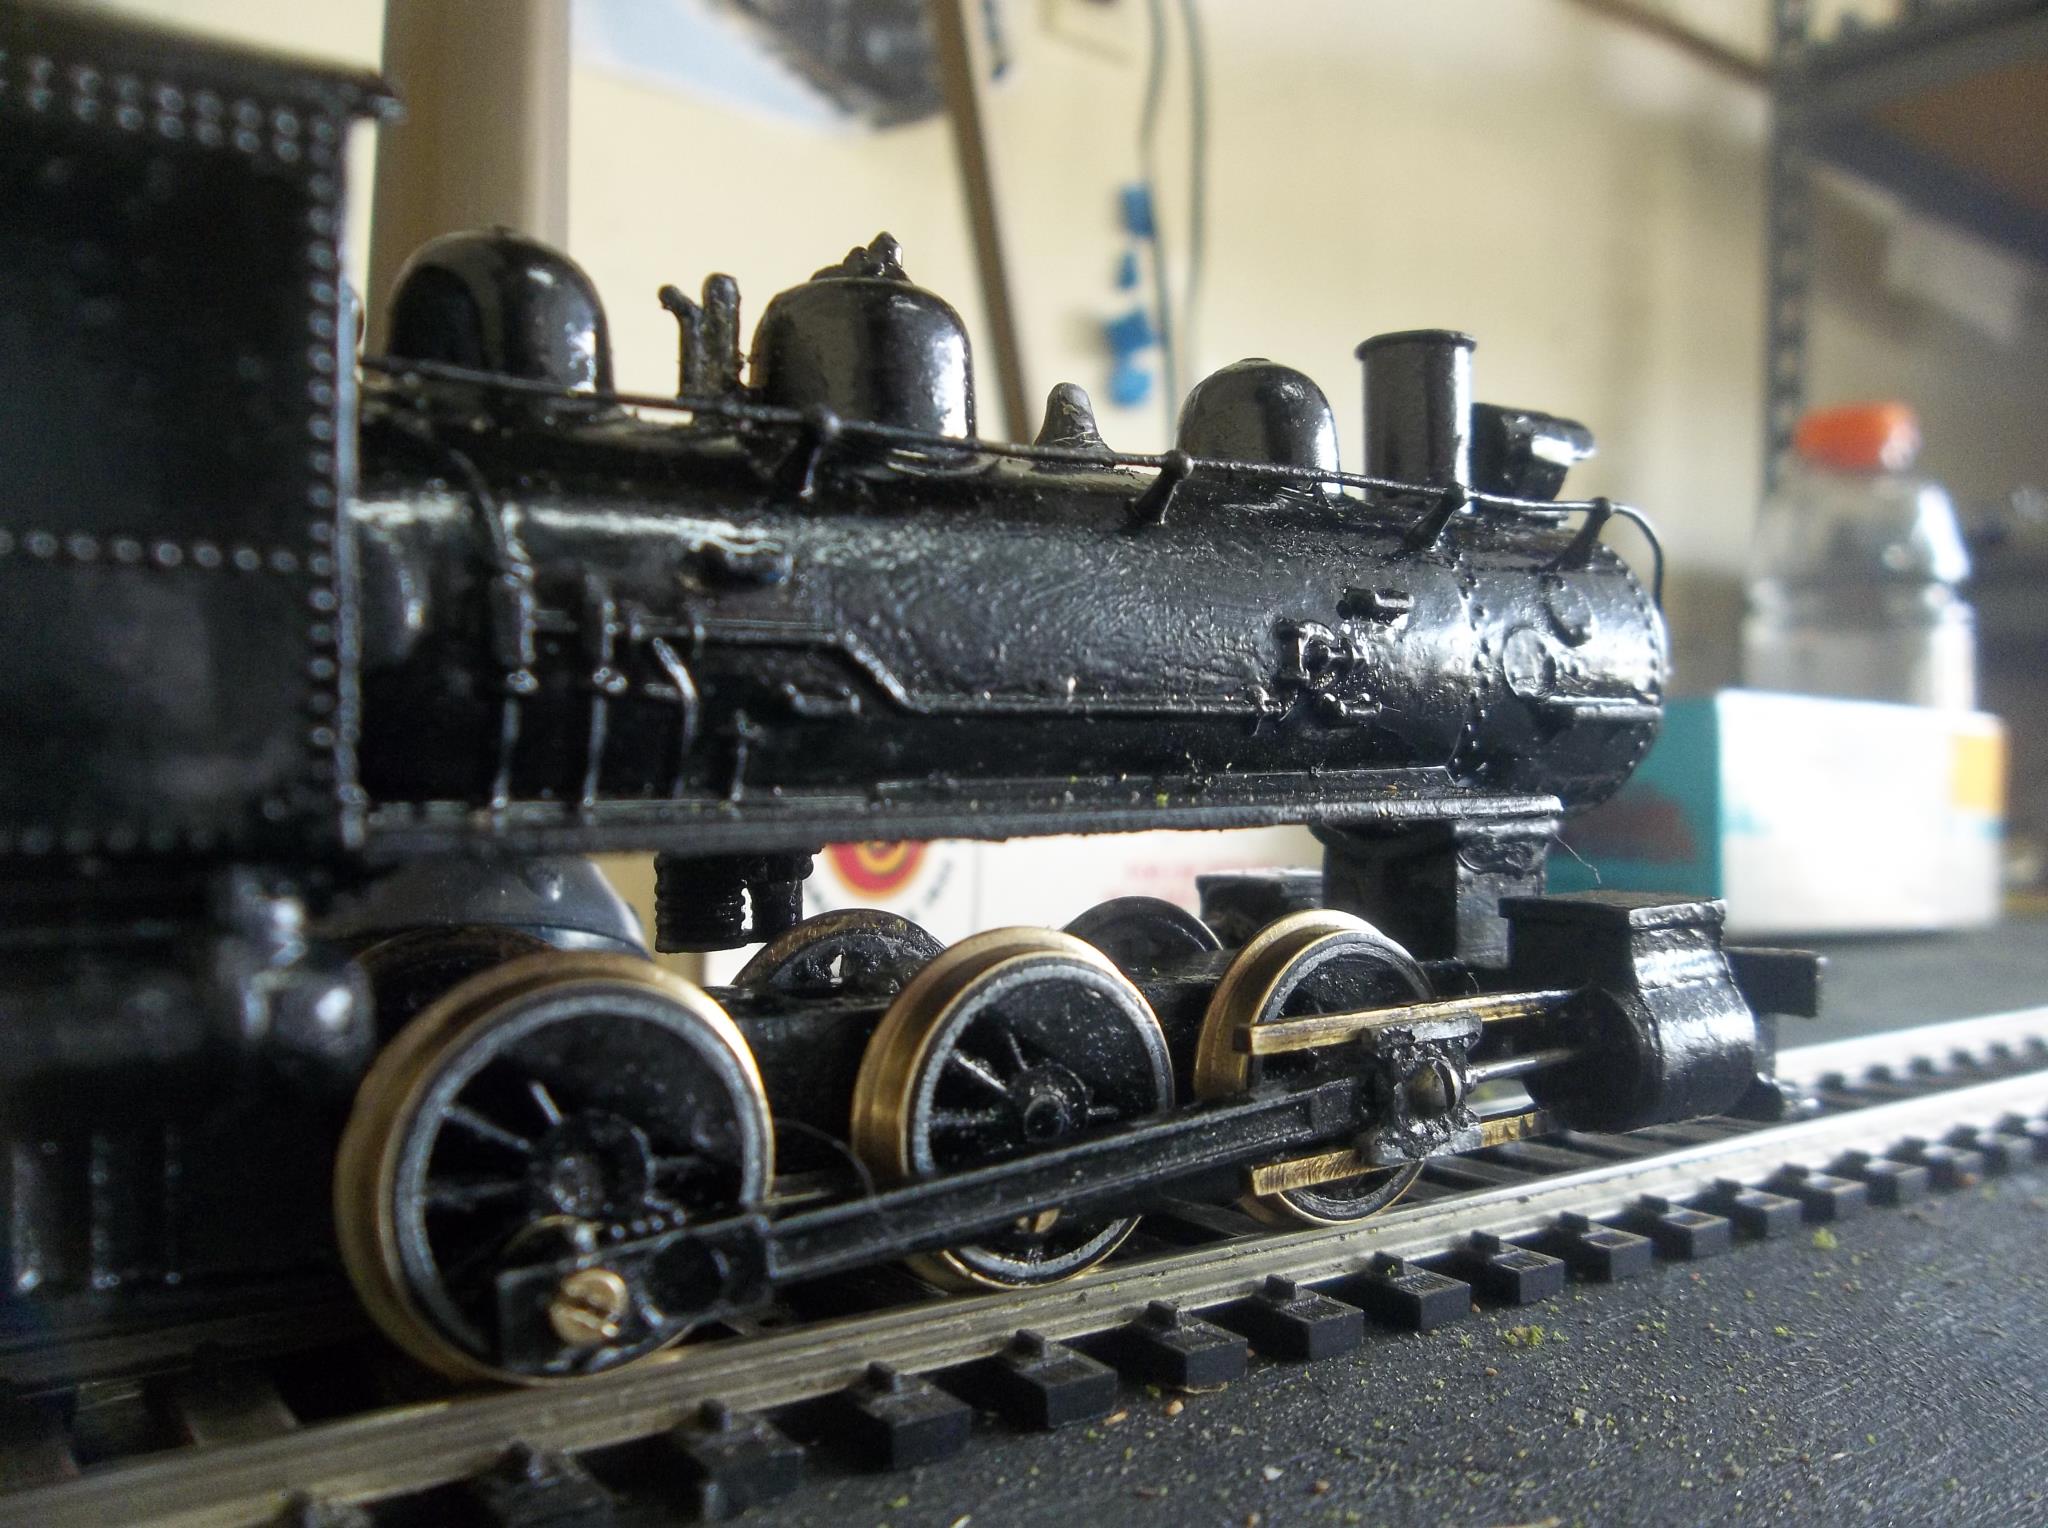
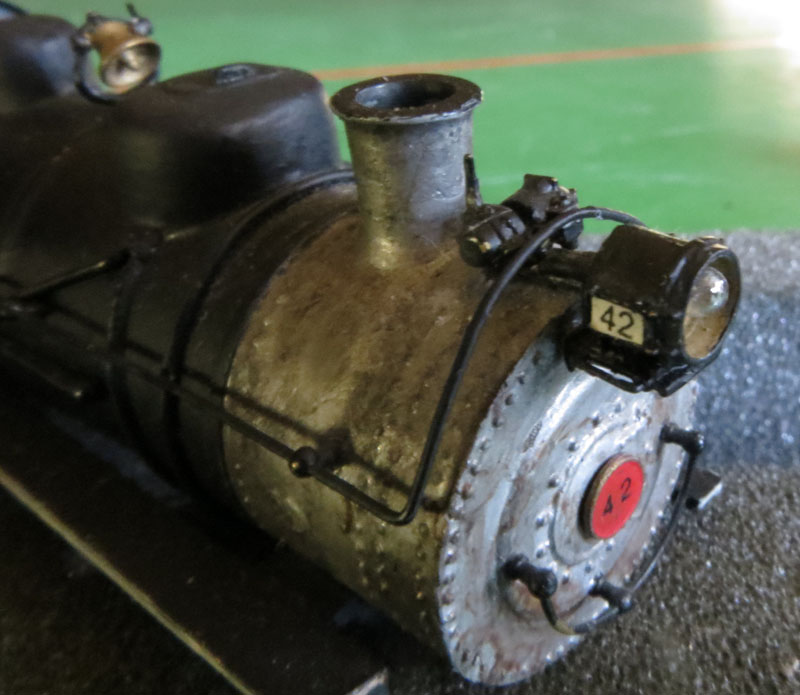
As you can see, the Belpaire firebox has been filed into a normal round-top boiler. The cab roof overhangs a bit on the front, unlike the original. I like that look, so I glued on a sheet of copper for a new roof outline, then added the roof hatch. A Baldwin steamer should have a deck behind the pilot beam, so I added one. I also added injector lines to the front of the boiler. You can't see those on an H9. I also added a working headlight, which is not standard on a Bowser kit. There are boards on the tender extending the coal bunker. One can never have too much coal (that consoles me on Christmas morning).
When you file off the corners of the Belpaire firebox, you get two gaps in the top of the boiler where opening inside the square shell cuts through the curve of the boiler barrel. Those were filled with filler putty for metal screen doors. Other changes to the shell were made to improve maintenance. In the shot below, you can see the putty. Also, the walkways are glued on with epoxy. A contact has been added to the underside to connect the headlight to the left-side polarity without having to fuss with connecting/disconnecting a wire when removing and mounting the shell.
Here is a closer look at the light:
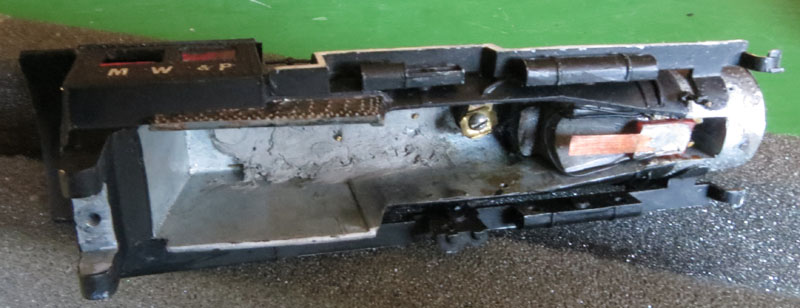
These changes are reflected in changes on the frame. The other side of that headlight contact is ahead of the crosshead guide bracket. The braces between the smoke box and the pilot are just glued to the pilot so they'll only look connected to the smoke box. That eases disassembly and reduces accidents during disassembly. Also, you can see an upgraded motor magnet.
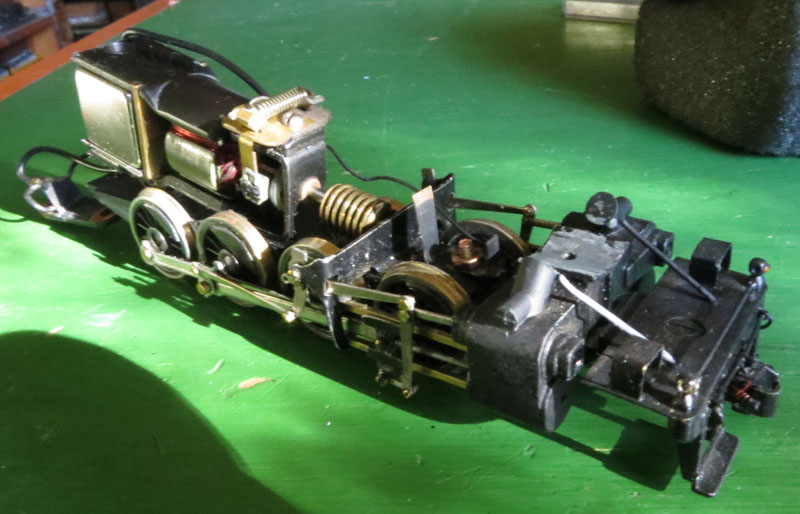
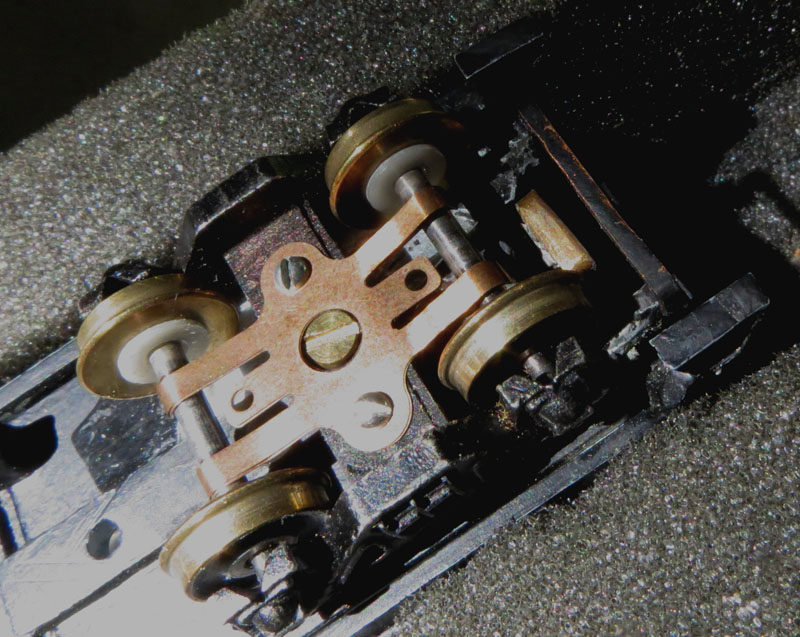
As always, the drivers are the best electrical pickup, so I added contacts for the insulated side drivers to the axle cover on the frame. This cover is blank printed circuit board with phosphor bronze strips spring-mounting brass wipers that ride the drivers. A track connector and a little strip of brass serve as a connector for a wire tying these pickups in with the motor.
Originally, the drawbar connected to the tender by slipping over a support and hooking to a post from below. Then a big wire ran to a screw right on the tender deck. That arrangement worked poorly and looked bad.
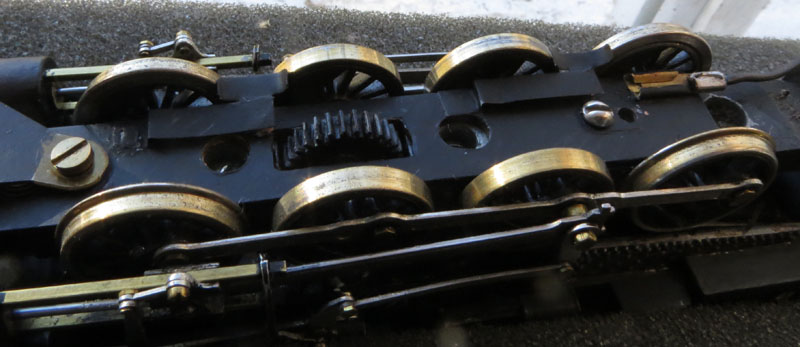
I put a contact wiper on the tender to ride on a brass contact on the drawbar. I lowered the drawbar support so the engine could change gradient without prying the back of the tender into the air. The wire from the motor now goes to the brass contact on the drawbar, as does the wire from the left-side pickups from the drivers. This arrangement also permitted a rear cab wall and cab support sheet without fouling the wires.
The photos below illustrate the above confusion of words.
New contact wiper and drawbar support:
New drawbar and rear of cab:
This final shot shows an uncoupling lever and the coal boards added to the tender. I think the rest is pretty much stock Bowser H9.
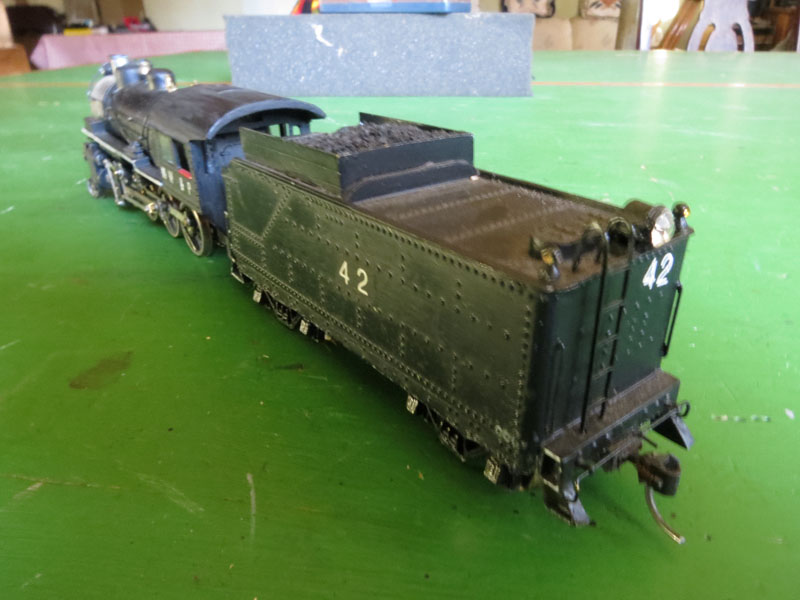
The resulting engine is a pretty powerful puller and a good runner. It is a bit noisy after the magnet upgrade, but I don't much mind.
Carpe Manana!
|
Country:  USA ~
Posts: 2417 ~
Member Since: September 17 2013 ~
Last Visit: June 17 2026 USA ~
Posts: 2417 ~
Member Since: September 17 2013 ~
Last Visit: June 17 2026
|
 Alert Moderator
|
|
|
|
Posted - November 12 2013 : 9:22:56 PM
|
Really digging this 2-8-0! Beautiful! I too am not a fan of belpair fireboxes so this customization is absolutely wonderful!
I buy, repair, and collect
http://scvr.weebly.com/
http://seyboldlocomotiveworks.weebly.com/
http://www.youtube.com/user/TheDeputation?feature=watch
Hyde.
|
|
Country: USA ~
Posts: 1352 ~
Member Since: January 15 2012 ~
Last Visit: July 25 2021
|
Alert Moderator

|
|
|
|
Posted - November 12 2013 : 11:57:46 PM
|
| Great photo story Don. Nice work. I believe I dig what you're saying about having a locomotive that looks like it's going to work instead of to the fair. Very innovative work. I'm not real familiar with different train manufacturers, but I like the way Bowser did the inside of the cab with the room available around the nice firebox.
|
|
Country: USA ~
Posts: 2087 ~
Member Since: March 16 2013 ~
Last Visit: July 05 2018
|
Alert Moderator
|
|
|
|
Posted - November 13 2013 : 10:10:18 AM
|
I like the way you added the wipers to the drivers and the clever idea of using a brass rail joiner as an electrical connector. Can you tell us a little more about the magnet upgrade to the motor? Also please give some more information of this "screen door putty" I am not familiar with that at all. Is it like epoxy?
Randy
|
|
Country: USA ~
Posts: 369 ~
Member Since: April 30 2011 ~
Last Visit: June 19 2026
|
Alert Moderator
|
|
|
|
Posted - November 13 2013 : 1:36:43 PM
|
Thanks to all of you for your kind words.
quote:Can you tell us a little more about the magnet upgrade to the motor? Also please give some more information of this "screen door putty" I am not familiar with that at all. Is it like epoxy?
Originally posted by rbturner - November 13 2013 : 10:10:18 AM
|
Magnet Upgrade: As the magnet gets more powerful in a permanent magnet DC motor, it runs slower and cooler, and has more torque. The original motor probably had an Alnico magnet. I replaced that with a rare earth (neodymium) magnet from K&J magnetics, which has a big assortment of magnets. The magnet was a cube 5/8" on a side, if I remember right. That's a pretty powerful magnet.
The magnets need to be installed so they're polarized the same way as the old one. If you get it sideways, the motor will not run. Reversing it reverses the direction of the motor, making it incompatible with the direction of your other locomotives. If you cannot get a perfect fit, a small steel shim will fill the gap and conduct the magnetic field.
The added torque helps on my layout which has an obscenely steep ruling grade, causing the worm gear to act like a brake on the worm while the engine is throttled back to go downhill.
The downside to magnet upgrades is that, when the armature turns, the poles break in and out of the magnetic field with a sort of abrupt pop. This translates into a lot of noise. Since Bowser steamers are notoriously noisy, anyhow, a noisier Bowser whines about like a Power Torque drive. I mention this caveat because folks who like to add sound do not want the motor to drown it out.
Putty: The filler putty I used on the boiler was a Devcon product I got at Ace Hardware. It's called "Metal Patch and Fill." It comes in a toothpaste tube and is worked into place like window putty. It can be filed, sanded and painted just like the metal around it. It helps to shape the hole to be filled so the putty has something to grab and stay in.
While I used a particular brand, I think there are other brands and other stores where you can find this sort of thing.
Carpe Manana!
Edited by - scsshaggy on November 13 2013 1:40:22 PM
|
|
Country: USA ~
Posts: 2417 ~
Member Since: September 17 2013 ~
Last Visit: June 17 2026
|
Alert Moderator
|
|