|
|
 Posted - June 13 2012 : 2:34:12 PM Posted - June 13 2012 : 2:34:12 PM


|
Well guys, the first fruits of summer come in the form of my finally-completed powering and lighting of the Atheran Rotary Snow Plow I obtained on E-Bay this recent spring. I had come across several customizing efforts on this model, most of which involved cutting the chassis and shell to a shorter length. The original builders photo shows that the Athearn model is fairly accurate:
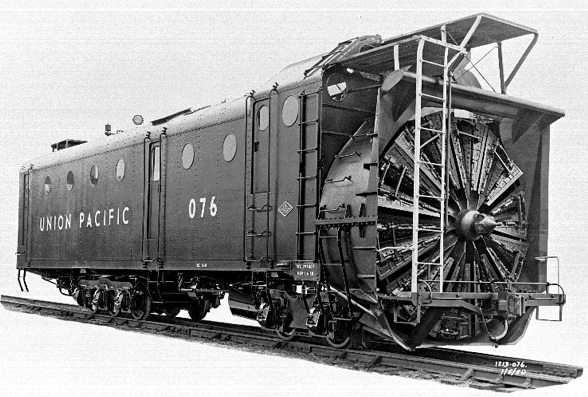
There are other similar plows, notably the BNSF rotary one (see Railpictures), which have a shorter chassis, but I decided to stick with the original.
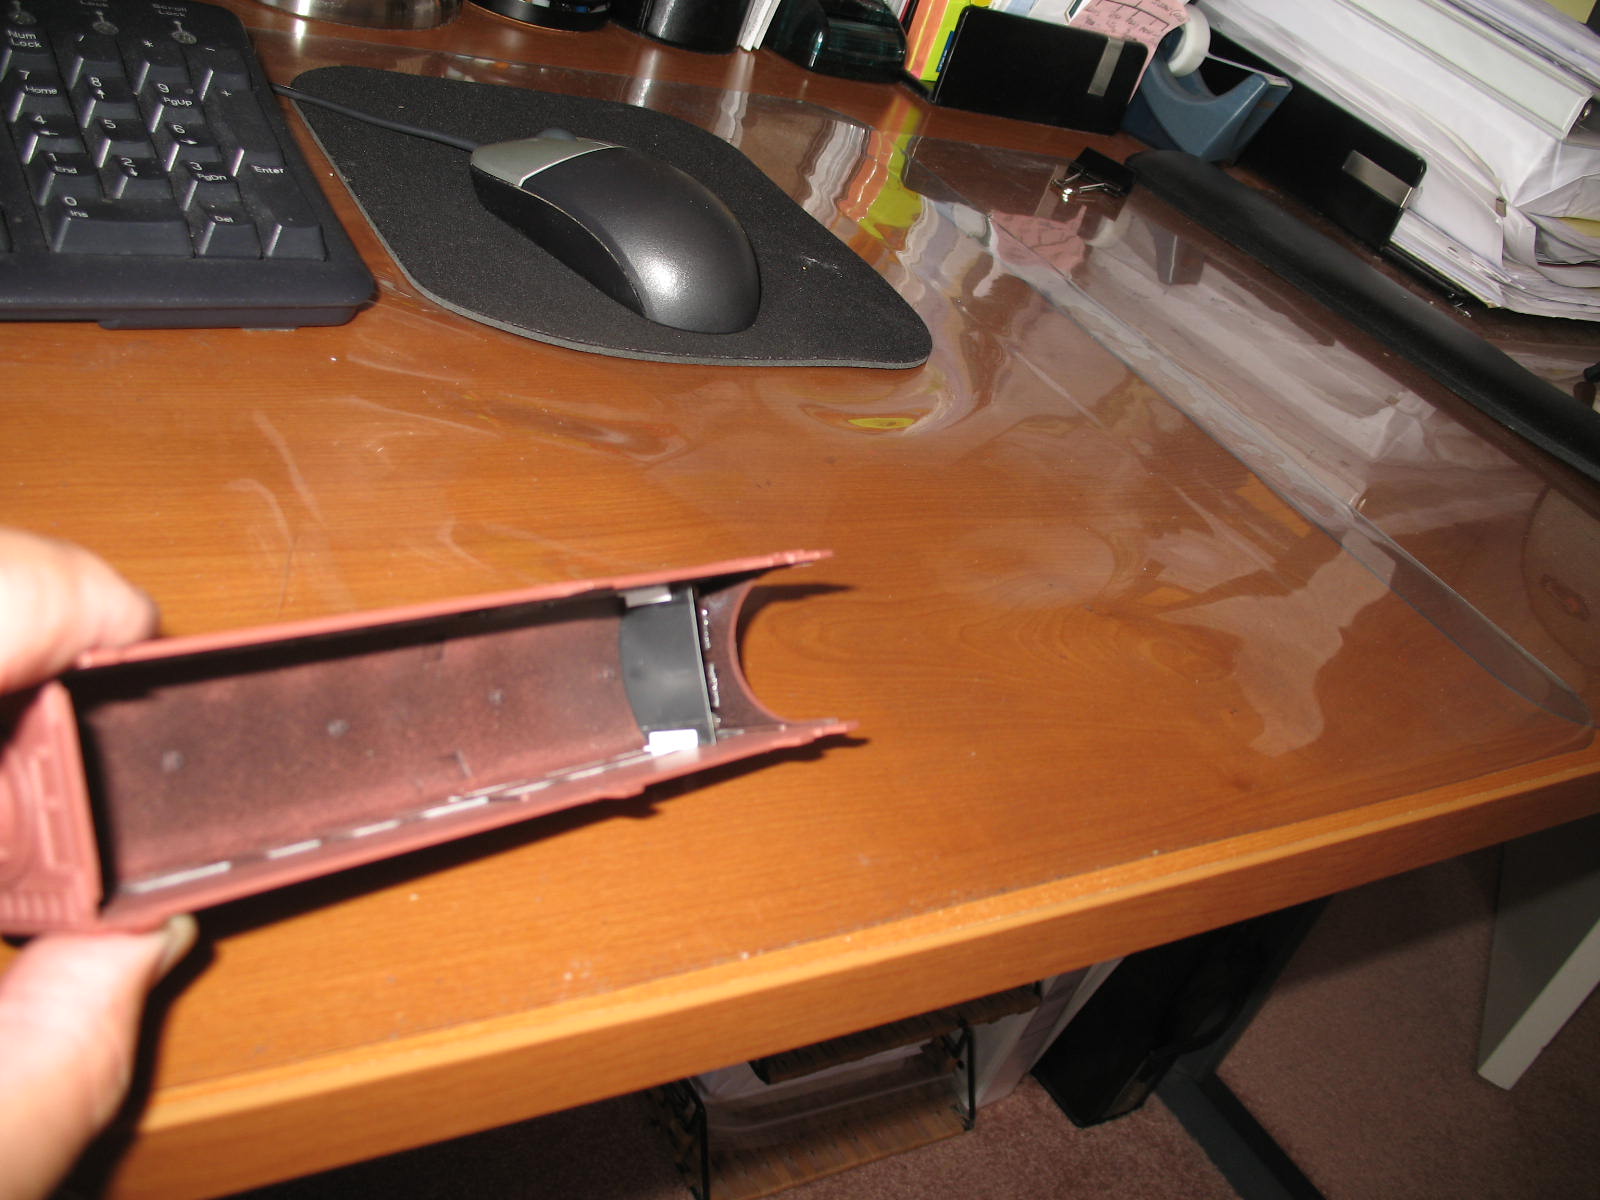
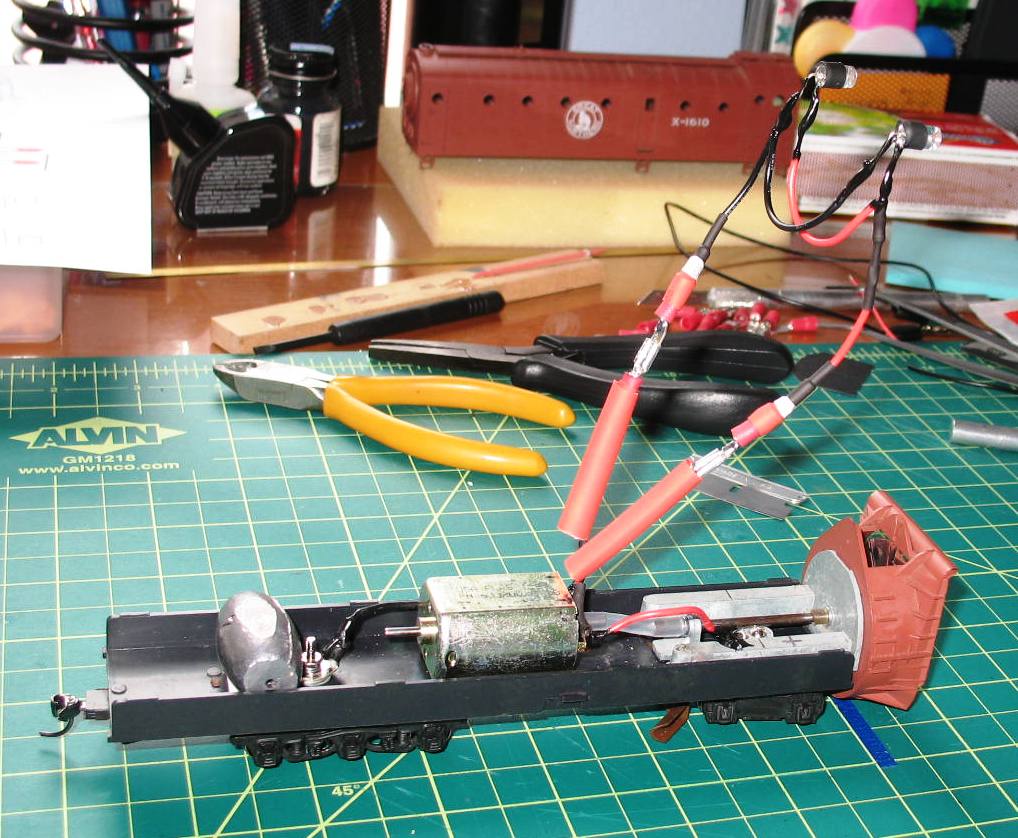
I started by getting the rotor and blade to spin, powered off the trucks. I replaced the wheelsets with insulated metal ones, then wired the front all-metal truck to the positive lead of the Igarashi motor (Howard Moseley of Hobbytown- now on E-Bay) I installed amidships on the chassis. I then fabricated a brass electrical wiper for the three-axle rear truck, retaining the original plastic truck and wired that to the negative motor lead. I then took 2 clear window parts tree pieces, sanded them with 4-- grit wet/dry and installed them as light pipes in the two outer front "windows" of the shell. I had seen an example on an LED sales website of this same model with LEDs in those locations and copied the idea. Another modeler had created a hole above and between the front windows for a single LED, but this was too delicate for me. The original plow had a separately installed front light anyway, and the existing holes looked cleaner. I showed some prior images of this work on the Loose Threads forum over a month ago.
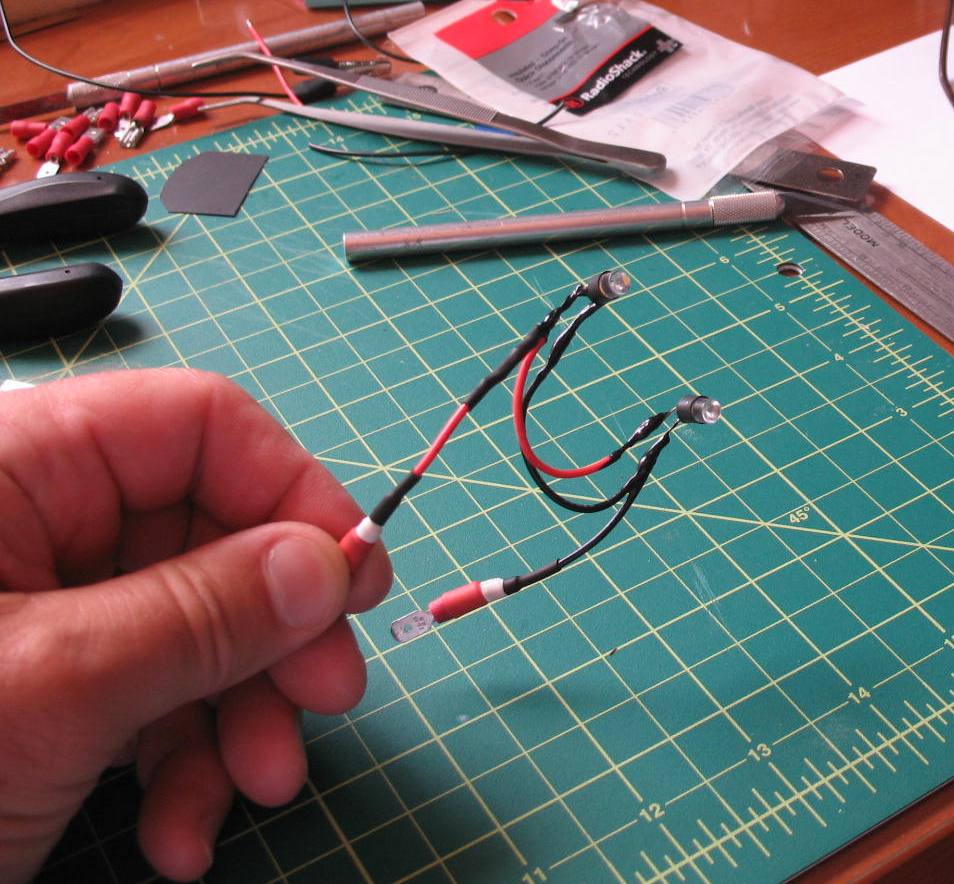
I then developed a schematic for the lighting, deciding to use a parallel wiring circuit, to save using an extra resistor. As there are only 2 LEDs, I saw no issues with doing so.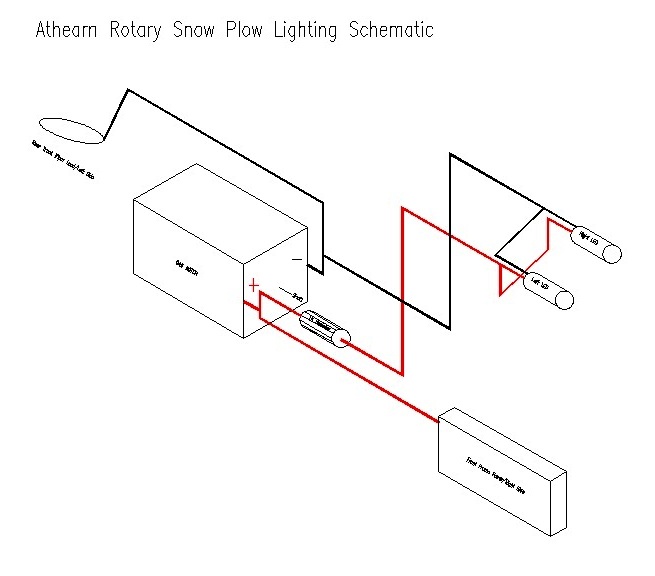
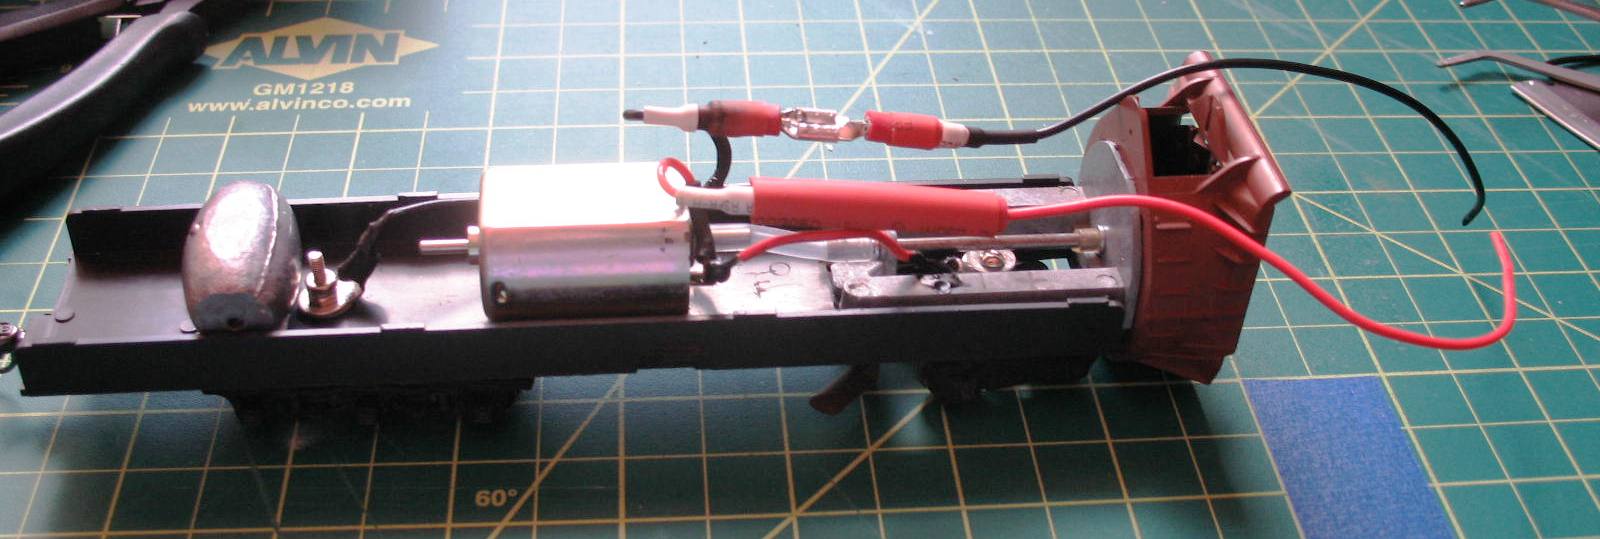
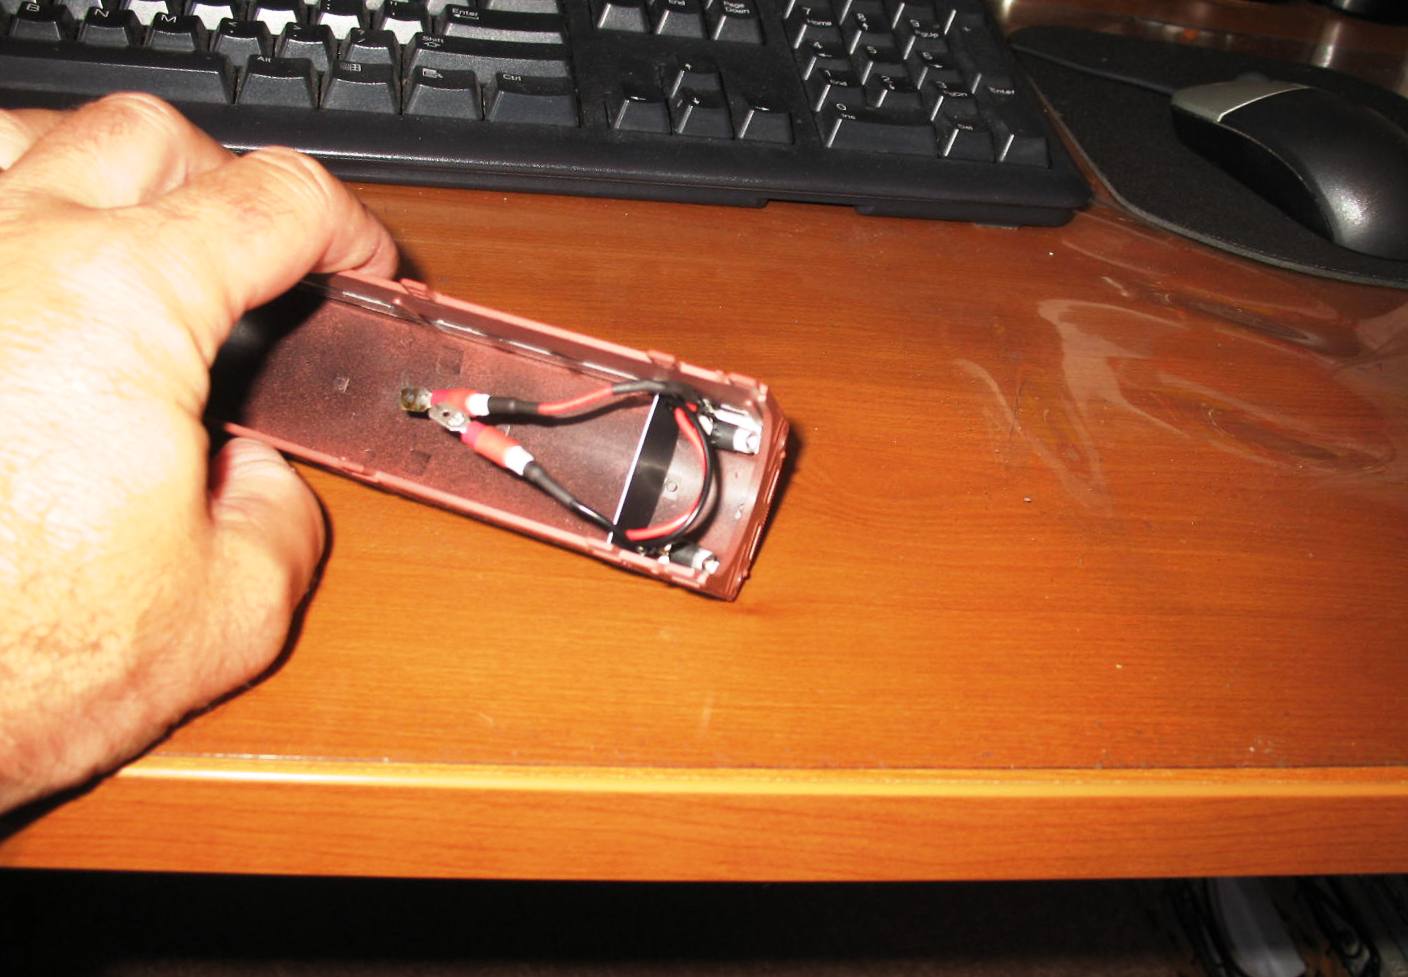
Then I worked on the wiring of the LEDs, using red and black wires. I also picked up some quick disconnect wire leads, so I could later separate the shell and chassis if work was required. (I'm slowly getting smarter at this stuff!)
The connection between the leads was sleeved with an "unshrunk" polyolefin tube, to insulate the connection and enable access later, as well. I used heat shrink tube where I could, and also liquid electrical tape where I could not. The 2 LEDs are mounted on foam doublestick tape behind the light pipes and are partially-jacketed with heat shrink tube to reduce the cabin illumination. I isolated the cabin lighting from the rest of the shell with a black-painted piece of styrene.
Note: the last image- of the plow on the test track, shows one of the LEDs partially visible- that is due to the angle of the photo. From straight on, it is not visible.
The following images show this work:
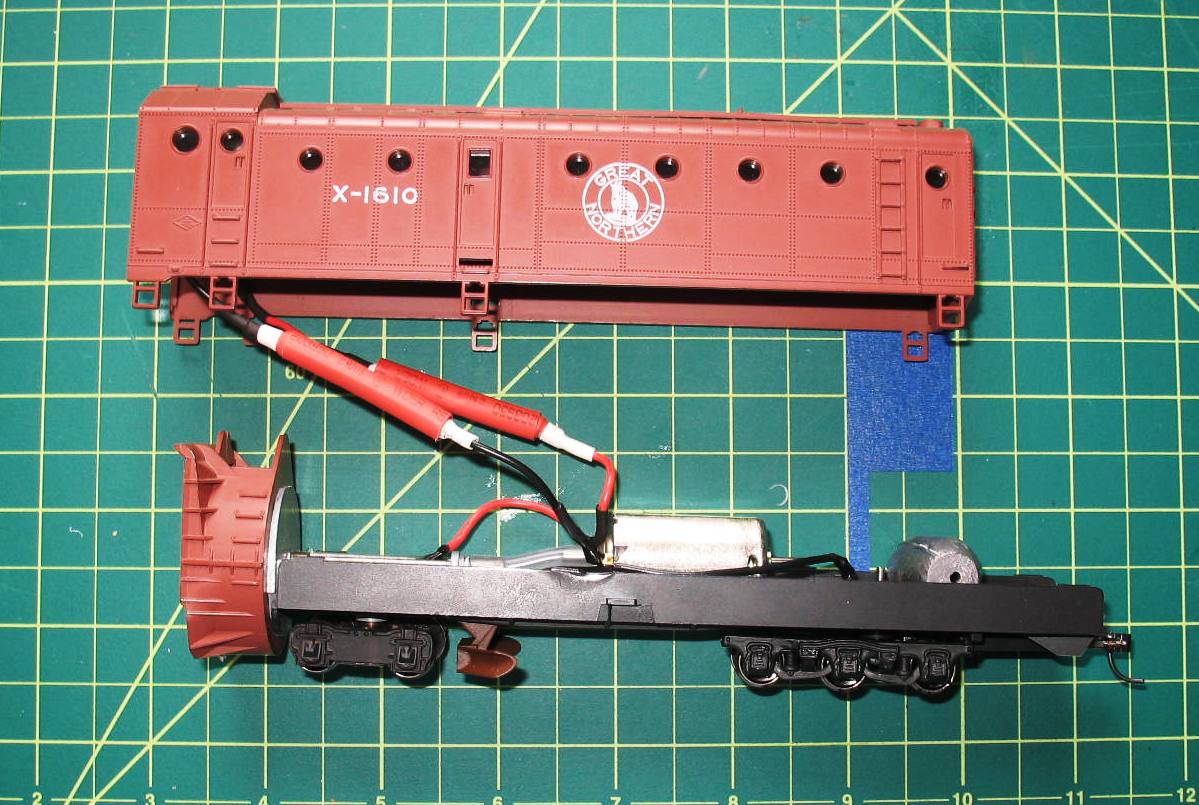
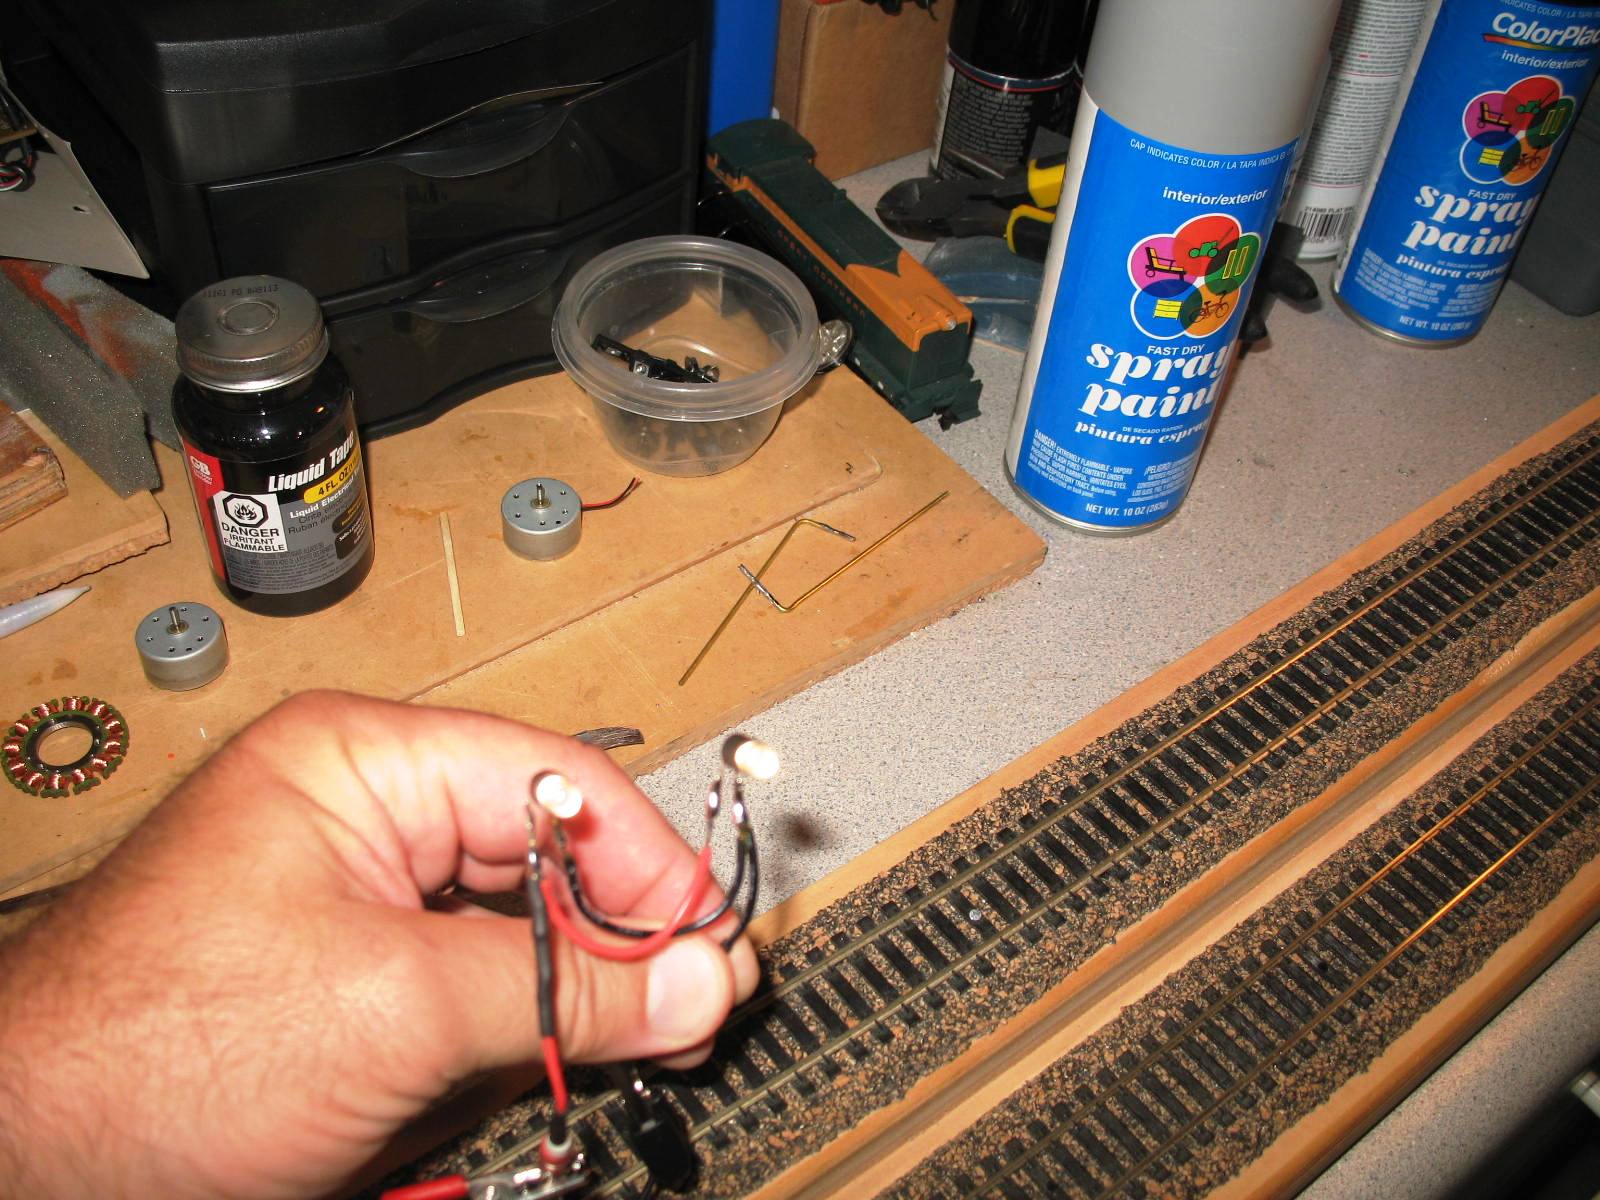

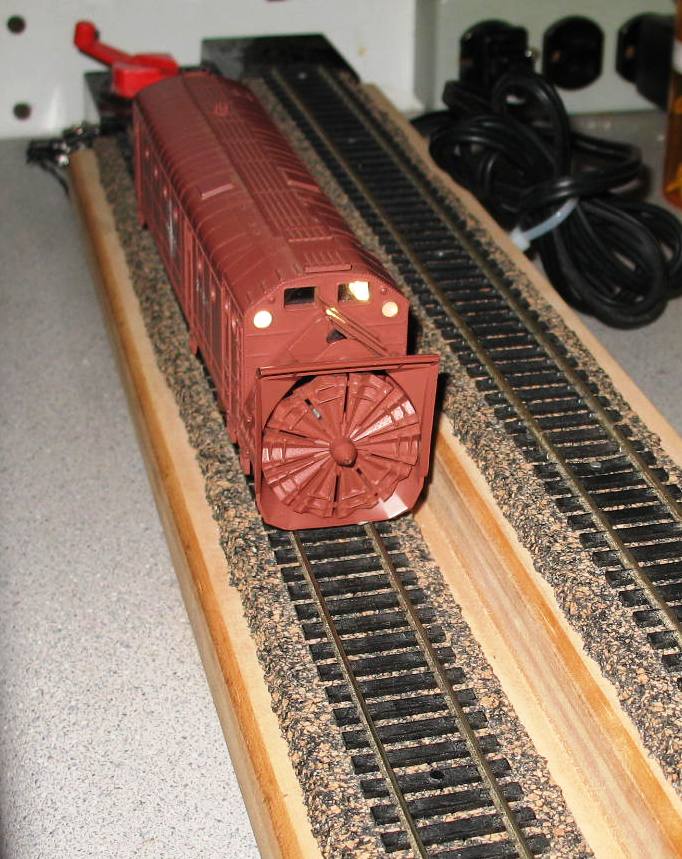
The only other work done was to put clear glazing in all windows, replace the horn hook coupler with a Kadee #5, paint the chassis underside engine black and the front flanger (which cleans the rails) mineral red (actually, my favorite- Rustoleum red auto primer, which is close enough).The rotor turns, the lights up in front and the residual light only illuminates the cabin.
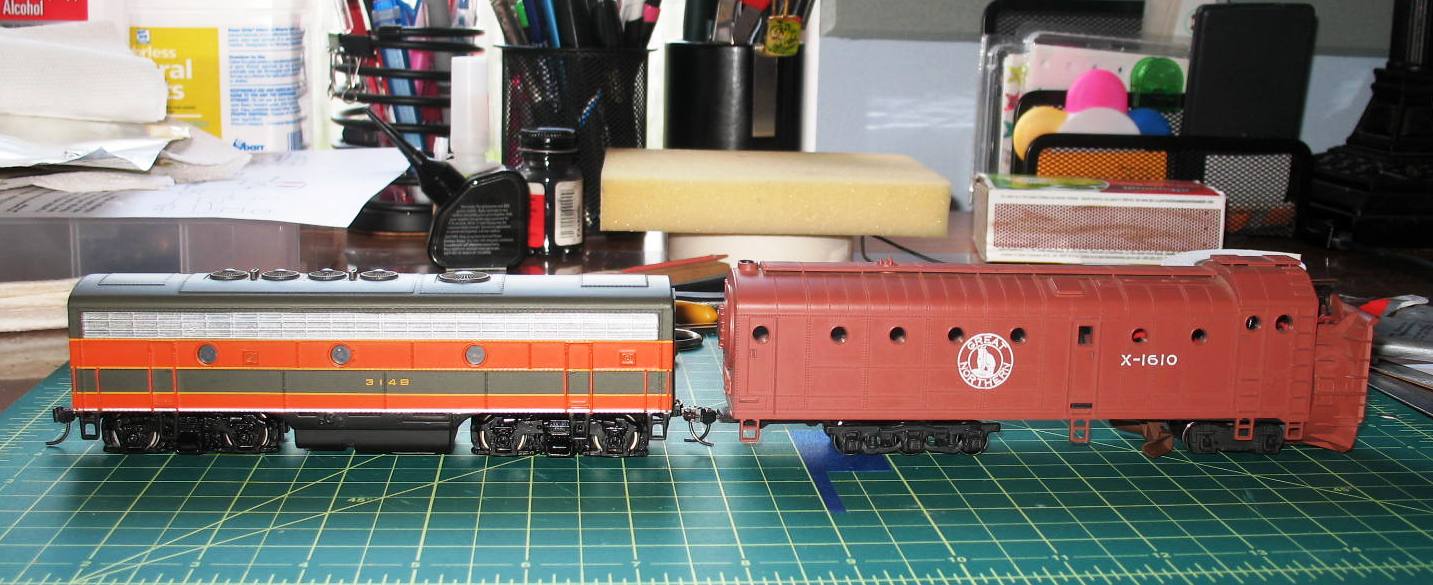
A few weeks ago, at one of our quarterly flea markets, I came across a powered F7B unit in Great Northern colors- it was a Bachman Spectrum Plus in mint condition, for which I paid only $ 20.00. The exact thing I needed to really complete this project!
Now- on to the jillion or so backlogged projects that have accumulated; that is, right after I get my daughter to her college orientation on Thursday. That- by itself- is the best Father's Day gift I could have!!!!(other than that Xtronic 4010 soldering station she is getting me (that I am not supposed to know about)  ) )
Back with another project soon!
Siouxlake/Ron
|
Country:  USA ~
Posts: 510 ~
Member Since: September 21 2011 ~
Last Visit: December 21 2014 USA ~
Posts: 510 ~
Member Since: September 21 2011 ~
Last Visit: December 21 2014
|
 Alert Moderator
|
|
|
|
Posted - June 13 2012 : 10:35:29 PM
|
Neat work, Ron. I think you could start a car with that gauge wiring, and with all that shrink tubing shorts won't be an issue.
Btw, these are for sale again. 
http://www.ebay.com/itm/200774946867
The Tyco Depot
|
|
Country: USA ~
Posts: 3927 ~
Member Since: June 20 2007 ~
Last Visit: November 19 2015
|
Alert Moderator

|
|
|
|
Posted - June 14 2012 : 12:48:04 PM
|
Nels:
I got spools of that gauge of braided wire from Radio Shack a while ago, so I need to use it up (to be frugal)-and it is relatively easy to work with. Later, I will get some smaller stuff,
but by then, I will have more experience in wiring. The small disconnect leads' holes just barely fit that wire (with plastic insulation on), but I had to compress more with a needle-nose plier to crimp them in properly.
I also saw the reappearance of those motors on E-bay. I plan to get several more. All I have is 2 left right now and I want to maintain that as a minimum.
Thanks for your compliment. Happy Father's Day this weekend!
Ron
|
|
Country: USA ~
Posts: 510 ~
Member Since: September 21 2011 ~
Last Visit: December 21 2014
|
Alert Moderator
|
|
|
|
Posted - June 14 2012 : 1:43:53 PM
|
Beautiful!
Bruce Clouette
|
|
Country: USA ~
Posts: 81 ~
Member Since: May 05 2009 ~
Last Visit: August 09 2012
|
Alert Moderator
|
|
|
|
Posted - June 14 2012 : 2:02:56 PM
|
For someone who doesn't have a lot of experience in wiring, you sure make a nice wring harness... it looks watertight. Does it flex enough for the trucks turn easily?
The Tyco Depot
|
|
Country: USA ~
Posts: 3927 ~
Member Since: June 20 2007 ~
Last Visit: November 19 2015
|
Alert Moderator
|
|
|
|
Posted - June 15 2012 : 03:18:07 AM
|
The front trucks originally never had a screwed in attachment, just a metal stub that went into a positioning hole. Had to drill and tap a hole in that stub for a 2-56 screw, then used a 2-56 nut to secure it on the bottom of the truck. The front wire (+) runs off the screw head " inside" the frame up to the (+) motor lead.
The rear (-) truck wiper conducts track power up thru another longer 2-56 screw up to where I put a wiring terminal ring around the screw head on the chassis interior floor. I then soldered the negative wire lead to that metal ring and then to the (-) motor lead.
Both 2-56 screws were tightened to allow truck movement, then I secured the nuts from loosening with a few drops of clear craft glue, so I could later easily remove, if needed.
The wiring "harness" was made to allow for me to flexibly fit the LEDs onto foam doublestick tape behind each light pipe, yet still have enough give to lengthen as I separated the shell from the chassis ( again, with future maintenance in mind). All I did was basically follow the schematic I drew, using flexible wire instead of straight lines.
Ron
|
|
Country: USA ~
Posts: 510 ~
Member Since: September 21 2011 ~
Last Visit: December 21 2014
|
Alert Moderator
|
|
