|
|
 Posted - March 22 2023 : 9:46:30 PM Posted - March 22 2023 : 9:46:30 PM


|
I'm only 3 months into 3d printing and have been prototyping this entire time. It's not only the design that takes time but the behavior of plastic. There are so many intricasies to it. I've learned a lot to say the least. I was close to becoming an architect early on in life. I've always been creative and love to build things. 3d printing has opened up a whole new world for me.
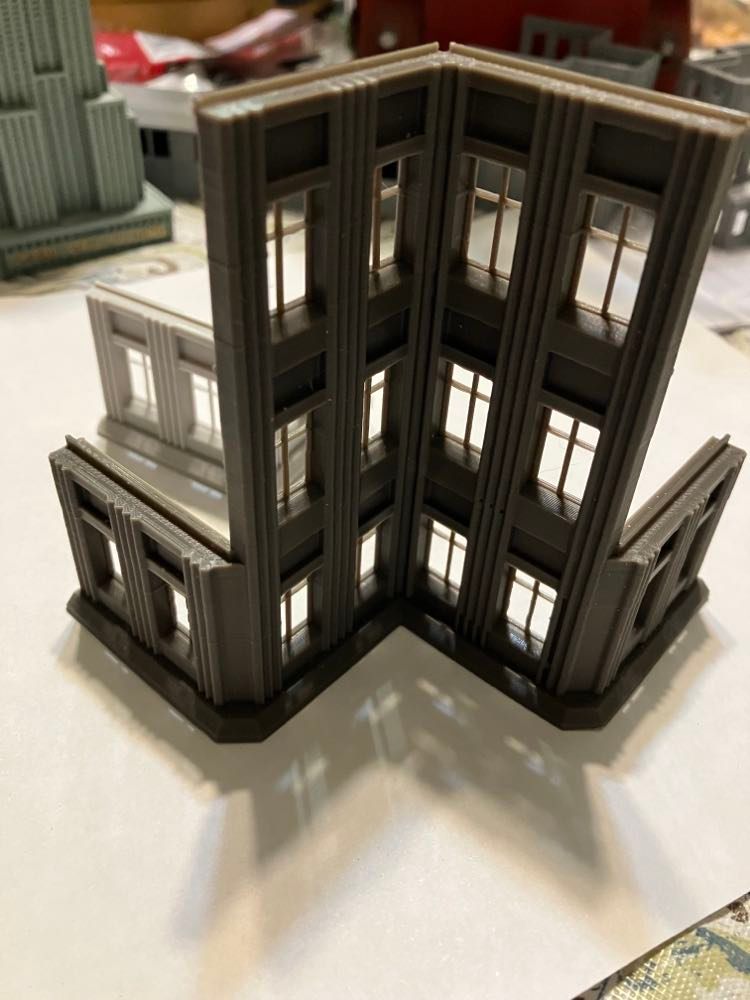
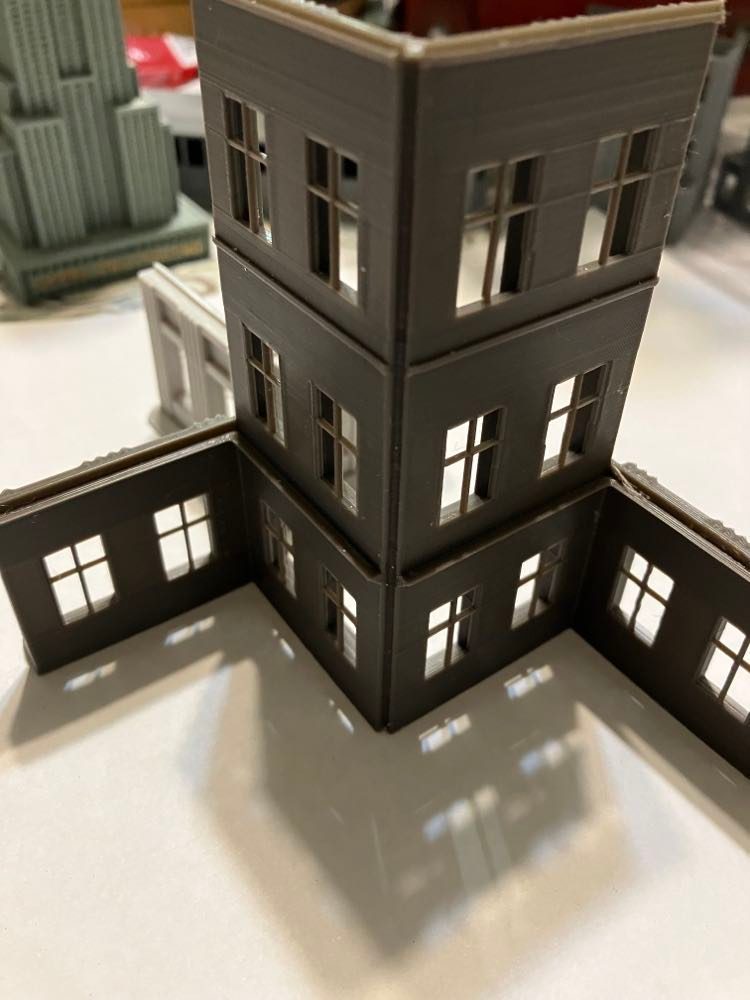
Here are a few pics of prototype designs and tests for what will become my first skyscraper. There are some photos of some physical prints to test what really works in our physical world, not just some design in the computer. I think I'm ready to get going with it very soon. There is also a screenshot to give you a better idea of where I'm going with this. Put this altogether and think 42 stories high in HO scale.
Ho Scale Exterior - Windows built-in, wanted to see what it looks like. Model will have windows seperate and will snap in. Already tested and works real nice. great fit and same look. This will enable the modeler to easily paint them.
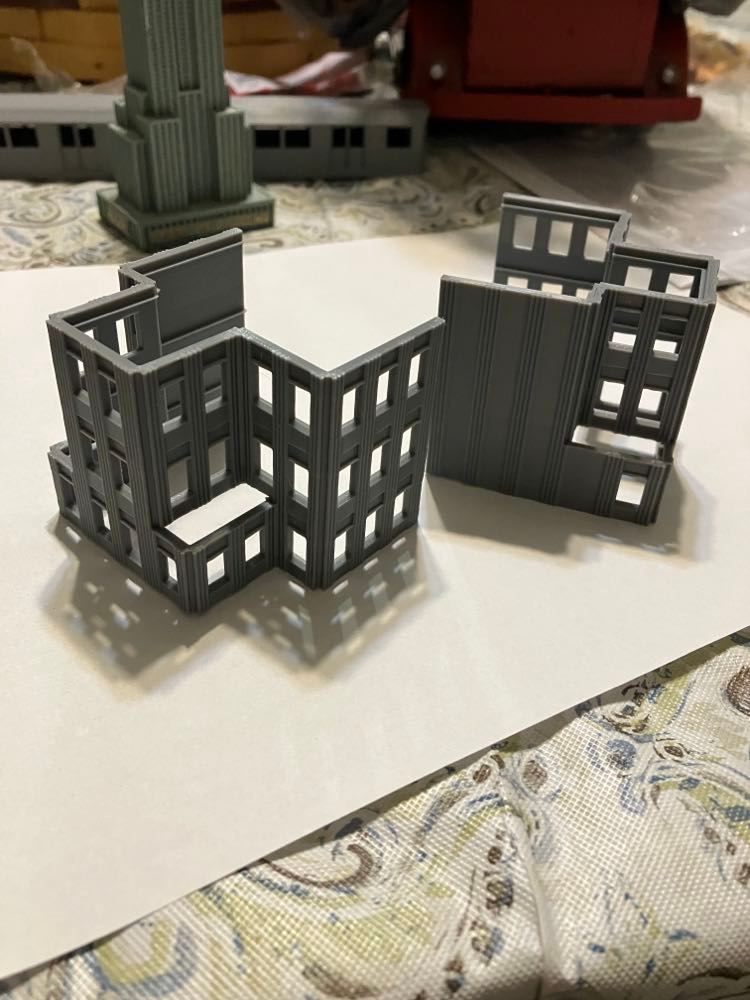
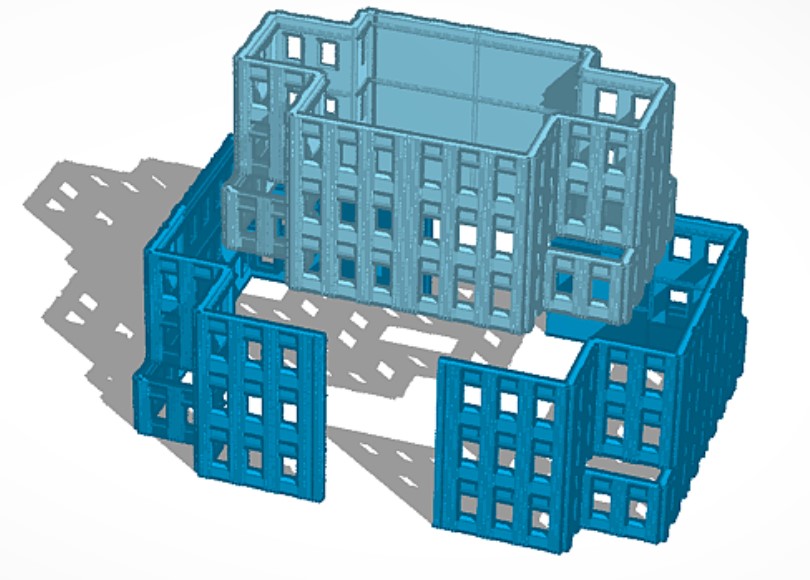
Ho Scale Interior - Note the supports jutting out for putting in your own styrene floors is you want spend the next year of your life super detailing it. There is also thin channeling to run wires for lighting throughout the building.
Here is a test shot in N scale (conserving time and material for all my testing)
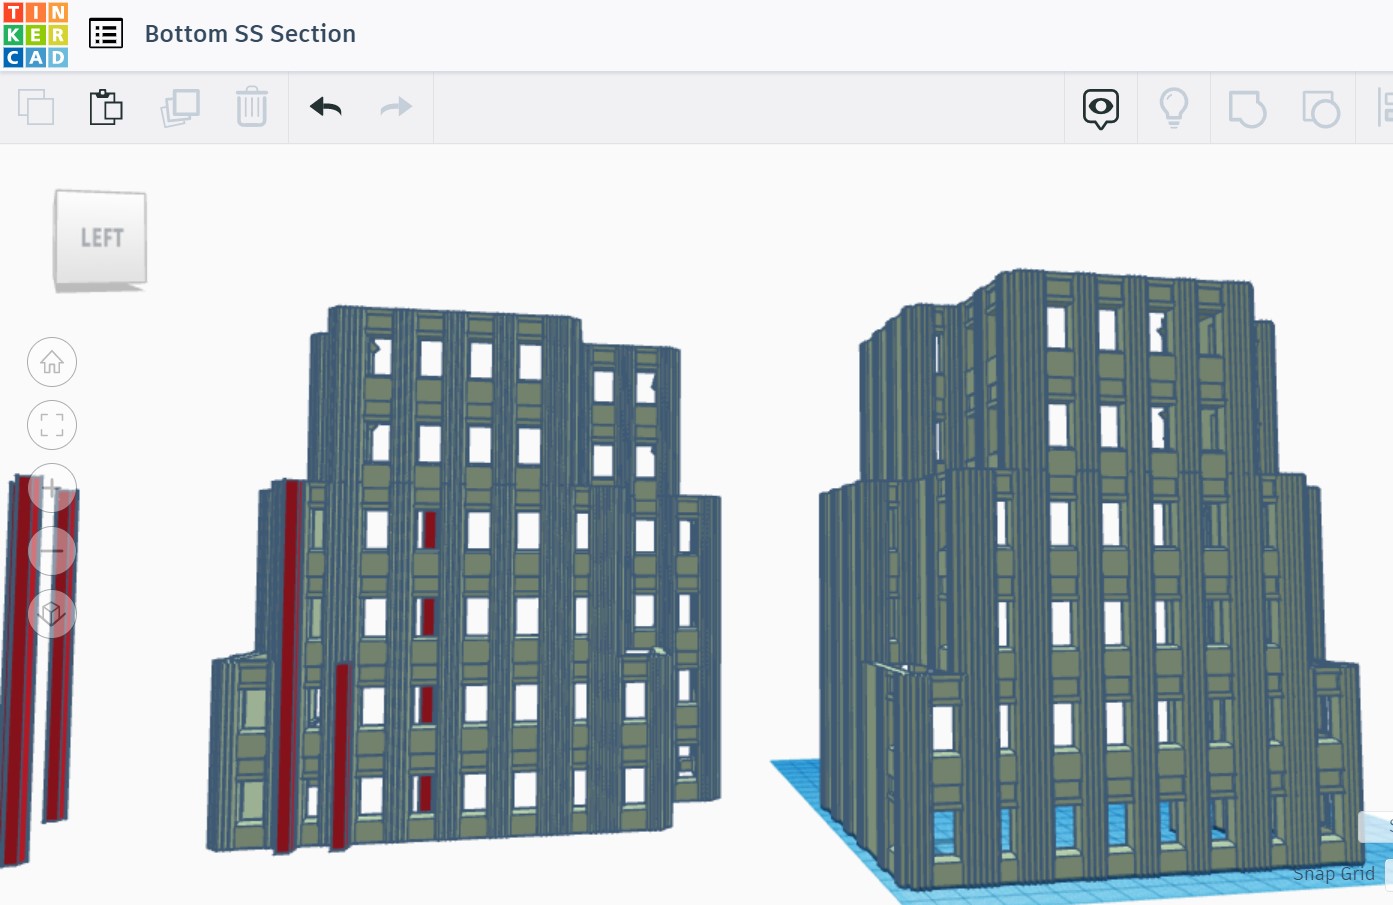
The next couple of screenshots are of my design space. Using tinkercad. It's working for me, I can do everything I want so far.
|
Country:  USA ~
Posts: 1330 ~
Member Since: October 30 2005 ~
Last Visit: March 18 2026 USA ~
Posts: 1330 ~
Member Since: October 30 2005 ~
Last Visit: March 18 2026
|
 Alert Moderator
|
|
|
|
Posted - March 24 2023 : 2:29:44 PM

|
| I remember in the 80s & 90s that Atlas had a few N scale built-up skyscrapers
|
|
Country: USA ~
Posts: 15034 ~
Member Since: February 23 2009 ~
Last Visit: July 29 2026
|
Alert Moderator

|
|
|
|
Posted - March 24 2023 : 6:00:27 PM
|
Not something commonly undertaken. Only Rod Stewart's Chicago skyline comes to mind.
It didn't take me very long to figure out the iconic fluting is of the Empire State Building.
Looks very finished, like a Walther's kit.
|
|
Country: USA ~
Posts: 11686 ~
Member Since: December 09 2013 ~
Last Visit: May 26 2026
|
Alert Moderator
|
|
|
|
Posted - March 26 2023 : 9:12:47 PM
|
Very impressive design work. Certainly something I could get into if only I had more space. 45 stories in HO? I hope you have high ceilings!
Master Of Plasticville
|
|
Country: USA ~
Posts: 455 ~
Member Since: March 17 2015 ~
Last Visit: June 27 2026
|
Alert Moderator
|
|
|
|
Posted - April 03 2023 : 3:18:10 PM

|
Those look great! The window frames came out nice for being so thin. Keep us posted on progress. 
|
Country:  Canada ~
Posts: 3448 ~
Member Since: September 22 2006 ~
Last Visit: April 03 2026 Canada ~
Posts: 3448 ~
Member Since: September 22 2006 ~
Last Visit: April 03 2026
|
Alert Moderator
|
|
|
|
Posted - April 04 2023 : 1:06:40 PM
|
Yes, I was surprised the windows came out so well also. The position you see in the picture is how it was printed, from the ground up. Still going to do seperate windows, with a choice of styles. I forgot to mention the area between the windows which is recessed will fit seperate decorative panels, again with a choice of styles.
I'm about to start really going at this. It took a long time to figure out the do's and don'ts in 3d printing. I also got my final upgrades for the Ender 3 last night. OMG, this glass bed with the ceramic dots is absolutely amazing. Cured a few issues, like warping and adhesion. Even with PETG filament, you just let the bed cool and the print releases itself. I also added a dual gear extruder mechanism, I was getting too much slippage and ruining prints. All dialed in and ready to go.
|
|
Country: USA ~
Posts: 1330 ~
Member Since: October 30 2005 ~
Last Visit: March 18 2026
|
Alert Moderator
|
|
|
|
Posted - April 05 2023 : 03:37:31 AM
|
That's real smart. A little extra effort in the design phase to make things as modular as possible and you'll have a whole city in no time.
Sounds like you're set for the printer! If I was to buy another filament printer, the two upgrades I would do right off the bat (and the only two currently on my Ender 3), is the glass bed you describe, and an aluminum extruder. The glass bed is night and day to the stock bed. The original extruder was working ok for me at first, but the plastic casing that held the idler wheel eventually developed a hairline crack and caused the same slippage you're describing.
One tip, and you might already know this, is to clean the glass bed surface with alcohol periodically. If mine gets a few days worth of dust on it, or I touch it too much with my bare hands, prints stop sticking. People online will argue forever about hair spray, glue sticks, etc....... Before you do any of that, just give the thing a wipe with some methyl hydrate, IPA, or whatever.
|
|
Country: Canada ~
Posts: 3448 ~
Member Since: September 22 2006 ~
Last Visit: April 03 2026
|
Alert Moderator
|
|
|
|
Posted - September 27 2025 : 09:22:17 AM
|
Could you post exactly what is needed to do that.... ie. software, plastic, what of equipment, etc...???
Thanks!
|
|
Country: USA ~
Posts: 668 ~
Member Since: April 28 2010 ~
Last Visit: July 28 2026
|
Alert Moderator
|
|
|
|
Posted - October 18 2025 : 02:46:29 AM
|
quote:Could you post exactly what is needed to do that.... ie. software, plastic, what of equipment, etc...???
Thanks!
Originally posted by AF Kid - September 27 2025 : 09:22:17 AM
|
I don't know NYC's setup, but in general you need:
-a 3D printer,
-a spool of plastic printer filament (PLA is the commonly used plastic),
-and a program known as a 'slicer', which your printer will generally come with or can be downloaded for free. The slicer takes 3D models and slices them into a files which the printer can interpret.
I haven't bought a filament printer in years, but the big brands right now seem to be Creality, Elegoo, and Bambu. Youtube should have loads of tutorials on getting started. Keep in mind, actually creating 3D models for the printer to print is a whole other skill set which requires additional software. You can also download files for free from websites such as thingiverse.com.
|
|
Country: Canada ~
Posts: 3448 ~
Member Since: September 22 2006 ~
Last Visit: April 03 2026
|
Alert Moderator
|
|
|
|
Posted - October 18 2025 : 10:31:44 AM
|
note that using a 3d printer requires a certain mindset, and designing models a similar mindset.
my last printer I bought was a CoreXY Sovol SV08. very fast comparatively, prints fine, but it really seems sloppy compared to my older printers.
|
|
Country: USA ~
Posts: 170 ~
Member Since: October 09 2020 ~
Last Visit: July 17 2026
|
Alert Moderator
|
|


