|
|
 Posted - April 19 2020 : 4:05:34 PM Posted - April 19 2020 : 4:05:34 PM


|
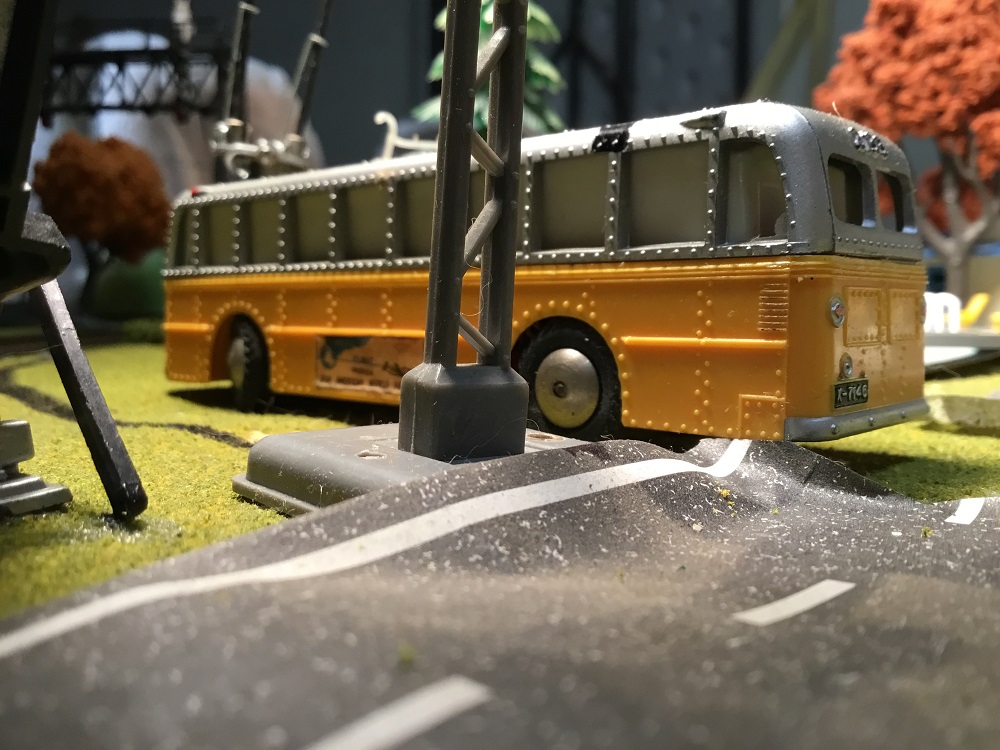
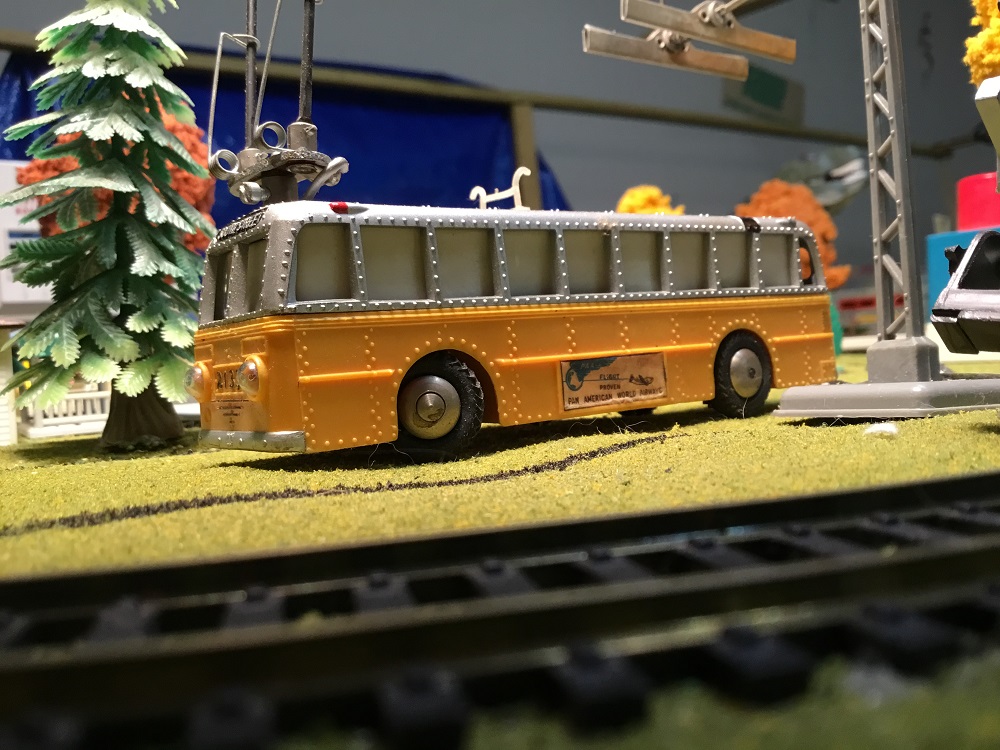
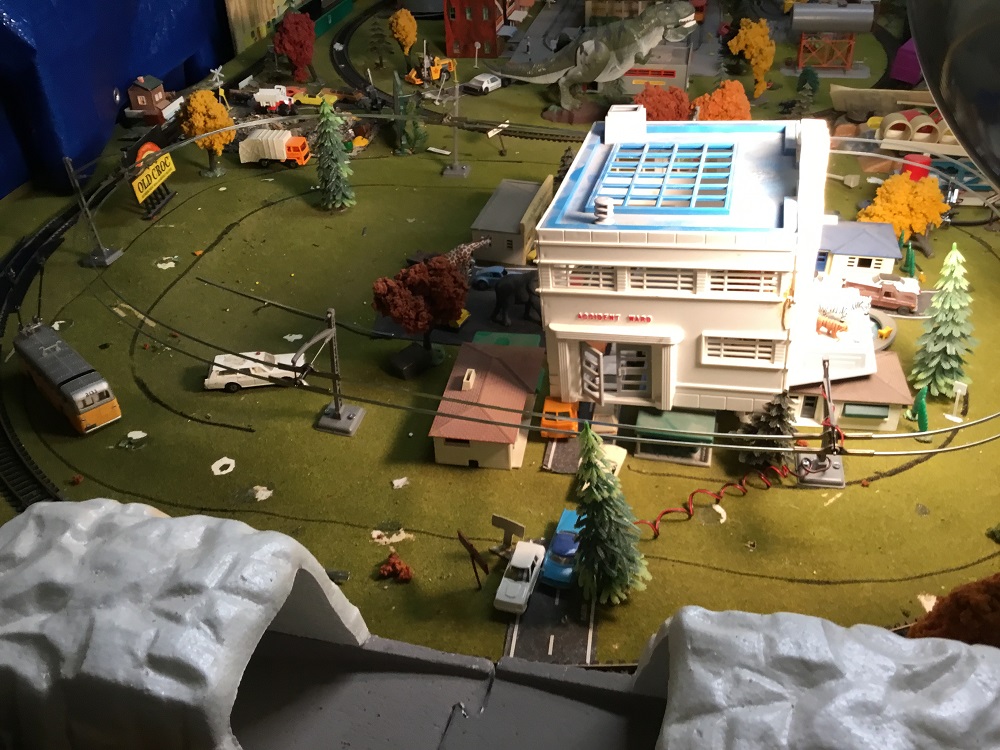
Trolley bus getting ready to be installed in Armodilloville. I'm going to go with a basic indented
oval. Got to find me some 3/8 screws.
|
Country:  USA ~
Posts: 11686 ~
Member Since: December 09 2013 ~
Last Visit: May 26 2026 USA ~
Posts: 11686 ~
Member Since: December 09 2013 ~
Last Visit: May 26 2026
|
 Alert Moderator
|
|
|
|
Posted - April 20 2020 : 5:46:00 PM

|
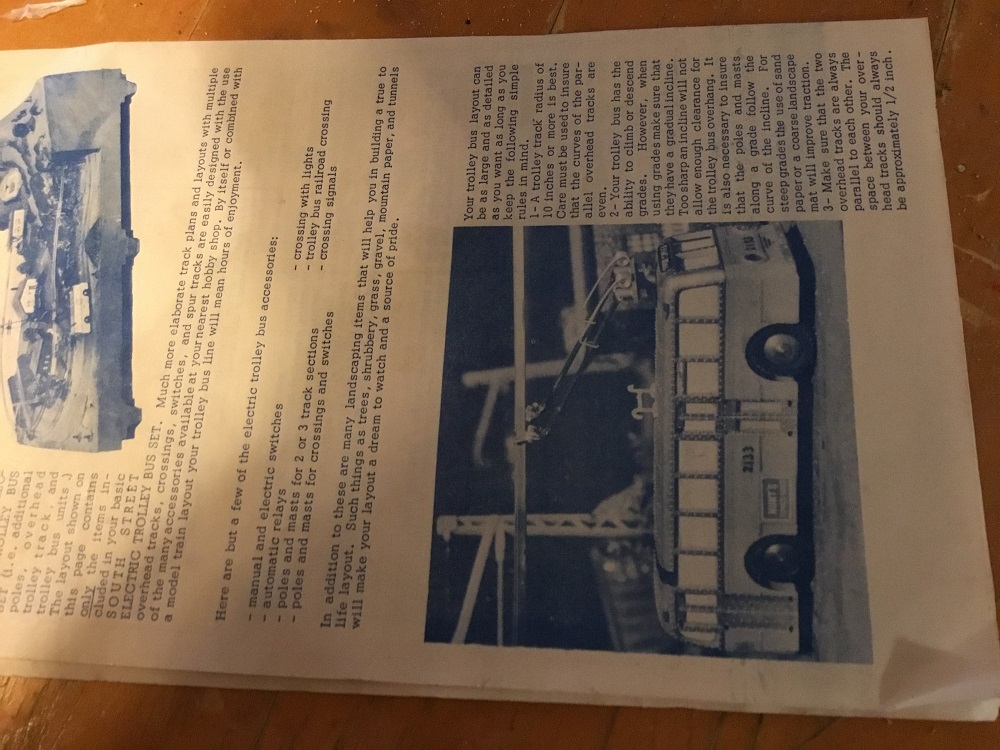
| Very cool, Chops! I've never seen the instruction sheets before.
|
Country:  Canada ~
Posts: 3448 ~
Member Since: September 22 2006 ~
Last Visit: April 03 2026 Canada ~
Posts: 3448 ~
Member Since: September 22 2006 ~
Last Visit: April 03 2026
|
Alert Moderator

|
|
|
|
Posted - April 20 2020 : 8:39:26 PM
|
I found my 3/8 screws, will start screwing tonight! I thought off finishing nails, but surprisingly the heads
were to small. Just as well, just one poorly aimed whack with the track hammer...
Edited by - Chops124 on April 20 2020 8:40:50 PM
|
|
Country: USA ~
Posts: 11686 ~
Member Since: December 09 2013 ~
Last Visit: May 26 2026
|
Alert Moderator
|
|
|
|
Posted - April 21 2020 : 02:38:06 AM
|
Blargh, right screw, a hair short, will need to get some more screws
in the morning. Again, I say. Man is the only creature that invents
problems for himself to solve.
A predecessor of modern man, think it was Homo Erectus, or
"Walking Man" made crude looking hand axe for tens of thousands
of years on the banks of a long extinct African lake. Tens of
thousands of years. Apparently it worked well enough that there
was never any real incentive to add a handle or a stick to it.
Archeology is never without wonder.
|
|
Country: USA ~
Posts: 11686 ~
Member Since: December 09 2013 ~
Last Visit: May 26 2026
|
Alert Moderator
|
|
|
|
Posted - April 22 2020 : 8:12:05 PM
|
Setting up poles: the old plastic is most friable, and I quickly discovered I had to ream out
the holes to accept the #4 1/2 inch screws to prevent cracking. Ouch.

The bigger challenge will to be able to line up the rails to create a consistent 1/2 inch gap. Surprisingly,
they gave about twice as much rail as I could use, and there is some slack where the rails
go into the supports, so should not be overly hard.
Going to stagger another trolley mast to provide some more lateral action. Any ideas for road?
I saw a tool box liner for $20 at Lowes, today, that is basically a rubber sheet. Looked ideal, cut
to shape, but $20?? My first idea was to lay a plaster street, painted black, or tinted, black, but
my thought is the plaster will eventually have ruts.
Probably going to spring on that tool box mat, it is just the right surface and color, and if I can figure
out how to paint straight or curved lines, that would do that trick. Anyone have any ideas about
painting road lines, parking spaces?
Edited by - Chops124 on April 23 2020 10:37:32 AM
|
|
Country: USA ~
Posts: 11686 ~
Member Since: December 09 2013 ~
Last Visit: May 26 2026
|
Alert Moderator
|
|
|
|
Posted - April 22 2020 : 9:40:26 PM
|
This is looking great. I've never seen anything actually operate via electrical pickup from the centenary, I've only heard about it in my marklin catalogs! I'm really interested in seeing the buses go!
I'm assuming you will make a video on it, and speaking of which, I subscribed to your channel awhile back. Dont know if you noticed. 
Jupiter arrived today. He is so much fun!! Such an improvement over the old one!
|
|
Country: USA ~
Posts: 1549 ~
Member Since: October 10 2019 ~
Last Visit: January 04 2024
|
Alert Moderator
|
|
|
|
Posted - April 23 2020 : 12:13:05 AM
|
| Awesome! The New Jupe so much better!
|
|
Country: USA ~
Posts: 11686 ~
Member Since: December 09 2013 ~
Last Visit: May 26 2026
|
Alert Moderator
|
|
|
|
Posted - April 23 2020 : 10:33:53 AM
|
So, wired up the catenary last night, and the bus lurched,
sparked and spluttered, careened forward and derailed.
After 20 minutes of this several things came quite clear:
1. The rails need to be cleaned.
2. the masts need to be perfectly aligned, as do the rails.
3. it will need a smooth roadway.
I had tried to install the masts directly onto the pike, and this
proved awkward in many instances as the reach to the masts
had to be over and under dust cover frame work and back
board. The mast bases are quite fragile, and screwing them
so they would be perfectly vertical impossible when doing so
from a three foot reach.
Think my best bet is to create another layout within a layout,
which is to get a square wood or homasote sheet that will fit
into the existing space of the trackway. Upon the sheet I shall
carefully erect the masts and adjust the tension on the catenary
with greater ease. Once it is up and running, the bus pike can
be reinserted int the vacant lot.

Edited by - Chops124 on April 23 2020 10:38:40 AM
|
|
Country: USA ~
Posts: 11686 ~
Member Since: December 09 2013 ~
Last Visit: May 26 2026
|
Alert Moderator
|
|
|
|
Posted - April 23 2020 : 7:59:10 PM
|
Keep at it Chops! You're already farther ahead than I ever got in that you've made curves and permanently attached the masts. I'd imagine once you get things broken in it will run smoothly. If you're just making a flat road, some thin hardboard from the hardware store would probably be the easiest. Plaster might be fine, maybe give it a top coat of something just to harden it up?
Here's the video I made years ago when I set up my little test track.
|
|
Country: Canada ~
Posts: 3448 ~
Member Since: September 22 2006 ~
Last Visit: April 03 2026
|
Alert Moderator
|
|
|
|
Posted - April 23 2020 : 9:45:23 PM
|
would it be hard to make more wires to extend the length ? ?
|
|
Country: USA ~
Posts: 15029 ~
Member Since: February 23 2009 ~
Last Visit: June 28 2026
|
Alert Moderator
|
|
|
|
Posted - April 23 2020 : 10:06:45 PM
|
| The round-style overhead is just the standard steel wire you see at hobby shops. The flat-stock that Chops' set uses, I'm not sure, but it probably wouldn't be too hard to fabricate.
|
|
Country: Canada ~
Posts: 3448 ~
Member Since: September 22 2006 ~
Last Visit: April 03 2026
|
Alert Moderator
|
|
|
|
Posted - April 23 2020 : 10:59:14 PM
|
quote:would it be hard to make more wires to extend the length?
Originally posted by microbusss - April 23 2020 : 9:45:23 PM
|
Not really. It seems like it functions in the same way as regular H0 pantograph wire.
-Steve
"A lot of modellers out there who go to these train shows see broken HO stuff and go, 'This is useless' when, in reality, they can still be used for modeling whether it's as a prop on your layout or a cool project to make something old new again."
|
|
Country: USA ~
Posts: 3533 ~
Member Since: February 17 2014 ~
Last Visit: January 11 2023
|
Alert Moderator
|
|
|
|
Posted - April 23 2020 : 11:44:11 PM
|
Well, from bad to worse. After an initial test run, the cross bar
at the base of the anttenae developed a hairline crack, so I
applied a drop of super glue to hopefully prevent it from worsening.
Then the motor stopped working, that is to say current applied
directly to the attennae does nothing, which means I shall have
to pop the shell and find where and if the current break is.
Not looking forward to that, as when things start getting
disassembled, bad luck often follows.
The overhead "wire" is a very bendable strap rail, and for
whatever reason the set came with about double the
amount I can use with the masts being about 6 or so
inches apart. The problem in extending the overhead
would be making up masts, not so difficult if one has
a little skill, which I don't.
I got a square of thin plywood, will paint it black, for
the surface of the city the bus serves, and to mount
the masts, hopefully with greater straightness, assuming
I can find the loose link to the motor.
Another curious feature is that front wheels turn the
opposite way of the catenary. If the catenary bears
right the wheels go left, and vice versa. Also, the radius
is such that the bus is likely to ram the mast around a
curve, so having this set up on a piece of wood will
help adjusting things.
Cheez, loved your video, and the sound track was nice, too.
A good sound track always helps a video. It was educational
to see that in a straight line that the bus had a little lateral
wobble in play.
Lastly, your Einheim bus and my "South Street" bus appear
just about identical, except for the unusual trailer. So one
guesses that the parentage is the same.
Not so lastly, linked to this video, and it appears that even the best
modellors have to struggle a bit to get it rolling, and their overhead
appears to be as close to perfect as could be:
https://www.youtube.com/watch?v=NlwyI-mtDkY
Going to hang it up tonight, try it with a clear head and
fresh start before I start taking things apart. I've been
on a "virus vacation" for the past week, and discovered that
not working for a living, and getting paid a retainer, is a
lot nicer than actually having to work. That all ends
Monday, they found something for me to do.
Edited by - Chops124 on April 23 2020 11:53:29 PM
|
|
Country: USA ~
Posts: 11686 ~
Member Since: December 09 2013 ~
Last Visit: May 26 2026
|
Alert Moderator
|
|
|
|
Posted - April 24 2020 : 02:25:26 AM
|
Thinking about where things stand: I've gotta get this attenae righ,
but I'm already falling down. That drop of super glue to stablize the
cross beam failed to stabilize anything and some micro drip trickled
into the hinge of the pole, freezing in from vertical travel. The pole has
to bounce to be able to accomodate the caternary.
So, Plan B will to see if I dissolve the glue with a tiny drop of acetone
and find some other means to brace the cracked cross member. Only'
if all that works then I will have to unbotton it and see if I can find the
broken solder joint.
This is amateur hour for me. If anyone has strong repair skills, PM me,
I will assume full responsiblity. This stuff is quite old and a high degree
of confidence in its repair is no warranted. All one can do it try, no guarantee at all.
|
|
Country: USA ~
Posts: 11686 ~
Member Since: December 09 2013 ~
Last Visit: May 26 2026
|
Alert Moderator
|
|
|
|
Posted - April 24 2020 : 09:17:44 AM
|
Chops, if the motor stopped running about the time the glue got in the trolley pole hinge, it may be that the rest of the circuit is okay. Perhaps the glue is acting as an insulator and once that's removed, the whole thing will work again.
Carpe Manana!
|
|
Country: USA ~
Posts: 2417 ~
Member Since: September 17 2013 ~
Last Visit: June 29 2026
|
Alert Moderator
|
|
|
|
Posted - April 24 2020 : 1:38:08 PM
|
Well, the hinge is riveted to a underlying metal base plate, so I am
thinking the glue is not that issue. Actually stopped running before
I found the cracked base plate, too.
I think I might be really screwed now, the frozen trolley arm
is the part that got glued good, the base plate, not at all. Going
to see if I can reduce the glue with some acetone. If that doesn't
work I will have to bag this project. Win some, lose some.
|
|
Country: USA ~
Posts: 11686 ~
Member Since: December 09 2013 ~
Last Visit: May 26 2026
|
Alert Moderator
|
|
|
|
Posted - April 24 2020 : 3:04:41 PM
|
| Chops, if your bus is anything like mine (which it appears to be), that plastic base that the trolley poles sit on will be tricky to fix/replace, mostly because the poles appear to be riveted. Not impossible, but tricky. Maybe take a look at ebay and see if you can get a spare bus? Loose buses seem to sell for $30-$40.
|
|
Country: Canada ~
Posts: 3448 ~
Member Since: September 22 2006 ~
Last Visit: April 03 2026
|
Alert Moderator
|
|
|
|
Posted - April 24 2020 : 5:05:13 PM
|
Doh! That whole thing really went BUSt?
Pun intended
That's a really unique set and I hope you get it working again!
|
|
Country: USA ~
Posts: 1549 ~
Member Since: October 10 2019 ~
Last Visit: January 04 2024
|
Alert Moderator
|
|
|
|
Posted - April 25 2020 : 5:52:08 PM
|
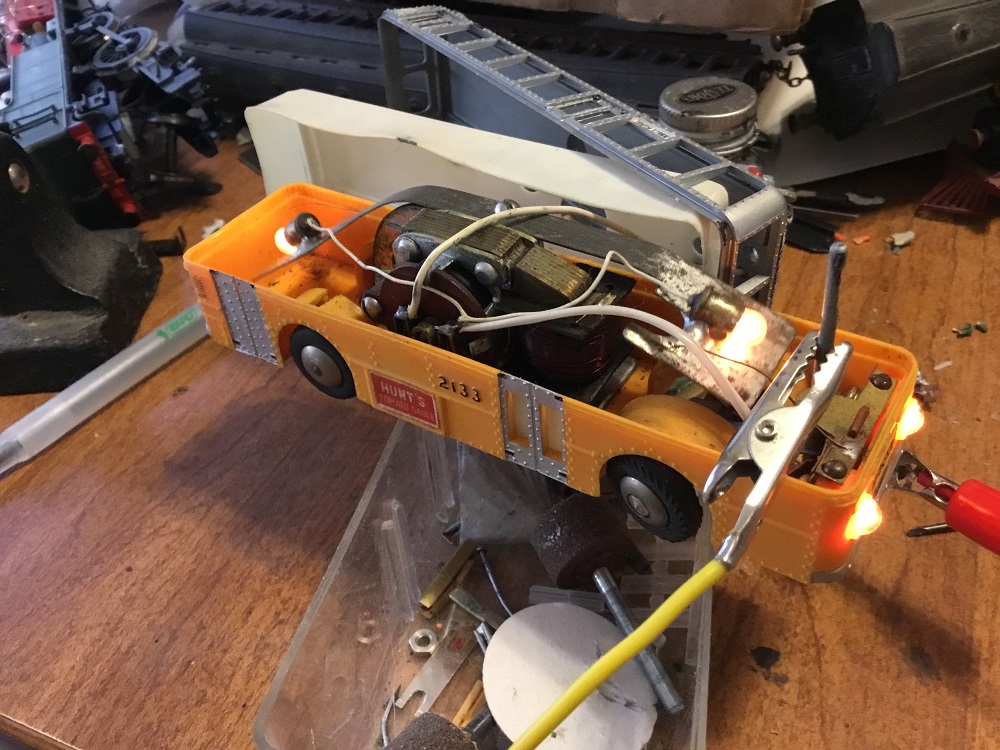
Well, opened it up, with some trepidation that I'd never get it back together again, fortunately
very simple.
Discovered that the ground is fed through the steering rod, and this accounts for the
skippy electrical current in general, as there are a few contact points from the rod to
the ground that contacts the motor. Thus, any oxidization or looseness breaks the
circuit continuity. I'll try to clean it up as I go, very carefully.
The rod also has a set screw, so that the attenae can be adjusted for steering, this may come
useful as I go along with the overhead rails.
The biggest issue by far is that the damn super glue walked away from where I was trying to bond
it and has glued the spring that creates the upward tension on the trolley pole. %@$#%#%$@#%
Major lesson learned is that even though this is pretty close to NOS, and I paid for that privilege,
is that metal oxidizes and plastic becomes very brittle.
To that end, I browsed the Faller Car System, which is very German, very precise, high quality,
and really not a whole lot more than this vintage set. Thing is, while I admire German model
technology (don't hear much about split gears or other malfunctions for starters), I have no
particular connection to Germany so no particular feeling for it. Also, the vehicles Faller is doing
are all Germanic, though I did think I saw a modern Peterbuilt.
I'm going out in search of acetone right now, hopefully I can reinforce the plastic base plate and
restore the spring. If all that goes to plan, I will construct a thin wooden base plate to mount the
masts. I thought this was something that could just be thrown down like so much EZ track: WRONG.
Cheez's video links very useful in getting me to see what to expect.
|
|
Country: USA ~
Posts: 11686 ~
Member Since: December 09 2013 ~
Last Visit: May 26 2026
|
Alert Moderator
|
|
|
|
Posted - April 25 2020 : 10:37:00 PM
|
Update: very gradually the acetone is loosening up microblobs of
super glue that I can prise off with an exacto blade. I immersed
it in the acetone as while it eats the paint, the plastic does not
appear affected. A little range of motion has been restored to the
trolley arm, but has a long way to go. I cannot extract the tiny,
tiny king pin with forceps. Looks as if I try too hard it will just break
away from metal fatigue.
|
|
Country: USA ~
Posts: 11686 ~
Member Since: December 09 2013 ~
Last Visit: May 26 2026
|
Alert Moderator
|
|
|
|
Posted - April 26 2020 : 12:14:50 AM
|
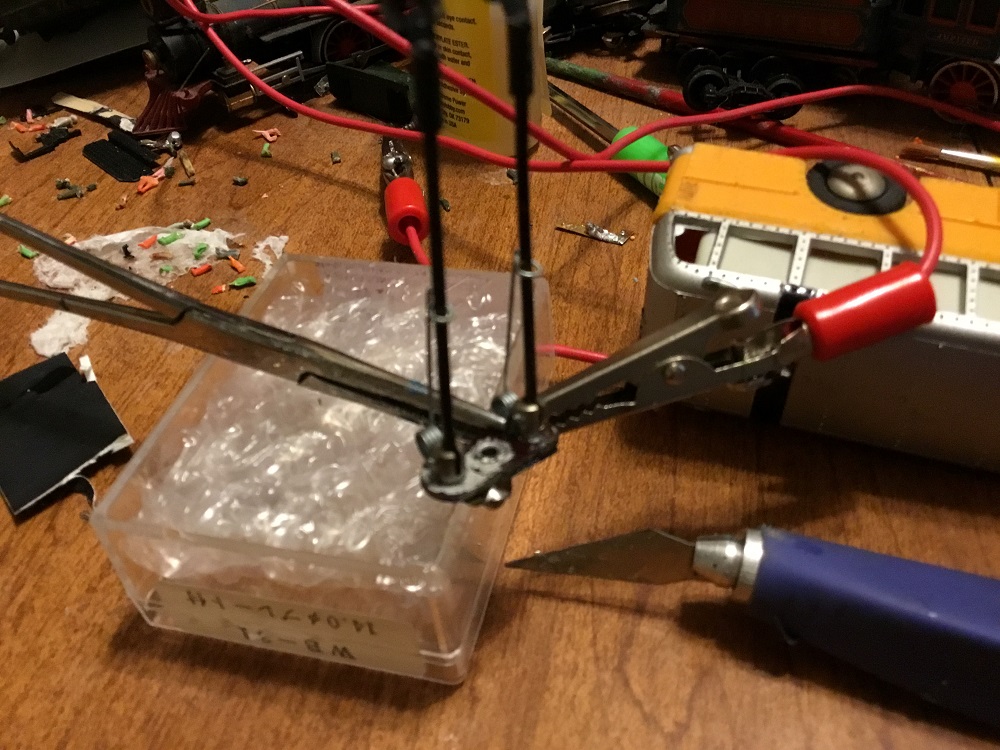
PHEW, Batman. Finally able to trick out the last tiny gob of
superglue from the hinge. I got the trolley arm to swing
freely now. No damage to the plastic. After letting it dry
overnight, I am going to glue a tiny splint to the plastic
base with some alligator clips. Hopefully, this will firm it
up. There is hope yet.
|
|
Country: USA ~
Posts: 11686 ~
Member Since: December 09 2013 ~
Last Visit: May 26 2026
|
Alert Moderator
|
|
|
|
Posted - April 26 2020 : 01:45:31 AM
|
Having successfully deglued the hinge, I am adding tiny splints
to the base plate to stabilize it. That's when I realized there
is an opportunity to firm up the base plate by adding a drop
of solder to the rivet that clamps to the metal subplate.
|
|
Country: USA ~
Posts: 11686 ~
Member Since: December 09 2013 ~
Last Visit: May 26 2026
|
Alert Moderator
|
|
|
|
Posted - April 26 2020 : 09:15:33 AM
|
Aha! Quick thinking with the acetone. I guess you'll need to touch up some paint.
Those headlights seem to work really good! It's always nice when the headlights light. Something I was excited about on the new Jupiter. My old one flickered on and off! 
|
|
Country: USA ~
Posts: 1549 ~
Member Since: October 10 2019 ~
Last Visit: January 04 2024
|
Alert Moderator
|
|
|
|
Posted - April 27 2020 : 2:09:35 PM
|
| Chops, I'm glad to see you got the bus working again! Nice job!
|
|
Country: Canada ~
Posts: 3448 ~
Member Since: September 22 2006 ~
Last Visit: April 03 2026
|
Alert Moderator
|
|
|
|
Posted - April 27 2020 : 7:30:22 PM
|
Thanks, Cheez! Your video links actually helped me get the right
perspective on this unique vintage toy. I am slooowly going to
be working on making a firm plywood insert foundation, about
2 x 3 feet should do it, to carefully mount the masts with as
much precision as I can muster.
|
|
Country: USA ~
Posts: 11686 ~
Member Since: December 09 2013 ~
Last Visit: May 26 2026
|
Alert Moderator
|
|
|
|
Posted - April 28 2020 : 9:37:48 PM
|
The trick seems to be that the layout needs to be built around the bus, not the other way around. Your plywood base should be a good start. I never actually attempted curves so you're already beyond any point I ever got to. 
I went and pulled my old Eheim set out of storage last week. The first thing I found was a paper bitcoin wallet I'd forgotten about hidden in the box. Alas the wallet contained no value (imagine opening up an old toy set and finding $7000? ). After looking at the steering mechanism on the Eheim bus for a few minutes, it got some gears turning in my head. Using the trolley bus mechanism as a reference, I designed and 3D printed a functional steering system that I plan to mount under one of my own bus models, eventually creating a poor man's version of the Faller car system.

https://i.imgur.com/kfr1y2O.mp4
|
|
Country: Canada ~
Posts: 3448 ~
Member Since: September 22 2006 ~
Last Visit: April 03 2026
|
Alert Moderator
|
|
|
|
Posted - April 29 2020 : 08:43:41 AM
|
Looks and functions great!
But can the wheels turn?
|
|
Country: USA ~
Posts: 1549 ~
Member Since: October 10 2019 ~
Last Visit: January 04 2024
|
Alert Moderator
|
|
|
|
Posted - April 29 2020 : 3:28:19 PM
|
That’s taking it to a whole new level. Please keep us posted.
Yes, that’s what dawned on me: build the layout around the
bus! Why did the value on the wallet come to zero? Already
cashed out?
|
|
Country: USA ~
Posts: 11686 ~
Member Since: December 09 2013 ~
Last Visit: May 26 2026
|
Alert Moderator
|
|
|
|
Posted - April 29 2020 : 6:31:29 PM
|
The wheels spin, albeit a little wobbly. The final assembly will likely be built using the wheels and axles off a Hotwheels or similar. I altered the 3D model to have thicker steering knuckles and a tighter hold on the guide pin, which should firm up the assembly and remove any lash.
Chops, I'll keep you updated. I have a low-rpm motor ready to drop in. A set of gears has been ordered, but Amazon is estimating delivery in three weeks. As for the wallet, a friend generated me a number of BTC wallets several years ago, but only a couple ever had any value added to them. This wasn't one of them... 
|
|
Country: Canada ~
Posts: 3448 ~
Member Since: September 22 2006 ~
Last Visit: April 03 2026
|
Alert Moderator
|
|
|
|
Posted - May 03 2020 : 03:26:20 AM
|

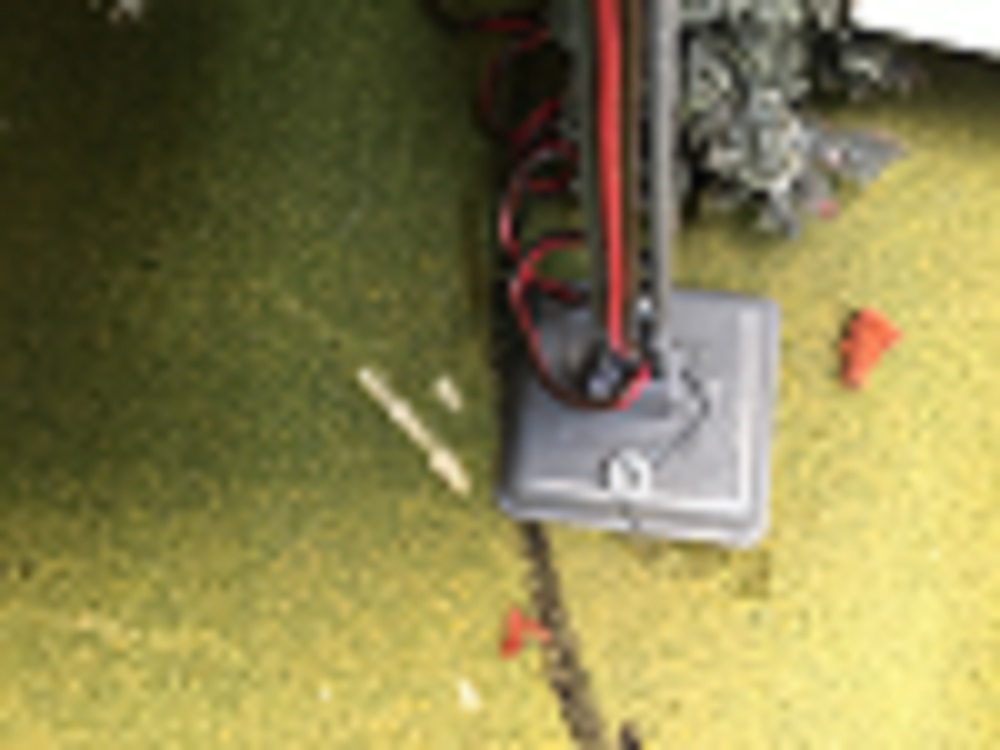
Initial feel of the insertable bus layout. Going to work on the masts until the bus tracks and runs
reliably. The work on some kind of road surface, maybe just a black over coat of paint with the
grass worked in to form a perimeter.
|
|
Country: USA ~
Posts: 11686 ~
Member Since: December 09 2013 ~
Last Visit: May 26 2026
|
Alert Moderator
|
|