|
|
 Posted - January 26 2017 : 10:34:34 PM Posted - January 26 2017 : 10:34:34 PM


|
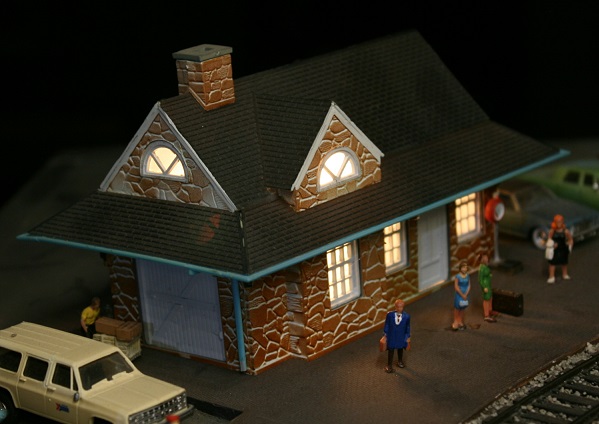
Last night I was looking for a quick layout project that I could complete in one evening when my attention turned to my Tyco "Lighted" Passenger Station...
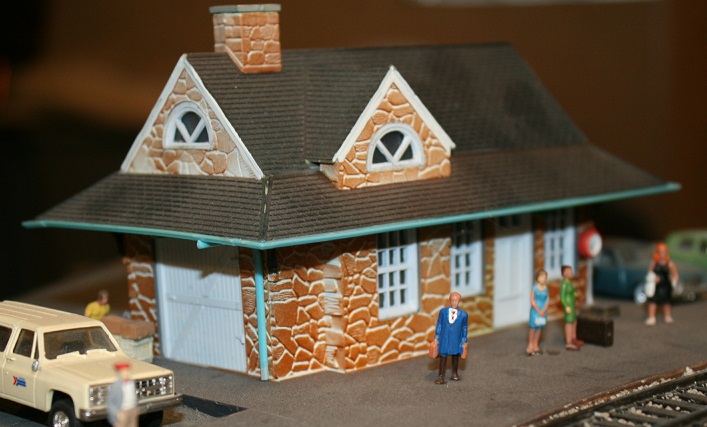
Although I had installed the little depot on my layout a while ago I had never gotten around to hooking up its interior light to my power supply. Correcting this situation I thought would be a perfect one evening project!
There was one problem though. Hard wiring multiple accessories into a single power supply can make trouble shooting future electrical problems difficult. As a result, I prefer to hook up my electrical accessories so that I can turn them on and off individually. This meant that I needed to scare up an on/off switch.
The problem was that I couldn't find any on/off switches in my supply bins that would work for my application.
I wanted a component that could be attached to the underside of the layout without needing any kind of control panel housing. This ruled out all the toggle switches of various sizes that I had available.
One possibility I had on hand was an old Atlas "Selector". The Atlas "Selector" is a ready made electric component designed for controlling electrical track blocks for two cab operation on standard DC layouts. Each Atlas "Selector" has four Single Pole/ Double Throw switches built into a thin profile plastic housing that can be screwed directly to the face of a control panel or to the side of a layout's bench work.
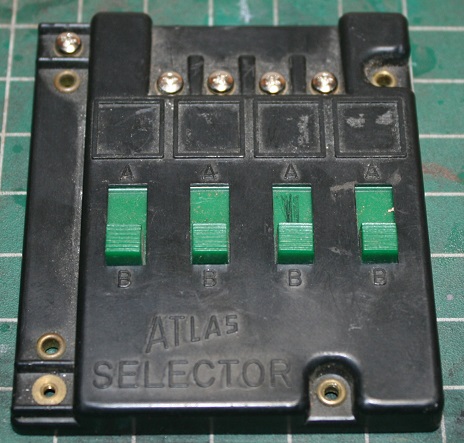
However, while I liked the simplicity of the Selector's installation and its thin profile, the idea of using a fairly large component capable of controlling four circuits as an on/off switch for a single accessory was pure over kill. What I needed was a component that could be mounted to the underside of the layout just like the "Selector" but with only one switch. Something like a Turnout Control Box....
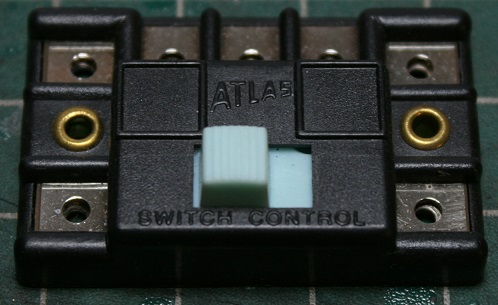
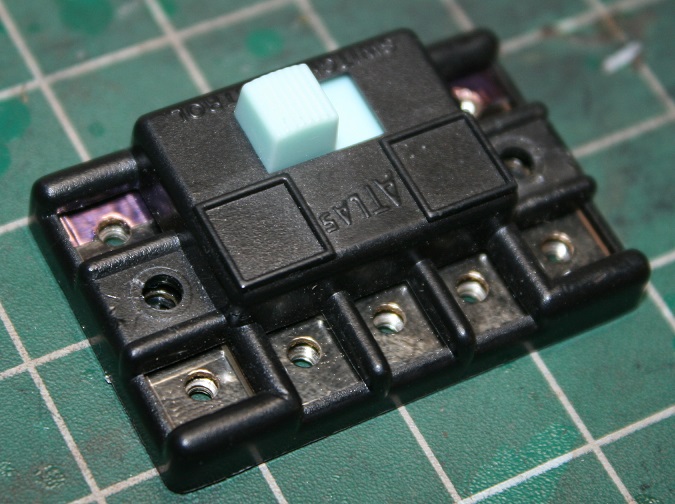
Just about every HO scale model railroader has had experience with this nearly universal component. Tyco, AHM, Bachmann, Lifelike, and Atlas have used this basic component design to provide a simple and relatively fool proof system that enables novice model railroaders to hook up and operate twin solenoid switch machines while reducing the risk of accidentally burning out the coils.
The catch with using a Turnout Control Box as an on/off switch is that they are primarily designed to be a "normally open" push button control. By design you can't set a turnout control box to allow electrical current to continuously pass through like a regular on/off switch.
However, it is a relatively easy to modify a Turnout Control Box so that it functions as a single pole double throw slide switch. Here is how I modified mine....
1. Remove the cover plate, to do this use a drill bit to ream out the two rivets on the bottom side of the component....
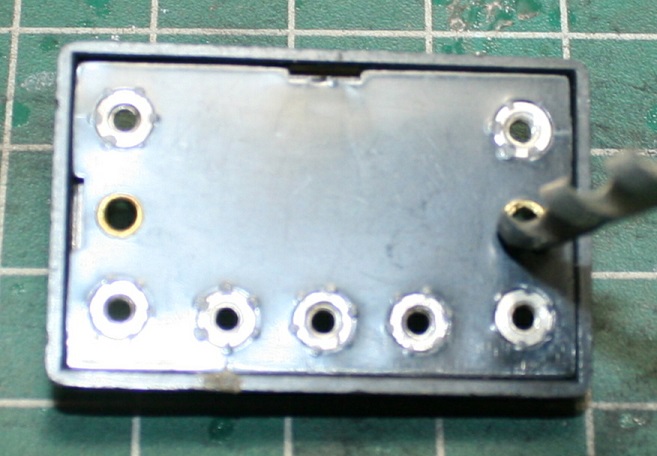
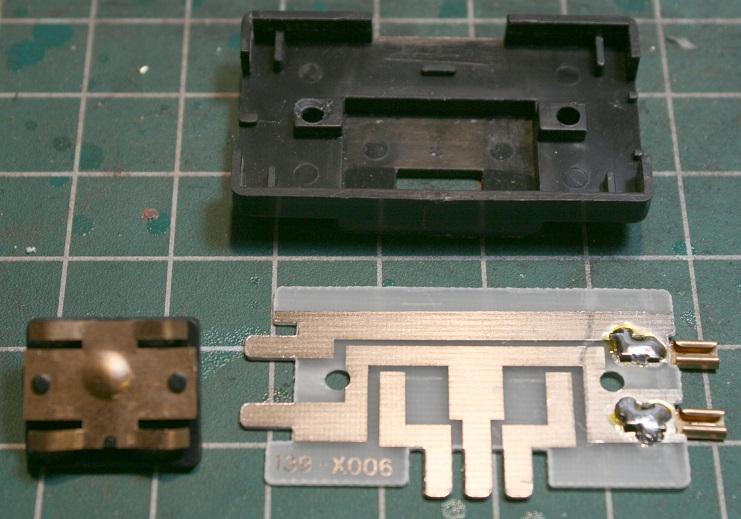
2. With the rivets removed gently pry the cover off the control box....
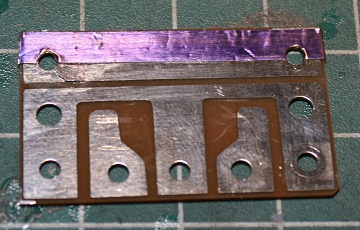
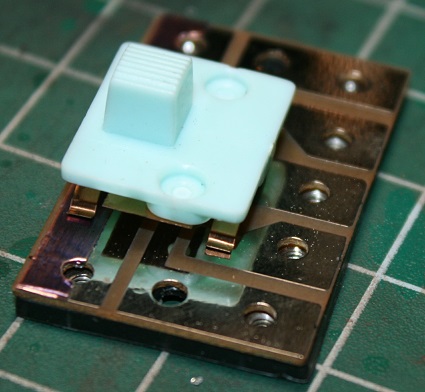
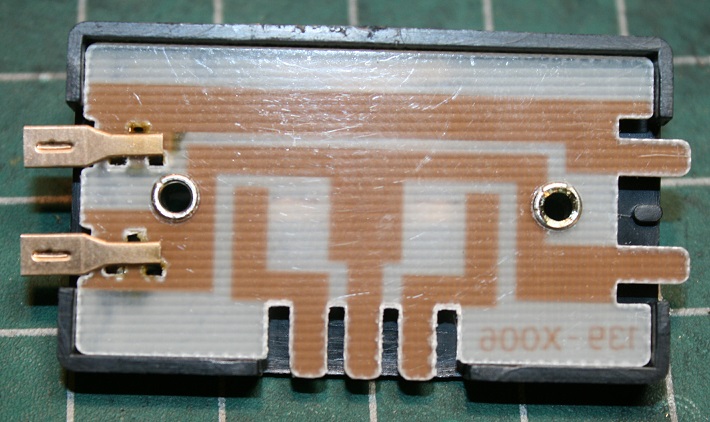
3. With the Control box disassembled, the simple genius of this devise is revealed. Notice how the sliding switch resembles a tiny "table" with four "legs" made of phosphor bronze....
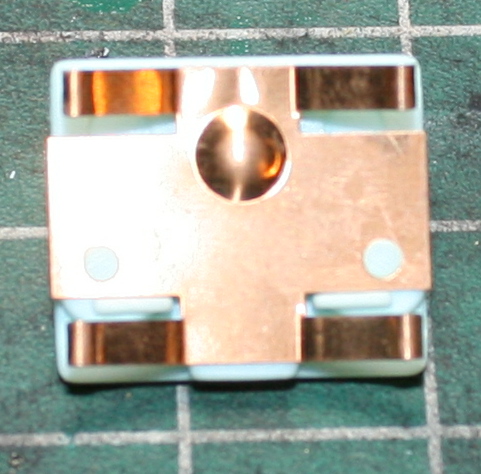
Two of legs of the sliding switch "table" are always on the insulated surface of the circuit board and hence serve only as springs. The other two legs of the "table" do come into contact with the electric circuit but not at the same time. The "table" itself straddles the energized or "Hot" circuit on the circuit board creating a "Normally Open" circuit. When the sliding switch is pressed, the bottom of the "table" is squished down on top of the energized portion of the circuit board creating a "closed circuit" allowing electricity to flow through the "table" down one of the "legs" then out of the control box to energize a solenoid of a switch machine.
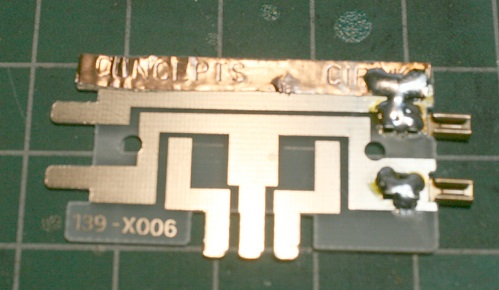
4. To modify a Turnout Control Box into an on/off switch it is necessary to disable the "Normally Open" feature. This is done by modifying the circuit board so that the the "table" is always energized. I did this by adding a strip of electric tape to the circuit board so that the two legs of the "table" that would otherwise always be insulated now stand directly on the energized circuit...
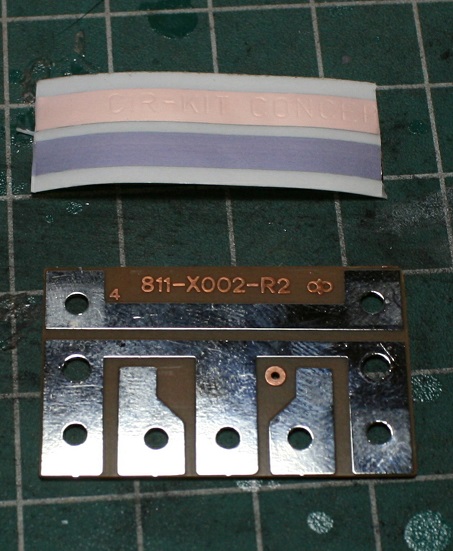
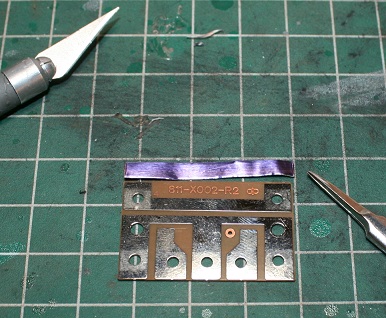
At this point the Turnout Control Box is now a Single Pole Double Throw (SPDT) slide switch.
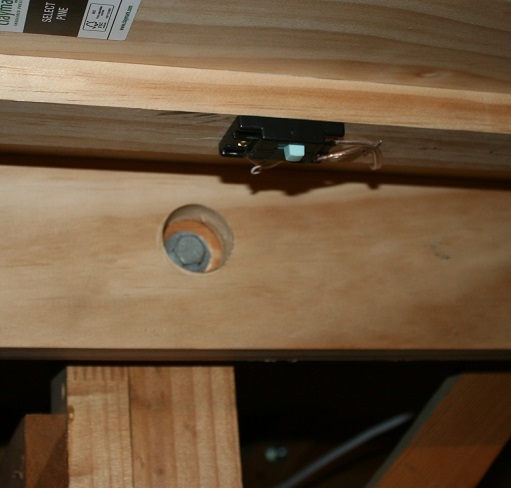
5. All that remains to be done now is to reassemble the control box. I didn't bother replacing the rivets, the screws that fasten the control box to the layout will hold the whole assembly together...
6. This is how I wired my modified switch to my accessory. Note that the common wire does not have to pass through the Control Box, but by wiring the accessory in this manner it makes it easier to disconnect the depot's wiring if I need remove the structure from the layout...
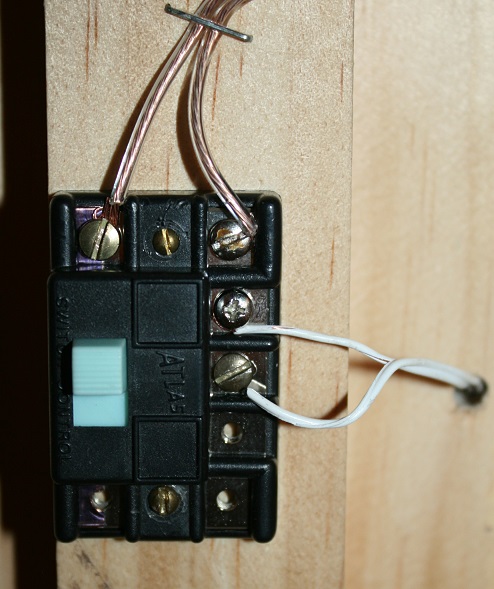
That's it, a simple on/off switch that is easy to install made from a common component that is easy to come by!
Proudly keeping Tyco Pluggers out of landfills since 2016
Edited by - Srenchin on January 27 2017 10:36:58 PM
|
Country:  USA ~
Posts: 821 ~
Member Since: December 26 2009 ~
Last Visit: March 28 2026 USA ~
Posts: 821 ~
Member Since: December 26 2009 ~
Last Visit: March 28 2026
|
 Alert Moderator
|
|
|
|
Posted - January 27 2017 : 12:26:04 AM
|
| Nice photo story Scott. And that building looks great illuminated.
|
|
Country: USA ~
Posts: 2087 ~
Member Since: March 16 2013 ~
Last Visit: July 05 2018
|
Alert Moderator

|
|
|
|
Posted - January 27 2017 : 08:36:19 AM
|
wouldn't a toggle switch of been easier? 
but still this is a neat idea if you want to do a day or night scenes 
where did you get the Amtrak suburban?
|
|
Country: USA ~
Posts: 15029 ~
Member Since: February 23 2009 ~
Last Visit: June 21 2026
|
Alert Moderator
|
|
|
|
Posted - January 27 2017 : 10:10:58 PM
|
quote:wouldn't a toggle switch of been easier?
but still this is a neat idea if you want to do a day or night scenes
where did you get the Amtrak suburban?
Originally posted by microbusss - January 27 2017 : 08:36:19 AM
|
No, a toggle switch would not have been easier. As I said in my original message, "I wanted a component that could be attached to the underside of the layout without needing any kind of control panel housing. This ruled out all the toggle switches of various sizes that I had available".
As for the Amtrak suburban, I purchased it second hand from a local hobby shop. I don't know who made it because the original packaging was missing. My guess is that it was made by Trident.
Proudly keeping Tyco Pluggers out of landfills since 2016
Edited by - Srenchin on January 28 2017 11:52:45 AM
|
|
Country: USA ~
Posts: 821 ~
Member Since: December 26 2009 ~
Last Visit: March 28 2026
|
Alert Moderator
|
|
|
|
Posted - January 28 2017 : 7:04:24 PM
|
After completing my original post on this subject, I wondered if other versions of the standard Switch Control Box could be as easily modified into SPDT slide switch as the modern Atlas version.
So today I dropped by my local hobby shop to pick up some Switch Control Boxes made by other manufactures to try my hand at converting them into SPDT switches. This is what I found....
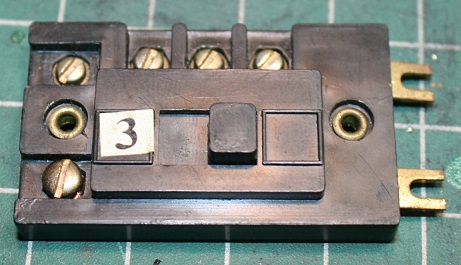
1. TYCO Switch Control Box
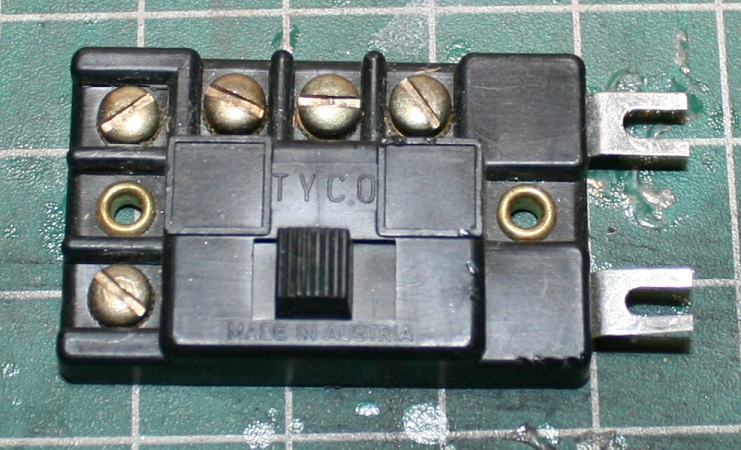
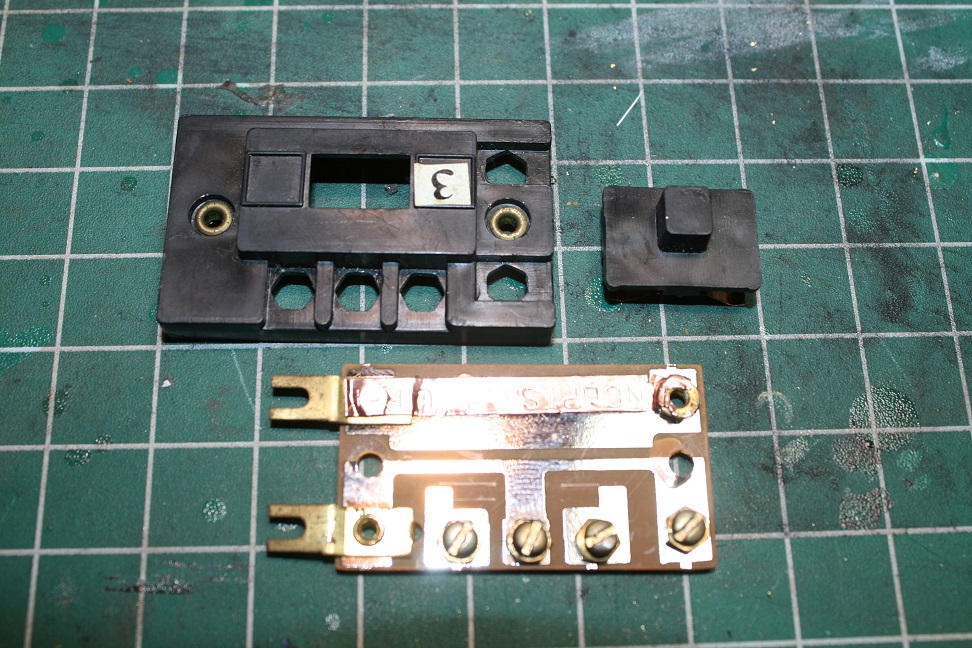
The Tyco version proved to be a little difficult to dismantle, drilling the rivet out as described with the Atlas version didn't work (the rivets would spin with the drill) so I ground them down with my Dremel tool...

The internal workings of the Tyco control box are very similar to the Atlas version...

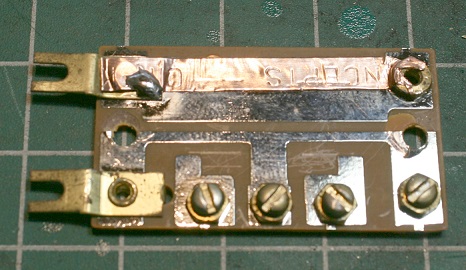
Unlike the Atlas conversion which did not require any soldiering, I found that he Tyco conversion needed a drop of solder to electrically connect the electric tape to the original hot circuit...
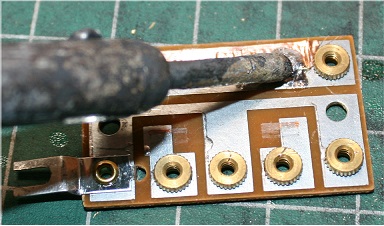
At this point you just reassemble the switch box and your conversion is complete.
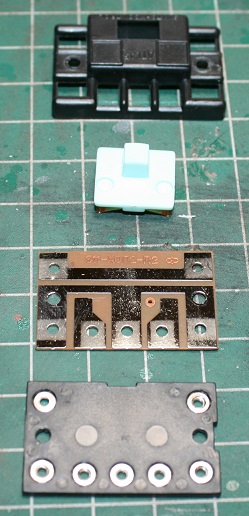
2. Model Power, AHM, and Lifelike Switch Control Box...
This version of Switch Control Box is a little larger than the Tyco and Atlas examples but the modifications are the same. Disassemble the control box box and add the electrical tape...
Then make a solder connection between the tape and the circuit board...
Reassemble the control box and the conversion is complete.
3. Bachmann Switch Control Box...
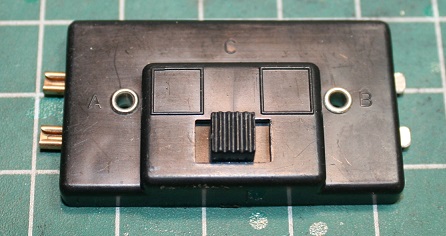
The Bachmann Switch Control Box was the most difficult to convert to a SPDT slide switch. For starters, the Bachmann design dispensed with screw connections in favor of male/female plugs. To adapt this control Box for use as an accessory control will require soldering hook up wire to the circuit board.  I also found that the sliding switch floats so loosely inside the housing that the contacts don't reliably conduct electricity. (This may sound like a design flaw, but this component is supposed to be a normally open push button control so the design still works as intended). I also found that the sliding switch floats so loosely inside the housing that the contacts don't reliably conduct electricity. (This may sound like a design flaw, but this component is supposed to be a normally open push button control so the design still works as intended).
If you choose to try to modify a Bachmann Switch Control Box, remove the rivets and disassemble the mechanism....
Add the electrical tape and made a solder connection...
Then, to tighten up slop between the sliding switch and circuit board so that the electrical contacts will make positive connections, add strips of styrene to the top of the sliding switch.
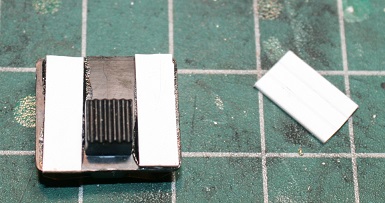
The styrene strips serve as spacers that will press the sliding switch down onto the circuit board creating positve electrical contact when the housing is fastened back over the mechanism. Reassemble the mechanism and test the the circuit. You may have to add several thin styrene strips to get enough slop out of the mechanism to get the switch to work properly.
Proudly keeping Tyco Pluggers out of landfills since 2016
Edited by - Srenchin on January 28 2017 9:24:41 PM
|
|
Country: USA ~
Posts: 821 ~
Member Since: December 26 2009 ~
Last Visit: March 28 2026
|
Alert Moderator
|
|

