|
|
 Posted - December 09 2015 : 1:59:21 PM Posted - December 09 2015 : 1:59:21 PM


|
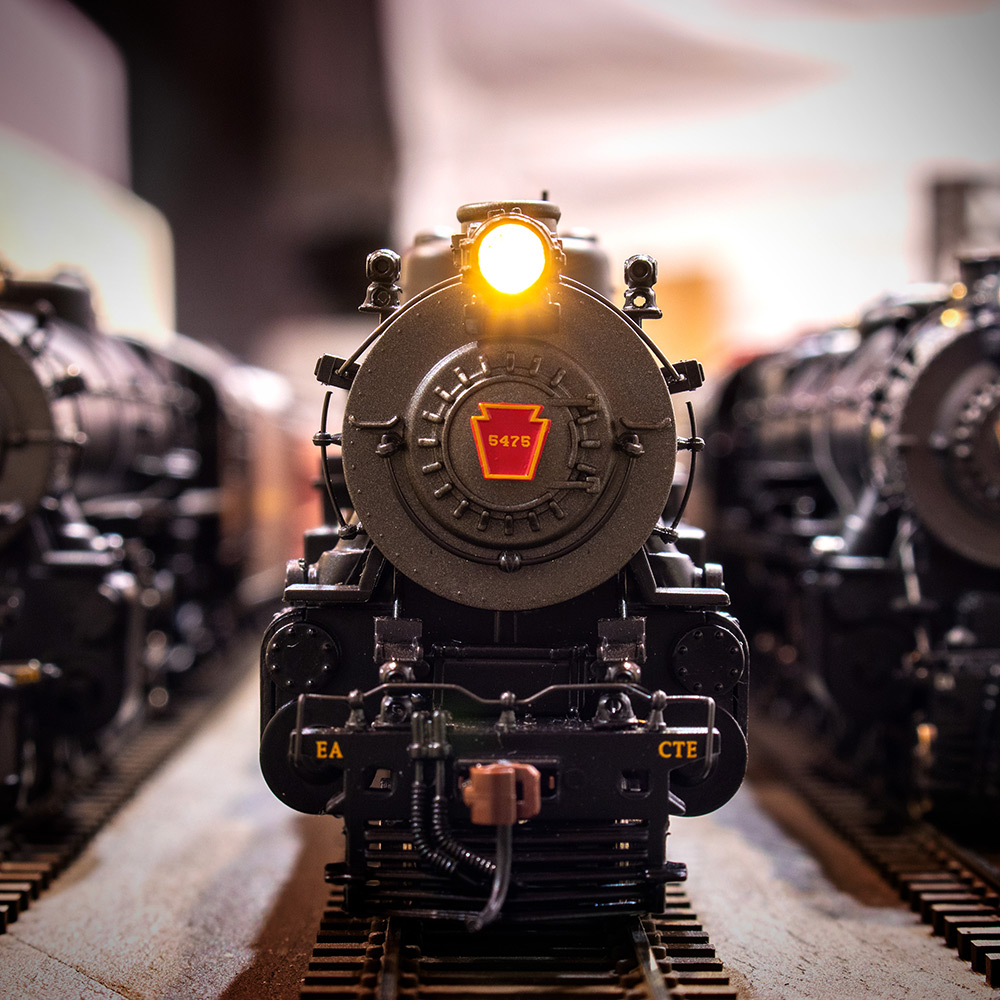
She won't run, even after I cleaned out the motor. It appears to be fine, but no movement. But I do, at least most of the time, feel the motor running when I turn the power on. I have provided photos:


Feedback-hungry attention w****
|
Country:  USA ~
Posts: 750 ~
Member Since: December 05 2015 ~
Last Visit: January 24 2024 USA ~
Posts: 750 ~
Member Since: December 05 2015 ~
Last Visit: January 24 2024
|
 Alert Moderator
|
|
|
|
Posted - December 09 2015 : 4:31:08 PM
|
When you feel the motor running, do any of the gears go around?
Carpe Manana!
|
|
Country: USA ~
Posts: 2418 ~
Member Since: September 17 2013 ~
Last Visit: July 12 2026
|
Alert Moderator

|
|
|
|
Posted - December 09 2015 : 4:52:25 PM
|
No, they don't. They're all securely on their shafts, but they don't move. What's weird is that when I turn the motor spindle by hand when it's open like this, the core turns and so do the gears.
Feedback-hungry attention w****
|
|
Country: USA ~
Posts: 750 ~
Member Since: December 05 2015 ~
Last Visit: January 24 2024
|
Alert Moderator
|
|
|
|
Posted - December 09 2015 : 6:32:48 PM
|
Check the pinion gear. The silver one.
" Heck with counting 'em rivets, TRAINS ARE FOR FUN! Not called the Mad Scientist for nothing either!"
|
|
Country: USA ~
Posts: 3147 ~
Member Since: May 07 2007 ~
Last Visit: June 01 2026
|
Alert Moderator
|
|
|
|
 Posted - December 09 2015 : 8:33:16 PM Posted - December 09 2015 : 8:33:16 PM
|
I did. As I said, all gears are securely on their shafts.
Feedback-hungry attention w****
|
|
Country: USA ~
Posts: 750 ~
Member Since: December 05 2015 ~
Last Visit: January 24 2024
|
Alert Moderator
|
|
|
|
Posted - December 11 2015 : 12:33:01 AM
|
Okay, so, somebody on the MR forums pointed out that the commutator was in fact filthy as all get out. Cleaning that has improved things a good bit - I can actually see the pinion gear trying to turn now when the motor is running now. But there's still work to be done: The gears... while they'll turn when I fiddle the motor mechanism by hand or push the chassis along while it's under power, none except the pinion gear are turning freely. So they obviously need some lube. Any suggestions? I was thinking of either graphite lube or Goo Gone but I'm not sure they'd be safe for a loco.
Additionally, I've become uncertain as to whether the brushes are in good condition for performance. They're this sort of satin black color - is that as it should be?
Feedback-hungry attention w****
|
|
Country: USA ~
Posts: 750 ~
Member Since: December 05 2015 ~
Last Visit: January 24 2024
|
Alert Moderator
|
|
|
|
Posted - December 11 2015 : 3:02:30 PM
|
Gear grease such as Labelle 106 would be ideal. I have used Vaseline on a PT drive.
I'd shy from graphite lubricants because they're a conductor and could creep into someplace where they're not wanted and cause a short circuit.
Goo gone is a degreaser, not a grease and it's based partly on fruit juice so it gets sticky like spilled pop when it dries.
There may be some old hardened grease that needs removing before you lubricate.
Carpe Manana!
|
|
Country: USA ~
Posts: 2418 ~
Member Since: September 17 2013 ~
Last Visit: July 12 2026
|
Alert Moderator
|
|
|
|
Posted - December 12 2015 : 03:27:42 AM
|
You sure about Goo Gone getting sticky? I've never had it get sticky - my experience has in fact been that it leaves things feeling oily.
In any case, I found some Hoppe's 9 lubricating oil in the garage and used that after removing the gears and cleaning off them and their posts. Tried running the loco again, now it just seemed like all I needed to do was maybe glue the pinion gear again. But then before I could confirm that, the loco just stopped picking up power entirely - even the headlight wasn't coming on. And what do you know, it turned out that the solder joint connecting the red wire to its copper tab (and thus, to the motor) decided to give out. So I've decided... as long as I have to do harder work on this any way I may as well scavenge a disk tray motor and upgrade her.
Feedback-hungry attention w****
|
|
Country: USA ~
Posts: 750 ~
Member Since: December 05 2015 ~
Last Visit: January 24 2024
|
Alert Moderator
|
|
|
|
Posted - December 12 2015 : 08:16:44 AM
|
quote:You sure about Goo Gone getting sticky?
Originally posted by ZeldaTheSwordsman - December 12 2015 : 03:27:42 AM
|
I used some Goo Gone on one of those track cleaning cars with the brass roller in the middle. Those leave a residue on top of the rails. After a day or so the rails felt sticky like there was some sugar resin on them. It wasn't a tacky kind of sticky, but something you felt if you slid your finger along the rail.
Carpe Manana!
|
|
Country: USA ~
Posts: 2418 ~
Member Since: September 17 2013 ~
Last Visit: July 12 2026
|
Alert Moderator
|
|
|
|
Posted - December 12 2015 : 11:44:35 AM
|
Check the pinion gear. The silver one.
" Heck with counting 'em rivets, TRAINS ARE FOR FUN! Not called the Mad Scientist for nothing either!"
|
|
Country: USA ~
Posts: 3147 ~
Member Since: May 07 2007 ~
Last Visit: June 01 2026
|
Alert Moderator
|
|
|
|
 Posted - December 12 2015 : 2:56:27 PM Posted - December 12 2015 : 2:56:27 PM
|
quote:Check the pinion gear. The silver one.
Originally posted by Redneck Justin - December 12 2015 : 11:44:35 AM
|
 Okay, you're just being a spammer. Go away. Okay, you're just being a spammer. Go away.
Feedback-hungry attention w****
|
|
Country: USA ~
Posts: 750 ~
Member Since: December 05 2015 ~
Last Visit: January 24 2024
|
Alert Moderator
|
|
|
|
Posted - December 12 2015 : 11:37:51 PM


|
quote:Okay, so, somebody on the MR forums pointed out that the commutator was in fact filthy as all get out. ...
Additionally, I've become uncertain as to whether the brushes are in good condition for performance. They're this sort of satin black color - is that as it should be?
Originally posted by ZeldaTheSwordsman - December 11 2015 : 12:33:01 AM
|
No, black is NEVER a good color to see when you're looking for "conductivity"...it means the brush carbon has powdered and stuck to the brush surface. Normally a clean brush would have dark pits and some coppery highlights on the high spots. All black or gray means that's you need to clean them with alcohol.
Check all your wire connections, they can become brittle with age and break off, and cause intermittent problems. Gears in the truck can get sticky due to grease age and hair/fuss infiltration. And also, on some of the PT gear studs, they will get zinc pest, and swell, and the gears will NOT spin freely. PT motor casings don't exhibit the rot like other engines do, it just seems to occur on the gear studs, I've never noticed the motor casing itself cracking, but I've had more than a few with tight gears, and stud nipples will break off, looking very crystalized. So totally disassemble the motor and make sure all the gears turn smoothly and don't bind up. Graphite is not the best lube for these, either the speciality grease or white lithium is what I use.
Jerry in VA
" When life throws you bananas...it's easy to slip up"
|
|
Country: USA ~
Posts: 3974 ~
Member Since: January 04 2009 ~
Last Visit: January 11 2019
|
Alert Moderator
|
|
|
|
Posted - December 13 2015 : 12:15:43 AM
|
Cleaning the commutator with Deoxit works well for me. It is a little expensive ($15 for the above). If the commutator moves a little when you apply power, you can spray a little right onto the commutator and it should run much better within a few seconds. If it is so dirty that it doesn't move at all, remove the commutator cover, spray a little on the contacts, let it sit for a minute or so, take a toothpick and carefully slide (do not press hard) it along the space between the segments to loosen the residue, then wipe with a lint free tissue or towel. Replace the cover and try again.
|
|
Country: USA ~
Posts: 140 ~
Member Since: November 29 2006 ~
Last Visit: April 08 2026
|
Alert Moderator
|
|
|
|
Posted - December 13 2015 : 02:24:51 AM
|
I had already gotten the commutator clean by this point, but thank you for the suggestion. However, apparently nobody read the second part of the following quoted post....
quote:You sure about Goo Gone getting sticky? I've never had it get sticky - my experience has in fact been that it leaves things feeling oily.
In any case, I found some Hoppe's 9 lubricating oil in the garage and used that after removing the gears and cleaning off them and their posts. Tried running the loco again, now it just seemed like all I needed to do was maybe glue the pinion gear again. But then before I could confirm that, the loco just stopped picking up power entirely - even the headlight wasn't coming on. And what do you know, it turned out that the solder joint connecting the red wire to its copper tab (and thus, to the motor) decided to give out. So I've decided... as long as I have to do harder work on this any way I may as well scavenge a disk tray motor and upgrade her.
Originally posted by ZeldaTheSwordsman - December 12 2015 : 03:27:42 AM
|
Feedback-hungry attention w****
|
|
Country: USA ~
Posts: 750 ~
Member Since: December 05 2015 ~
Last Visit: January 24 2024
|
Alert Moderator
|
|
|
|
Posted - December 13 2015 : 10:10:41 AM
|
* When you checked things no one mentions anything about voltage to the motor. Or trying to turn the gears by hand, or if on the locomotive end that it is properly picking up power. Also when viewing the wiring of the motor no one adjusted the wires before the photo to show how the wires are connected. In one photo it looks like there are 2 black wires to one brush and on the other three black.
* Step one in checking a new loco you've acquired is never put power to a motor till you have proven all gearing is correct and moves all gearing and wheels properly.
* The rest you can carefully do.
rank
toptrain
" It's a Heck of a Day " !!!
|
|
Country: USA ~
Posts: 7539 ~
Member Since: August 07 2008 ~
Last Visit: June 22 2026
|
Alert Moderator
|
|
|
|
Posted - December 13 2015 : 1:53:34 PM
|
Toptrain, someone did mention turning the gears by hand - me. And the loco end was properly picking up power, I could confirm that much. Although the wire connections showed signs of weakening even at first (Small wonder, considering that the tender shell's screw=socket had been broken and thus left wires as the sole connection) and as I said as soon as I got the gears and all finally cleaned the red wire decided to break off entirely.
There are three black wires visible in all photos, although in the third photo one is hard to see. One is coming from the loco's main body, the other two from the tender trucks.
quote:
No, black is NEVER a good color to see when you're looking for "conductivity"...it means the brush carbon has powdered and stuck to the brush surface. Normally a clean brush would have dark pits and some coppery highlights on the high spots. All black or gray means that's you need to clean them with alcohol.
Check all your wire connections, they can become brittle with age and break off, and cause intermittent problems.
Originally posted by AMC_Gremlin_GT - December 12 2015 : 11:37:51 PM
|
All-black's bad even with graphite brushes then? Alright. Though kinda moot since as stated I decided to replace the motor entirely.
The wire connections being brittle, that much I noticed. And also as stated one did indeed eventually break on me. Just when I'd gotten the gears nicely oiled and turning freely too.
Feedback-hungry attention w****
Edited by - ZeldaTheSwordsman on December 13 2015 4:26:14 PM
|
|
Country: USA ~
Posts: 750 ~
Member Since: December 05 2015 ~
Last Visit: January 24 2024
|
Alert Moderator
|
|
|
|
Posted - December 20 2015 : 03:55:05 AM
|
So, a bit of an update:
http://img13.deviantart.net/c7fa/i/2015/354/d/f/cementine_new_motor_wired_1_by_zeldatheswordsman-d9kqwgr.jpg
Got the motor block bored out and the new motor installed., The wires seem to be soldered to it just fine, but it isn't running.

Based on the headlight acting up, I would guess that the wiring at the smokebox end is to blame for the issues... but I can't identify what exactly is wrong with these wires (well, other than the smoke generator's filament being broken but that was an accident of my fidgeting with the thing trying to straighten it after I removed the internal plastic cover to have a look.
Feedback-hungry attention w****
Edited by - ZeldaTheSwordsman on December 20 2015 04:31:01 AM
|
|
Country: USA ~
Posts: 750 ~
Member Since: December 05 2015 ~
Last Visit: January 24 2024
|
Alert Moderator
|
|
|
|
Posted - December 21 2015 : 9:20:52 PM
|
Okay, so, the stupid CD tray motor was only 5 volts. Thanks for nothing Hewlett Packard.
So I've got two choices: Rebuild the Powertorque motor (thankfully the magnets are very strong still, so they're still viable), or use a spare can motor I have and convert her to loco drive.
If I rebuild the Powertorque, what should I use to cement the magnets in place?
Feedback-hungry attention w****
|
|
Country: USA ~
Posts: 750 ~
Member Since: December 05 2015 ~
Last Visit: January 24 2024
|
Alert Moderator
|
|
|
|
Posted - December 24 2015 : 05:32:34 AM
|
UPDATE:
I have reassembled the Powertorque motor. The brushes are clean and in, the magnets are cemented firmly in place. I once more attempted to run the loco, and actually witnessed the armature make a 1/3 turn before returning back to being motionless. I believe the fault here is with the wiring on one or two poles of the armature - while one of the poles cleaned up nice and shiny, at least one had dark spots on the wiring that wouldn't be scrubbed away. I suspect it is in fact singed.
As such, I will likely have to re-wind the armature with fresh wiring. The question is, what length of wire do I need? And how many coils around each pole?
Feedback-hungry attention w****
|
|
Country: USA ~
Posts: 750 ~
Member Since: December 05 2015 ~
Last Visit: January 24 2024
|
Alert Moderator
|
|
|
|
Posted - December 24 2015 : 11:12:54 AM
|
quote:UPDATE:
I have reassembled the Powertorque motor..... I believe the fault here is with the wiring on one or two poles of the armature - I suspect it is in fact singed.
As such, I will likely have to re-wind the armature with fresh wiring. The question is, what length of wire do I need? And how many coils around each pole?
Originally posted by ZeldaTheSwordsman - December 24 2015 : 05:32:34 AM
|
I doubt there is any documentation available on the armature windings, unless someone from the factory has a secret stash of the specs when they were wound new. Highly unlikely. Armature winding is a precise operation, and all 3 need to have exactly the same number of windings as the others. You may have to venture into unknown territory and uncoil one arm, and document yourself the number of layers of windings, and the final length. The wire itself is probably 32 gauge, with special varnish coating, not unsulated plastic coating. Winding your own armatures is probably a lost art, many slot car guys did it to improve their motors performance over factory ones in the 60's, but most were the larger 1/24 type. these little ones like Tyco has are far more delicate to work with. Best bet would probably be to find a donor motor armature. But, if you enjoy the challenge, go for a rewind! 
Jerry in VA.
P.S. - I can probably find you a working armature in my Tyco parts stash ( after the holidays ), as I have several bad / broken frames so the rest is parts. I just have to find the parts case I keep them in.  Let me know if you're interested. Let me know if you're interested.
" When life throws you bananas...it's easy to slip up"
|
|
Country: USA ~
Posts: 3974 ~
Member Since: January 04 2009 ~
Last Visit: January 11 2019
|
Alert Moderator
|
|
|
|
Posted - December 24 2015 : 7:50:02 PM
|
I would be interested, but I don't have any money..
I've seen people state that they've re-wound Powertorque armatures. which is why I was asking here.
Feedback-hungry attention w****
|
|
Country: USA ~
Posts: 750 ~
Member Since: December 05 2015 ~
Last Visit: January 24 2024
|
Alert Moderator
|
|
|
|
Posted - December 24 2015 : 11:18:22 PM
|
I can't remember for sure just who did it, but someone one this forum or a similar one rewound a motor by carefully imitating how the old windings went. I think he added more windings for increased torque, because there was room. If you don't want to dare as greatly, you could just count the windings and do the same number.
Carpe Manana!
|
|
Country: USA ~
Posts: 2418 ~
Member Since: September 17 2013 ~
Last Visit: July 12 2026
|
Alert Moderator
|
|
|
|
Posted - March 21 2016 : 5:38:07 PM
|
At the risk of being annoying, I've had those pinion
gears on those @#$%$@% pancake motors
spin the gears when off the tracks, but slip
hopelessly when any drag is placed on the wheels.
Appearances are deceiving.
That you are contemplating rewinding an armature
is remarkable.
In the side of one of the mountains in El Paso, there
is a crawl hole hacked out during the 19th century
where some determined fellow mined copper ore
for smelting. Perhaps he overlooked a few small
veins, so perhaps you'd like to go in there and
scavenge it and melt it down and pound it down
into armature wire with a handy rock.
Seriously, bravo to you. You and Lionel Cowen
must share some serious DNA.
|
|
Country: USA ~
Posts: 11686 ~
Member Since: December 09 2013 ~
Last Visit: May 26 2026
|
Alert Moderator
|
|
|
|
Posted - October 03 2016 : 8:48:17 PM
|
Ok this thread is is going nowhere....
I would suggest a degrease. GREASE is what makes gears slow. OIL is what makes gears turn freely.
Graphite DOES NOT conduct. Even if it did, it wouldn't affect the mech.
Degrease:
Disassemble the whole tender, desolder everything, etc. It's ok if it isn't completely disassembled.
Soak everything in a bath of Dish soap and water.
Soak for 30 min.
scrub pieces under cold water with a spare toothbrush.
Make SURE all soap is gone.
Reassemble all the wheels and gears.
Lub gears with dry graphite lub, or lub oil, NOT GREASE
Make sure no oil got on any contacts, like wheel, or where the wheel axle touches the chassis.
Clean the commutator with Isopropyl Alcohol. It should be shiny.
Replace the cover with the black(they should be black) brushes. Make sure the brushes are touching the commutator.
resolder wires.
Troubleshoot:
1. Try moving gears with finger. They should be relatively easy to spin. If not, do the degrease.
2. Try applying leads to the solder joints on the motor, and make sure the train isn't on the track. the motor should move. If not, try to remove the motor cover, and make sure the commutator and coils aren't touching the magnets/sides.
3. if the motor moves when the train isn't on the track, but it stops when you place the engine on the track, then you got a short. Try to rewire the engine/tender.
If I can't fix it, I can fix it so it can't be fixed.
|
|
Country: USA ~
Posts: 105 ~
Member Since: March 16 2015 ~
Last Visit: March 22 2023
|
Alert Moderator
|
|
|
|
Posted - October 03 2016 : 8:50:30 PM
|
Now that I think about it, I think one(or 2) of the 3 coils aren't powered. You said that it spun 1/3 of the way and stopped, right?
Inspect the coils carefully, make SURE that none of the wires are broken.
If I can't fix it, I can fix it so it can't be fixed.
|
|
Country: USA ~
Posts: 105 ~
Member Since: March 16 2015 ~
Last Visit: March 22 2023
|
Alert Moderator
|
|
|
|
Posted - October 04 2016 : 01:01:57 AM
|
They weren't broken so much as fried.
This thread is out of date. I think a lot of the discussion of the project here wound up migrating to a different thread.. In any case, I got the Clementine running months ago. Replacement armature from Jerry, Replacement motor block (I bored out the old one to make room for a CD tray motor that turned out to be of insufficient voltage) from someone on the other Tyco train forum, replacing the original magnets with Dash Motorsports T-dash magnets, and replacing some wires that had broken got her running again. Only thing broken now is the filament for the smoke generator, which is nonessential.
Feedback-hungry attention w****
|
|
Country: USA ~
Posts: 750 ~
Member Since: December 05 2015 ~
Last Visit: January 24 2024
|
Alert Moderator
|
|