|
|
 Posted - November 05 2015 : 1:35:49 PM Posted - November 05 2015 : 1:35:49 PM


|
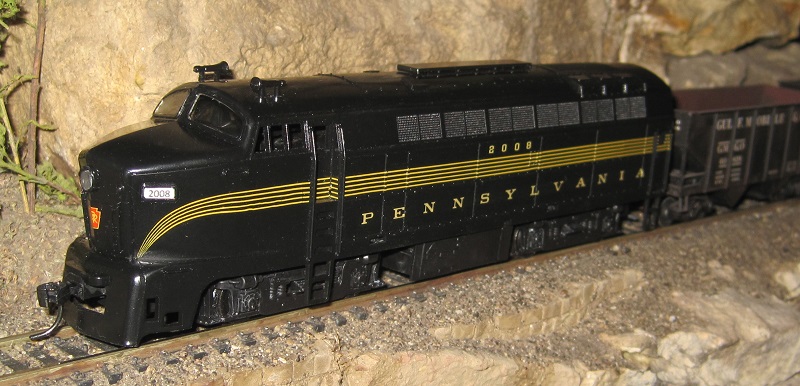
I remember seeing models of Baldwin Sharknose engines and thinking they really looked cool, but not getting them because other equipment had more priority to me.
Recently at a swap meet, I came across a ROCO shark at a fairly cheap price and picked it up:

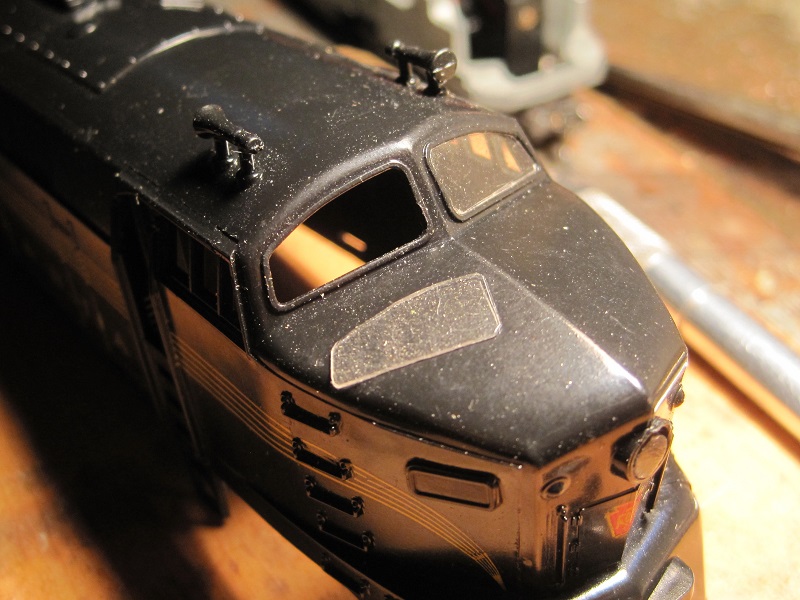
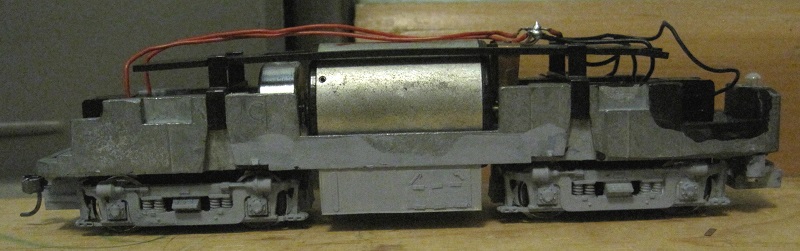
When I got it, it had no light pipe for the headlight, no windshield glazing, no front coupler, a hook and horn rear coupler, a missing traction tire and no fuel tank.
Before I got around to photographing it, I painted the wheel faces and some other bare metal parts black, added the light pipe, and installed knuckle couplers.
Here's the rear coupler. It's a Kadee whisker coupler with a medium drop shank. There's a thin plastic sleeve from some Kadee installation kit over the pivot point for the coupler, since the hole in a Kadee is bigger than the one in the original coupler:
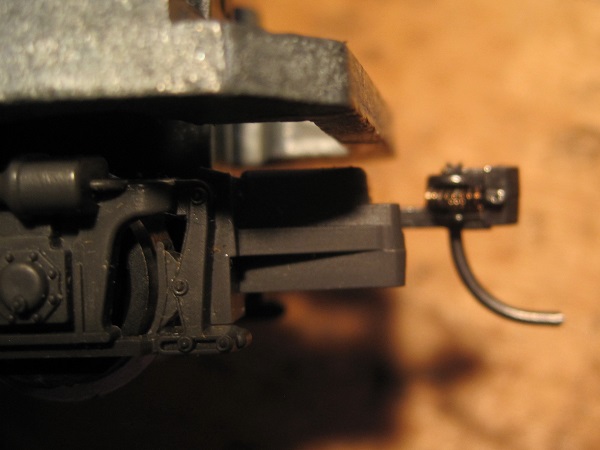
Here's the light pipe and front coupler. I filed a square piece of clear plastic into an octagon and then chucked it in a drill and turned it into a cylinder shape with a file. The end is smoothed as much as possible and then painted with acrylic gloss medium. The front coupler is a Kadee whisker coupler with a medium normal shank. The coupler box is trimmed at back to clear the frame and glued in place to the pilot:
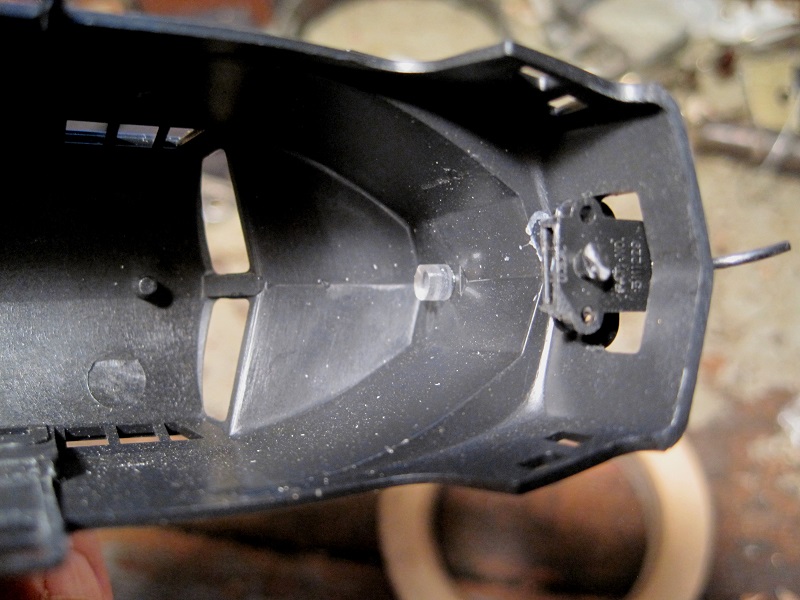
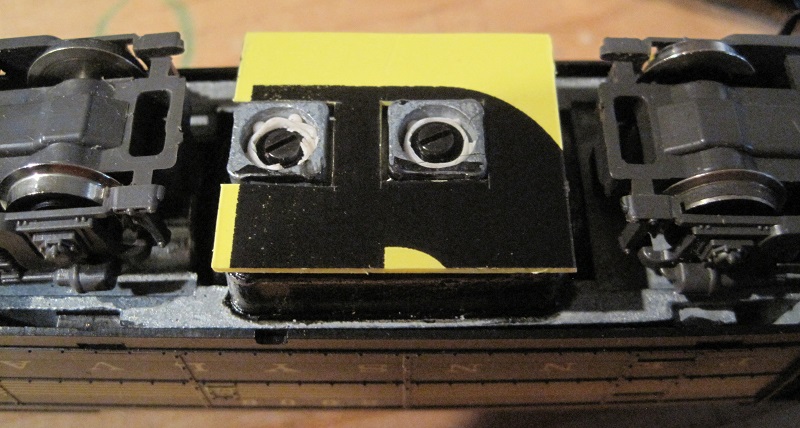
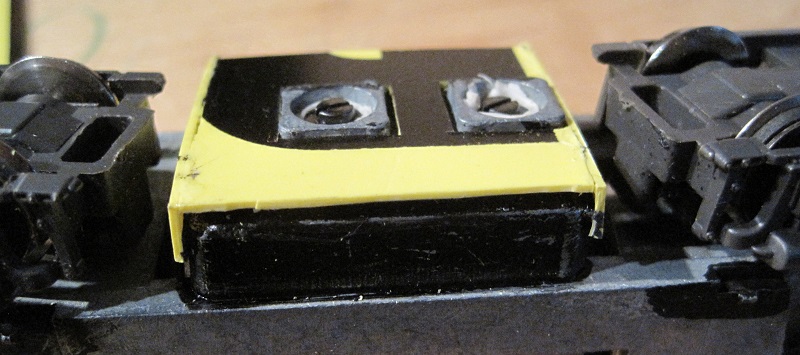
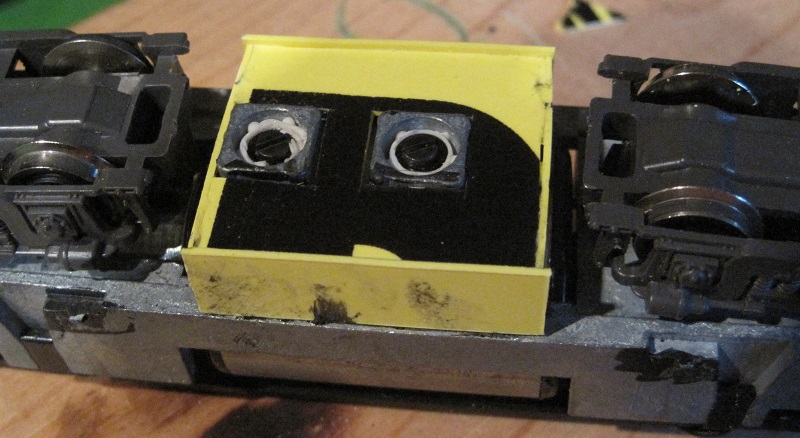
Places where you could see the chassis through a window or a hole in the body, I painted it black:
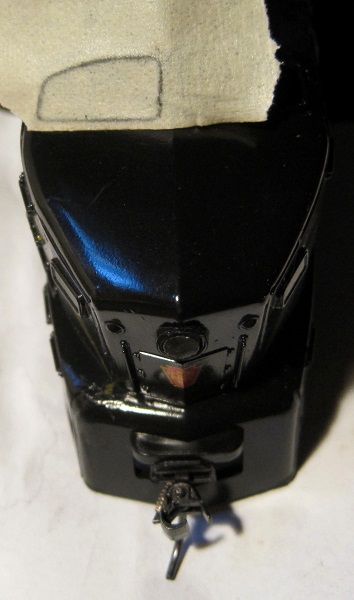
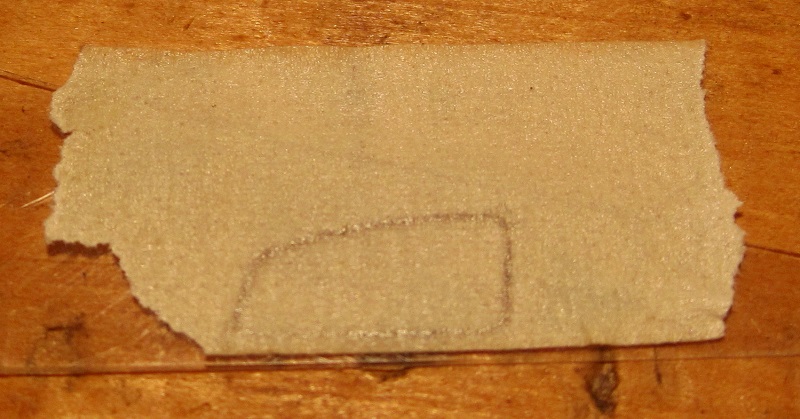
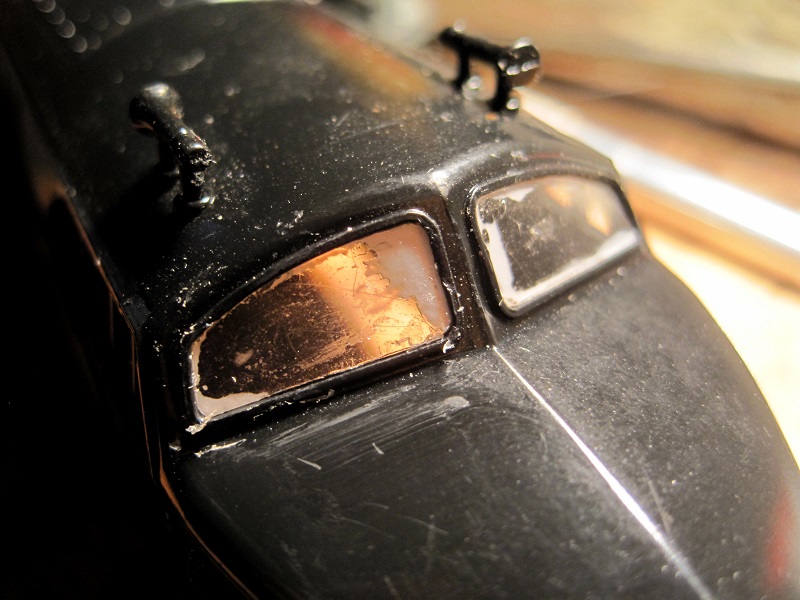
As big as they were, those empty windshield holes were as conspicuous as empty eye sockets, so I cut some clear plastic glazing to fit flush inside the windows. The first step was tracing out the windshield frame on a piece of tape:
Also in this picture, you can see the headlight lens, which is the end of the light pipe described above.
The tape was then stuck on a piece of clear plastic and used as a template to cut out a windshield.
The windshield was trimmed and filed to fit, then duplicated for the other side:
At this point, I glued in the glazing with white glue, making what looked like a terrible mess:
I washed off the worst of the mess with a wet Q-tip for this result:
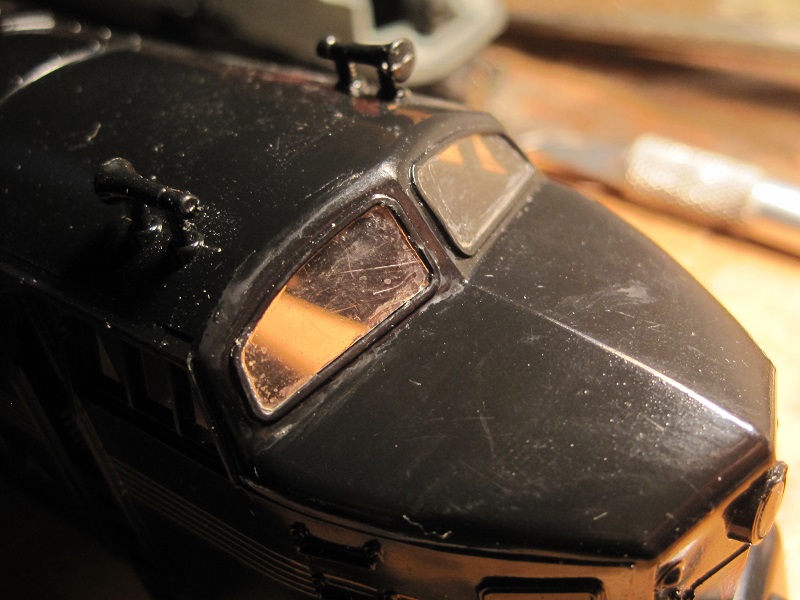
Partly to serve as further glue and partly to cover up any scuffing on the glazing, I painted it over with acrylic gloss medium:
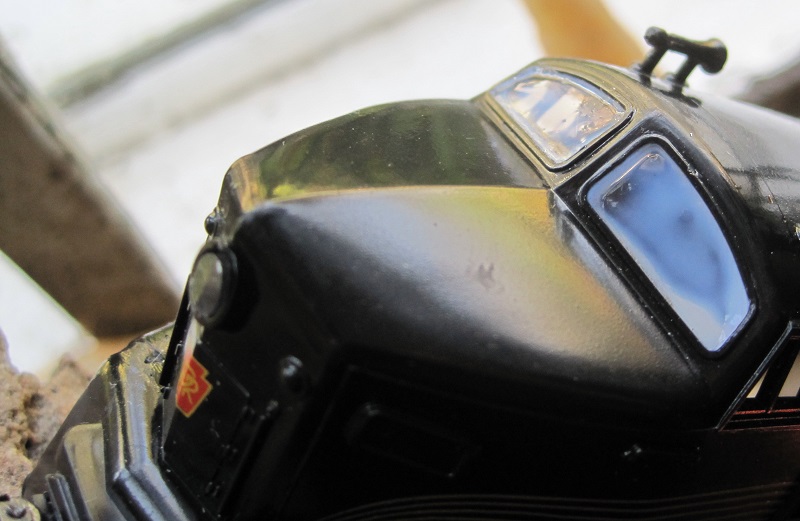
This'll dry completely clear.
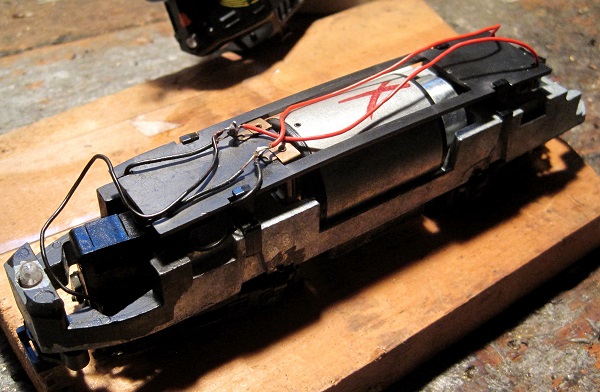
In this next shot, you can see the wheel faces painted black, the replacement traction tire and the place where I have yet to fabricate a new fuel tank:
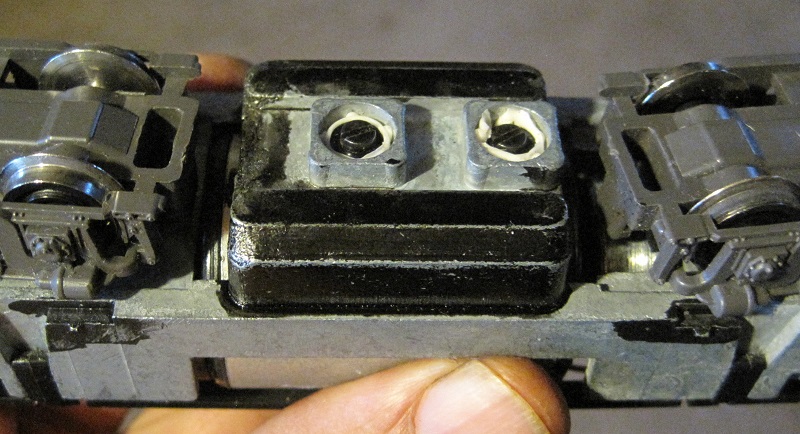
The new tank will be my next step in the project. More on that in future installments.
Carpe Manana!
|
Country:  USA ~
Posts: 2417 ~
Member Since: September 17 2013 ~
Last Visit: June 14 2026 USA ~
Posts: 2417 ~
Member Since: September 17 2013 ~
Last Visit: June 14 2026
|
 Alert Moderator
|
|
|
|
Posted - November 05 2015 : 7:10:26 PM
|
Nice job! I own one as well.
" Heck with counting 'em rivets, TRAINS ARE FOR FUN! Not called the Mad Scientist for nothing either!"
|
|
Country: USA ~
Posts: 3147 ~
Member Since: May 07 2007 ~
Last Visit: June 01 2026
|
Alert Moderator

|
|
|
|
Posted - November 05 2015 : 9:02:29 PM
|
| Cool tip on making windows Don. And that's pretty amazing the way the clear acrylic clears up the scratches.
|
|
Country: USA ~
Posts: 2087 ~
Member Since: March 16 2013 ~
Last Visit: July 05 2018
|
Alert Moderator
|
|
|
|
Posted - November 06 2015 : 10:26:27 AM
|
| There is never an argument that the motor and flywheel is not large enough on the old RoCos.
|
|
Country: USA ~
Posts: 332 ~
Member Since: August 28 2010 ~
Last Visit: April 23 2020
|
Alert Moderator
|
|
|
|
Posted - November 08 2015 : 10:02:09 PM
|
I am totally impressed. I would never have thought of using Masking tape for the templates. But, even so, the job you did was very very nice.
Regards, Vic B.
Vic Bitleris
|
|
Country: USA ~
Posts: 55 ~
Member Since: May 08 2013 ~
Last Visit: February 20 2022
|
Alert Moderator
|
|
|
|
Posted - November 08 2015 : 10:29:46 PM
|
quote:I would never have thought of using Masking tape for the templates.
Originally posted by bitlerisvj - November 08 2015 : 10:02:09 PM
|
I started out using a piece of paper, but I couldn't hold it still enough over the window, and there sat a roll of masking tape on the work bench.
Thanks, everyone, for the kind words.
Carpe Manana!
|
|
Country: USA ~
Posts: 2417 ~
Member Since: September 17 2013 ~
Last Visit: June 14 2026
|
Alert Moderator
|
|
|
|
Posted - November 09 2015 : 12:38:27 AM
|
Nice.
You got the newer version with flywheel.
I also have 6 or so of the original version. All in bogus CN livery, of course.
Evan
|
Country:  Canada ~
Posts: 505 ~
Member Since: August 09 2014 ~
Last Visit: June 01 2026 Canada ~
Posts: 505 ~
Member Since: August 09 2014 ~
Last Visit: June 01 2026
|
Alert Moderator
|
|
|
|
Posted - November 12 2015 : 4:42:55 PM
|
Today, I added a fuel tank.
I somewhat copied a Tyco Sharknose:
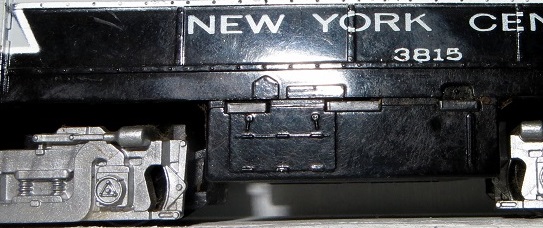
A plastic box was needed around the metal nub where the fuel tank goes. I started by gluing the bottom with rubber cement. The plastic comes from a "No Trespassing" sign I got at WalMart.
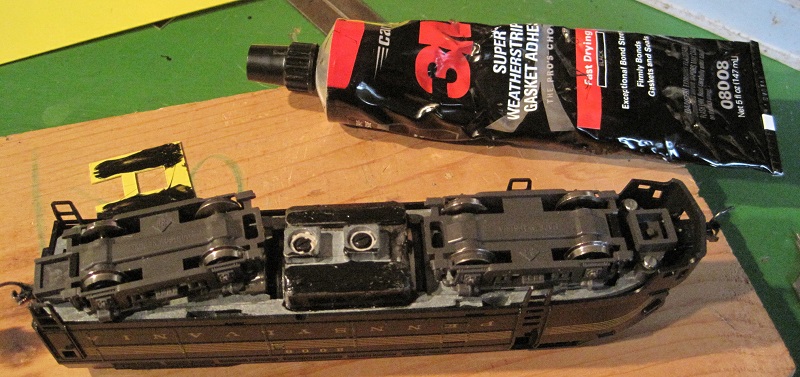
Next, I glued ends to the metal nub and plastic bottom:
Then came the sides:
I cut out the raised details from photographic film and glued those to the box:
A coat of primer ties it all together. I also primed the truck sideframes, since I wanted to paint and weather them and not just leave the molded in color as made.
Now, there'll be a wait while the primer dries.
Carpe Manana!
|
|
Country: USA ~
Posts: 2417 ~
Member Since: September 17 2013 ~
Last Visit: June 14 2026
|
Alert Moderator
|
|
|
|
Posted - November 12 2015 : 8:21:02 PM
|
| That's pretty cool about using film to add details in relief; closer to scale and realism and stiff enough to be able to work with.
|
|
Country: USA ~
Posts: 2087 ~
Member Since: March 16 2013 ~
Last Visit: July 05 2018
|
Alert Moderator
|
|
|
|
Posted - November 15 2015 : 10:29:25 AM
|
| Some quality work there!!!
|
|
Country: USA ~
Posts: 668 ~
Member Since: April 28 2010 ~
Last Visit: February 14 2026
|
Alert Moderator
|
|
|
|
Posted - November 16 2015 : 2:31:26 PM
|
The tank and trucks have been painted and numbers have been added to the number boards. I'm still a little undecided about what to do with the paint job, so I'll put off further painting and weathering pending a decision. So, here's the finished product for the time being:
Carpe Manana!
|
|
Country: USA ~
Posts: 2417 ~
Member Since: September 17 2013 ~
Last Visit: June 14 2026
|
Alert Moderator
|
|
|
|
 Posted - November 19 2015 : 9:40:53 PM Posted - November 19 2015 : 9:40:53 PM
|
Great work, bringing old models back to life is one of the best parts of this hobby!
Proudly keeping Tyco Pluggers out of landfills since 2016
|
|
Country: USA ~
Posts: 821 ~
Member Since: December 26 2009 ~
Last Visit: March 28 2026
|
Alert Moderator
|
|
|
|
Posted - November 19 2015 : 10:57:37 PM
|
Thanks. I enjoy the tinkering aspect and it's neat that, at used equipment prices, I can have an engine that really doesn't fit in with what the layout is doing, just because I like its looks.
Carpe Manana!
|
|
Country: USA ~
Posts: 2417 ~
Member Since: September 17 2013 ~
Last Visit: June 14 2026
|
Alert Moderator
|
|