|
|
 Posted - May 07 2015 : 12:17:52 AM Posted - May 07 2015 : 12:17:52 AM


|
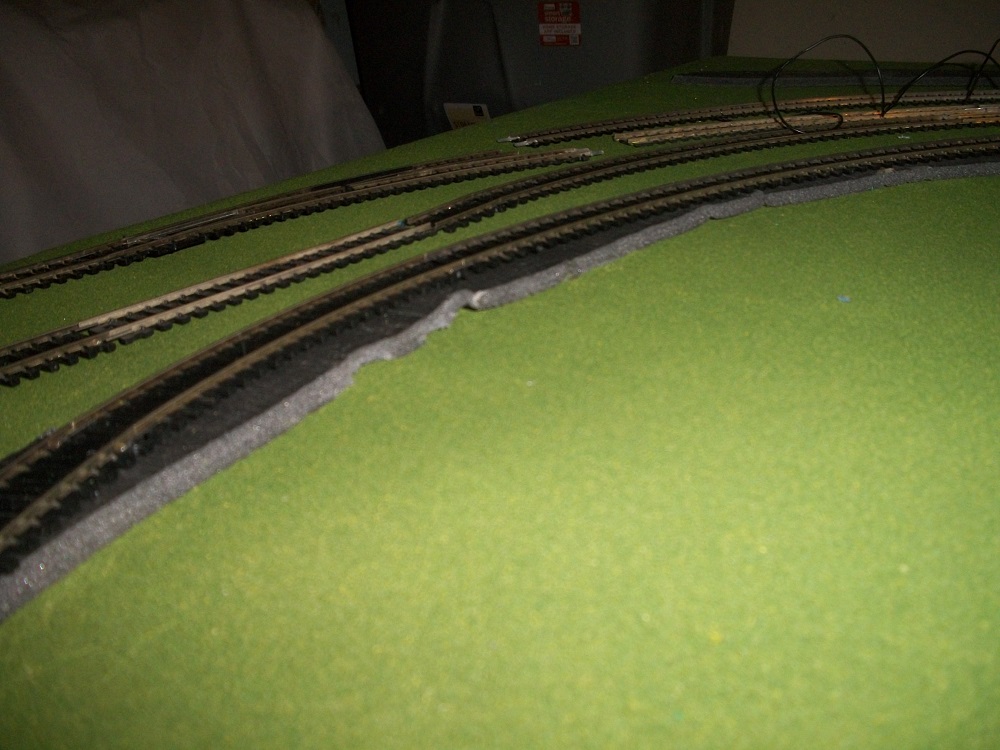
particularly around tight curves, as in 15 inches. I am finding that it has a
distressing tendency to wrinkle on the inside face. Do I have to chop out
little wedges to get it to sit?
Edited by - Chops124 on May 19 2015 01:04:26 AM
|
Country:  USA ~
Posts: 11686 ~
Member Since: December 09 2013 ~
Last Visit: May 26 2026 USA ~
Posts: 11686 ~
Member Since: December 09 2013 ~
Last Visit: May 26 2026
|
 Alert Moderator
|
|
|
|
Posted - May 07 2015 : 06:32:58 AM
|
Chops - hard to answer because I have not experienced that issue with it before. I haven't layed it in anything tighter than a 18" R curve. That said, if you are going to ballast, it should cover up all those little 'wrinkles'.
How are you fastening the roadbed to the surface of your board?
http://tycodepot.com/
|
|
|
|
|
Posted - May 07 2015 : 12:06:51 PM
|
Hi Chops124,
Chopping out little wedges is what I did when I ran in to that problem and it worked fine.
Mytyco
|
|
Country: USA ~
Posts: 790 ~
Member Since: April 30 2006 ~
Last Visit: July 21 2015
|
Alert Moderator

|
|
|
|
Posted - May 07 2015 : 4:34:22 PM


|
I believe the roadbed is designed for not less than 18" curves, so yes, you will have to relieve the excess stress when bending it further than that. Not many people are going to run 15" radius ( although my Eldon train track is 7.5" heh heh! ). Have fun with that.
Jerry in VA
" When life throws you bananas...it's easy to slip up"
|
|
Country: USA ~
Posts: 3974 ~
Member Since: January 04 2009 ~
Last Visit: January 11 2019
|
Alert Moderator
|
|
|
mph
Switcher

Status:
offline
| |
Posted - May 07 2015 : 10:38:09 PM
|
I don't believe that I have used this for smaller than 18" radius, but on the tight curves I laid on my layout, it worked really well. The method that I use is to split the roadbed into two parts and lay each half separately. I use small nails to hold the roadbed in place. The tighter the curve, the more nails needed.
I guess I am old school in this way. I know a lot of people are using glue, but I have to lay it out and change it too many times until I get it the way that I want it, and nails work the best for me.
When I think the road bed is what I want I nail the track in place to test - usually followed by pulling it up and starting over.
I hope this helps.
Mark
|
|
Country: USA ~
Posts: 39 ~
Member Since: January 19 2013 ~
Last Visit: February 15 2016
|
Alert Moderator
|
|
|
|
Posted - May 08 2015 : 12:19:39 AM
|
Well Jeff, when you figure it all out, let me know.. I have a bunch of this to lay down someday soon..
|
|
Country: USA ~
Posts: 6279 ~
Member Since: February 18 2009 ~
Last Visit: March 04 2022
|
Alert Moderator
|
|
|
|
Posted - May 08 2015 : 01:36:44 AM
|
I really appreciate the advice, guys, after playing
around with it some I definitely decided to go the
wedge 'n slice route. I looked at the DYI video on
Utube and the guy was plastering it down with all
this vinyl caulk, crimey's, I'd have to use a case
of the stuff. And I really am done with plastering
down all this adhesive and then finding out I'm
off a 1/4 inch somewhere. Knowing my limits, I'm
going to take a page out of MPH, up there. Eventually,
when I really want to torture myself, I can cover up
my sins with some ballast. Maybe.
I admire these guys who lay their own track, and build
their own turnouts, but I'm lucky to get prefab roadbed
right.
|
|
Country: USA ~
Posts: 11686 ~
Member Since: December 09 2013 ~
Last Visit: May 26 2026
|
Alert Moderator
|
|
|
|
Posted - May 15 2015 : 01:07:19 AM
|
I used MPH's, suggestion in the end, and the
results are quite satisfactory. I've tried the
DYI methods I've seen in various Youtube
videos and it never goes together as
easily as these pro's make it look.
|
|
Country: USA ~
Posts: 11686 ~
Member Since: December 09 2013 ~
Last Visit: May 26 2026
|
Alert Moderator
|
|
|
mph
Switcher
Status:
offline
| |
Posted - May 15 2015 : 10:30:20 PM
|
Jeff,
I'm glad my suggestions helped. Keep posting photos of the layout. I enjoy seeing the progress.
Mark
|
|
Country: USA ~
Posts: 39 ~
Member Since: January 19 2013 ~
Last Visit: February 15 2016
|
Alert Moderator
|
|