|
|
 Posted - November 20 2014 : 4:02:55 PM Posted - November 20 2014 : 4:02:55 PM


|
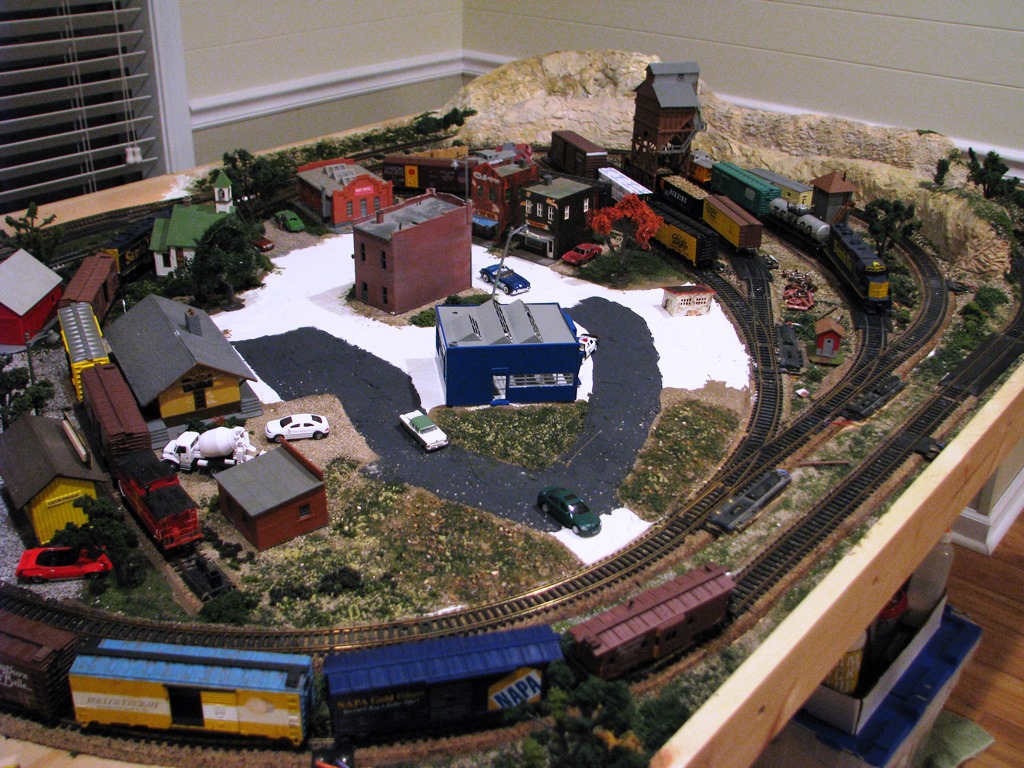
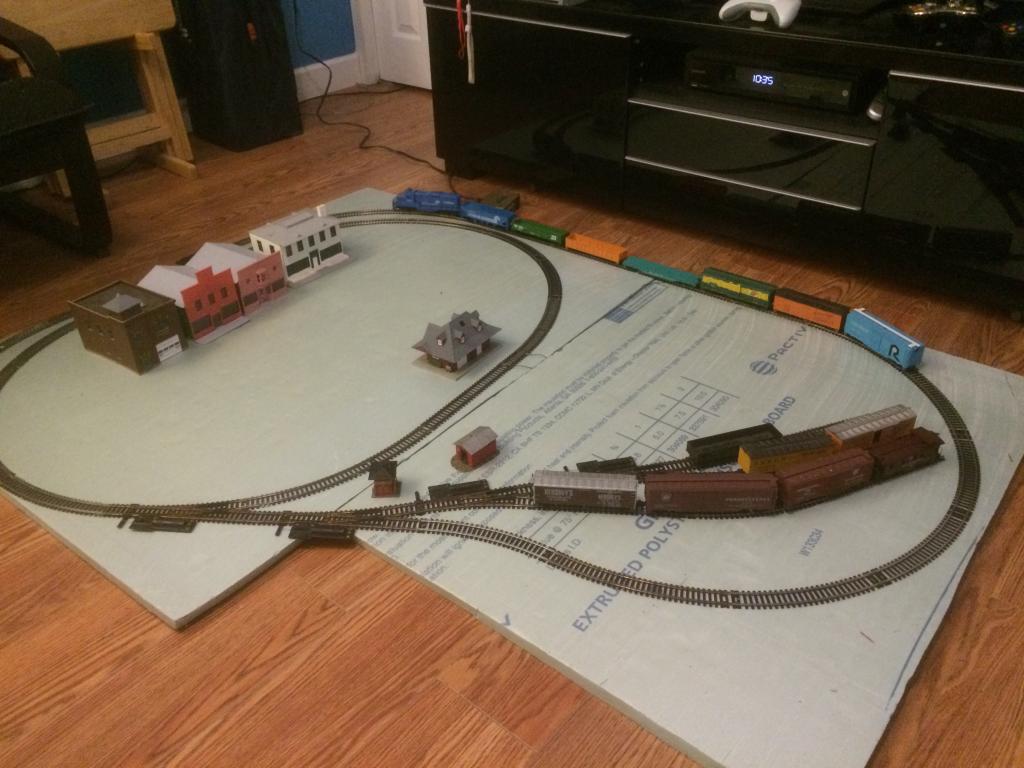
Threw together this temporary layout so it's easy to store. It breaks apart at the seam (has two pins for locating/keeping it from sliding). Needed to be keep the wife happy.  I've added a few more turnouts this morning on the loop, but not sure I'll keep them where they are. Have some WS foam track bed once the layout is "finalized". We all know half of the fun is tearing these layouts down and redoing them, right? I've added a few more turnouts this morning on the loop, but not sure I'll keep them where they are. Have some WS foam track bed once the layout is "finalized". We all know half of the fun is tearing these layouts down and redoing them, right?  Anyway, thanks for looking. Open to suggestions. Anyway, thanks for looking. Open to suggestions.
Tim
|
Country:  USA ~
Posts: 259 ~
Member Since: October 23 2014 ~
Last Visit: March 28 2017 USA ~
Posts: 259 ~
Member Since: October 23 2014 ~
Last Visit: March 28 2017
|
 Alert Moderator
|
|
|
|
Posted - November 20 2014 : 4:33:23 PM
|
| hmm something I needs to do to slip under my bed
|
|
Country: USA ~
Posts: 15032 ~
Member Since: February 23 2009 ~
Last Visit: July 11 2026
|
Alert Moderator

|
|
|
|
Posted - November 20 2014 : 5:00:30 PM
|
That's the ultimate plan. :-)
quote:hmm something I needs to do to slip under my bed
Originally posted by microbusss - November 20 2014 : 4:33:23 PM
|
|
|
Country: USA ~
Posts: 259 ~
Member Since: October 23 2014 ~
Last Visit: March 28 2017
|
Alert Moderator
|
|
|
|
Posted - November 20 2014 : 6:30:26 PM
|
Very ingenious. I love that track plan. Two train operation on a
single line. Let me know if you need extra track or a cheap
transformer- free plus shipping.
|
|
Country: USA ~
Posts: 11686 ~
Member Since: December 09 2013 ~
Last Visit: May 26 2026
|
Alert Moderator
|
|
|
|
Posted - November 20 2014 : 6:39:26 PM
|

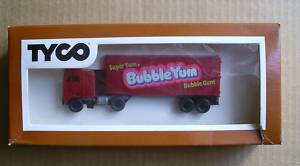
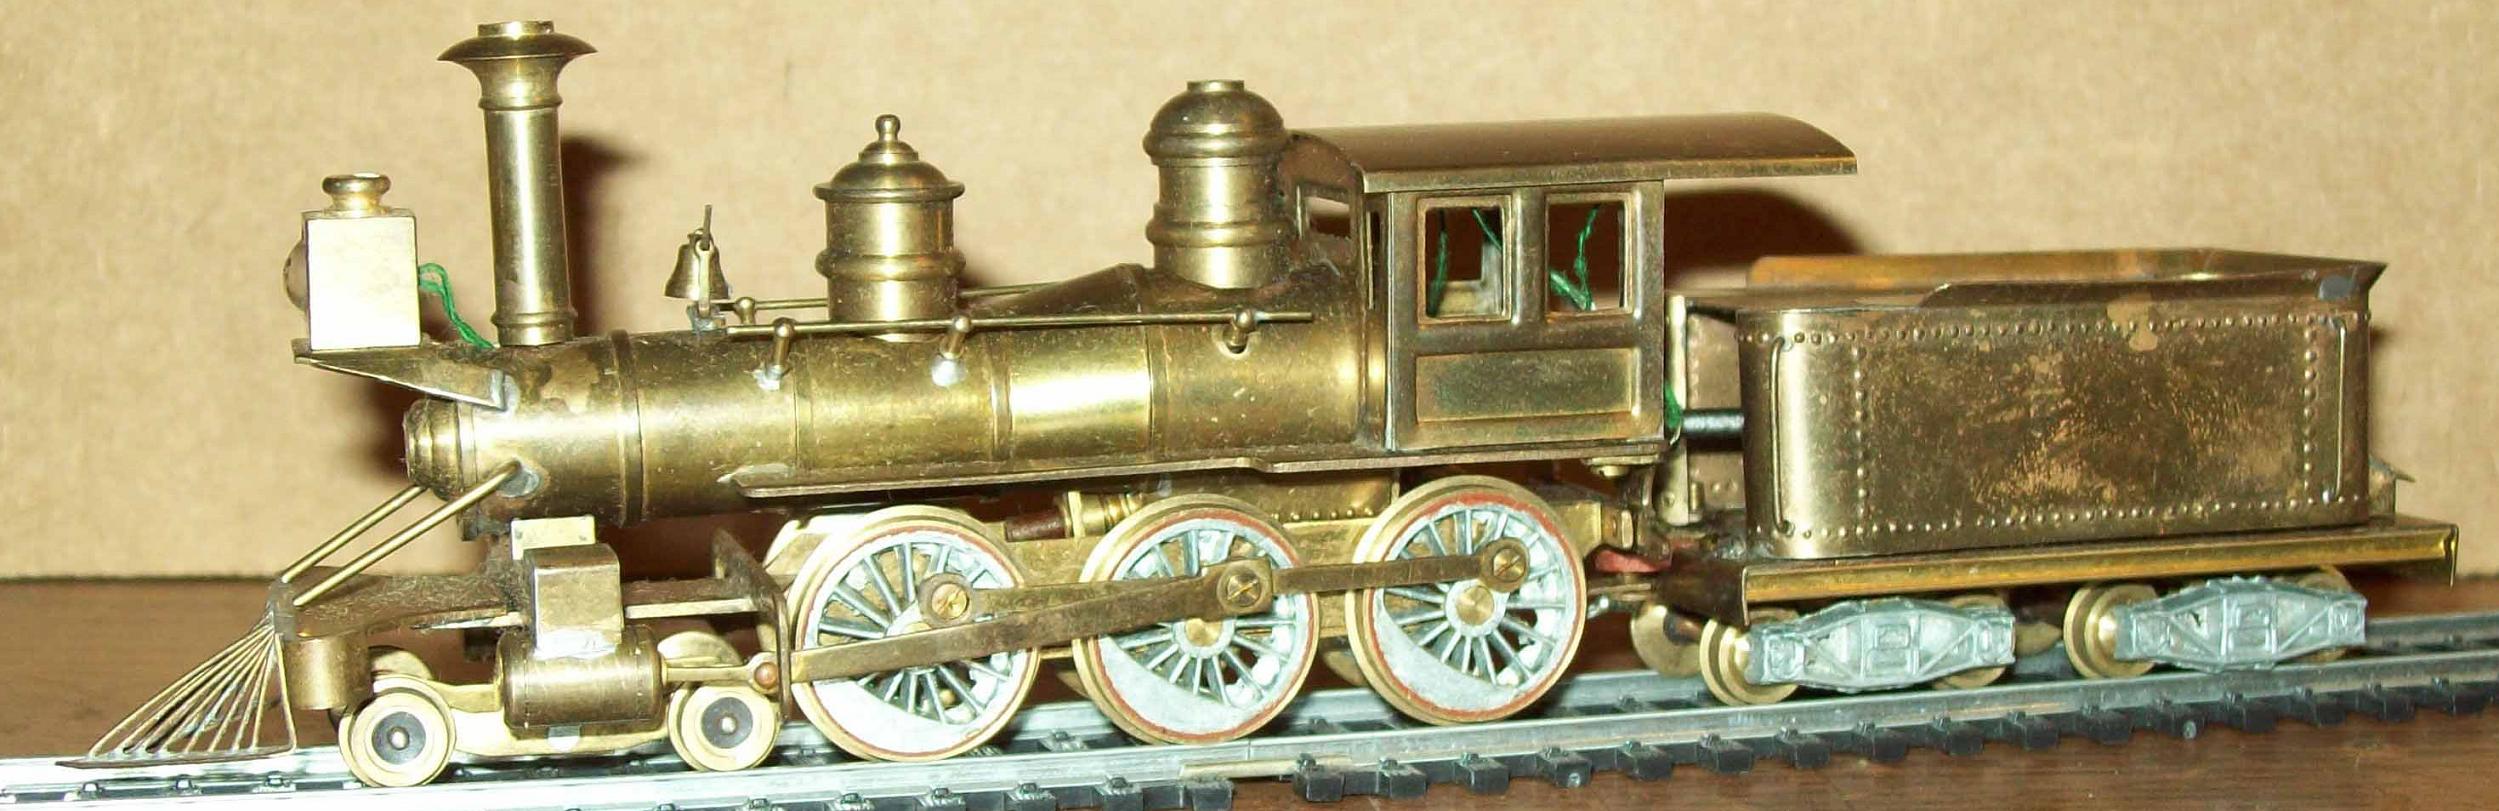
This is Tycomania V, that is to say, the fifth attempt. The first attempt was 5' x 9', double track
and incorporated a slot car set. Very ambitious, but not practical. Shrank it down into three
versions of a 4x8, eventually abandoning the slot car. This fifth, and last attempt, is a single
track using vintage brass track. The center trolley piece lifts out and the buildings safely
stored in a storage bin and the two boards, trolley and railroad track, stored flat against
the garage wall. Sometimes less is more. This one is 3.5 feet by 6' and sits atop a standard
folding plastic table. Next: to the train shows.
Edited by - Chops124 on November 20 2014 6:40:58 PM
|
|
Country: USA ~
Posts: 11686 ~
Member Since: December 09 2013 ~
Last Visit: May 26 2026
|
Alert Moderator
|
|
|
|
Posted - November 20 2014 : 6:46:32 PM
|
Chops, that would be greatly appreciated! I'll send a PM with my address. Many thanks! And I like your layout! Agreed, less is more.
Thanks,
Tim
|
|
Country: USA ~
Posts: 259 ~
Member Since: October 23 2014 ~
Last Visit: March 28 2017
|
Alert Moderator
|
|
|
|
Posted - November 20 2014 : 8:48:41 PM


|
Looks like a workable layout, Tim! I like it. Mine is over a stairwell, so I can leave it up permanently more or less, only a 4 x 4 foot. Not much room for anything else there. You should have fun figuring out how to populate that two-piece with scenery. I just got a near mint Tycoscene layout board, would love to use it sometime, it's about 5 x 5 square. I posted it in AOTW. I've been trying to find a custom graphics printer locally who can scan something that big, and reproduce it on something I can laminate, so I can actually not use the original. Will see what I can find. Anyway, keep us apprised of your progress.
Jerry in VA
" When life throws you bananas...it's easy to slip up"
|
|
Country: USA ~
Posts: 3974 ~
Member Since: January 04 2009 ~
Last Visit: January 11 2019
|
Alert Moderator
|
|
|
|
Posted - November 20 2014 : 9:04:23 PM
|
Looks good Chops. Here are a couple of my layout in progress. Can't decide how to make the roads though. It is a 4 x 6. Wish I had more room but I can work with it.
|
|
Country: USA ~
Posts: 338 ~
Member Since: February 08 2013 ~
Last Visit: January 27 2019
|
Alert Moderator
|
|
|
|
Posted - November 20 2014 : 9:53:21 PM
|
Tramp,
Lovely little layout there! I'm planning something similar w/a valley and running the middle section through it. Might fill most of the center in with hills. Western PA is mainly all hills and all the flat parts they ran trains through! More pics shortly.
Tim
|
|
Country: USA ~
Posts: 259 ~
Member Since: October 23 2014 ~
Last Visit: March 28 2017
|
Alert Moderator
|
|
|
|
Posted - November 20 2014 : 9:55:35 PM
|
| Wildecoupe, that is a cool plan for a small layout. What are the actual dimensions? What track radius?
|
|
Country: USA ~
Posts: 2087 ~
Member Since: March 16 2013 ~
Last Visit: July 05 2018
|
Alert Moderator
|
|
|
|
Posted - November 20 2014 : 10:08:41 PM
|
It's mainly 15" radius. The bigger section is 4' x 3'. The other section is 38" x 29". Overall its 4' x 5.5" roughly.
Tim
|
|
Country: USA ~
Posts: 259 ~
Member Since: October 23 2014 ~
Last Visit: March 28 2017
|
Alert Moderator
|
|
|
|
Posted - November 20 2014 : 10:10:15 PM
|
Nice layouts guys!
|
|
Country: USA ~
Posts: 6279 ~
Member Since: February 18 2009 ~
Last Visit: March 04 2022
|
Alert Moderator
|
|
|
|
Posted - November 20 2014 : 10:49:52 PM
|
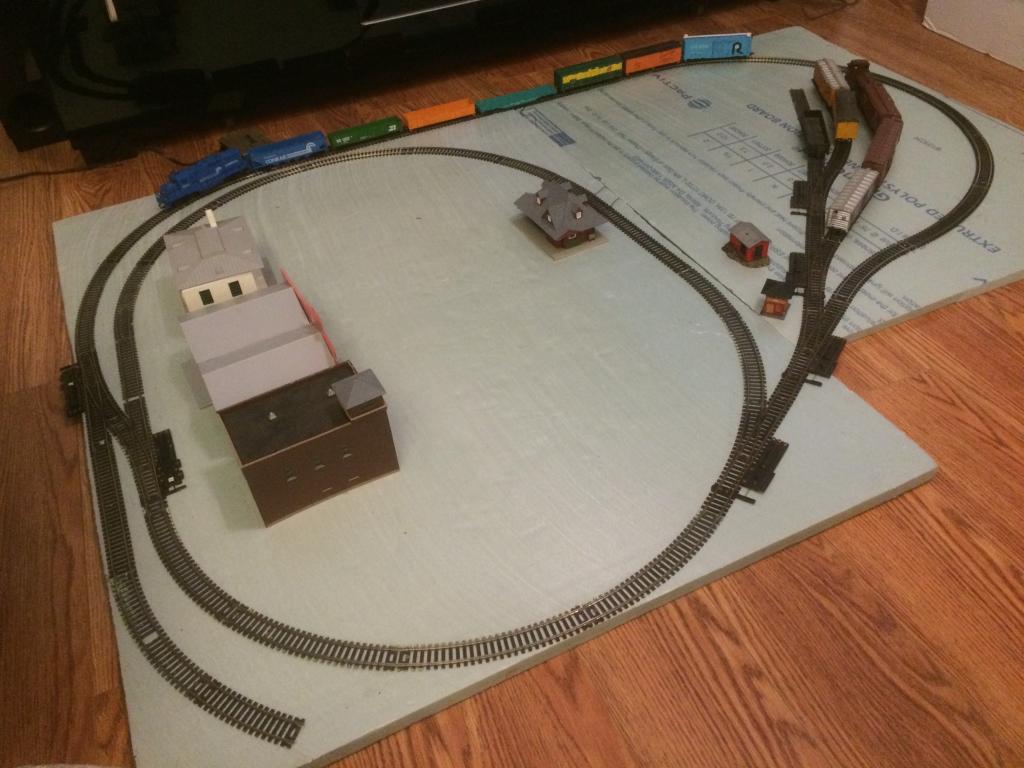
Ok, here's some more pics.
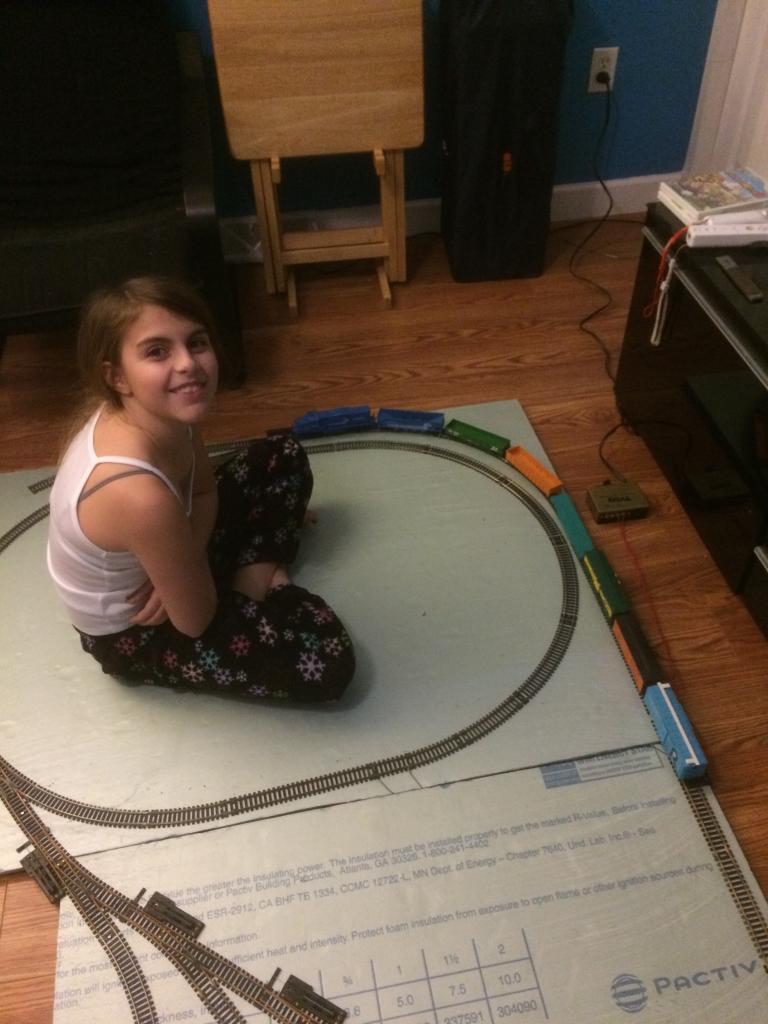
Haley getting ready to run the train around the track.
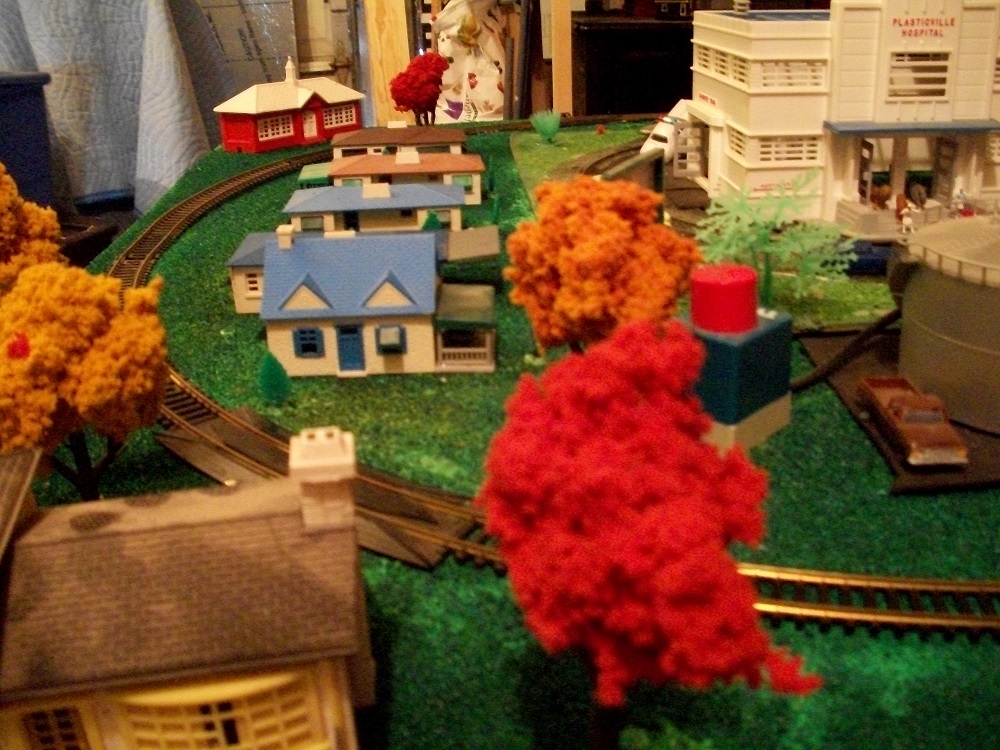
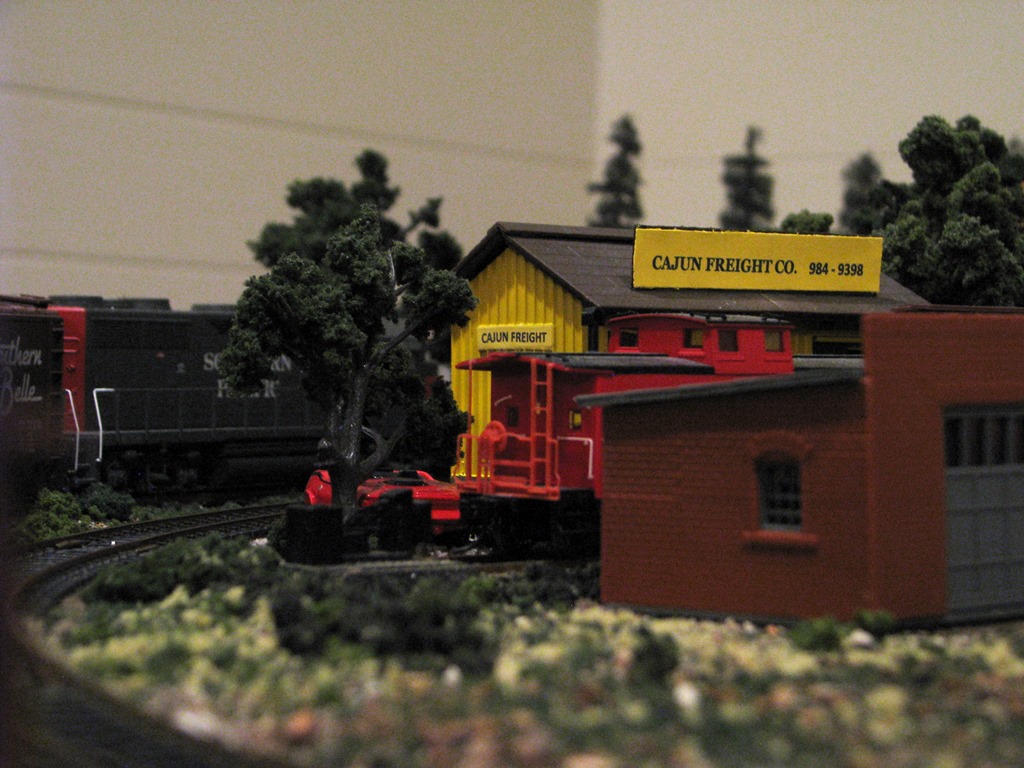
Some tweaks to the spur and placing some of my inherited Plasticville. My wife's pap passed away this summer and I was lucky enough to get his old stuff. That's really what got me back in to model railroading. I've always enjoyed scale modeling, but this was where I really wanted to spend my time and energy. In elementary school I'd read every Model Railroading magazine they had in the school library at least 10 times.
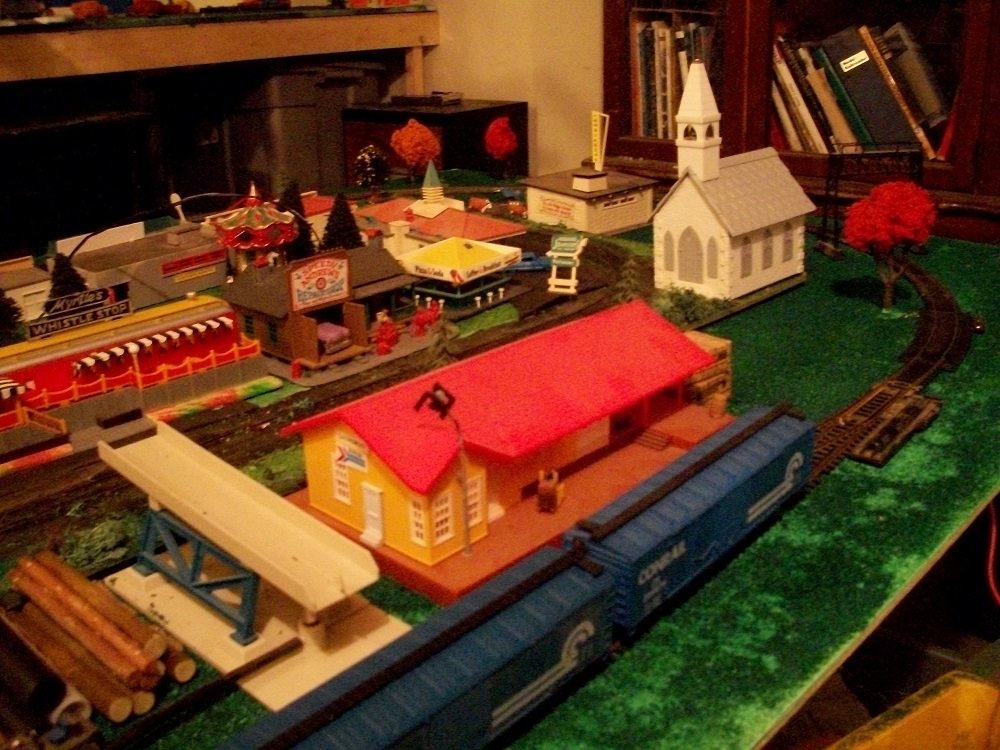
Some of my PRR consist.
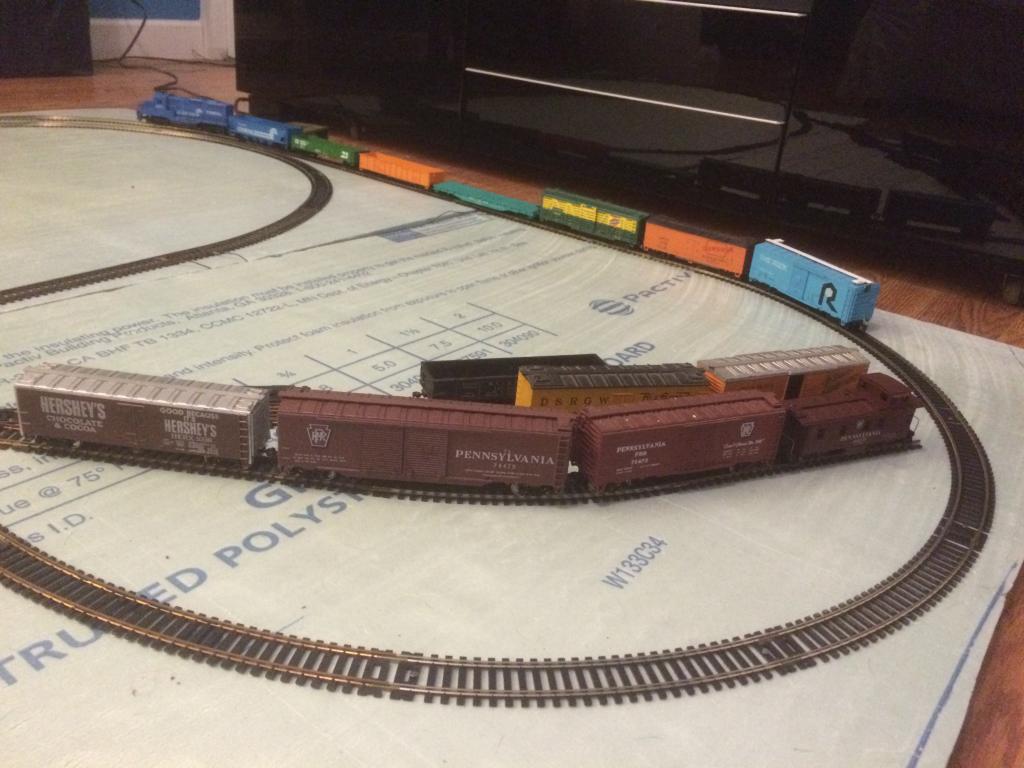
Thanks,
Tim
|
|
Country: USA ~
Posts: 259 ~
Member Since: October 23 2014 ~
Last Visit: March 28 2017
|
Alert Moderator
|
|
|
|
Posted - November 20 2014 : 10:52:39 PM
|
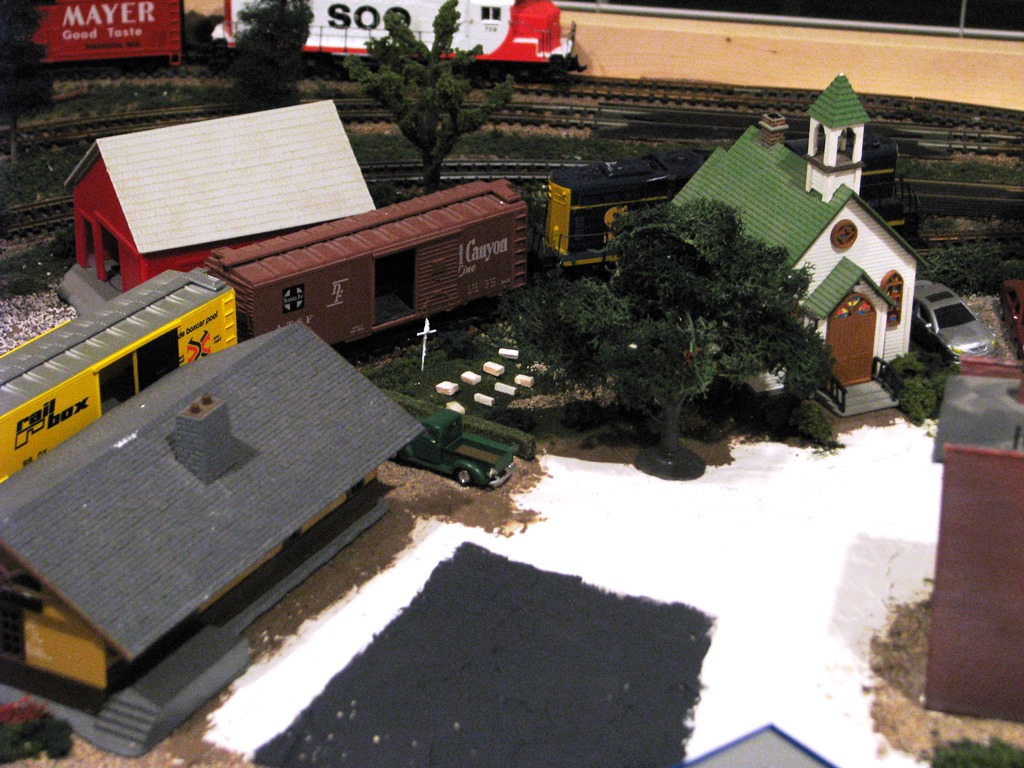
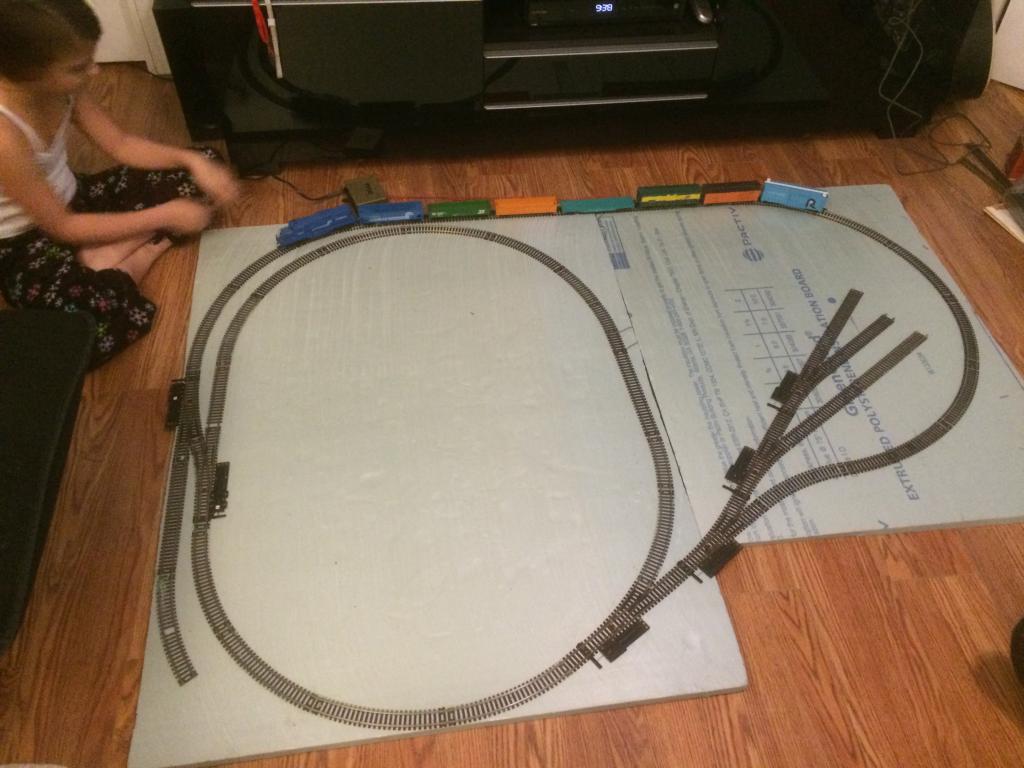
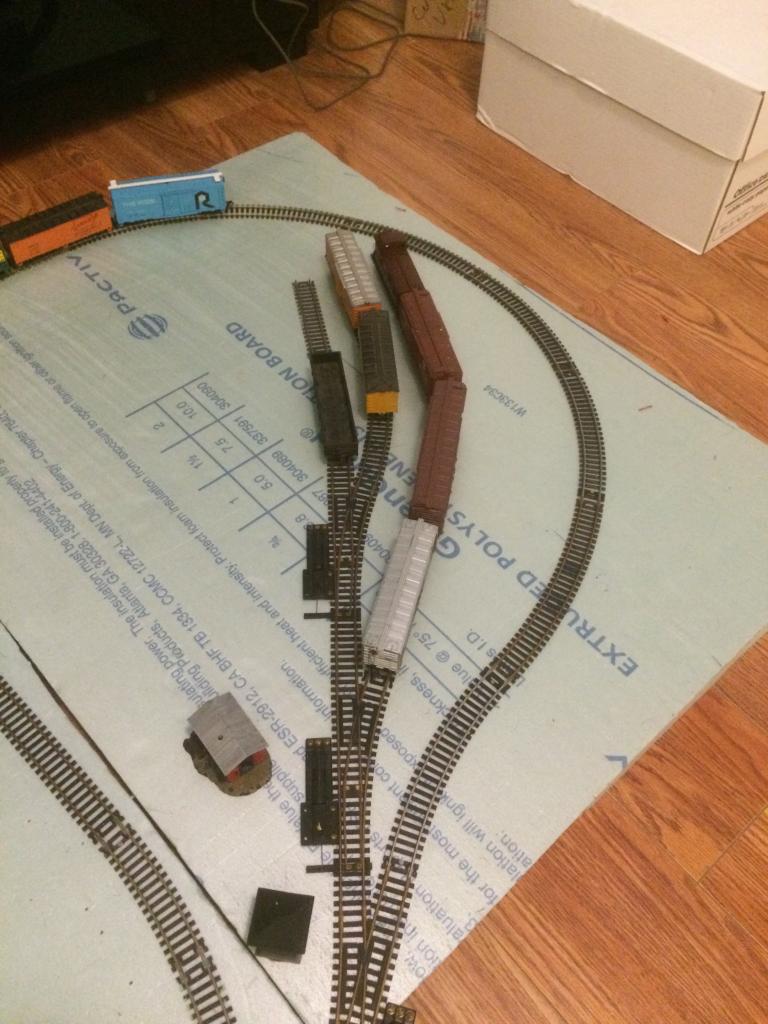
Two more shots.
|
|
Country: USA ~
Posts: 259 ~
Member Since: October 23 2014 ~
Last Visit: March 28 2017
|
Alert Moderator
|
|
|
|
Posted - November 20 2014 : 11:04:36 PM
|
Nice layouts guys. Wilde, you really need to get figurines more to scale tho. Unless you're doing a remake of the "Attack of the 50 Foot Woman".
Edited by - oldtimer52 on November 20 2014 11:04:53 PM
|
|
Country: USA ~
Posts: 865 ~
Member Since: September 23 2014 ~
Last Visit: May 01 2023
|
Alert Moderator
|
|
|
|
Posted - November 21 2014 : 01:35:48 AM
|
[quote]Looks good Chops. Here are a couple of my layout in progress. Can't decide how to make the roads
Tramp, you have stuffed an amazing amount of railroading into a 4x6. Great use of that cut that seperates
the tracks.
|
|
Country: USA ~
Posts: 11686 ~
Member Since: December 09 2013 ~
Last Visit: May 26 2026
|
Alert Moderator
|
|
|
|
Posted - November 21 2014 : 03:13:15 AM
|
quote:
A nice start to a little empire!
I have a couple of thoughts:
1. There's the potential for sideswiping where the inner and outer loops get close together.
2. It appears that the single crossover at the bottom is made with snap-switches. There's the potential for derailments there if you use body mounted couplers.
I would recommend operational testing in these areas before making things permanent. I realize you may be fully aware of these things, but I would be remiss if I did not mention them!
Happy railroading!
Glenn
I was thinking of the immortal words of Socrates, who said, "... I drank what?"
|
|
Country: USA ~
Posts: 1710 ~
Member Since: December 13 2008 ~
Last Visit: July 10 2026
|
Alert Moderator
|
|
|
|
Posted - November 21 2014 : 08:21:17 AM
|
Glenn,
Thanks for the advice. They are snap switches. I was unaware of them causing derailment, but that may explain why I have issues now and then. It's it due to the edge on the point rails? I've seen somewhere where the edge is filed down to an angle some.
I'll have to replace that section close to the outer edge track with flex to make more clearance.
Thanks!
|
|
Country: USA ~
Posts: 259 ~
Member Since: October 23 2014 ~
Last Visit: March 28 2017
|
Alert Moderator
|
|
|
|
Posted - November 21 2014 : 08:55:25 AM
|
Yah, after putting those up, looks more like O scale stuff. Easy fix. Just bring in the "wrecking ball" (aka, the kids) and have them "get rid of em". :-)
quote:Nice layouts guys. Wilde, you really need to get figurines more to scale tho. Unless you're doing a remake of the "Attack of the 50 Foot Woman".
Originally posted by oldtimer52 - November 20 2014 : 11:04:36 PM
|
|
|
Country: USA ~
Posts: 259 ~
Member Since: October 23 2014 ~
Last Visit: March 28 2017
|
Alert Moderator
|
|
|
|
Posted - November 21 2014 : 2:42:47 PM
|
quote:Glenn,
Thanks for the advice. They are snap switches. I was unaware of them causing derailment, but that may explain why I have issues now and then. It's it due to the edge on the point rails? I've seen somewhere where the edge is filed down to an angle some.
Originally posted by wildecoupe - November 21 2014 : 08:21:17 AM
|
Reversing curves cause the couplers to shift off center in opposite directions. This pulls hard sideways on the couplers pushing the wheel flanges hard against the track. Cross overs usually entail a reversing curve. The sharper the curve the more sideways forces occur. Whether this really causes your equipment a problem can only be known by running some trains through the crossover (forward and backward) to find out.
As for switches causing derailments, the main causes that I've seen are:
1) Picking the points - the filing you mention remedies this.
2) Picking the frog - the guard rails across from the frog are supposed to prevent this, but on snap switches, the flange ways by the guard rail are a bit wide allowing the wheels at the frog to head over the top or down the wrong flange way. I've had to shim some guard rails to prevent this on my layout. When fixing this, you have to be careful that you don't so narrow the flange way that your equipment binds there.
3) The outside edge of the wheel catching the inside edge of the stock rail - The points on snap switches are usually angle stock riveted to the throw bar. If the rivet is loose and the car or engine is heavy, the top of the point can be pressed below the stock rail's top so the wheel coming down the point hits the stock rail on the side rather than the top. Sometimes a thin shim in the tie behind the throw bar can raise the point enough that this no longer happens. This has to be done carefully because you don't want to suck the throw bar up hard against the bottoms of the rails.
Carpe Manana!
|
|
Country: USA ~
Posts: 2418 ~
Member Since: September 17 2013 ~
Last Visit: July 09 2026
|
Alert Moderator
|
|
|
|
Posted - November 21 2014 : 2:55:50 PM
|
Thanks shaggy for the reply! I've added some switch machines in hopes to keep them from switching on me. I'll also angle the points sone and check the gaps and such.
Tim
Edited by - wildecoupe on January 29 2015 7:24:38 PM
|
|
Country: USA ~
Posts: 259 ~
Member Since: October 23 2014 ~
Last Visit: March 28 2017
|
Alert Moderator
|
|
|
|
Posted - November 21 2014 : 4:49:36 PM
|
quote:
Thanks for the advice. They are snap switches. I was unaware of them causing derailment, but that may explain why I have issues now and then. It's it due to the edge on the point rails? I've seen somewhere where the edge is filed down to an angle some.
Originally posted by wildecoupe - November 21 2014 : 08:21:17 AM
|
Wheels can pick the points of any switch and derail, not just Snap-Switches, and putting an angle on the end of the point rail is a way to address that problem.
However, the potential problem I was addressing isn't with the snap-switch itself, but the fact that putting them together to make a crossover creates an "S" curve, which can cause derailments when using body mounted couplers. With one car on one half of the "S" curve and the other car on the other half, the couplers go to opposite sides of the track and misalignment occurs, as can be seen here:
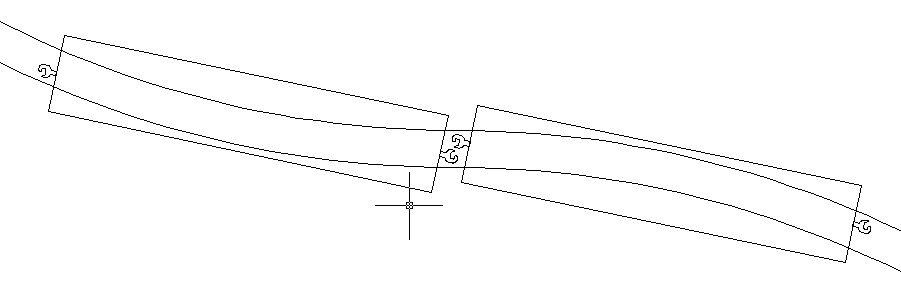
This can cause the cars to pull each other off the track. (Truck mounted couplers prevent this misalignment and can be pulled though "S" curves all day long without a problem, but that's about the ONLY advantage they have though!)
The best solution to this is to have a section of straight track, at least as long as your longest car or loco, between the opposite curves of an "S" curve. That isn't practical on a crossover, but a straight section 2.5 to 3 inches long between the snap-switches would help.
Whether you use snap-switches, #4's, #6's, etc, any single crossover creates this problem to some degree, but snap-switches exacerbate the problem because the entire diverging route is curved, whereas the diverging route on a numbered turnout is straight through the frog, and beyond it.
Your track arrangement actually creates two "S" curves back-to-back. This arrangement would eliminate both:
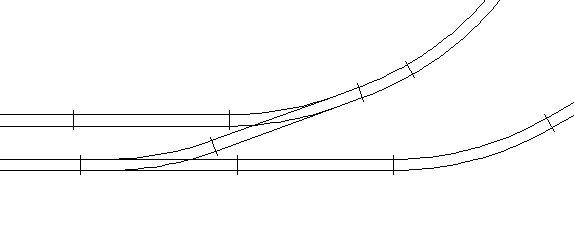
I think your present arrangement is more aesthetically pleasing, though!
Remember, this is only an issue with body mounted couplers; if you are running truck mounted couplers, the "S" curves shouldn't present a problem. Truck-mounts can cause other problems though.
Glenn
I was thinking of the immortal words of Socrates, who said, "... I drank what?"
|
|
Country: USA ~
Posts: 1710 ~
Member Since: December 13 2008 ~
Last Visit: July 10 2026
|
Alert Moderator
|
|
|
|
Posted - November 21 2014 : 5:39:10 PM
|
The layout's looking pretty good, Tim. It reminds me of my current layout under the bed. It's pretty much my only layout besides all of the layout sections in the garage since I don't really have room for any major layouts or whatever.
-Steve
"A lot of modellers out there who go to these train shows see broken HO stuff and go, 'This is useless' when, in reality, they can still be used for modeling whether it's as a prop on your layout or a cool project to make something old new again."
|
|
Country: USA ~
Posts: 3533 ~
Member Since: February 17 2014 ~
Last Visit: January 11 2023
|
Alert Moderator
|
|
|
|
Posted - November 21 2014 : 6:20:30 PM
|
Glenn,
Thanks for the clarification. Most of my cars have been converted to body mounted couplers. I'm guessing that is what is causing the issue that I have periodically. This consist and engine have truck mounted couplers though. I'll have to limit the cars running through this layout. No room to put in some straight between the switches.
Thanks again!
Tim
|
|
Country: USA ~
Posts: 259 ~
Member Since: October 23 2014 ~
Last Visit: March 28 2017
|
Alert Moderator
|
|
|
|
Posted - November 24 2014 : 11:28:16 AM
|
Looks like I'm going to have to pack up my layout. Trying to sell our house. Found a great house where I'll be able to set up a 4-5' x 12' layout! Will still use this one to play around with and for the kids to play with.
Wish me luck!
Tim
|
|
Country: USA ~
Posts: 259 ~
Member Since: October 23 2014 ~
Last Visit: March 28 2017
|
Alert Moderator
|
|
|
|
Posted - December 15 2014 : 3:23:24 PM
|
My temporary layout may become more permanent! Our offer on a second house was just accepted! I'll have tons more room to play with!
Tim
|
|
Country: USA ~
Posts: 259 ~
Member Since: October 23 2014 ~
Last Visit: March 28 2017
|
Alert Moderator
|
|
|
|
Posted - January 28 2015 : 10:55:17 AM
|
New house fell through. In the process of rearranging rooms in our house to give me a dedicated space for modeling and hobbies.
Glenn, going to try that change in the switch arrangements.
Tim
|
|
Country: USA ~
Posts: 259 ~
Member Since: October 23 2014 ~
Last Visit: March 28 2017
|
Alert Moderator
|
|
|
|
Posted - January 28 2015 : 9:39:05 PM
|
I just saw this discussion.
Too bad about the house deal. Real estate deals suck. I'm on my third and final house. They'll carry me out of here in a bag.
Love your temporary layout! My only comments, based on trial and error experience, are basically what others have said. The inside loop is too close to the outer loop, which will only matter if you ever expand to run two trains at once or try to "park" a train on one loop. Otherwise it doesn't matter.
Switches, no matter what type, can be "picky." Part of the hobby is adjusting and working with things until it all comes together. I think the switches themselves are fine, but maybe try to work a bit more distance into the crossover as you become permanent. For example, if you put a straight track between the two switches on the crossover, then make the whole layout longer to get it all to fit, you would basically solve both problems and give yourself more room for your switch yard. Your inner loop would then be further from your outer loop. gmoney's advice is great as well. Just avoid the "s curve" setup.
Whatever you do, if you keep tinkering you'll find a layout you like. Also great to see you get the family involved. This is a great hobby for families. I especially love this because it reminds me of a small version of my old layout.
|
|
Country: USA ~
Posts: 1166 ~
Member Since: October 18 2009 ~
Last Visit: December 23 2018
|
Alert Moderator
|
|
|
|
Posted - January 29 2015 : 5:15:36 PM
|
Sorry to hear about the house, Tim; I do wish you good luck on the "homefront" in the future. I also hope the switch rearrangment solves your derailment issues, otherwise it could be difficult to diagnose and remedy.
Glenn
I was thinking of the immortal words of Socrates, who said, "... I drank what?"
|
|
Country: USA ~
Posts: 1710 ~
Member Since: December 13 2008 ~
Last Visit: July 10 2026
|
Alert Moderator
|
|
|
|
Posted - May 11 2015 : 01:45:00 AM
|
| I'm using Bachmann E-Z-Track on a coffee table for my circular test track. Some joints have a rise in them which causes the leading wheelset on my six-wheel B-unit Hobbytown to derail. Can this problem be engineered out of the trucks, or is this unavoidable in six-wheel trucks on a rise in a curve?
|
|
Country: USA ~
Posts: 11 ~
Member Since: March 29 2015 ~
Last Visit: June 04 2015
|
Alert Moderator
|
|
|
|
Posted - May 11 2015 : 4:27:12 PM
|
| The rail joiners are not overlapping the rail? The are secure on both ends, that is?
|
|
Country: USA ~
Posts: 11686 ~
Member Since: December 09 2013 ~
Last Visit: May 26 2026
|
Alert Moderator
|
|