|
|
 Posted - April 28 2015 : 09:01:59 AM Posted - April 28 2015 : 09:01:59 AM


|
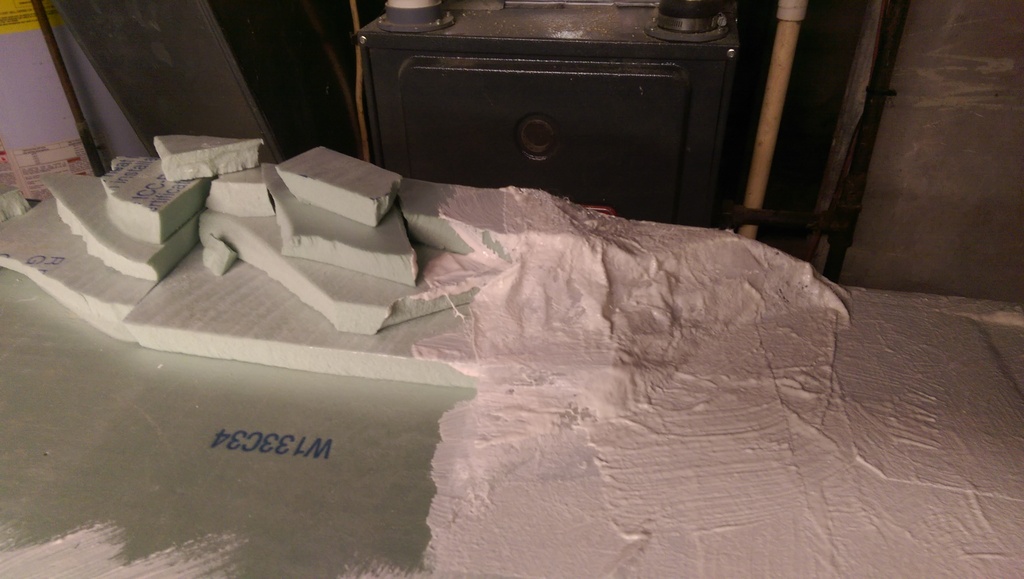
Wanted to put together a smaller module. The frame is built from an Ikea toekick "kit". It's 5/8 MDFchip board (thanks Alex), 88" long, 4.5" wide. The braces across the center are from the filler they ship with the toekick. These were in As-Is for $2.90 a piece. Picked up 6 more this past week for more modules and the frame for my switching puzzle.
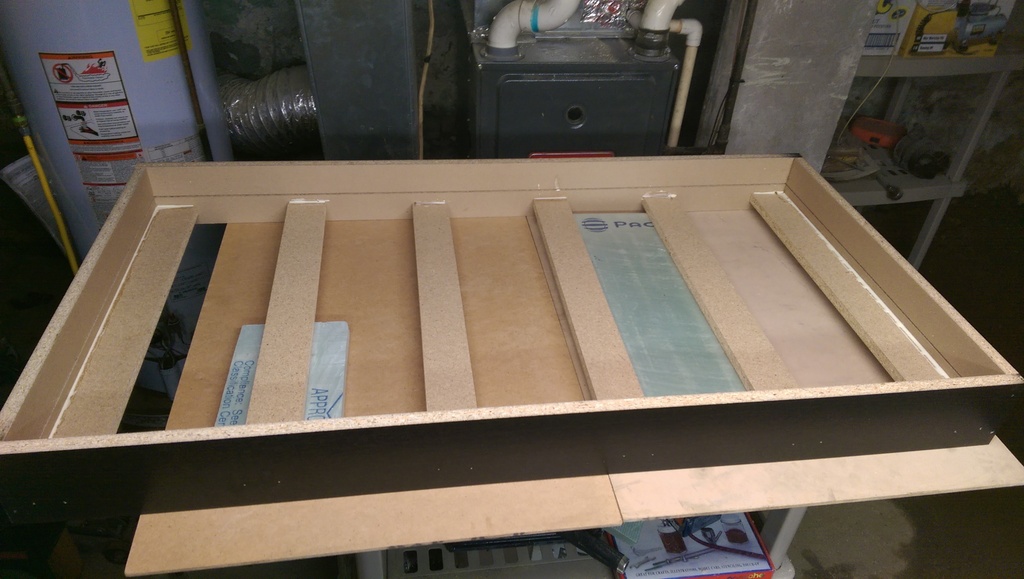
A simple Inglenook/shoofly. The surface and the "hills" will be covered with used dryer sheets with a layer of joint compound.
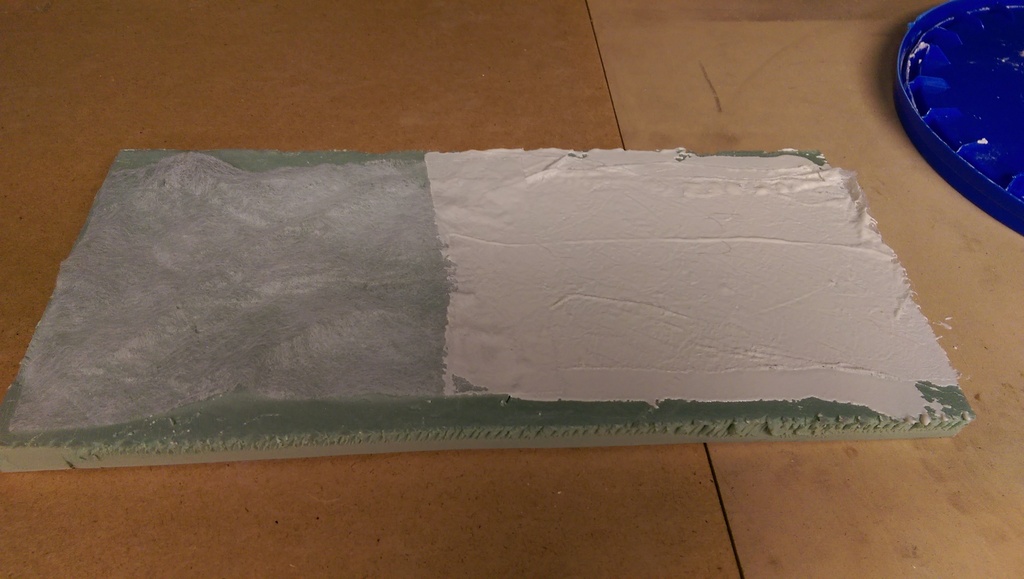
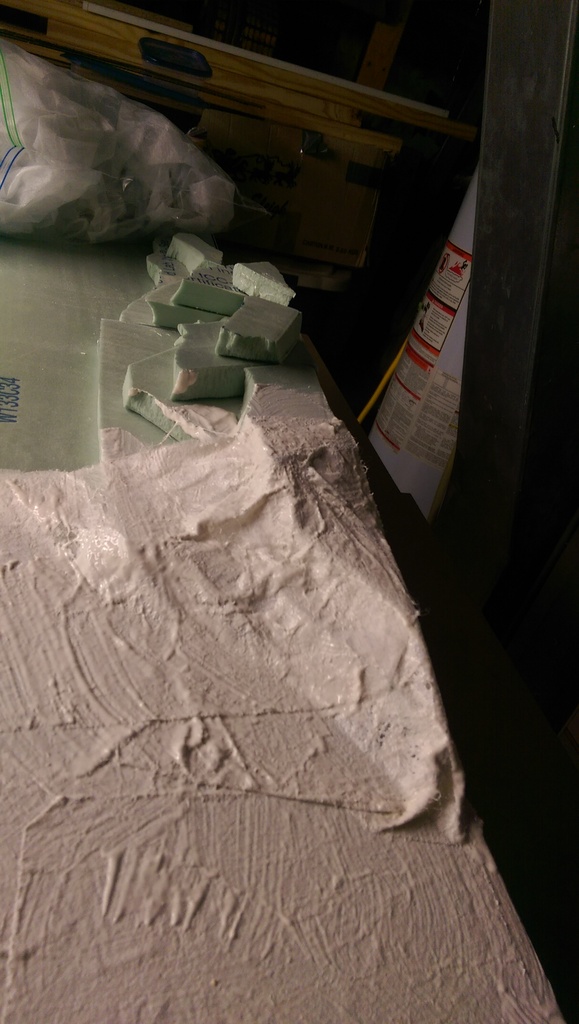
Here's my test of the dryer sheet with joint compound. Goes on nice and smooth. This joint compound has been thinned by about 50%.
Tim
Edited by - wildecoupe on April 29 2015 6:11:50 PM
|
Country:  USA ~
Posts: 259 ~
Member Since: October 23 2014 ~
Last Visit: March 28 2017 USA ~
Posts: 259 ~
Member Since: October 23 2014 ~
Last Visit: March 28 2017
|
 Alert Moderator
|
|
|
|
Posted - April 28 2015 : 9:19:49 PM
|
| That dryer sheet/joint compound looks interesting. That's on top of foam? Thanks for the ongoing photos of your work Tim.
|
|
Country: USA ~
Posts: 2087 ~
Member Since: March 16 2013 ~
Last Visit: July 05 2018
|
Alert Moderator

|
|
|
|
Posted - April 28 2015 : 10:46:56 PM
|
Glad to share. Helps keep me motivated. The dryer sheets/joint compound are directly on top of the foam. I tested the bond today and it sticks pretty tight. I'll be covering the whole layout with it and then paint. Then lay road bed, then track...
Tim
|
|
Country: USA ~
Posts: 259 ~
Member Since: October 23 2014 ~
Last Visit: March 28 2017
|
Alert Moderator
|
|
|
|
Posted - April 28 2015 : 11:57:59 PM
|
Which dryer sheet did you use for that? Was the joint compound thin enough to be painted on
with a brush, or did you still have to use a spat??
|
|
Country: USA ~
Posts: 865 ~
Member Since: September 23 2014 ~
Last Visit: May 01 2023
|
Alert Moderator
|
|
|
|
Posted - April 29 2015 : 09:31:03 AM
|
| They are used Snuggle dryer sheets. I used a 4" blade, but it's probably thin enough to use a brush. I'll probably brush it on for the coat on the module to help keep it smooth.
|
|
Country: USA ~
Posts: 259 ~
Member Since: October 23 2014 ~
Last Visit: March 28 2017
|
Alert Moderator
|
|
|
|
Posted - April 29 2015 : 4:03:56 PM
|
| I don't want to start an argument but are you sure that is MDF. It looks to me like chipboard. If it were 5/8 MDF I doubt you would be able to pick it up without a forklift.
|
Country:  Canada ~
Posts: 265 ~
Member Since: March 07 2014 ~
Last Visit: June 26 2018 Canada ~
Posts: 265 ~
Member Since: March 07 2014 ~
Last Visit: June 26 2018
|
Alert Moderator
|
|
|
|
Posted - April 29 2015 : 6:10:23 PM
|
You're right, it's chip board. Can never remember the name of that did. Hopefully it holds up ok. It is pretty light.
Tim
quote:I don't want to start an argument but are you sure that is MDF. It looks to me like chipboard. If it were 5/8 MDF I doubt you would be able to pick it up without a forklift.
Originally posted by Retired Alex - April 29 2015 : 4:03:56 PM
|
Edited by - wildecoupe on April 29 2015 9:33:42 PM
|
|
Country: USA ~
Posts: 259 ~
Member Since: October 23 2014 ~
Last Visit: March 28 2017
|
Alert Moderator
|
|
|
|
Posted - April 29 2015 : 10:29:40 PM
|
Thanks. Keep us posted on the results of this. Looks like it may be lighter and just as
strong as the plaster cloth (and maybe a lot better looking on the finish).
|
|
Country: USA ~
Posts: 865 ~
Member Since: September 23 2014 ~
Last Visit: May 01 2023
|
Alert Moderator
|
|
|
|
Posted - April 29 2015 : 10:52:17 PM
|
| Should be alright. As a precaution though, I would seal the edges with paint or varnish before working on any scenery. That stuff soaks up moisture and swells terribly.
|
|
Country: Canada ~
Posts: 265 ~
Member Since: March 07 2014 ~
Last Visit: June 26 2018
|
Alert Moderator
|
|
|
12444
Switcher

Status:
offline
| |
Posted - April 30 2015 : 11:04:51 AM
|
Lookin' good so far. Keep the good work up.
I'm home schooled, I love to work on cars and anything with an engine and wheels, I love model RR'ing, and listening to Dire Straits.
|
|
Country: USA ~
Posts: 43 ~
Member Since: November 19 2013 ~
Last Visit: May 30 2015
|
Alert Moderator
|
|
|
|
Posted - April 30 2015 : 11:21:22 AM
|
Thanks! Here's the latest from last night.
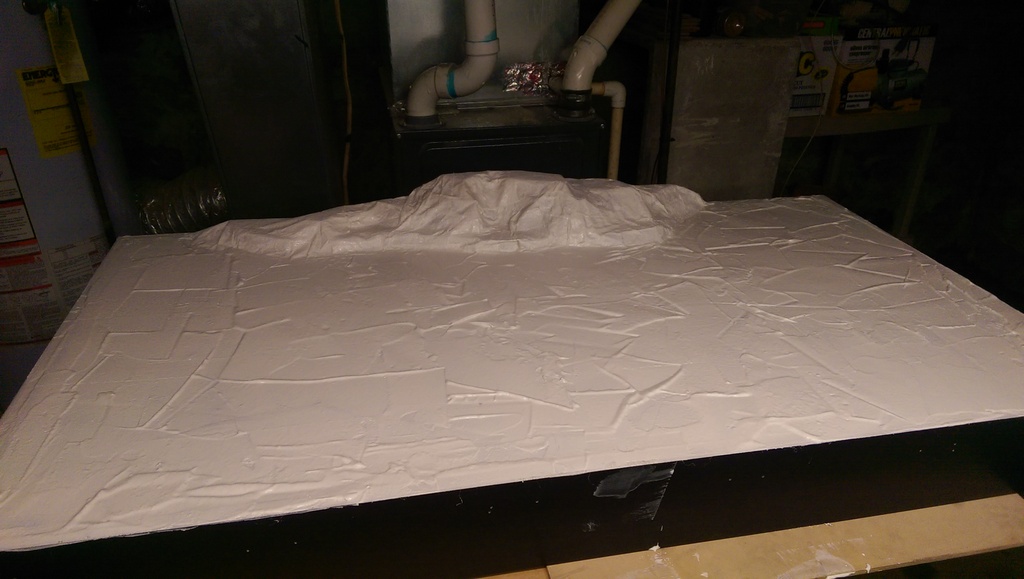
Completely covered plus a layer of joint compound spread by 4" putty knife. I didn't seal the edges of the chipboard, but this morning showed no signs of swelling. I may add some hills on the near side yet. I need to pick up some 2" foam to carve for more rolling terrain. Using 1" from leftover house remodeling.
|
|
Country: USA ~
Posts: 259 ~
Member Since: October 23 2014 ~
Last Visit: March 28 2017
|
Alert Moderator
|
|
|
|
Posted - April 30 2015 : 7:11:49 PM
|
quote:Thanks! Here's the latest from last night.
Originally posted by wildecoupe - April 30 2015 : 11:21:22 AM
|
The URL's of your photos return 404 not found.
Carpe Manana!
|
|
Country: USA ~
Posts: 2418 ~
Member Since: September 17 2013 ~
Last Visit: July 09 2026
|
Alert Moderator
|
|
|
|
Posted - April 30 2015 : 7:16:43 PM
|
| Looks like you may need to sand those ridges off to let the track lay flat? I only say this because I was rather cavalier about using different pieces of chip board and the little bumps are screwin' up my track plan. So now, my ultimate plan is to replace the layout board . . . which I'm looking forward to and kind of dreading at the same time.
|
|
Country: USA ~
Posts: 2087 ~
Member Since: March 16 2013 ~
Last Visit: July 05 2018
|
Alert Moderator
|
|
|
|
Posted - May 01 2015 : 07:58:04 AM
|
I'll clear a path for the roadbed somehow. I was thinking of laying down the roadbed first, but figured I'd try it this way. This is technically my first module, the switching layout just happened to come to light first, but since this was a smaller endeavor, it's turning in to my guinea pig for testing methods...
For the bigger switching layout, I will most likely lay out the roadbed first, then cover with dryer sheets and joint compound, instead of trying to get it all smooth and flat after. That's part of the fun of creating layouts; trial and error and learning how not to do things! 
Is anyone still seeing 404 for the pictures? They are showing OK here and from a test server I have at work.
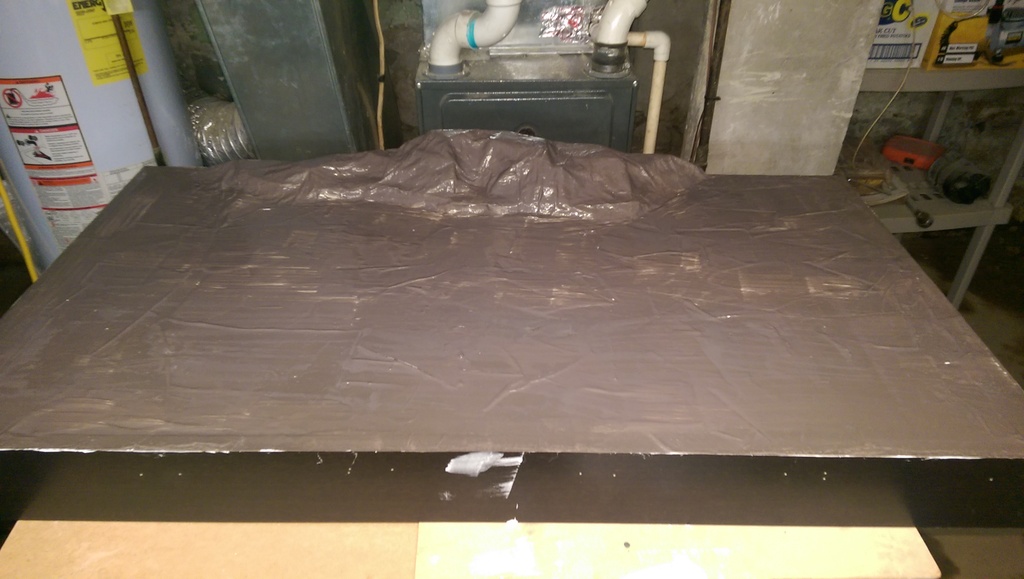
Here's the latest after a coat of paint. Need to order static grass and build my applicator. Not crazy how the hill turned out. Will use the carved foam method next time. I'll just cover this one with lots of trees and shrubs.
|
|
Country: USA ~
Posts: 259 ~
Member Since: October 23 2014 ~
Last Visit: March 28 2017
|
Alert Moderator
|
|
|
|
Posted - May 01 2015 : 8:05:18 PM
|
No more 404, here. Looks like the problem is resolved. 
Carpe Manana!
|
|
Country: USA ~
Posts: 2418 ~
Member Since: September 17 2013 ~
Last Visit: July 09 2026
|
Alert Moderator
|
|
|
|
Posted - May 16 2015 : 12:36:44 PM
|
Got the roadbed down. Woodland Scenics foam. Not crazy about it. Might try cork next few modules. It's squishy. Glued it down with Loctite Seal and Bond. Worked well. Also used that to glue the track down. It is silicone based. So if I need to peel it up, it comes up pretty easy.
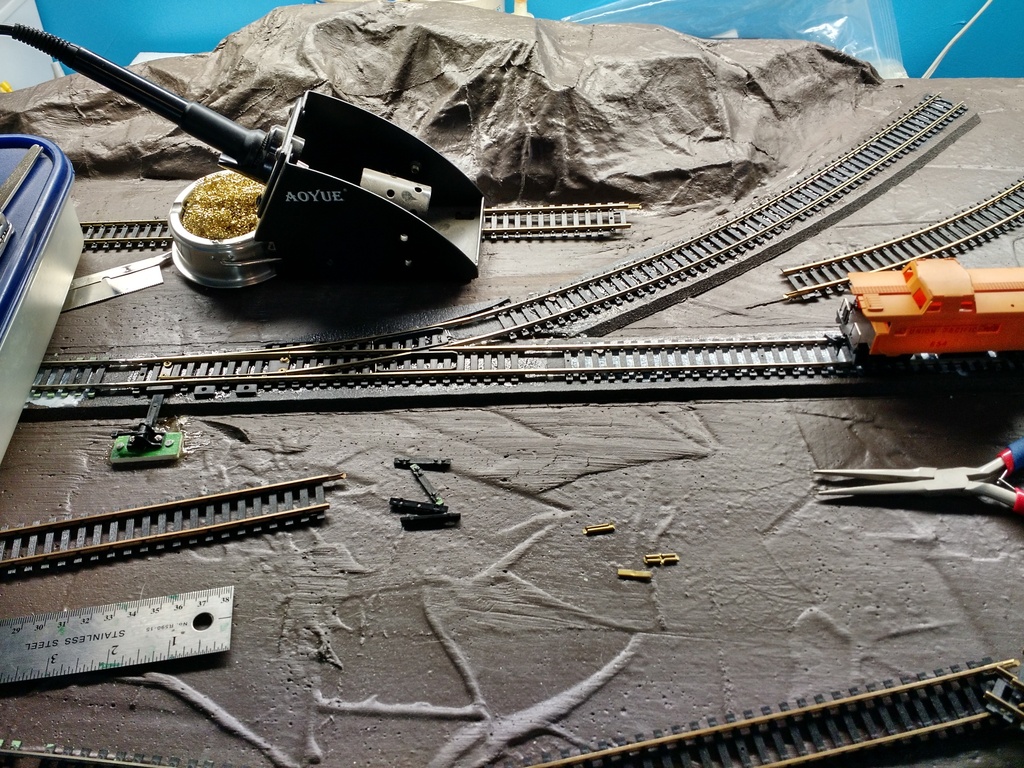
Going to try using Bachmann EZ track on the end to connect to the other modules. I'll cut them in half so the halves connect to each other.
|
|
Country: USA ~
Posts: 259 ~
Member Since: October 23 2014 ~
Last Visit: March 28 2017
|
Alert Moderator
|
|
|
|
Posted - May 16 2015 : 12:38:14 PM
|
| Nice work!
|
|
Country: USA ~
Posts: 11686 ~
Member Since: December 09 2013 ~
Last Visit: May 26 2026
|
Alert Moderator
|
|
|
|
Posted - May 20 2015 : 12:49:33 PM
|
Thanks Chops! Figured out how to connect my modules together. Going to use Bachmann EZ track. I cut in half a 9" straight. I'll glue the halves down on either end of this module and others. Sort of like the T-Trak modules. I only ever plan to use these myself, so not worried about not really fitting to standards. Hopefully will get pictures tonight after I get the EZ track glued down.
Tim
|
|
Country: USA ~
Posts: 259 ~
Member Since: October 23 2014 ~
Last Visit: March 28 2017
|
Alert Moderator
|
|
|
|
Posted - May 20 2015 : 8:36:48 PM
|
Eagerly awaiting the next set of photos. Clearly
you planned this meticulously from the beginning.
This is going to be a gorgeous layout.
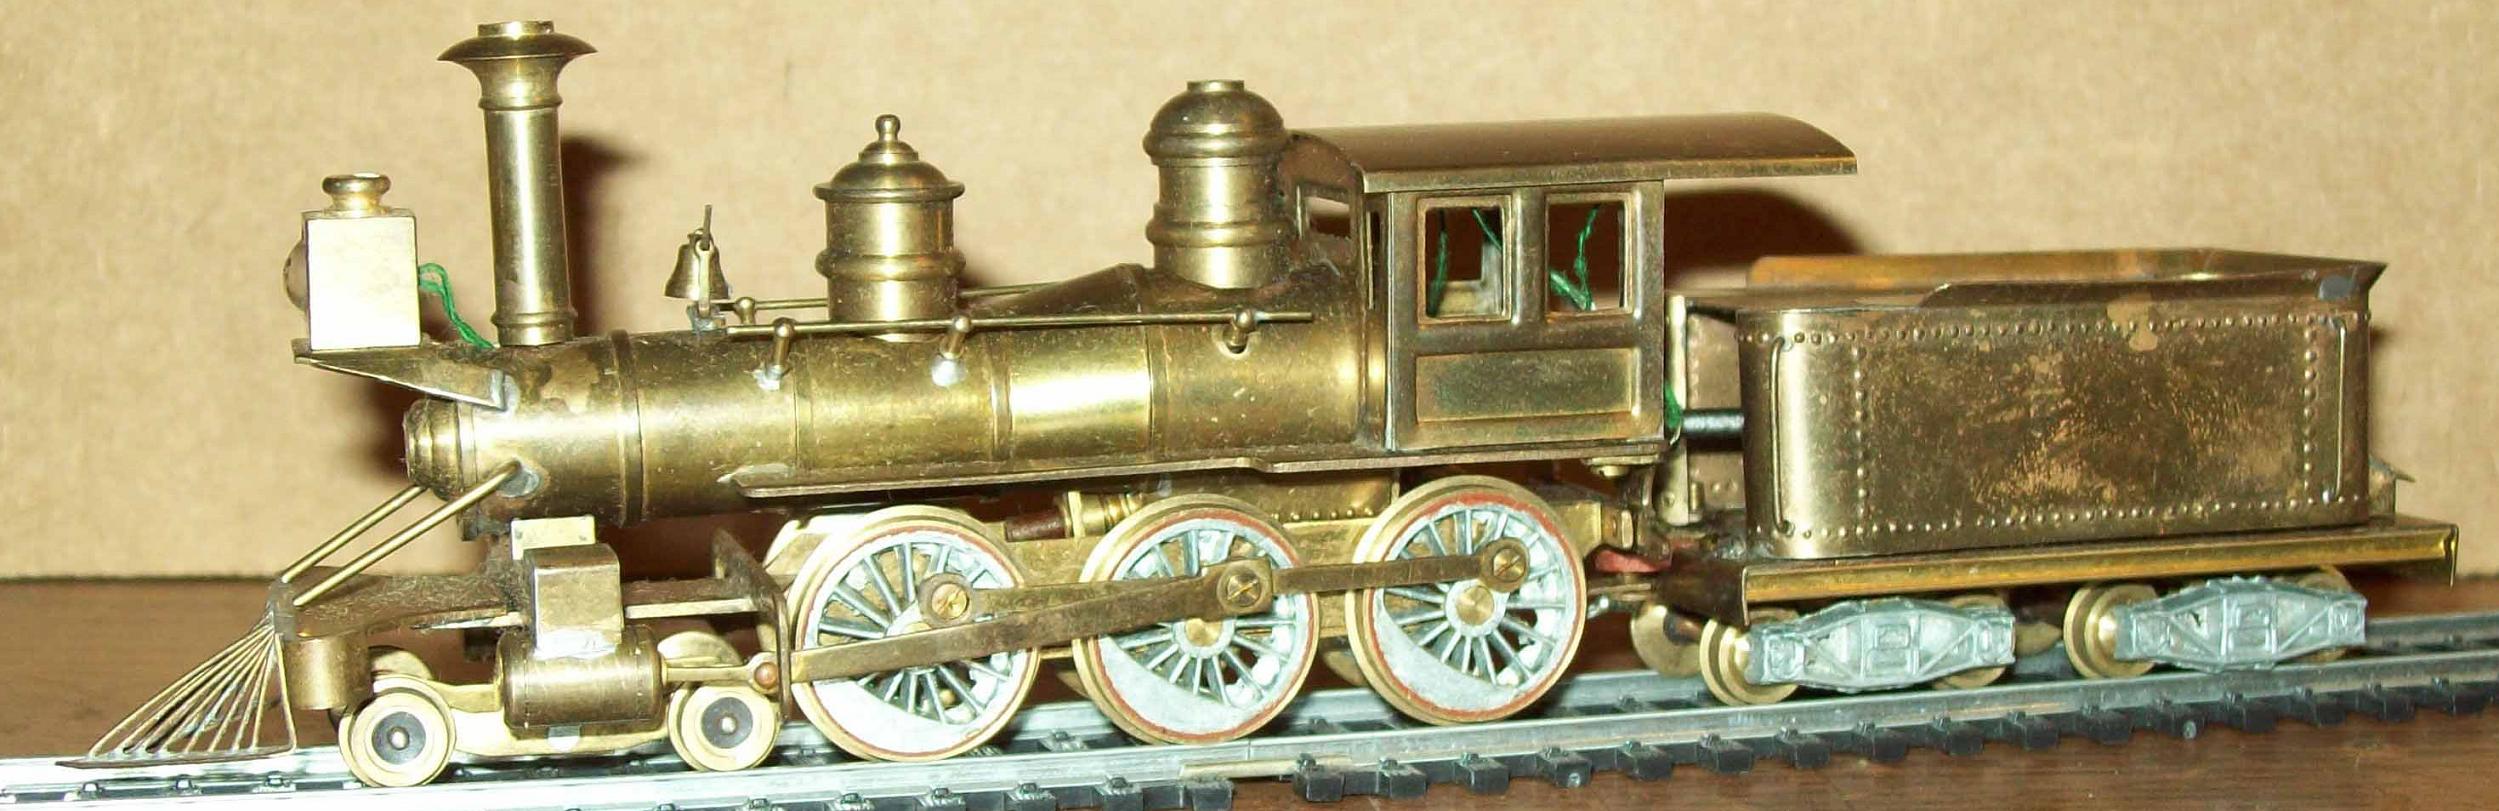
Great concept to join modules. I also see some
brass track. Brass track is beautiful and classic.
I give mine a wipe, every three months or so,
with Wahl Hair Clipper Oil and it performs
superbly.
|
|
Country: USA ~
Posts: 11686 ~
Member Since: December 09 2013 ~
Last Visit: May 26 2026
|
Alert Moderator
|
|
|
|
Posted - May 21 2015 : 09:02:55 AM
|
Didn't get a chance to work on it last night. Hopefully tonight. Have some nice older Atlas #4 turnouts that I'll be using that are brass. Thanks for the tip with the oil. I'll have to pick some of that up. Can also use it for my trimmer.
|
|
Country: USA ~
Posts: 259 ~
Member Since: October 23 2014 ~
Last Visit: March 28 2017
|
Alert Moderator
|
|
|
|
Posted - June 05 2015 : 2:41:25 PM
|
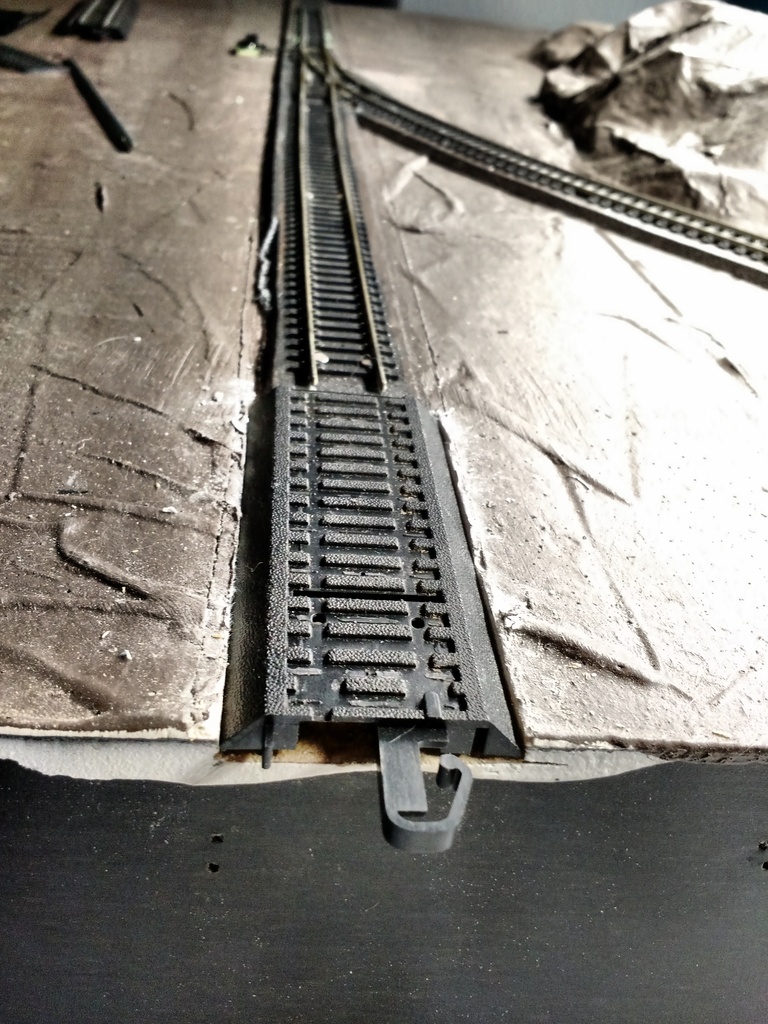
Got the Bachmann EZ track cut and Gorilla glued in place on one end. Need to notch the other end yet.
|
|
Country: USA ~
Posts: 259 ~
Member Since: October 23 2014 ~
Last Visit: March 28 2017
|
Alert Moderator
|
|