|
|
 Posted - December 09 2014 : 6:50:14 PM Posted - December 09 2014 : 6:50:14 PM


|
One of my Mantua 0-6-0's had worn side rods. The holes were worn oval and there was a lot of slack and rattle in the rods. It ran okay, but I figured that the hammer from all that slack was probably speeding up the wear on the crank pins, so it was time to make some new rods.
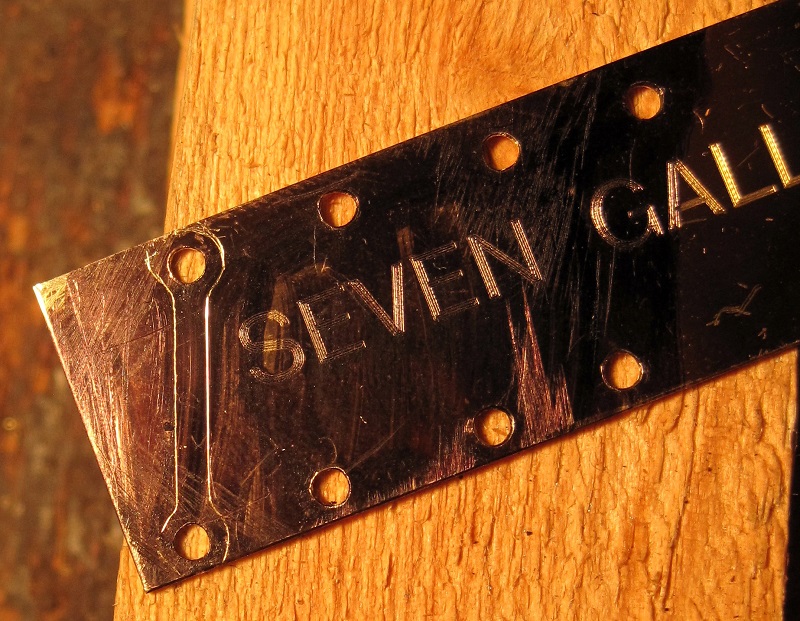
The rods measured .6mm thick. I had some brass that thick on hand. The holes were a little over 5/64" in diameter so I drilled pairs of holes in the brass sheet the same distance apart as in an unworn side rod I had on hand:
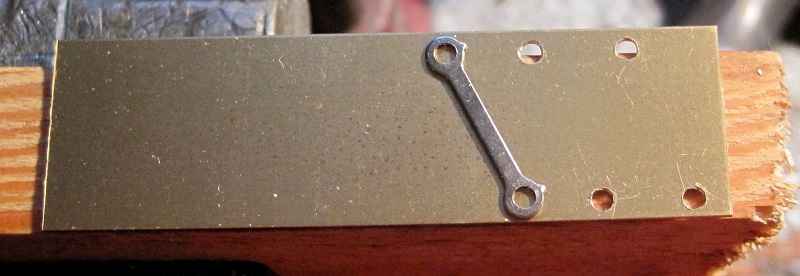
Here, a ream holds one end of the good side rod while I start a drill hole in the other end:
Here, the hole is reamed out smooth:
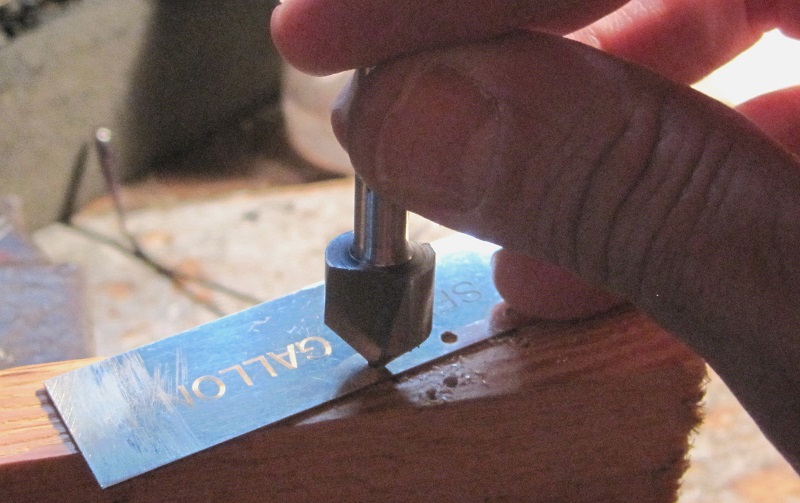
Burrs are removed from the ends of the hole with a light twist of a countersink bit:
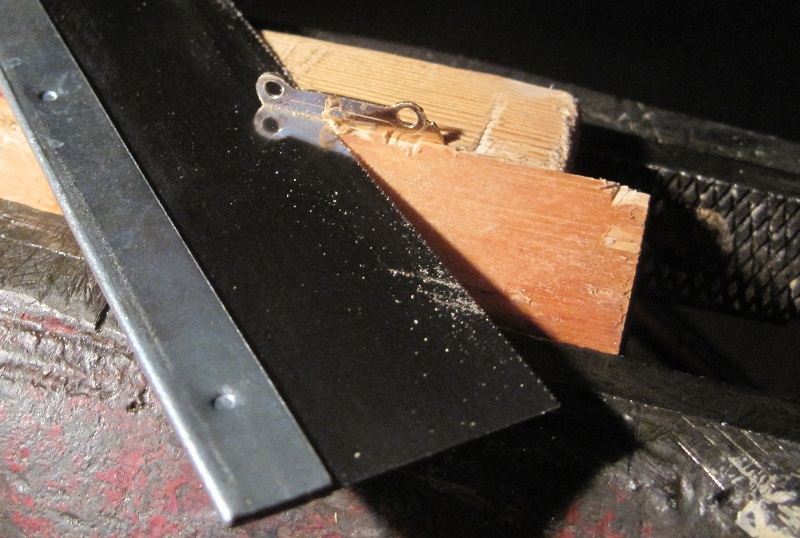
The brass is darkened with a black marker then the outside shape of the side rod is traced on with an X-acto knife with a number 11 blade:
One side of the side rod is filed to shape with the rod still on the larger piece of brass. Then, the side rod is cut free with a razor saw:
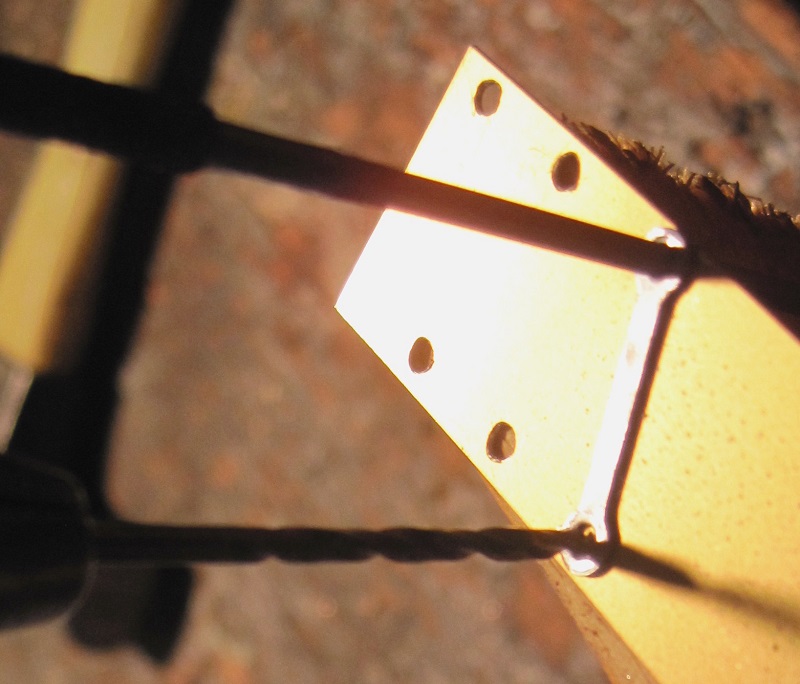
The rod is tacked to the edge of a board. Another board is put in front of it and the whole works is put in a vice. This holds the side rod in place so the unfinished side can be filed to shape:
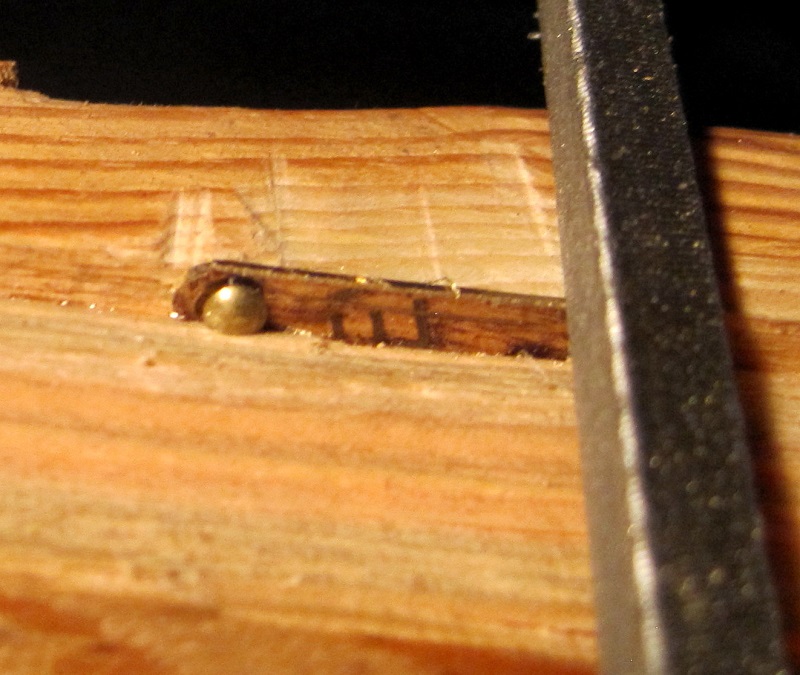
The tacks will be pulled and the side rod will be cleaned up with the last few strokes of the file:
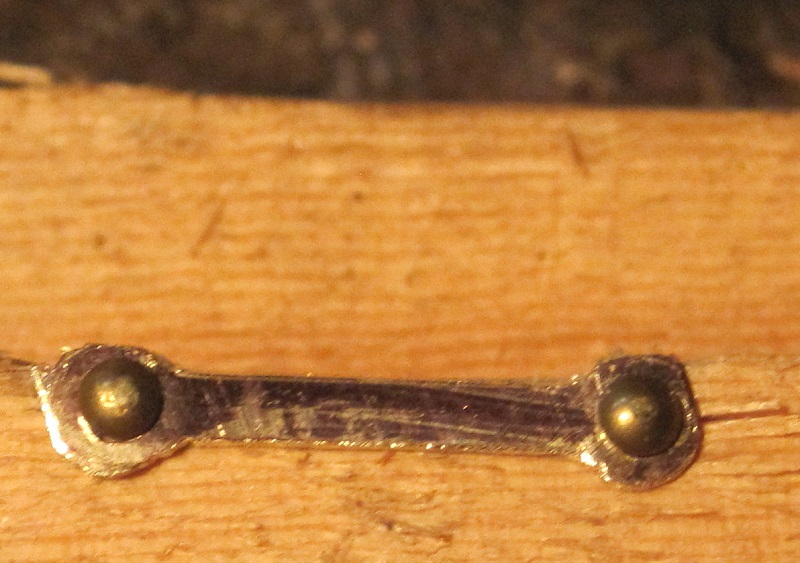
On top is one of the new side rods. Below it is the Mantua one I used for a pattern. Mine is a bit big because of the mechanics of tracing the pattern, but I'll live with that rather than try to guess how much more I need to file past the line.
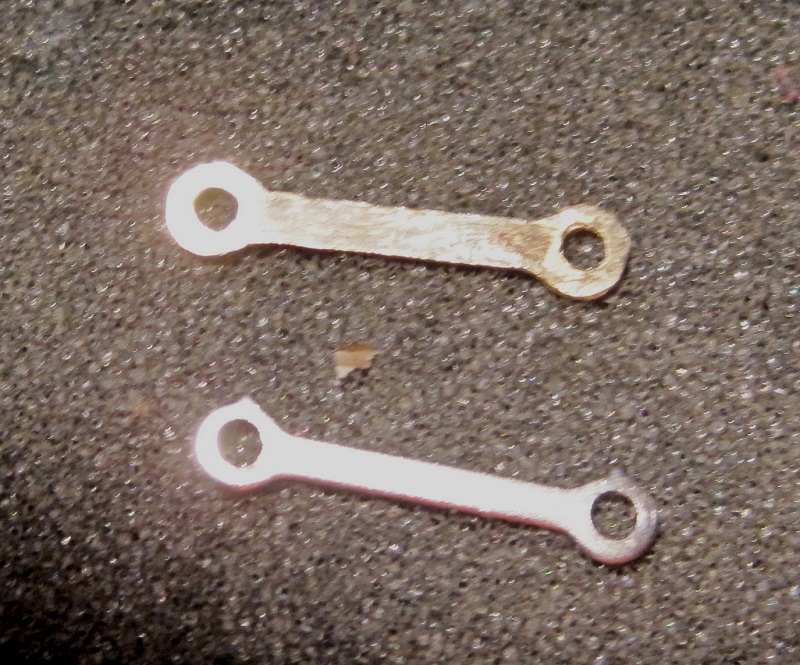
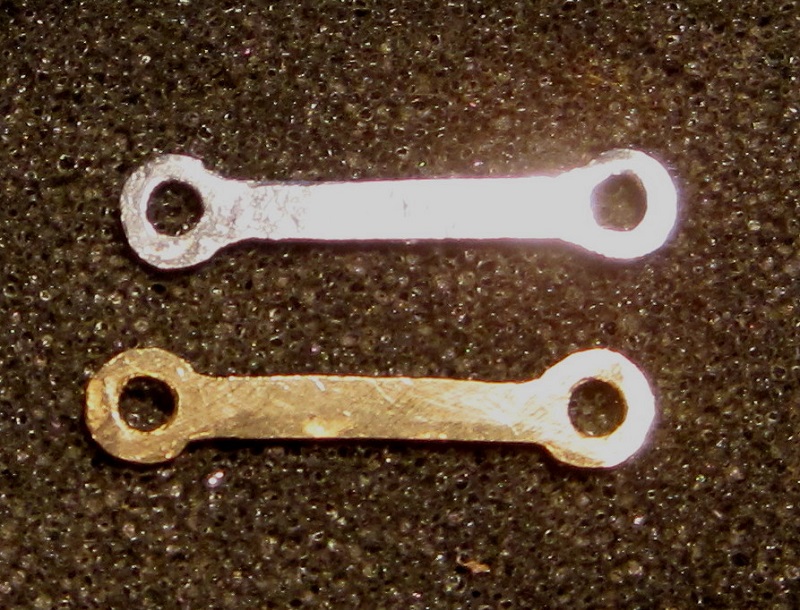
The rod on top has been tinned with solder to give it that gray burnished steel look. The one below is still in the original brass finish:
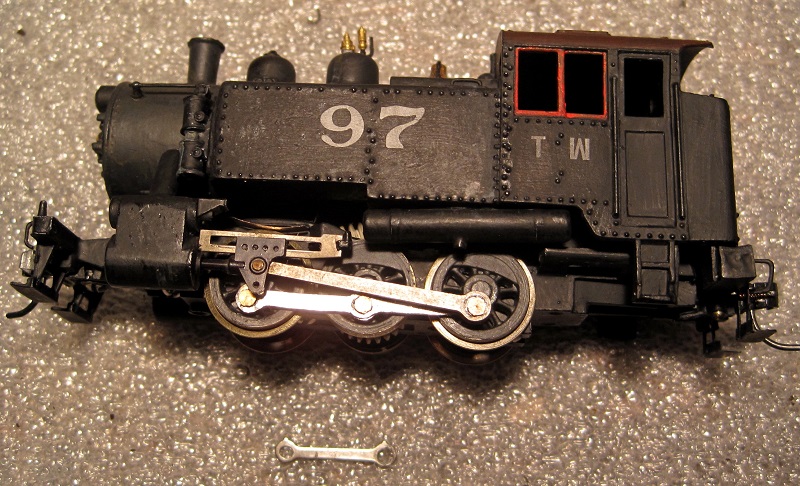
Here are the new rods on an engine. Compared to the original rod (below it), the new ones do look a bit big and they're too gleaming shiny:
In this shot, the side rods have been darkened with Neolube (a graphite paint) to tone them down and make them advertise their size a little less:
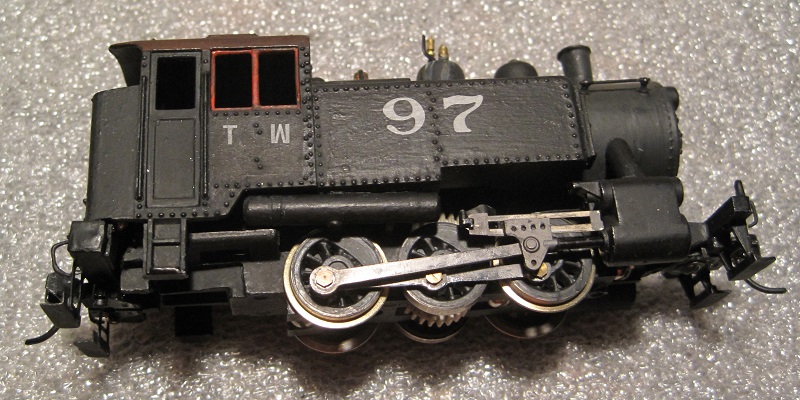
The mechanism has a bit less rattle in it, now. The side rods do look big if you're paying attention, but since they're mostly hidden behind the main rod, it's not obnoxiously obvious.
Carpe Manana!
|
Country:  USA ~
Posts: 2418 ~
Member Since: September 17 2013 ~
Last Visit: July 12 2026 USA ~
Posts: 2418 ~
Member Since: September 17 2013 ~
Last Visit: July 12 2026
|
 Alert Moderator
|
|
|
|
Posted - December 09 2014 : 6:58:22 PM
|
s:
Nice work. Making rods to fit & work well can be pretty tough. How did you get the drill to start in the right spot & stay on it? Drills like to go walking...
The upcycling of a brass nameplate is reminiscent of M.D. Thornburg :D

|
|
Country: USA ~
Posts: 432 ~
Member Since: March 04 2008 ~
Last Visit: December 28 2018
|
Alert Moderator

|
|
|
|
Posted - December 09 2014 : 7:10:03 PM
|
Yes, nice job making the side rods.
Ray
|
|
Country: USA ~
Posts: 1285 ~
Member Since: December 14 2005 ~
Last Visit: May 16 2019
|
Alert Moderator
|
|
|
|
Posted - December 09 2014 : 7:28:14 PM
|
quote:How did you get the drill to start in the right spot & stay on it? Drills like to go walking...
Originally posted by Autobus Prime - December 09 2014 : 6:58:22 PM
|
I used a good side rod from another engine as a pattern. I drilled the first hole at one end of the side-rod-to-be, then lined it up with one hole in the pattern by sticking a ream through the holes in the pattern and the hole in the side-rod-to-be. Then, I put the drill bit in the other hole in the pattern and ran the drill just enough to mark a divot in the center of where the next hole needed to be. I removed the pattern and drilled in that divot pushing as straight down as possible.
The bit was probably a reasonably new, properly sharpened bit so it drilled pretty straight.
Carpe Manana!
|
|
Country: USA ~
Posts: 2418 ~
Member Since: September 17 2013 ~
Last Visit: July 12 2026
|
Alert Moderator
|
|
|
|
Posted - December 09 2014 : 9:12:20 PM
|
You're a braver man than I, Shaggy. Really nice work. Did it take a lot of test fitting with the holes to file them to the right dia. or in the right direction?
The Tyco Depot
|
|
Country: USA ~
Posts: 3927 ~
Member Since: June 20 2007 ~
Last Visit: November 19 2015
|
Alert Moderator
|
|
|
|
Posted - December 09 2014 : 9:15:16 PM
|
Nice work Shaggy,
One other thing I have seen done was to drill out round a new hole in the rod, If you have a template made from a new one, you can make sure you keep the holes centered. Then insert a brass tube with an inner diameter opening just big enough to allow the insertion of the shoulder screw, solder it to the existing rod, file flush and you have now the old rod restored.
Just a thought.
Sean
"If everything seems under control, you're not going fast enough!" - Mario Andretti!
|
|
Country: USA ~
Posts: 1729 ~
Member Since: June 15 2011 ~
Last Visit: June 26 2021
|
Alert Moderator
|
|
|
|
Posted - December 09 2014 : 11:28:54 PM
|
quote:Did it take a lot of test fitting with the holes to file them to the right dia. or in the right direction?
Originally posted by NickelPlate759 - December 09 2014 : 9:12:20 PM
|
Getting the holes right turned out easier than I thought it would. I drilled the two holes first, so the critical part could be done on a big enough part to handle. The diameter of the crank pins was 5/64" and there was a drill bit that size already on hand. The hole in the side rods is just a bit bigger so with just a little light reaming, everything was right.
Using a good one for a drill template got the spacing between the holes right and it was easier than I expected. The Mantua parts list shows the distance as .640" between centers, so a good metal worker should be able to work it out, without a template, just by measuring. I only measure just so well, so I was glad to have a template. 
quote:One other thing I have seen done was to drill out round a new hole in the rod, If you have a template made from a new one, you can make sure you keep the holes centered. Then insert a brass tube with an inner diameter opening just big enough to allow the insertion of the shoulder screw, solder it to the existing rod, file flush and you have now the old rod restored.
Originally posted by Mustangs_n_Trains - December 09 2014 : 9:15:16 PM
|
I'd given some thought to that, but I couldn't quite figure how to get the round hole into which the tube goes centered where it's needed. The shape and size of the rod would have been better. I'm keeping the old rods, so if a slick way to make it happen occurs to me, I'll have them.
Carpe Manana!
|
|
Country: USA ~
Posts: 2418 ~
Member Since: September 17 2013 ~
Last Visit: July 12 2026
|
Alert Moderator
|
|
|
|
Posted - December 10 2014 : 08:35:33 AM
|
*** Nice work shaggy !! ***
Your idea of making a template for the rod holes is a good one. Me I never thought of doing it. Now that I have so many different old trains. Varney, Mantua, English, Rivarossi, Mantua, Penn-Line, Gilbert, international, and those Aristo-Craft. Maybe a universal template is in order. One with most of the common old 2, 3, and 4 axel side rod hole arrangements built into it.
frank
toptrain
" It's a Heck of a Day " !!!
Edited by - toptrain on December 10 2014 08:38:44 AM
|
|
Country: USA ~
Posts: 7539 ~
Member Since: August 07 2008 ~
Last Visit: June 22 2026
|
Alert Moderator
|
|
|
|
Posted - December 10 2014 : 10:01:36 AM
|
quote:*** Nice work shaggy !! ***
Your idea of making a template for the rod holes is a good one. Me I never thought of doing it. Now that I have so many different old trains. Varney, Mantua, English, Rivarossi, Mantua, Penn-Line, Gilbert, international, and those Aristo-Craft. Maybe a universal template is in order. One with most of the common old 2, 3, and 4 axel side rod hole arrangements built into it.
frank
Originally posted by toptrain - December 10 2014 : 08:35:33 AM
|
Weeeeell if you wanted to get really mad crazy you could buy some drill bushings:
http://www.mcmaster.com/#standard-drill-bushings/=uyoere
and then fire up the Bridgeport and make up some drill jigs with them...and from there it's probably a slippery slope to supplying repro parts to Yardbird trains and not having any fun anymore. :D
|
|
Country: USA ~
Posts: 432 ~
Member Since: March 04 2008 ~
Last Visit: December 28 2018
|
Alert Moderator
|
|
|
|
Posted - December 10 2014 : 10:42:11 PM
|
| Always fun to look at folk's metal work. That's cool Don. After you do a few of those type of projects, it leads you to believe that you actually could scratch build a locomotive, or whatever you want. Just have to "get 'er done".
|
|
Country: USA ~
Posts: 2087 ~
Member Since: March 16 2013 ~
Last Visit: July 05 2018
|
Alert Moderator
|
|