|
|
 Posted - November 14 2014 : 10:04:44 AM Posted - November 14 2014 : 10:04:44 AM


|
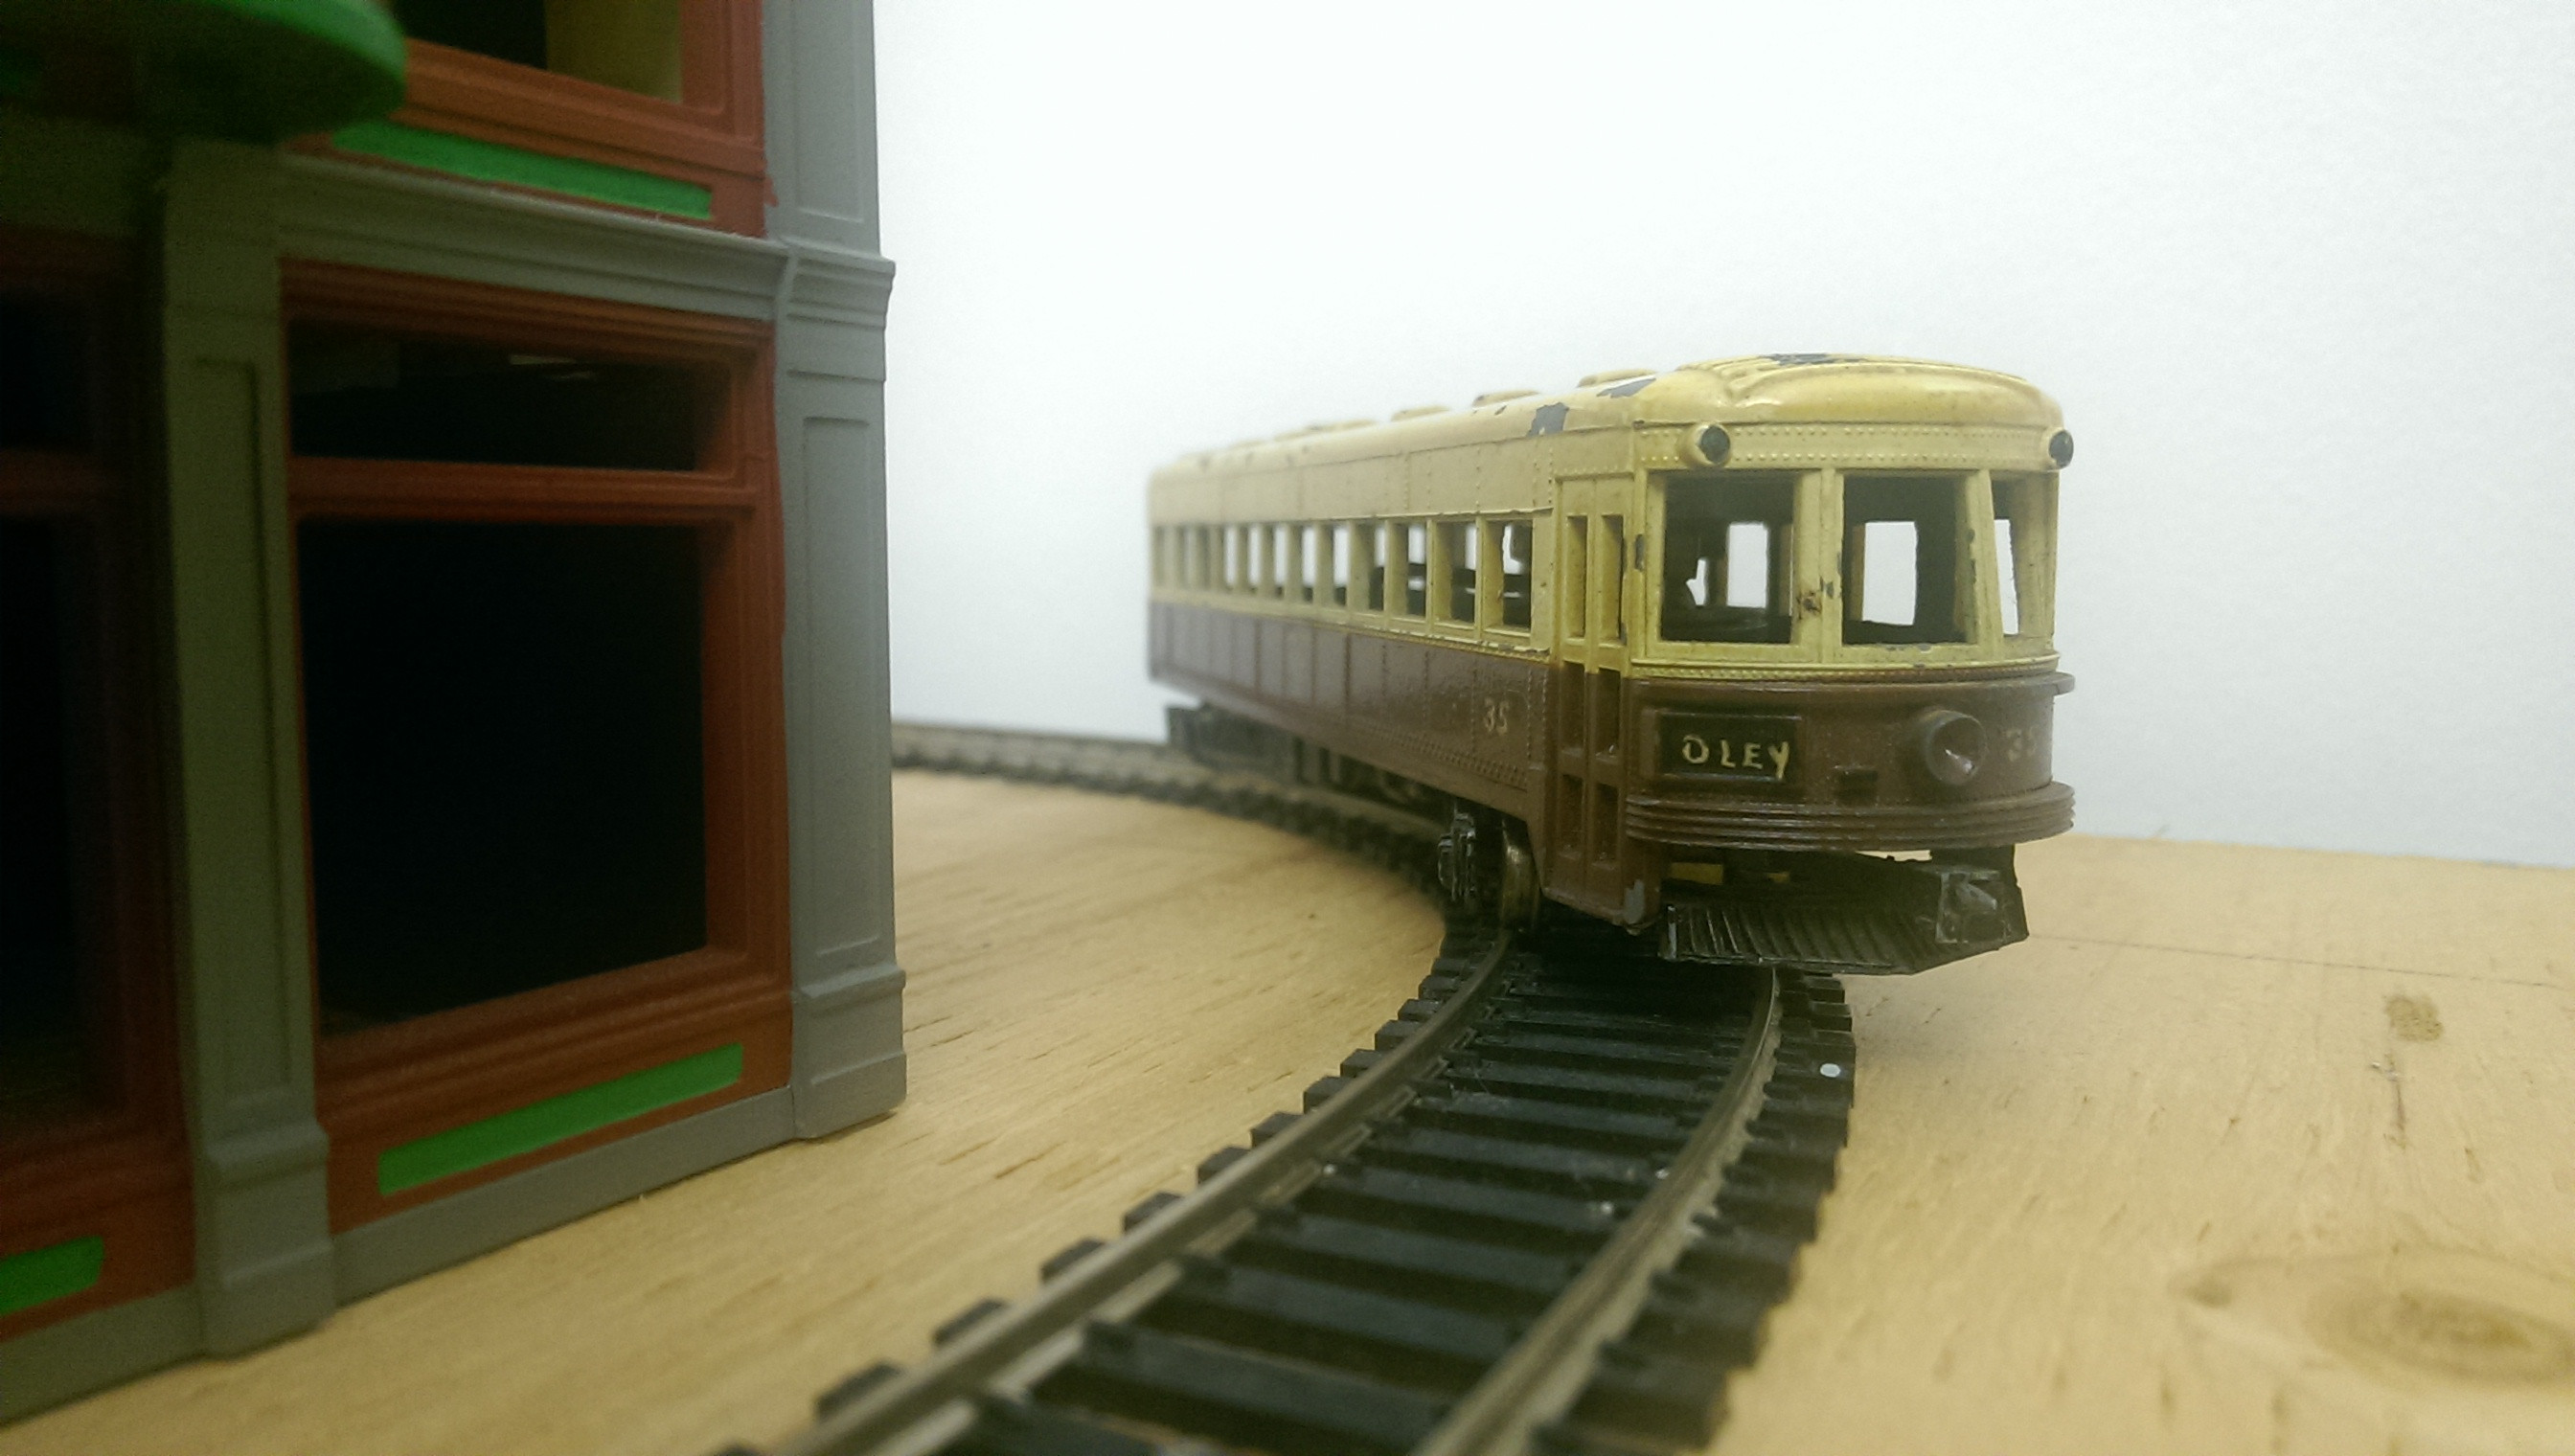
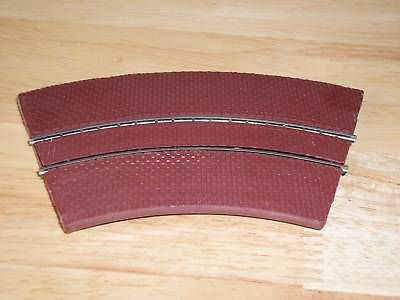
I'm getting started on a small layout to fit on top of my dresser. It's roughly 20"x30" and consists of a single loop of flex-track. The end product will be some variation of a city block with a trolley circling. The curve radius is about 7" which so far only my PSM IRR car will handle. That's good news though as the chassis should be the same as the PCC car I'm hoping to get running. 
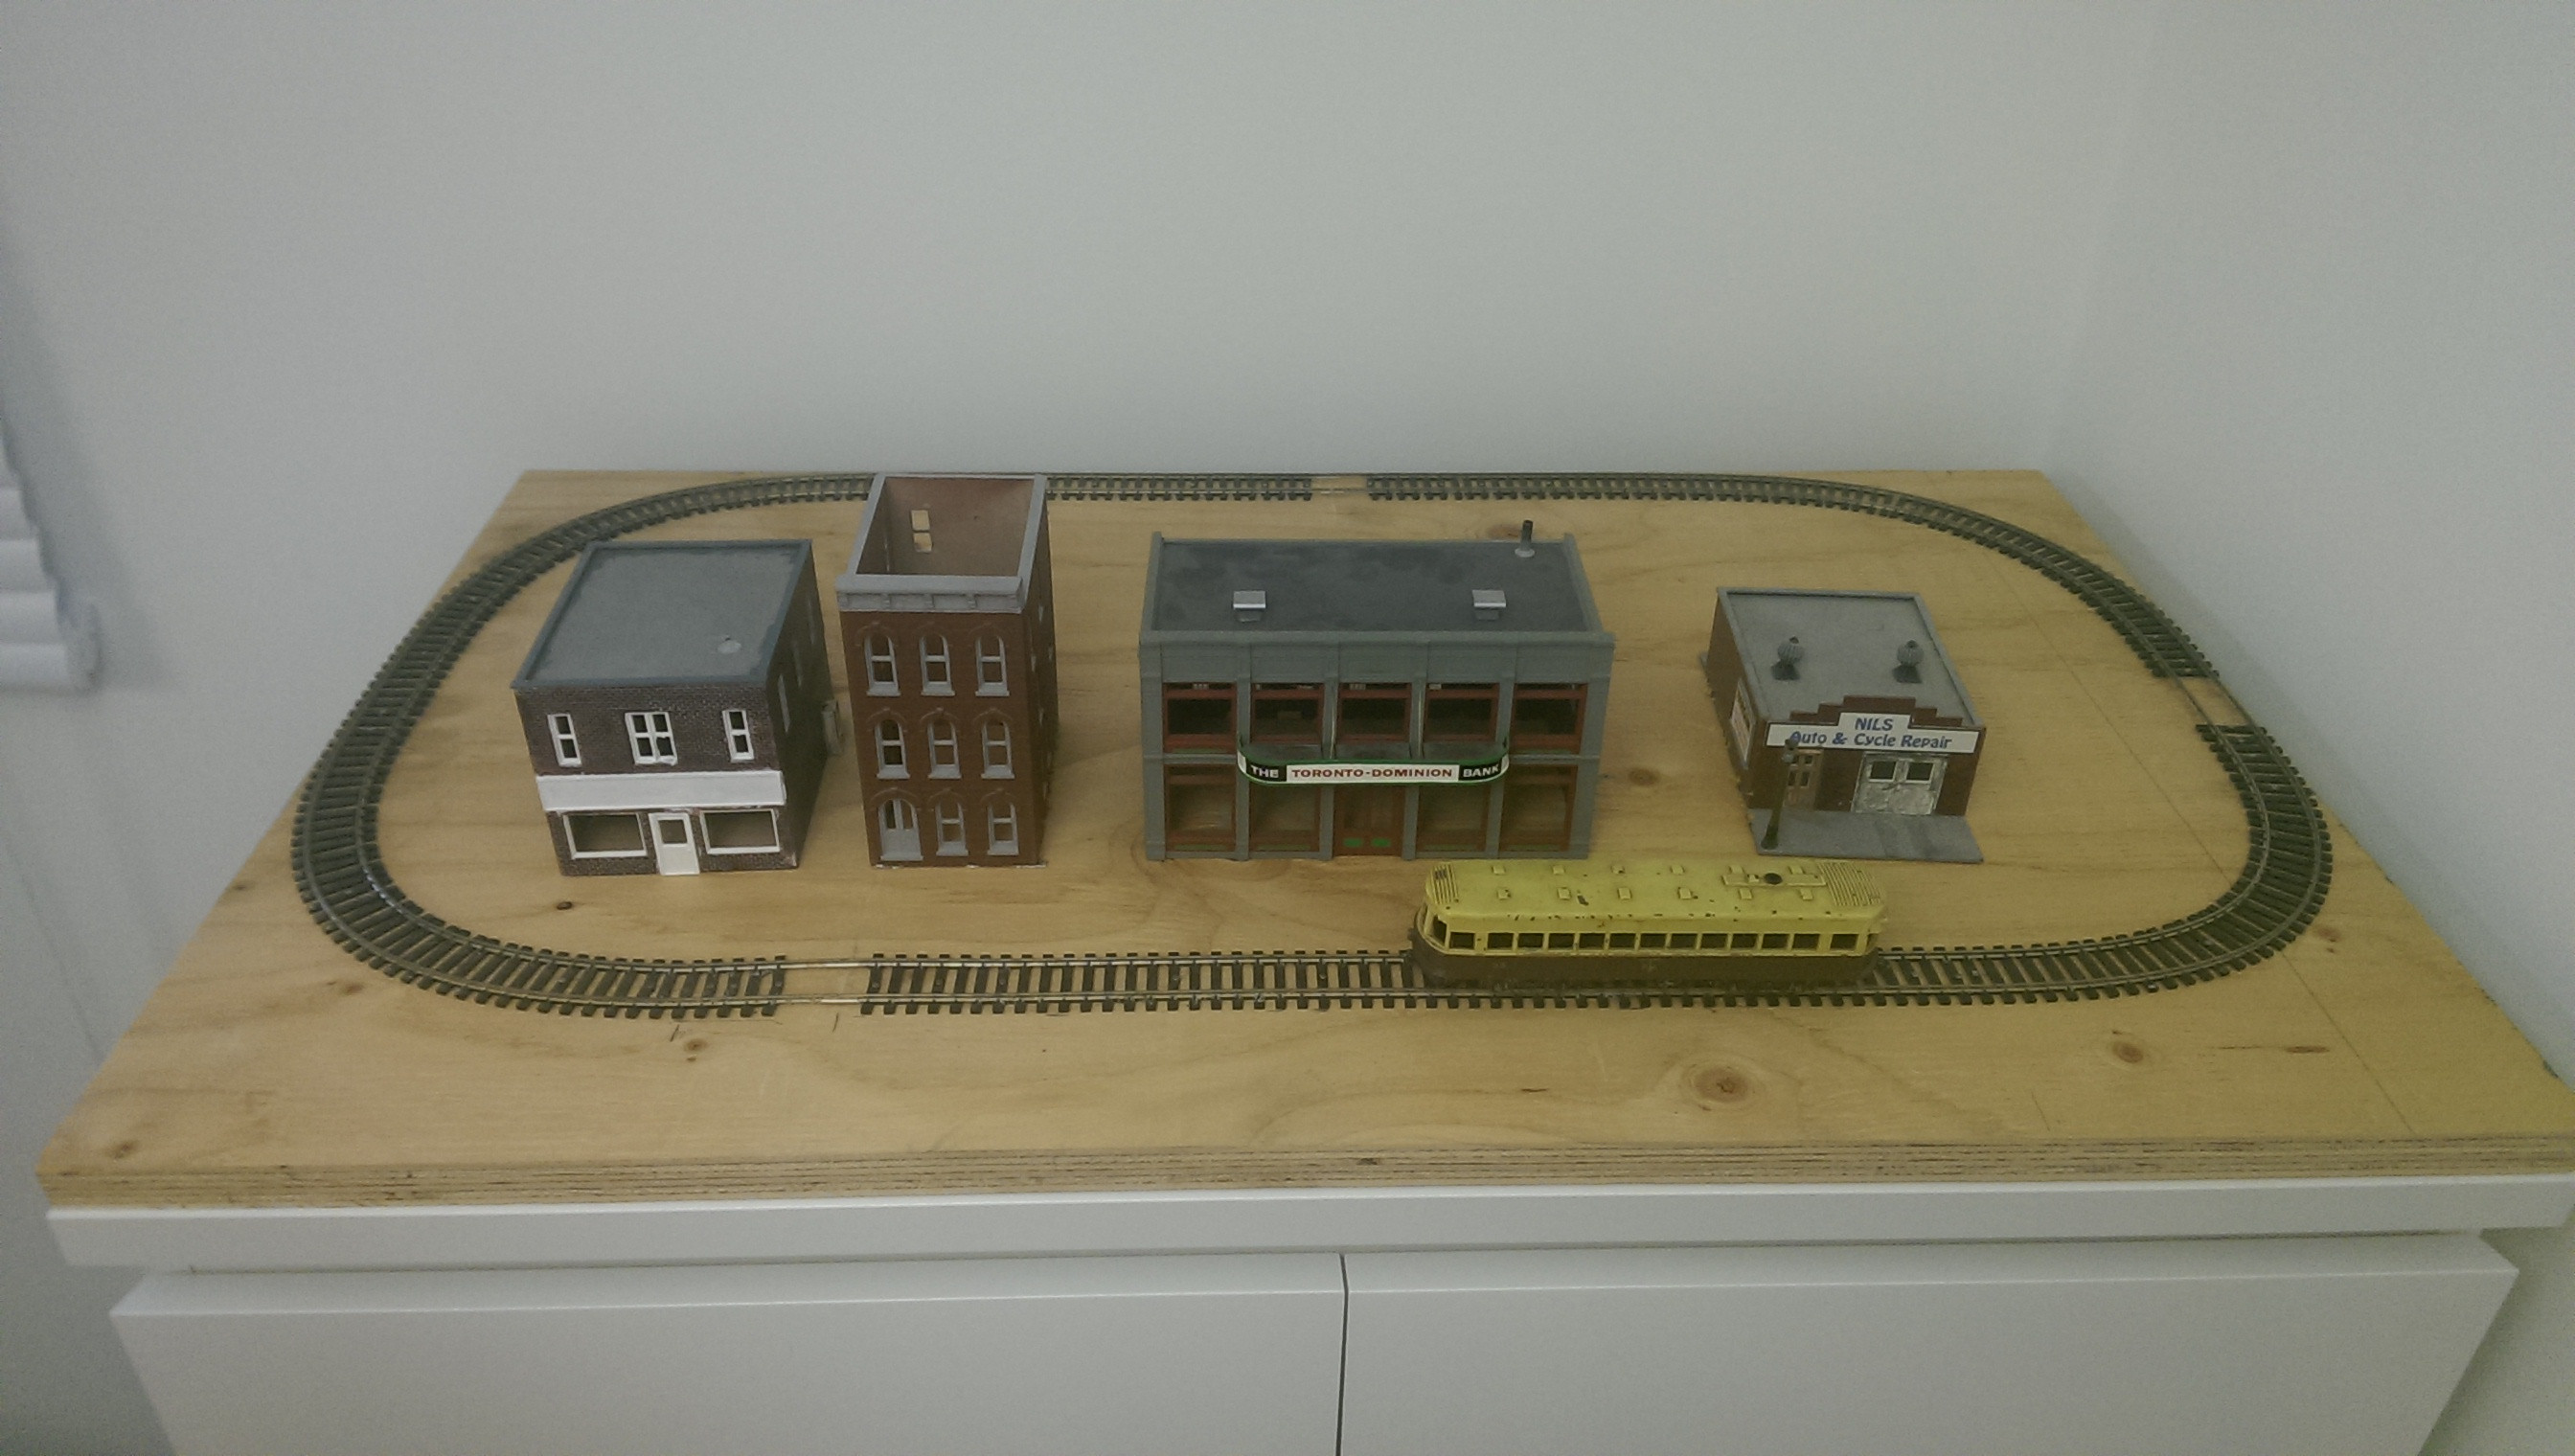
I think I need more buildings....
cheez
|
Country:  Canada ~
Posts: 3448 ~
Member Since: September 22 2006 ~
Last Visit: April 03 2026 Canada ~
Posts: 3448 ~
Member Since: September 22 2006 ~
Last Visit: April 03 2026
|
 Alert Moderator
|
|
|
|
Posted - November 14 2014 : 10:08:33 AM
|
Oh, cool! I love trollies.
-Steve
"A lot of modellers out there who go to these train shows see broken HO stuff and go, 'This is useless' when, in reality, they can still be used for modeling whether it's as a prop on your layout or a cool project to make something old new again."
|
Country:  USA ~
Posts: 3533 ~
Member Since: February 17 2014 ~
Last Visit: January 11 2023 USA ~
Posts: 3533 ~
Member Since: February 17 2014 ~
Last Visit: January 11 2023
|
Alert Moderator

|
|
|
|
Posted - November 14 2014 : 10:26:40 AM
|
| That looks pretty fun Eric.
|
|
Country: USA ~
Posts: 2087 ~
Member Since: March 16 2013 ~
Last Visit: July 05 2018
|
Alert Moderator
|
|
|
|
Posted - November 14 2014 : 2:52:15 PM
|
| I like that, Eric... Love the look of the old trolley....
|
|
Country: USA ~
Posts: 6279 ~
Member Since: February 18 2009 ~
Last Visit: March 04 2022
|
Alert Moderator
|
|
|
|
Posted - November 14 2014 : 5:20:16 PM


|
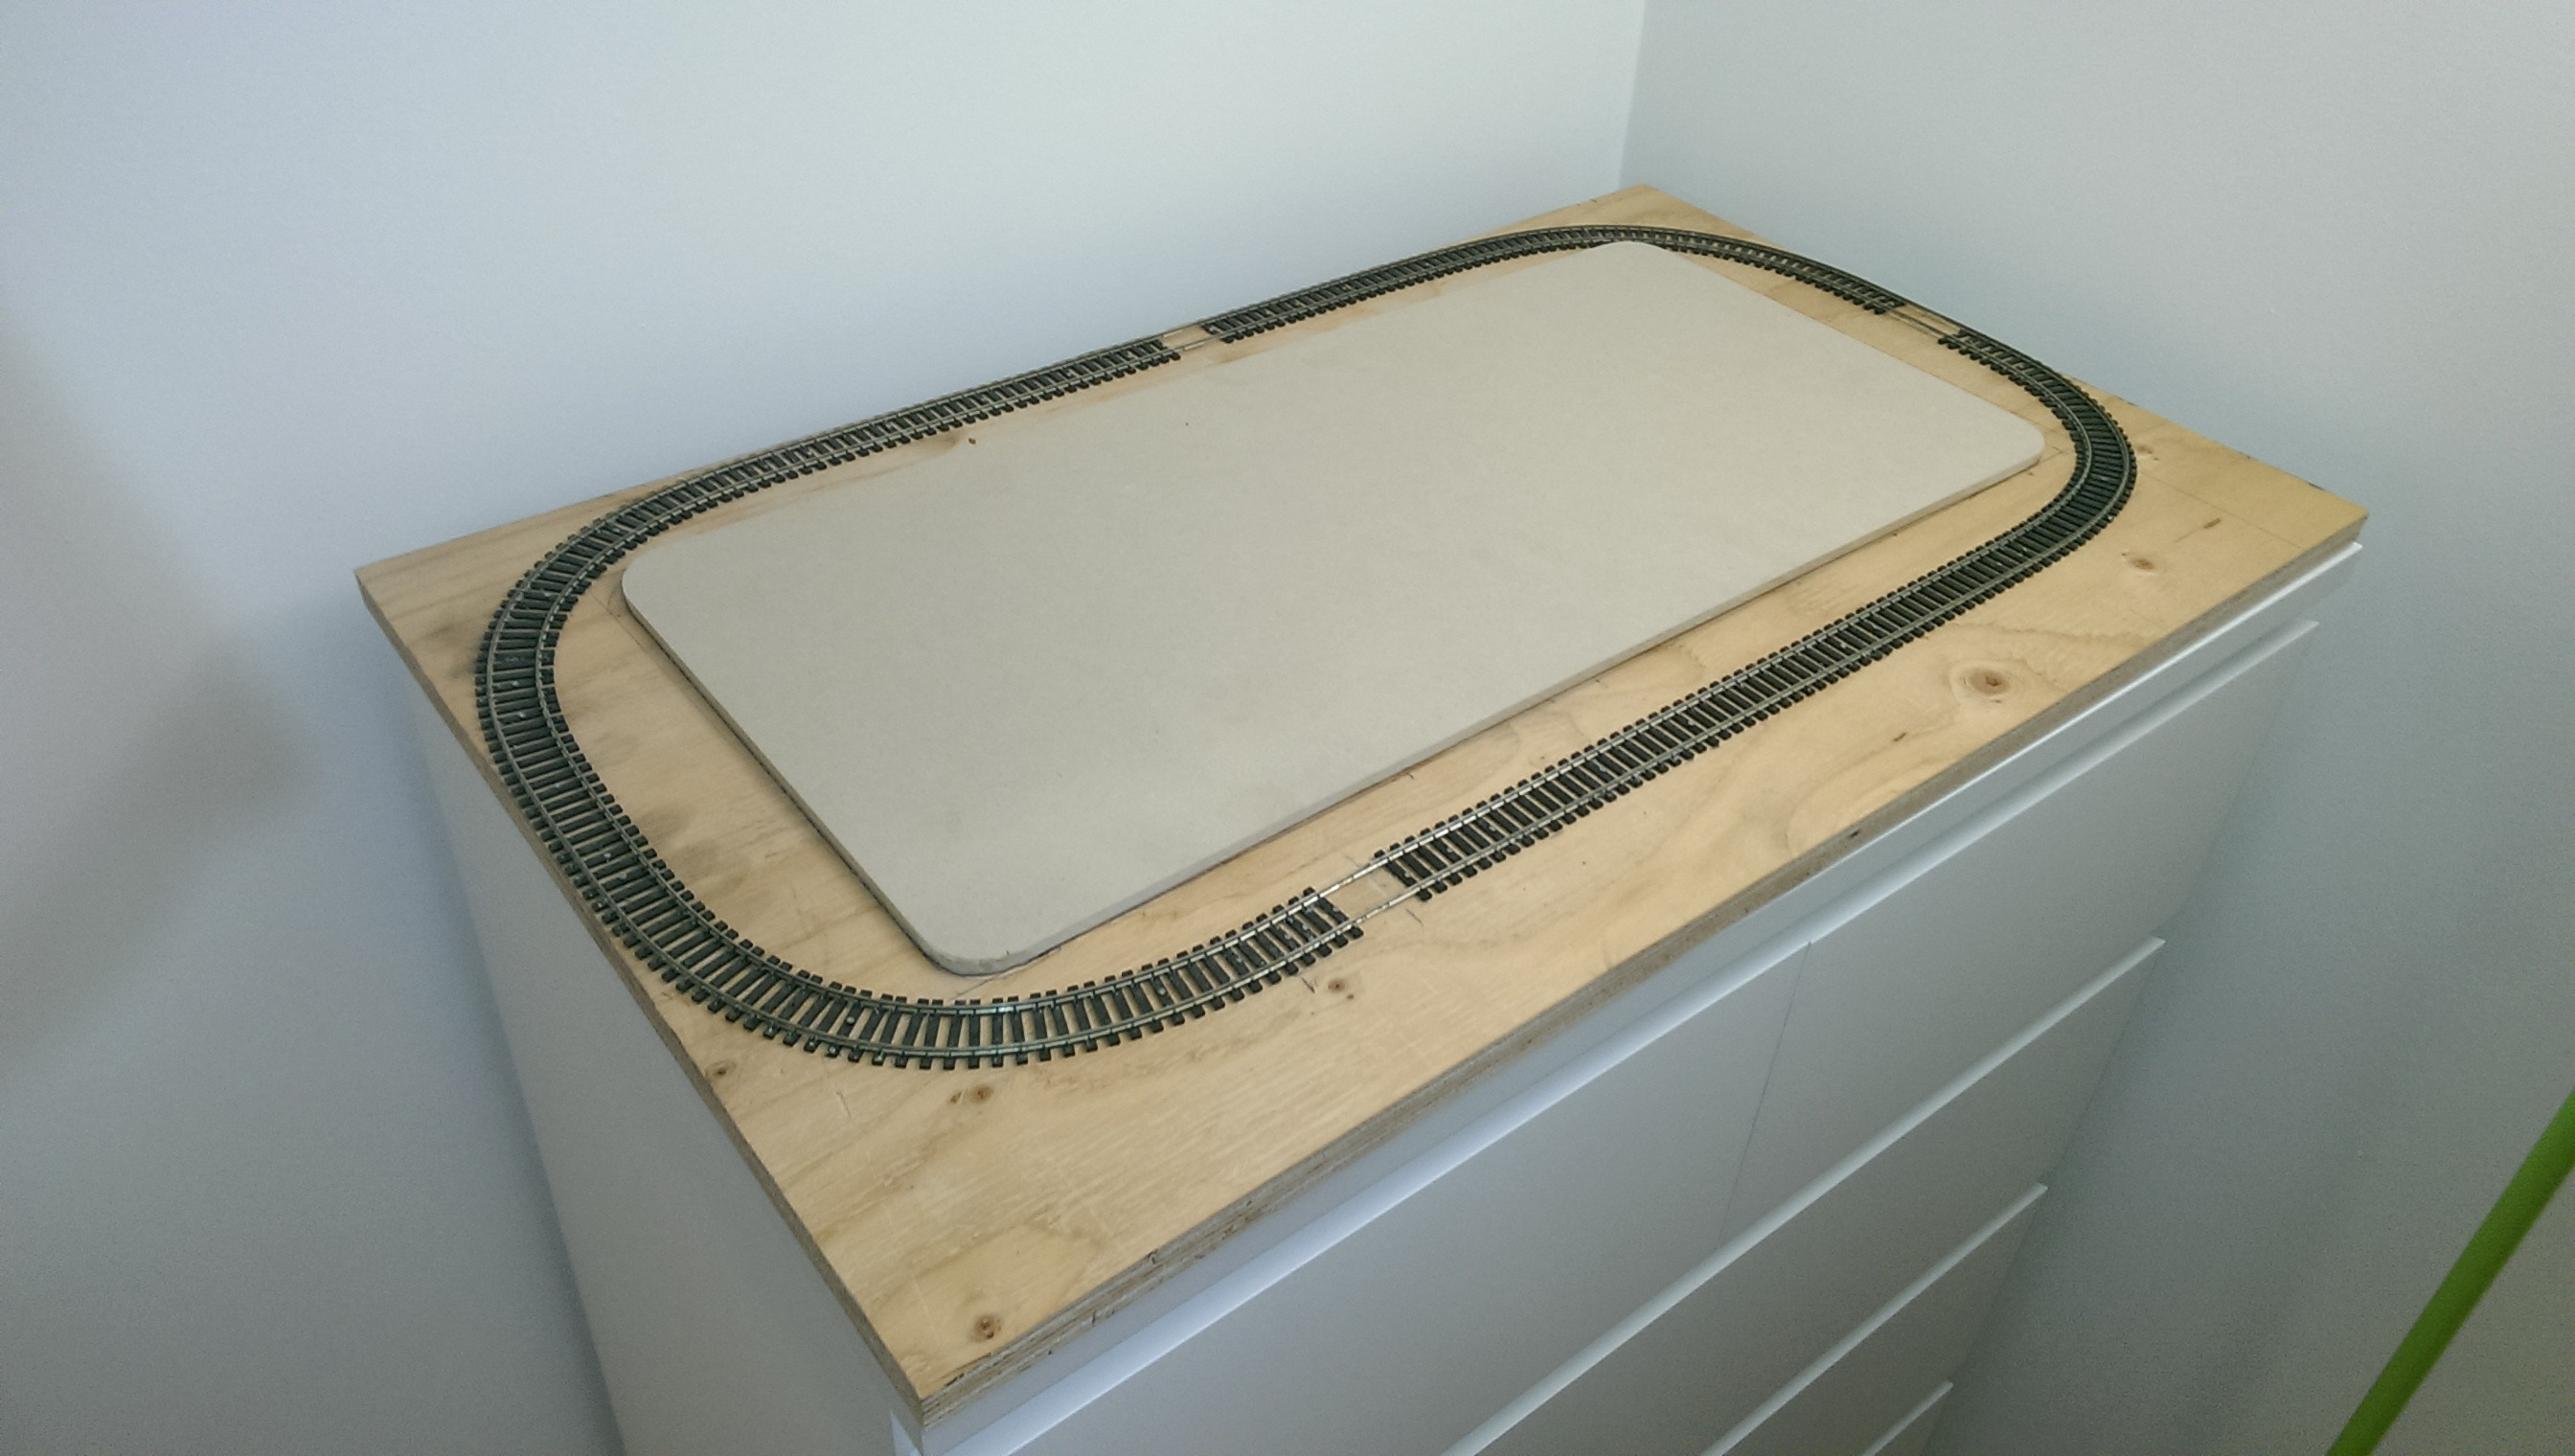
Looking good! Did you bend the track yourself? Or is it the Eldon 7.5 inch radius? Looks like you bent flex-track. Didn't know you could get it that tight.  I'm impressed. I may have to do something similar, as I am working on my Trolley's myself to get some repaired and operational. Post updates when you get more done. I'm impressed. I may have to do something similar, as I am working on my Trolley's myself to get some repaired and operational. Post updates when you get more done.
Jerry in VA
" When life throws you bananas...it's easy to slip up"
|
|
Country: USA ~
Posts: 3974 ~
Member Since: January 04 2009 ~
Last Visit: January 11 2019
|
Alert Moderator
|
|
|
|
Posted - November 15 2014 : 4:58:08 PM
|
Thanks guys!
Jerry, it is flex-track. I honestly didn't know it could go that tight either! It started with a single spike and then I just slowly worked my way around the loop. It took a couple of hours but turned out nice and smooth.
The next step will be measuring and cutting a piece of plywood/hardboard to form a raised section in the middle. This will create the curb and elevate the buildings slightly above street level (like on Walt's slotcar layout). Then I can do the street surface.
I'm also in the middle of detailing some buildings. They'll be posted as I finish them.
cheez
|
|
Country: Canada ~
Posts: 3448 ~
Member Since: September 22 2006 ~
Last Visit: April 03 2026
|
Alert Moderator
|
|
|
|
Posted - November 20 2014 : 2:33:11 PM
|
Nice bit of work. Also, that trolley is most unique with a charming natural
weathering. Please keep us posted.
|
|
Country: USA ~
Posts: 11686 ~
Member Since: December 09 2013 ~
Last Visit: May 26 2026
|
Alert Moderator
|
|
|
|
Posted - November 20 2014 : 7:03:40 PM
|
I love that trolley and I couldn't force myself to repaint it... But that's just me....
|
|
Country: USA ~
Posts: 6279 ~
Member Since: February 18 2009 ~
Last Visit: March 04 2022
|
Alert Moderator
|
|
|
|
Posted - November 24 2014 : 5:45:50 PM
|
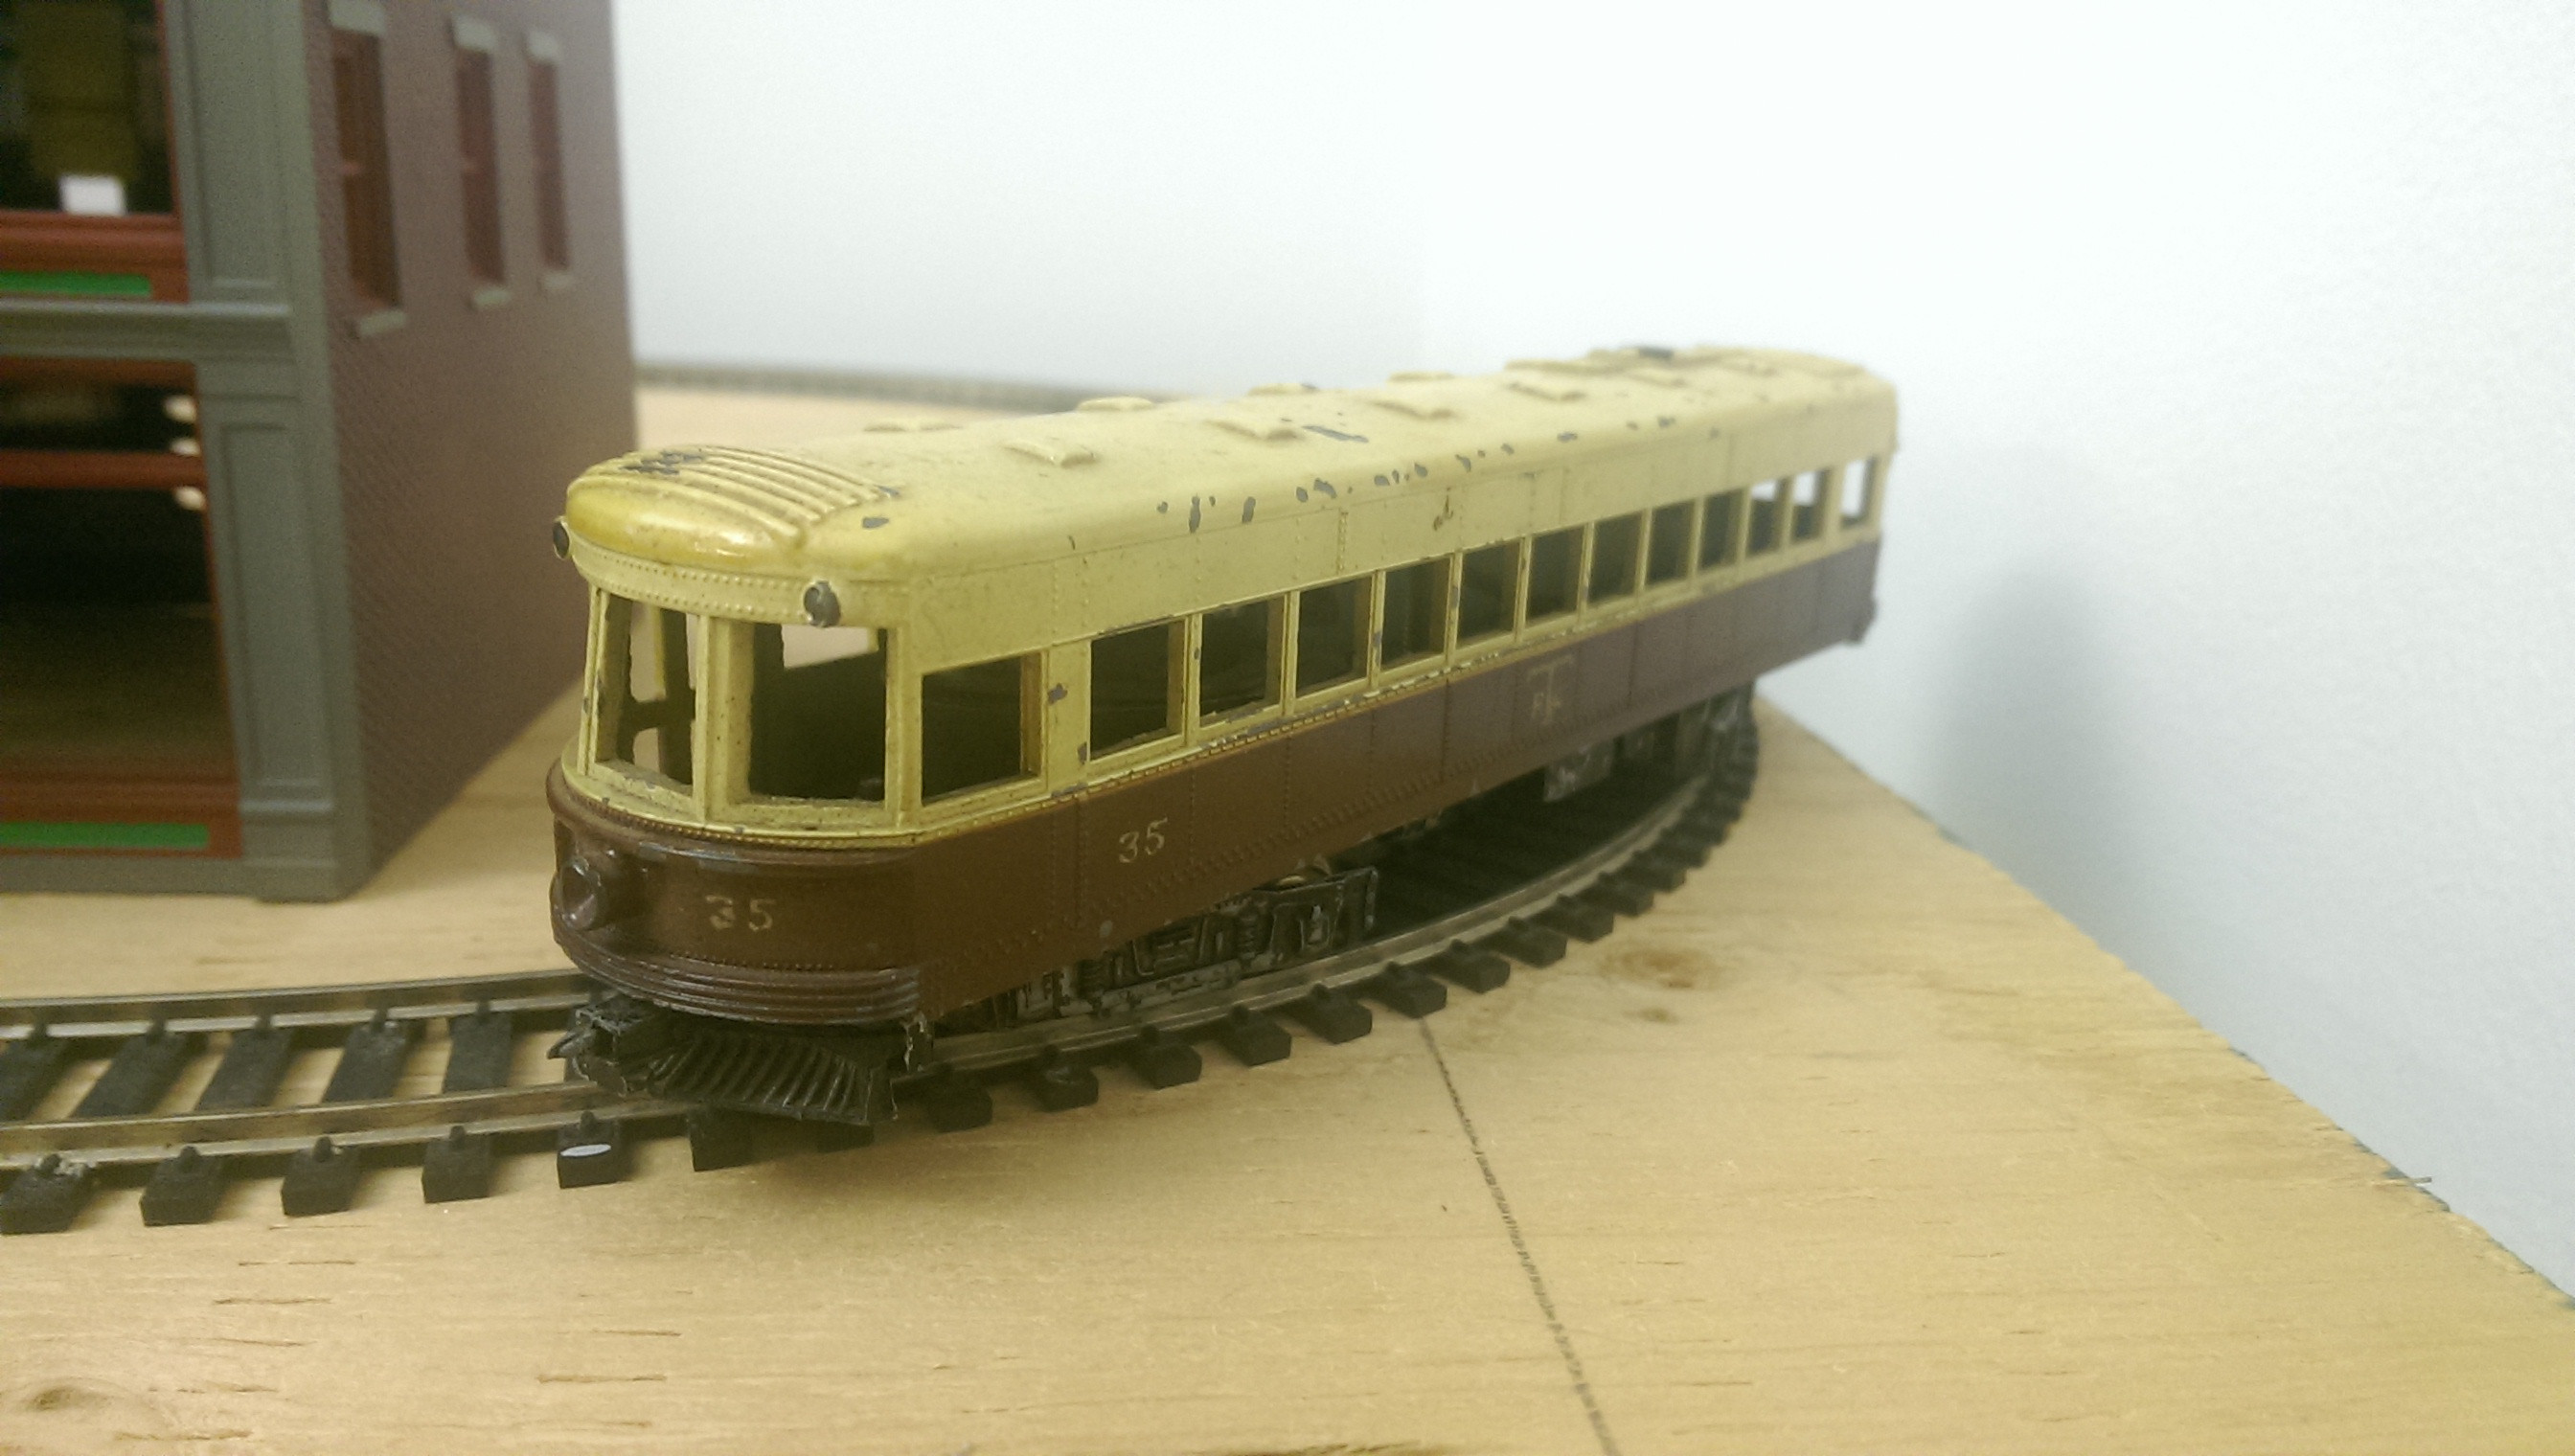
I'm torn on what to do with the trolleys. The brown IRR car shown above will be left in its original paint. The trolley I really want to use is my PCC car.
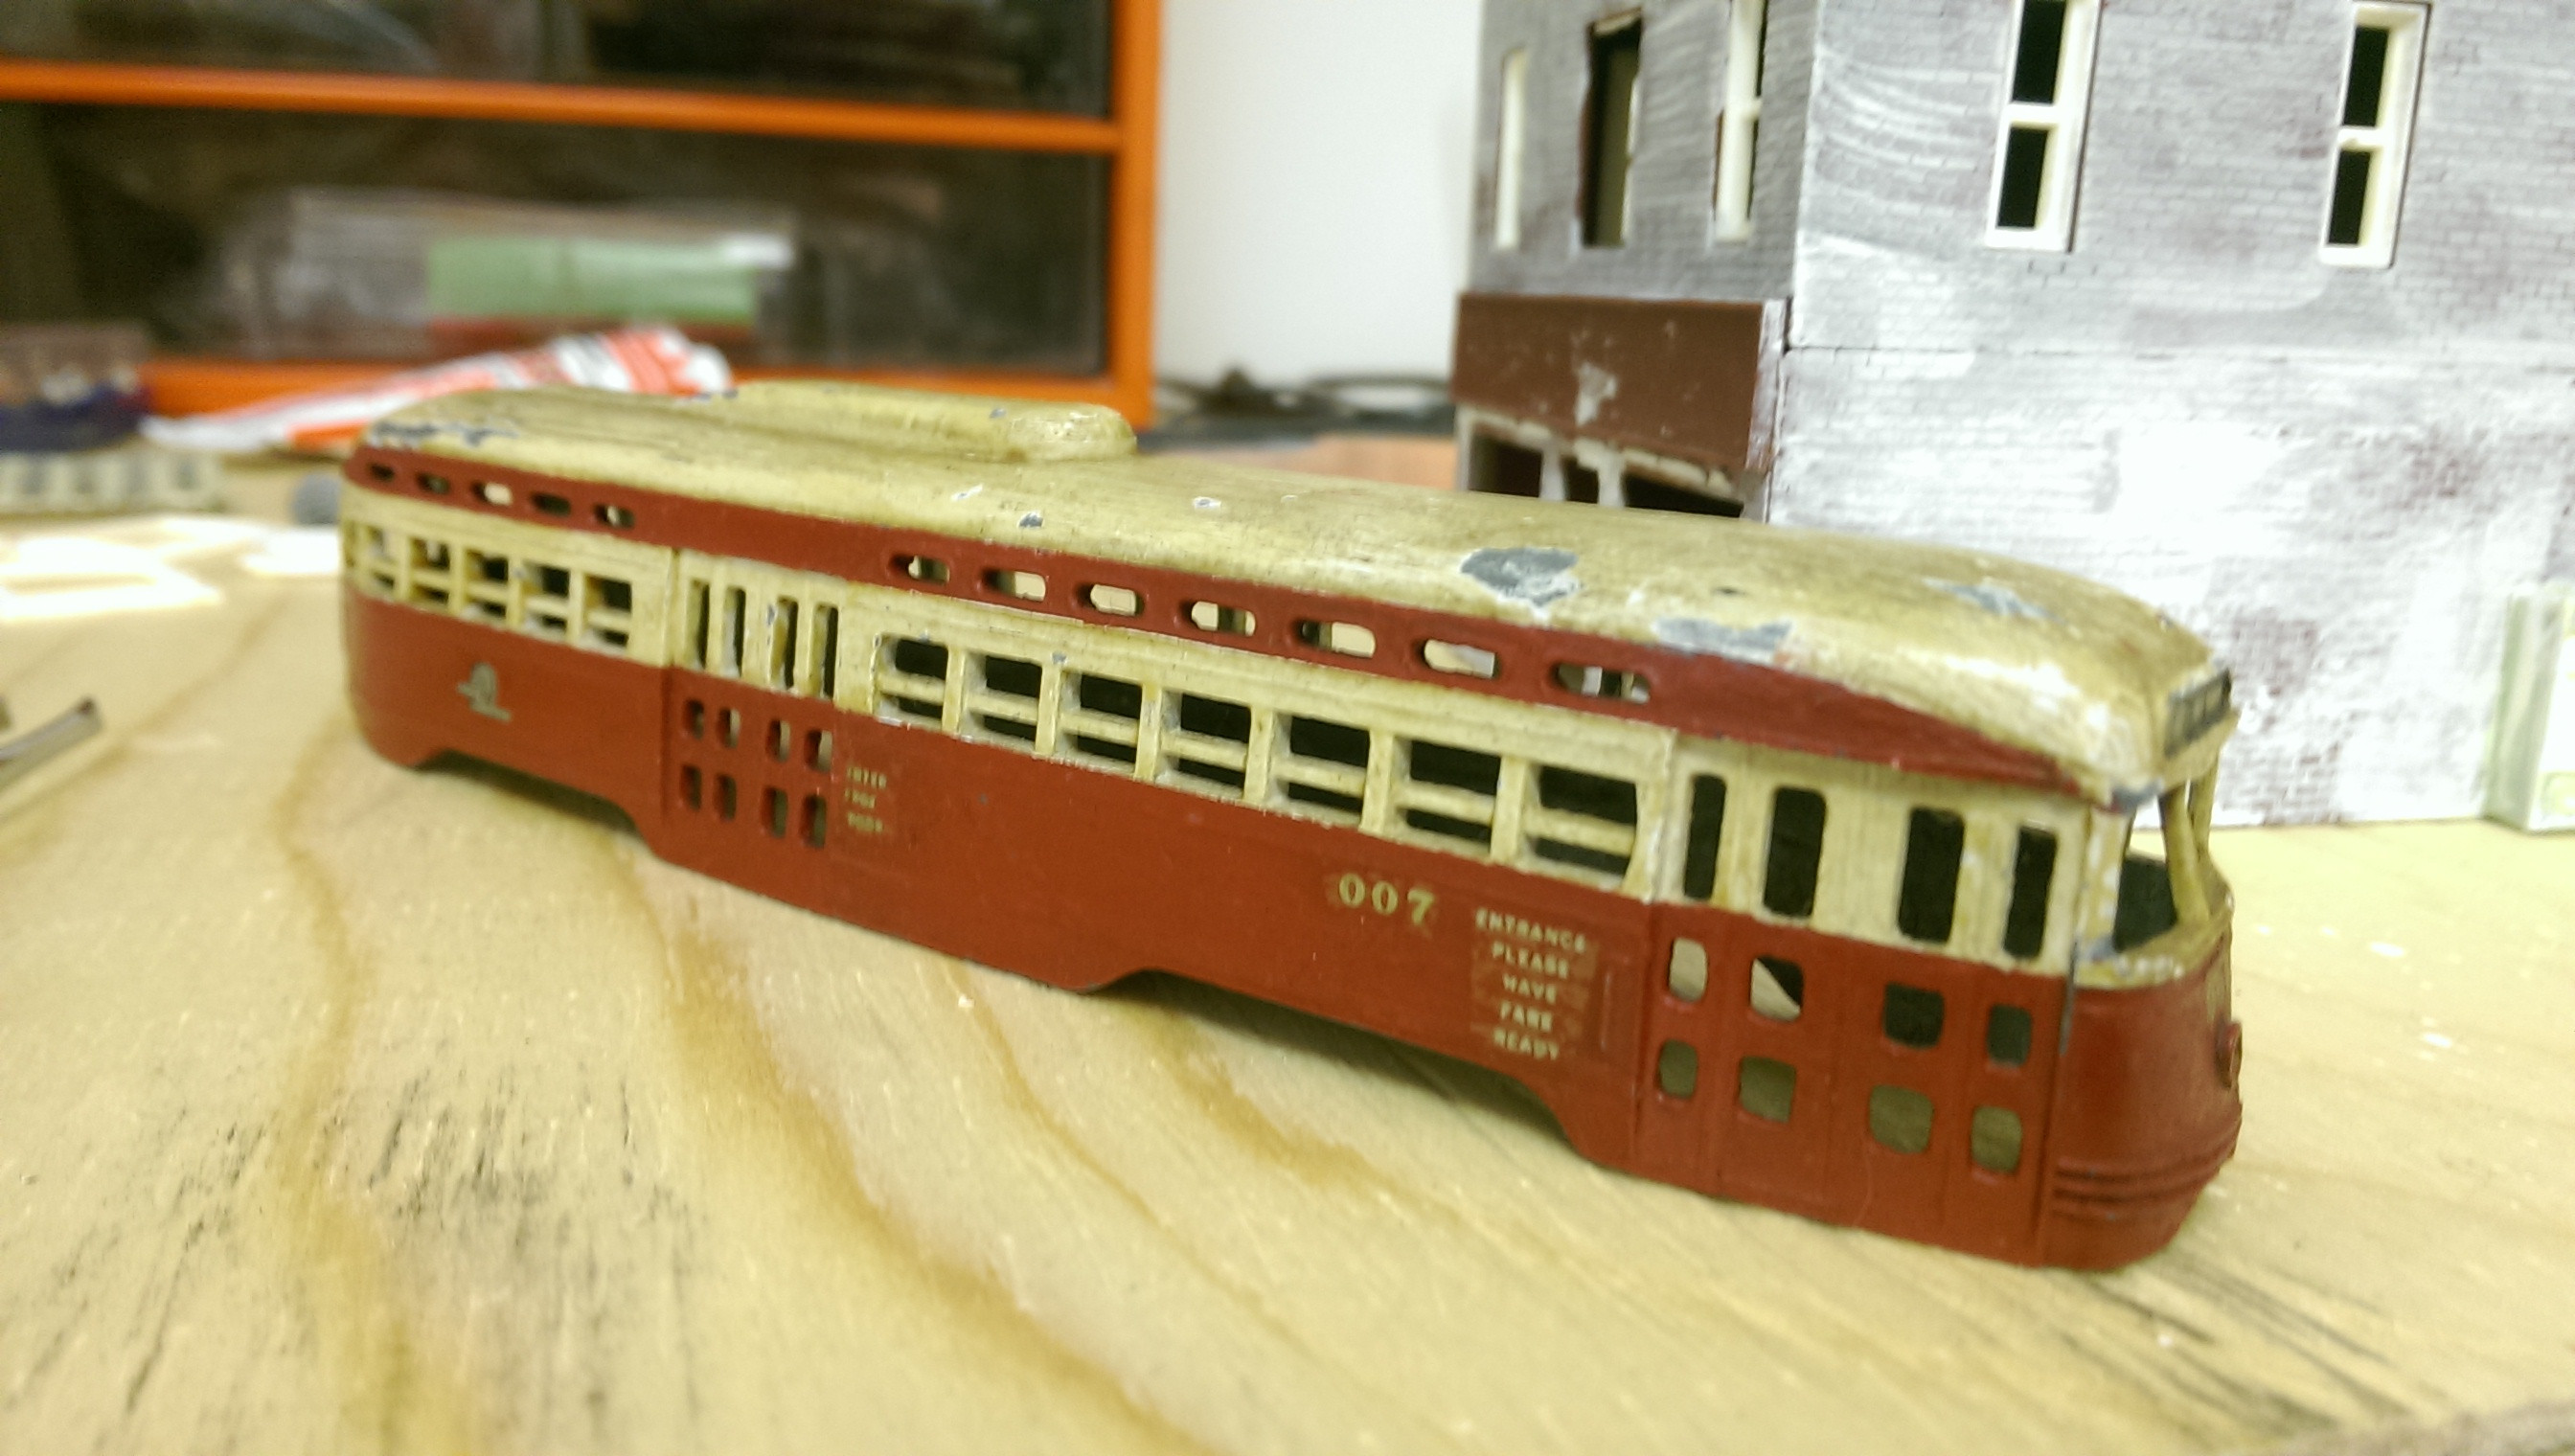
I'm still not sure what I want to do. The patina is nice but the roof is in absolutely terrible shape. I'm not in any position to be air brushing at the moment so it'll either be a carefully masked brush job, or I may just grab some rust coloured paint and camouflage the bare metal. That project is still a ways off....
Edited by - DaCheez on November 24 2014 8:11:26 PM
|
|
Country: Canada ~
Posts: 3448 ~
Member Since: September 22 2006 ~
Last Visit: April 03 2026
|
Alert Moderator
|
|
|
|
Posted - November 24 2014 : 6:44:58 PM
|
quote:I'm torn on what to do with the trolleys. The brown IRR car shown above will be left in its original paint. The trolley I really want to use is my PCC car.
I'm still not sure what I want to do. The patina is nice but the roof is in absolutely terrible shape. I'm not in any position to be air brushing at the moment so it'll either be a carefully masked brush job, or I may just grab some rust coloured paint and camouflage the bare metal. That project is still ways off....
Originally posted by DaCheez - November 24 2014 : 5:45:50 PM
|
Cheez - I'll just chime in for what it's worth, I love the look of that 007 trolley. Used, dirty and gritty - with great graphics. The roof does look terrible but then again the real ones did too.
http://tycodepot.com/
|
|
|
|
|
Posted - November 24 2014 : 8:10:56 PM
|
I suppose 50 years of natural weathering beats out anything I can do in an afternoon anyway. The 007 doesn't even have a powered chassis yet. As I said, lots of time to decide (although I'm definitely leaning towards leaving it alone). 
|
|
Country: Canada ~
Posts: 3448 ~
Member Since: September 22 2006 ~
Last Visit: April 03 2026
|
Alert Moderator
|
|
|
|
Posted - November 27 2014 : 11:17:39 PM
|
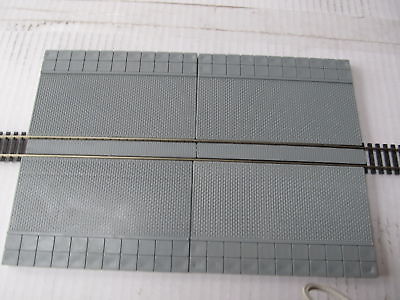
Today the sidewalk/curb was installed. It's made from a piece of 6mm hardboard. The rail height is just over 4mm so once the road is "paved" the curb height should look good.
Baby steps, but I'm keeping the project moving.
|
|
Country: Canada ~
Posts: 3448 ~
Member Since: September 22 2006 ~
Last Visit: April 03 2026
|
Alert Moderator
|
|
|
|
Posted - November 27 2014 : 11:21:33 PM
|
| so will James Bond ride that trolley to the bad guy's hideout?
|
|
Country: USA ~
Posts: 15031 ~
Member Since: February 23 2009 ~
Last Visit: July 07 2026
|
Alert Moderator
|
|
|
|
Posted - November 28 2014 : 08:43:43 AM
|
Cheez you need a trolley barn. That 2 story building will work with some modifications. I am sure there is a article somewhere on making sharp turnouts for switching to get the trollies into the barn. It looks like you will build your layout one block at a time.
Good luck, Frank
toptrain
" It's a Heck of a Day " !!!
|
|
Country: USA ~
Posts: 7539 ~
Member Since: August 07 2008 ~
Last Visit: June 22 2026
|
Alert Moderator
|
|
|
|
Posted - November 29 2014 : 09:44:24 AM
|
I'm not really planning other blocks yet, I'd need more dressers! A trolley barn would be cool though. Maybe I'll have to take a stab at making one.
cheez
Edited by - DaCheez on November 29 2014 09:44:44 AM
|
|
Country: Canada ~
Posts: 3448 ~
Member Since: September 22 2006 ~
Last Visit: April 03 2026
|
Alert Moderator
|
|
|
|
Posted - December 09 2014 : 11:49:03 PM
|
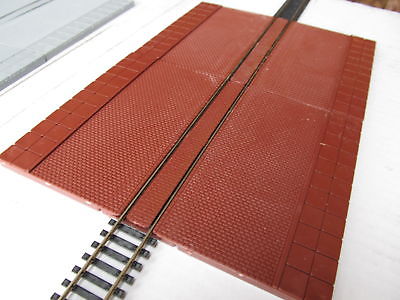
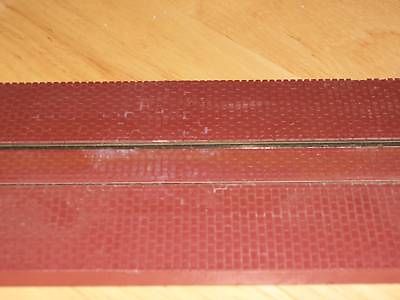
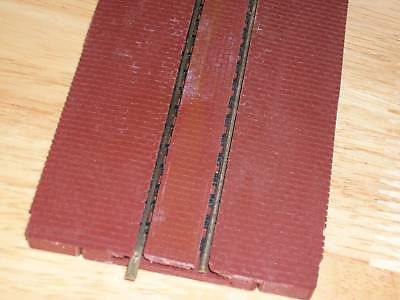
Progress is being made. A few weeks back Chops showed me how he'd paved roads with caulking and then carved out slots around the rails for wheel flanges. It seemed like the most aesthetically pleasing and cheapest option so I took a stab at it.
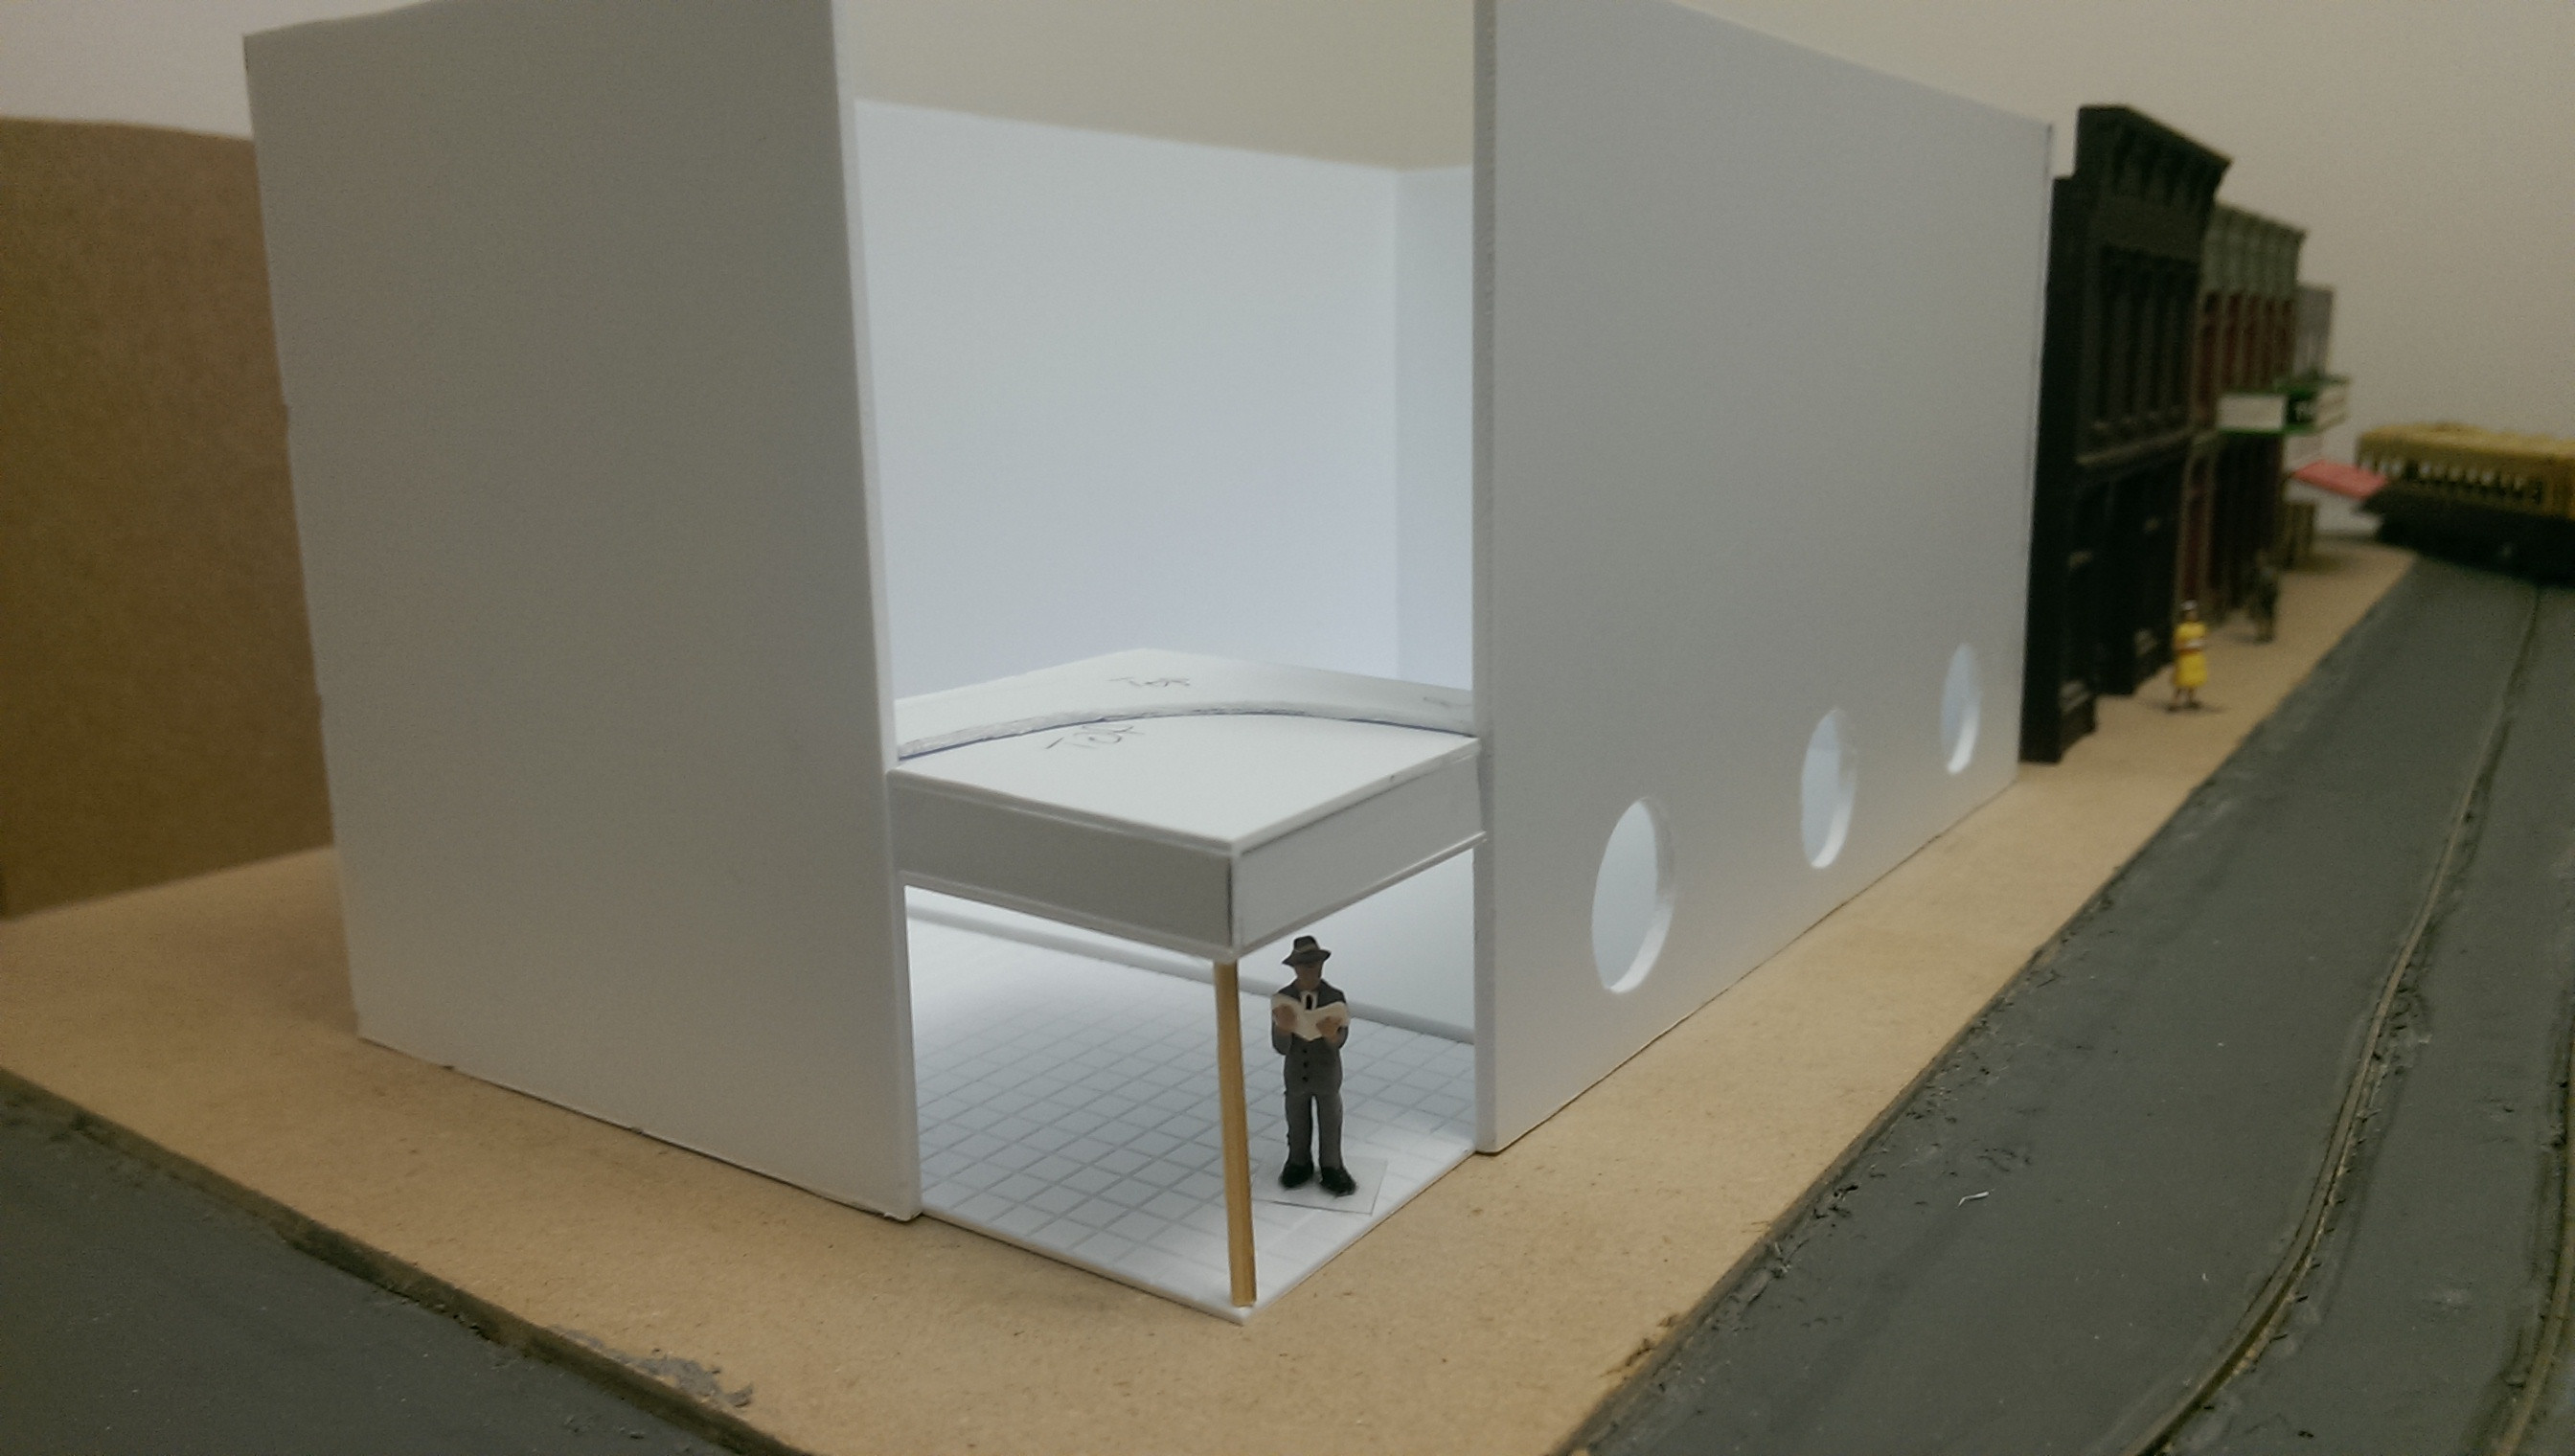
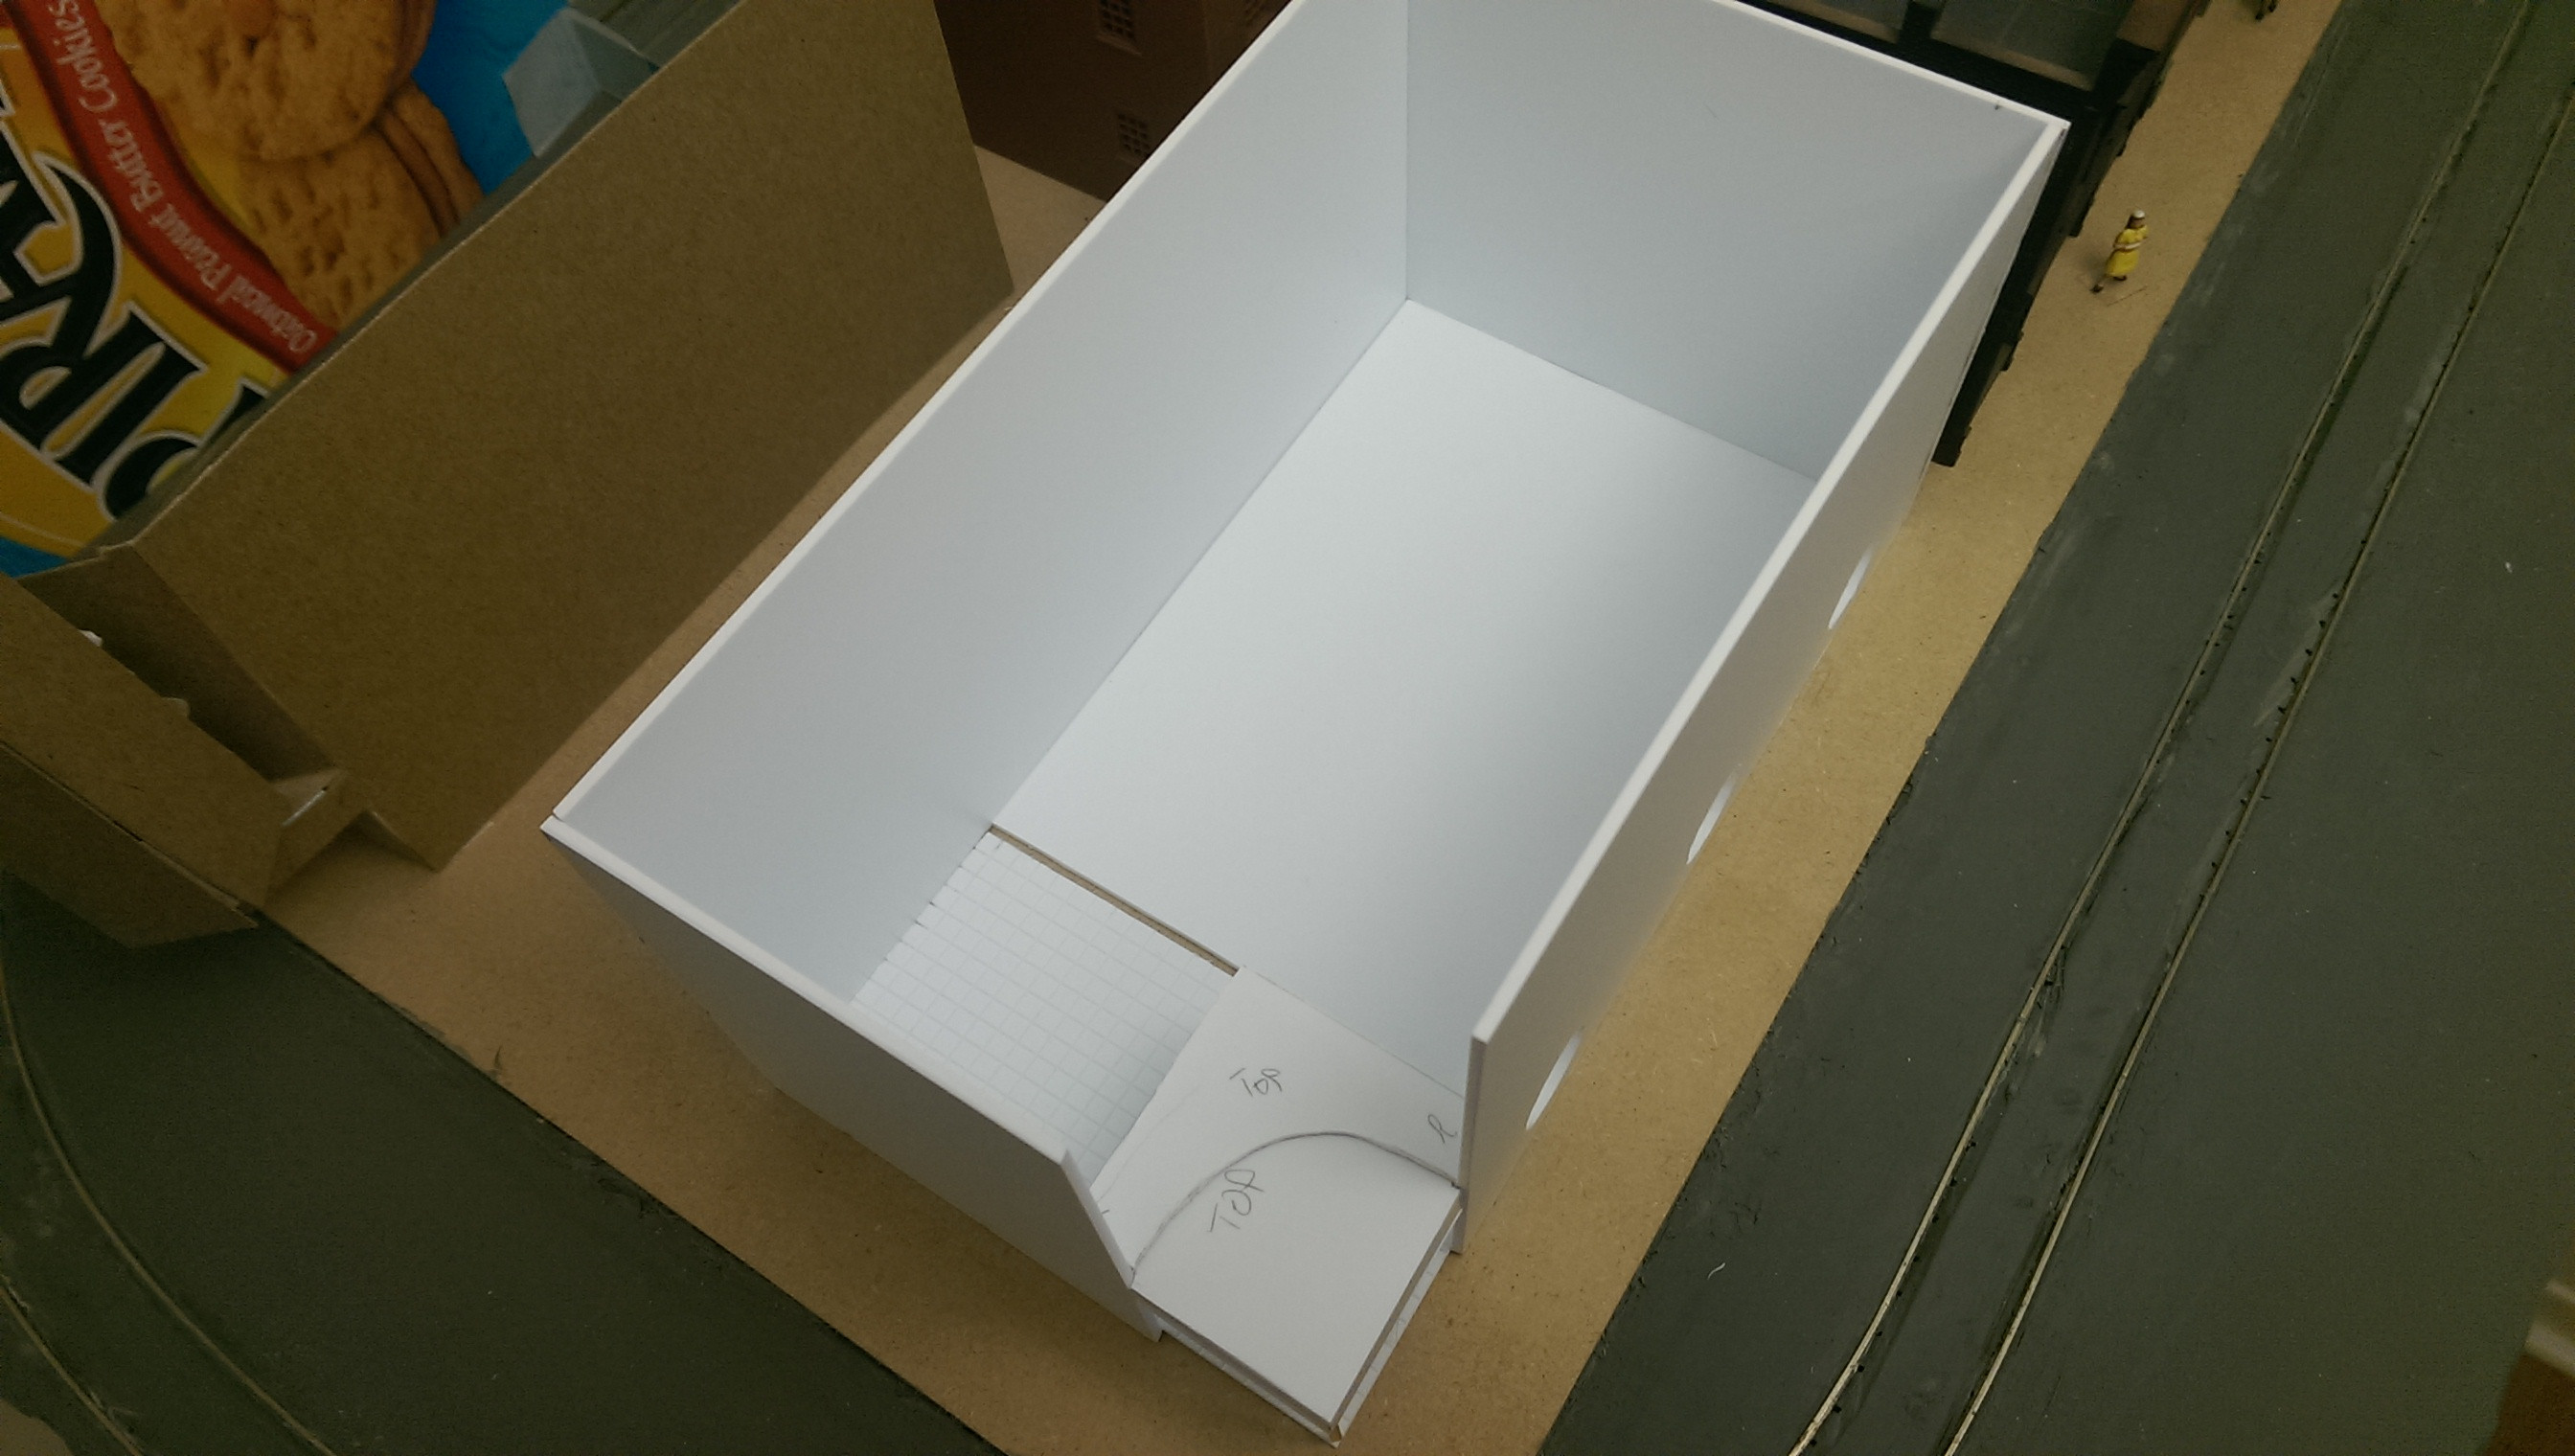
Here are the results, unpainted but with the flange-ways carved out. (Also note the mock-up of a movie theatre I'm hoping to build).
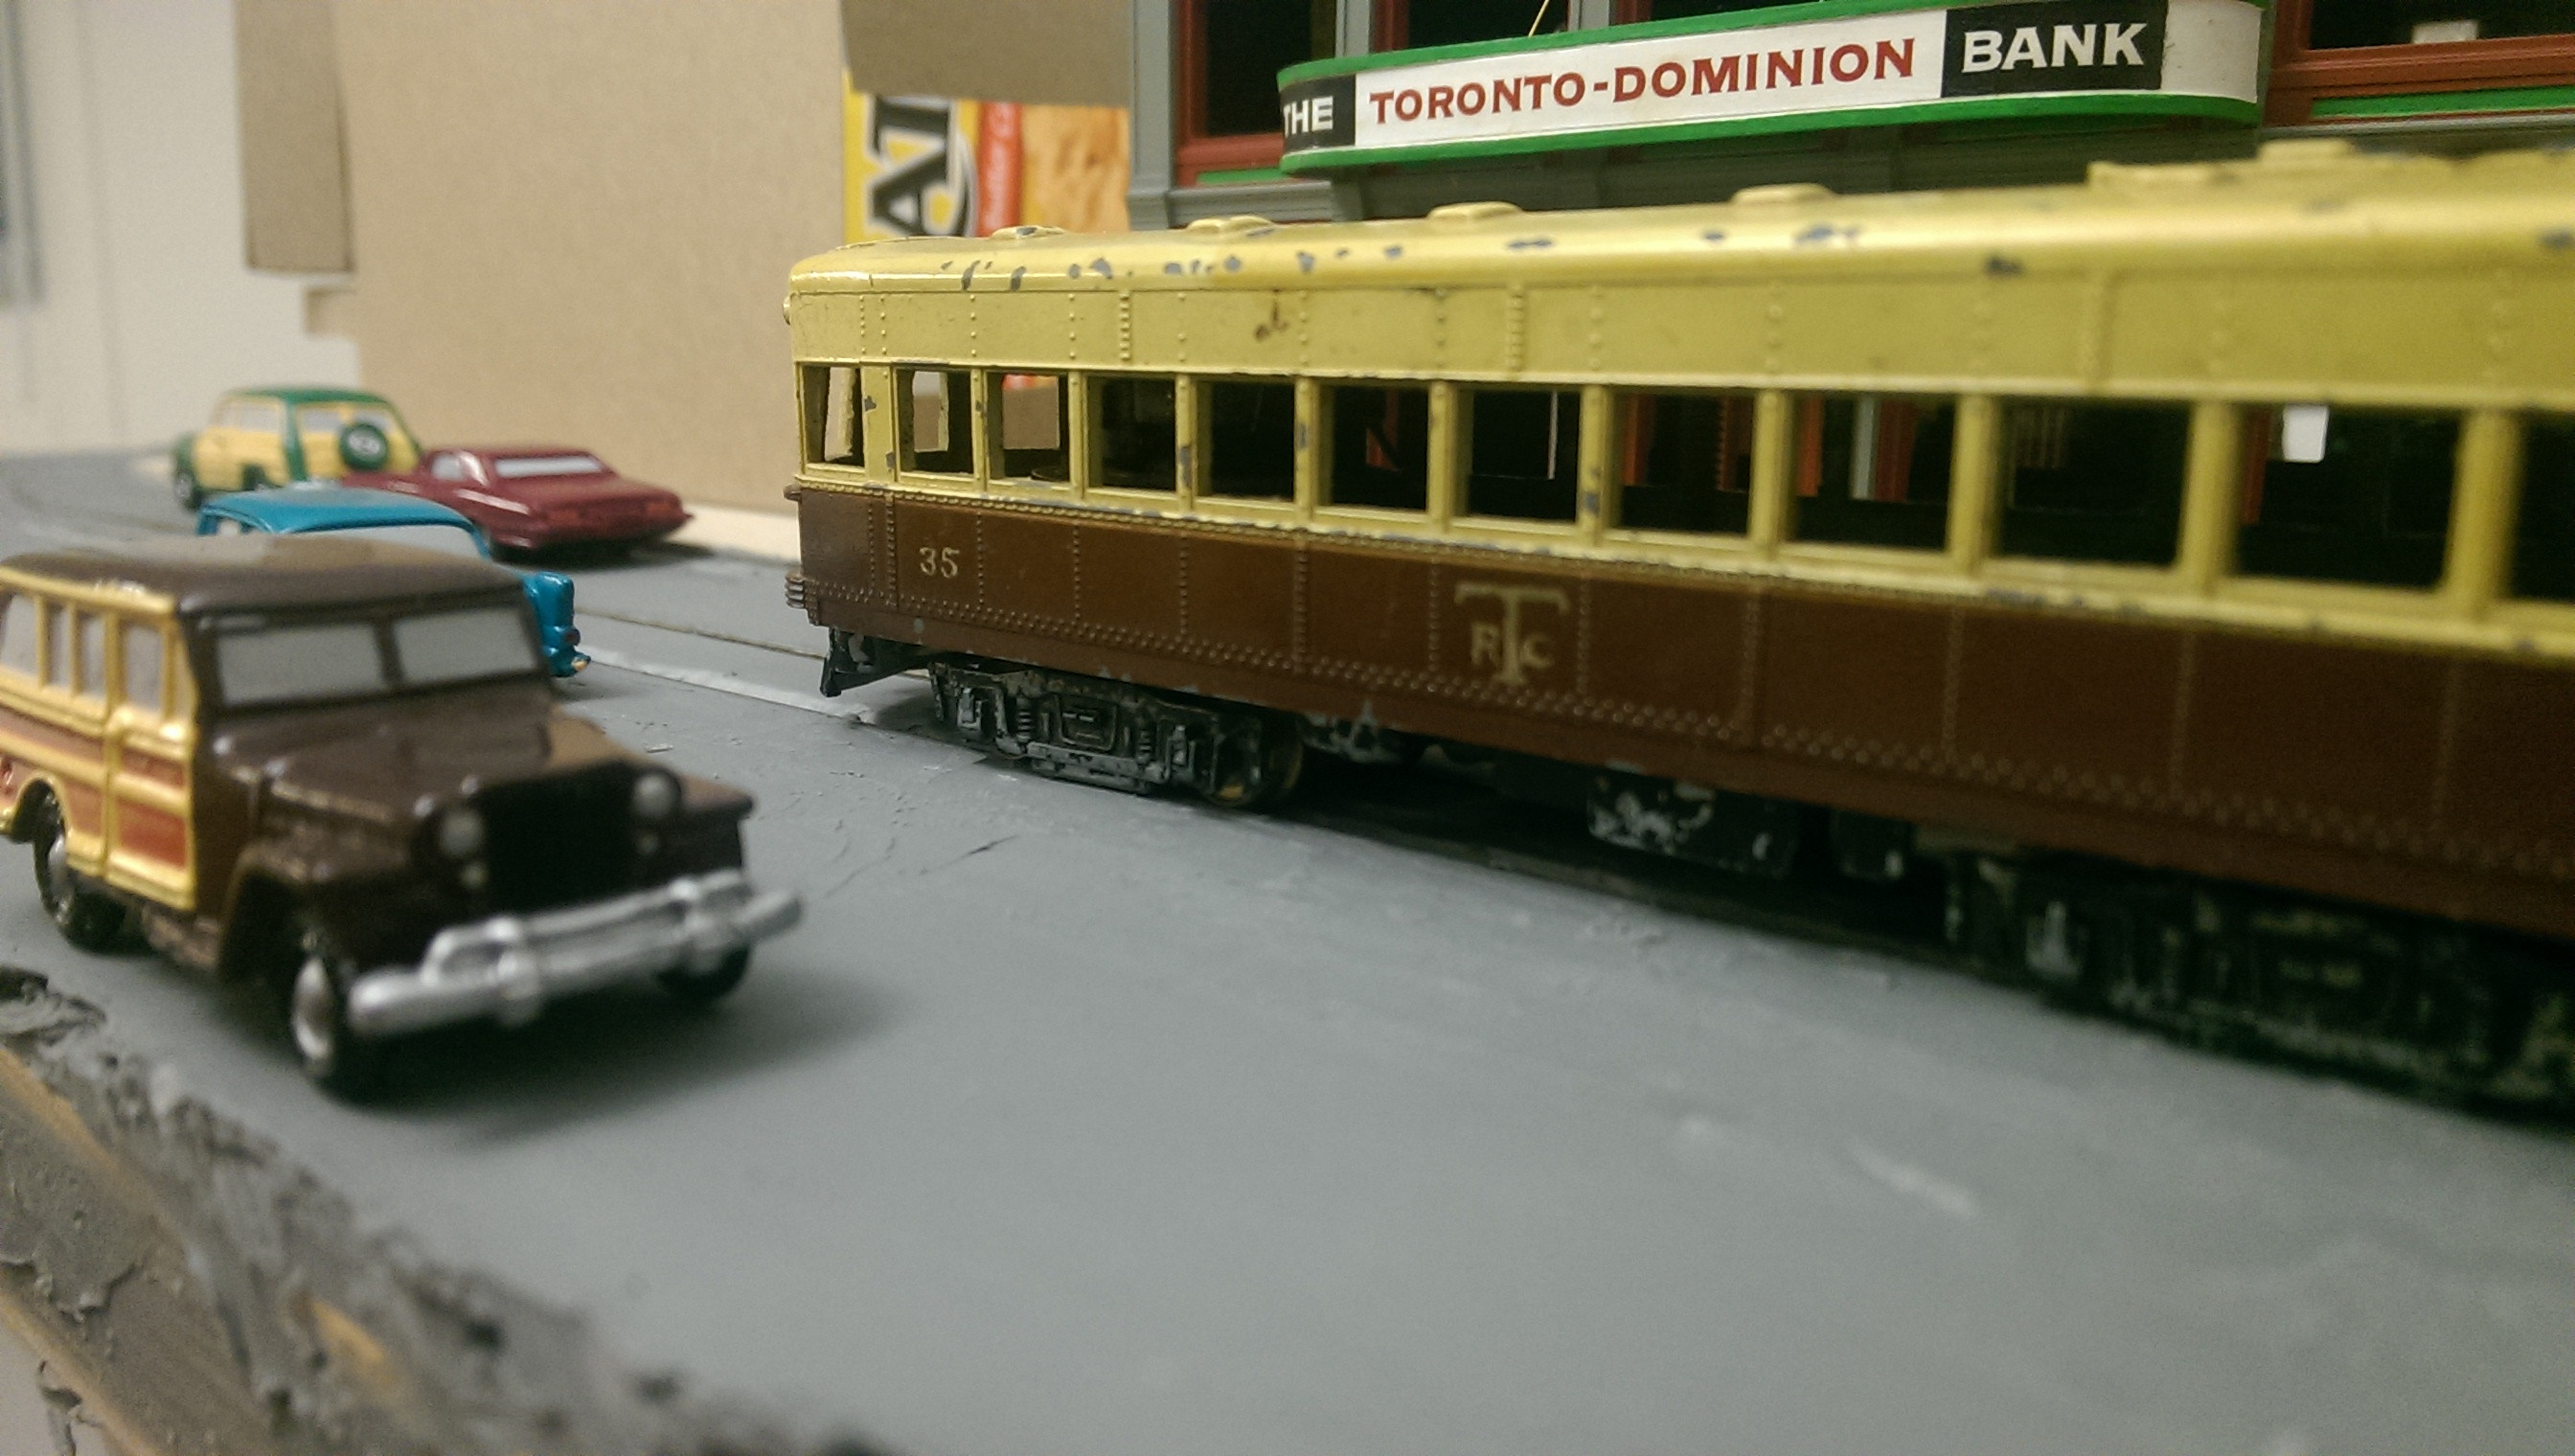
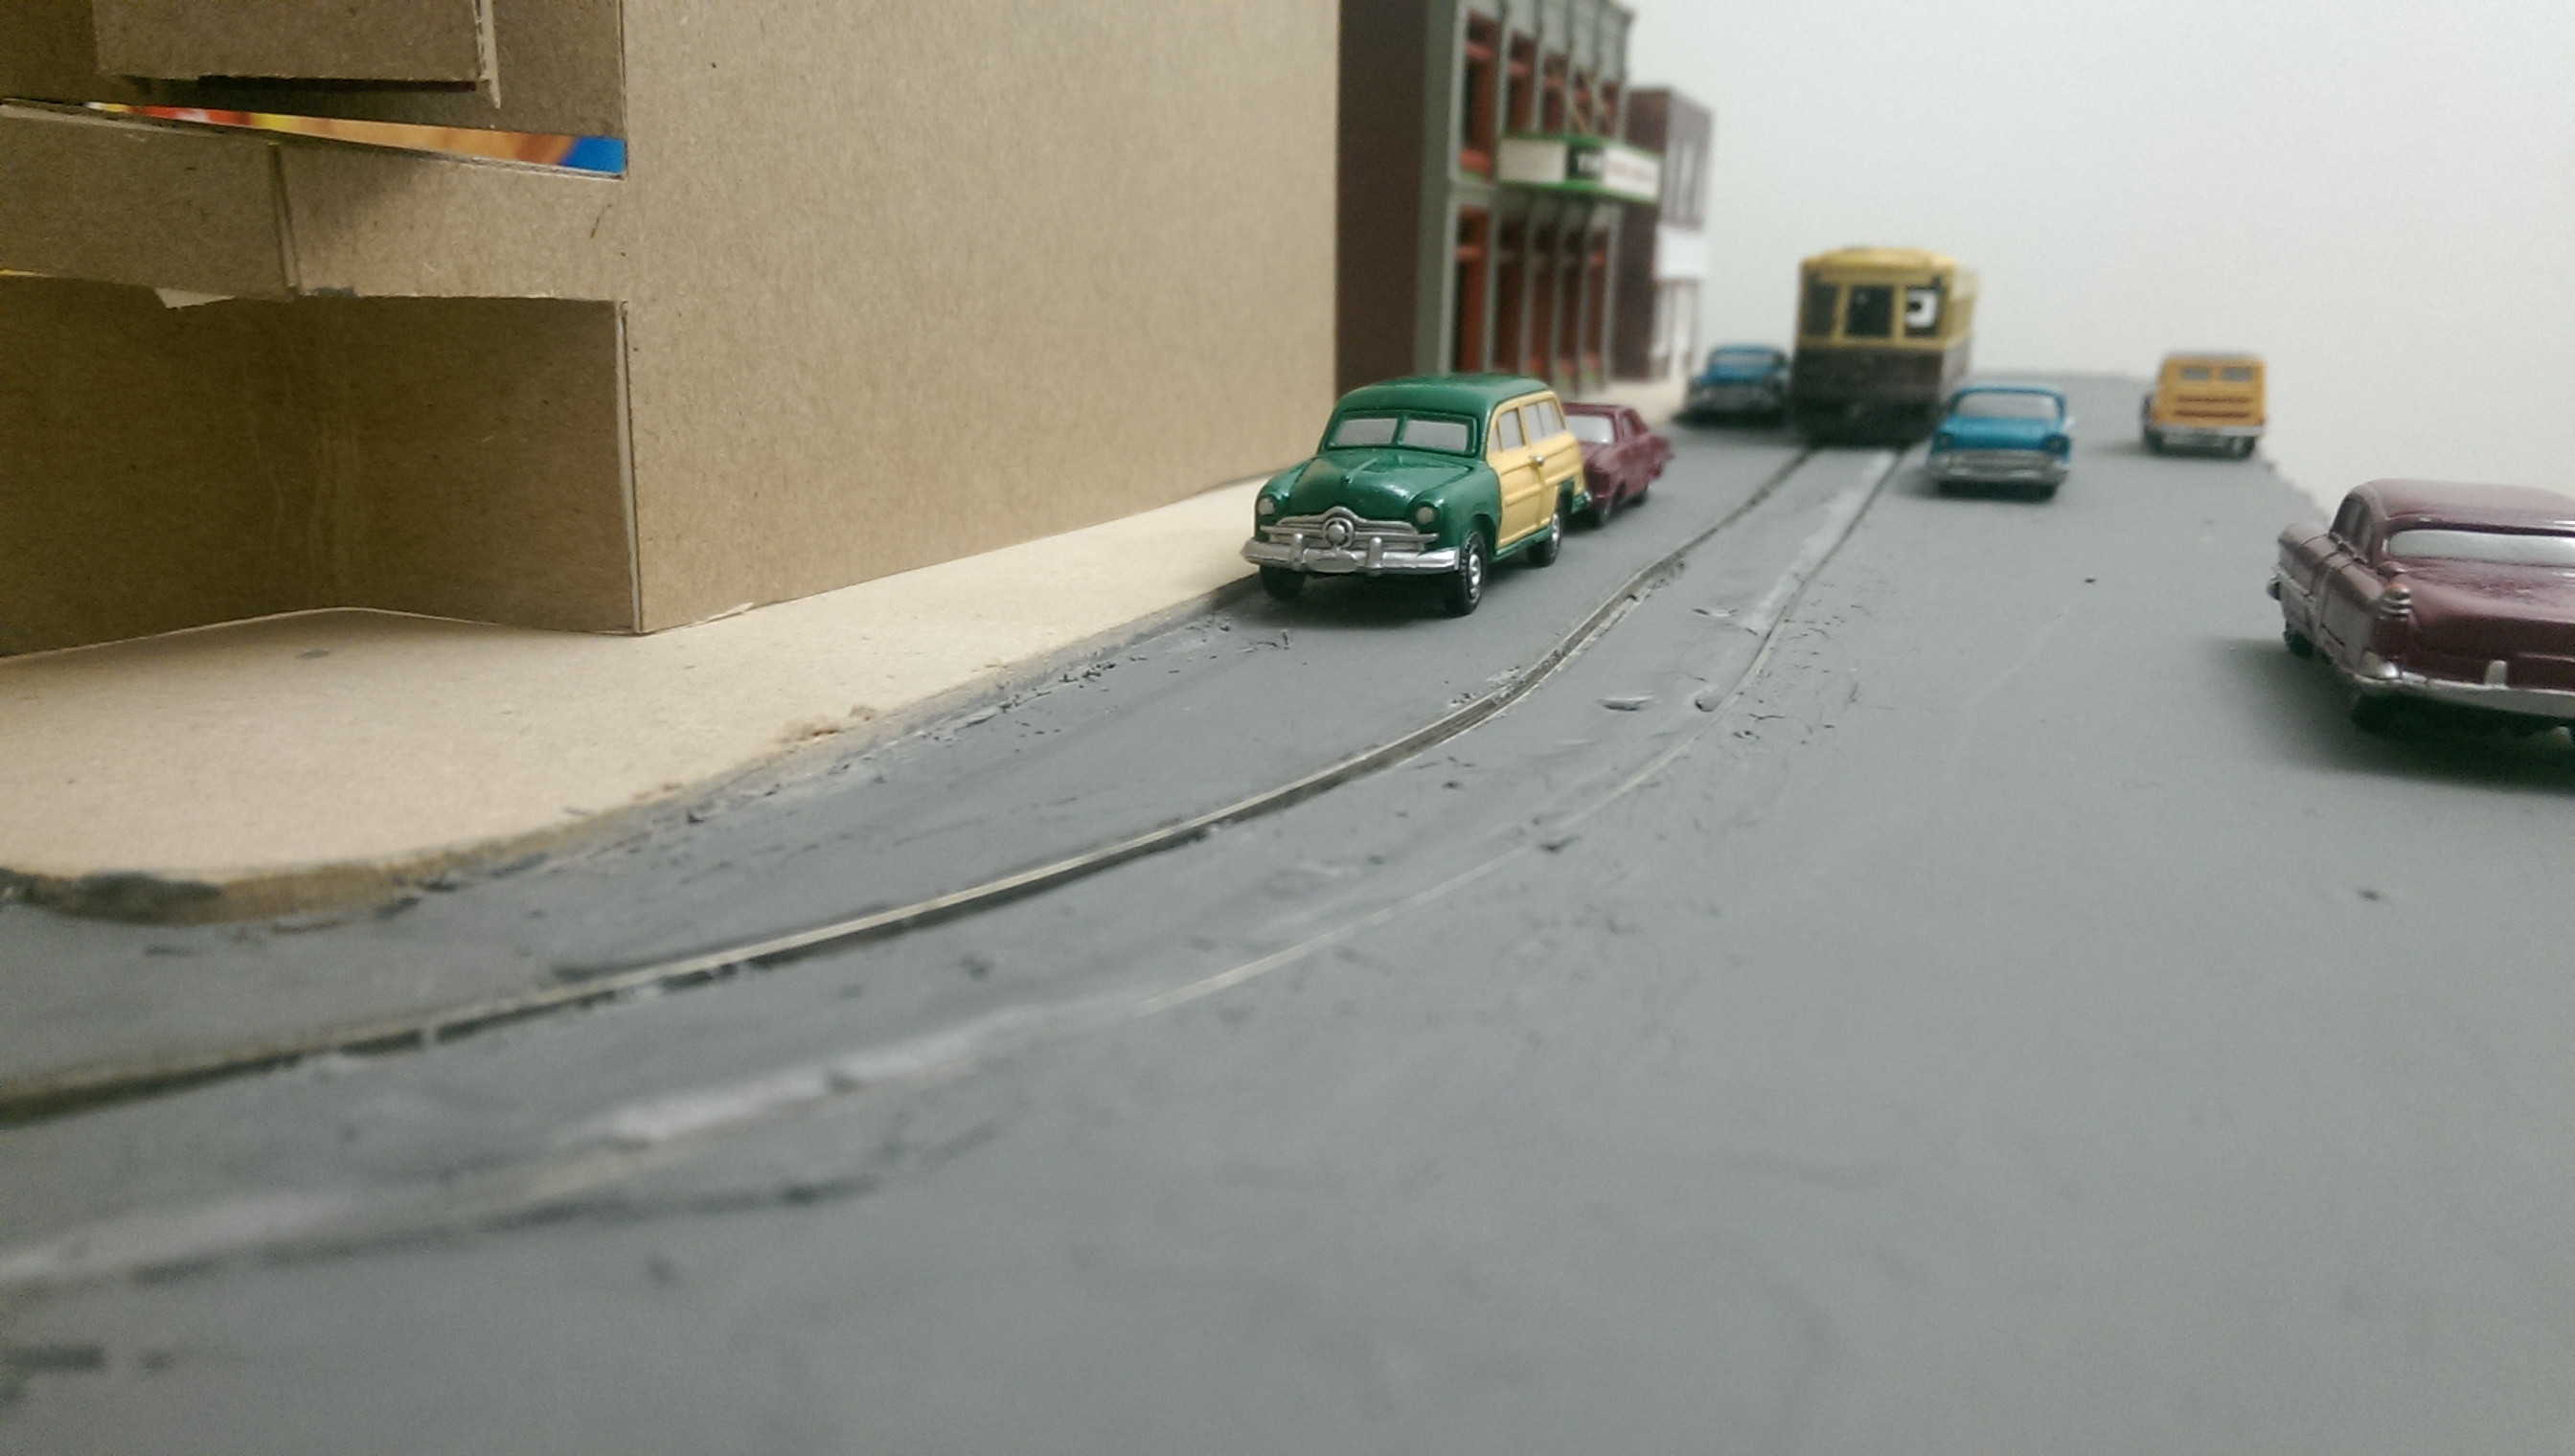
The next step will be loading up on grey and black dollar store paint and thoroughly covering the surface of the street. The caulking has some imperfections, but the right weathering should blend everything together.
|
|
Country: Canada ~
Posts: 3448 ~
Member Since: September 22 2006 ~
Last Visit: April 03 2026
|
Alert Moderator
|
|
|
|
 Posted - December 10 2014 : 12:00:19 AM Posted - December 10 2014 : 12:00:19 AM
|
That is looking cool, Cheez! It's starting to look very WWII-ish.
What type of caulk did you use?
The Tyco Depot
|
|
Country: USA ~
Posts: 3927 ~
Member Since: June 20 2007 ~
Last Visit: November 19 2015
|
Alert Moderator
|
|
|
|
Posted - December 10 2014 : 12:13:27 AM
|
| Lookin' good, Eric....
|
|
Country: USA ~
Posts: 6279 ~
Member Since: February 18 2009 ~
Last Visit: March 04 2022
|
Alert Moderator
|
|
|
|
Posted - December 10 2014 : 12:21:55 AM
|
Thanks guys!
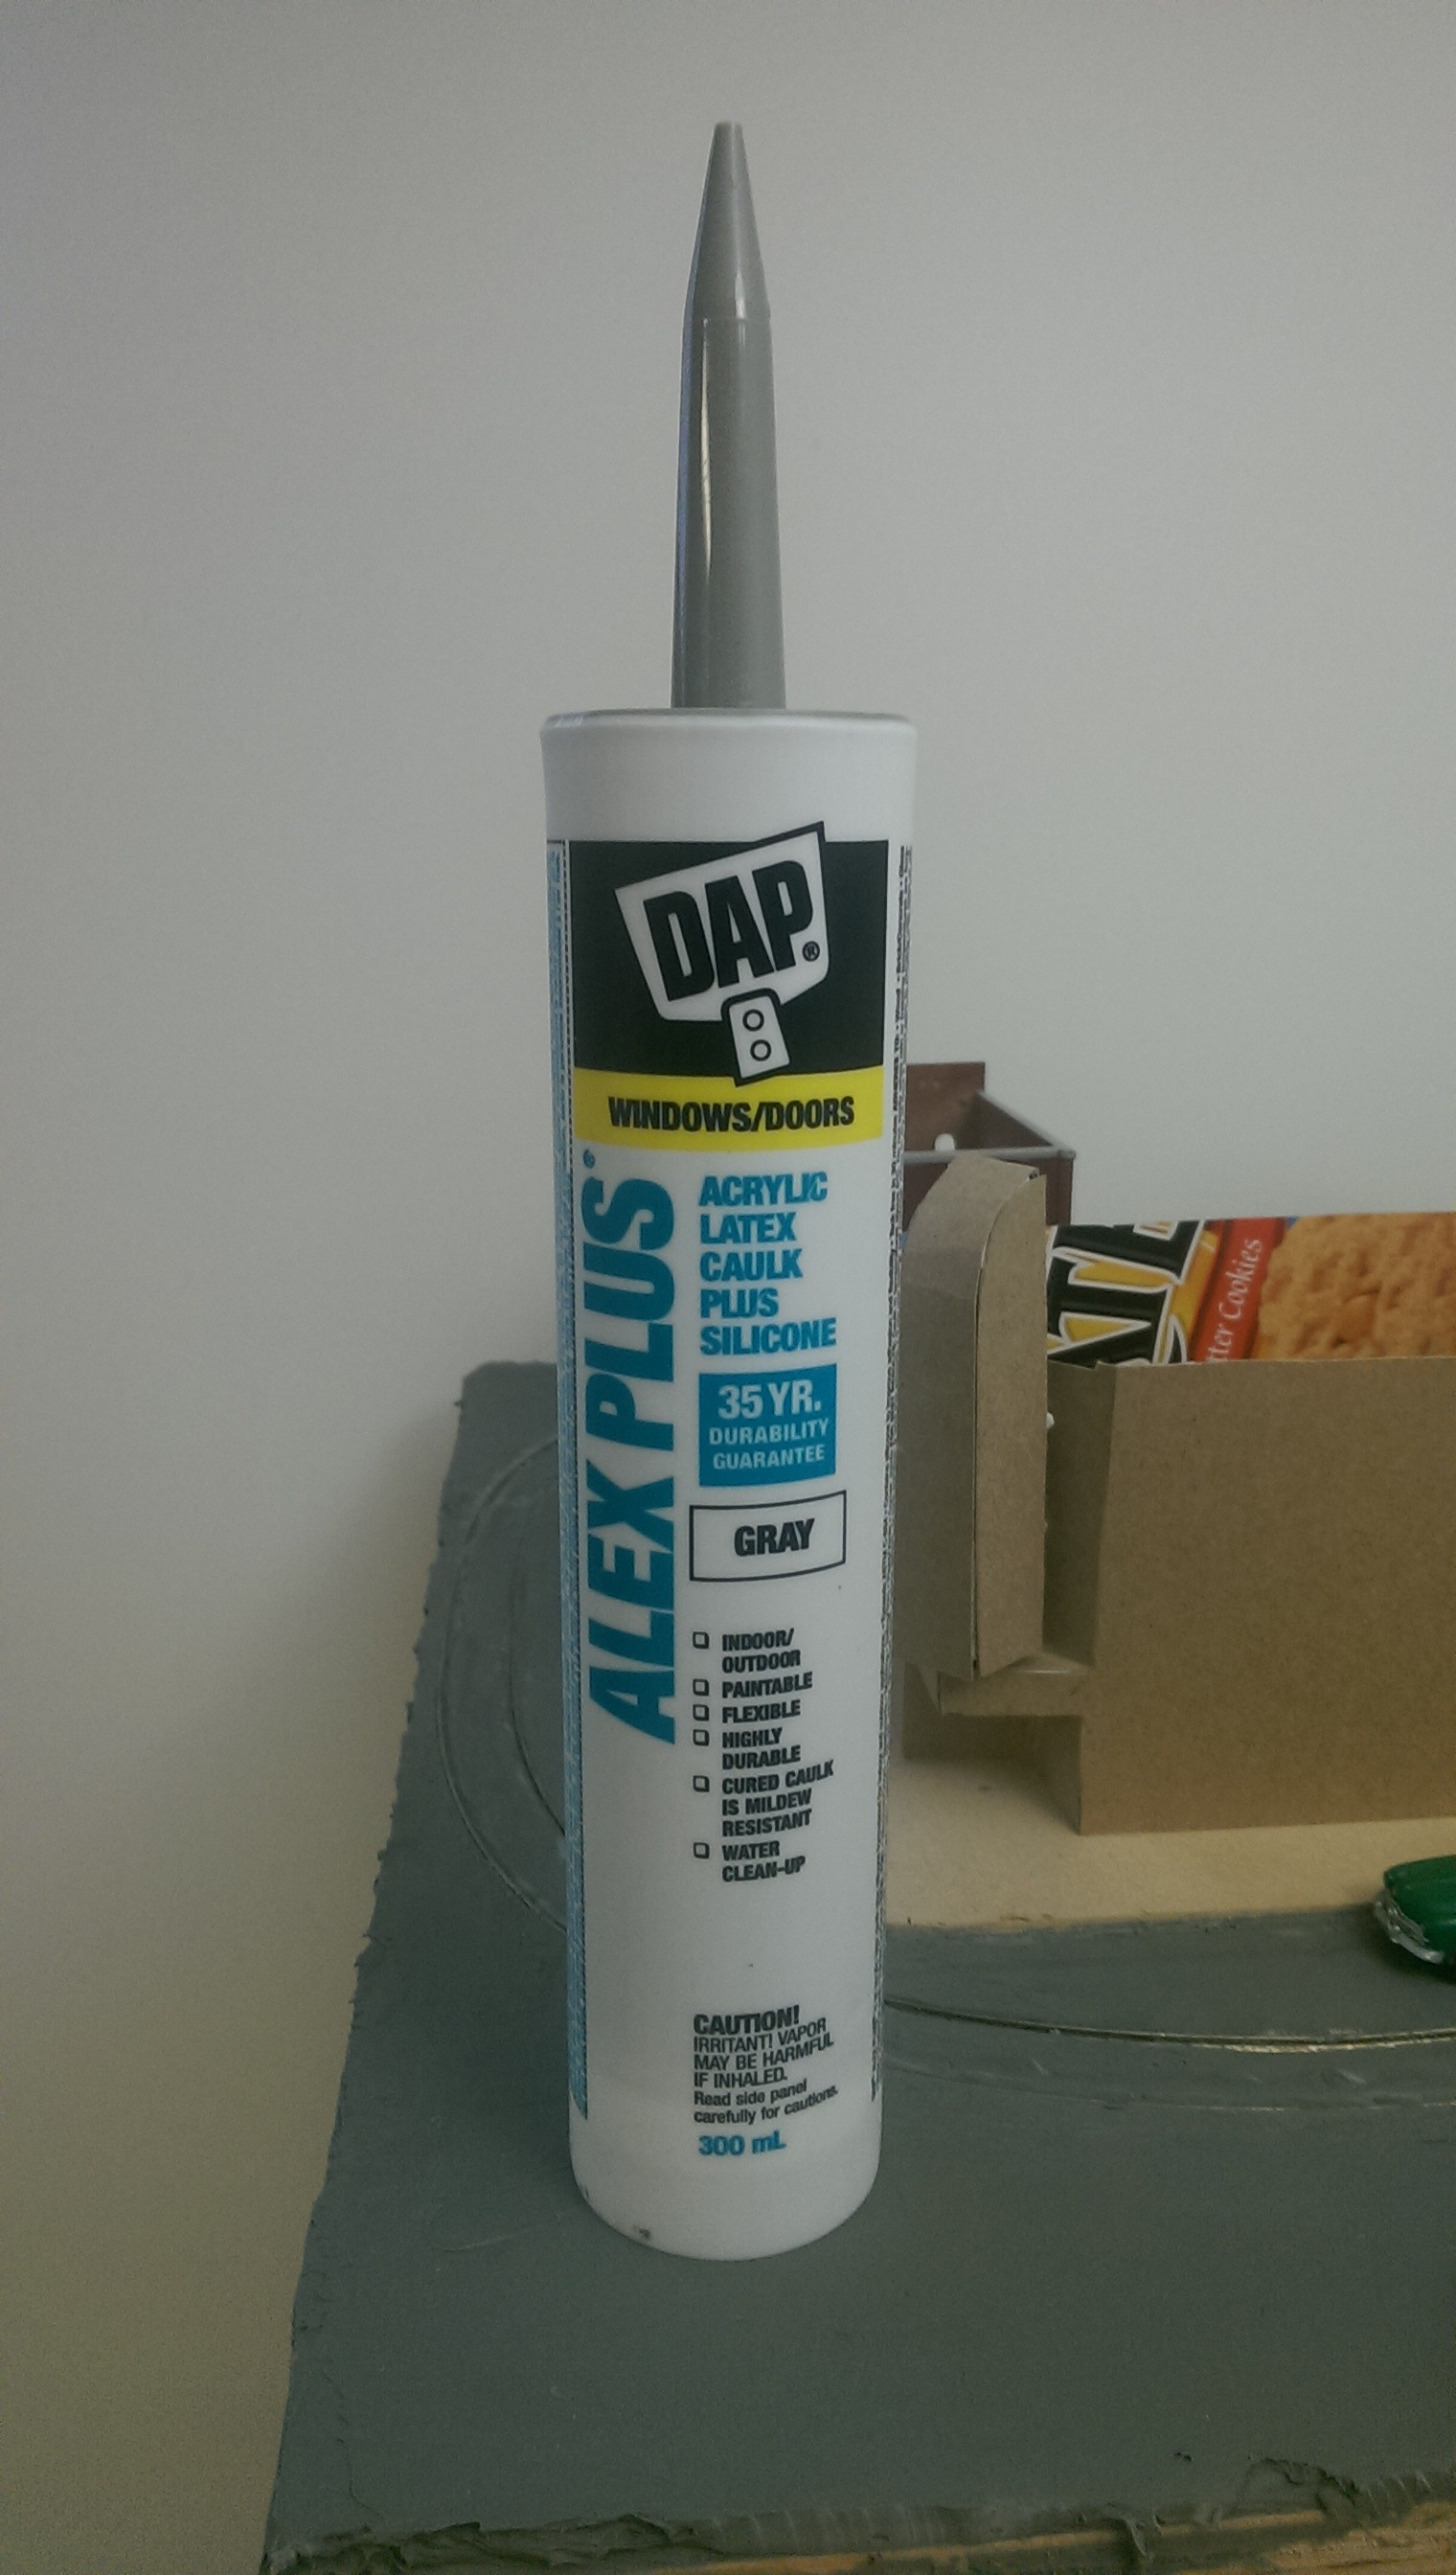
NP: I'm going for a 40's-60's look so it's good to hear that. The cars will probably be the defining feature more than anything. The caulking is DAP Alex Plus. It's acrylic latex with silicone; literally the cheapest caulking there is. $2.50 a tube and I used five tubes. I had to re-apply twice because of shrinkage, but I'm happy with the end result.
|
|
Country: Canada ~
Posts: 3448 ~
Member Since: September 22 2006 ~
Last Visit: April 03 2026
|
Alert Moderator
|
|
|
|
Posted - December 10 2014 : 12:50:15 AM
|
It's definitely coming along. And is that a Loews Theater popping up on the corner? Nice use of a cookie box.
The Tyco Depot
|
|
Country: USA ~
Posts: 3927 ~
Member Since: June 20 2007 ~
Last Visit: November 19 2015
|
Alert Moderator
|
|
|
|
Posted - December 10 2014 : 09:33:44 AM
|
Looks great! What kind of caulking did you use? Need to try that!
Tim
|
|
Country: USA ~
Posts: 259 ~
Member Since: October 23 2014 ~
Last Visit: March 28 2017
|
Alert Moderator
|
|
|
|
Posted - December 10 2014 : 09:41:26 AM
|
It's definitely starting to take shape at this point.My favorite shot is the first one where the camera is pointed at the side of the trolley itself. Looks almost like those old 1940's era trolley pictures which is what you're going for so good job on that.
-Steve
"A lot of modellers out there who go to these train shows see broken HO stuff and go, 'This is useless' when, in reality, they can still be used for modeling whether it's as a prop on your layout or a cool project to make something old new again."
Edited by - kovacste000 on December 10 2014 09:41:43 AM
|
|
Country: USA ~
Posts: 3533 ~
Member Since: February 17 2014 ~
Last Visit: January 11 2023
|
Alert Moderator
|
|
|
|
Posted - December 10 2014 : 12:12:44 PM
|
NP, some sort of theater. I haven't made it past the mock-up so no brand as of yet.
Thanks for the comments all. Here's what the caulking tubes look like...literally the cheapest caulk the hardware stores sell.
|
|
Country: Canada ~
Posts: 3448 ~
Member Since: September 22 2006 ~
Last Visit: April 03 2026
|
Alert Moderator
|
|
|
|
Posted - December 10 2014 : 12:43:37 PM
|
| Just to mention, Eric. You may find the silicone to be very hard to paint over.
|
|
Country: USA ~
Posts: 6279 ~
Member Since: February 18 2009 ~
Last Visit: March 04 2022
|
Alert Moderator
|
|
|
|
Posted - December 10 2014 : 12:43:51 PM
|
quote:NP, some sort of theater. I haven't made it past the mock-up so no brand as of yet.
Thanks for the comments all. Here's what the caulking tubes look like...literally the cheapest caulk the hardware stores sell.
Originally posted by DaCheez - December 10 2014 : 12:12:44 PM
|
Gray acrylic-latex caulking! Great idea. I'm going to have to try that! It seems like it should be resilient, and with color all the way through, no annoying white plaster chips...it even matches the gray craft foam I used for another highway...
Does it dry pretty flat, non-glossy?
|
|
Country: USA ~
Posts: 432 ~
Member Since: March 04 2008 ~
Last Visit: December 28 2018
|
Alert Moderator
|
|
|
|
Posted - December 10 2014 : 2:58:25 PM
|
another way to do this is to lay in brick patterns in & around the tracks
or modern way is to use concrete crossings 
|
|
Country: USA ~
Posts: 15031 ~
Member Since: February 23 2009 ~
Last Visit: July 07 2026
|
Alert Moderator
|
|
|
|
Posted - December 10 2014 : 9:34:42 PM
|
Hey Walt, the tube claims paintable so I'm hoping it goes well.
Autobus: The caulking I used is completely flat (non-gloss). The only reason I'm painting it is because I want to weather it and hide the cut marks. Plaster is a lot easier to achieve a smooth surface. The caulking required a steady hand and a spreader to get a nice even surface.
|
|
Country: Canada ~
Posts: 3448 ~
Member Since: September 22 2006 ~
Last Visit: April 03 2026
|
Alert Moderator
|
|
|
|
Posted - December 10 2014 : 9:38:29 PM
|
Nice job! I really should do something like this and give my trollies something to do!
~ Dave
They're ALL toys
|
|
Country: USA ~
Posts: 547 ~
Member Since: December 25 2010 ~
Last Visit: May 20 2019
|
Alert Moderator
|
|
|
|
Posted - December 10 2014 : 10:37:00 PM
|
| That looks real convincing for such a small space (and I dig that because it inspires me to work smarter with my small available space). Trolleys are cool and they take you back to an interesting era. Easy for me to say, but I'm thinking that would look pretty cool if you could make that look like bricks were used to pave the street . . . keep the photos comin' Eric. Fun to look at.
|
|
Country: USA ~
Posts: 2087 ~
Member Since: March 16 2013 ~
Last Visit: July 05 2018
|
Alert Moderator
|
|
|
|
Posted - December 11 2014 : 8:01:08 PM
|
Love the little layout so far, especially that classic IRR interurban! Don't change a thing on those trolleys, the patina really gives them that vintage character. Also, I think I have a plastic Loew's theater vertical sign sitting somewhere if you'd like it in building that theater you're planning.
--CRC
|
|
Country: USA ~
Posts: 930 ~
Member Since: January 25 2012 ~
Last Visit: August 23 2023
|
Alert Moderator
|
|
|
|
Posted - December 11 2014 : 9:07:33 PM
|
Barry, the bricks would look cool. It probably wouldn't be too hard either. Grab some sheets of cobblestone and inlay them in to the caulking. I believe there's a company that makes a full trolley track system complete with various street patterns....not cheap of course.
PRR, the decision has been made to leave the paint alone. I agree, the character is in the paint.
I made some progress on the layout today. The track was cleaned up and made fully operational. I also spent several hours bringing the trolley up to a useable state...I tore it down and put it back together at least three times trying to make it run. She purrs now.
Here's a quick video I took:
|
|
Country: Canada ~
Posts: 3448 ~
Member Since: September 22 2006 ~
Last Visit: April 03 2026
|
Alert Moderator
|
|
|
|
Posted - December 11 2014 : 9:26:41 PM
|
| Really nice, Eric... I love that old trolley....
|
|
Country: USA ~
Posts: 6279 ~
Member Since: February 18 2009 ~
Last Visit: March 04 2022
|
Alert Moderator
|
|
|
|
Posted - December 11 2014 : 11:44:23 PM
|
| Thanks for the video Eric. I believe a scene like that could keep you busy for a quite a spell.
|
|
Country: USA ~
Posts: 2087 ~
Member Since: March 16 2013 ~
Last Visit: July 05 2018
|
Alert Moderator
|
|
|
|
Posted - December 11 2014 : 11:57:25 PM
|
That whole scene really works - I can only imagine what it will look like as you continue. And I agree with Walt, love that old trolley
http://tycodepot.com/
|
|
|
|
|
Posted - December 12 2014 : 09:28:44 AM
|
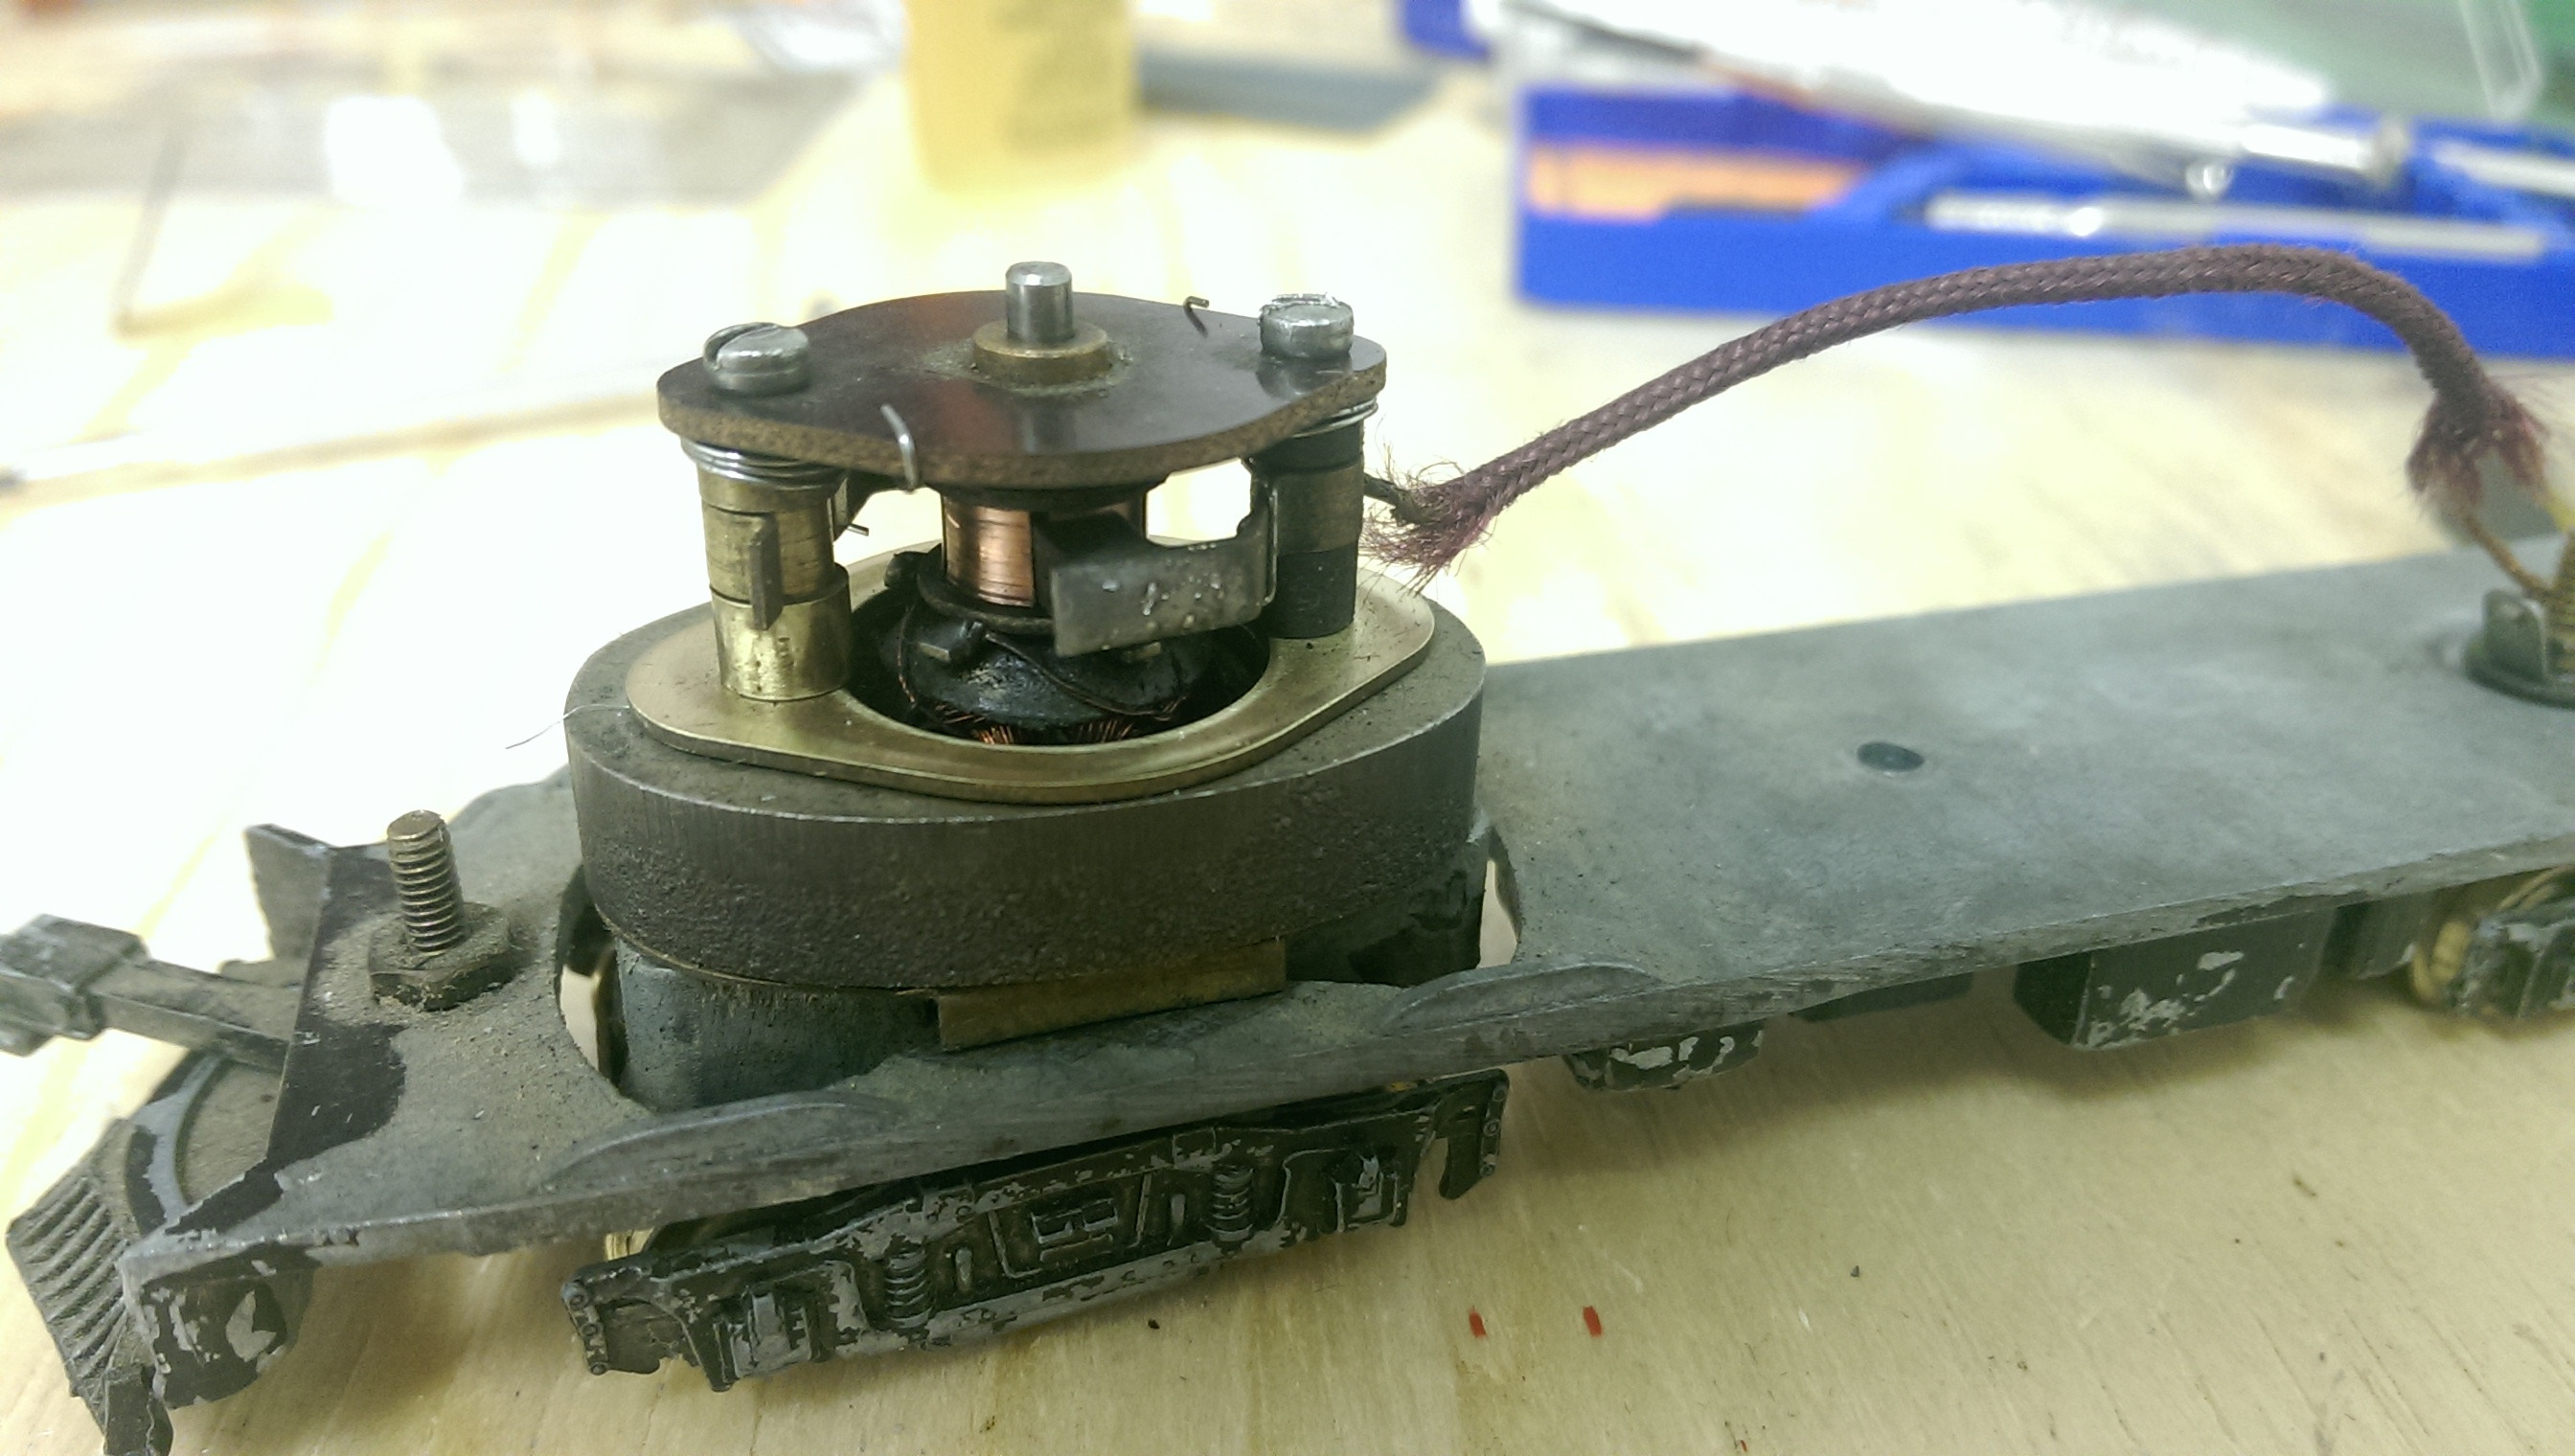
That trolley is so smooth. The motor it uses must be of high quality.
-Steve
"A lot of modellers out there who go to these train shows see broken HO stuff and go, 'This is useless' when, in reality, they can still be used for modeling whether it's as a prop on your layout or a cool project to make something old new again."
|
|
Country: USA ~
Posts: 3533 ~
Member Since: February 17 2014 ~
Last Visit: January 11 2023
|
Alert Moderator
|
|
|
|
Posted - December 12 2014 : 10:29:49 AM
|
If you have the money, you can buy pre-made street track with the HO rails embedded. At $10 per 9 inch, it would be expensive, but would look REALLY nice.
I'd love to do this, but right now the expense would be a bit much. I may buy a few straight pieces to use for diorama purposes for now.
Jerry
" When life throws you bananas...it's easy to slip up"
|
|
Country: USA ~
Posts: 3974 ~
Member Since: January 04 2009 ~
Last Visit: January 11 2019
|
Alert Moderator
|
|
|
|
Posted - December 12 2014 : 4:30:29 PM
|
quote: That trolley is so smooth. The motor it uses must be of high quality.
Originally posted by kovacste000 - December 12 2014 : 09:28:44 AM
|
I'd honestly never seen anything like it before. Those two towers hold the brushes which are spring-loaded by a piece of wire that hooks over the plate on the top. Interesting design. As the video shows, it can be made to run well.
Jerry, those certainly are nice. I think the gap in between pieces would bother me a little though.
|
|
Country: Canada ~
Posts: 3448 ~
Member Since: September 22 2006 ~
Last Visit: April 03 2026
|
Alert Moderator
|
|
|
|
Posted - December 12 2014 : 10:05:44 PM
|
That was the standard vertical traction motor of the time. I have two old Bowsers with similar motors, although the brushes hinge on brass posts on one end of the phenolic plate. All of them have that big alnico ring magnet, which is impossible to replace with neodymiums if it gets weak.
The Tyco Depot
|
|
Country: USA ~
Posts: 3927 ~
Member Since: June 20 2007 ~
Last Visit: November 19 2015
|
Alert Moderator
|
|
|
|
Posted - December 12 2014 : 10:23:31 PM
|
quote:
That thing is awesome. I'll have to keep an eye out for a mechanism like that. One more for the wish list.
~ Dave
They're ALL toys
|
|
Country: USA ~
Posts: 547 ~
Member Since: December 25 2010 ~
Last Visit: May 20 2019
|
Alert Moderator
|
|
|
|
Posted - December 22 2014 : 5:04:05 PM
|
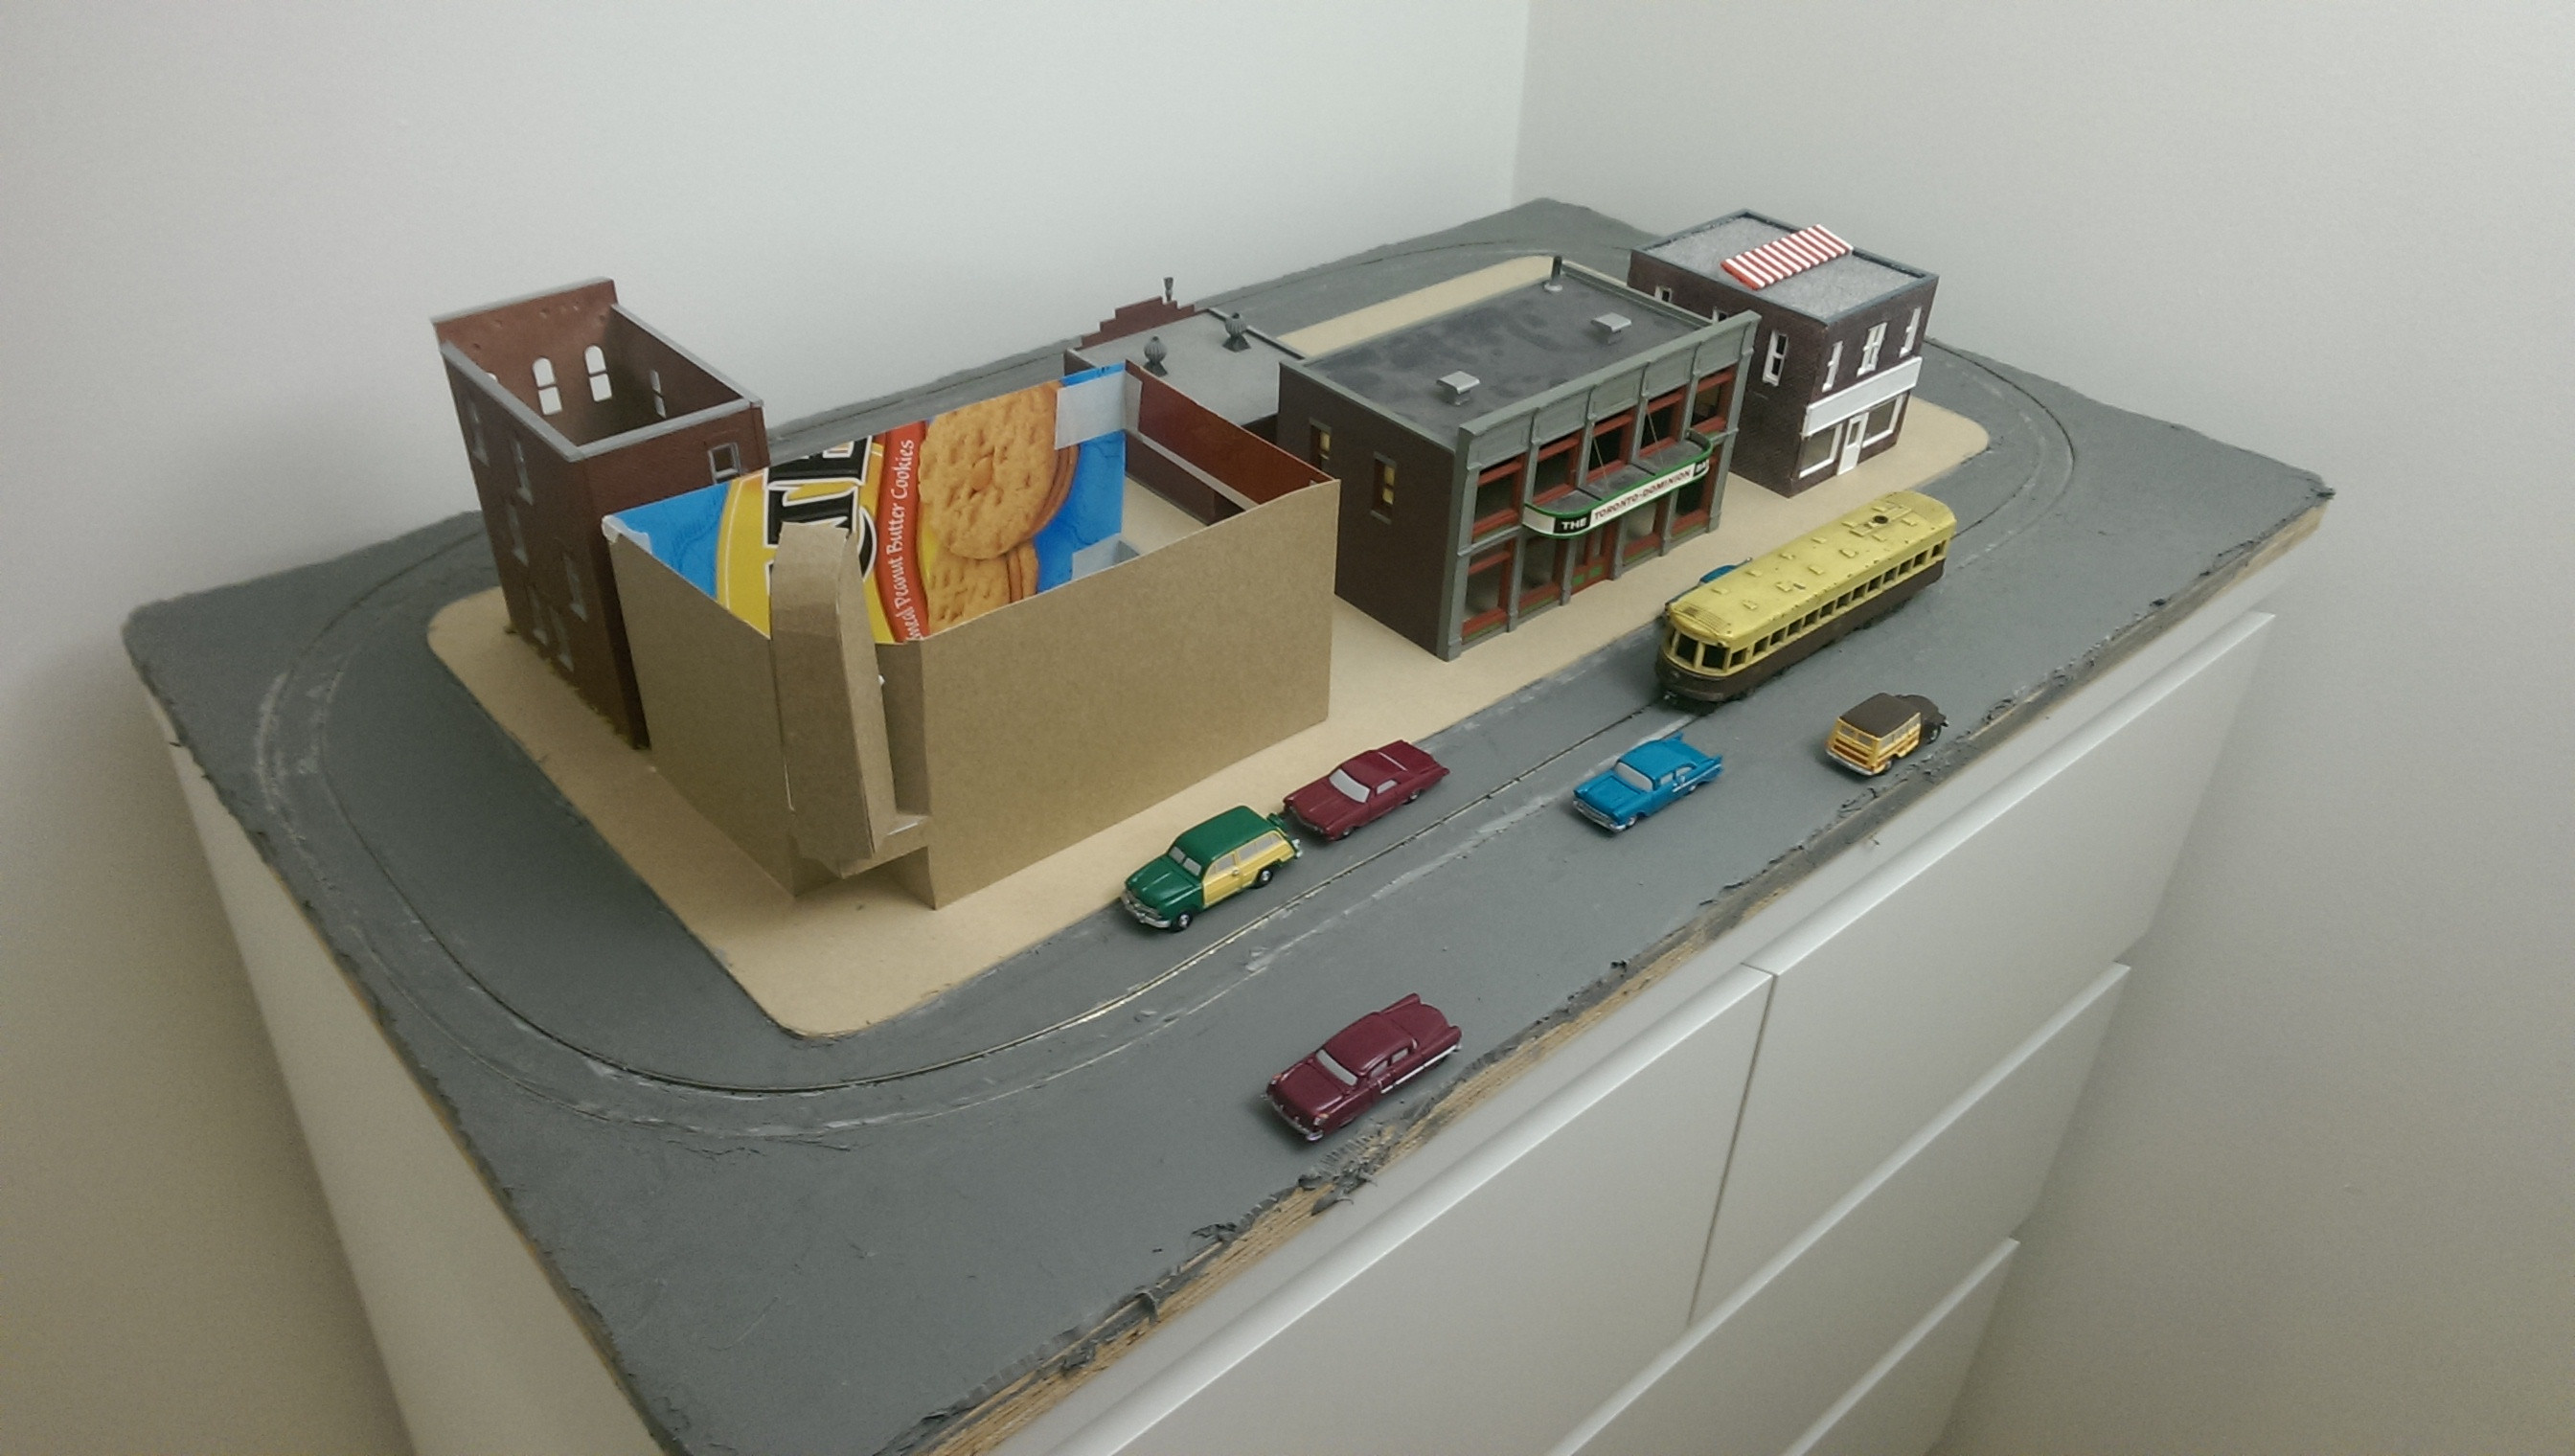
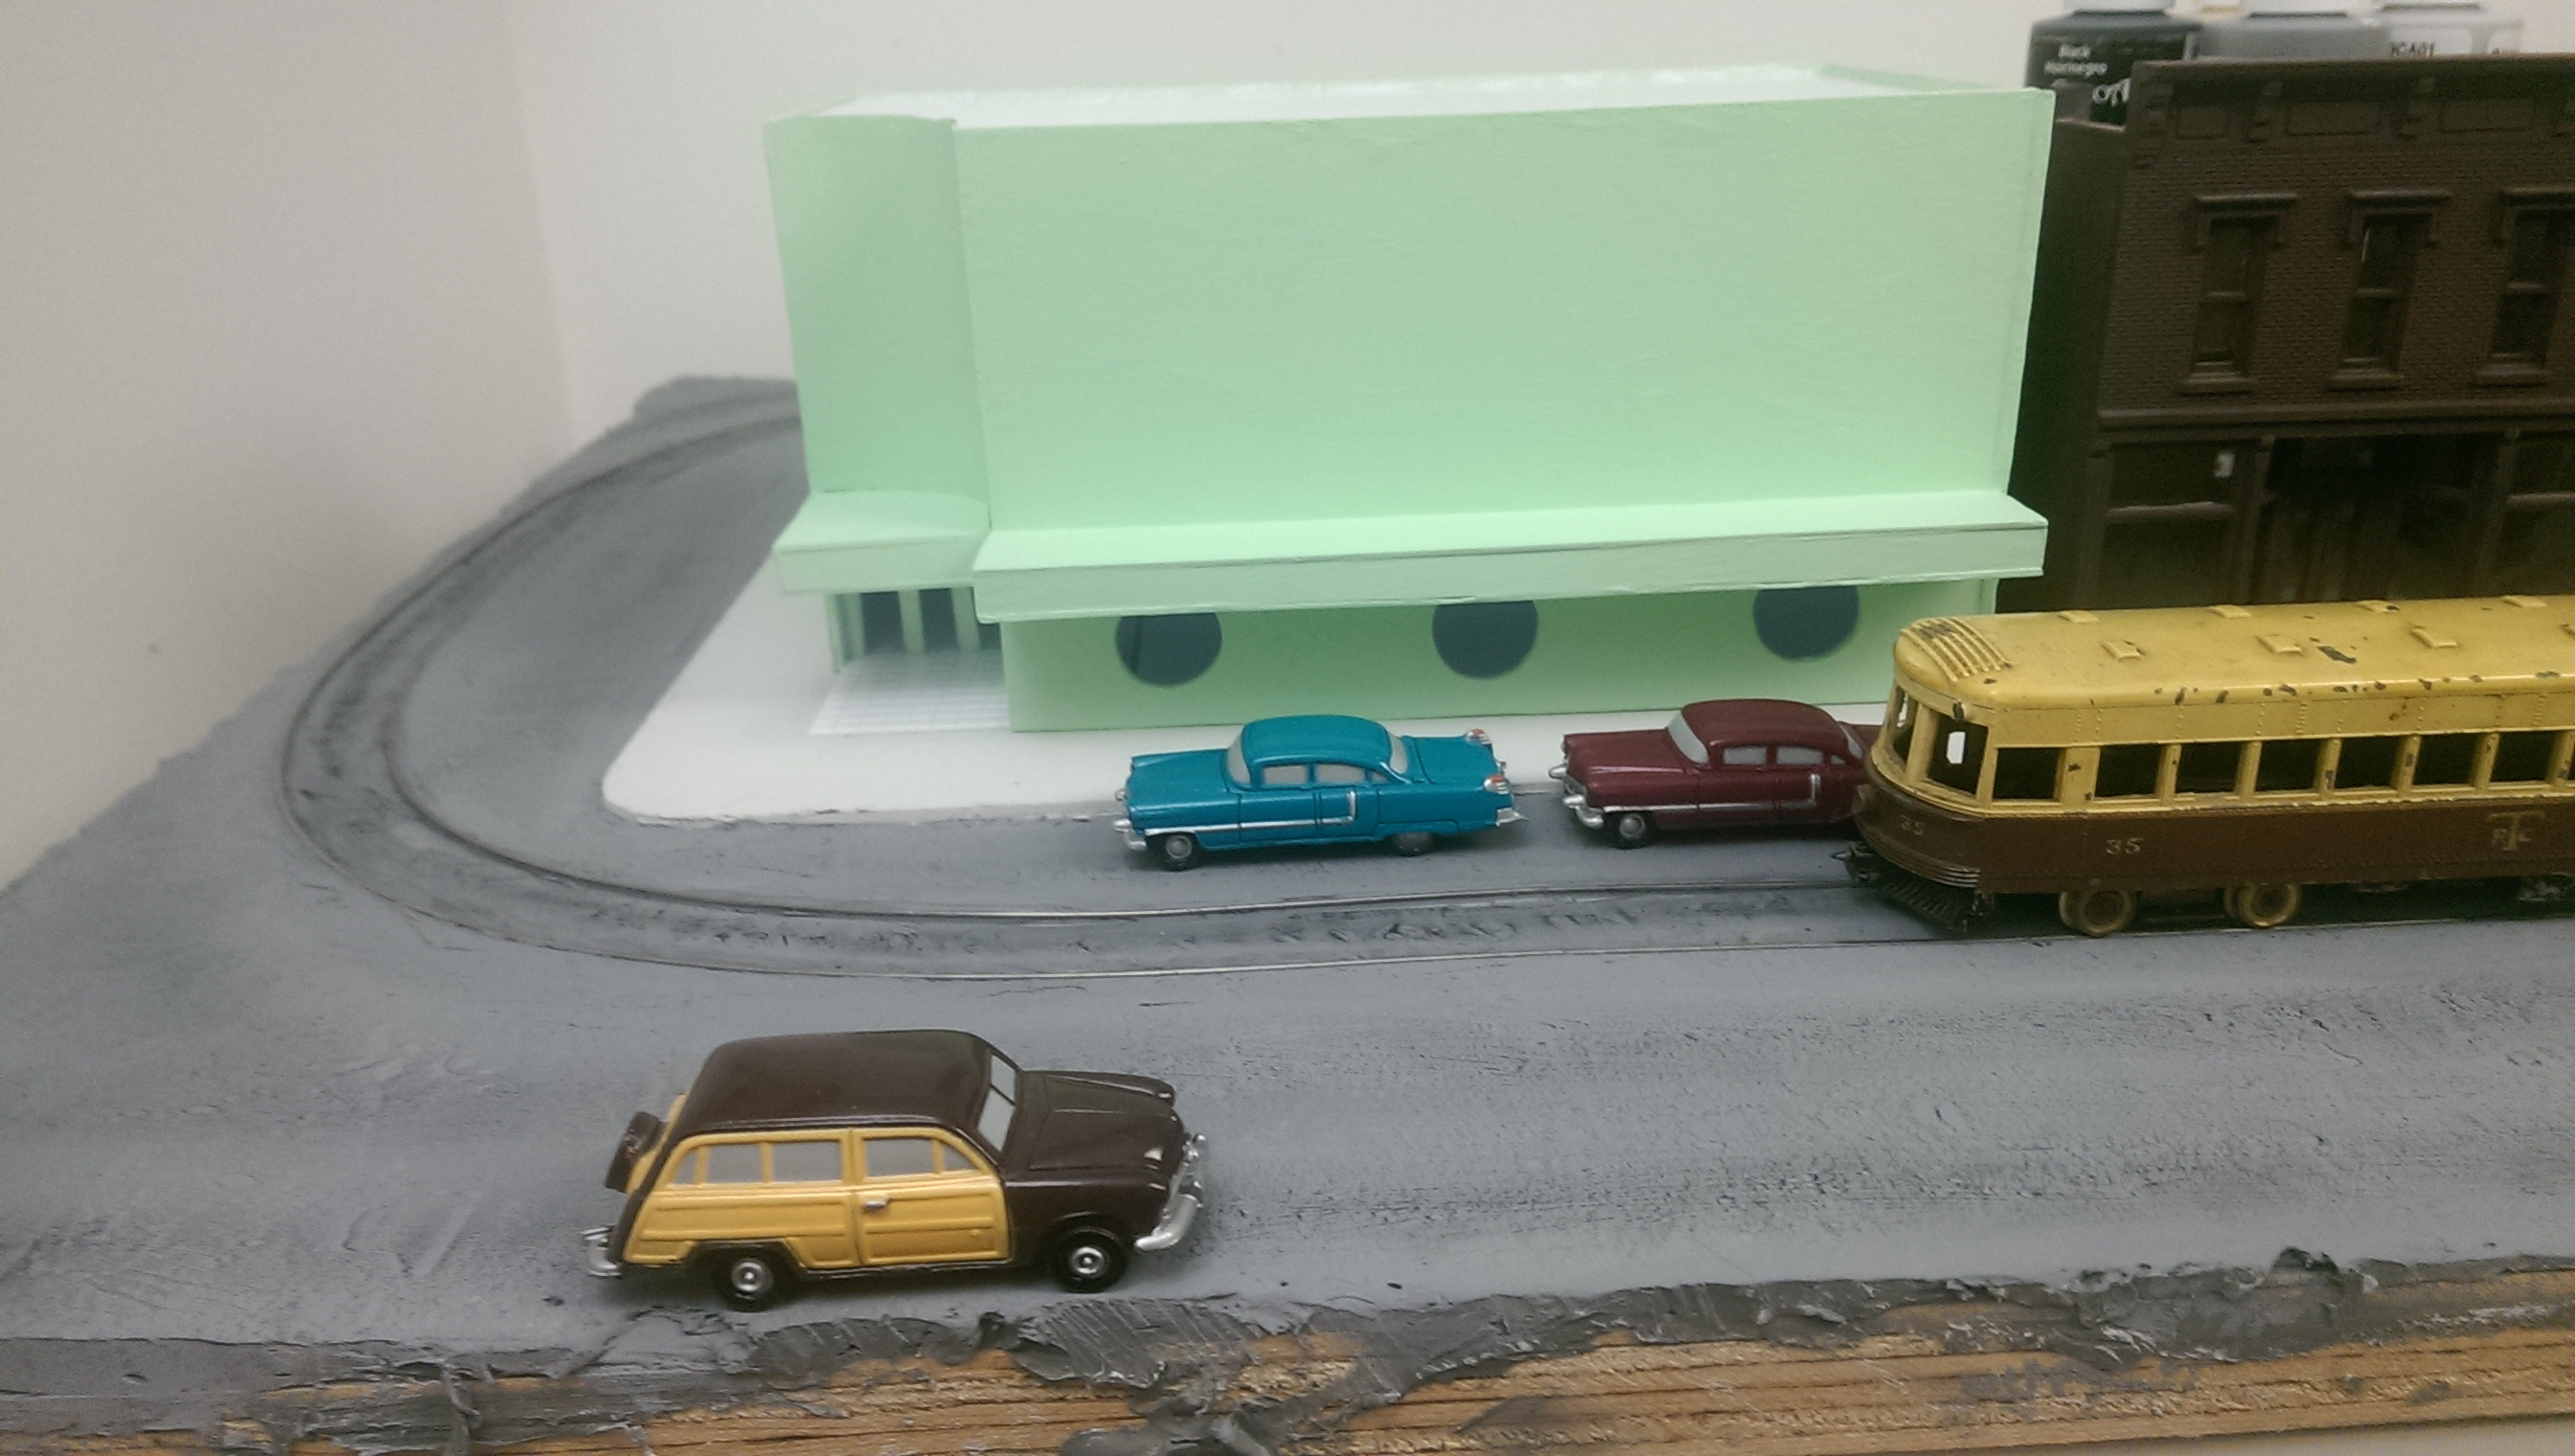
Lots of little progress is happening at the moment, mostly in the form of detailing the buildings. I acquired a small haul of city buildings last week and have finalized the arrangement on the front curb (I think ). Construction has begun on the movie theatre.
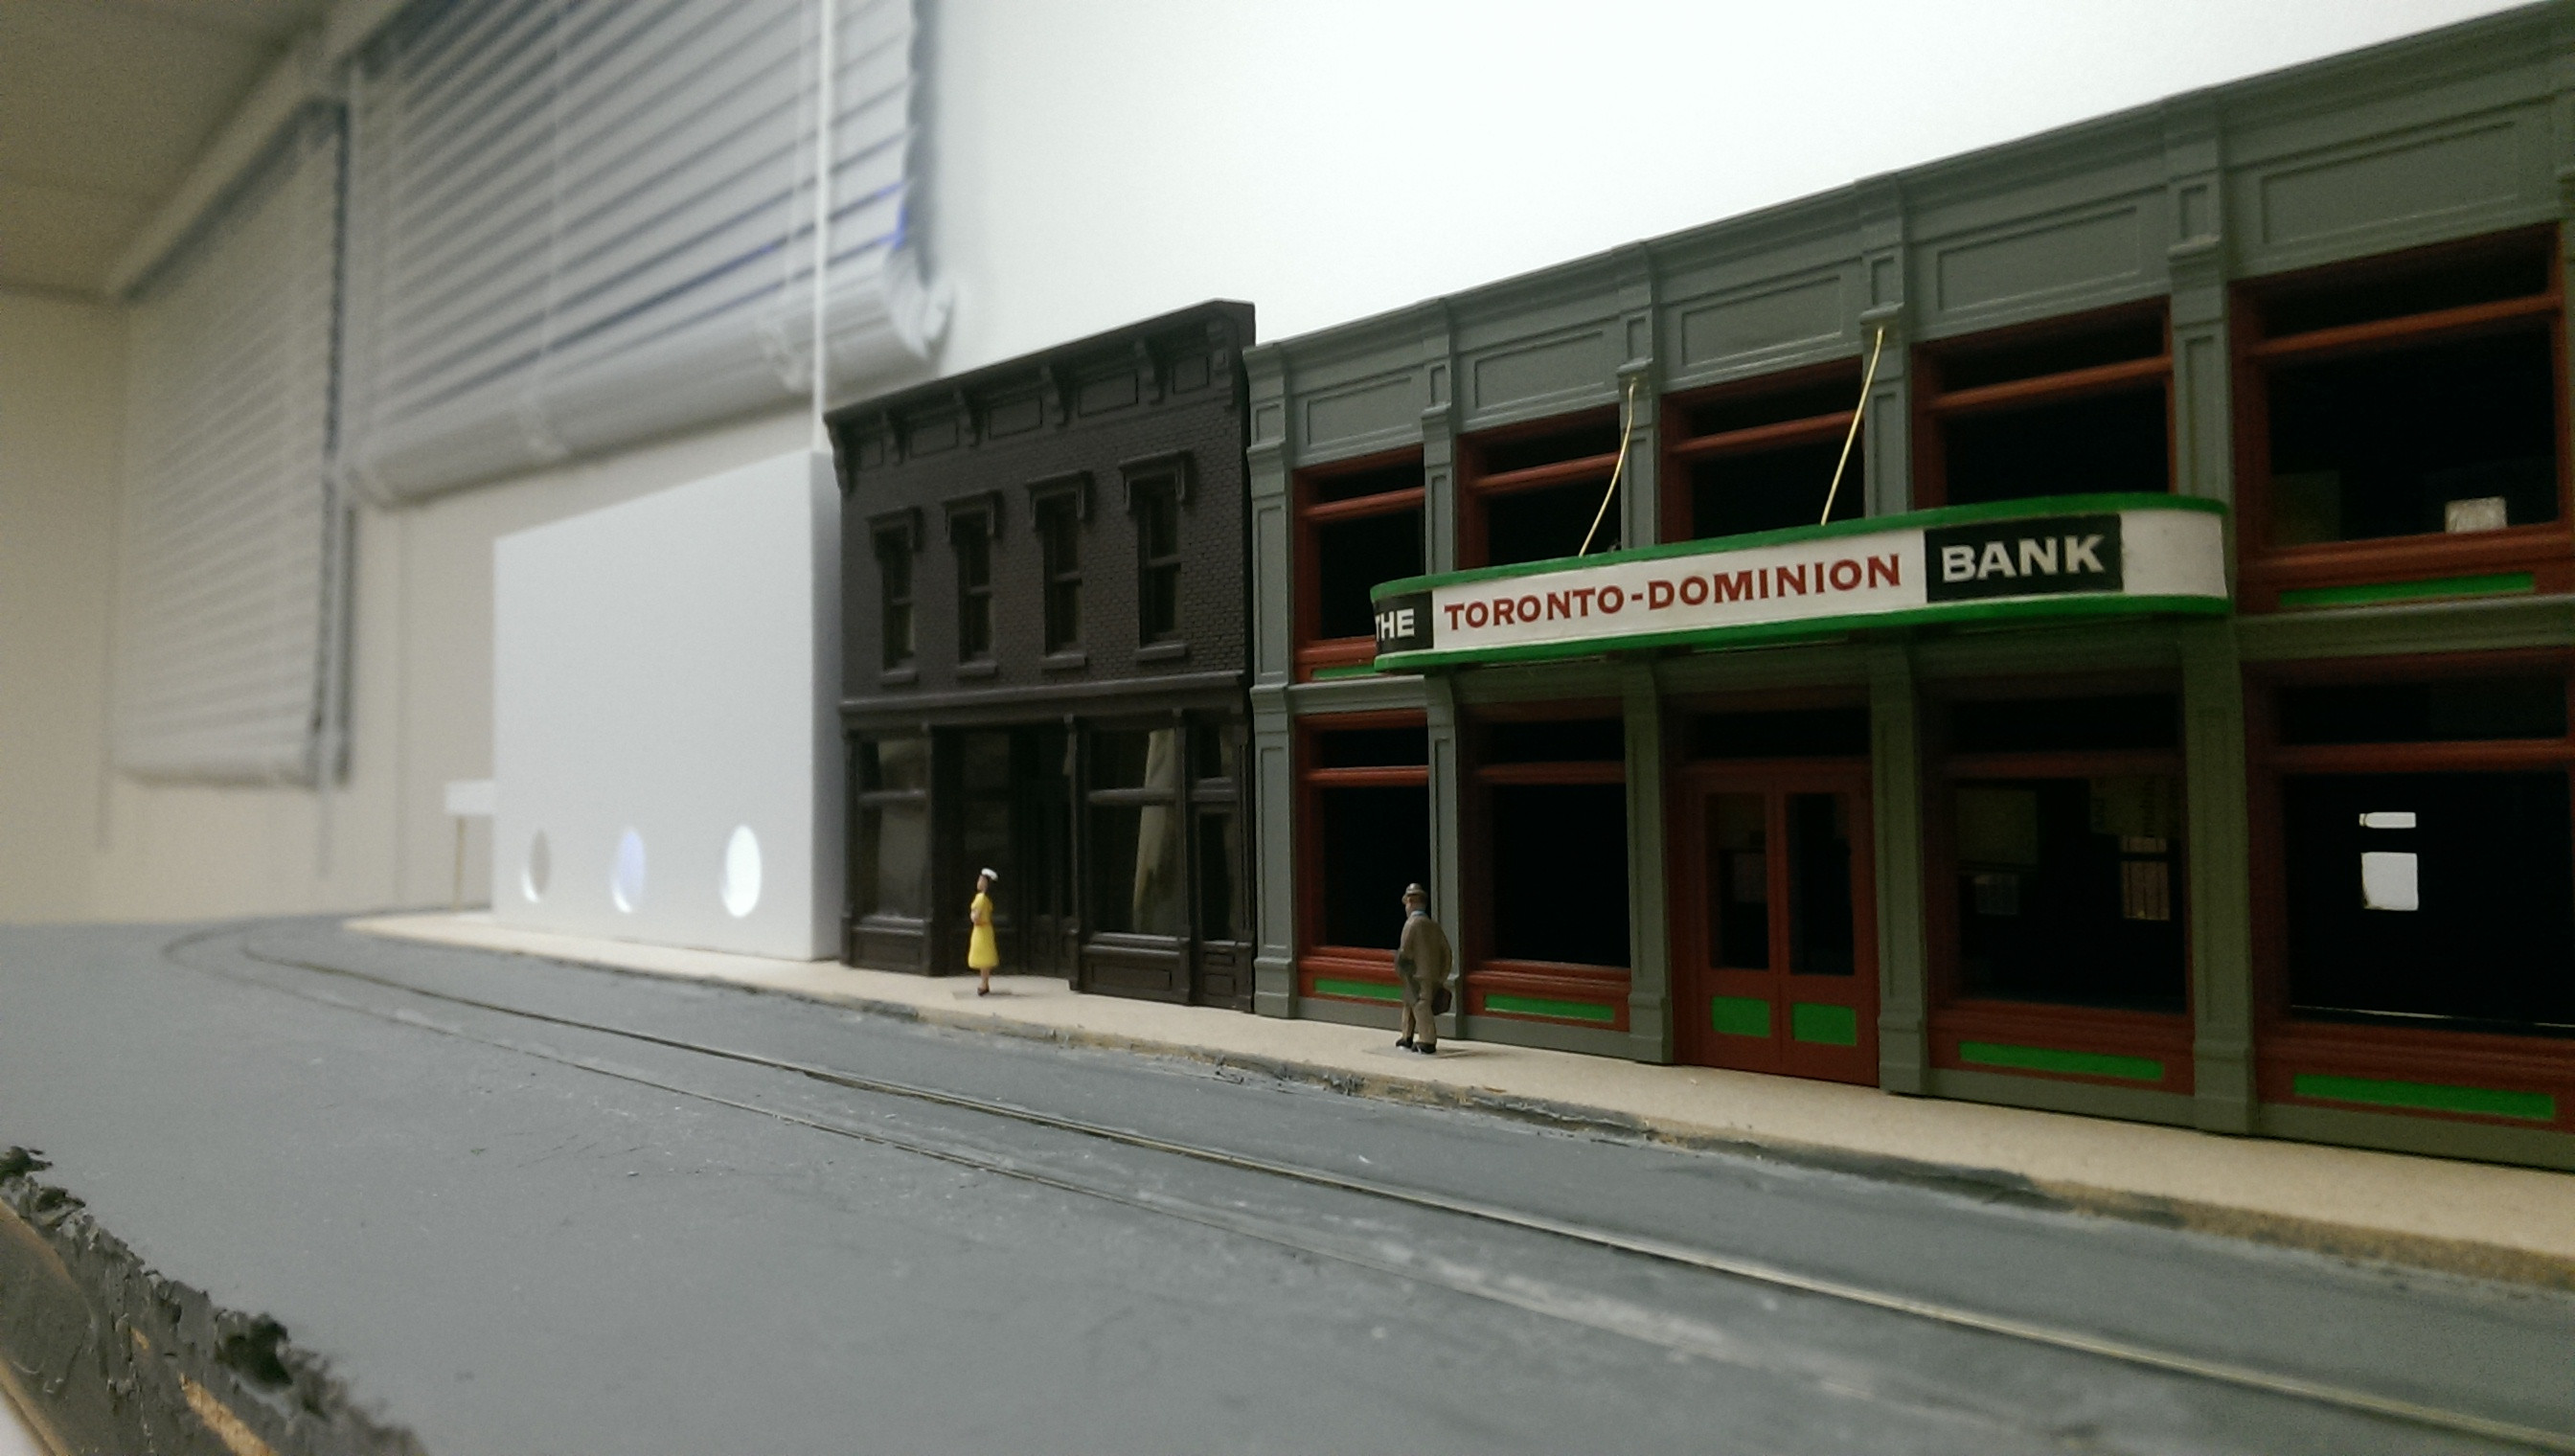
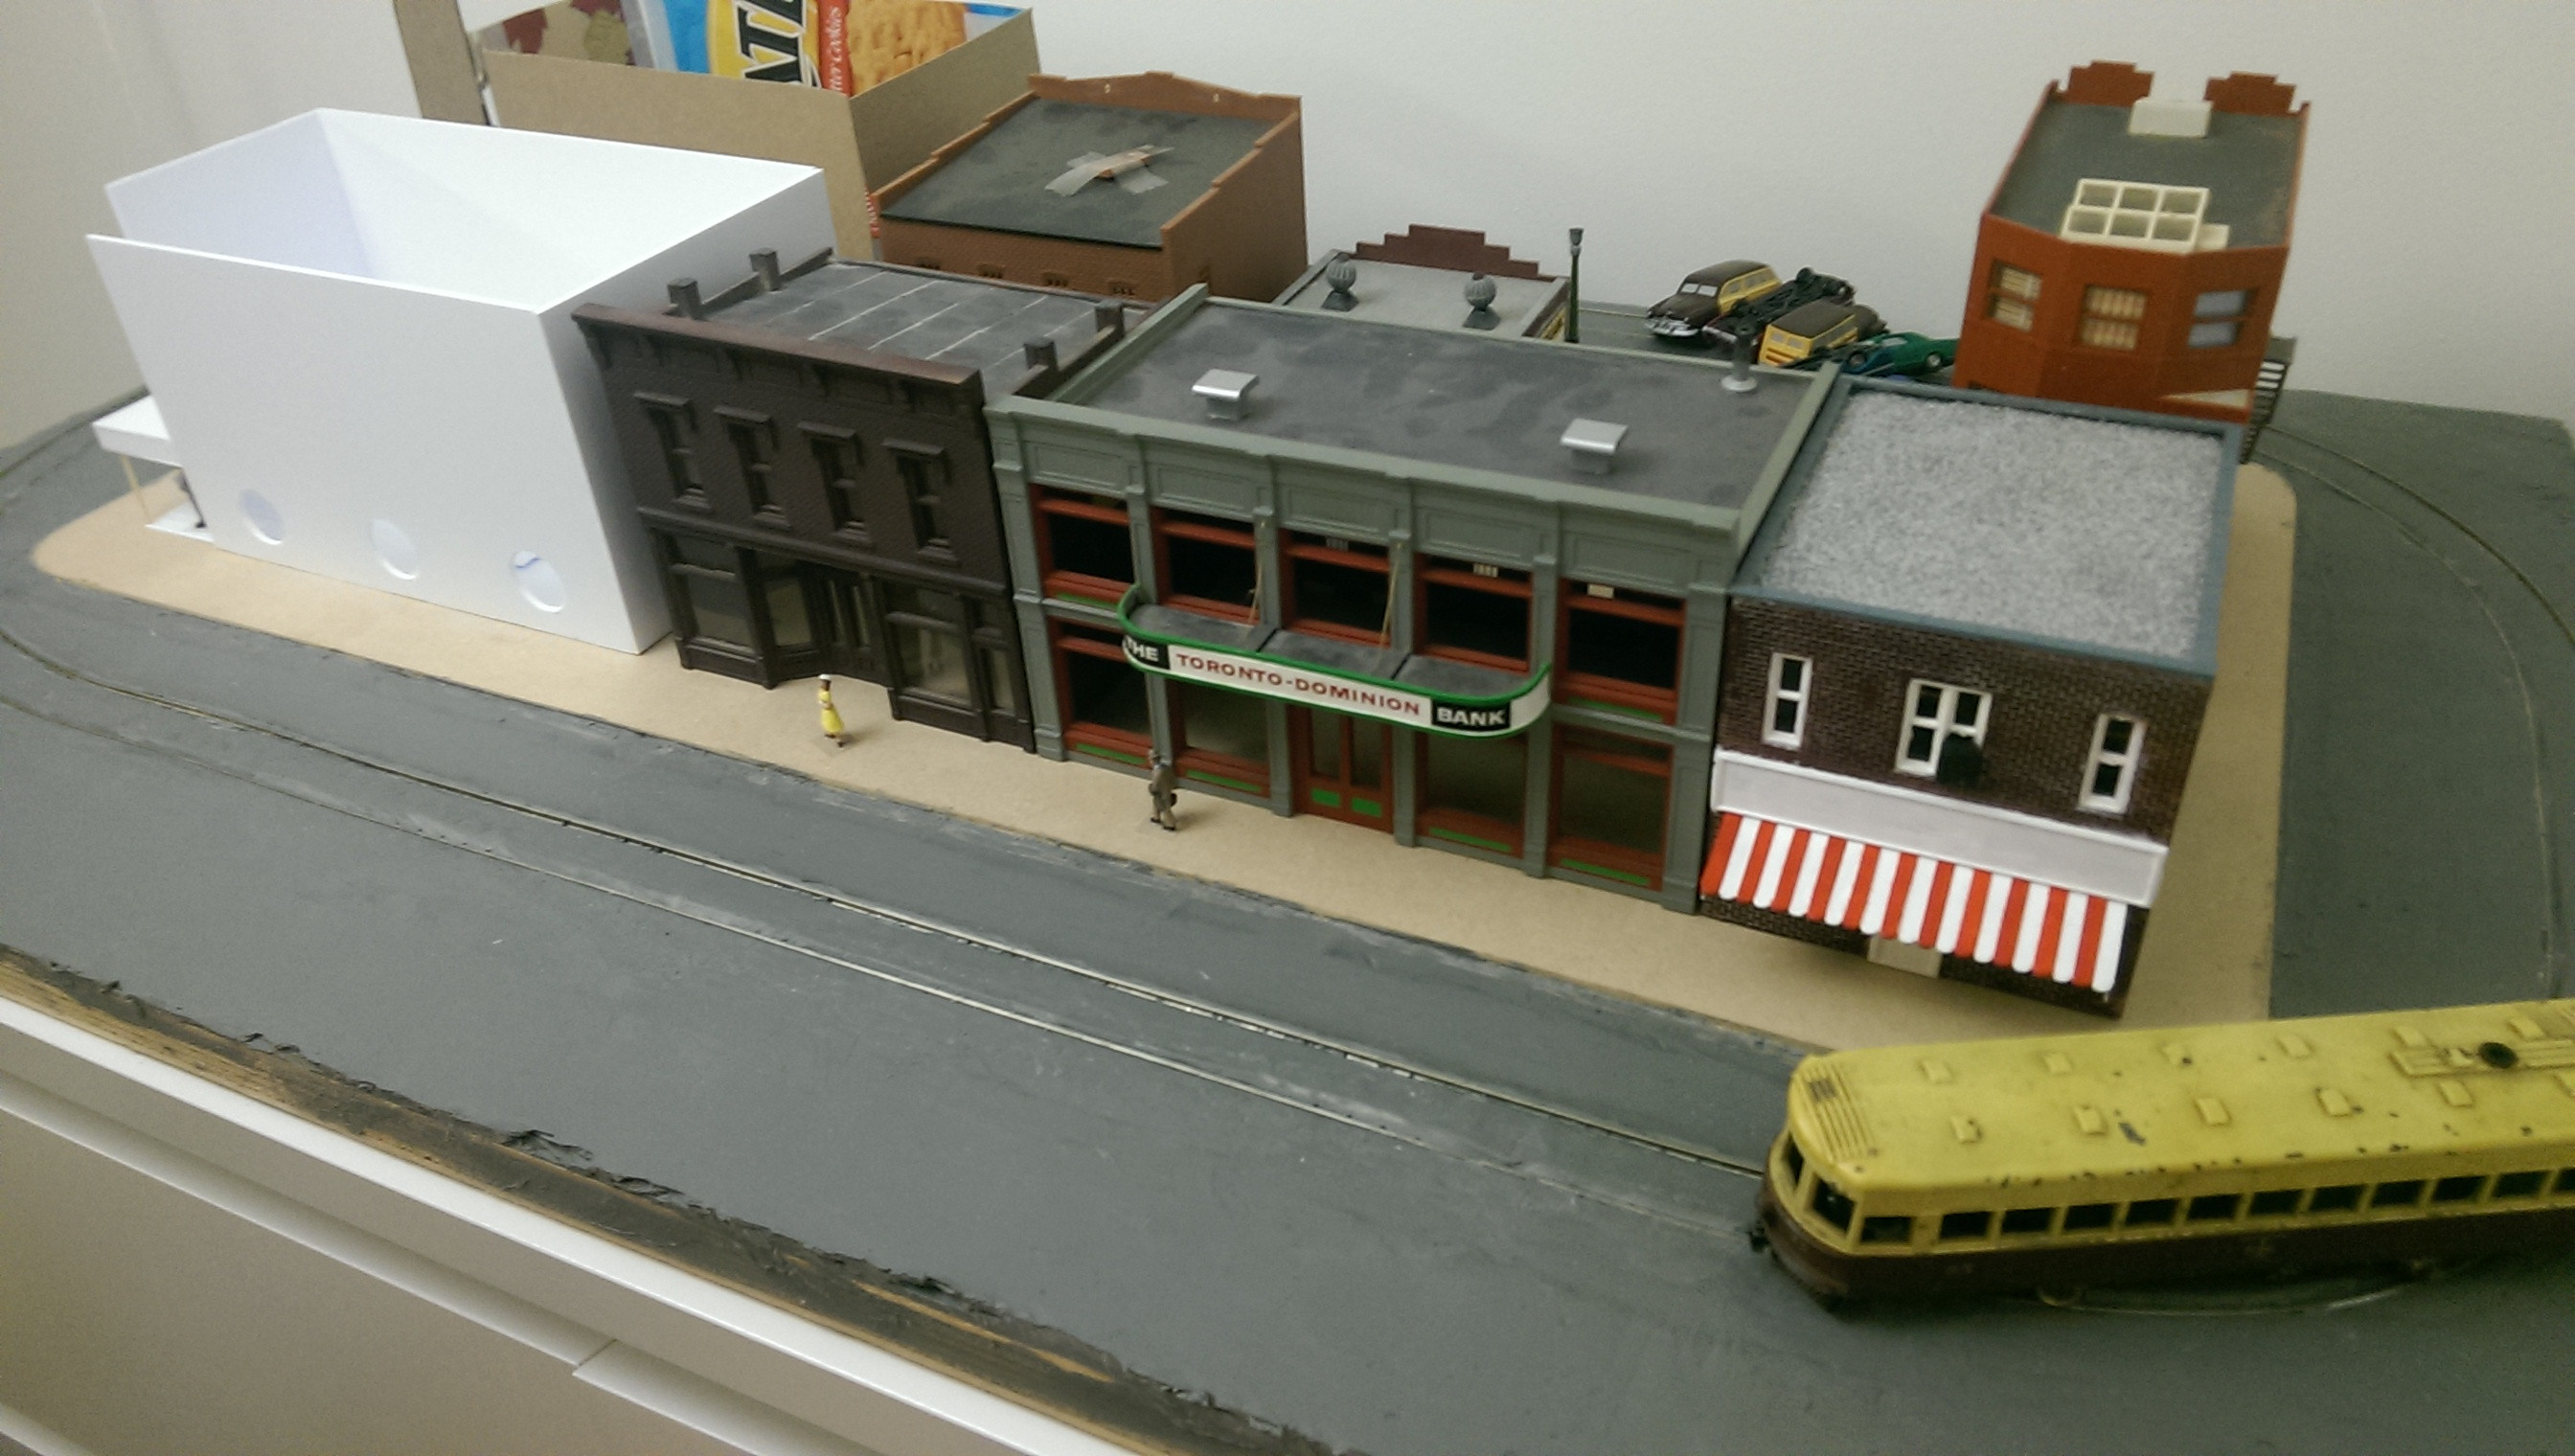
Ignore the multi-car pile-up in the background...
Edited by - DaCheez on February 18 2015 3:21:37 PM
|
|
Country: Canada ~
Posts: 3448 ~
Member Since: September 22 2006 ~
Last Visit: April 03 2026
|
Alert Moderator
|
|
|
|
Posted - January 25 2015 : 9:47:22 PM
|
DaCheez, what did you use to carve out the grooves on the inside of the track? I wouldn't mind some details on your method. This really worked out well!
~ Dave
~ Dave
They're ALL toys
|
|
Country: USA ~
Posts: 547 ~
Member Since: December 25 2010 ~
Last Visit: May 20 2019
|
Alert Moderator
|
|
|
|
Posted - January 26 2015 : 12:52:47 AM
|
| That cityscape is looking nice and interesting Eric. And I'm noting a little potential alleyway. There's an artist in the neighborhood here (Michael Garman http://www.michaelgarman.com/magic_town/ - if you visit this site to check it out, you have to click around a bit to see the photos of magic town, the interactive show) and he has created this "magic town" which is sort of a model of an old inner city with lots of alley ways to peer in and in the alleys he even has some holographic figures. Not sure of the scale, but the figures are like 10 inches tall. Anyway, the possibilities for "fleshing out" an alleyway seem huge.
|
|
Country: USA ~
Posts: 2087 ~
Member Since: March 16 2013 ~
Last Visit: July 05 2018
|
Alert Moderator
|
|
|
|
Posted - January 26 2015 : 09:34:25 AM
|
quote: Huh. The only other mechanism that looks anything like that is the one used in AHM's BL2's back in the 60's and 70's. At least, that's one of the first things I thought when I saw the motor.
-Steve
"A lot of modellers out there who go to these train shows see broken HO stuff and go, 'This is useless' when, in reality, they can still be used for modeling whether it's as a prop on your layout or a cool project to make something old new again."
|
|
Country: USA ~
Posts: 3533 ~
Member Since: February 17 2014 ~
Last Visit: January 11 2023
|
Alert Moderator
|
|
|
|
Posted - January 26 2015 : 11:01:56 AM
|
You did a much better job than I did making those rubber streets.
How did you get the caulk sit down so flat? I simply love the
original paint, anything else, in my crummy opinion, would
sort of make it generic. But, in the end, this is a terrific and
imaginative layout the likes I've never seen, eh.
|
|
Country: USA ~
Posts: 11686 ~
Member Since: December 09 2013 ~
Last Visit: May 26 2026
|
Alert Moderator
|
|
|
|
Posted - January 26 2015 : 3:30:00 PM
|
quote:DaCheez, what did you use to carve out the grooves on the inside of the track? I wouldn't mind some details on your method. This really worked out well!
~ Dave
Originally posted by RDC1 - January 25 2015 : 9:47:22 PM
|
It was mostly trial and error for me but here is my basic method.
1. Before even starting with the caulking I covered the rails with masking tape. The tape was applied so that one edge met the ties on the inside of the rail and then folded up over the top of the rail. I then ran a knife down the outer edge of the rail slicing the excess tape off. The end result is a long, thin piece of tape covering the inside and top side of the rail.
2. Apply/smooth your caulking with a plastic scraper. The caulking will shrink; I had to make three applications. The goal is to bring the road surface up to the height of the rail and make it as smooth as possible. This will take 1-2 weeks minimum when factoring in dry-time.
3. Once the final application had dried for a few days I started carving away the caulk around the rails. The first step is to use a sharp knife to cut the flangeways. I ran the knife at about a 30 degree angle to the rail along the inside of the tracks (basically you want the tip of the blade hitting the bottom of the rail and the top of the blade about 1-2mm away from the top of the rail). Next I scored the caulking right along the outside of the rail. I was then able to peel the masking tape off taking the caulking in the flangeway and on the top of the rail with it.
4. Test the track with the trolley you plan on using to check for wheel clearance. I had to carve a small amount of caulking away from the outside of the rail so the wheels made proper contact with the rails.
...clear as mud? There are probably better ways but that was mine.
cheez
Edited by - DaCheez on January 26 2015 3:30:22 PM
|
|
Country: Canada ~
Posts: 3448 ~
Member Since: September 22 2006 ~
Last Visit: April 03 2026
|
Alert Moderator
|
|
|
|
Posted - January 26 2015 : 3:50:29 PM
|
Barry, I google imaged the artist's name and checked out some of his work. It's beyond impressive. No way mine comes anywhere close, but it's good inspiration!
Chops, the caulking actually took about a month to fully dry. It has a much rougher surface now (shrinking as it dried) but it looks good as a well used city street. The trolley paint will be left alone, that has been decided!
I'm kind of part way through several little projects on the layout ATM, but since I haven't updated in a while I'll throw up some pictures.
The road has been painted and lightly weathered. The sidewalks are now sidewalk coloured (although I haven't added the expansion joints yet). My trolley also has a new pole!
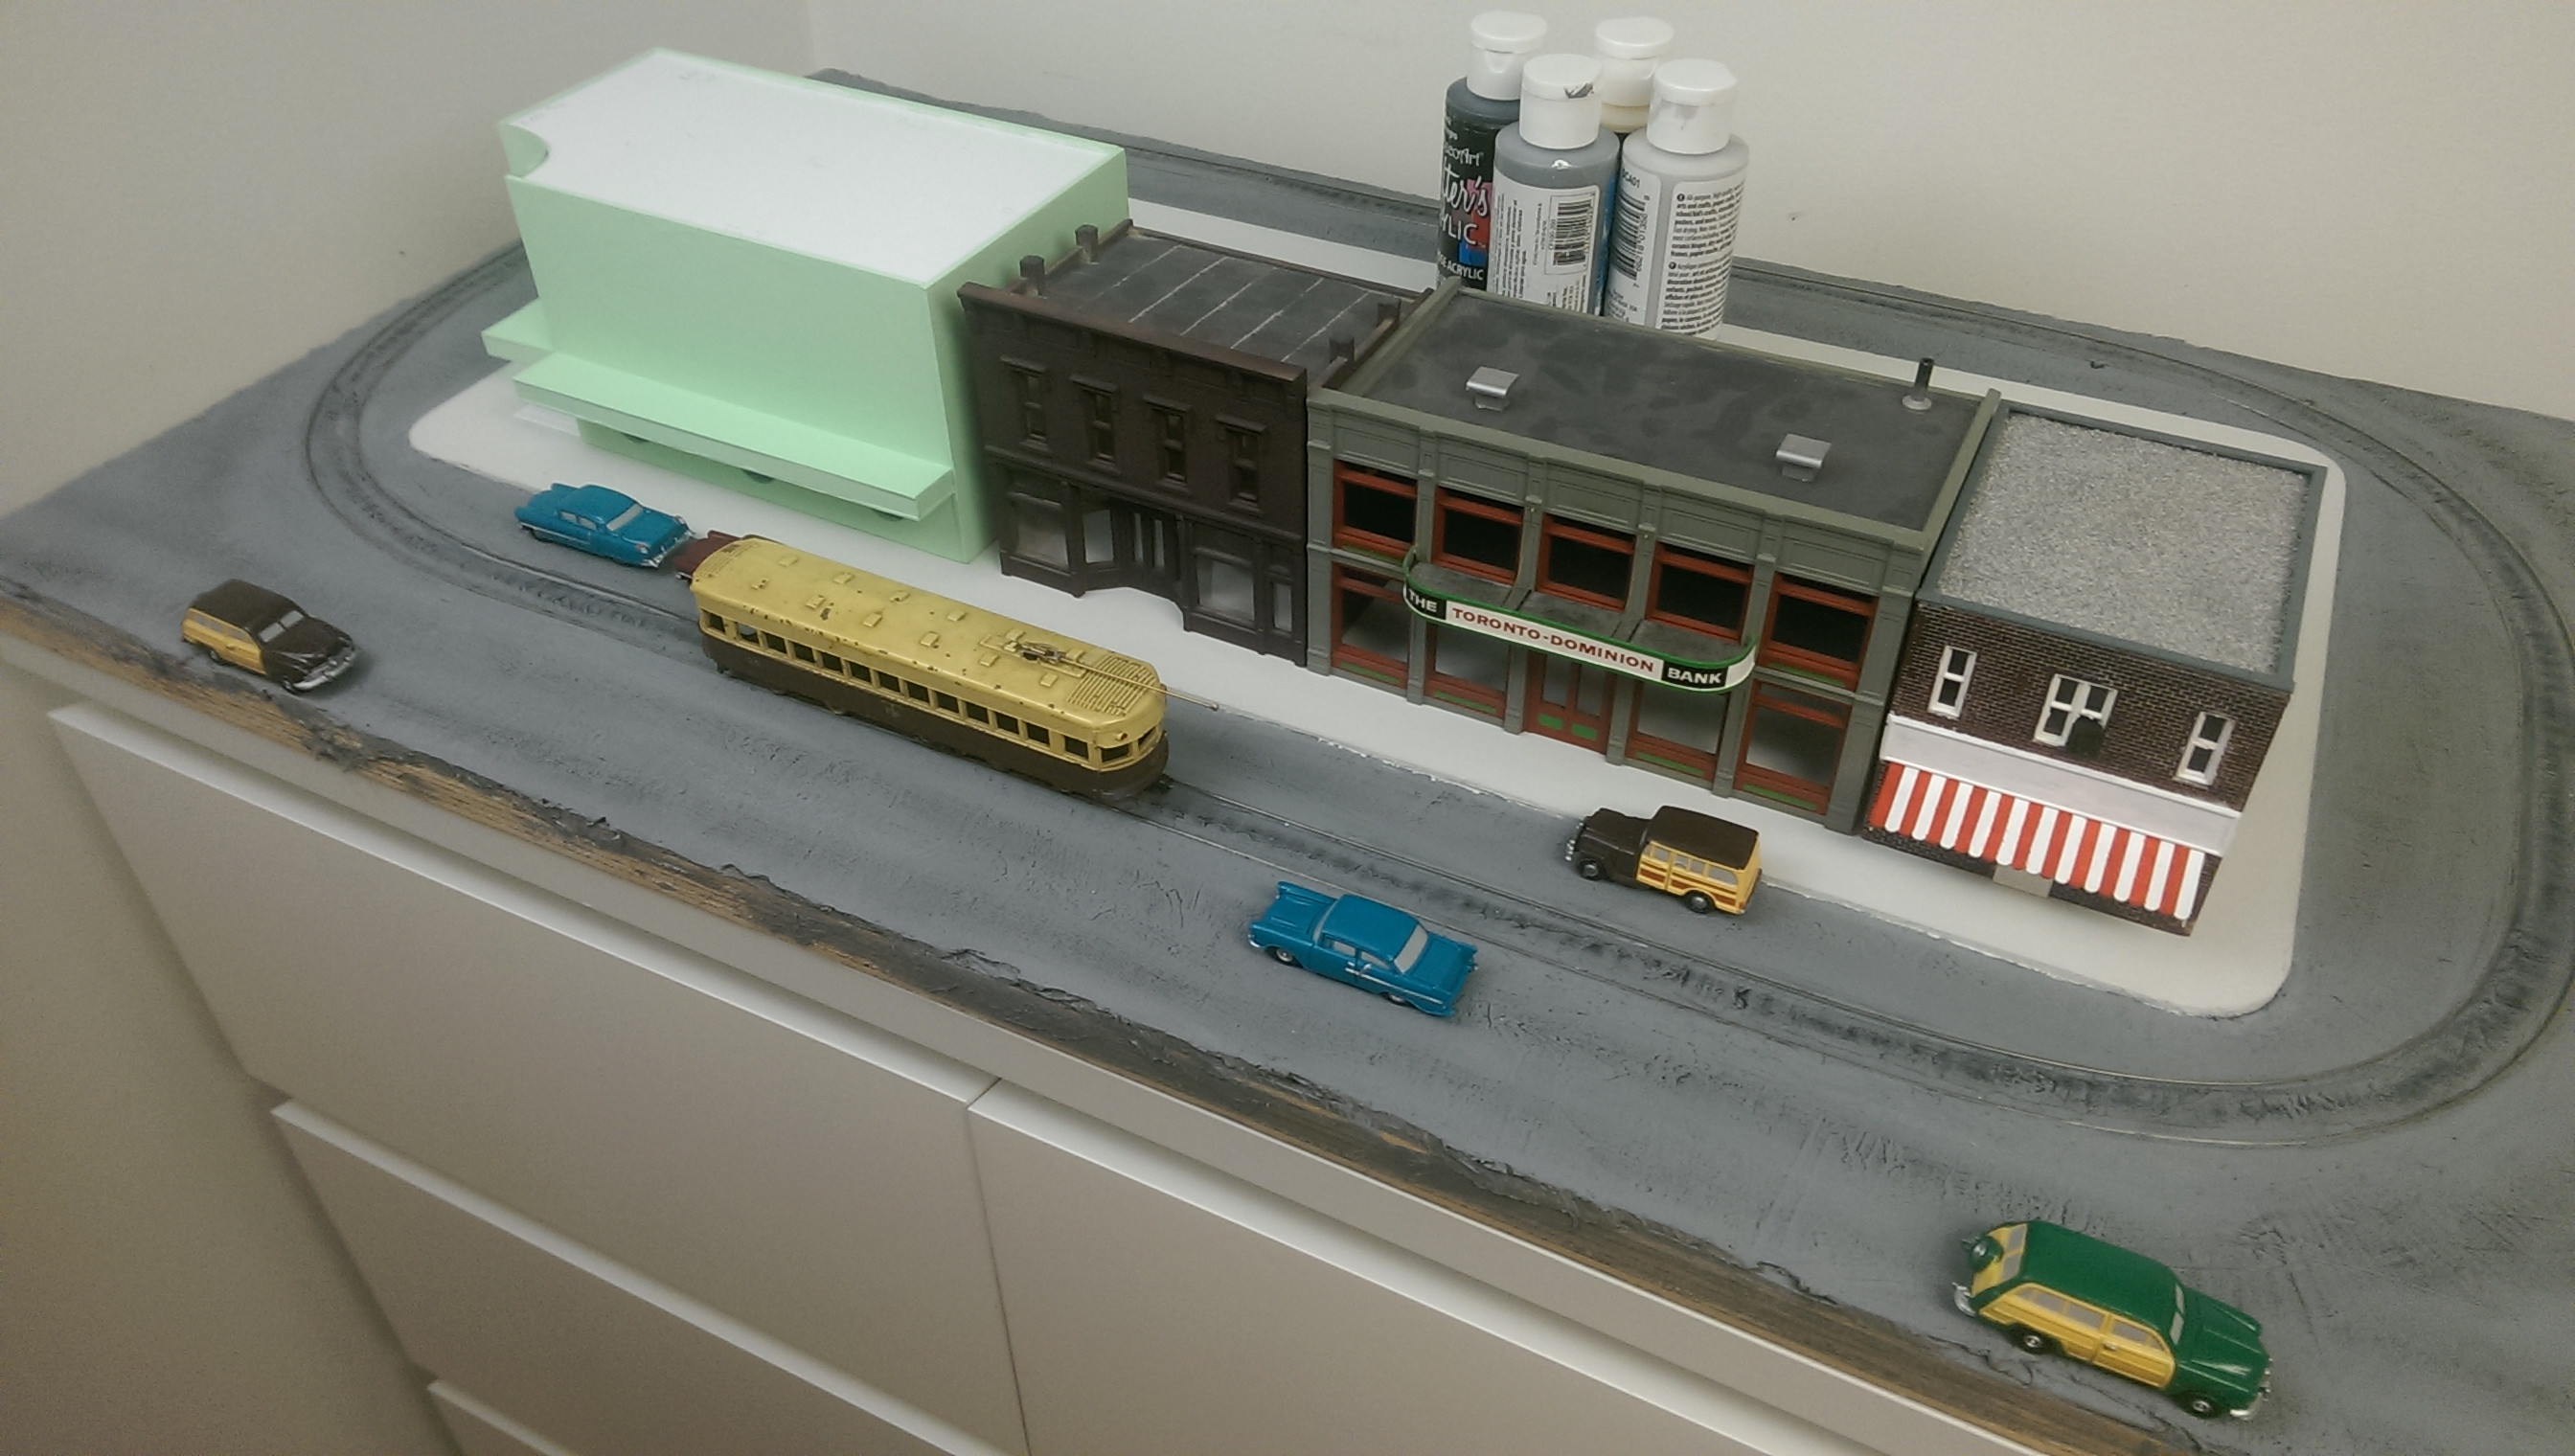
Work on the movie theatre is progressing nicely. The basic structure is complete and the base coat of paint applied. I have yet to construct the sign over the entrance. The large holes along the sidewalk will be windows featuring old fashioned movie posters.
|
|
Country: Canada ~
Posts: 3448 ~
Member Since: September 22 2006 ~
Last Visit: April 03 2026
|
Alert Moderator
|
|
|
|
Posted - January 26 2015 : 5:22:18 PM
|
Cheez I really like that movie theater. Excellent. Can't wait to see it with the posters in those windows
http://tycodepot.com/
|
|
|
|
|
Posted - January 26 2015 : 9:03:24 PM
|
quote: quote:DaCheez, what did you use to carve out the grooves on the inside of the track? I wouldn't mind some details on your method. This really worked out well!
~ Dave
Originally posted by RDC1 - January 25 2015 : 9:47:22 PM
|
It was mostly trial and error for me but here is my basic method.
1. Before even starting with the caulking I covered the rails with masking tape. The tape was applied so that one edge met the ties on the inside of the rail and then folded up over the top of the rail. I then ran a knife down the outer edge of the rail slicing the excess tape off. The end result is a long, thin piece of tape covering the inside and top side of the rail.
2. Apply/smooth your caulking with a plastic scraper. The caulking will shrink; I had to make three applications. The goal is to bring the road surface up to the height of the rail and make it as smooth as possible. This will take 1-2 weeks minimum when factoring in dry-time.
3. Once the final application had dried for a few days I started carving away the caulk around the rails. The first step is to use a sharp knife to cut the flangeways. I ran the knife at about a 30 degree angle to the rail along the inside of the tracks (basically you want the tip of the blade hitting the bottom of the rail and the top of the blade about 1-2mm away from the top of the rail). Next I scored the caulking right along the outside of the rail. I was then able to peel the masking tape off taking the caulking in the flangeway and on the top of the rail with it.
4. Test the track with the trolley you plan on using to check for wheel clearance. I had to carve a small amount of caulking away from the outside of the rail so the wheels made proper contact with the rails.
...clear as mud? There are probably better ways but that was mine.
cheez
Originally posted by DaCheez - January 26 2015 : 3:30:00 PM
|
Sweet! Thanks! I'm going to try that out.
~ Dave
~ Dave
They're ALL toys
|
|
Country: USA ~
Posts: 547 ~
Member Since: December 25 2010 ~
Last Visit: May 20 2019
|
Alert Moderator
|
|
|
|
Posted - January 26 2015 : 9:27:59 PM
|
| The theatre is looking great. I was thinking, with the earlier photos of the theatre, that there seemed almost to be a "glo" under the marquee. The way the light reflects off that styrene (?) is kind of cool.
|
|
Country: USA ~
Posts: 2087 ~
Member Since: March 16 2013 ~
Last Visit: July 05 2018
|
Alert Moderator
|
|
|
|
Posted - January 26 2015 : 9:45:54 PM
|
| Always nice to see your progress , Eric...
|
|
Country: USA ~
Posts: 6279 ~
Member Since: February 18 2009 ~
Last Visit: March 04 2022
|
Alert Moderator
|
|
|
|
Posted - January 27 2015 : 09:50:43 AM
|
Thanks for the comments! The input is always appreciated.
Jerry, thanks! There are a few buildings on the strip that need posters and such computer printed. I don't have a program to properly control photo resolution at the moment but once I get around to that the whole street should get a nice boost of colour and interest. Stay tuned!
Dave, good luck! Post your results once you get started. I love looking at other folks' layouts here.
Barry, the styrene has nice a sheen to it. I don't want to leave the tiles unpainted but I may need to spring for something a little glossier than the dollar store paint I've been using. Interior lighting may or may not be added at a later date. The lighting in the pics above is just a lack of roof.
Thanks Walt! I like seeing you layout as well. I'll be using your expansion joint method on the sidewalks soon!
|
|
Country: Canada ~
Posts: 3448 ~
Member Since: September 22 2006 ~
Last Visit: April 03 2026
|
Alert Moderator
|
|