|
|
 Posted - October 02 2014 : 9:25:49 PM Posted - October 02 2014 : 9:25:49 PM


|
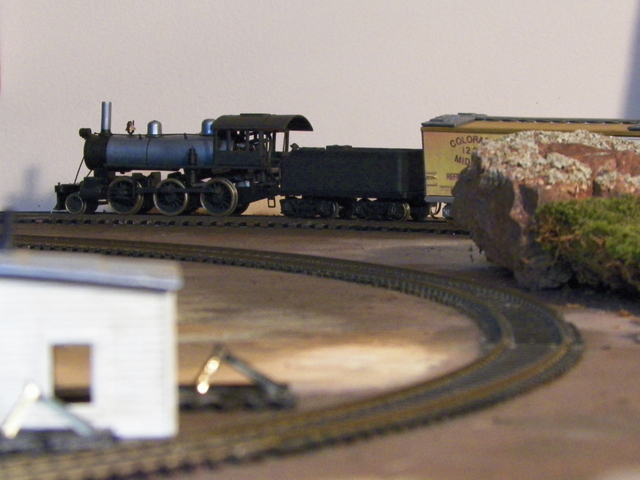
A while back I was looking at eBay and the devil tapped me on the shoulder and encouraged me to acquire another Mantua Mogul. I had wanted two so that I could have one for freight service and one for passenger service . . . now I had three. I swear, looking at these trains, man, it's like lusting for gold. Anyway, what the heck was I going to do with it. It wasn't urgent for me to get after it, since I had the two running, and certainly enough stuff on standby to work on. I decided to try painting this one a bit more in the scheme of the railroad that ran by my house, the Colorado Midland. That railway company didn't use any 2-6-0's, so I guess you might consider this an "homage".
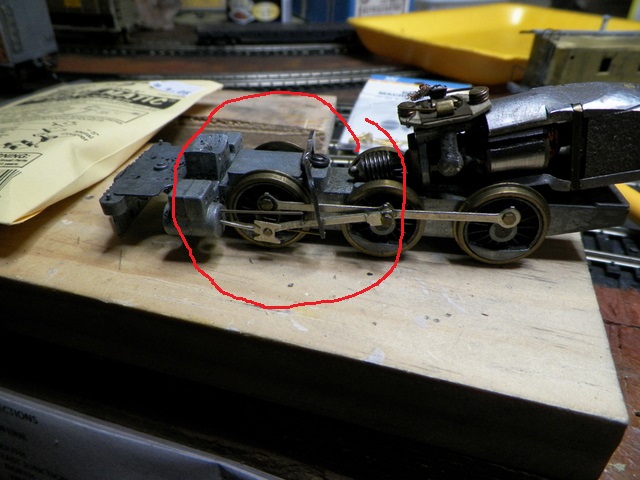
Somewhere on my computer, there are probably photos of the entire model, but the only one I could find presently is the frame and drive train. The red circle is to show the bent guide bar yoke. The yoke (once straightened) was actually the best I've yet to come across.
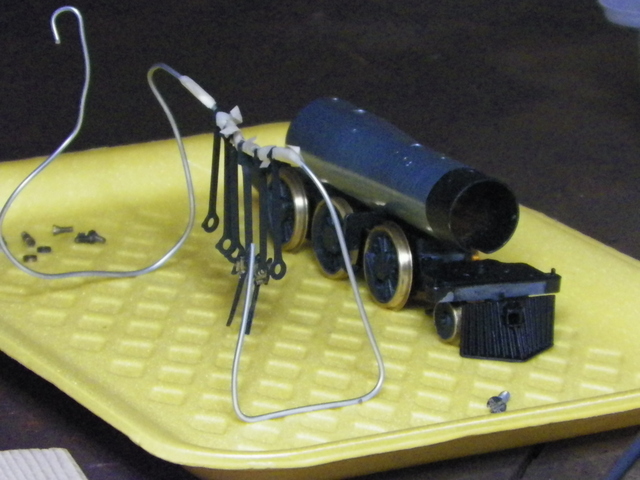
I new I was asking for trouble painting the rods, but it actually worked out OK. I had thought that I wouldn't be surprised if half the paint chipped off the first time I ran it, but it seems to be staying even after maybe a 1/2 hour of running so far. This little paper clip paint rack helped me out.
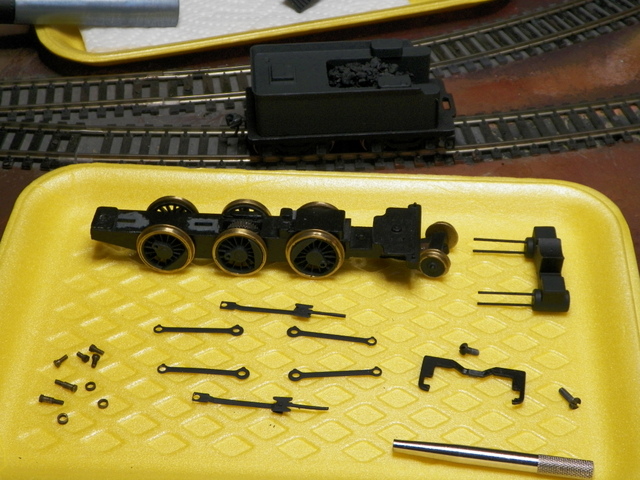
I looked at this tray of parts for a spell before I decided to go ahead and "chip" away at the project.
So this video is of the initial running and drive train adjustment.
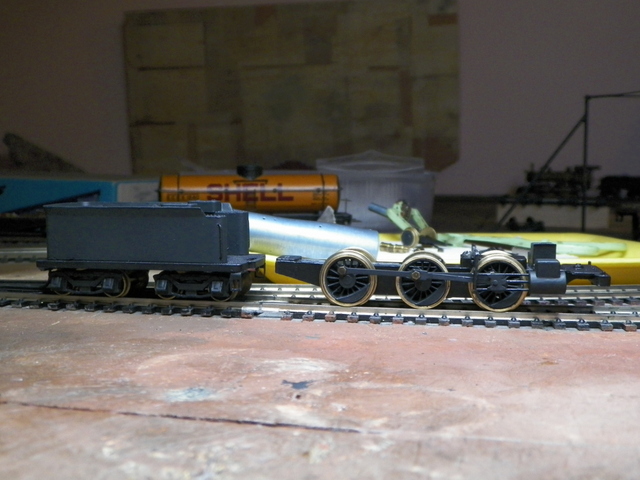
The tender and frame and drive train . . . teasing me to finish the project.
Took a bunch of photos . . . they tell me where I screw up better than my eyes.
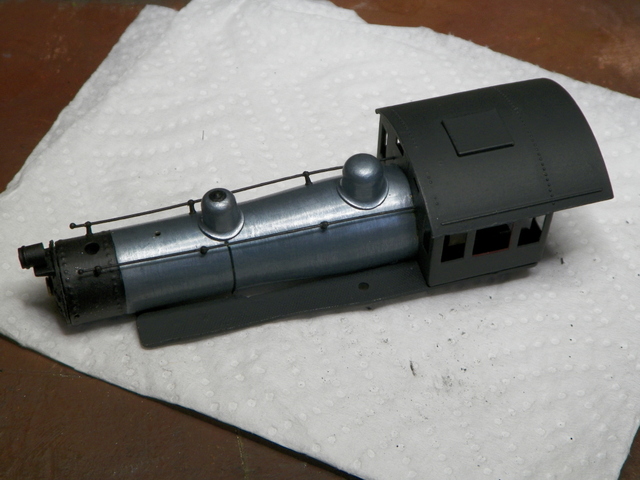
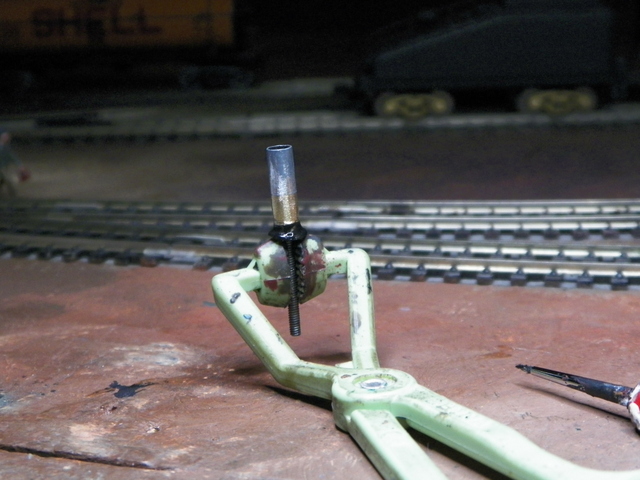
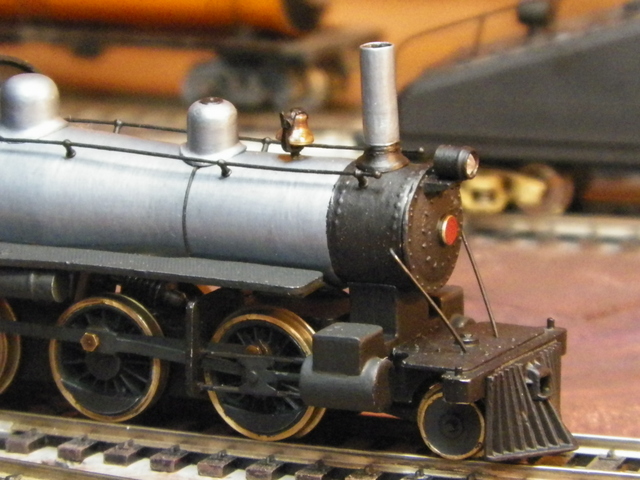
In the above photo, you can see my crude job of extending the smoke stack (which had been shortened by about 5/16" by the previous modeler. And the boiler supports and cab grab irons haven't been added yet.
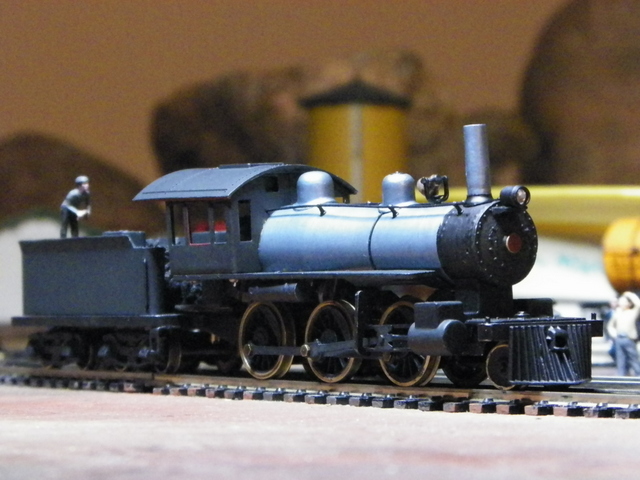
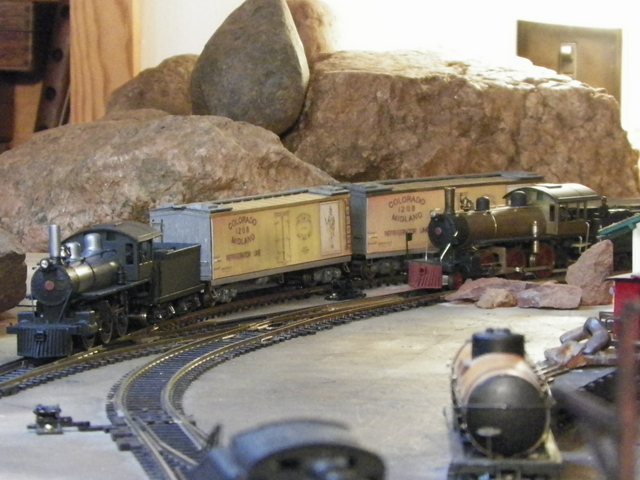
So, I guess you could say the above photo is of the "finished" project.
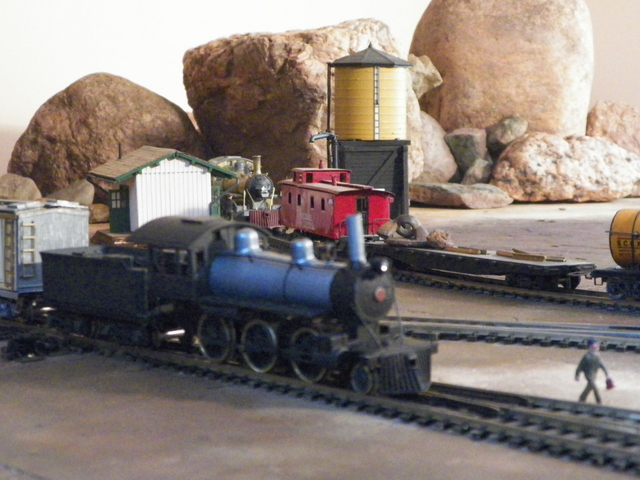
And below is an initial "working" run with a small freight consist. The electrical connection between the locomotive and the tender is the "pin between a couple of brass strips". It works better than I thought it would, but there is room for improvement. In this video it's running about 50% throttle and you may notice some hiccups where some track work is needed.
|
Country:  USA ~
Posts: 2087 ~
Member Since: March 16 2013 ~
Last Visit: July 05 2018 USA ~
Posts: 2087 ~
Member Since: March 16 2013 ~
Last Visit: July 05 2018
|
 Alert Moderator
|
|
|
|
Posted - October 02 2014 : 9:34:43 PM
|
Great work Brry....pretty impressive. My hat is off to you folks who work on steam locos.
And I have to note your use of the meat tray. Not a loaf pan of course, but pretty nifty 
http://tycodepot.com/
|
|
|
|
|
Posted - October 02 2014 : 9:40:02 PM
|
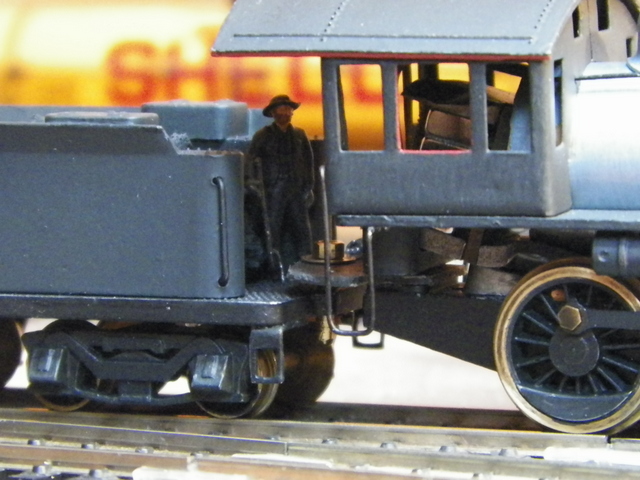
Barry. You got the boiler to a point where the cab, walkway, and smokestack were painted and the boiler look to be buffed shiny. That was close to Russian iron. Once you dull coated it the boiler became fogy. You should have clear coated the boiler to keep the Russian iron look.
frank
toptrain
" It's a Heck of a Day " !!!
|
|
Country: USA ~
Posts: 7538 ~
Member Since: August 07 2008 ~
Last Visit: December 06 2025
|
Alert Moderator

|
|
|
|
Posted - October 02 2014 : 11:13:07 PM
|
Nice one, Barry. You have to admit, those Mantua Moguls are not too bad looking little things. You have to admit, those Mantua Moguls are not too bad looking little things.
-Steve
"A lot of modellers out there who go to these train shows see broken HO stuff and go, 'This is useless' when, in reality, they can still be used for modeling whether it's as a prop on your layout or a cool project to make something old new again."
|
|
Country: USA ~
Posts: 3533 ~
Member Since: February 17 2014 ~
Last Visit: January 11 2023
|
Alert Moderator
|
|
|
|
Posted - October 02 2014 : 11:13:16 PM
|
That's a sweet looking engine. The simple black and Russian iron scheme has a classy dignity about it. It's not garish like an 1860's locomotive, but it still looks a bit dressier than the later tangles of pipes and appliances in a "modern" steam locomotive.
And any way you look at it, that engine just has nice lines.
Carpe Manana!
|
|
Country: USA ~
Posts: 2417 ~
Member Since: September 17 2013 ~
Last Visit: June 15 2026
|
Alert Moderator
|
|
|
|
Posted - October 02 2014 : 11:57:59 PM
|
| Hey, thanks for the compliments and comments guys. I did learn some lessons on this one (some that it seems I have to keep relearning). One is that I didn't make sure the thing fit together exactly as I wanted before I painted it and I caused a few scrapes due to adjusting and fitting parts after they were painted. Regarding that paint Frank: I didn't dull coat the Russian iron. I'll try to get a better photo. I actually did put about 5 coats of Russian iron on with wet sanding in between, though I do believe I could have prepped the brass better so it wouldn't have chipped so easily. Then after I wet sanded it, I rubbed it by hand with a soft cloth to polish it . . . so when you see it (or good photo), the Russian iron does have a luster to it. We'll see how I do with the next incarnation of one of these things . . . practice makes perfect, hey?
|
|
Country: USA ~
Posts: 2087 ~
Member Since: March 16 2013 ~
Last Visit: July 05 2018
|
Alert Moderator
|
|
|
|
Posted - October 03 2014 : 12:30:52 AM
|
quote:
Took a bunch of photos . . . they tell me where I screw up better than my eyes.
Originally posted by Barry - October 02 2014 : 9:25:49 PM
|
Ain't that a kick in the head? I finish a touch-up project and take some pictures of it, all proud of myself, until I see the close-ups on the computer.  Stupid unforgiving camera flash. Stupid unforgiving camera flash. 
That looks great, Barry. The graphite looks bluish in certain light. Beautiful dry brush weathering on the cars, too.
Btw, that massive rock in the background makes me nervous. All I can picture is it rolling over on your consist.
The Tyco Depot
|
|
Country: USA ~
Posts: 3927 ~
Member Since: June 20 2007 ~
Last Visit: November 19 2015
|
Alert Moderator
|
|
|
|
Posted - October 03 2014 : 10:54:07 AM
|
| Hey Nelson, Just FYI . . . there is no dry brush weathering on those cars. I have yet to try and do that. The refrigerator cars and the gondola are Mantua cars with paper sides that I printed. The refrigerator car sides were from an image I got from the web, that seemed to become a bit more distorted and "weathered" as I manipulated it and the gondola sides are scans of original Mantua paper gondola sides that I took through Picassa and changed the color and then added lettering in Windows Paint. Just sort of lucked out that they ended up being serviceable.
|
|
Country: USA ~
Posts: 2087 ~
Member Since: March 16 2013 ~
Last Visit: July 05 2018
|
Alert Moderator
|
|
|
|
 Posted - October 03 2014 : 7:32:57 PM Posted - October 03 2014 : 7:32:57 PM
|
Barry, it sure looks like there are subtle shadings on them in the video. However it happened, they look great.
The Tyco Depot
|
|
Country: USA ~
Posts: 3927 ~
Member Since: June 20 2007 ~
Last Visit: November 19 2015
|
Alert Moderator
|
|
|
|
Posted - October 03 2014 : 8:37:20 PM
|
quote:Btw, that massive rock in the background makes me nervous. All I can picture is it rolling over on your consist.
Originally posted by NickelPlate759 - October 03 2014 : 12:30:52 AM
|
I, too, have looked at those big rounded rocks but I imagined something different. There are big rounded bluffs of rock in Colorado's Front Range. If those rocks were integrated into a hillside with some decomposed granite for dirt in between, and there were some low foliage for bushes and some trees, it would look like the scenery on Gold Camp Road between Colorado Springs and Cripple Creek. Know the place, Barry?
Carpe Manana!
|
|
Country: USA ~
Posts: 2417 ~
Member Since: September 17 2013 ~
Last Visit: June 15 2026
|
Alert Moderator
|
|
|
|
Posted - October 04 2014 : 9:30:39 PM
|
| Yes I do know that place Don and I'm overdue for another drive on that road. I think maybe the last time I was on it, I was having my son drive the route as he was learning to drive. I love the history of that road as well. I've been wondering recently if the old coach (can't recall trolley or what) was still there just before you get in to Victor. There's a street railway group in Colorado Springs that has been restoring trolleys and I'm hoping if it's gone, they got hold of it.
|
|
Country: USA ~
Posts: 2087 ~
Member Since: March 16 2013 ~
Last Visit: July 05 2018
|
Alert Moderator
|
|
|
|
Posted - October 06 2014 : 4:41:38 PM
|
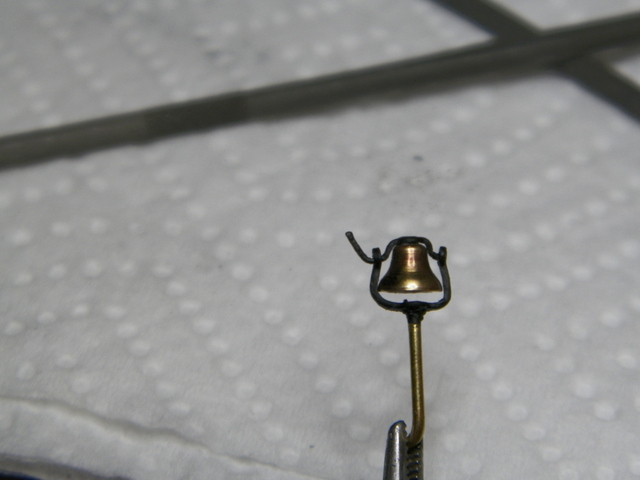
Lookin' at that photo of the crudely built smoke stack and the bell that wouldn't hang freely made me get back to it . . .
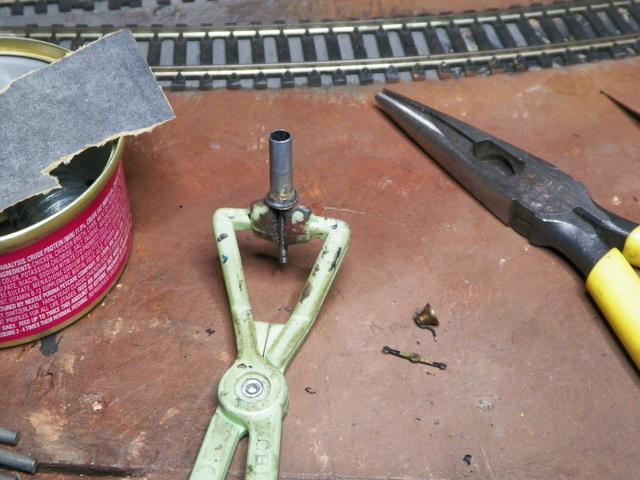
I was concerned that I could possibly make things worse and even ruin the parts, but what the hell, like going to school. And probably better for me to have the ruined parts than a ruined locomotive because of shoddy work. I eliminated the idea of trying to get a screw or bolt head below the bell (which works sometimes) and instead superglued a piece of wire for a mounting post and then lightly superglued the bell frame in place; it'll come out with a twist.
I'm not quite as happy with the smoke stack, but I think it's better than it was. I'll be checkin' the hobby shop for possible replacements.
So here's where this 2-6-0 is at. Not a museum piece, but serviceable to do some work on the layout . . .
|
|
Country: USA ~
Posts: 2087 ~
Member Since: March 16 2013 ~
Last Visit: July 05 2018
|
Alert Moderator
|
|
|
|
Posted - October 06 2014 : 5:44:37 PM
|
Barry - you do excellent work. I think you nailed it with the changes/fixes you made.
Gotta say too - your work has such a rich patina. Can't really put my finger on it but it's a treat to look at. Thanks for posting
http://tycodepot.com/
|
|
|
|
|
Posted - October 07 2014 : 01:52:26 AM
|
| Thanks Jerry. I always enjoy looking at your models as well.
|
|
Country: USA ~
Posts: 2087 ~
Member Since: March 16 2013 ~
Last Visit: July 05 2018
|
Alert Moderator
|
|
|
|
Posted - October 07 2014 : 7:19:00 PM
|
To my eye the only thing that seems to be missing about the stack is a flange around the top. Most smoke stacks I've seen seem to have one.
I once saw a model locomotive that used the shell from a bullet for a stack. If you have a gun shop or firing range near you, someone there might be able to find you an empty shell of the right caliber.
Carpe Manana!
|
|
Country: USA ~
Posts: 2417 ~
Member Since: September 17 2013 ~
Last Visit: June 15 2026
|
Alert Moderator
|
|
|
|
Posted - October 08 2014 : 12:36:46 AM
|
| I agree with you Don. I thought about messing with that different ways; maybe gluing a little ring of the right size to the top, maybe "flanging" it with one of those pipe tools. The local hobby shop here usually has some stacks, though sometimes not. You know like Precision Scale Co or Cal Scale. They make some of those D & RGW stacks that might look OK. I think probably what I'd like to do is just come across one of the original style Mantua stacks. We'll see what turns up.
|
|
Country: USA ~
Posts: 2087 ~
Member Since: March 16 2013 ~
Last Visit: July 05 2018
|
Alert Moderator
|
|