|
|
 Posted - January 09 2013 : 12:45:49 PM Posted - January 09 2013 : 12:45:49 PM


|
Having disassembled that Life-Like Dockside steam locomotive (a real back-breaking 5 minute task! ), I took a good look at the whole thing. Others have noted the slack tolerances in the mechanism, but it bears repeating: ), I took a good look at the whole thing. Others have noted the slack tolerances in the mechanism, but it bears repeating:
1. The drive wheels move laterally about 1/16 - 1/8 inch side to side, causing a secondary slop fit with the small gear that sits on top of the front wheel gear.
2. The entry points for the driveshafts are 1/16 inch too wide, and-as others noted- causes a very slack fit where the shafts enter the cylinders.
3. The cylinder/piston plastic piece is only held by a single screw and is acetal plastic, sitting on top of the chassis- also acetal plastic. No matter how tight the assembly screw, there is a slippery fit obtained at best.
4. The weighting- the rectangular piece inside the tender at the rear and the hemispherical
weight on top of the forward worm screw- are supplemented by the large motor and it's weight, therefore, changing the motor may reduce the traction weight, despite being more efficient and operable.
Possible remedies:
1. I made "collars" from a Evergreen (or K&S) styrene tube to wrap around each axle outside the chassis box, but these may fall off with extensive use. I tried to look online for very small retaining washers, but didn't find any really small ones.
2. Alternatively, a shaped plastic piece that rides over both axles is contemplated- but, again, acetal plastic makes it hard to attach and keep in place. Double-sided thin tape is an option, but it's durability is questionable. Foam tape in this location might be too "thick".
3. I believe a small double-sick piece of foam tape under and on top of the cylinder/piston piece might stabilize that situation when the assembly screw is replaced into the shell from the base of the chassis. I tried inserting a piece of that styrene tube from the front, but the cavity reduces to the rear and the tube has no effect on the slop fit.
4. I am rewiring the front light to a LED with a 470 ohm resistor; same goes for the rear light location, which requires a drilled-out hole and will be reverse-wired to operate when the unit is backing up.
5. I have had success using "Amazing Goop" with acetal plastic (see my trials and tribulations on the MR general forum about 2 weeks ago), but not where motion and vibration are constants.
Maybe this is too much analysis...
Any thoughts??????
Siouxlake/Ron
|
Country:  USA ~
Posts: 510 ~
Member Since: September 21 2011 ~
Last Visit: December 21 2014 USA ~
Posts: 510 ~
Member Since: September 21 2011 ~
Last Visit: December 21 2014
|
 Alert Moderator
|
|
|
|
Posted - January 09 2013 : 1:01:33 PM
|
I'm speaking only for myself here, but I very much appreciate the analysis since I have one I intend to operate, and if I run into operational issues with it I'll have information with which to start.
Glenn
I was thinking of the immortal words of Socrates, who said, "... I drank what?"
|
|
Country: USA ~
Posts: 1709 ~
Member Since: December 13 2008 ~
Last Visit: July 09 2026
|
Alert Moderator

|
|
|
|
Posted - January 09 2013 : 2:13:25 PM
|
Ron, It should be possible to glue shims to the frame at the opening of each axle slot if you roughen up the acetyl plastic with coarse sandpaper, then use that Goop or Zap CA to glue them in place. That will give the glue something to bite into. I would replace the screw through the steamchest with a metal one to see if that allows it to be tightened down and gives that assembly more rigidity.
I think you mean that the pistons are loose in the cylinders, right? That shouldn't be and issue if the axles are tight in the frame and running true, unless of course the pistons are so loose that they're falling out or jamming.
The Tyco Depot
|
|
Country: USA ~
Posts: 3927 ~
Member Since: June 20 2007 ~
Last Visit: November 19 2015
|
Alert Moderator
|
|
|
|
Posted - January 09 2013 : 3:14:00 PM
|
More less ZAP the cylinders into place, they won't be going anywhere after that glue hardens! I removed the motor screw in mine and it became pretty quiet. Don't worry, the motor won't move around or slip because of how tight everything is packed in there. I maintain mine very well I don't run them like a little kid and have them blast full throttle, no, I run them at a very smooth pace.
I buy, repair, and collect
http://scvr.weebly.com/
http://seyboldlocomotiveworks.weebly.com/
http://www.youtube.com/user/TheDeputation?feature=watch
Hyde.
|
|
Country: USA ~
Posts: 1352 ~
Member Since: January 15 2012 ~
Last Visit: July 25 2021
|
Alert Moderator
|
|
|
|
Posted - January 09 2013 : 3:35:02 PM
|
Ron, make sure when ya do this, take plenty of photos! I wanna make mine run better!
" Heck with counting 'em rivets, TRAINS ARE FOR FUN! Not called the Mad Scientist for nothing either!"
|
|
Country: USA ~
Posts: 3147 ~
Member Since: May 07 2007 ~
Last Visit: June 01 2026
|
Alert Moderator
|
|
|
|
Posted - January 09 2013 : 4:12:49 PM
|
One error I made- the long screw in the front comes down through the top of the boiler, not from the bottom. There is a shorter screw for the motor bracket at the rear of the chassis on the bottom, and the front of the chassis bottom has a rivet.
I will image my work on this extensively, as it is my first steam loco rehab project.
One other item- those thin "driving rods" that move in and out of the cylinders are a bit corroded- I guess they were silvered or chromed, etc., so I am going to see if a rattle can improvement- Rustoleum- of a bright aluminum can improve them after a bit of careful
wet/dry paper sanding (400-600 grit).
Again, I realize this is actually not much more than a toy, but the option to improve it
gives it greater value (well, not at the swap meets, but to me) as part of my inventory.
It is missing one of the bottom steps below the tender, but I think I can replicate that piece easily in styrene.
I plan on a little touch up and relettering with existing pre-printed decals (GN).
Siouxlake/ Ron
|
|
Country: USA ~
Posts: 510 ~
Member Since: September 21 2011 ~
Last Visit: December 21 2014
|
Alert Moderator
|
|
|
|
Posted - January 09 2013 : 4:18:43 PM
|
I have had success with gluing plastic with Walther's Goo.. It doesn't actually melt the plastic like some glues, it's just plain sticky.
1. I would try phosphor-bronze collars/shims. They will last a long time. Might be difficult to hand-form accurately. or solid brass rod and drill a hole for the axle to go through.
I'm not quite picturing what's going on:
2. The entry points for the driveshafts are 1/16 inch too wide, and-as others noted- causes a very slack fit where the shafts enter the cylinders.
Picture, please.
3. Make a second screw. Drill a hole through the bottom plate and insert a coarse
thread screw beside the center screw.
4.I'd remotor it, anyway. Add lead weights as much as you can.
Just so that we are on the same page, I'm using Wikipedia's Glossary of Steam Locomotive Components.
The piece that moves in and out of the lower cylinder is the piston rod.
The link from the piston rod to the driving wheels in the main rod.
The driving wheels are linked together by the side rod
And the leg bone is connected to the knee bone, and the knee bone.....
Unspoken expectations are premeditated failures.
Edited by - NC shortlines on January 09 2013 4:26:15 PM
|
|
Country: USA ~
Posts: 825 ~
Member Since: December 22 2008 ~
Last Visit: March 16 2015
|
Alert Moderator
|
|
|
|
Posted - January 09 2013 : 5:21:56 PM
|
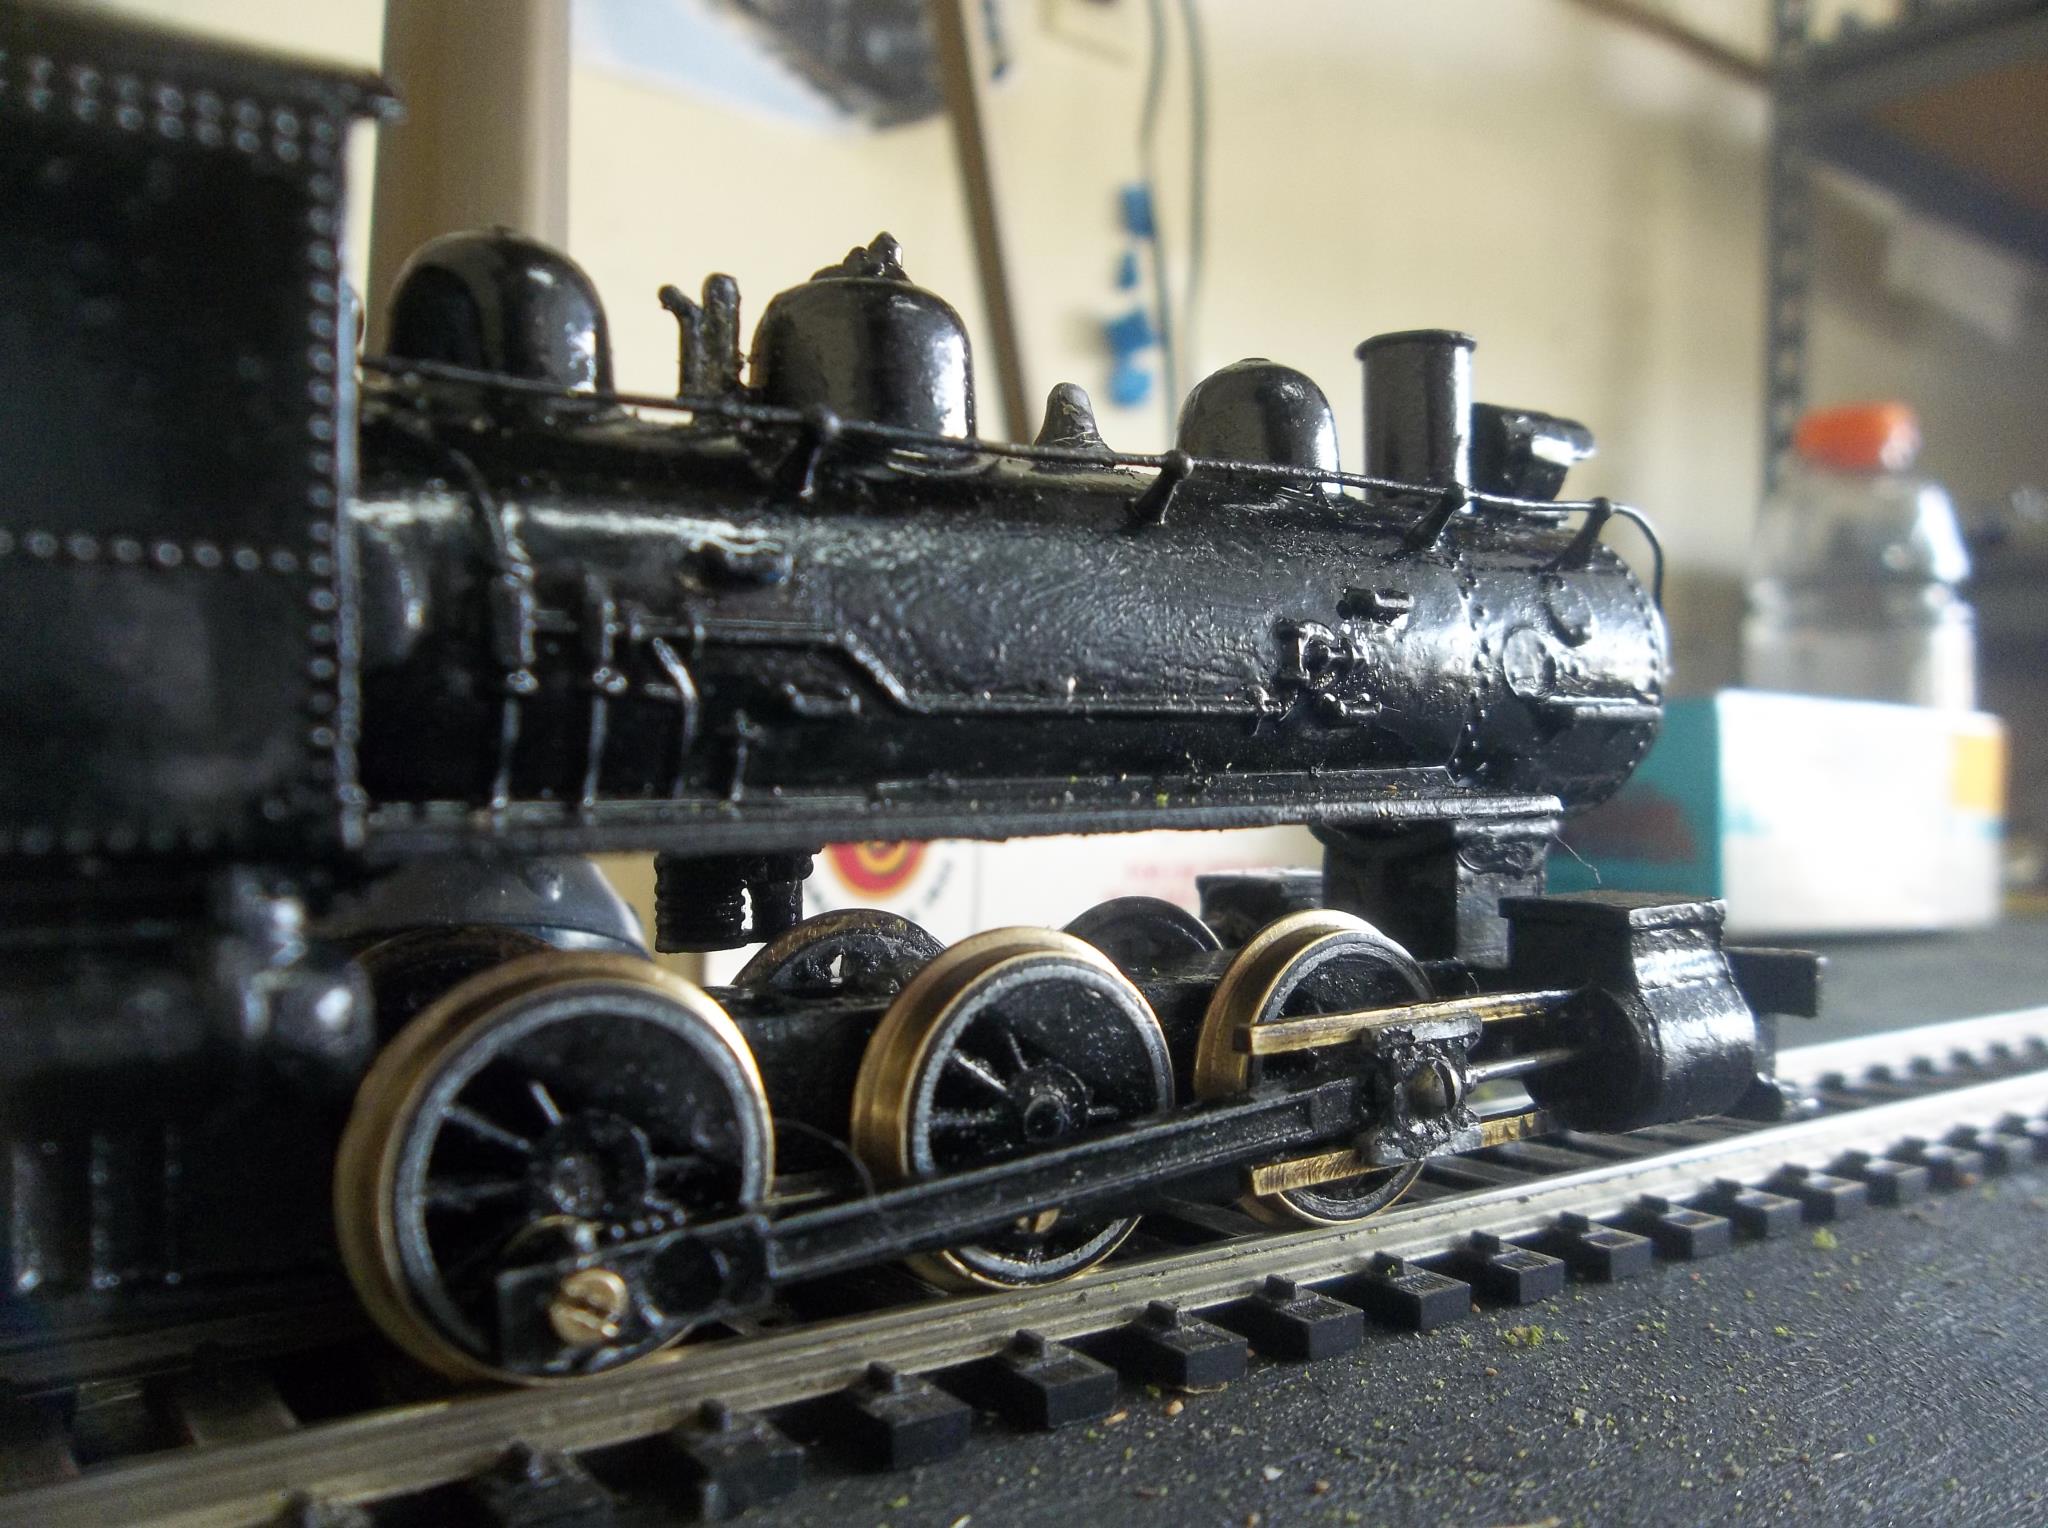
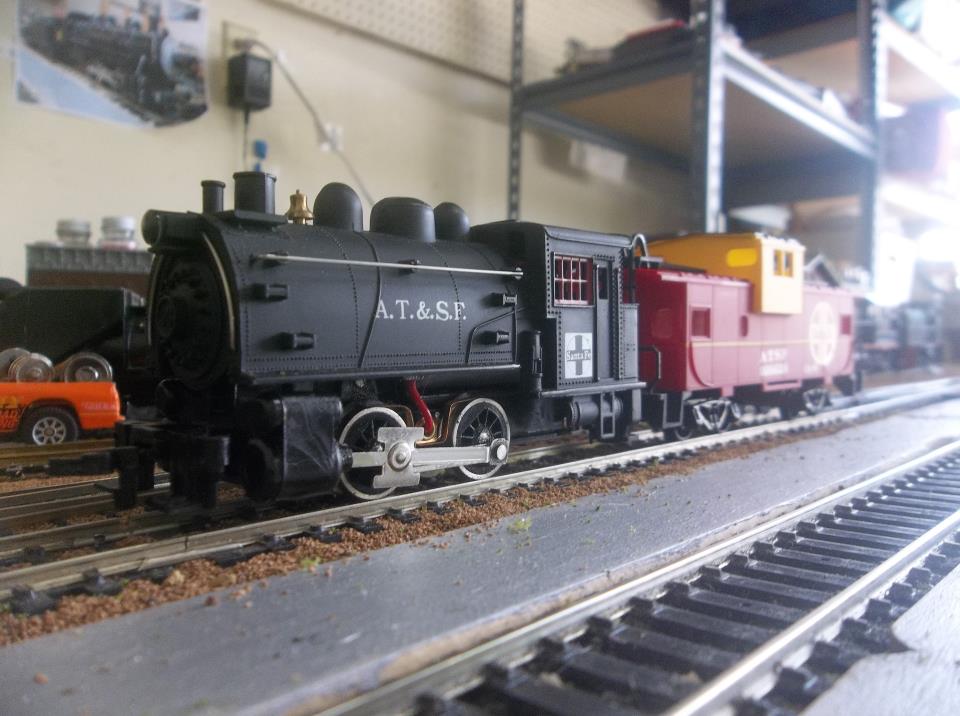
Yeah when I repainted the boiler on mine I couldn't figure out how to remove the boiler there was a screw under the cylinders but then I realized there was one in the smoke stack. Nelson and I use ZAP the stuff will stick your fingers together in seconds and its a thin liquid so it's very easy to use. I use it so hold drive wheels together, fix broken coupler pockets, and so much more. Here's mine.
I buy, repair, and collect
http://scvr.weebly.com/
http://seyboldlocomotiveworks.weebly.com/
http://www.youtube.com/user/TheDeputation?feature=watch
Hyde.
Edited by - SCVR66 on January 09 2013 5:22:25 PM
|
|
Country: USA ~
Posts: 1352 ~
Member Since: January 15 2012 ~
Last Visit: July 25 2021
|
Alert Moderator
|
|
|
|
 Posted - January 09 2013 : 6:47:47 PM Posted - January 09 2013 : 6:47:47 PM
|
Okay...the main rods that move in and out of the rear of the pistons, where there is a vertical slot. That slot is too wide, so these pieces (actually, just thin slats of metal) move side to side, in addition to all the other issues which induce shake and shimmy. If the lateral movement is mitigated at it's primary source- the wheel slop, then it may make the side rods behave better, or be less relevant to the stability overall. In addition to the wheels, the stabilization of the plastic piston/cylinder piece may also be part of the primary solution.
The idea of making my own "washers" from thin brass rod will be explored and tested- that may be better than relying on styrene, which could wear and tear quickly, now that I think about it. Thanks to NCShortlines on that idea! Come to think about it, I want something that can rotate with the axle easily and can also stabilize the wheel problem and be durable. Metal over plastic wins.
I did a little sanding of the more obvious molding seam lines on the domes, but making the roof vent operable (as I saw on the you tube video) is a bridge too far.
I will paint the motor flat black and perhaps glass in the windows.
If I can use my existing GN decals, there is the thought that the roof should receive the GN red paint treatment, seen on other GN steam locomotives. I would guess that boxcar red or my Rustoleum red primer would suffice.
I'm cleaning the boiler weight and the other small parts now in my "Super Clean" degreaser (of course, I bought it in the auto section at WalMart- you guys must think I own stock in that place, as much as I mention it on this forum!). I swear by this stuff for cleaning stuff and removing old paint that 91 alcohol doesn't work on!
Siouxlake/ Ron
Edited by - siouxlake on January 09 2013 6:50:41 PM
|
|
Country: USA ~
Posts: 510 ~
Member Since: September 21 2011 ~
Last Visit: December 21 2014
|
Alert Moderator
|
|
|
|
Posted - January 09 2013 : 7:03:33 PM
|
What kind of tools do you have? Lathe?
The slop on the main rod/piston rod/cylinder may not be such a bad thing. A fair amount of slop is needed to keep the mechanism from binding.
The bigger concern is side rod play, i.e. how much the driving wheels can turn independent of each other.
I like loco rebuilds. Got several in the shop.
|
|
Country: USA ~
Posts: 825 ~
Member Since: December 22 2008 ~
Last Visit: March 16 2015
|
Alert Moderator
|
|
|
|
Posted - January 09 2013 : 8:02:58 PM
|
Full woodshop with standing and bench top tools- all you can imagine, collected over 17 years. For modeling, I have everything I need to do bench work, self- designed and built spray booth, two air compressors and brushes, not enough time to use everything, but retirement could be an option in 7 yrs.
Siouxlake Ron
|
|
Country: USA ~
Posts: 510 ~
Member Since: September 21 2011 ~
Last Visit: December 21 2014
|
Alert Moderator
|
|
|
|
Posted - January 09 2013 : 8:35:18 PM
|
That's really cool! In my garage we have a built in compressor as well as our own drill press and bench grinder.
I buy, repair, and collect
http://scvr.weebly.com/
http://seyboldlocomotiveworks.weebly.com/
http://www.youtube.com/user/TheDeputation?feature=watch
Hyde.
|
|
Country: USA ~
Posts: 1352 ~
Member Since: January 15 2012 ~
Last Visit: July 25 2021
|
Alert Moderator
|
|