|
|
 Posted - May 20 2012 : 12:45:08 PM Posted - May 20 2012 : 12:45:08 PM


|
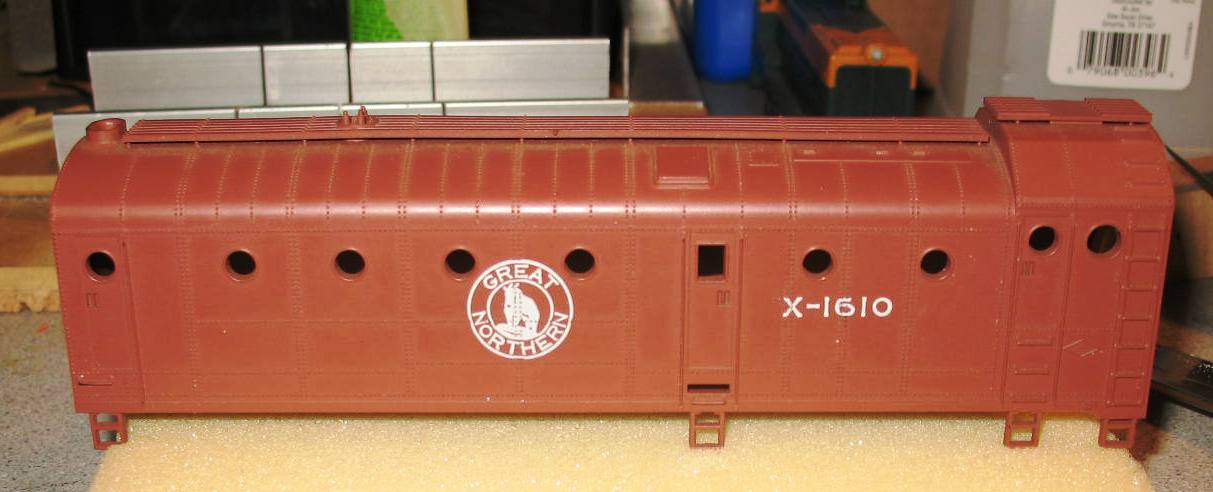
When I started this one, my goal was to have the rotory blade turn electrically, rather than rely on Athearn's old rubber band device. I considered and applied a universal shaft between the rotor shaft and the small Irigashi (spelling?) can motor, but found that, despite all efforts, the operation was noisy and clunky at best. I then read of someone using a small length of plastic tubing as a connector, so I managed to find a 1.0 mm RC airplane fuel line, which I placed on both shafts and things smoothed out immediately. I used very small (#2) metal washers (as "thrust washers) to make the rotor hub (plastic- where the shaft enters the rear of the blade) stand a bit proud of the snow shroud opening, as it was slightly hitting the sides when spinning. This further smoothed things out when tested with electric current applied.
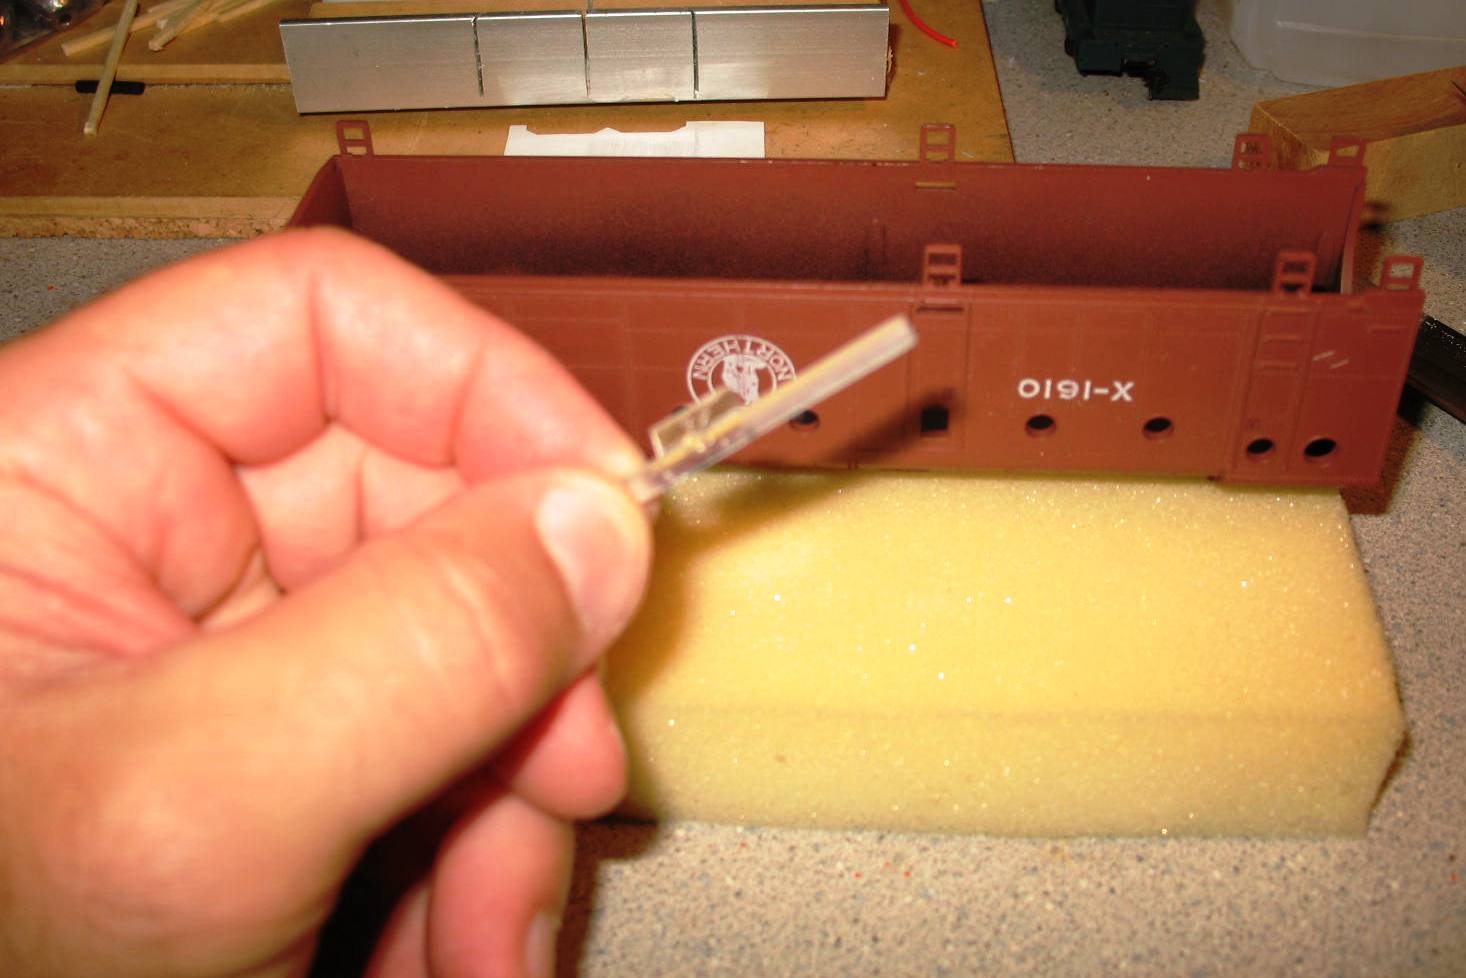
I saw a website with a similar project where the two small portholes on either side of the cab windows were fitted with LEDs. As I have only 5mm xmas warm whites (used in several other posted projects- the center cab and the dummy SW7 calf lighting job) which were to large, I used some clear styrene rod from a parts tree as home made light pipes. I made the pipes translucent by sanding with 400 grit wet/dry paper, then made sure to sand the end flush. After cutting and resanding the cut ends, I ended up with 2 1/4" pipes which I secured into those two portholes with CA, glued carefully from behind.
I am posting some images and will comment further in another post
Siouxlake Ron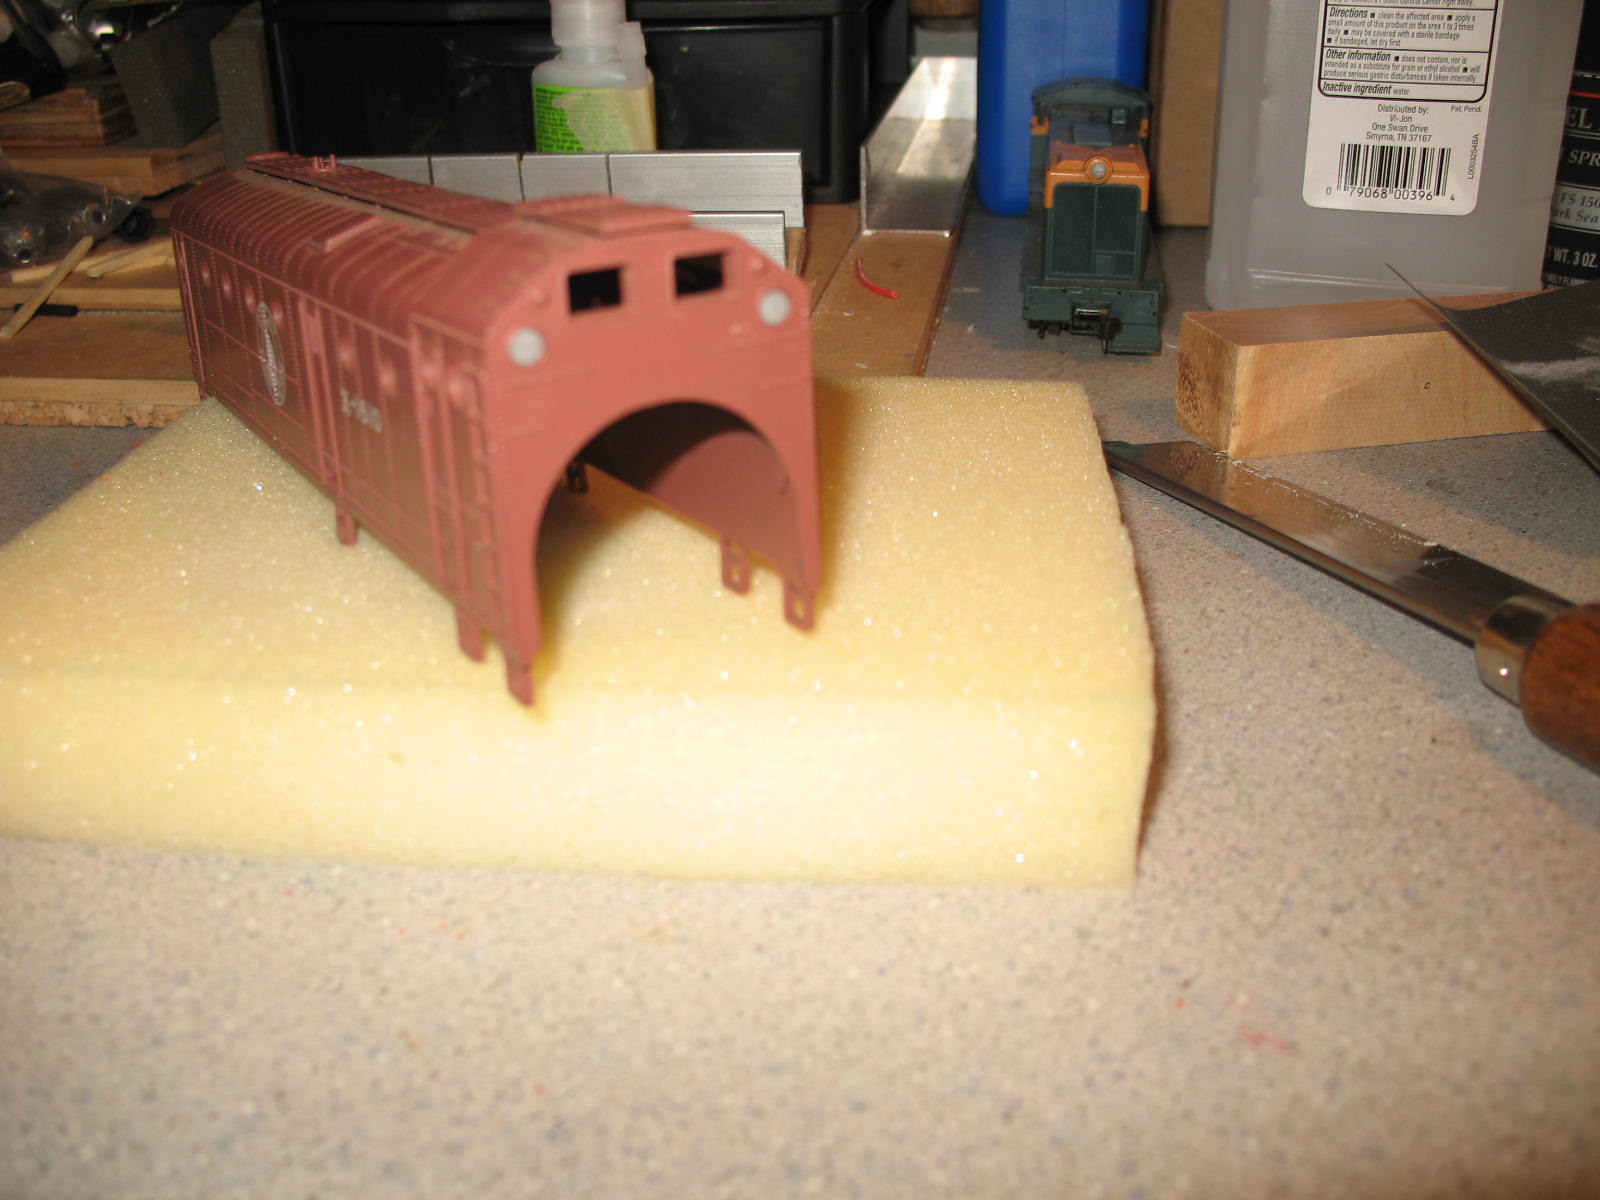
|
Country:  USA ~
Posts: 510 ~
Member Since: September 21 2011 ~
Last Visit: December 21 2014 USA ~
Posts: 510 ~
Member Since: September 21 2011 ~
Last Visit: December 21 2014
|
 Alert Moderator
|
|
|
|
Posted - May 20 2012 : 5:14:25 PM


|
Looking good, I too have a few rotary snowplows now,and will follow your thread here. Looks like a good conversion. I was thinking of adding a tank inside with some flour, and then have it actually "work" blowing fake snow on a personal module, so wouldn't blow snow over over people's scenery. LOL. But that's a long-term project to consider. Lookin' good , baby!
Jerry
" When life throws you bananas...it's easy to slip up"
|
|
Country: USA ~
Posts: 3974 ~
Member Since: January 04 2009 ~
Last Visit: January 11 2019
|
Alert Moderator

|
|
|
|
Posted - May 20 2012 : 8:07:03 PM
|
quote:I was thinking of adding a tank inside with some flour, and then have it actually "work" blowing fake snow on a personal module, so wouldn't blow snow over over people's scenery. LOL.
Originally posted by AMC_Gremlin_GT - May 20 2012 : 5:14:25 PM
|
I can see the clouds of flour now... just don't strike a match! 
Ron, I just did a post about the warm white LED's I bought. There's another seller who has 3mm ones with a flat top... I don't know if they would fit the openings.
http://www.ebay.com/itm/180752816807
The Tyco Depot
|
|
Country: USA ~
Posts: 3927 ~
Member Since: June 20 2007 ~
Last Visit: November 19 2015
|
Alert Moderator
|
|
|
|
Posted - May 20 2012 : 8:51:04 PM
|
For Nelson and others:
I initially used my bench top drill press to try and turn down (sand) the 5mm Xmas LEDs, but then it turned out that these two portholes are adjacent to the cab walls, with a slight alignment groove molded at the front of the cab inside to seat the metal support for the rotor shaft. Even a smaller LED would be off center relative to those holes, which is why I decided to go the light pipe route. Especially after looking at a few fiber optics sites and seeing prices. Being the frugal fellow that I am, the homemade solution works best, as the 5mm LEDs can remain off center when seated behind the light pipes, but transmit more than enough light to glow the outside ends as seen from the front. I will post a test image of that after working on the dual front LED array.
I want to light the cab area and am working on a light block, so that the following portholes along the sides of the plow remain dark. I can't see the need for lighting that area, as no one would need to be back "there" when the plow would be operating at night, except incidentally.
I did break down and bought a Walthers metal 3axle truck set at the one local LHS left in the area, and it has two assembly screws I can easily tap power off for one motor lead, as well as for the lighting. The other lead will come from the front metal axle.
I sprayed the bottom of the chassis flat black, but tuned up the flanger plow behind the front truck with Rustoleum primer red, close enough to the Great Northern red of the plow car. The front truck needed to have the mounting pin filed flat, the drilled with a 5/64 bit to enable a 2-56 screw and nut to hold the truck onto the chassis, especially as I am running the other motor lead from it. As the model was originally made, that front truck is not attached otherwise.
Another word on optic fiber research: I did notice that there are flexible light solid rods in various thicknesses, capable of enabling LED light to shine thru the length of the rod and emit light like a "glow stick" effect. That is an interesting idea, and the Website I looked at did show an HO structure lit by that means, where uniform general interior lighting is desired. That one will help with my Proto 1000 RDC lighting task, instead of using a plastic straw as I planned to do.
I am going to get to work on that rear truck for power, then solder up the LEDs and test things.
One other word on snow plowing- as I researched on MR forums, there was one guy who but a spreader for this Athearn model and also managed to make it an active snow plow, using some light snow-like material.
He shows where he prototypically plowed the tracks as part of his layout. Pretty neat, but more mess than I would tolerate.
Be back after some working on the railroad.
Ron
|
|
Country: USA ~
Posts: 510 ~
Member Since: September 21 2011 ~
Last Visit: December 21 2014
|
Alert Moderator
|
|
|
|
Posted - May 21 2012 : 06:11:11 AM

|
Ron,
Its a lookin good my friend!
So you opted to use fiber optics for the side "lights" pointing forward instead of LEDs?
Those Portholes on either side of the front of that, whats the diameter of those holes? I'm not sure off the top of my head.....I know of a way you can get those light pipes to light up by installing lights in the end of the inside sections of the light pipes as you mentioned this could and is fiber optics.....you can actually get that in many different colors to suit your liking....
Will say tho, looks GREAT so far for what you have done to it! Keep up the good work and keep us all posted!
~John
Many have tried to, and failed, ya just can't repair stupid...
Do NOT try to Idiot-Proof anything!!!! God, will simply create a better......IDIOT!
|
|
Country: USA ~
Posts: 2911 ~
Member Since: March 26 2012 ~
Last Visit: January 14 2014
|
Alert Moderator
|
|
|
|
Posted - May 21 2012 : 10:30:17 AM
|
I guess that these homemade styrene rods can be considered "fiber optics" in a sense, although they are actually rigid light-conducting solids. As I mentioned, the location of the hole and the need to fill the diameter made an LED difficult to properly position, but the rods will enable LED backlighting to show thru these rods.
As I researched the actual flexible fiber optics alternatives, I realized that there could be one light source, from which individual or bundled fibers could convey light to different locations- perhaps most adaptable to structure models with various rooms and light uses (exterior, interior, dim light, bright light) that can vary by location of the end of the fiber run.
Here, such a solution would be more than is needed- but very much worth considering for other projects.
The rear of these rods will remain uncovered/unpainted until I determine if the LED and resulting light from the rods that lights up the cab area is sufficient, or needs to be toned down a bit by covering the sides of the LED with shrink tubing or liquid electrical tape.
That Walthers 3-axle passenger truck I bought needs to be worked on next, then on to the LED wiring. If I am lucky, I can finish this job up next week, just in time for a 3-day weekend!
So I can start or continue another project.!!!!!!
Will post follow up images as I continue on the Snow Plow.
Siouxlake Ron
|
|
Country: USA ~
Posts: 510 ~
Member Since: September 21 2011 ~
Last Visit: December 21 2014
|
Alert Moderator
|
|
|
|
Posted - May 21 2012 : 4:28:35 PM
|
Ron,
To most of us, the clear "lens" is merely a type of fiber optics....Its used alot in this hobby for a multitude of applications, whether rigid or flexible its all the same sort of material.
As for the lighting, what type bulb or LED you plan to use? something slightly colored or dim to basically "illuminate" them? What sort of color shade you looking to get?
As for the Athearn metal passtender trucks, All you should need for them is metal wheels and axles to cary power from the rail through the wheels to the axle up into the truck frame to the bolt that holds it in place.....What type of work do you plan to do to it?
As for the shrink wrap tubing, that be a good way to hold the LED or even a low voltage light bulb in place to the clear rod on your marker lights and then use a normal type bulb that dimmly lights the cab interior of your snow plow!
Interesting conversion you got there!
All your progress looks GREAT so far.....Can't wait to see more pictures of what you get done on it....
~John
Many have tried to, and failed, ya just can't repair stupid...
Do NOT try to Idiot-Proof anything!!!! God, will simply create a better......IDIOT!
|
|
Country: USA ~
Posts: 2911 ~
Member Since: March 26 2012 ~
Last Visit: January 14 2014
|
Alert Moderator
|
|
|
|
Posted - May 21 2012 : 5:02:13 PM
|
The "el cheapo" LEDs I have been using come from a 50-light string I bought at Walgreens 2 Xmas seasons ago. I found out about them from an article in RMC about LED lighting by a fairly well-known modeler, who even showed the box they come in. The cost was about $6 for 50, so that works out to 12 cents each. They are a warm white 5mm flat-topped diode with a molded-in cone at the end to spread the light at the end.
I can cut them shorter and eliminate the diffusing cone, trim them in my drill press, etc.
The leads are sufficiently durable and long enough to allow for bending and re-bending several times w/o breaking. As a learning tool, their durability makes them very versitile; their light color is decently old fashioned enough for my mid-1950s modeling era.
I am sure I will look harder this next Xmas season for more variety at a low price, but I may also order a bulk quantity of smaller similarly-colored LEDs as my modeling needs become more precise (or artful).
The Walthers metal passenger 3 axle trucks are two part assemblies using small Phillips screws, to which a lead is easily soldered. Actually, as is to be the case with the front metal truck (2 axle), I can just solder to the retention screw that emerges on the inside bottom of the chassis, to tap the electrical current and run shorter leads to the motor, as well as for the LEDS.
Ron
|
|
Country: USA ~
Posts: 510 ~
Member Since: September 21 2011 ~
Last Visit: December 21 2014
|
Alert Moderator
|
|
|
|
Posted - May 21 2012 : 11:51:37 PM
|
The LED's I bought were 100 3mm for $7 with 100 limiting resistors, which is less than 4 cents per component. I think there are color assortments available too.
The Tyco Depot
|
|
Country: USA ~
Posts: 3927 ~
Member Since: June 20 2007 ~
Last Visit: November 19 2015
|
Alert Moderator
|
|
|
|
Posted - May 23 2012 : 08:57:53 AM
|
Here is a look at those Xmas LEDs I always mention, although previous projects have shown an image or two with the LED in place. I believe the "trade name" of these LED Xmas lights is
" Good Buy ", as purchased at Walgreens in the holiday season.
Here is the way the LED is cut from the string:
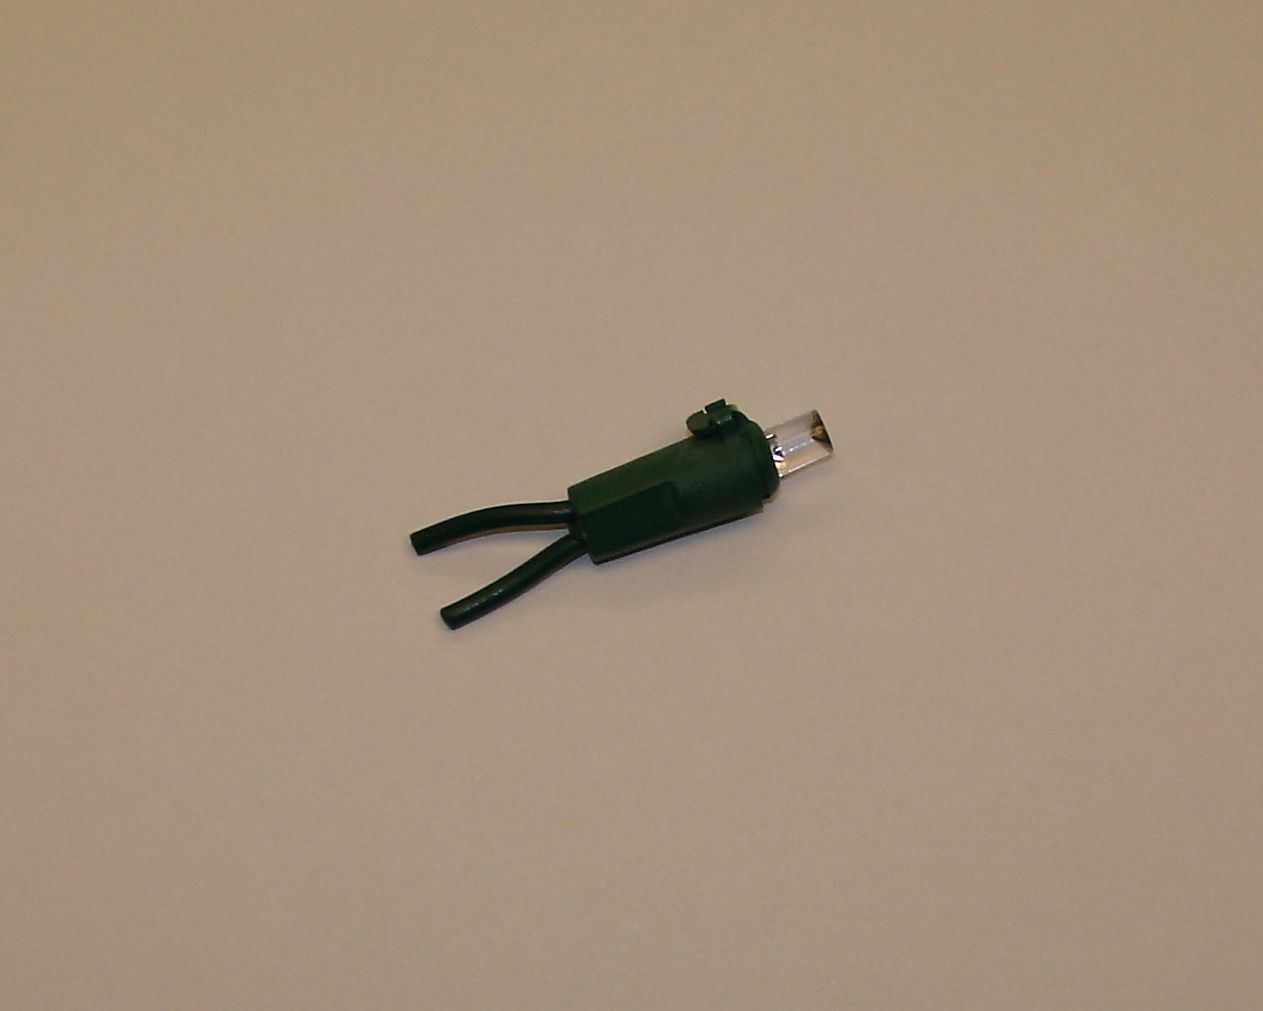
After removing the housing, you can see the inverted cone-shaped diffuser (I hope)
in this image:
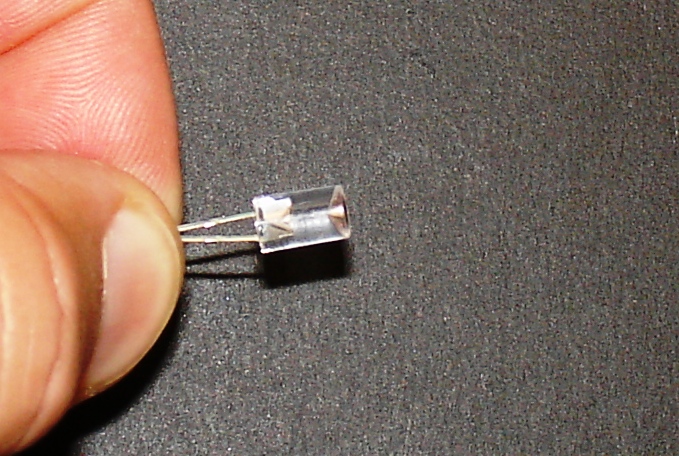
That diffuser is useful as it stands in structure lighting, either wrapped by electrical shrink tubing or left alone, depending on the light effect desired. The size of these (5mm) (and their hardiness) makes them easy to put into my drill press and sand down, to eliminate the diffuser or turn down the diameter. Generally, I have been using 470 ohm resistors, but testing with 1000 ohm resistors showed no real difference in brightness level for this particular LED.
In my application of this particular LED to the "light pipes" I made, I will probably do nothing, expect mask the sides to a degree, again depending on the cab lighting effect I want to achieve.
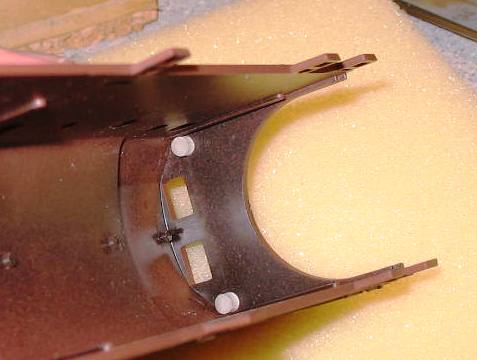
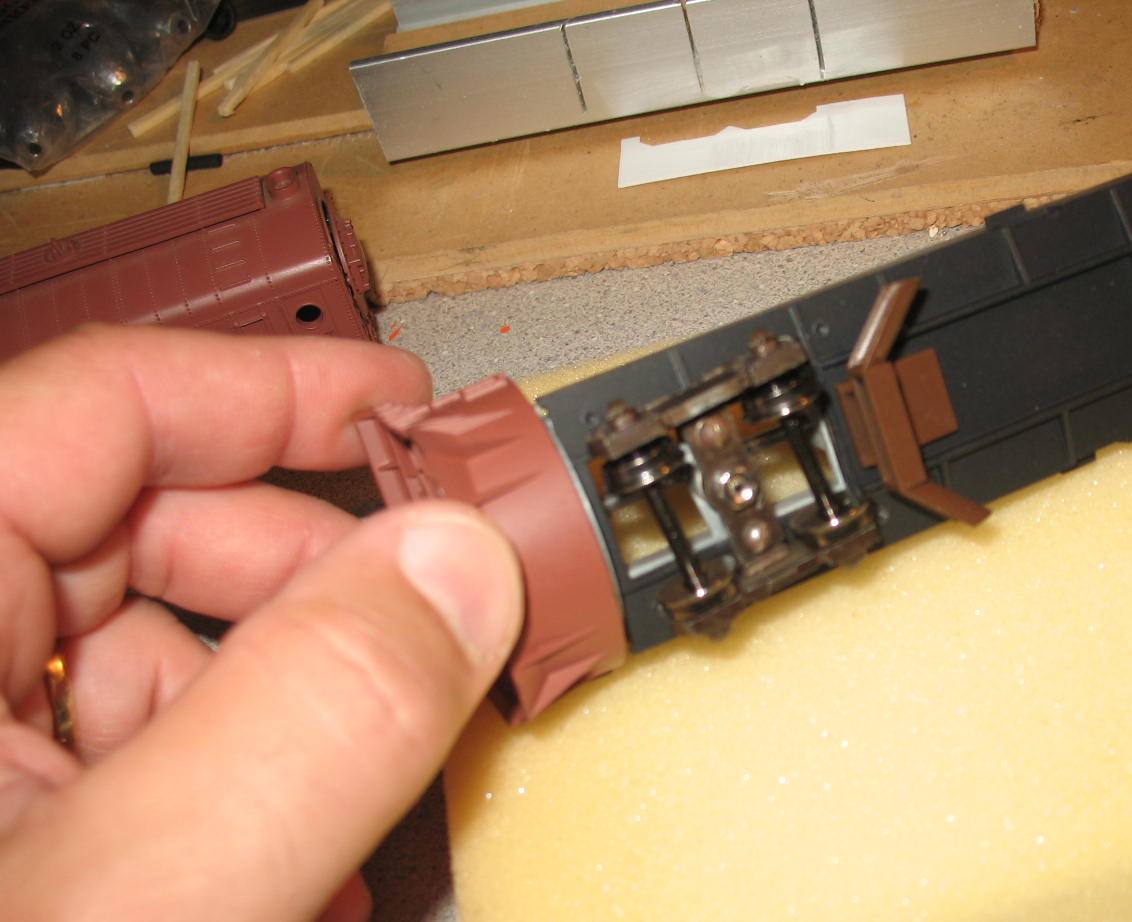
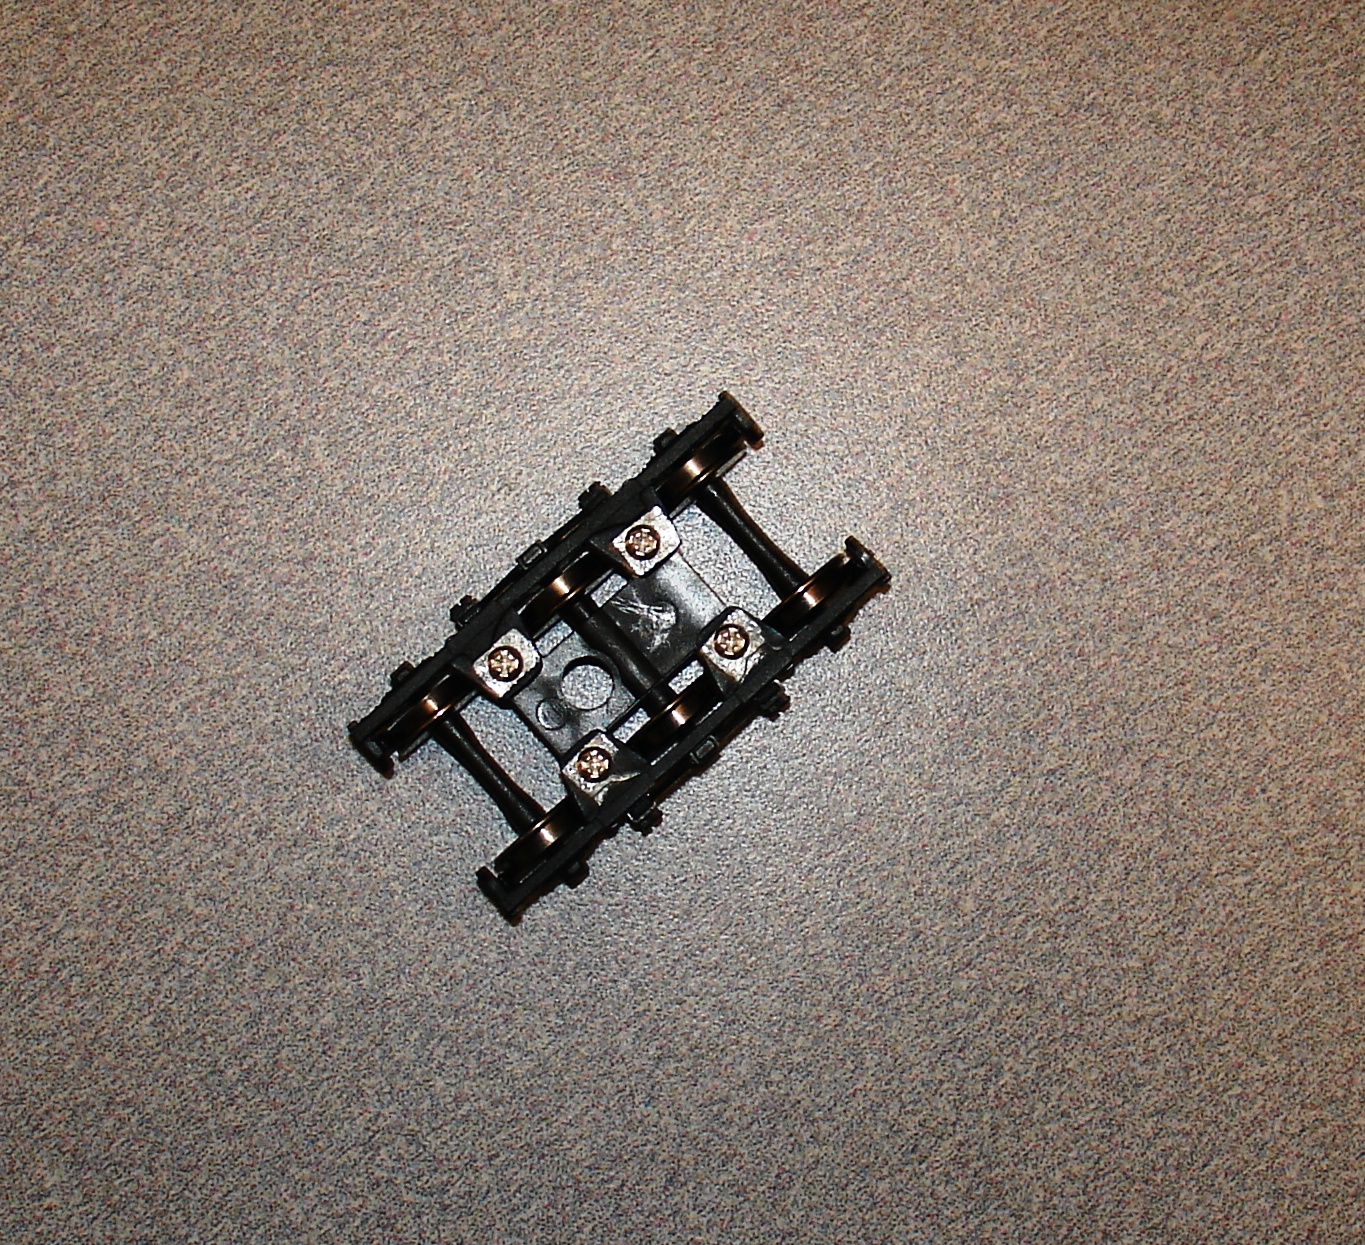
On another note, this is an image of the Walthers all-metal 3-axle passenger truck I plan
to use in place of the original Athearn one. The screw that retains the truck to the chassis conducts the track current up, so that becomes my other lead for wiring the motor and the LEDs. The front truck is all-metal as the model was made, and that provides the other track
power contact point. The only issue is the size of the mounting hole, but a thorough search of my workshop should solve that. The wheels are being replaced with 33" insulated (one-side) ones, same as the front truck.
I tried to fiddle the original Athearn rear plastic truck with a wiper on two of the wheels,
but it looks clunky and this Walthers metal truck is a more "elegant" solution for power.
Back in a few days with more images of further project work on this snow plow.
Siouxlake/ Ron
|
|
Country: USA ~
Posts: 510 ~
Member Since: September 21 2011 ~
Last Visit: December 21 2014
|
Alert Moderator
|
|
|
|
Posted - May 25 2012 : 10:58:41 PM
|
Snow Plow Update:
Well, I should have saved my money! That Walthers metal truck turned out to to be
metal sides with a delrin/acetal plastic connection "bridge" between the sideframes.
I turned back to my existing Athearn plastic 3-axle truck, re-thought the electrical pickup situation and fashioned a dual wheel wiper from a K&S 1/4 inch brass strip I had lying around.
I bent one end at 45 degrees down over one end wheel, then used a mechanical pencil
lead to come down thru the truck pivot hole and locate the place to drill a 5/64th hole to secure the wiper to the truck with a 2-56 screw (longer, to reach above the frame floor).
After drilling the hole, I reamed it out a bit, to enable the screw threads to turn thru the hole, then marked and cut the other end of the wiper. I bent that other end after temporarily running the screw into the truck from the bottom of the pivot hole, then cut it off about 3/16 inch past the bend (after making the bend to ensure contact with the other end wheel axle.
On the chassis floor, I ran a metal terminal ring and a washer over the screw end, then
the 2-56 nut was put on. I used craft glue to "seize" the nut on the screw thread after tightening appropriately, sao that turning motion of the rear truck would not loosen the whole thing. (I had done the same on the front truck). This is less permanent than using thread lock, and allows for future access and work, if needed.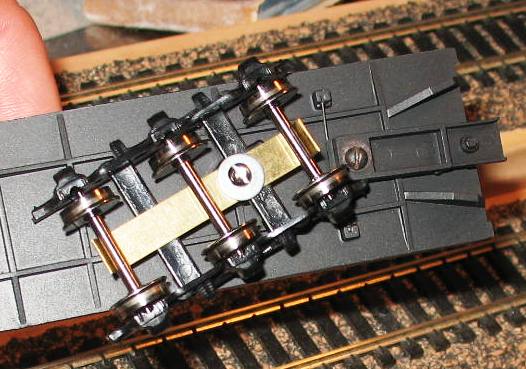
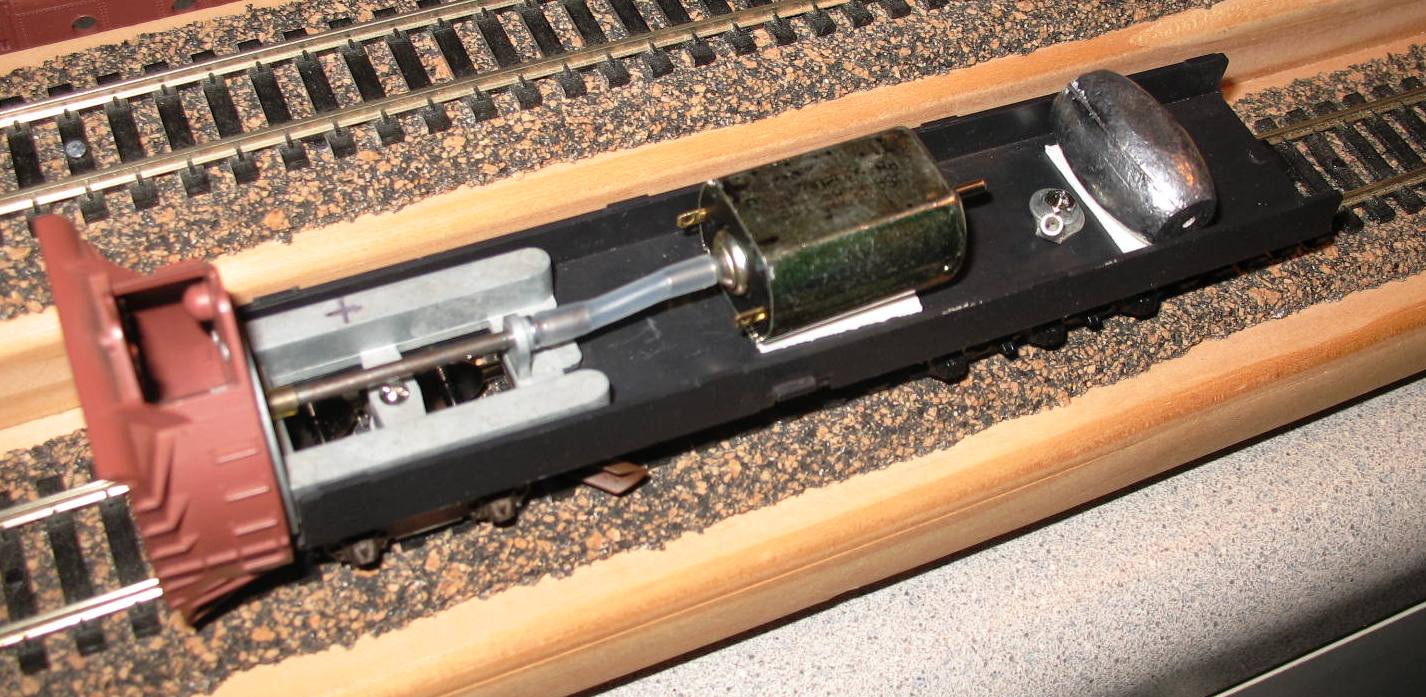
I seated the can motor with heavy duty foam double-stick tape (again, for future access/work) and did the same for the lead fishing weight (cheap- at Walmart), to give greater heft to the weight bearing down on the rear truck and wiper system. The entire assembly is over-weighted by 1.675 oz, but rolls very smoothly and easily on my test track.
Most of my present switching layout is straight runs, switches and a few gentle arcs, so there should be no movement problems.
I plan to use basic engine black to paint both trucks, then I will proceed to the LED placement, the cab area light block, and the remaining elelctrical wiring. One other item- I tested all basic electrical connections on my test track as I went along, so as not to find out after the fact that my wiper is not working- but it does, real nicely!!!!!!
The rear coupler will be a Kadee #5, as the coupler swing arm comes out fairly far from under the frame/chassis.
This is the start of a 3-day weekend for me, so I will get the soldering stuff out- right after I mow the lawn tomorrow AM! tomorrow AM!
Back in a few days with another exciting installment and images.
Oh yeah- in the middle of all this, I got some inspiration to better-detail the Walthers scale test car kit I still have waiting on the rip track.
Siouxlake/Ron
|
|
Country: USA ~
Posts: 510 ~
Member Since: September 21 2011 ~
Last Visit: December 21 2014
|
Alert Moderator
|
|
|
|
Posted - May 26 2012 : 02:02:09 AM
|
Very neat installation.  I was thinking you could put a lug with a pickup wire under one of the screws on the Walthers truck, but after looking at your photo, I think the axles are plastic. I was thinking you could put a lug with a pickup wire under one of the screws on the Walthers truck, but after looking at your photo, I think the axles are plastic.
I ran into that with P2K wheelsets I bought that I needed for a tender... not only were the plastic axles useless electrically, they weren't true and wobbled! I exchanged them at the LHS for Intermountains instead.
The Tyco Depot
|
|
Country: USA ~
Posts: 3927 ~
Member Since: June 20 2007 ~
Last Visit: November 19 2015
|
Alert Moderator
|
|
|
|
Posted - May 26 2012 : 09:27:03 AM
|
Nelson:
Yes, the wheels that came with the Walthers trucks have a plastic-or plastic covered- axle, and the 12 packs I picked up from Yankee Dabbler (not trying to advertise, but they are nice folks in person!) are all metal with the small black plastic insulator ring at one wheel. Those Walthers trucks will be used elsewhere, as it would cost more in gas to return them, than just use them as is.
Since I am committed to using metal wheels as I go thru other freight car projects as time goes on, the plastic ones I "harvest" will become part of car loads or decorative detail around the engine house on my layout.
By the way, this simple wheel wiper works so well, that it avoids the need to buy commercial equivalents from JayBee or the backshop guy ( forgot his business name). I hate to sound so cheap, but that is the reality of my personal economics, so frugal does as frugal must be!
One other note- ( again, not an advertising plug, per se) I found those number two washers at a Hobbytown store nearby. They are a good source for odd stuff, as they emphasize RC models and have mechanical repair parts available.
Back after the weekend soldering and LED work.
Ron
|
|
Country: USA ~
Posts: 510 ~
Member Since: September 21 2011 ~
Last Visit: December 21 2014
|
Alert Moderator
|
|


