|
|
 Posted - April 02 2012 : 04:18:55 AM Posted - April 02 2012 : 04:18:55 AM


|
Well everyone,
Here it comes! I decided on MY Christmas holiday of December 23rd, 2008 I was going to begin work on my Brass B&O EM-1, paint removal, detail refining and added "extra" detail.
So, without further ado, I'll begin on whats been done, with pictures to accompany it! 
First up,
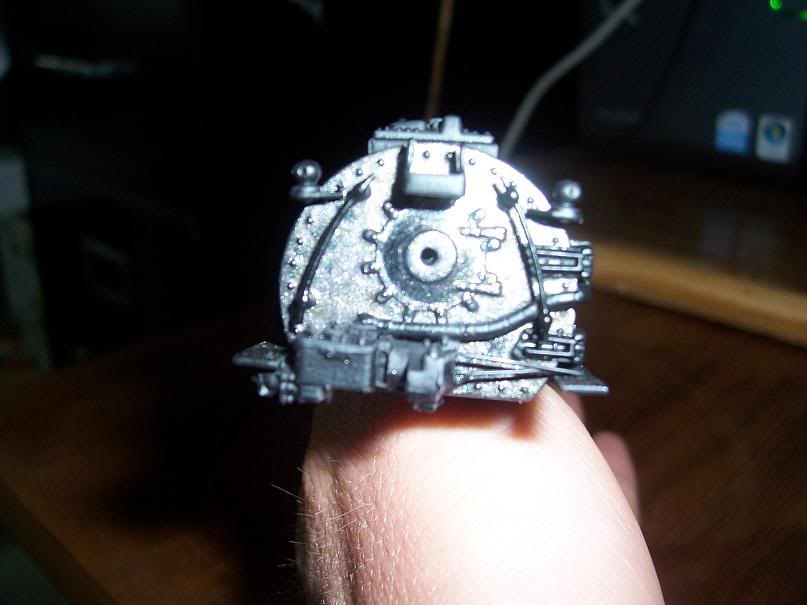
This is the "NEW" boiler front. I've drilled a hole to install a "B&O Capitol Dome" where a "decal" plate was put. Its a VERY thin piece, so I did not remove it but to drill right through the center of it, with a slightly enlarged drill bit for the hole size and good "adjustable fit" for the Capitol Dome detail casting. (The Capitol Dome detail casting will NOT be installed till AFTER the locomotive is painted!
Also you'll see I add a better detailed Feedwater heater detail part, then that from the factory, in 1958. (Yes I've got an extremely OLD Akane Model here!) To the new Feedwater heater detail, I added better detailed pipe, leading to it, which is "lagged" as should be! With this, I also added other smaller pipes that lead to the Feedwater Heater detail, on the bottom edge of the boiler front, just below the smokebox door, and to the right of it. The feedwater heater detail, and pipping are of my own castings! (Yes I casted my own parts, and will return into the detail casting business ASAP, as I want to get back into it!) I did that some time ago tho... Which is one reason I want to return to the casting industry, as its a good way to make a few $$ and it also allows me to make parts no one else sells and such so.....Anyway, at the time of that casting, I was still residing in Pennsylvania!
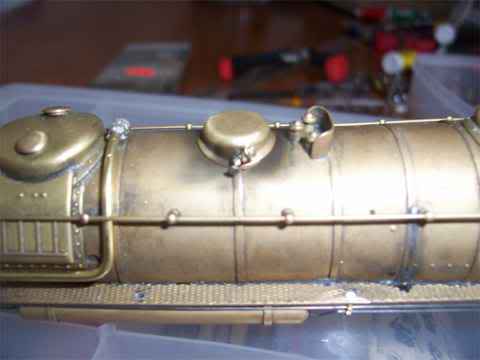
Next:
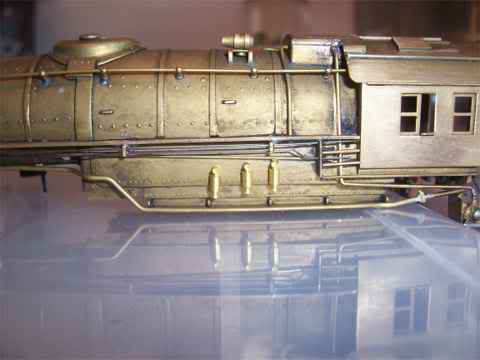
This shows the length and place that feedwater heater larger pipe goes, I made this from 1/16th inch brass rod, formed to shape. It leads behind the sand dome to a casted detail fitting, which you'll see with more pictures! Also underneath the boiler "catwalk" you'll see the smaller pipes I added with 2 pipe, pipe hangers from Cal-Scale. These were originally on TOP of the Catwalk! And from pictures of the real thing, were NOT in the correct location. So, that was means of re-location.
Next:
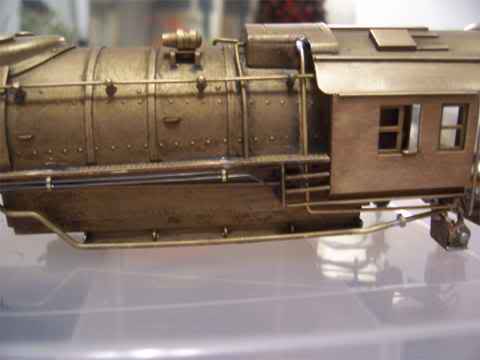
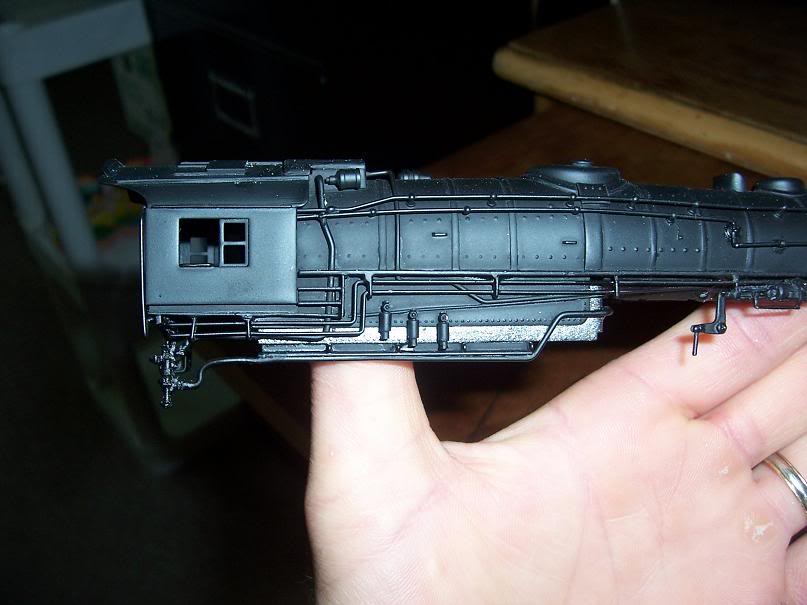
This is a continued picture to show where these smaller pipes lead to, and the added feedwater heater "Cold Water Pump" under the cab corner. Which you'll get a better picture of as well in a few more pictures. This picture also show my revised "Turret" pipping, (I just wasn't happy with what was there, not to mention it was already loose at the solder joint.)
Next:
This picture shows the Feedwater Heater "Cold Water Pump" and its bracket made to hold it. With all the piping attached to it. It also shows on the opposite corner, the added Nathan Injector, which was a VERY CRUDE representation, by factory. As, in a few pictures, you will see all the attached pipping to it alot better.
Next:
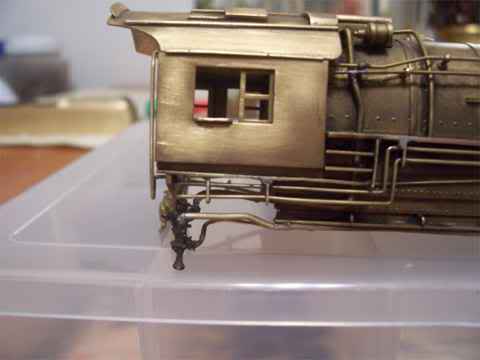
This is that picture showing the Nathan Injector, with attached brass pipping.
Next:
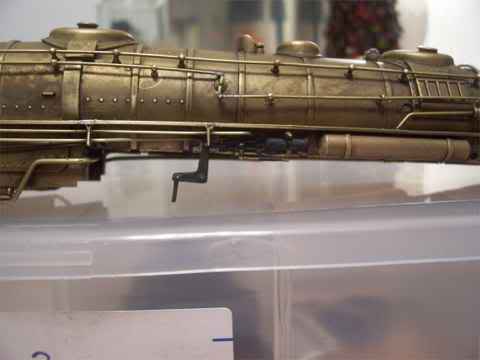
This shows the old original Articulated Power Reverse refined, with a nice Cal-Scale casting in its place, with pipping going to it, and some factory pipping re-attached as it needed removed to add the new Power Reverse. This picture also shows a refined Front End Throttle, with rods and rod hangers in place.
Next:
This shows the top of the boiler with the added feedwater heater pipe fitting, and a newly added air tank cross over pipe. Also seen is the new front end throttle end, where all the action takes place!
~John
Many have tried to, and failed, ya just can't repair stupid...
Do NOT try to Idiot-Proof anything!!!! God, will simply create a better......IDIOT!
|
Country:  USA ~
Posts: 2911 ~
Member Since: March 26 2012 ~
Last Visit: January 14 2014 USA ~
Posts: 2911 ~
Member Since: March 26 2012 ~
Last Visit: January 14 2014
|
 Alert Moderator
|
|
|
|
Posted - April 02 2012 : 04:19:45 AM
|
Now, for the Tender!
First up:
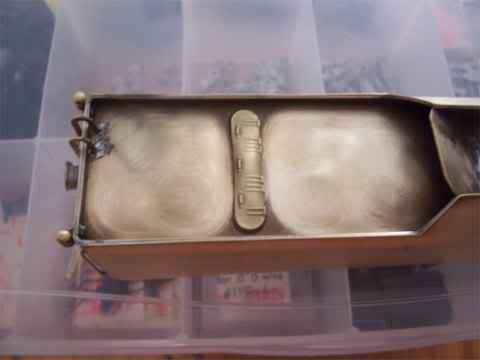
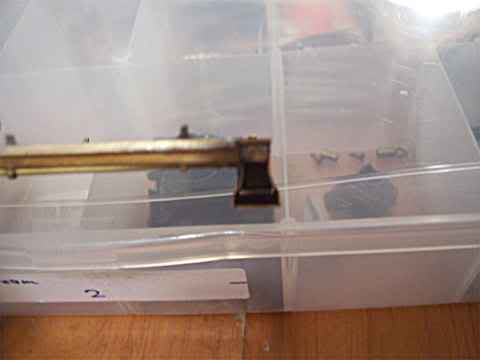
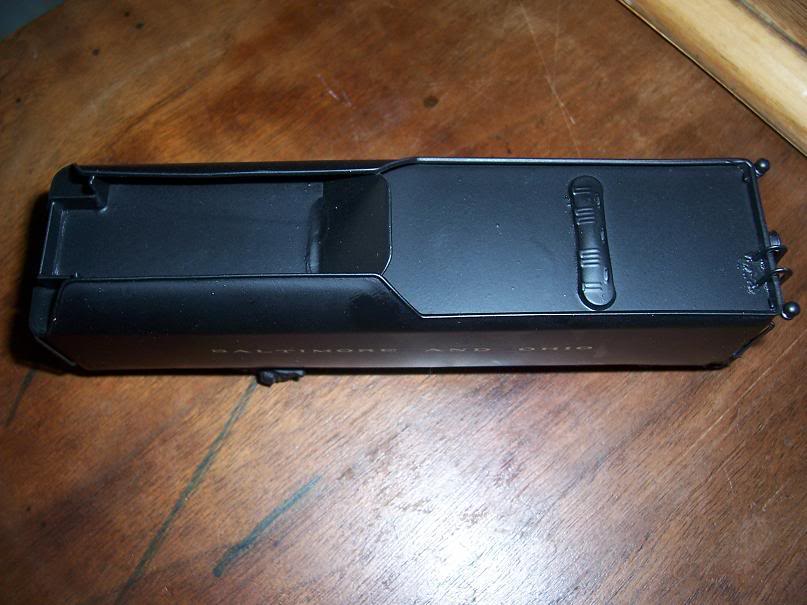
Paint, decals, under frame broken up coal load, all removed, ready for re-detailing, and refining, with the trucks removed, for paint stripping as well!
Next:
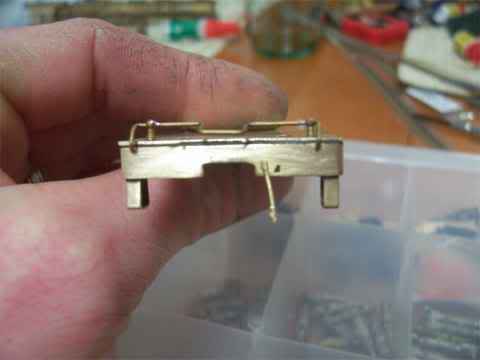
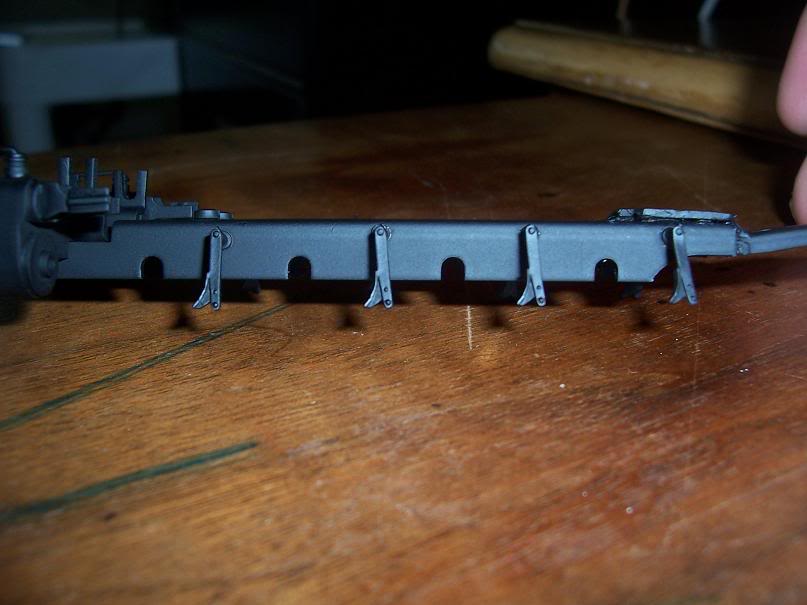
Front of tender cab step, re-attached, was alittle loose, so.... It needed it.
Next:
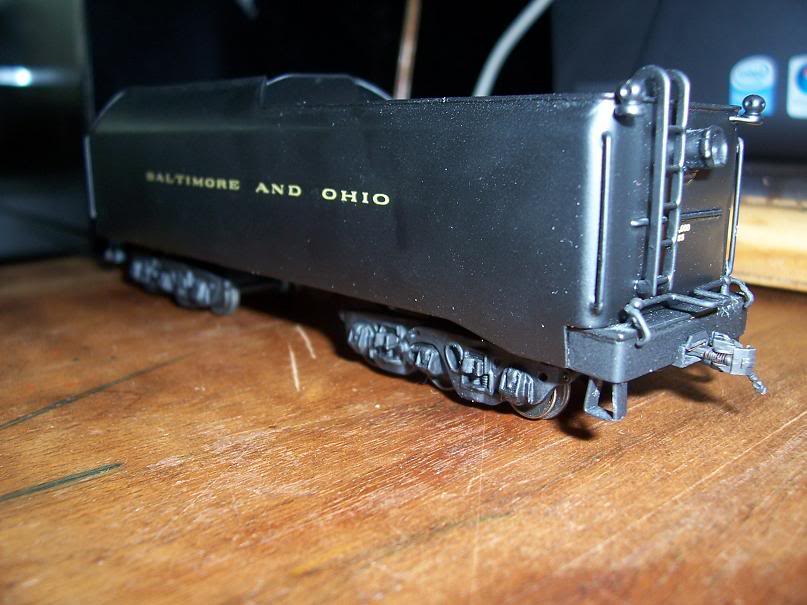
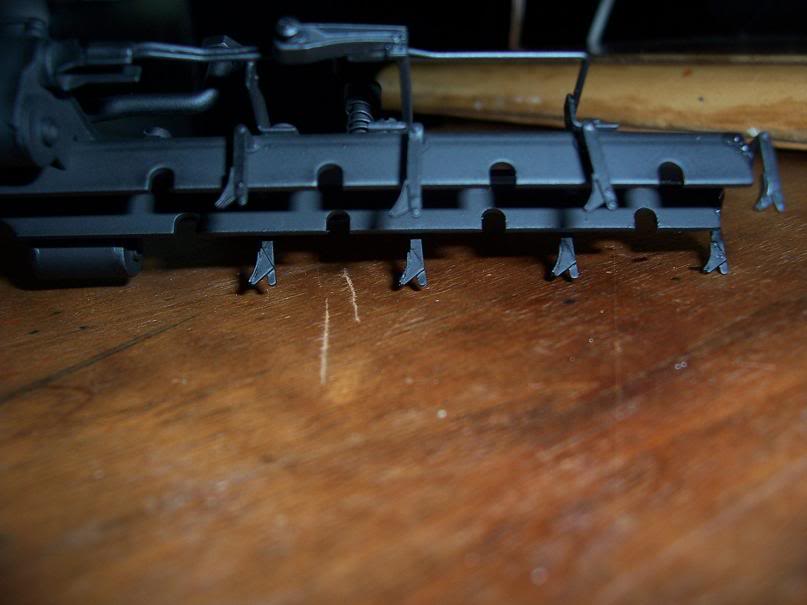
This shows what was done to the rear end of the tender under frame with added air glad hand, and mounted coupler cut lever.
Next:
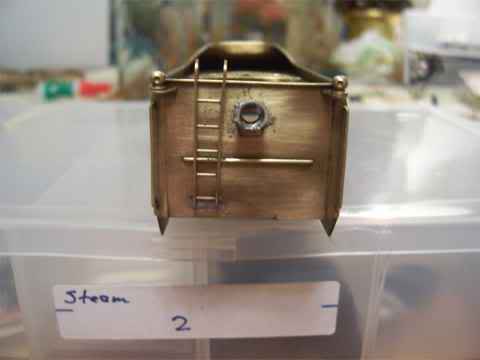
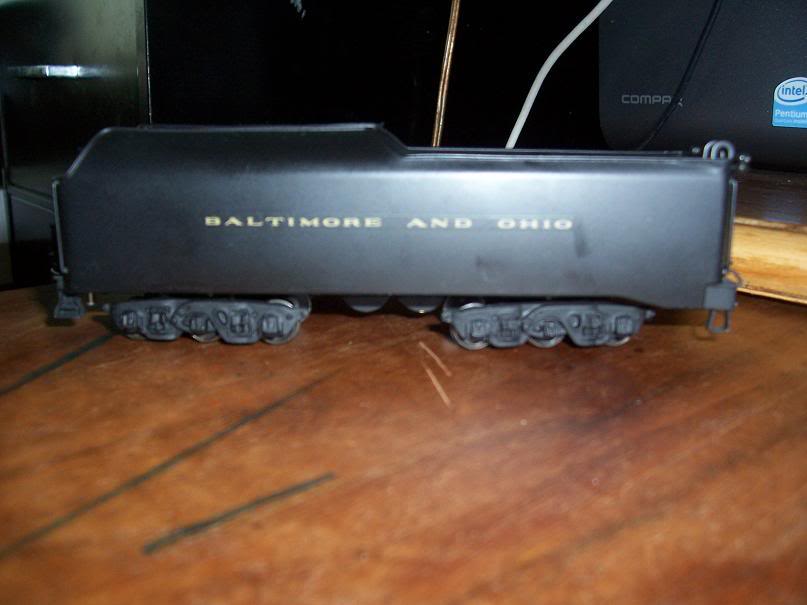
This shows the rear of the tender panel. The ladder was loose, and I re-attched it, and added a tail light, that the model never had. The light casting is yet another casting I made myself, a few years ago, to go along with my other detail part that I made. Notice, it is drilled for a tail light dirrectional light bulb, when the painting is all done and all the electronics is in the tender for that that I wish to add, like dual mode sound.
Next:

The tender trucks stripped, and ready for primer, and then a coat of actual color!
MORE to come!
~John
Many have tried to, and failed, ya just can't repair stupid...
Do NOT try to Idiot-Proof anything!!!! God, will simply create a better......IDIOT!
|
|
Country: USA ~
Posts: 2911 ~
Member Since: March 26 2012 ~
Last Visit: January 14 2014
|
Alert Moderator

|
|
|
|
Posted - April 02 2012 : 04:20:54 AM
|
Well now the hard part begins! The engine beds, and such, these can be the hardest part to re-finish on ANY locomotive, let alone a brass one!
So, with that said, I'll begin.
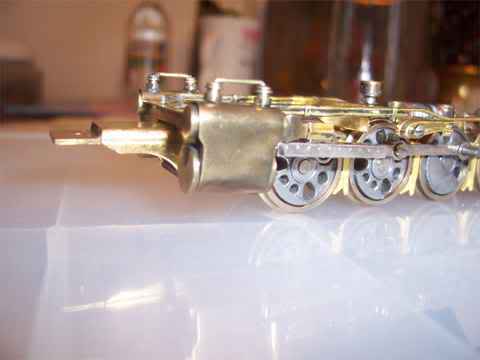
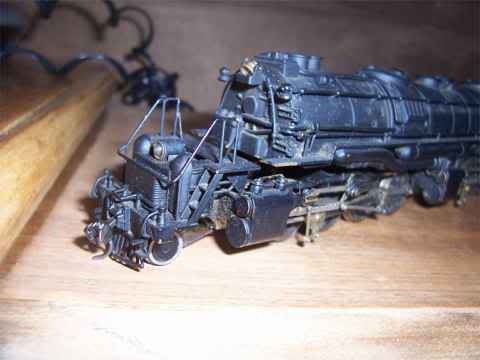
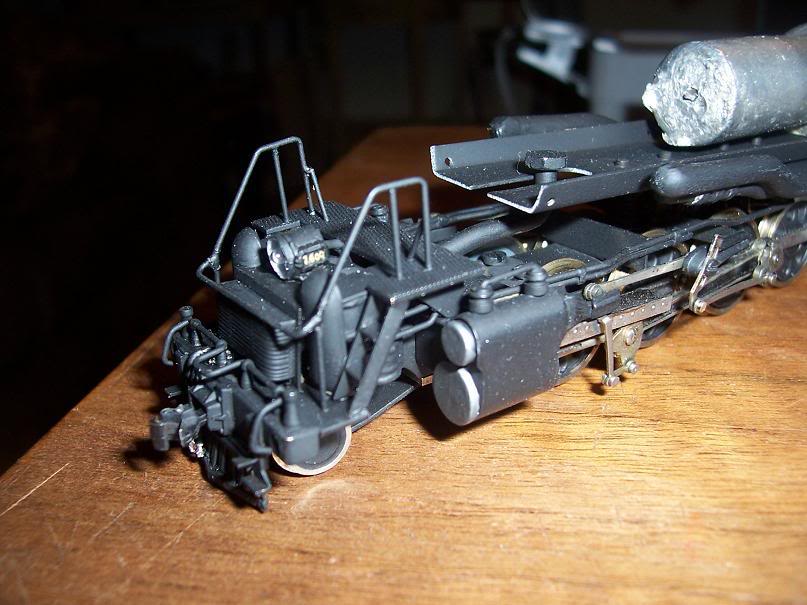
First up, The pilot:
It was stripped of paint, the headlight casting, and then I removed the air glad hands from the pilot and added my own! I will be adding a better detail casting by Cal-Scale for the headlight as well (this is why its missing), as I have to order one for it. Also I had touch soldered the pilots cut lever to there mounts as well.
Next:
The side of the pilot, showing a re-attached deck plate brace, and the handrailing resoldered for strength.
Next:
Other side, showing strengthened handrailing.
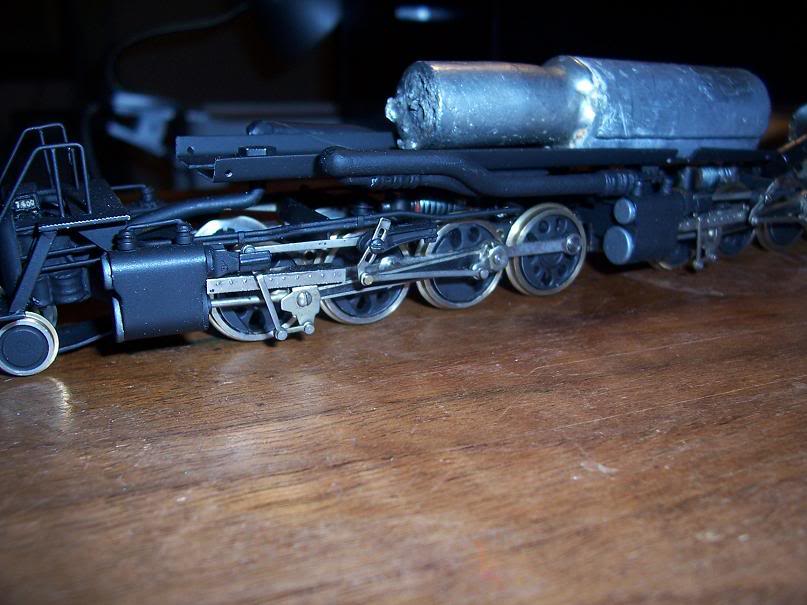
Next:

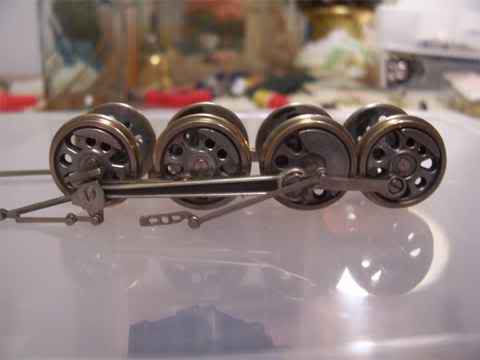
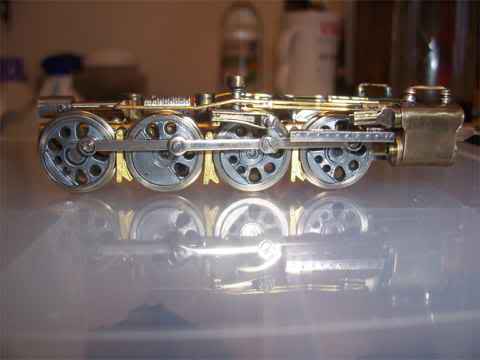
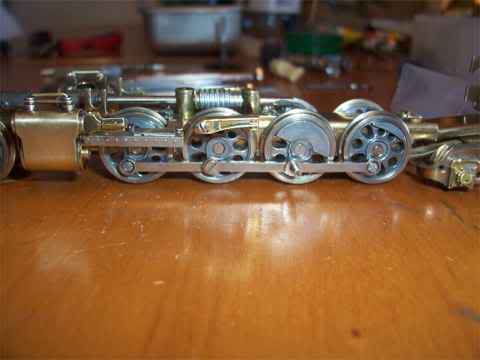
Drivers removed, polished, and then all the rods polished and then re-assembled, (for fear of loosing parts), ready for painting.
Next:
Opposite side, same thing.
Next:
This shows driver treads, reconditioned, turned and then polished at high speed! Looks like brand new!
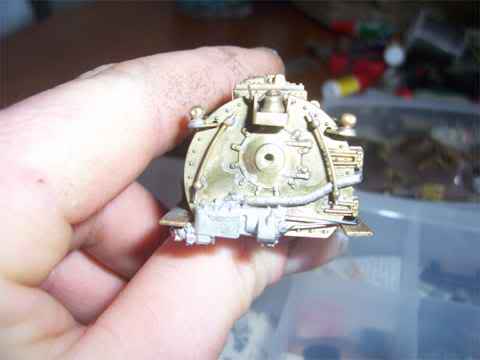
Next:
Rear engine set, to show for comparison to the above units. I still have the engine bed, and piping to strip paint from, and the cylinders as well. With a small amount of detail re-mounting, and possible added of more details, like lubricators, and more pipping, etc.....I'll be sure to get as many pictures as possible while work is being done over the holidays!
ENJOY! 
~John
Many have tried to, and failed, ya just can't repair stupid...
Do NOT try to Idiot-Proof anything!!!! God, will simply create a better......IDIOT!
|
|
Country: USA ~
Posts: 2911 ~
Member Since: March 26 2012 ~
Last Visit: January 14 2014
|
Alert Moderator
|
|
|
|
Posted - April 02 2012 : 04:22:25 AM
|
Well, it was late last night after I made the above post, so, I went to bed. HOWEVER, I'm back at it today! Here's what was in the paint stripper as I was making last nights posting.
Well here's what that turned out like...
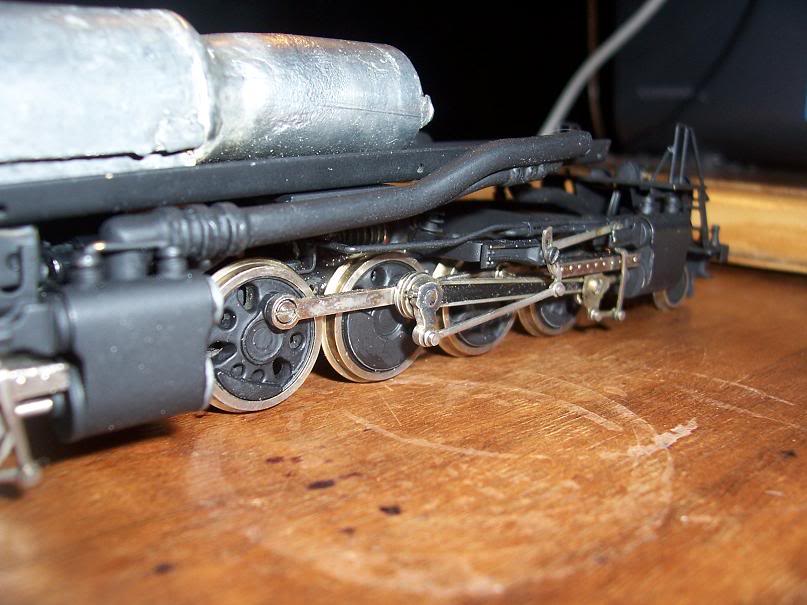
First up:
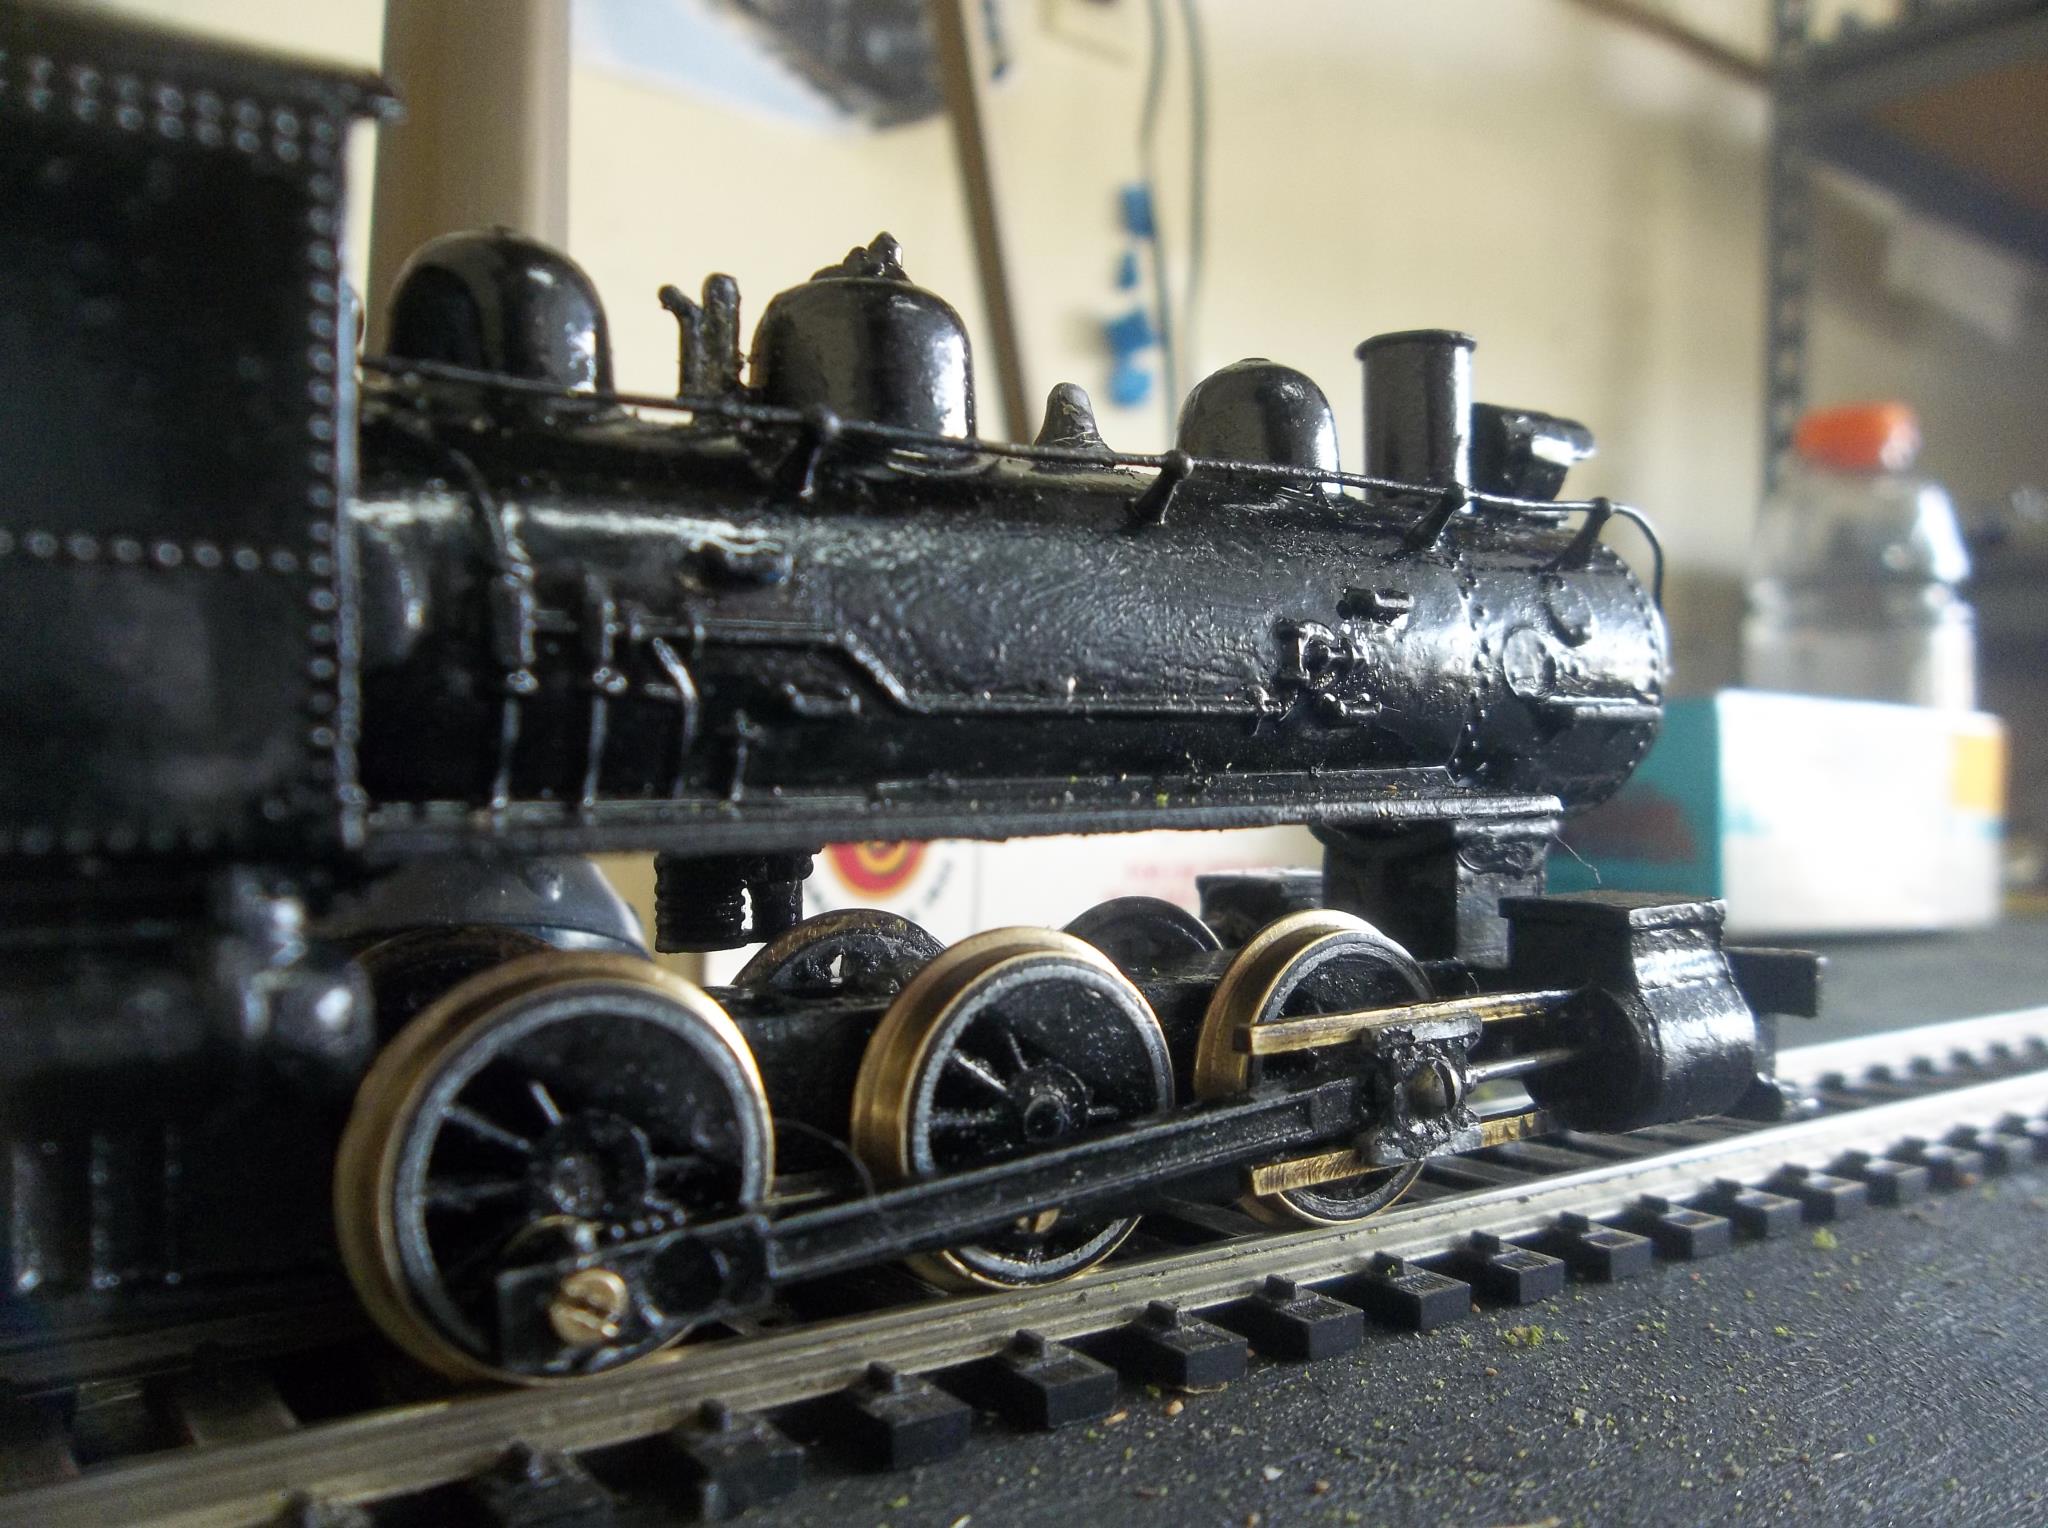
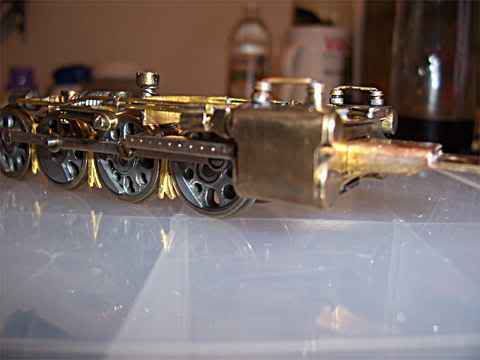
This is showing the paint removed, and its nice and shinny. Plus, I added brass brake castings. These were from Cal-Scale, and looks real nice, as the factory locomotive, never had these so.....I added them! Also, just the side rods are present, the main, and valve gear will be added once this is all painted.
Next:
Showing the cylinders, stripped, and the cylinder cocks were loose so, I re-attached them.
Next:
Opposite side, same thing! Added brake details, and one of the pipes seen here was also loose which was re-attached!
Another picture of the opposite side of the cylinders, which had this sides cylinder coks loose, which yes was re-attached.
Next:

Showing top of engine set, with everything nice and clean and shinny! Compared to the rear set in one of the above pictures, this is a REAL improvement.
Stay tuned, more to come as progress is made!
~John
Many have tried to, and failed, ya just can't repair stupid...
Do NOT try to Idiot-Proof anything!!!! God, will simply create a better......IDIOT!
|
|
Country: USA ~
Posts: 2911 ~
Member Since: March 26 2012 ~
Last Visit: January 14 2014
|
Alert Moderator
|
|
|
|
Posted - April 02 2012 : 04:23:23 AM
|
As promissed, more progress!
First up:
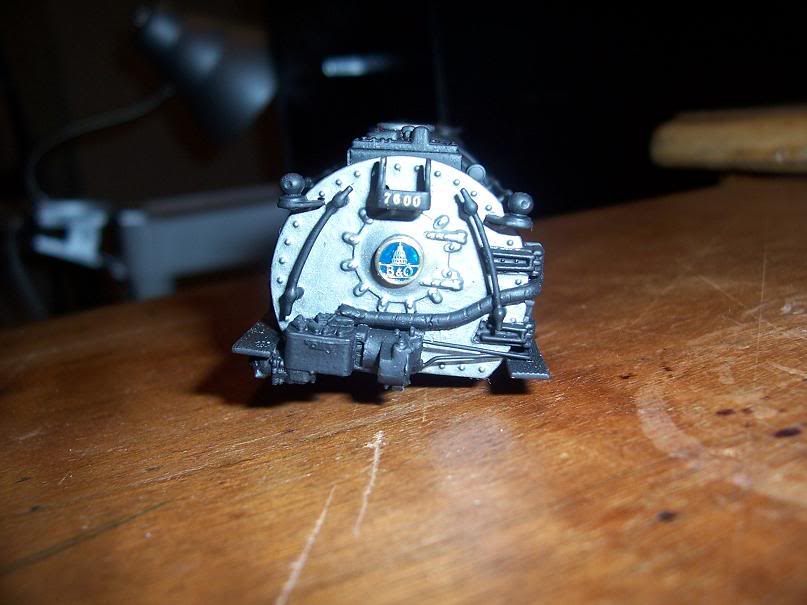
I added "Over Fire Jets" these were added to the EM-1's in later years. And with the brass EM-1, I am modeling it in the last years of the steam era, so, it was well in need of these few small details. My model will be painted for the EM-1 #7600 (as you all should have guessed), so it was one of very few needed details as the factory model was made to look like the EM-1 as delivered from Baldwin.
I have yet to add the small pipping for these and will be adding them shortly.
Next:
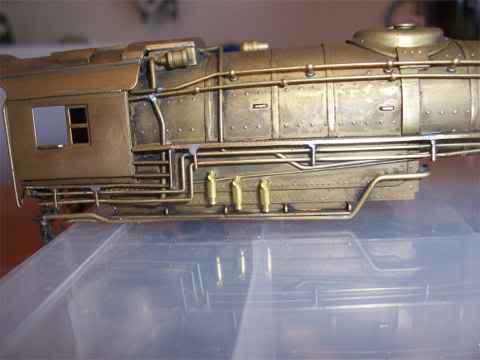
Opposite side, showing the Over Fire Jets. Which as said above, needs the pipping added.
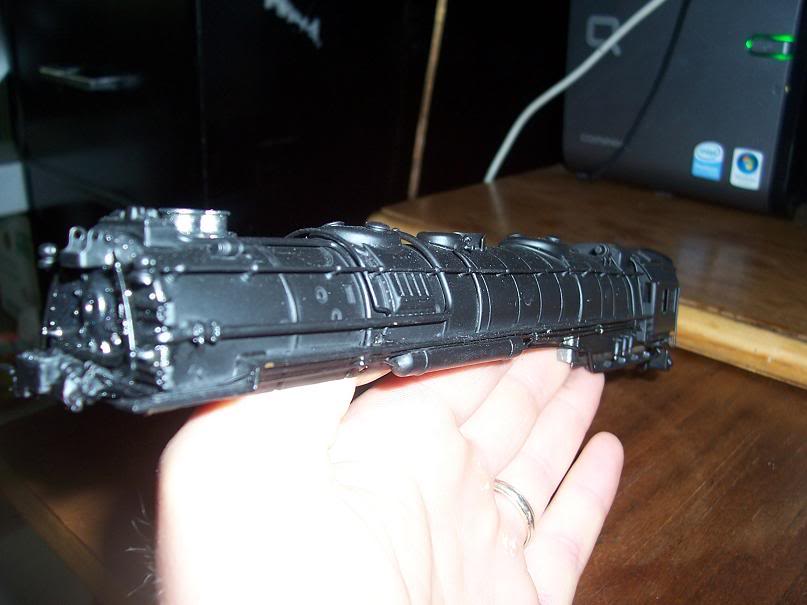
Next:
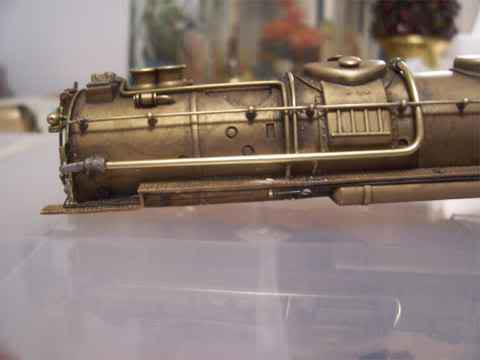
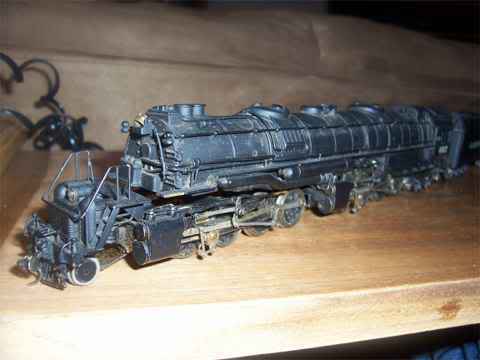
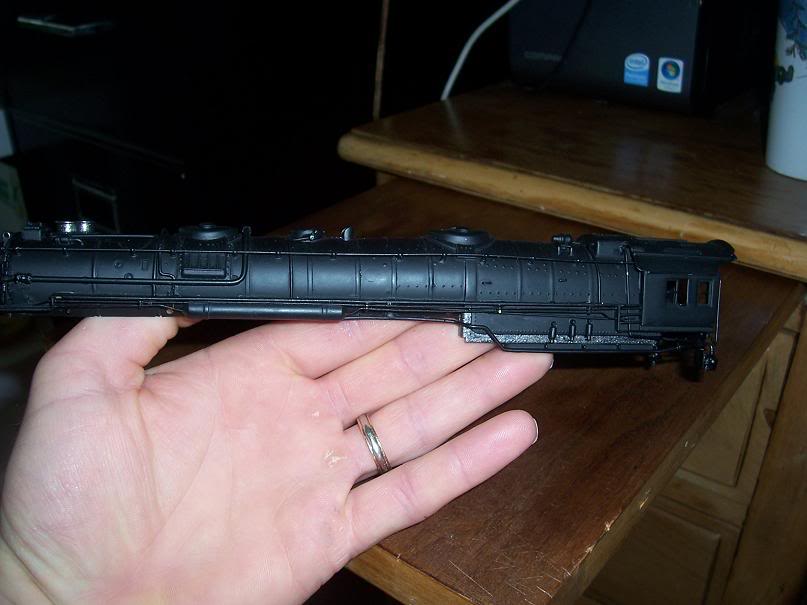
Overall shot of the boiler.
Next:
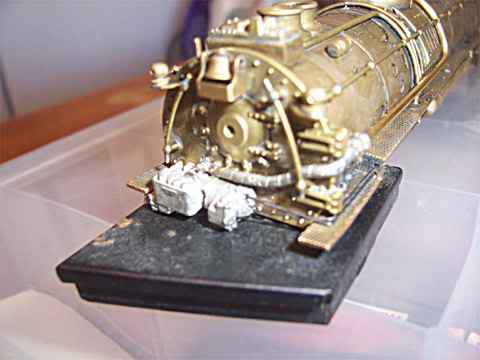
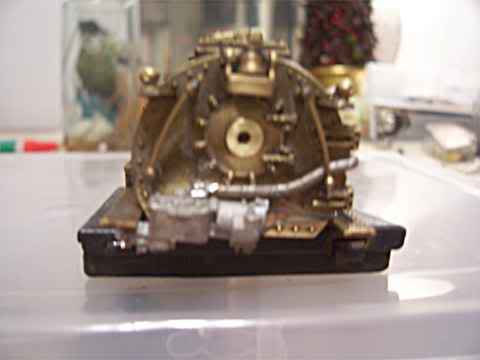
Better view of the boiler front.
Next:
Added Whistle valve, without the whistle, which will be added AFTER painting is done as I want to keep the whistle in shinny brass luster. I have yet to add the whistle pipping, which will be added shortly.
Next:
A head on shot of the boiler front, in better contrast from the first one I posted.
Next:
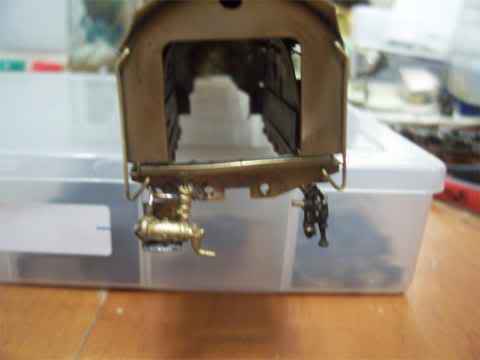
Cab interior with a backhead. This was made to fit my original Yellowstone, that was made from a Rivarossi Big Boy, that was sold on ebay for parts, but all the items (sub-assemblies) were saved to install onto this brass model. I'll have to modifiy this assembly slightly to fit, but will look GREAT when done, PLUS I'll be adding red firebox glow to this just for added detail and realism. As the Butterfly doors do open and close! I will also be adding Enginner, head end Brakeman, and fireman to the cab as if you see, the cab has 3 windows! One for each of the engine crew!
Stay tuned, more to come!
~John
Many have tried to, and failed, ya just can't repair stupid...
Do NOT try to Idiot-Proof anything!!!! God, will simply create a better......IDIOT!
|
|
Country: USA ~
Posts: 2911 ~
Member Since: March 26 2012 ~
Last Visit: January 14 2014
|
Alert Moderator
|
|
|
|
Posted - April 02 2012 : 04:24:54 AM
|
Well, heres some more progress!
Anyway, Here's what it looks like thus far.
First up:
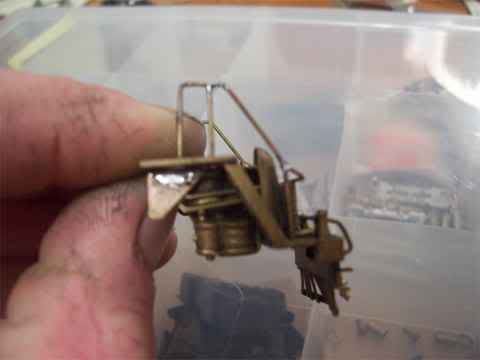
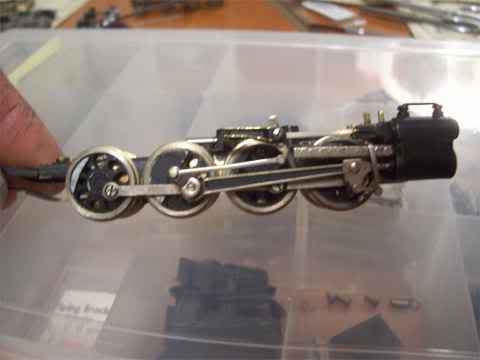
Rear engine set, notice a few details aren't present. I need to add the brakes to this unit as I did the front unit. Unfortunately, I didn't have a second set, to fit. (I thought I had 2 sets, (which I do) just one set is for 64 inch drivers, and the other set probably goes to 57 inch drivers as they're smaller and won't fit the space between the drivers, so that will have to wait till, I get an order in to Boswer for more of those Cal-Scale castings.
Next:
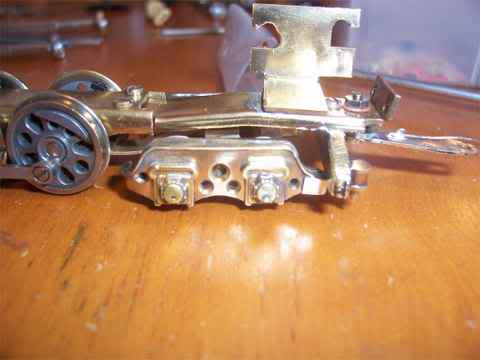
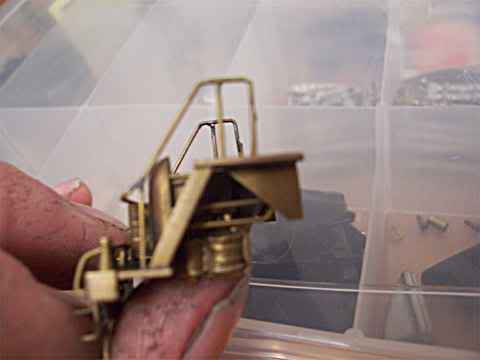
Showing the trailing truck, all stripped of paint, and partially of the rear portion of the rear engine set. And also the motor mount, which I think I may change due to the type motor I'm going to use in this locomotive.
Next:
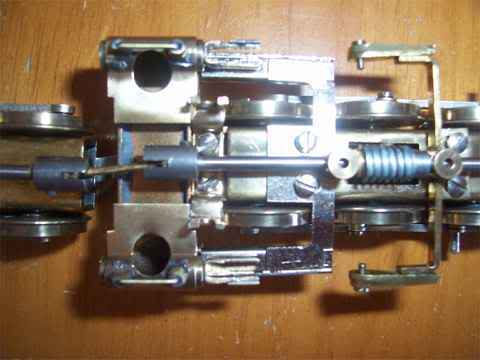
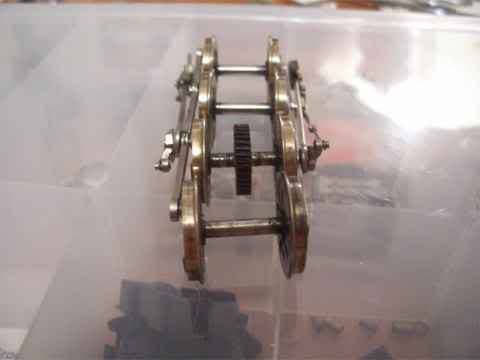
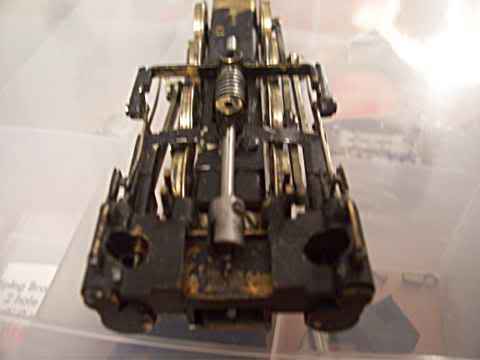
This shows the drive coupling between both engine sets for power to the drivers. I had re-shimmed the worm gear to take any play out of the drive, but not create alot of friction in that area. Which would cause the drive not to spin freely.
Next:
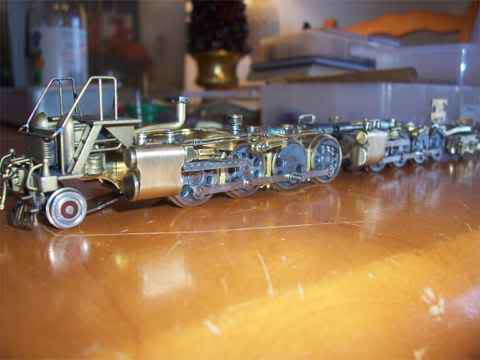
This is shows the 2 units back together and re-attached to each other as they're to be prior to re-assembly to the boiler.
Next:
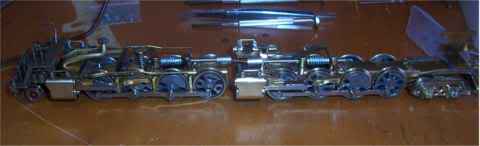
And a greater view of the 2 units back together.
ENJOY! More to come!
~John
Many have tried to, and failed, ya just can't repair stupid...
Do NOT try to Idiot-Proof anything!!!! God, will simply create a better......IDIOT!
Edited by - EM-1 on April 02 2012 04:26:11 AM
|
|
Country: USA ~
Posts: 2911 ~
Member Since: March 26 2012 ~
Last Visit: January 14 2014
|
Alert Moderator
|
|
|
|
Posted - April 02 2012 : 04:29:18 AM
|
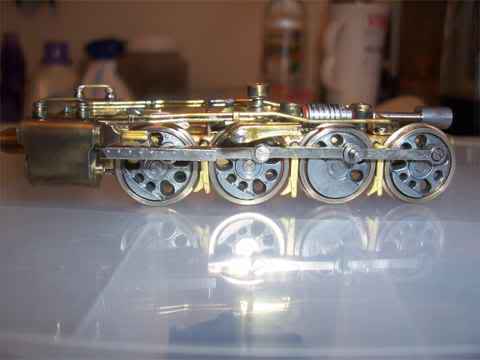
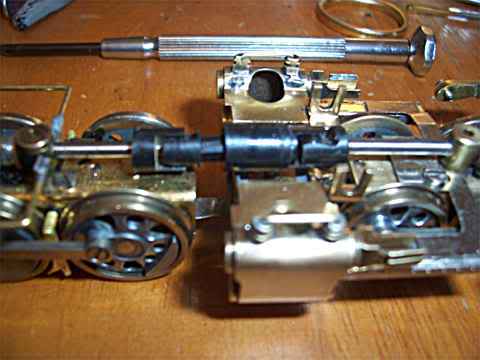
Well, a couple more pictures to add to the collection of those so far. After re-assembly of the engines, I had looked at the drive shaft work and well, it was something of desire, and I changed it to Athearn "Keyed" slide/adjustable shafting, for both the motor and the articulated joint between the engines.
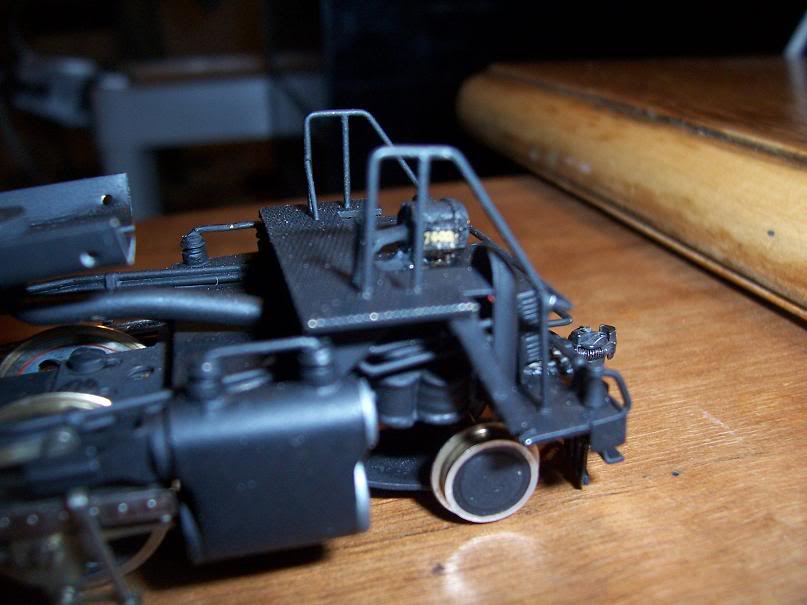
The Motor is a Cannon Precision Flat Can Motor, thats extremely powerfull and works well for the power house in this Articulated. BUT, due to the angle of the shaft in the picture below, it will be mounted on a slight upward angle to take presure off the shaft, connecting the motor shaft with the worm gear shaft for smooth transmission. This is what it all currently looks like:
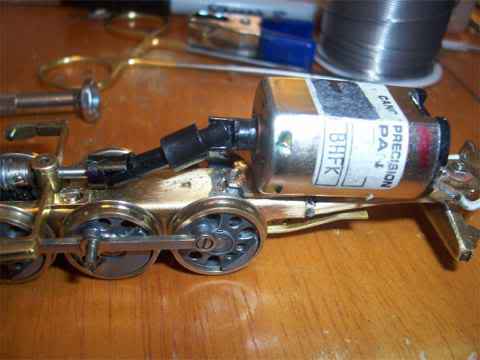
More to come, The tender is now painted and decalled, and the boiler is painted. I need to add decals to the cab and the painting for the most part will be completed.
Sadly, this is all I have of this GORGEOUS locomotive for pictures, it has been completed for now as I want to repower it with something other then the Canon Flat Can, DN-22 as I have another slightly larger flat can with dual shafts to add a flywheel to it!
I haven't got the Dual mode DCC and sound decoder either.....I got this bad girl, before I got the Spectrum version seen pulling my MOW train along with the passenger train runs I done at my local club!
ENJOY!
~John
Many have tried to, and failed, ya just can't repair stupid...
Do NOT try to Idiot-Proof anything!!!! God, will simply create a better......IDIOT!
|
|
Country: USA ~
Posts: 2911 ~
Member Since: March 26 2012 ~
Last Visit: January 14 2014
|
Alert Moderator
|
|
|
|
Posted - April 02 2012 : 11:30:00 AM
|
I remember there is a real one of them in the B&O Railroad museum at Baltimore. I also remember the large sign on the loco saying it was the last articulated loco that the B&O had Baldwin make for them. I lost my photos from that trip, so it is just from memory.
Frank
toptrain
" It's a Heck of a Day " !!!
|
|
Country: USA ~
Posts: 7539 ~
Member Since: August 07 2008 ~
Last Visit: June 21 2026
|
Alert Moderator
|
|
|
|
Posted - April 02 2012 : 12:43:21 PM
|
Yeah, its good to bring back fond memories! I simply wish they would have saved one! (And YES they had the chance too!)
OR more so, was around when they were around!
~John
Many have tried to, and failed, ya just can't repair stupid...
Do NOT try to Idiot-Proof anything!!!! God, will simply create a better......IDIOT!
|
|
Country: USA ~
Posts: 2911 ~
Member Since: March 26 2012 ~
Last Visit: January 14 2014
|
Alert Moderator
|
|
|
|
Posted - April 02 2012 : 1:37:20 PM
|
| nice step by step photos and loco of course,cheers for the insight ken
|
Country:  United Kingdom ~
Posts: 8294 ~
Member Since: September 28 2006 ~
Last Visit: October 20 2021 United Kingdom ~
Posts: 8294 ~
Member Since: September 28 2006 ~
Last Visit: October 20 2021
|
Alert Moderator
|
|
|
|
Posted - April 02 2012 : 6:17:56 PM
|
Ken,
Thanks! I got some more pictures of this one......Some before, you seen the durring, and some afters.....So, here they come!
This is what it looked like when I got it!
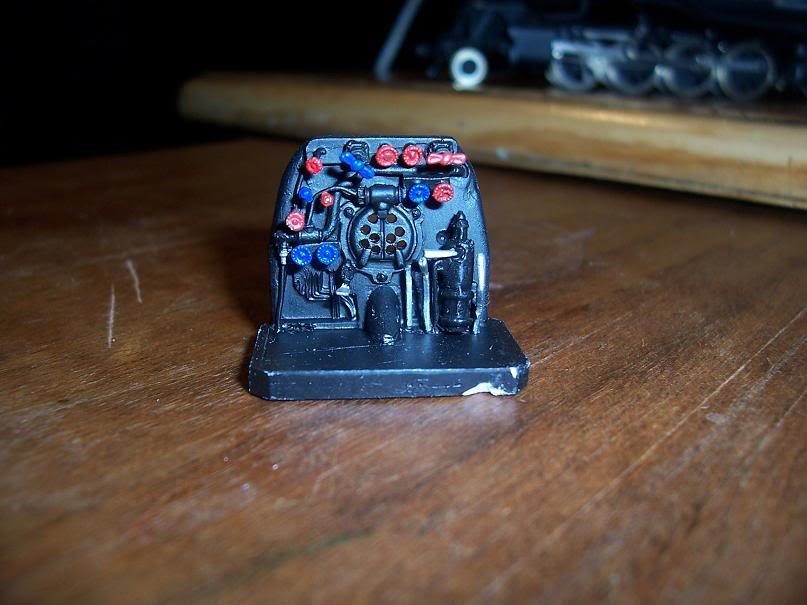
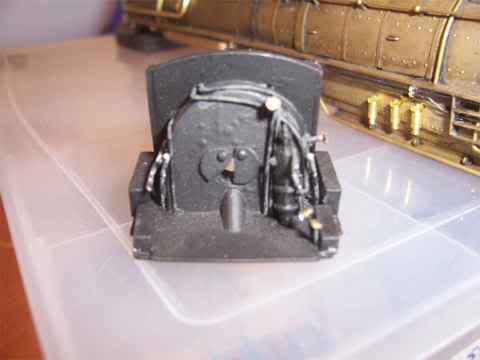
I replaced the original backhead and details with a newly designed one! I think this one looks MUCH better then what I was originally going to do! The design is the same thing, (I actually took the first one all apart, fitted it and then removed it to add all the details seen in these 2 pictures!
Boiler being painted and such is comming up next along wit hthe tender as well!
~John
Many have tried to, and failed, ya just can't repair stupid...
Do NOT try to Idiot-Proof anything!!!! God, will simply create a better......IDIOT!
Edited by - EM-1 on April 02 2012 6:35:56 PM
|
|
Country: USA ~
Posts: 2911 ~
Member Since: March 26 2012 ~
Last Visit: January 14 2014
|
Alert Moderator
|
|
|
|
Posted - April 02 2012 : 6:23:52 PM
|
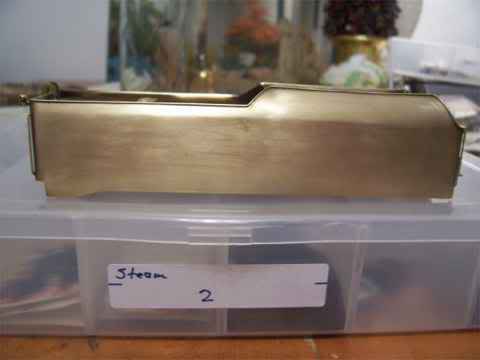
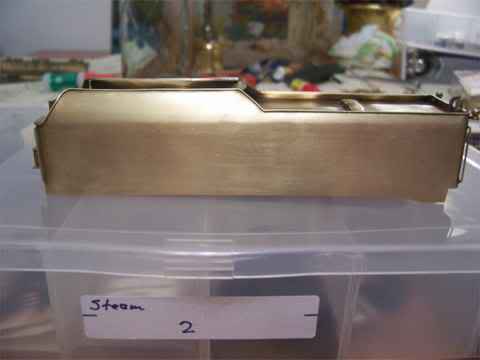
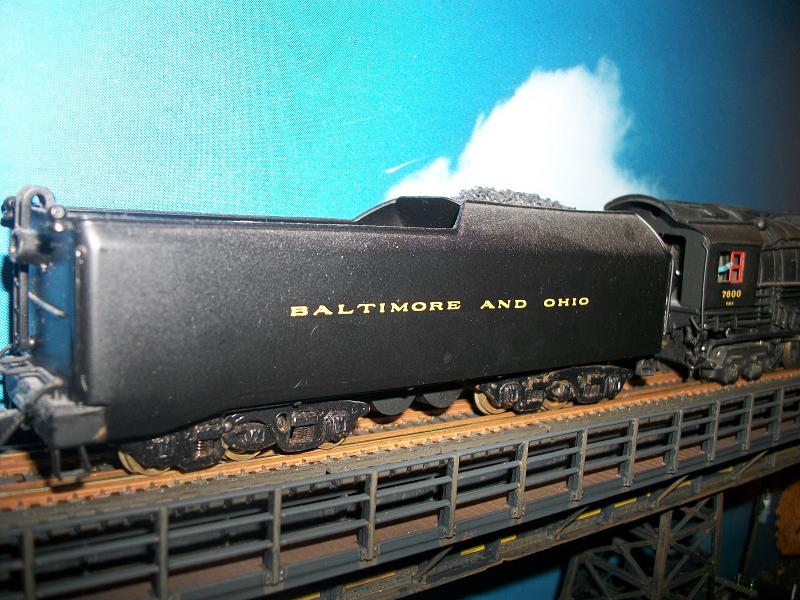
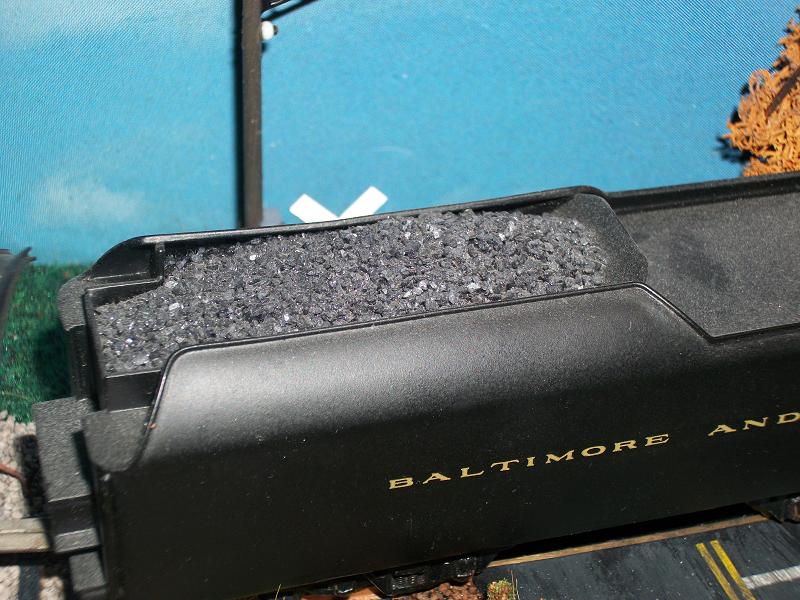
So guys as promissed here comes the painted tender......
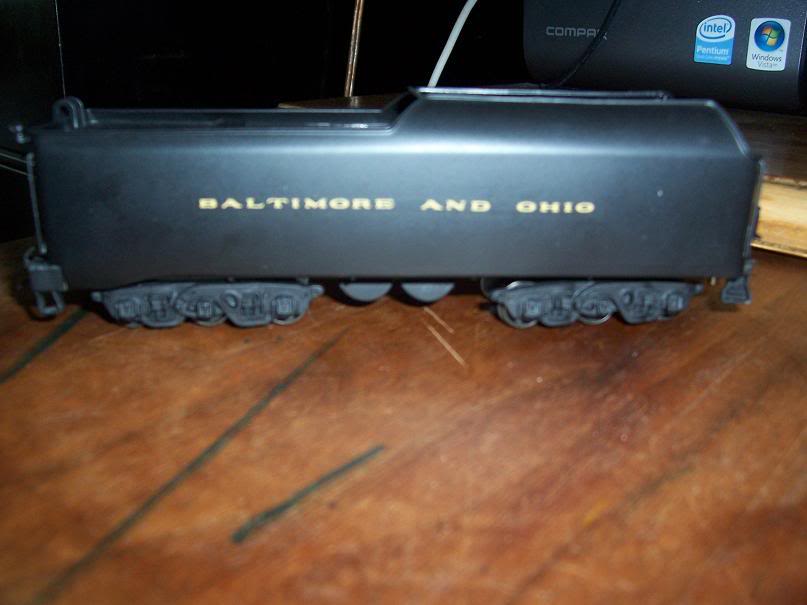

Notice in these pictures, I have not added the coasl to the coal bunker yet, as this current time, the coal bunker is filled! I took these pictures some time ago so........
Again, more to come!
~John
Many have tried to, and failed, ya just can't repair stupid...
Do NOT try to Idiot-Proof anything!!!! God, will simply create a better......IDIOT!
|
|
Country: USA ~
Posts: 2911 ~
Member Since: March 26 2012 ~
Last Visit: January 14 2014
|
Alert Moderator
|
|
|
|
Posted - April 02 2012 : 6:28:05 PM
|
Now we have the finished engine beds and drivers!
These are the frames painted along with the added brak handers that are made for display, running they are removable.....(Just like Rivarossi did!)
This is the frames together, and ready for the boiler to go into place....which is next!
~John
Many have tried to, and failed, ya just can't repair stupid...
Do NOT try to Idiot-Proof anything!!!! God, will simply create a better......IDIOT!
|
|
Country: USA ~
Posts: 2911 ~
Member Since: March 26 2012 ~
Last Visit: January 14 2014
|
Alert Moderator
|
|
|
|
Posted - April 02 2012 : 6:34:16 PM
|
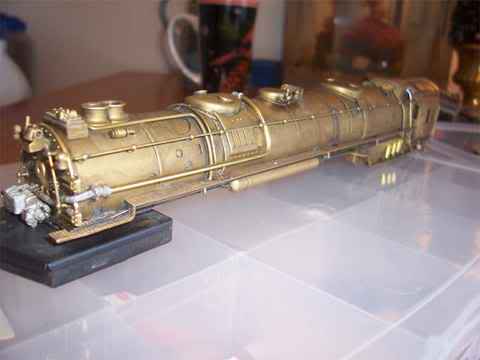
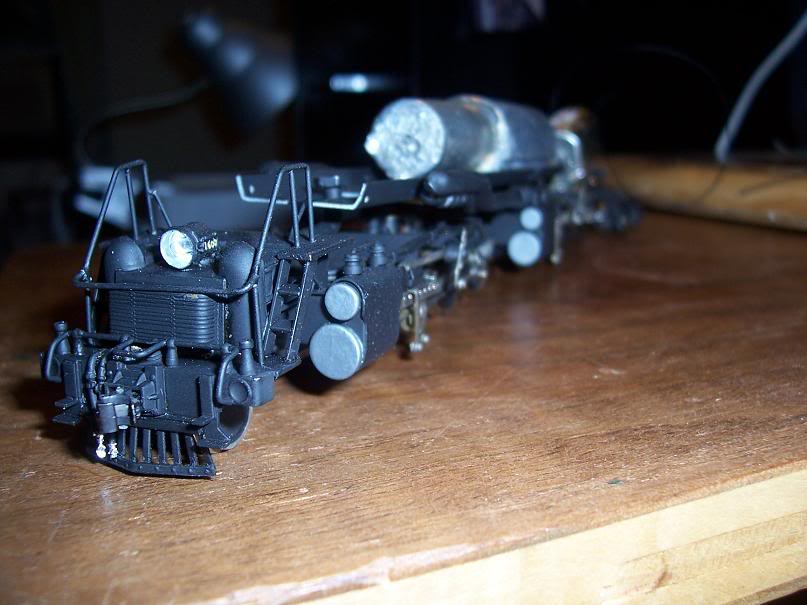
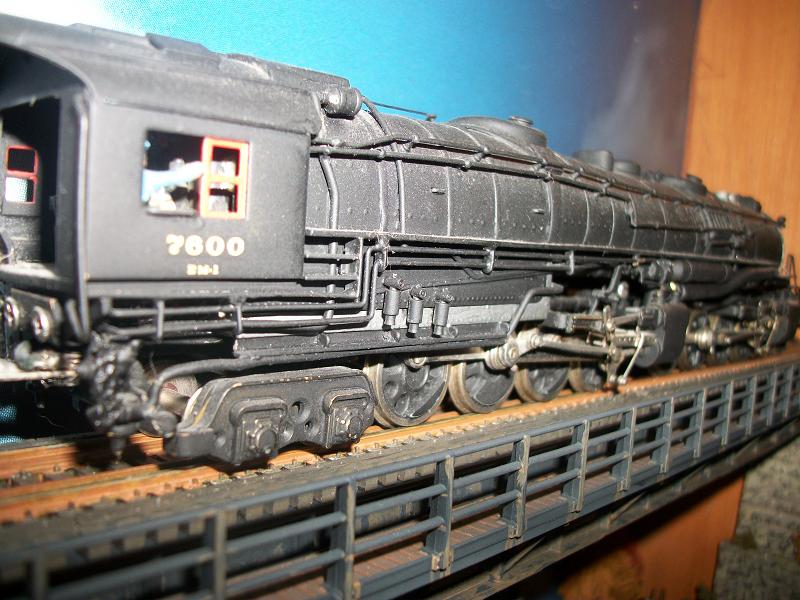
And now.....the business end of this brute! Boiler.....
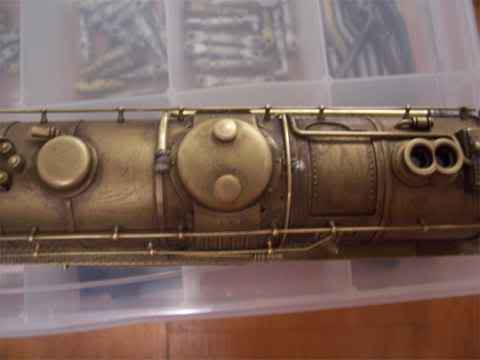
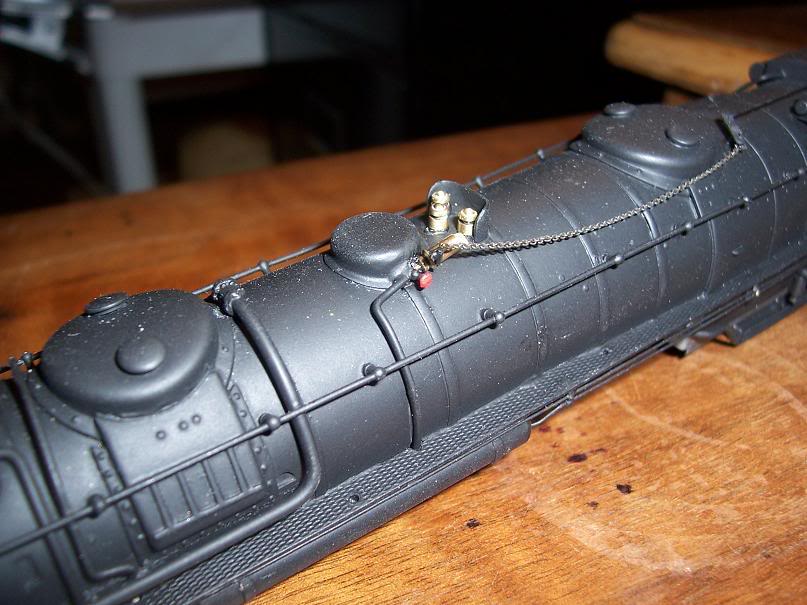
This picture shows the 2 phase graphite paint I use.... This is the first phase/coat as you'll see!

This shows again, the 2 phase graphite paint, as this too, is the first phase/coat of it!
Missing the B&O Capitol Dome casting, which is next!
~John
Many have tried to, and failed, ya just can't repair stupid...
Do NOT try to Idiot-Proof anything!!!! God, will simply create a better......IDIOT!
Edited by - EM-1 on April 02 2012 6:45:51 PM
|
|
Country: USA ~
Posts: 2911 ~
Member Since: March 26 2012 ~
Last Visit: January 14 2014
|
Alert Moderator
|
|
|
|
Posted - April 02 2012 : 6:56:21 PM
|
Sorry guys, I couldn't help myself for the long posting but thought all would enjoy seeing it!
And last but not least......Some "extra" pictures of this whole thing! Sorry guys, I couldn't help myself, I thought all would enjoy seeing it all as it was done!
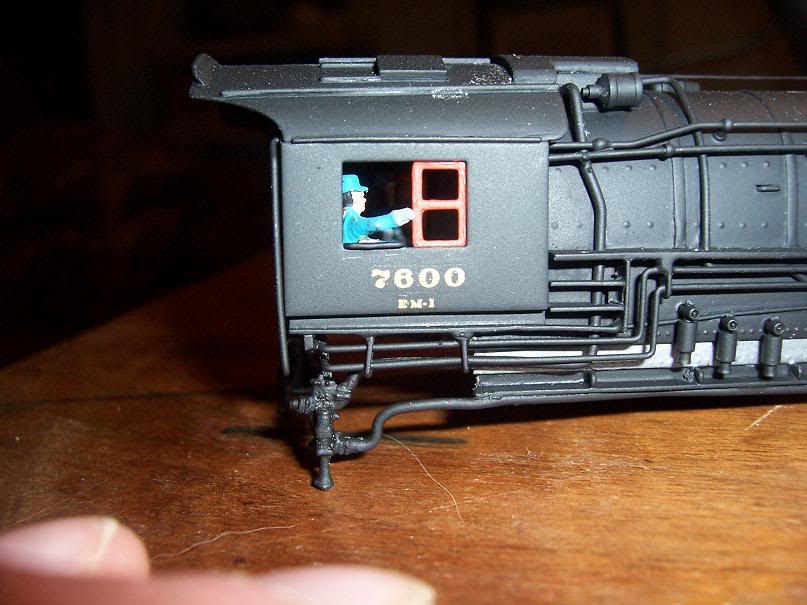
Waving Engineer anyone? SURE!
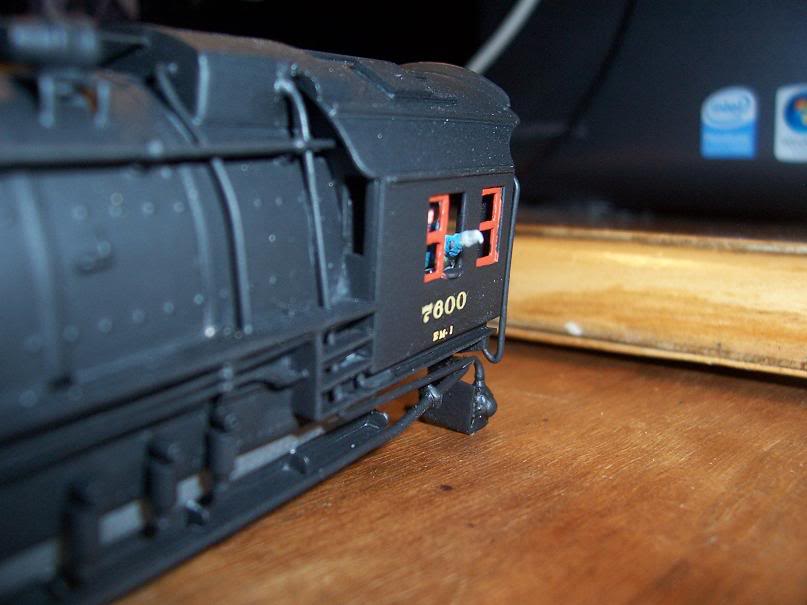
Waving Headend Brakeman? SURE!
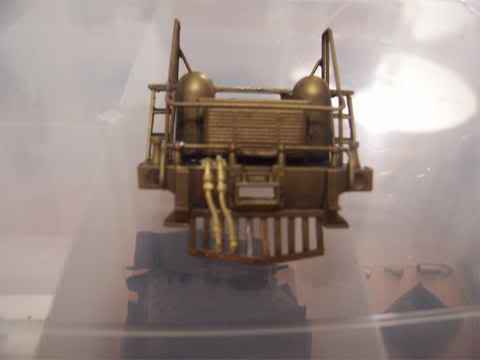
Pilot?
ENJOY!
~John
Many have tried to, and failed, ya just can't repair stupid...
Do NOT try to Idiot-Proof anything!!!! God, will simply create a better......IDIOT!
|
|
Country: USA ~
Posts: 2911 ~
Member Since: March 26 2012 ~
Last Visit: January 14 2014
|
Alert Moderator
|
|
|
|
Posted - April 02 2012 : 11:20:46 PM
|
That's a powerful lot of work there, and your new backhead is incredible. How do those universals run at that angle? Is there any noise?
The Tyco Depot
|
|
Country: USA ~
Posts: 3927 ~
Member Since: June 20 2007 ~
Last Visit: November 19 2015
|
Alert Moderator
|
|
|
|
Posted - April 03 2012 : 5:18:07 PM
|
quote:That's a powerful lot of work there, and your new backhead is incredible. How do those universals run at that angle? Is there any noise?
Originally posted by NickelPlate759 - April 02 2012 : 11:20:46 PM
|
Nelson,
Yes it is a lot of work BUT you seen the what it looked like when I got it and what it looks like now. (I have it completed, I just haven't gotten around to getting "finished" pictures of it all together! 
As for the shaft work, Nope its silent! And the Canon DN-22 runs well, (thats how I found out just how powerfull those motors were!) BUT, I got a better one and going to try it in the unit, an Igarshi (I think thats spelt right).......
As for the backhead, absolutely! I thought it looked much better the second time around as I said the first one was made to fit a Rivarossi Big Boy, I had as a kid.....I sold the Big Boy some time ago, to get the cash to by the Brass B&O EM-1 "Yellowstone" pictured here!
~John
Many have tried to, and failed, ya just can't repair stupid...
Do NOT try to Idiot-Proof anything!!!! God, will simply create a better......IDIOT!
|
|
Country: USA ~
Posts: 2911 ~
Member Since: March 26 2012 ~
Last Visit: January 14 2014
|
Alert Moderator
|
|
|
|
Posted - October 02 2012 : 12:17:40 AM
|
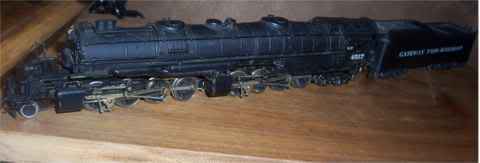
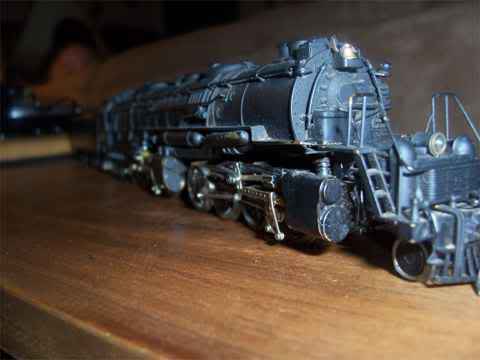
Well, I'm gonna bring this posting up to the newest members and post a few "finished" pictures of this Brass Akane 1965 Model B&O EM-1, 2-8-8-4, Yellowstone, I painted to be #7600 at the time of her retirement and was running Excursions for the B&O!
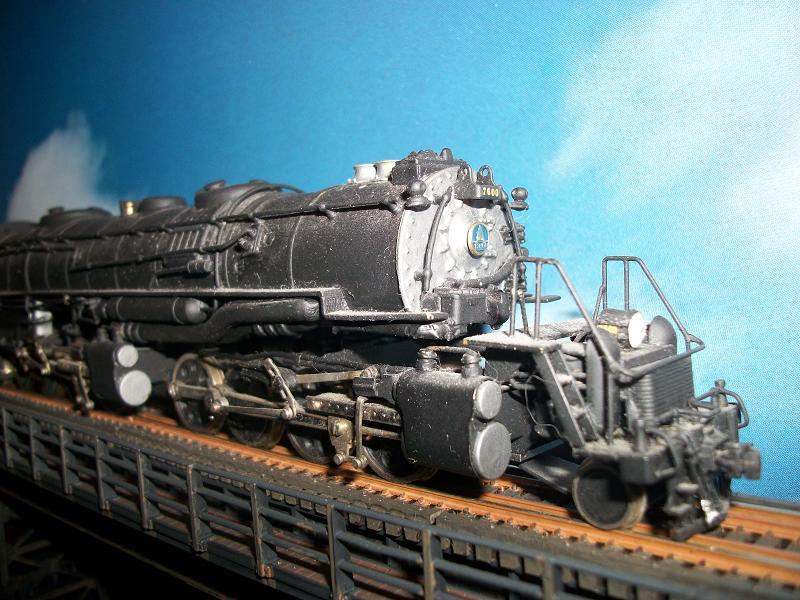
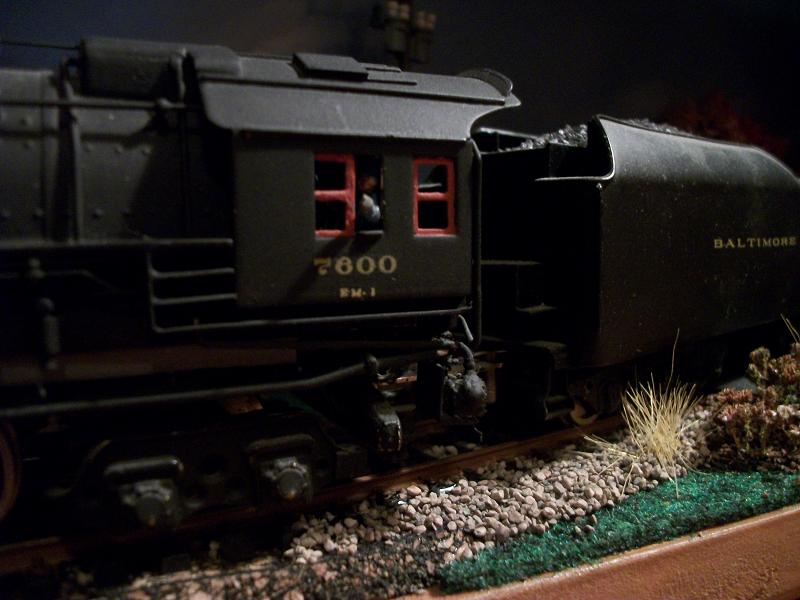
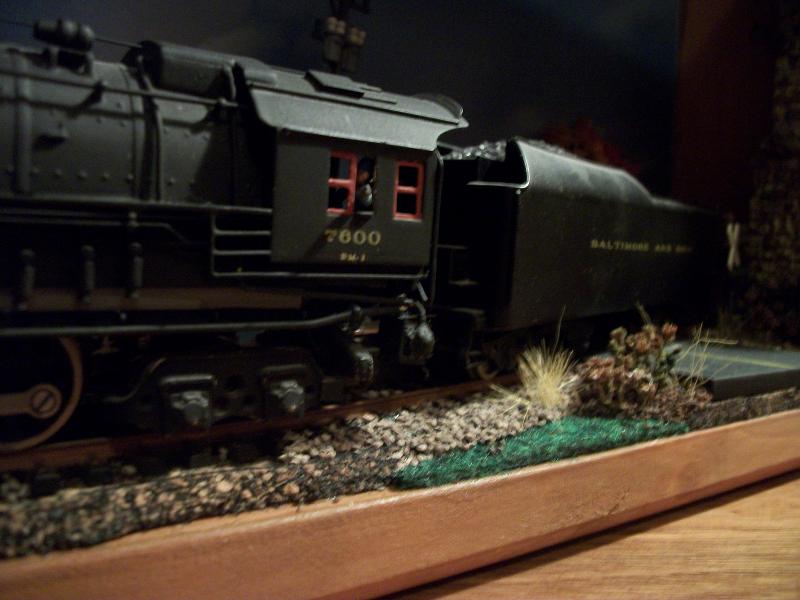

ENJOY the new pictures of the Brass EM-1 and the newest display case made to hold it..........
~John
Many have tried to, and failed, ya just can't repair stupid...
Do NOT try to Idiot-Proof anything!!!! God, will simply create a better......IDIOT!
Edited by - EM-1 on October 02 2012 12:47:46 AM
|
|
Country: USA ~
Posts: 2911 ~
Member Since: March 26 2012 ~
Last Visit: January 14 2014
|
Alert Moderator
|
|
|
|
Posted - October 02 2012 : 8:43:49 PM
|
Beautiful EM-1 there John! I'm glad Bachmann made one, now we need one in N scale from Bachmann! One was made in brass in N, just rare and pricey!
" Heck with counting 'em rivets, TRAINS ARE FOR FUN! Not called the Mad Scientist for nothing either!"
|
|
Country: USA ~
Posts: 3147 ~
Member Since: May 07 2007 ~
Last Visit: June 01 2026
|
Alert Moderator
|
|
|
|
Posted - October 02 2012 : 9:25:17 PM
|
John,
Very nice work and attention to detail. Impressive.
Alco Fan
|
|
Country: USA ~
Posts: 2496 ~
Member Since: August 03 2006 ~
Last Visit: September 17 2024
|
Alert Moderator
|
|
|
|
Posted - October 02 2012 : 10:17:39 PM
|
shouldn't it be running and not on display??
But fabulous work!!
I buy, repair, and collect
http://scvr.weebly.com/
http://seyboldlocomotiveworks.weebly.com/
http://www.youtube.com/user/TheDeputation?feature=watch
Hyde.
|
|
Country: USA ~
Posts: 1352 ~
Member Since: January 15 2012 ~
Last Visit: July 25 2021
|
Alert Moderator
|
|
|
|
Posted - October 02 2012 : 10:31:01 PM
|
quote:Beautiful EM-1 there John! I'm glad Bachmann made one, now we need one in N scale from Bachmann! One was made in brass in N, just rare and pricey!
Originally posted by Redneck Justin - October 02 2012 : 8:43:49 PM
|
I'D LOVE to see Spectrum come out with one in N scale to go with the HO Big Brother!
Brass, well this was my first brass steamer. Now I own 4 or 5 of them, NOT EM-1's but different brass steamers.....Not gonna go there in N scale! Specially in brass, but I'd get one on N scale if Bachmann made one!
~John
Many have tried to, and failed, ya just can't repair stupid...
Do NOT try to Idiot-Proof anything!!!! God, will simply create a better......IDIOT!
|
|
Country: USA ~
Posts: 2911 ~
Member Since: March 26 2012 ~
Last Visit: January 14 2014
|
Alert Moderator
|
|
|
|
Posted - October 02 2012 : 10:32:28 PM
|
quote:John,
Very nice work and attention to detail. Impressive.
Originally posted by Alco Fan - October 02 2012 : 9:25:17 PM
|
Thanks Alco Fan!
I enjoyed the work done to that monster.....It does pull well, but I don't run it offen just because its brass, and I want to add in the same controls as Bachmann's, DCC and sound from the Spectrum EM-1 that way, I can "MU" the 2 of them!
~John
Many have tried to, and failed, ya just can't repair stupid...
Do NOT try to Idiot-Proof anything!!!! God, will simply create a better......IDIOT!
|
|
Country: USA ~
Posts: 2911 ~
Member Since: March 26 2012 ~
Last Visit: January 14 2014
|
Alert Moderator
|
|
|
|
Posted - October 02 2012 : 10:37:45 PM
|
quote:shouldn't it be running and not on display??
But fabulous work!!
Originally posted by SCVR66 - October 02 2012 : 10:17:39 PM
|
Well yes, I'd much rather run it. its on display for a reason tho. one you'll soon understand.....
On my layout, I'm going to have a 9 stall roundhouse, with stalls on 1/3 of it big enough to hold and close the doors behind the tender or pilot..... HOWEVER, the section is still under construction, which to run this loco is one thing, to leave it in the stall its going to be in when not run, is another thing. I have 3 cats......Catzilla One, Catzilla Two, and Catzilla Three, EACH ONE loves to lay and needless to say other things on my layout......NOT do the nasty, but walk around and knock things over............. That brass EM-1 is thee LAST thing I EVER want to see laying on my concrete basement floor! Falling the excess of 40 inches from the layout edge to the floor.... SO, you see, I'd much rather see it in a display case!
I have yet to finish the layout enough to put an edge "block" around to keep things from falling off it. so ALL my engines have a display case to be stored in.......
~John
Many have tried to, and failed, ya just can't repair stupid...
Do NOT try to Idiot-Proof anything!!!! God, will simply create a better......IDIOT!
|
|
Country: USA ~
Posts: 2911 ~
Member Since: March 26 2012 ~
Last Visit: January 14 2014
|
Alert Moderator
|
|
|
|
Posted - October 04 2012 : 6:12:30 PM
|
Dont be afraid to run that big beast, older brass like the Akane's, PFM/United, Tenshodo, Gem, LMB ect were built to run, as that was the MTH/Proto 2K of its day. Brass was just the easiest and best medium to build the models affordably back then. This was before brass became the collectable it is today, was just a high end model train back then, like the diecast DCC/Sound equipted steamers from MTH, Proto 2k ect today. We had several older brass models at the local club, and we ran the daylights out of them, just keep the side rods and bearings oil. I find that models that sit to much, get oxidation in the axle bearings and contact surfaces, then when you do want to run them, they dont run as well. Where as one that sees regular service, run well all the time. P.S. Awsome rework on that old girl!!!! Mike
Still NT's, I have Aspergers.
|
|
Country: USA ~
Posts: 308 ~
Member Since: November 17 2008 ~
Last Visit: June 05 2023
|
Alert Moderator
|
|
|
|
Posted - October 04 2012 : 9:36:02 PM
|
Thanks Mike!
That ole girl made a trip from over seas from a good friend of mine that found it, mis-listed on ebay some years ago... Long story, I got it for $100 cash!
However that thing will pull yer house.... its heavy, and its a smooth runner to say the least.
I don't run it often as its hard on 20 to 22 inch radius track! Remember, that rear set of engines is just like the real thing, its rigidly mounted to the boiler and doesn't articulate like the newer plastic models do! PLUS, its not got sound, this is why I don't run it nearly as often as I do the Spectrum unit......
A detailed statement on its paint job:
This locomotive, the B&O's #7600 was all dulled up for its last and final years for the B&O starting in 1956. It was used to pull the last Excursion trains for the end of steam era on the B&O, which was a consist of a gondola right behind the tender, 6 to 8 passenger cars, in B&O passenger livery, and then followed by another gondola, followed by a caboose. BECAUSE of this train, the locomotive was deemed "Passenger service" by the B&O and was repainted (back then ALL the EM-1's were numbered in the 650 to 680. The #7600 was #650, and re-instated its original number for the occasion, and given a graphite boiler front, and lower firebox sheething. As ALL of the B&O's passenger steamers were......I have this train set painted to go for the excursion to replica it....In regards to all the EM-1's all were plain black, no other color was used till the passenger service EM-1 #7600 was created and ran till 1960!
~John
Many have tried to, and failed, ya just can't repair stupid...
Do NOT try to Idiot-Proof anything!!!! God, will simply create a better......IDIOT!
|
|
Country: USA ~
Posts: 2911 ~
Member Since: March 26 2012 ~
Last Visit: January 14 2014
|
Alert Moderator
|
|
|
|
|
|