|
|
 Posted - April 02 2012 : 04:00:37 AM Posted - April 02 2012 : 04:00:37 AM


|
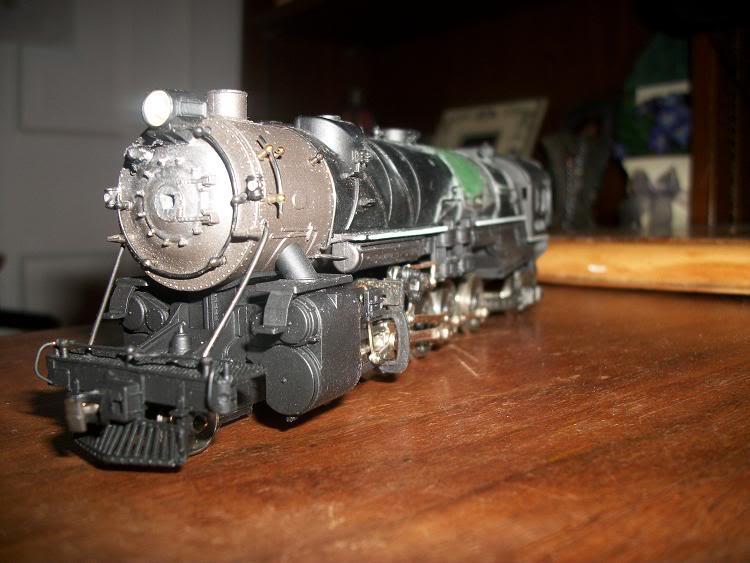
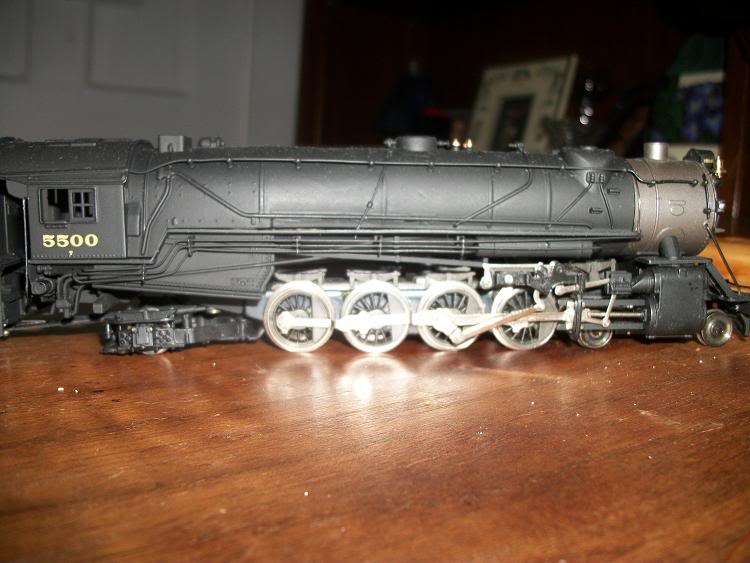
This is a locomotive, I've been pondering to custom build, for a long time! It took some serious "getting over" hacking up a Rivarossi 2-10-2, plus, make it heavier, and run well...... So, Its all done now! 
With that said, the locomotive is now complete, and there will be "completed" pictures comming at the end of this tread of the finished model!
Built just like the B&O did there's! Mine was done the exact same way, in scale! As you'll see below:

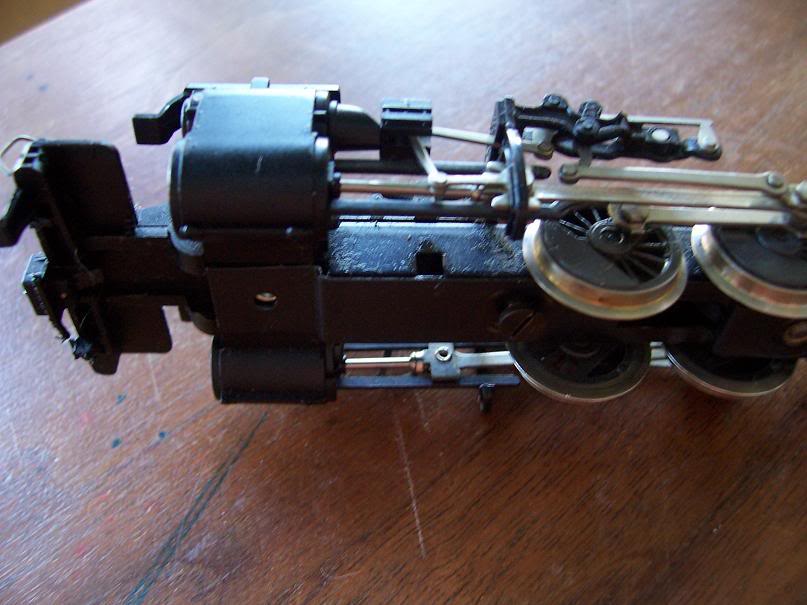
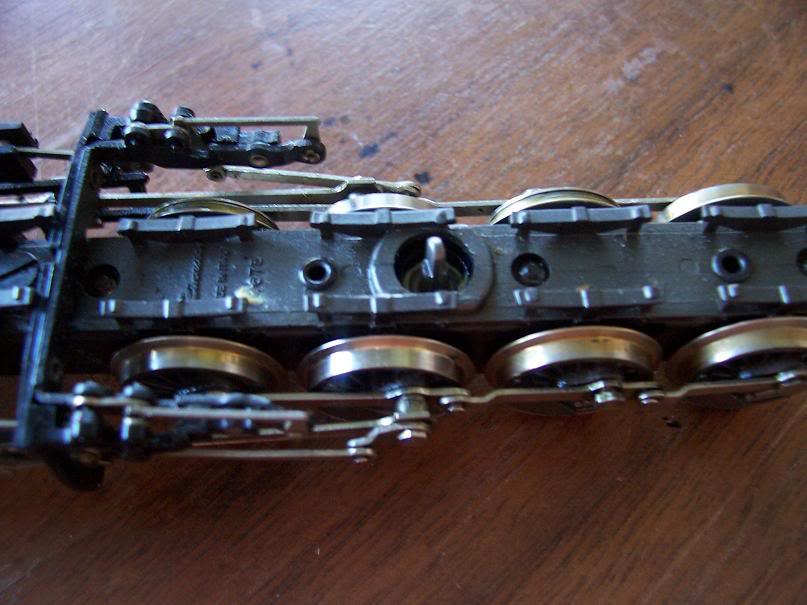
And the following are of the frame, BEFORE any milling took place!
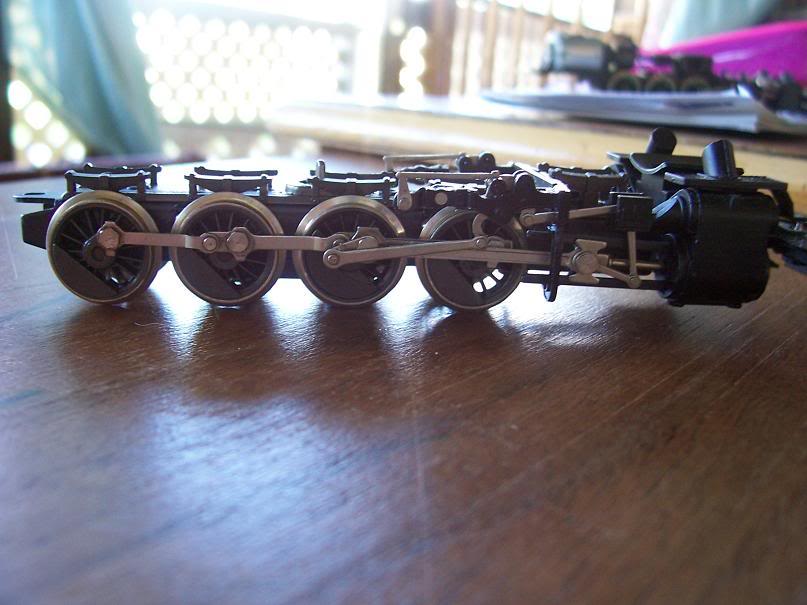
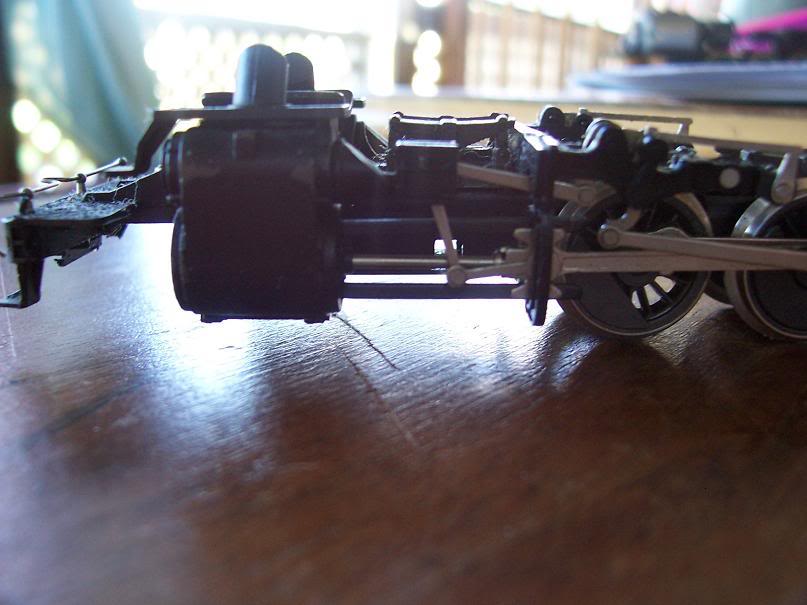
ENJOY! 
~John
Many have tried to, and failed, ya just can't repair stupid...
Do NOT try to Idiot-Proof anything!!!! God, will simply create a better......IDIOT!
Edited by - EM-1 on April 03 2012 4:46:09 PM
|
Country:  USA ~
Posts: 2911 ~
Member Since: March 26 2012 ~
Last Visit: January 14 2014 USA ~
Posts: 2911 ~
Member Since: March 26 2012 ~
Last Visit: January 14 2014
|
 Alert Moderator
|
|
|
|
Posted - April 02 2012 : 04:01:56 AM
|
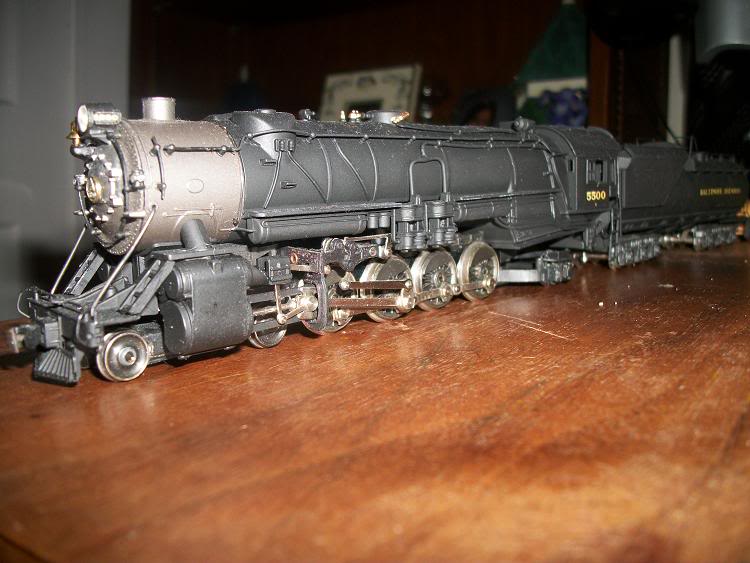
And now (as promissed) pictures of the finished model!
With the recent choice of Yellowstone Train Repairs casting just about EVERYTHING to make these locomotive possible it has taken time to get to finishing even one of my own as well as customers, but the next few pictures, will show whats being done and what the end result is!
First up, a 3/4 view of the model:
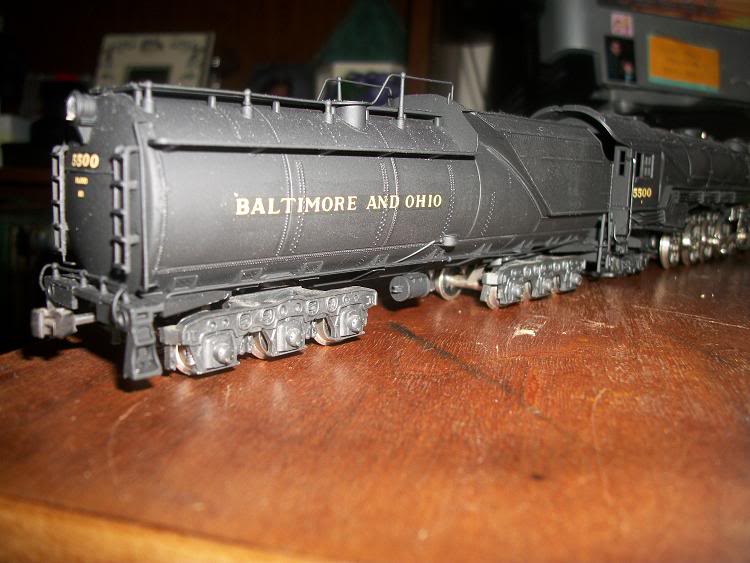
A shot of the tender:

This next one shows a picture of whats been done to the cab......(I've casted this detail for all those B&O modelers out there!)
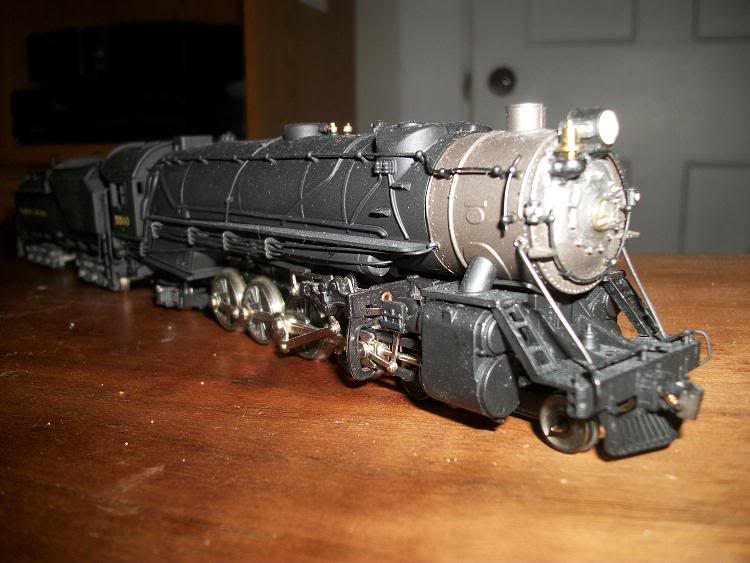
Opposite side of the 3/4 view:
Opposite side of the tender:
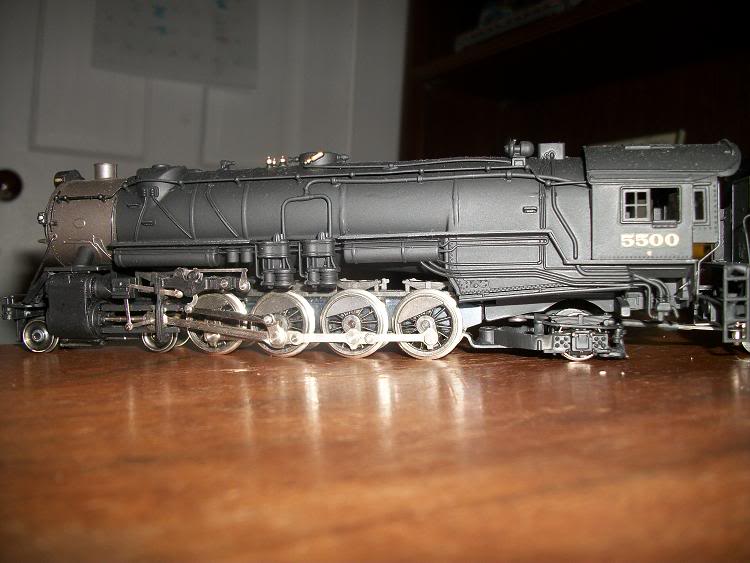
And for the last one, the opposite side of the full side view of the locomotive showing the cab detail, just the other side:
Alot of AWESOME details went into this one, and the nice thing for anyone interested, is it ALL can be replicated for production!
~John
Many have tried to, and failed, ya just can't repair stupid...
Do NOT try to Idiot-Proof anything!!!! God, will simply create a better......IDIOT!
|
|
Country: USA ~
Posts: 2911 ~
Member Since: March 26 2012 ~
Last Visit: January 14 2014
|
Alert Moderator

|
|
|
|
Posted - April 02 2012 : 11:35:12 AM
|
| It looks great!
|
Country:  Canada ~
Posts: 3448 ~
Member Since: September 22 2006 ~
Last Visit: April 03 2026 Canada ~
Posts: 3448 ~
Member Since: September 22 2006 ~
Last Visit: April 03 2026
|
Alert Moderator
|
|
|
|
Posted - April 02 2012 : 12:40:24 PM
|
Thanks! I wanted a B&O "Mountain" and the only way to get them is either, brass.......$$$$$ OR buildone myself, so I took the regualr approach, my own.
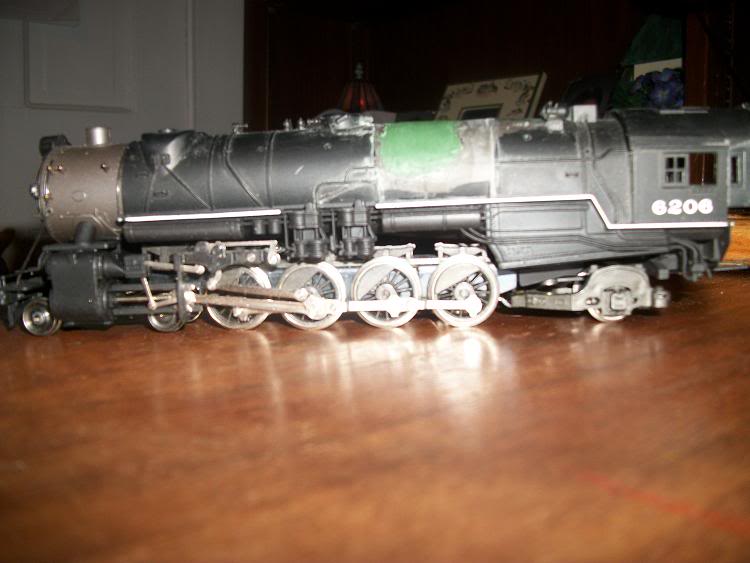
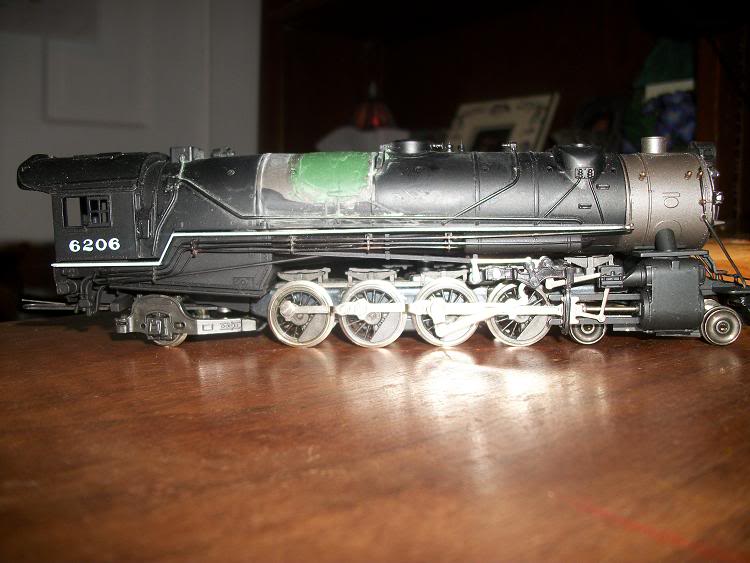
This model, however is a replica exception for the drivers! The B&O's real one had larger diameter drivers. BUT they took 2 wrecked 2-10-2's, and built them into 4-8-2's......Which is actually how I did it! (Only my 2-10-2, wasn't wrecked!)
~John
Many have tried to, and failed, ya just can't repair stupid...
Do NOT try to Idiot-Proof anything!!!! God, will simply create a better......IDIOT!
|
|
Country: USA ~
Posts: 2911 ~
Member Since: March 26 2012 ~
Last Visit: January 14 2014
|
Alert Moderator
|
|
|
|
Posted - April 02 2012 : 12:53:17 PM
|
I'm sure you got a lot more satisfaction and pride out of doing it yourself  It's neat how you even modeled the production and not just the finished product It's neat how you even modeled the production and not just the finished product
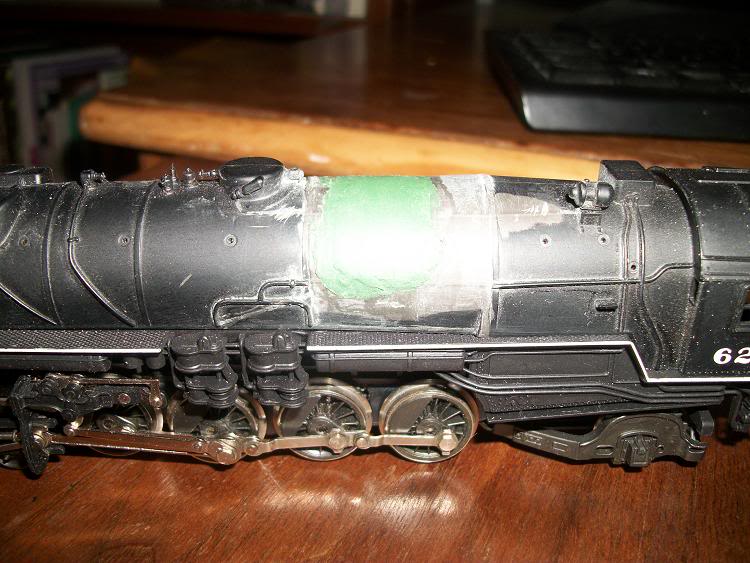
What did you do to the green section of the boiler? Is that all model putty? I'm curious about how you were able to shape that.
|
|
Country: Canada ~
Posts: 3448 ~
Member Since: September 22 2006 ~
Last Visit: April 03 2026
|
Alert Moderator
|
|
|
|
Posted - April 02 2012 : 5:58:58 PM
|
quote:I'm sure you got a lot more satisfaction and pride out of doing it yourself It's neat how you even modeled the production and not just the finished product
What did you do to the green section of the boiler? Is that all model putty? I'm curious about how you were able to shape that.
Originally posted by DaCheez - April 02 2012 : 12:53:17 PM
|
Well as you know the place that green putty is, was on the orignal boiler a set of sand domes, as per the Rivarossi 2-10-2. I cut them out, and filed the area edges to be somewhat straight, and then from the inside, took .015 thick styrene sheet, cut it to fit, and glued it in place with Ambroid plastic weld "Proweld", and let it dry, and be secure, as this glue also softens the sheet to conform to the shape of the inside of the boiler curvature. Once it was dry and the sheet wasn't going to move, took white Squadrans putty, and filled in the thickness of the factory thickness of the boiler. let it dry, and then went back to fill in the remaining area again, as to "heep" it up so to have something to sand. The white putty was a filler, and green was a finisher surface type filler.
Once both were fully cure for 48 hours I sanded to get the general shape of the boiler. After getting it as close as possib;e but NOT to scratch the boilers outter surface from sanding, I took fingernail polish "clear" gloss to seal the putty, so to not "flash" when for painting, then sprayed just enough primer to show ANY and all imperfections, and then recoated them with the green putty once again (this is what you see in the pictures) and then carfully wet sanded the area again, with 1200 grit. Once the contour was close once again, I finished the contour with a file, as that actually cuts a smooth finish in the hardened putty, and then recoated that with the fingernail polish "clear" gloss once more.
After that had all set up for another 12 hours, went back and used liquid "gloss off"" to rid the shinny surface to be ready for gloss black paint through my air brush, having the smokebox taped off for graphite paint after the black was dry! After the black was added to the model, I painted on the custom mixed graphite for the application as the real one had!
And then decals as I'm sure you know!
~John
Many have tried to, and failed, ya just can't repair stupid...
Do NOT try to Idiot-Proof anything!!!! God, will simply create a better......IDIOT!
|
|
Country: USA ~
Posts: 2911 ~
Member Since: March 26 2012 ~
Last Visit: January 14 2014
|
Alert Moderator
|
|
|
|
Posted - April 02 2012 : 11:07:52 PM
|
John, boy does that sound familiar. As model maker, I had to sand and keep hitting castings with prime to highlight the imperfections, especially on character faces.
I'm also beginning to see why you have an endless need for Big Six parts.  Very nice job. What did you use for the lead truck? It has a very long wheelbase. Very nice job. What did you use for the lead truck? It has a very long wheelbase.
The Tyco Depot
Edited by - NickelPlate759 on April 02 2012 11:08:06 PM
|
|
Country: USA ~
Posts: 3927 ~
Member Since: June 20 2007 ~
Last Visit: November 19 2015
|
Alert Moderator
|
|
|
|
Posted - April 03 2012 : 4:45:07 PM
|
quote:John, boy does that sound familiar. As model maker, I had to sand and keep hitting castings with prime to highlight the imperfections, especially on character faces.
I'm also beginning to see why you have an endless need for Big Six parts. Very nice job. What did you use for the lead truck? It has a very long wheelbase.
Originally posted by NickelPlate759 - April 02 2012 : 11:07:52 PM
|
Nelson,
Yes I get into it pretty deep as you can see! (needless to say you have an idea of what I have in the shop and such from the pictures!
As for the Rivarossi 4-8-2, this is a picture of the real thing:
/tyco/forum/uploaded/EM-1/bo5501s.jpg
The only differenace in this picture to my model is the fact that the model was made after #5500, and the picture shows 5501. BOTH road numbers were exactly the same! The only detail differance is the driver diameter, (I never changed it) I did however, change the "blind" center driver from ther model so that all 4 axles had flanged drivers. Which was done simply using the one that was removed, the first one, to make room behind the cylinders to accomodate the pilot truck.
As for the question on the pilot truck, that was custom made from brass. I took Jay-Bee wheel sets (33 ich diameter), and fitted them to a piece of brass tubing, thats got 2 small holes drilled into the top of it for adding lubrication, and then after the inside was deburred and the axle fitted, but not installed I soldered the 2 pieces of brass tubing to a section of brass sheet bent to hold the whole works level. Broke with a small "break" for stength, and then center drilled to add a mill "U" for the whole plate to slide from side to side, and then had to mill out the back side of the cylinders for clearance. Works well on 22 inch radius track, BUT I'm going to take the front apart one more time to make it able to run on 18 inch radius!
As for the use of Rivarossi 2-10-2's, you know what I'm working on designing next with them so.......
~John
Many have tried to, and failed, ya just can't repair stupid...
Do NOT try to Idiot-Proof anything!!!! God, will simply create a better......IDIOT!
|
|
Country: USA ~
Posts: 2911 ~
Member Since: March 26 2012 ~
Last Visit: January 14 2014
|
Alert Moderator
|
|
|
|
|
|


