|
|
 Posted - May 23 2024 : 12:29:29 AM Posted - May 23 2024 : 12:29:29 AM


|
I recently started my Tyco C630 rebulld program. The photos below are of the first unit in the program. If it is successful, I have at least two more to do including a Golne Eagle.
I had considered a number of options including dual power torques, and replacing the magnets in the motor. In the end I opted not to use the Tyco drives for a couple of reasons. First and foremost was the traction tire issue. I don't like them, and don't want any on my motive power. That meant finding suitable replacement wheels for the ones grooved for tires. Even then, i'd have a locomotive with less than optimal electrical pickup, and no easy way to correct it.
I may revisit the dual power torque idea in the future, but as a battery powered dead rail locomotive where the pickup through the wheels won't matter. But cost is a factor here. Rebuilding a locomotive with a battery and Bluetooth control is twice as expensive as the solution I steeled on.
It turns out Hobbytown of Boston, a name long associated with smooth running locomotives going back at least 60 years, is still around. Better yet, they make a universal drive that not only has the option of the proper Alco trucks for the C640, it is also expandable in length to fit anything from an SD45 to a U28C. The C630 is slightly longer than the C630. Best of all, its cost of $75 is less than half the price of a new locomotive, What's not to like?
I have two C630s and a bunch of C430s that are candidates for this conversion. A similar universal kit is available for 4 axle diesels like the C430. One of my C630s is the Golden Eagle, and I didn't want to use that as a guinea pig, the Chessie System one is far more common and thus expendable should the conversion not work out as planned.
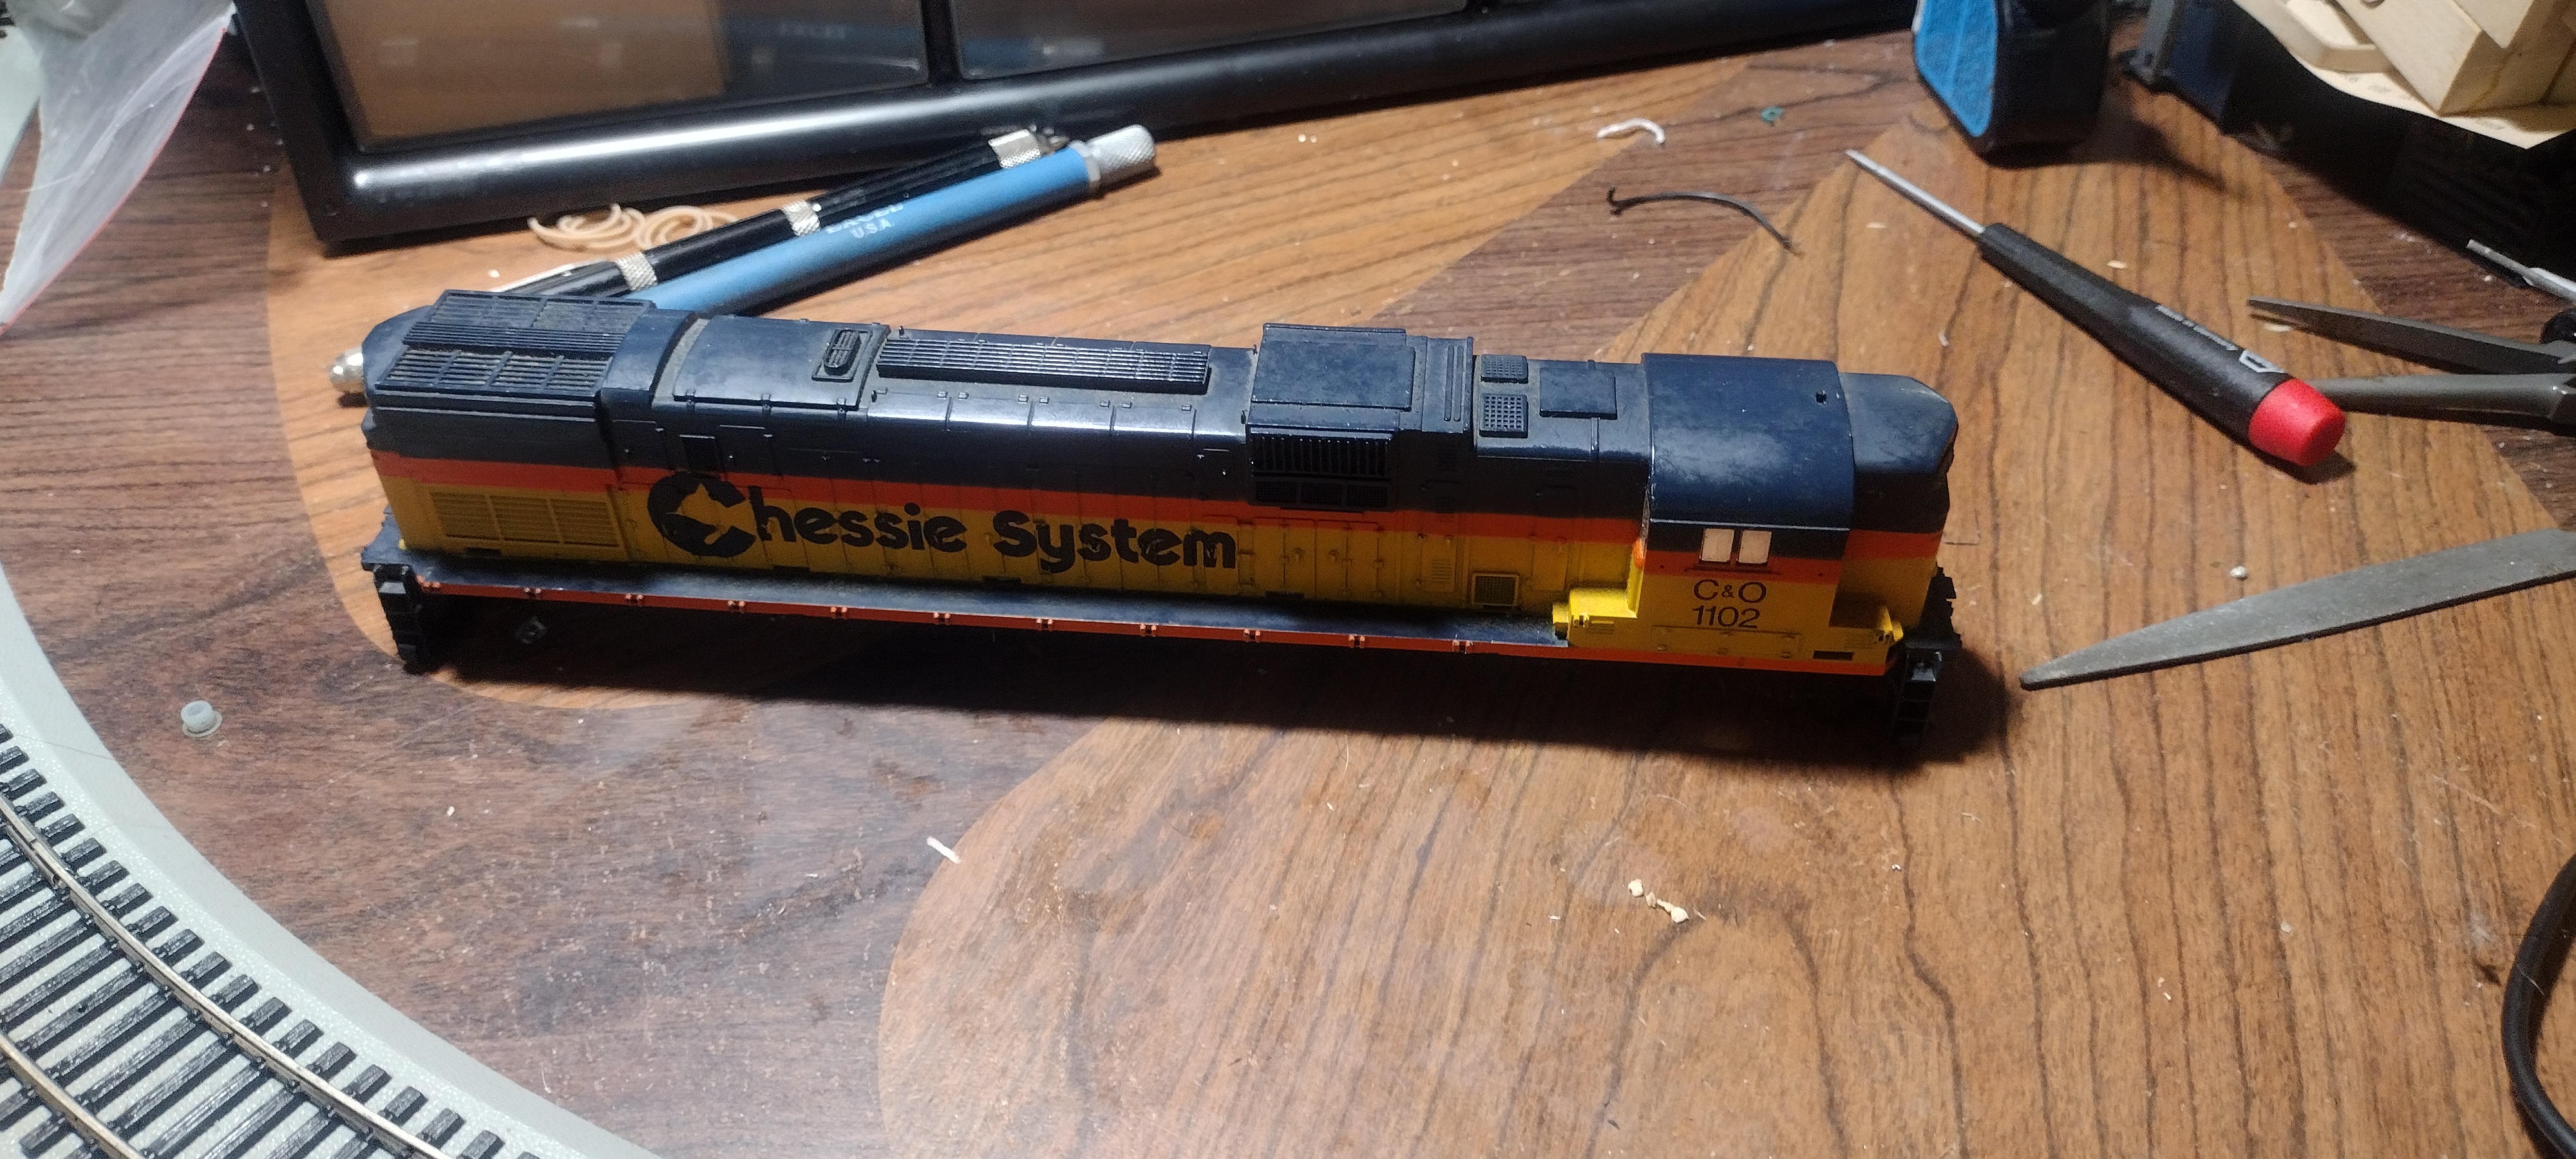
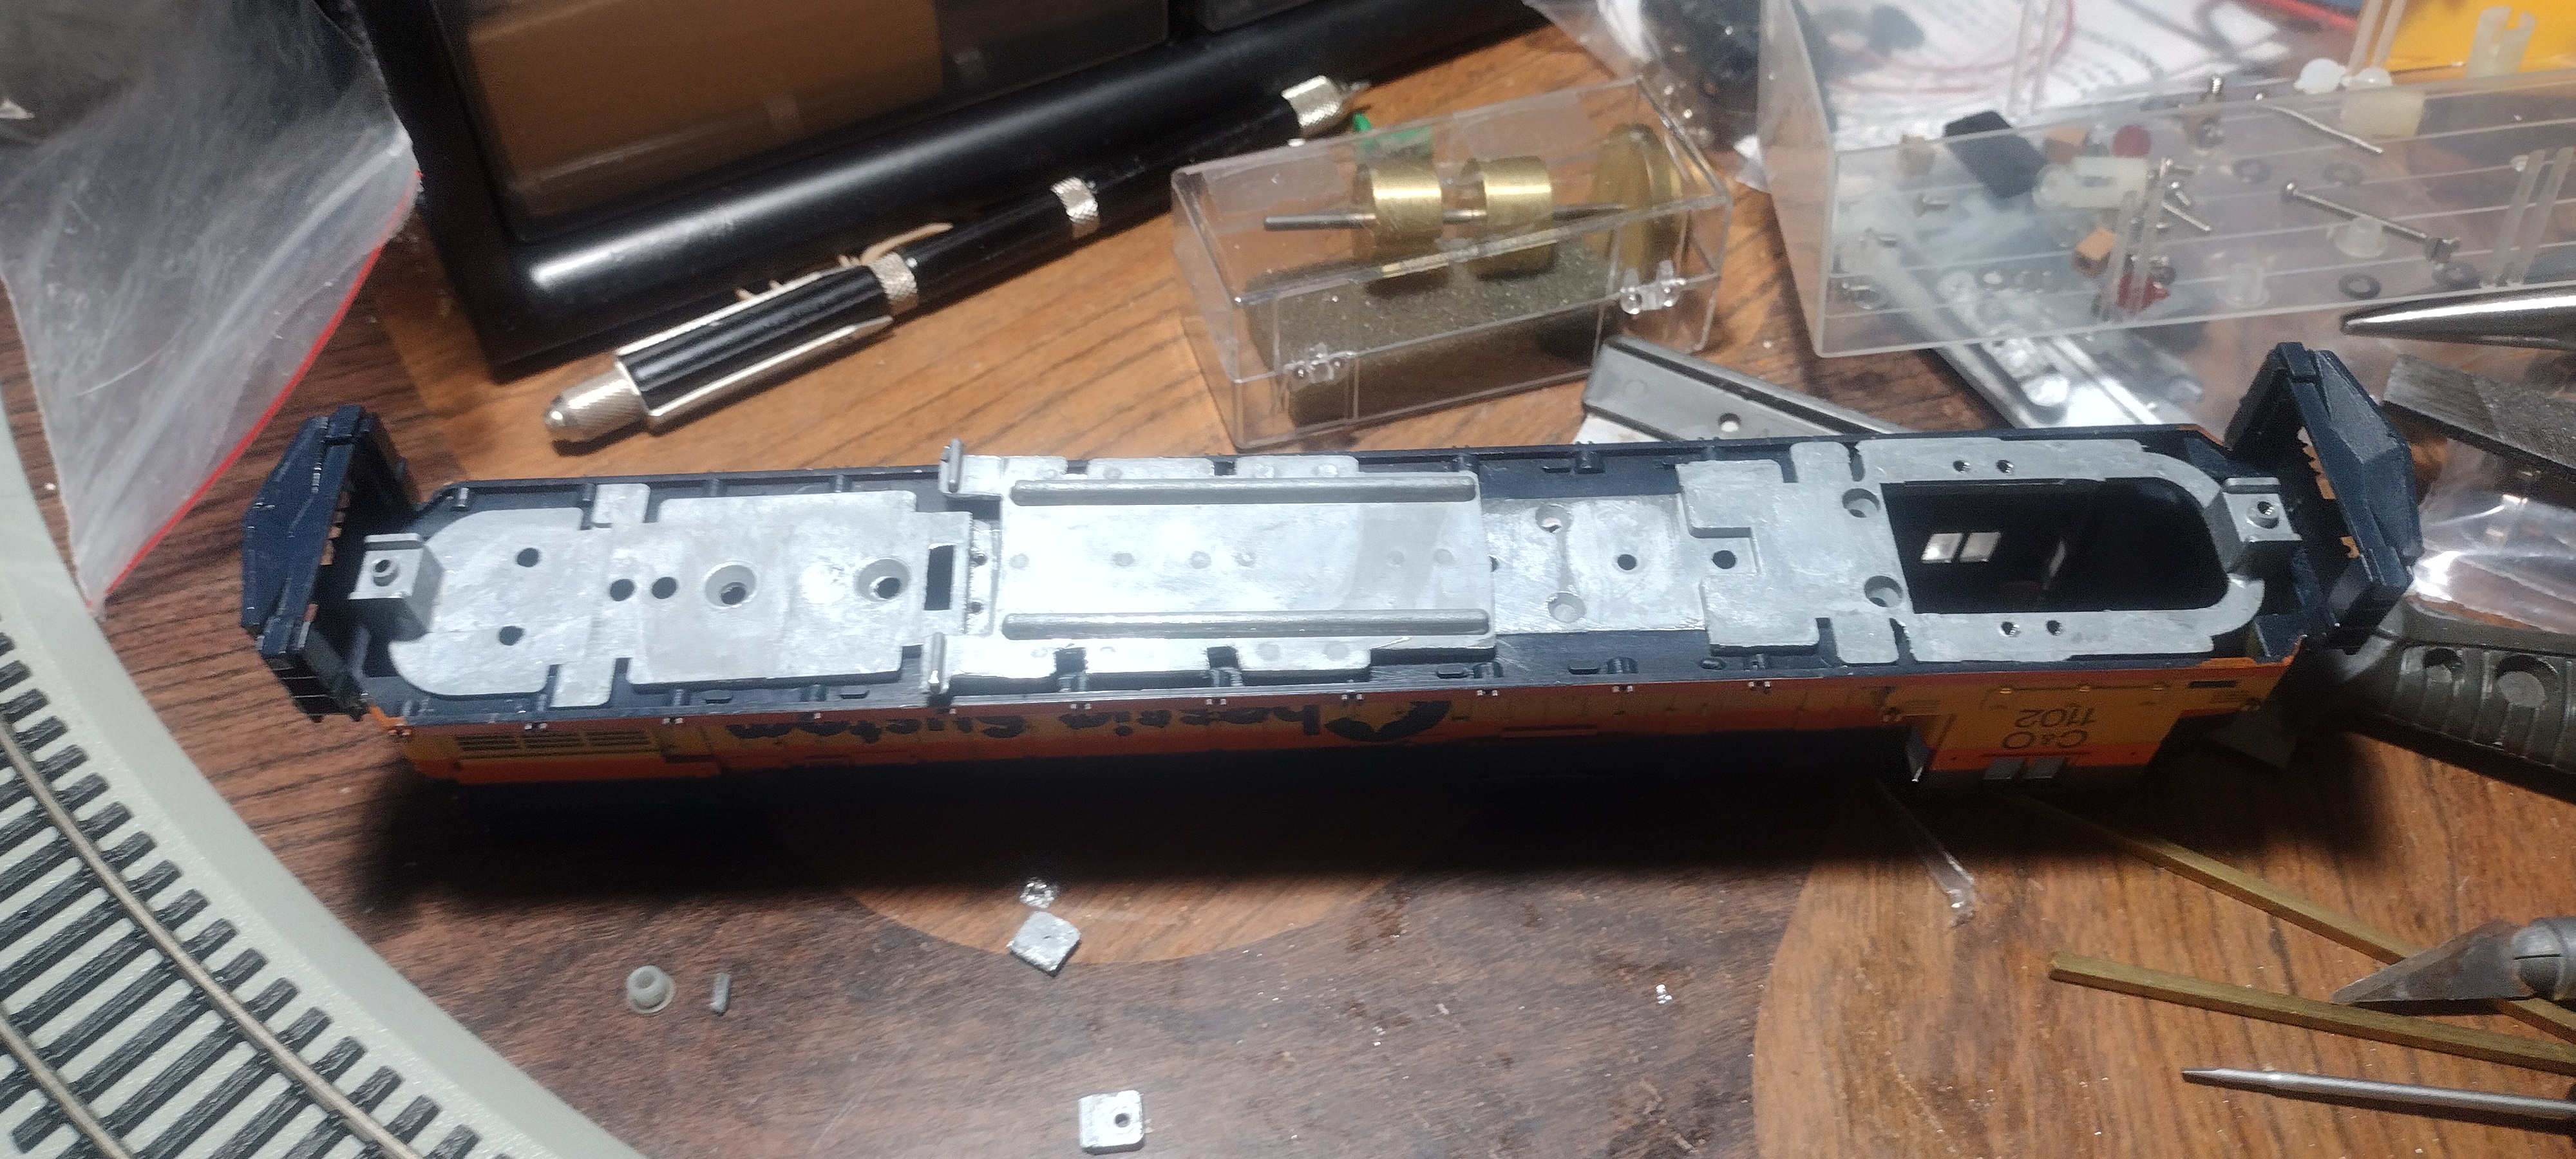
The donor locomotive. The power torque driver and fuel tank weight have already been removed.
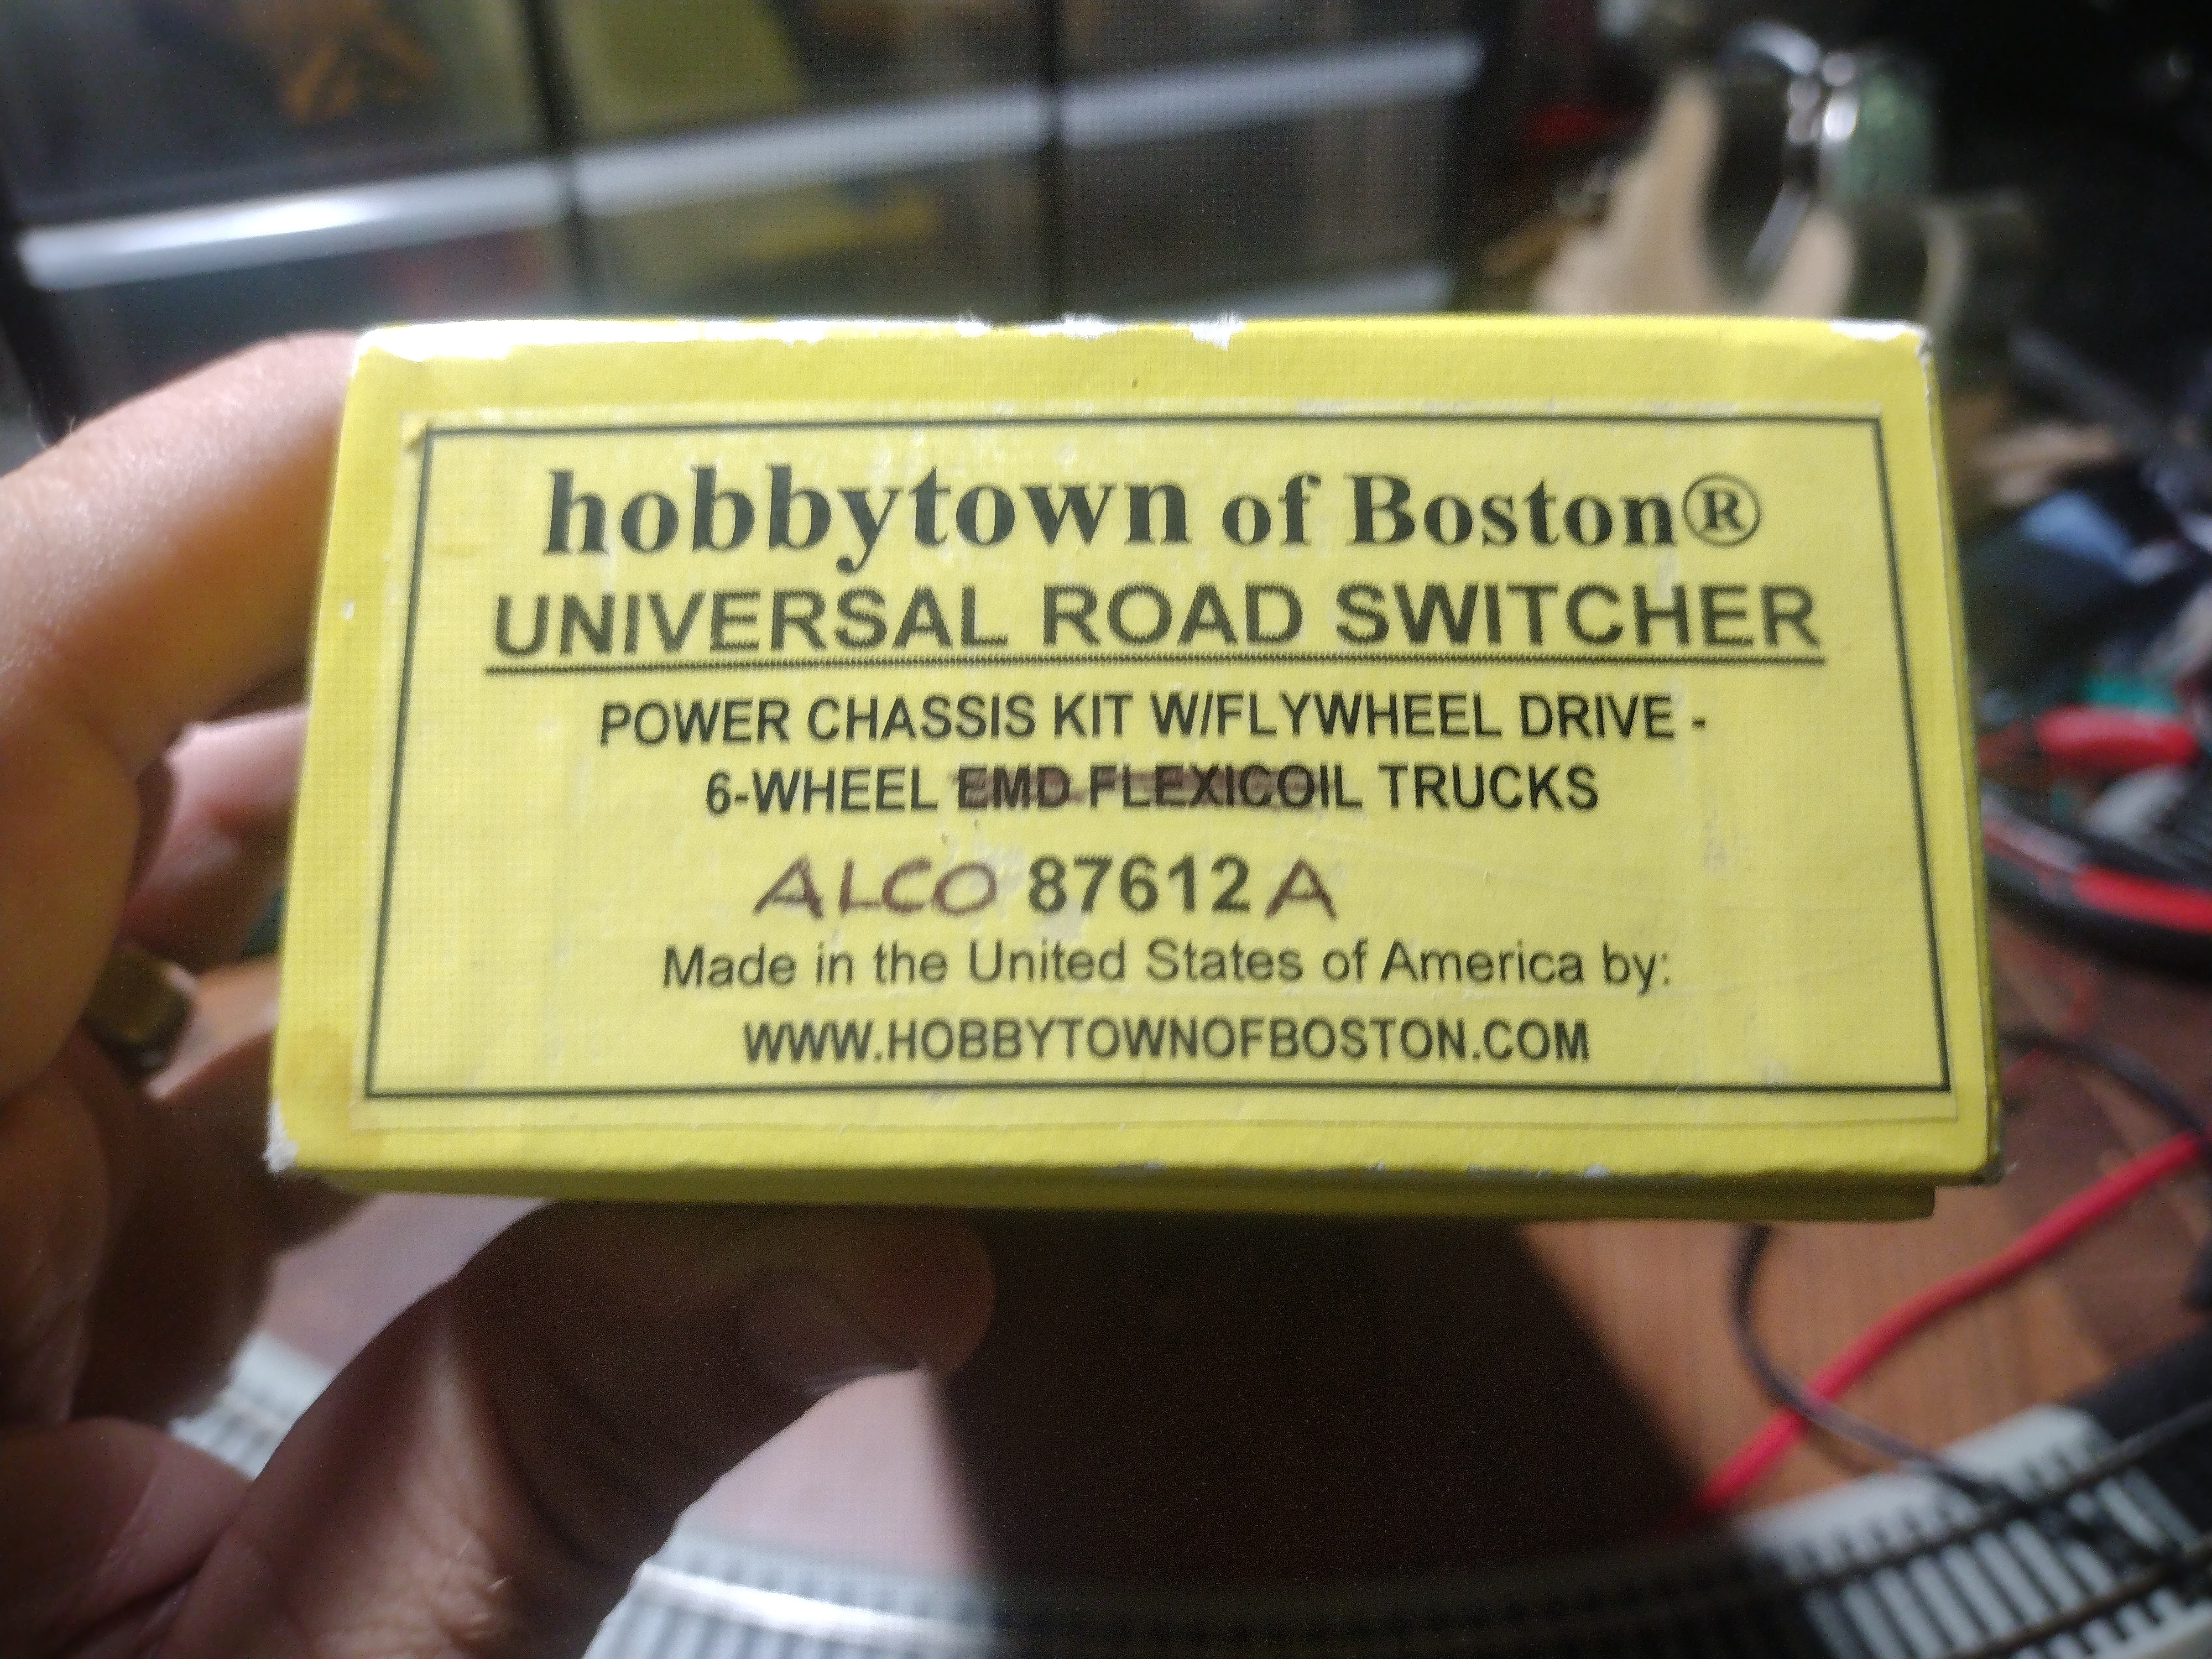
This is the kit used in the conversion.
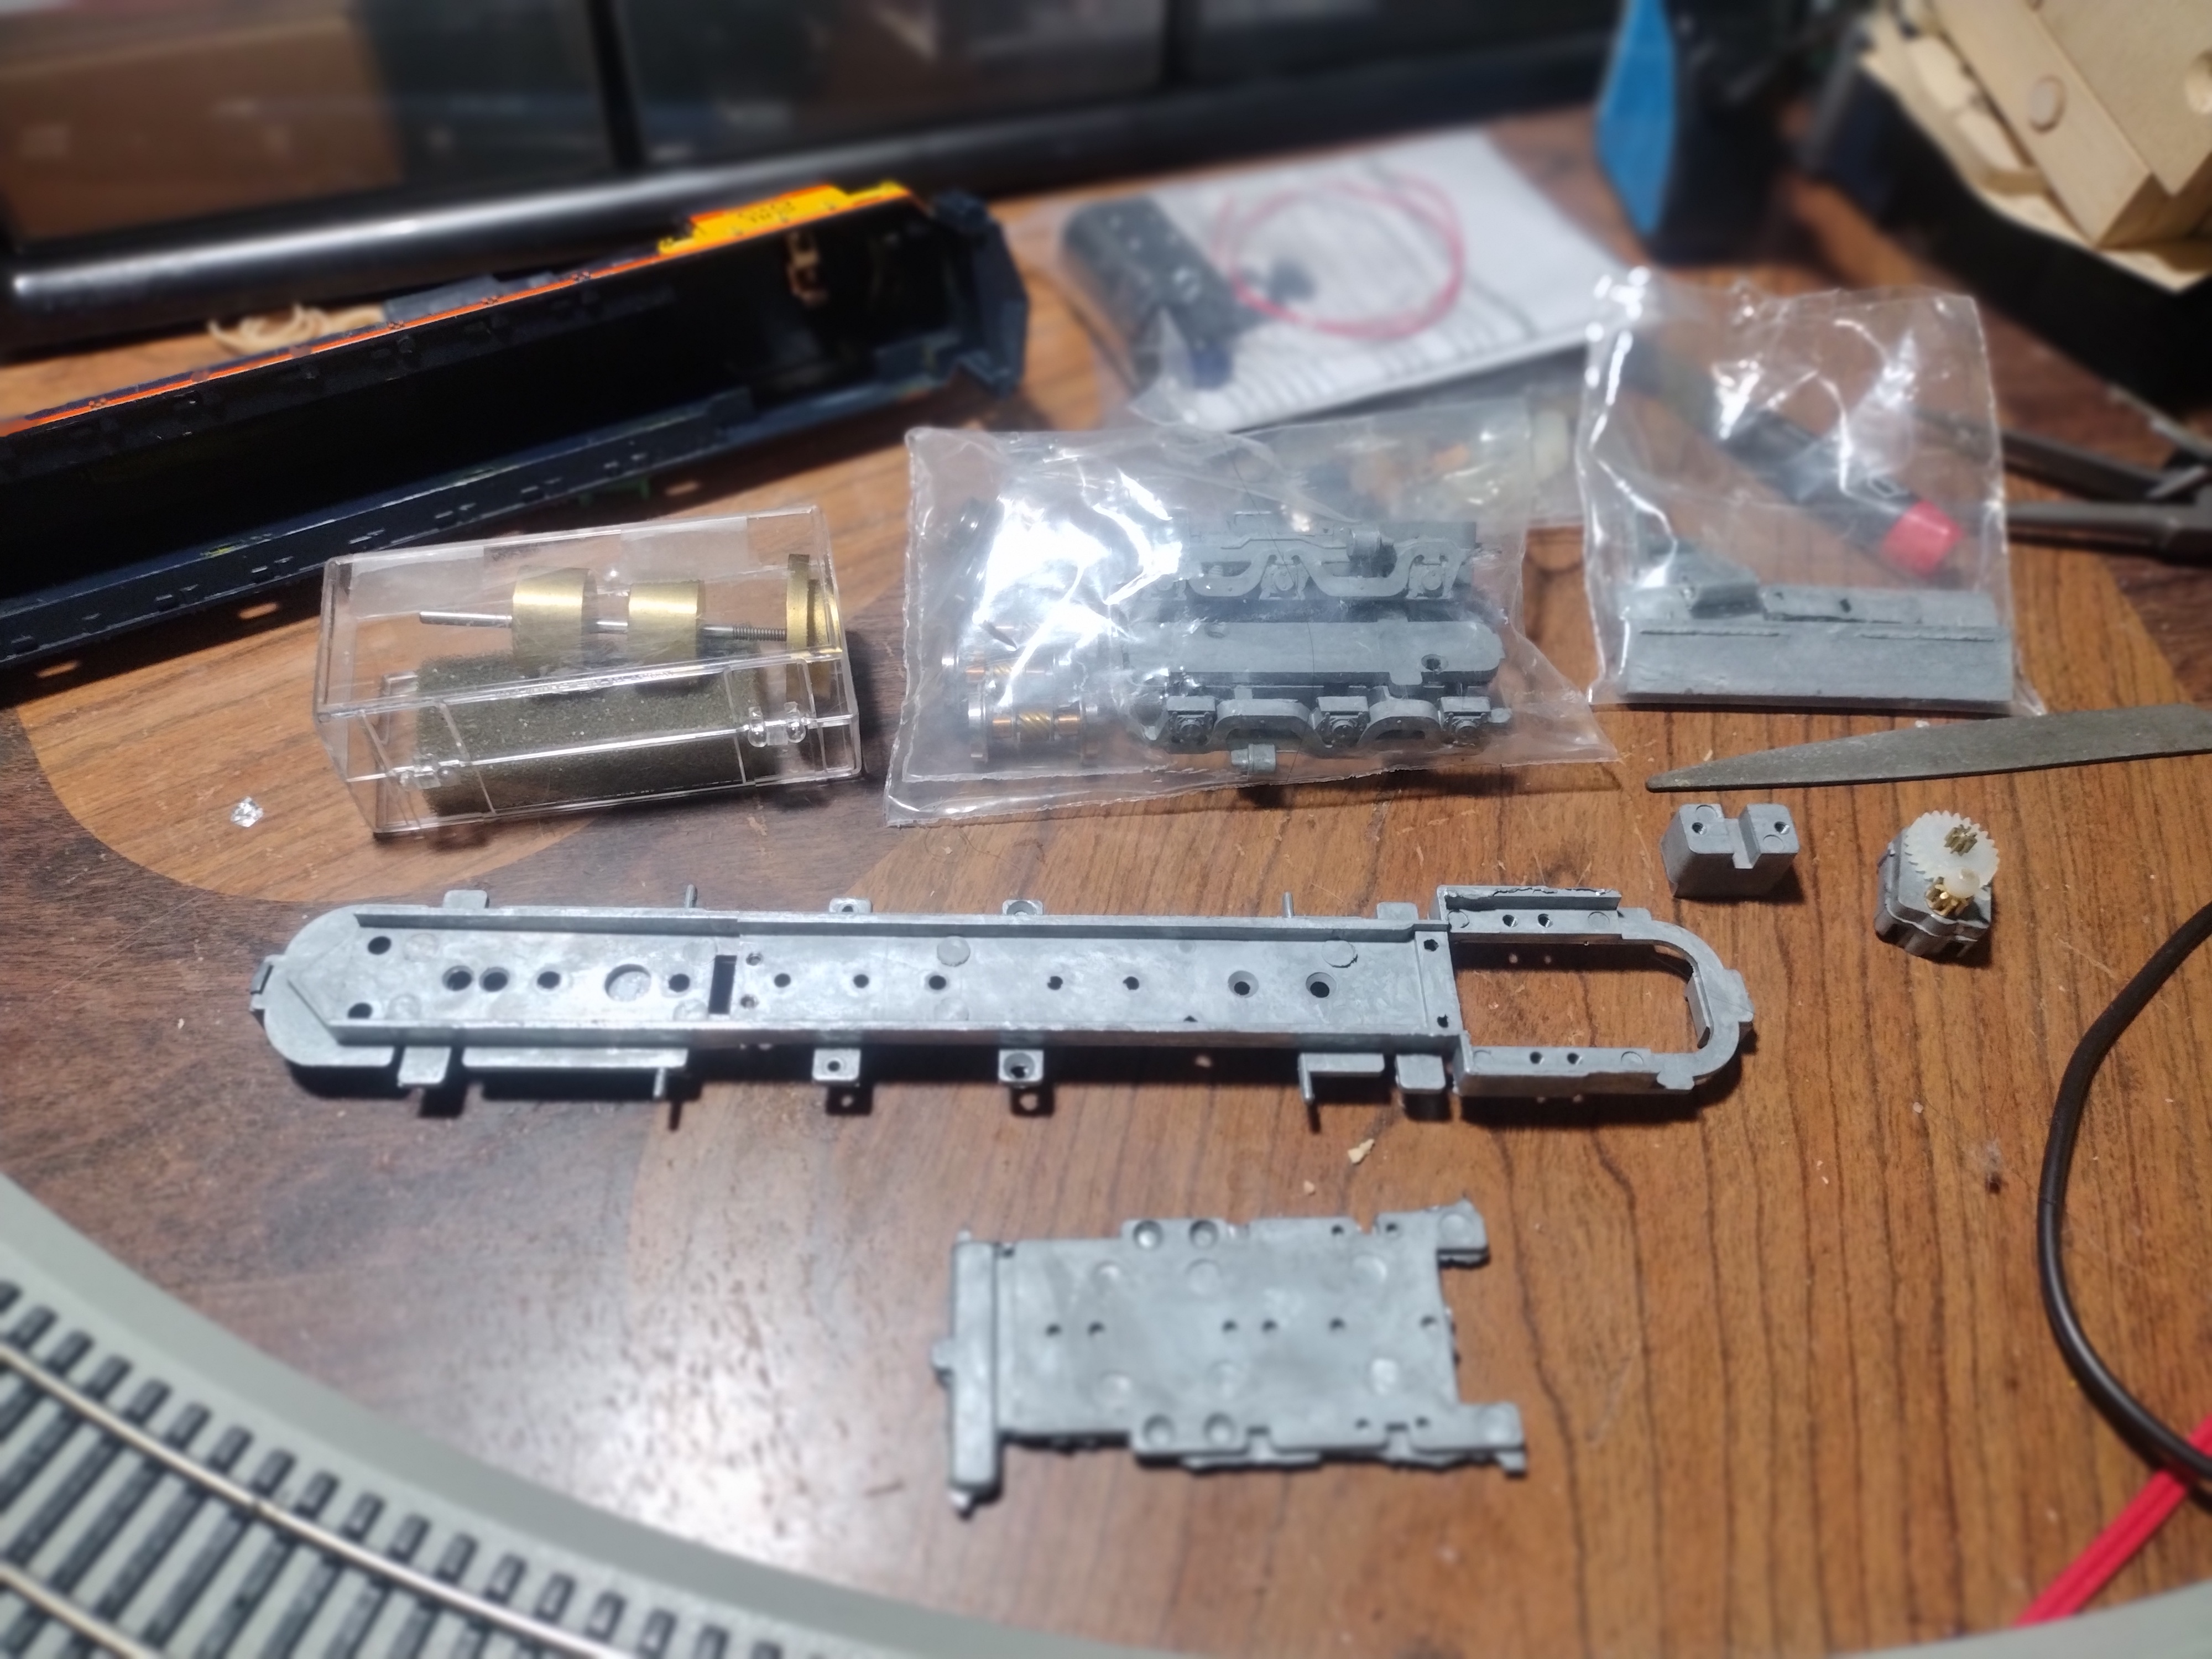
The contents of the kit. The locomotive frame and splice plate are at the bottom.
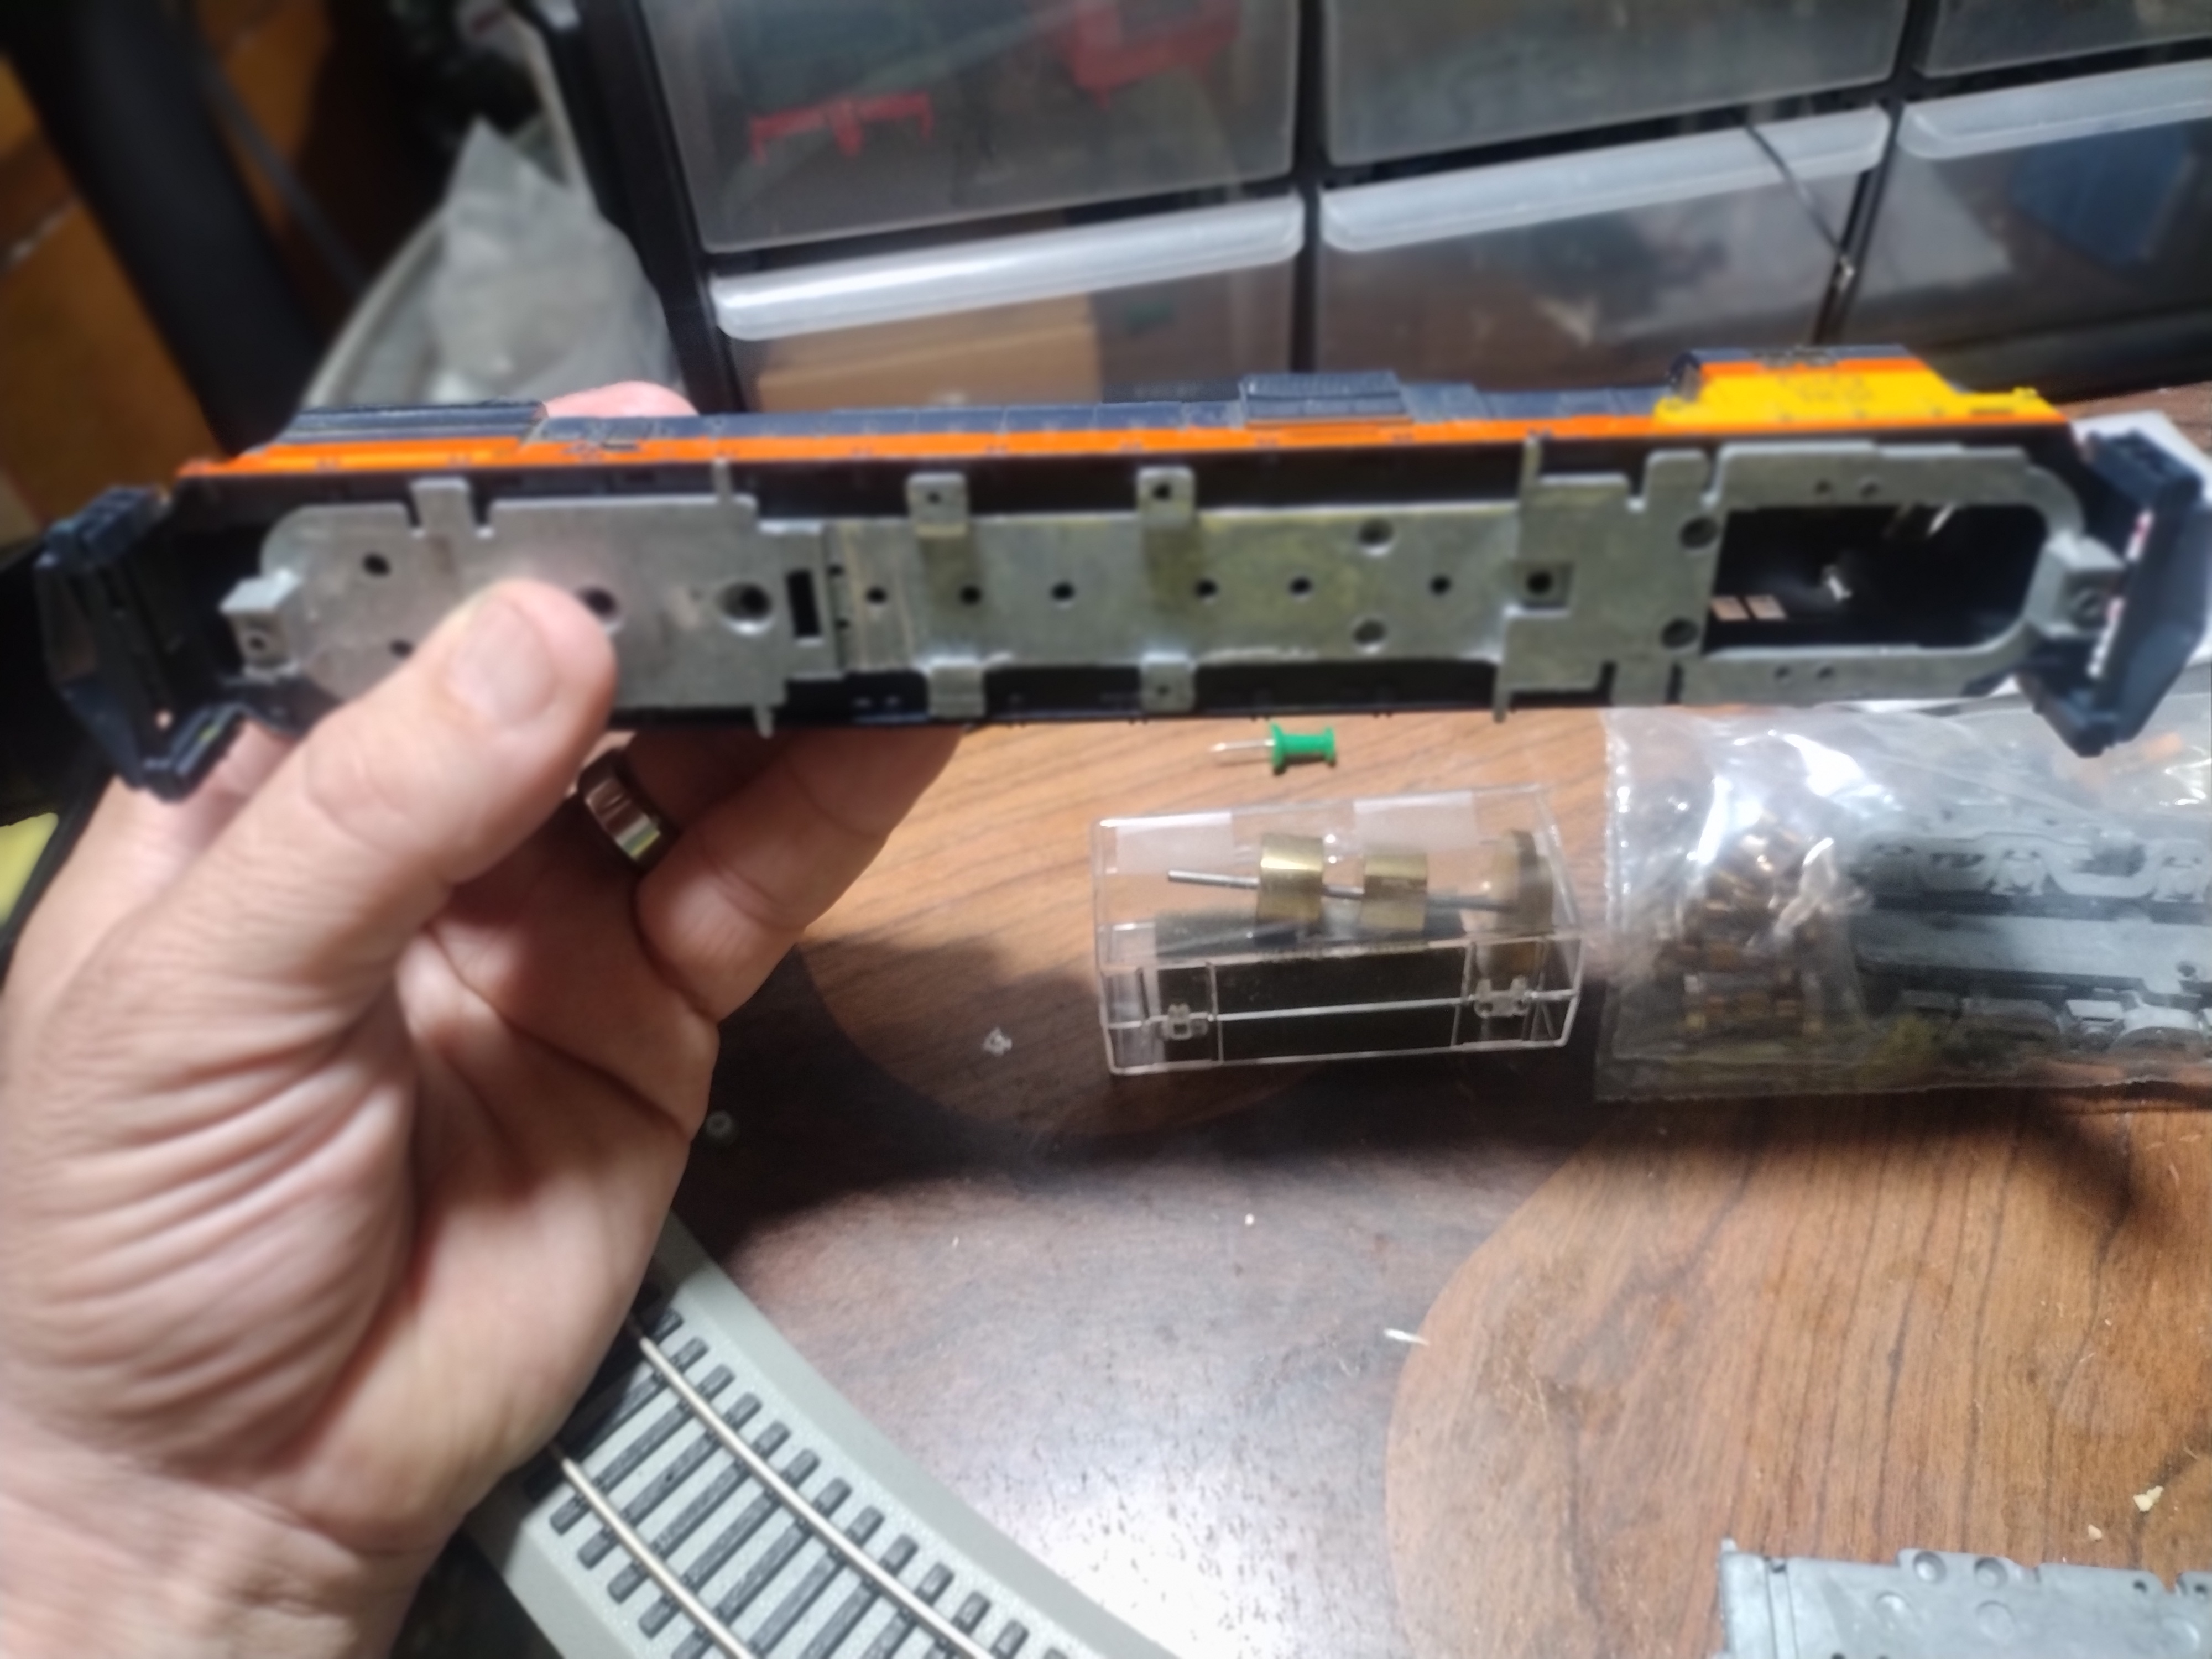
The unmodified frame fits in the Tyco shell perfectly, except for the length. This illustrates the difference between the SD45 and C630, and why the splice plate is necessary.
|
Country:  USA ~
Posts: 501 ~
Member Since: December 22 2013 ~
Last Visit: June 16 2024 USA ~
Posts: 501 ~
Member Since: December 22 2013 ~
Last Visit: June 16 2024
|
 Alert Moderator
|
|
|
|
Posted - May 23 2024 : 06:51:59 AM
|
SO here is the progress I"ve made so far on this project.

The frame has been cut in half, and test fitted to the shell. When completed, The frame will be secured to the shell by the couplers through the front and rear pilots. This is similar to the newer Atlas units.
Adding the splice plate showed two things. The frame spliced to fit the U28C using the pre-drilled holes in the frame and splice plate is still too short. DO I continue to build the kit as designed? This would require the use of long shank couplers, which might not be a bad thing considering this will run on 18" radius curves. DO I further extend the frame to fit and drill and tap my own holes? This would give the correct length. I have reached out to the manufacturer for advice.
The other issue is a minor one. The splice plate interferes with the bumps in the shell that hold the handrail stanchions. Notching the plate to clear these bumps will being the notches perilously close to the holes for the screws that hold the fuel tank on. I may just shave off the bumps for the stanchion holes, and hope for the best.
Originally posted by jward - May 23 2024 : 06:43:40 AM
|
|
Country: USA ~
Posts: 501 ~
Member Since: December 22 2013 ~
Last Visit: June 16 2024
|
Alert Moderator

|
|
|
|
Posted - May 23 2024 : 11:26:13 AM
|
 
So, this is going to be an all-in upgrade. Very nice.
|
|
Country: USA ~
Posts: 11248 ~
Member Since: December 09 2013 ~
Last Visit: June 16 2024
|
Alert Moderator
|
|
|
|
Posted - May 23 2024 : 3:09:29 PM

|
A fascinating build. Keep us updated!
Edited by - DaCheez on May 23 2024 3:09:41 PM
|
Country:  Canada ~
Posts: 3332 ~
Member Since: September 22 2006 ~
Last Visit: June 06 2024 Canada ~
Posts: 3332 ~
Member Since: September 22 2006 ~
Last Visit: June 06 2024
|
Alert Moderator
|
|

