|
|
 Posted - November 13 2010 : 01:30:46 AM Posted - November 13 2010 : 01:30:46 AM


|
This has been in the works off and on for about the past five months. I think the scenery is finally at a state where it's photo-worthy, so I thought I'd share some pictures 
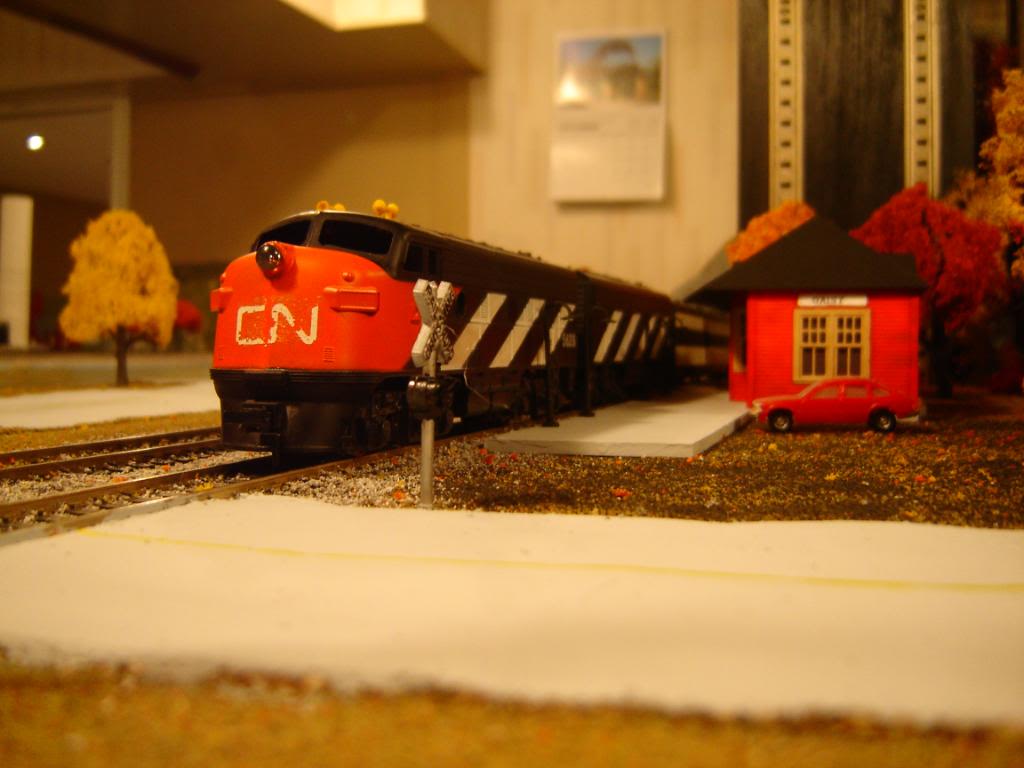
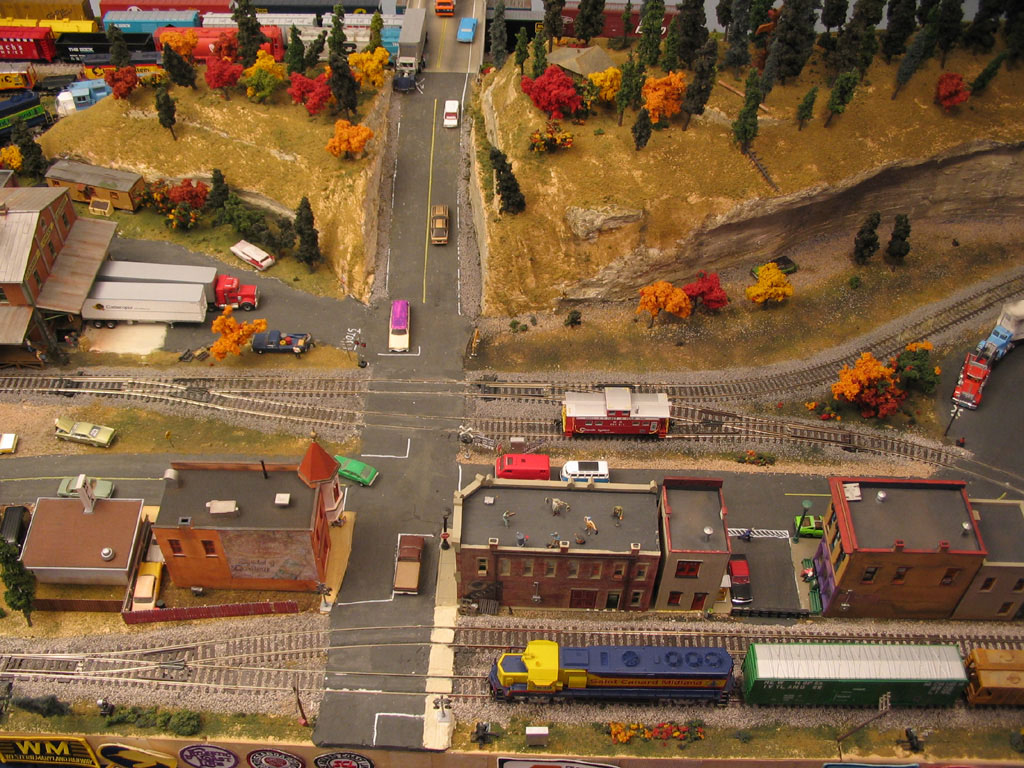
Here's the town section. A good chunk of today was spent painting street lines, glueing down buildings and signs, setting up the powerlines, etc...
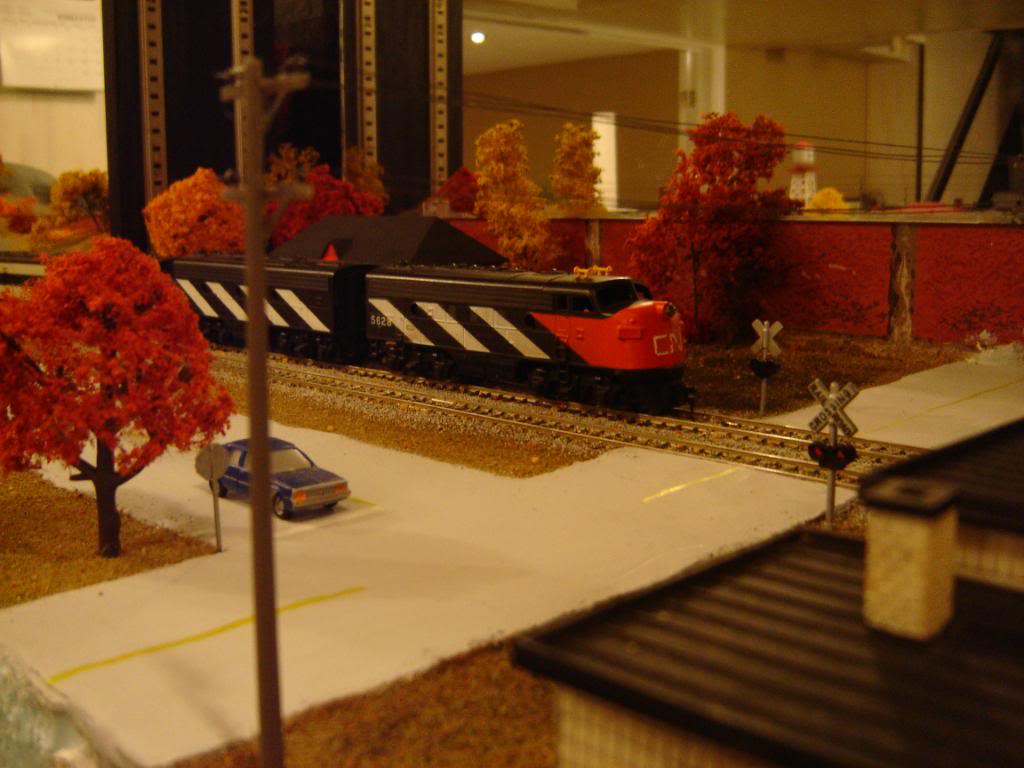
The station is an old Life-Like kit that I painted and detailed. It still needs some people on the platform
This part was in a few of my LotW pics...just a nice little open stretch for the trains to run along.
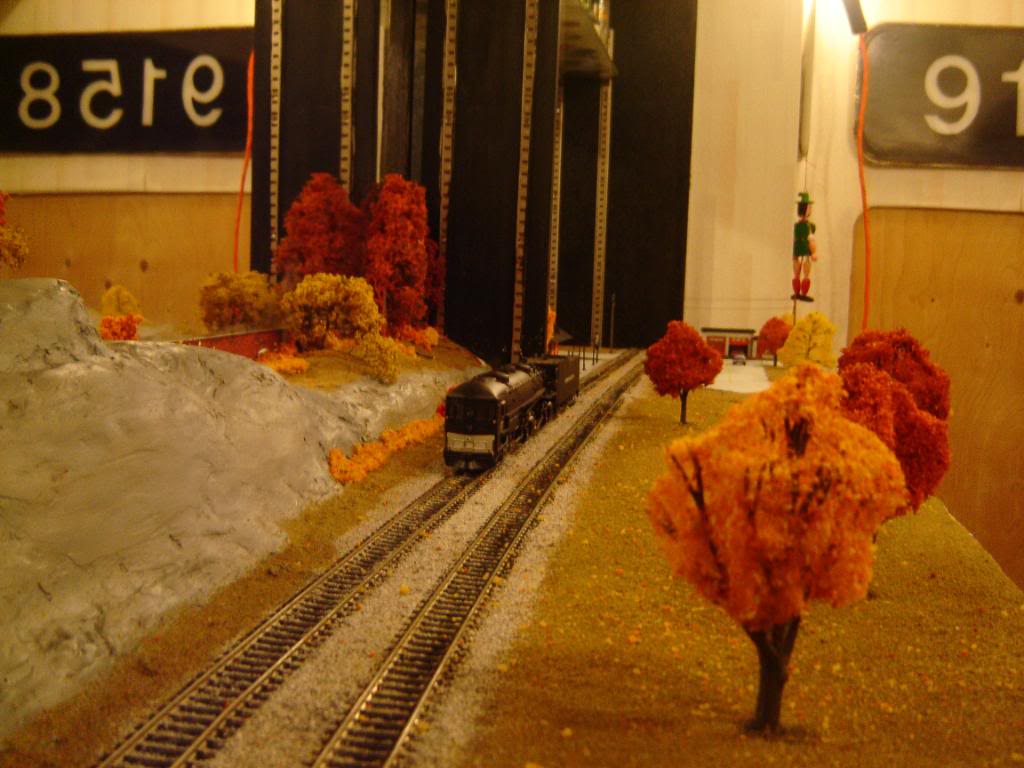
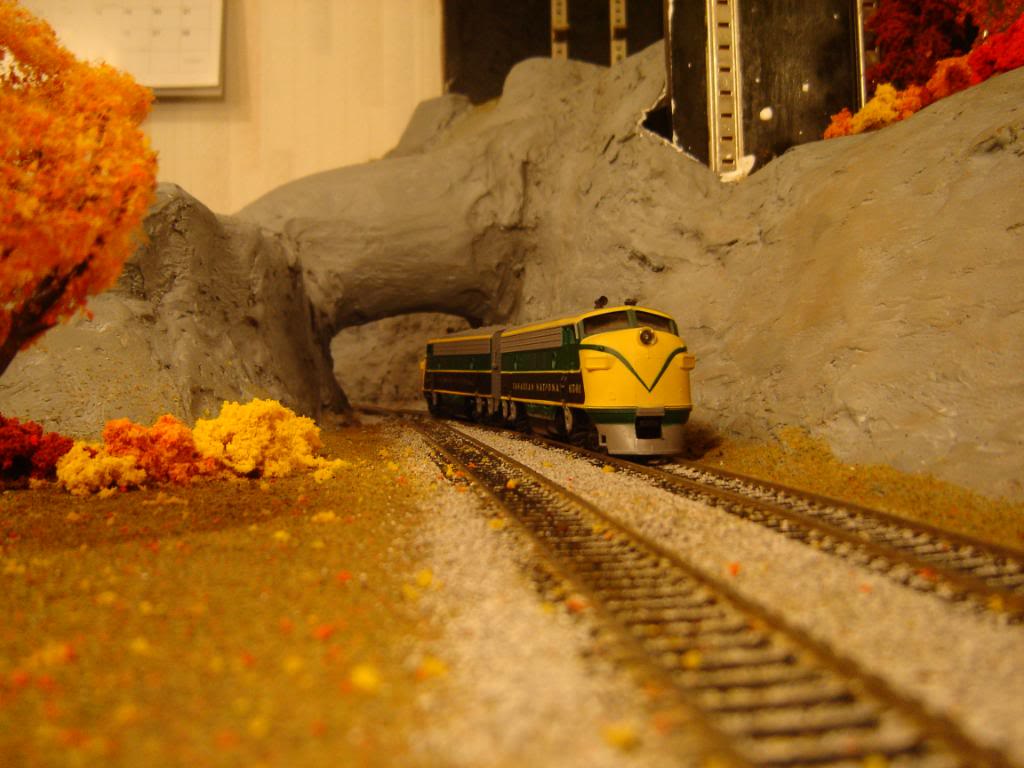
Here's the other end of the extension. This is the end where the trains enter from the main layout. When I was younger I remember seeing a layout with a nice rock arch on it for the trains to pass through...that's where I borrowed the idea for this section from
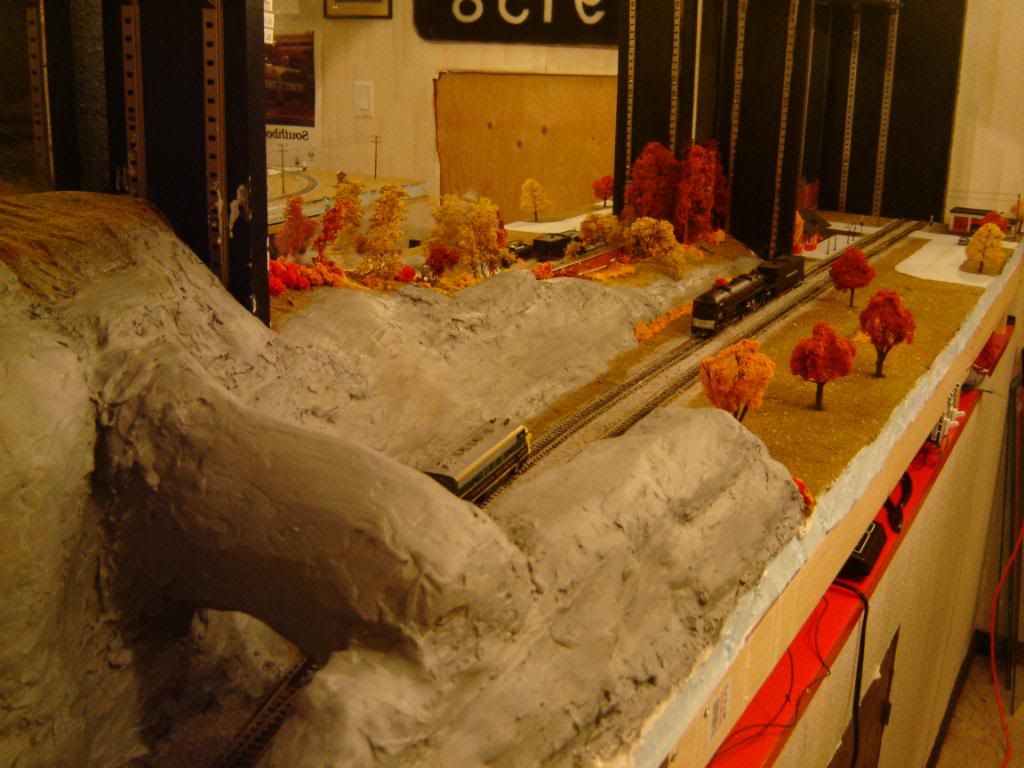
And finally, here's a shot of the entire extension. I have a few things left to do, but for the most part it's complete (as far as layouts go anyway)
I hope everyone liked the pictures. If you have any questions fire away I was taking pictures as I was building, so if there's anything anyone wants to see, let me know!
cheez
|
Country:  Canada ~
Posts: 3448 ~
Member Since: September 22 2006 ~
Last Visit: April 03 2026 Canada ~
Posts: 3448 ~
Member Since: September 22 2006 ~
Last Visit: April 03 2026
|
 Alert Moderator
|
|
|
|
Posted - November 13 2010 : 04:52:35 AM
|
very nice & hope you fill in the crossing  Go out & get the simulated concrete crossings Go out & get the simulated concrete crossings
|
Country:  USA ~
Posts: 15033 ~
Member Since: February 23 2009 ~
Last Visit: July 25 2026 USA ~
Posts: 15033 ~
Member Since: February 23 2009 ~
Last Visit: July 25 2026
|
Alert Moderator

|
|
|
|
Posted - November 13 2010 : 09:00:16 AM
|
| Looks great! I love the fall foliage.
|
|
Country: USA ~
Posts: 293 ~
Member Since: January 17 2010 ~
Last Visit: September 29 2023
|
Alert Moderator
|
|
|
|
Posted - November 13 2010 : 2:23:21 PM
|
Thanks! I thought the fall colours would make a nice atmosphere for the trains
Hey MB. That's one of the things I still need to figure out how to do I've found that pouring plaster around tracks makes a terrible mess, so I may try for a wooden crossing. I've found that pouring plaster around tracks makes a terrible mess, so I may try for a wooden crossing.
|
|
Country: Canada ~
Posts: 3448 ~
Member Since: September 22 2006 ~
Last Visit: April 03 2026
|
Alert Moderator
|
|
|
|
Posted - November 13 2010 : 5:56:03 PM
|
Wow! That looks great! Love the long straight extension, I've been wishing for one of those lately. The rock arch is superb. I actually had a similar idea in mind when I built the current STC, but I figured having 3 tracks under there would sort of be pushing plausibility.
Plaster over tracks isn't that bad - I did exactly that on all my grade crossings. Although to be fair I think it was Hydrocal, but the same concepts apply. Just mask off the sides of the rails, plug the ends of your crossing with toothpicks set flush to the rail tops, then pour plaster in resultant box.
Scrape off the excess with a card dragged along the rails, to make the crossing flush. You might also cut the card such that it has a small tab of about 1mm depth, between the rails: I find that trip pins, etc do often droop below the railheads.
Make sure you have a spare set of junk railcar trucks to groove your flange clearances (oversized "pizzacutter" wheels are great for this. You may also use a small jeweler's screwdriver to do the same thing.
The results look pretty good and very convincing IMHO. Of course, Shaygetz has proven a wood crossing can destroy socks as well.
|
|
Country: USA ~
Posts: 2798 ~
Member Since: September 17 2010 ~
Last Visit: July 22 2015
|
Alert Moderator
|
|
|
|
Posted - November 13 2010 : 8:23:39 PM
|
| Nice Cheez!!! Like it. I had to tear my layout down back in May of this year that i used to film all of my videos with - haven't built a new one yet and may not until i get another house one day.
|
|
Country: USA ~
Posts: 2507 ~
Member Since: January 31 2006 ~
Last Visit: October 21 2017
|
Alert Moderator
|
|
|
|
Posted - November 14 2010 : 6:29:40 PM
|
Alright Tony, you convinced me :D I gave the toothpick thing a try, and it's looking good so far. I'll post the results in a couple days once I get it all painted.
Brian, sorry about your layout, but I'm sure your next one will be even better I'm guessing you kept all the skyscrapers, track, etc?
|
|
Country: Canada ~
Posts: 3448 ~
Member Since: September 22 2006 ~
Last Visit: April 03 2026
|
Alert Moderator
|
|
|
|
Posted - November 14 2010 : 7:04:36 PM
|
Brian, sorry about your layout, but I'm sure your next one will be even better I'm guessing you kept all the skyscrapers, track, etc?
Originally posted by DaCheez - November 14 2010 : 6:29:40 PM
[/quote] Oh Yes - still have all the sky scrapers track and everything
|
|
Country: USA ~
Posts: 2507 ~
Member Since: January 31 2006 ~
Last Visit: October 21 2017
|
Alert Moderator
|
|
|
|
Posted - November 14 2010 : 11:32:00 PM
|
Wow- that looks GREAT!
I like all of it- especially the rock arch.
And the fall colors- really nice... perhaps the best part. I'm not brave enough to try fall colors- I've always been worried they'd look unnatural- but you've really pulled it off. AWESOME WORK!
|
|
Country: USA ~
Posts: 201 ~
Member Since: March 14 2009 ~
Last Visit: October 28 2012
|
Alert Moderator
|
|
|
|
Posted - November 15 2010 : 12:36:42 PM
|
Nice layout, Cheez! I agree with everyone else that the fall colors look great.
The Tyco Depot
|
|
Country: USA ~
Posts: 3927 ~
Member Since: June 20 2007 ~
Last Visit: November 19 2015
|
Alert Moderator
|
|
|
|
Posted - November 15 2010 : 11:51:27 PM
|
| Thanks! The fall colours actually aren't hard at all. It's just like summer scenery but with dry grass, and colourful trees/shrubs. The leaves on the ground were a complete accident Woodland Scenics sells this foliage that you pull appart to fit where you need it (it's the same stuff they stretch around their pre-made trees)...anyway, as I was putting that in it was flaking everywhere. I was going to vacuum it up, but then I realised it looked good, so I sprayed some glue/water over it
|
|
Country: Canada ~
Posts: 3448 ~
Member Since: September 22 2006 ~
Last Visit: April 03 2026
|
Alert Moderator
|
|
|
|
Posted - November 16 2010 : 08:17:17 AM
|
Ataway Cheeze ! Very nice ! Nice background for photos. Keep up the good work!
frank
toptrain
" It's a Heck of a Day " !!!
|
|
Country: USA ~
Posts: 7539 ~
Member Since: August 07 2008 ~
Last Visit: June 22 2026
|
Alert Moderator
|
|
|
|
Posted - November 16 2010 : 11:39:04 AM
|
Ah Cheez, glad to see you consider joining the dark side ;)
It's really not that hard once your start. I did all my roads with plaster. Here's some more inspiration / explanation:
Earlier I said to cover the sides of the rails, but that of course assumes you have some other roadwork in place. If you don't, just spill over the sides and extend your road as necessary: same basic construction concept applies. You can frame / box the edges of the road with strips of styrene, thick foam tape, or whatever else. The road doesn't need to be very thick. Where you see a sidewalk, I later framed this and built up another layer to create a curb.
Once I got the knack for the plaster's consistency and workability, I just applied it directly to the scenery with no "edging" and let it dry naturally. This is especially good to simulate secondary asphalt roads, rural driveways, etc that aren't perfectly manicured. Any imperfections/ bubbles/ what-have-you in the final result? Potholes, of course!
|
|
Country: USA ~
Posts: 2798 ~
Member Since: September 17 2010 ~
Last Visit: July 22 2015
|
Alert Moderator
|
|
|
|
Posted - November 16 2010 : 11:08:24 PM
|
Oh it's not the plaster I have trouble working with...I just hate having to pour it when I already have the majority of the scenery in I learned the road-making process back when I did the main section of my layout. I remember you were explaining how the Woodland Scenics road kit works. My method now is basically that, but using painters tape for the edging and then pulling it up before the plaster fully sets.
Anyway, here's what I have so far. I may do a tad more sanding/filling, but my cars seem to be clearing it no problem
The only problem I see with this so far is that my MU-2 powered engines won't be able to go over it. They have the little humps for the gears to fit in, and they can't clear the center section
|
|
Country: Canada ~
Posts: 3448 ~
Member Since: September 22 2006 ~
Last Visit: April 03 2026
|
Alert Moderator
|
|
|
|
Posted - November 23 2010 : 01:26:44 AM
|
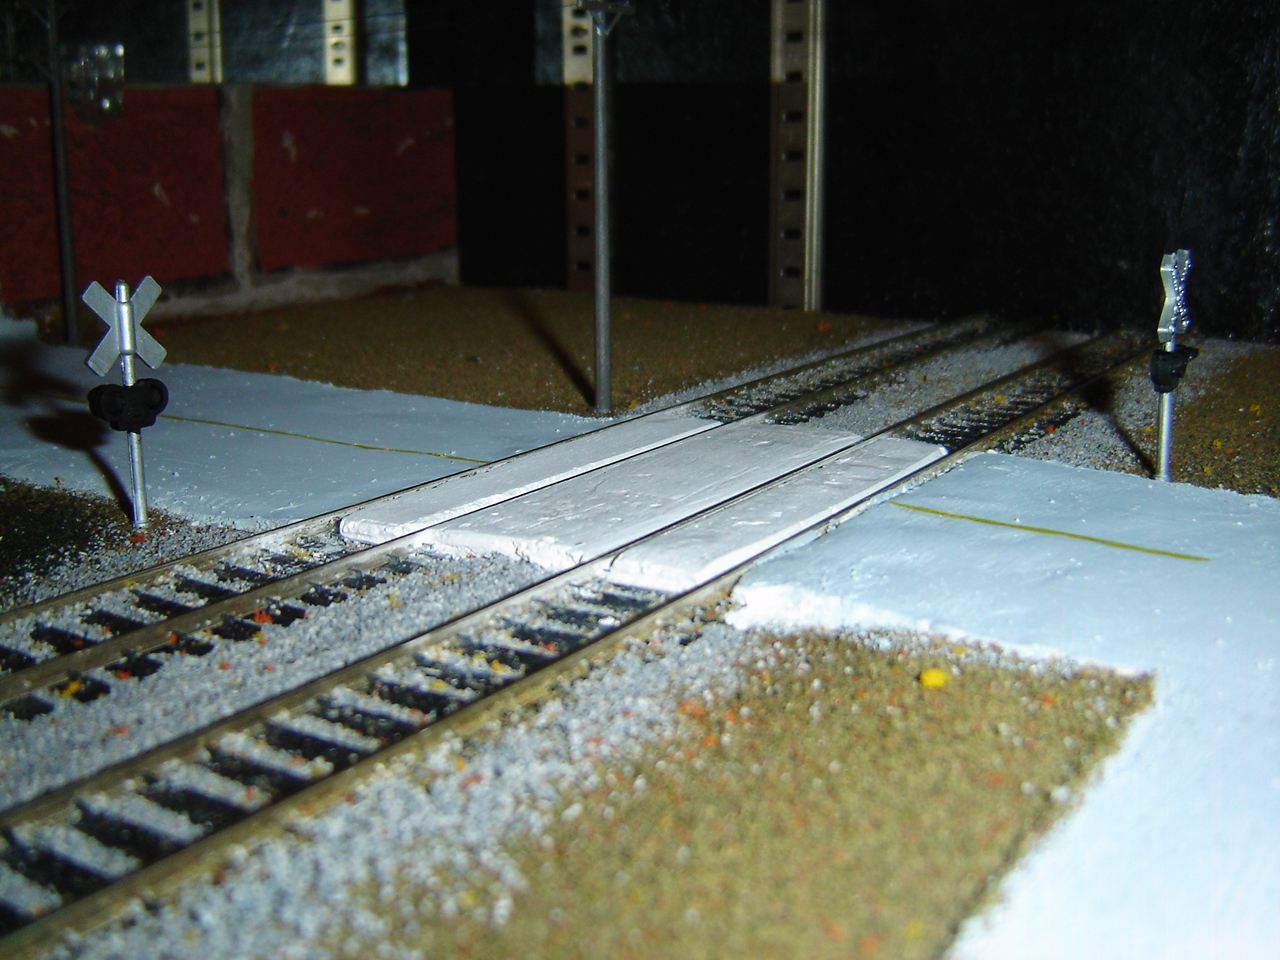
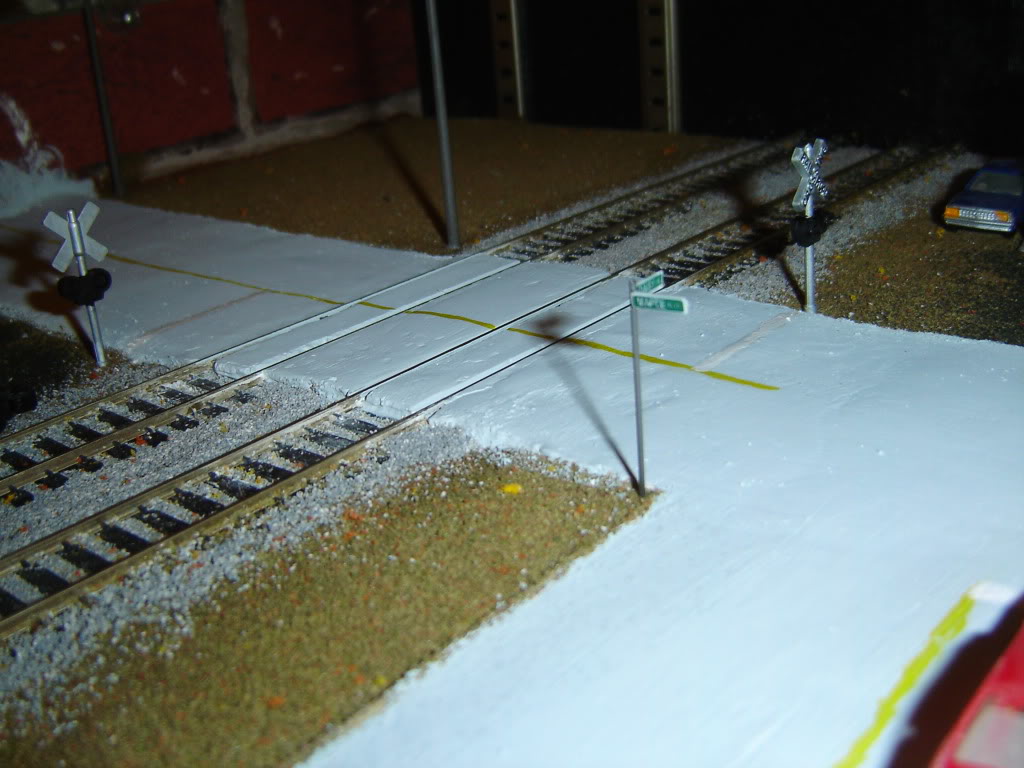
Here's the end result. I may touch-up one or two spots, but I'm happy with how it turned out. I also added a street sign made out of a piece of wire and some signs I printed off the computer.
|
|
Country: Canada ~
Posts: 3448 ~
Member Since: September 22 2006 ~
Last Visit: April 03 2026
|
Alert Moderator
|
|
|
|
Posted - November 23 2010 : 2:06:26 PM
|
| That looks really good Cheez. I've been using the Woodland Scenics road system too. I used the foam tape that came with the system, but when that ran out I found cheap self adheasive weather strip at Lowes to make the barriers for the liquid road. I've been able to reuse the foam tape, but the second use I have to secure it to the layout with track nails. After it is dried it pulls right up.
|
|
Country: USA ~
Posts: 636 ~
Member Since: February 03 2008 ~
Last Visit: June 22 2026
|
Alert Moderator
|
|
|
|
Posted - November 23 2010 : 2:42:23 PM
|
| Thanks! I actually just use plaster and masking tape...it's pretty much the same as the Woodland Scenics system. The weather stripping is clever.
|
|
Country: Canada ~
Posts: 3448 ~
Member Since: September 22 2006 ~
Last Visit: April 03 2026
|
Alert Moderator
|
|
|
|
Posted - November 23 2010 : 9:34:51 PM
|
i'm in the midst of scenery building so i am very envious of your end results. a true autumn scene
Creativity and artistic aptitude is not me so i got to read a lot and copy
Love that rock arch and have a spot where i can make one as opposed to a conventional portal..
what are the trunks and branches of your trees made of. kit built???
I looked at woodland scenic trees but 4 for $10.00 is out of the question.
I'm going to try wire and foam.
I note you don't bother with ditches. I cut some into my foam. but they take up a lot of space and i can't make them look realistic. Real ditches are either full of weeds and brush or maintenence roads Thinking of forgetting ditches
what do you think?
|
|
Country: USA ~
Posts: 424 ~
Member Since: June 25 2010 ~
Last Visit: July 30 2021
|
Alert Moderator
|
|
|
|
Posted - November 24 2010 : 02:10:22 AM
|
quote:i'm in the midst of scenery building so i am very envious of your end results. a true autumn scene
Creativity and artistic aptitude is not me so i got to read a lot and copy
Love that rock arch and have a spot where i can make one as opposed to a conventional portal..
what are the trunks and branches of your trees made of. kit built???
I looked at woodland scenic trees but 4 for $10.00 is out of the question.
I'm going to try wire and foam.
I note you don't bother with ditches. I cut some into my foam. but they take up a lot of space and i can't make them look realistic. Real ditches are either full of weeds and brush or maintenence roads Thinking of forgetting ditches
what do you think? |
I'm not all that artistic either actually. I just picked out different elements that I liked and pieced them all together.
I thought the rock arch was a nice change. It's just a piece of styrofoam with some plaster smeared over it...easy to make
The trees are Woodland Scenics. If I was doing a larger layout I would've found a cheaper alternative, but I figured it wouldn't hurt too much for this. You could probably get some nice trees using twigs and branches from bushes.
As for the ditches, I didn't really have room for them on such a narrow layout. Unless you have a huge amount of space to work with, they'd probably just make less room for scenery.
|
|
Country: Canada ~
Posts: 3448 ~
Member Since: September 22 2006 ~
Last Visit: April 03 2026
|
Alert Moderator
|
|
|
|
Posted - November 25 2010 : 10:27:08 AM
|
instead of using plaster for roads what about cutting sheets of styrene or card board.
The plaster i bought from Hobby Lobby sets up so fast i have no time to work it.
Agree with you on the ditches, they look neat if done right but take up a lot of room and so far mine don't look at all realistic.
Saw a cool U Tube last night on electrostatic grass and electric fly swatter. stuff really looks real
There are just tons of U tubes on every subject regarding H O Lots of good info but the photography quality is lacking in some cases
|
|
Country: USA ~
Posts: 424 ~
Member Since: June 25 2010 ~
Last Visit: July 30 2021
|
Alert Moderator
|
|
|
|
Posted - November 25 2010 : 8:01:14 PM
|
I'm pretty sure there are some members here who use styrene sheets for their roads I use plaster of paris for my roads. I generally make the mixture nice and runny so it pours smooth and evens out on its own.
Youtube definitely has some useful resources
|
|
Country: Canada ~
Posts: 3448 ~
Member Since: September 22 2006 ~
Last Visit: April 03 2026
|
Alert Moderator
|
|