|
|
 Posted - December 14 2022 : 11:42:56 PM Posted - December 14 2022 : 11:42:56 PM


|
Hello All...
It has been a while since I posted anything here, I apologize for my absence. I have a good excuse though, I have spent the last two years replacing my old O scale Urban Railroad for a new HO scale layout. So far the new pike only consists of a ten track staging yard and not much else, but I am finally reaching the stage where I can start laying the main line.
One feature I want my new railroad to have is a causeway through a navigable waterway with a movable span bridge. Since the layout will have to be built specifically to accommodate this feature, I decided the first thing I need to do was build a bridge!
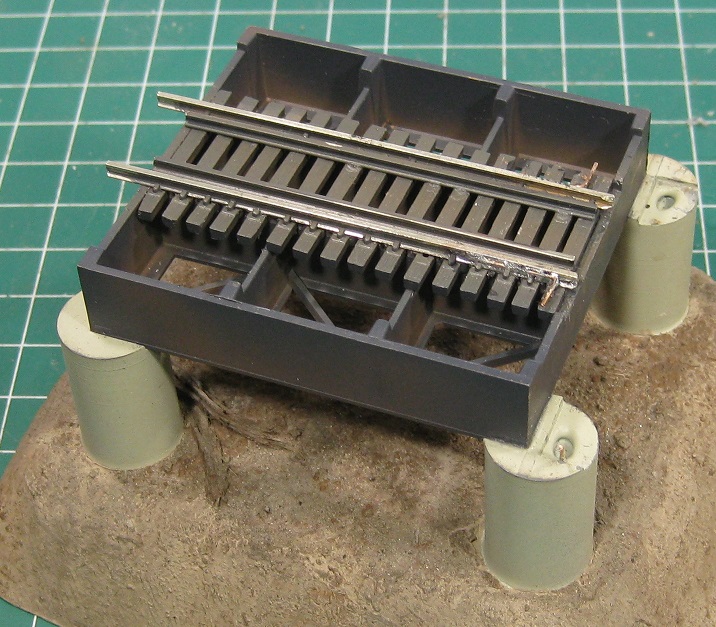
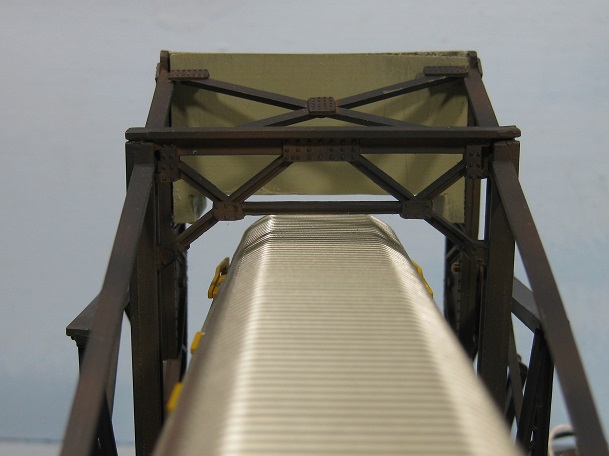
The model I chose will be familiar to anyone who collects Tyco and AHM products; the 5818 (AHM) Rolling Bridge. I was also fortunate enough to find a motorizing kit specifically made for this kit....
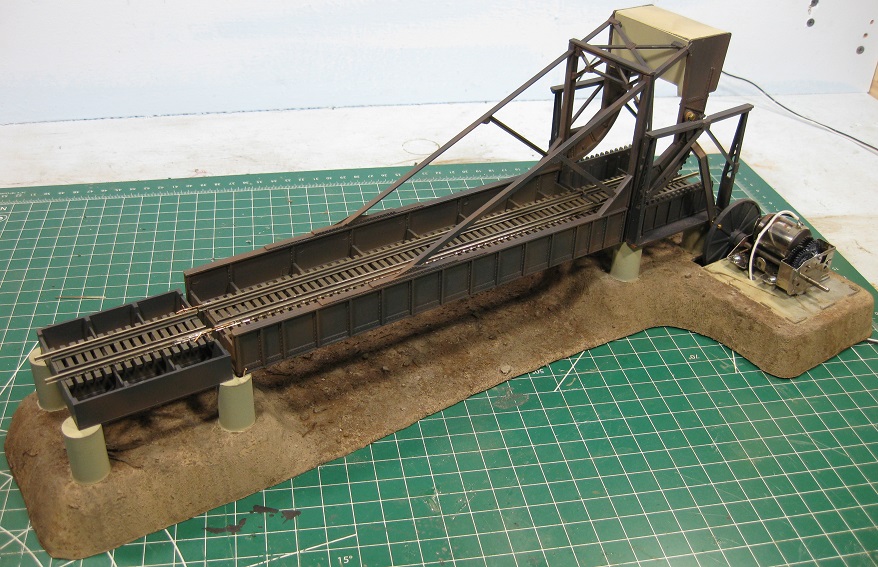
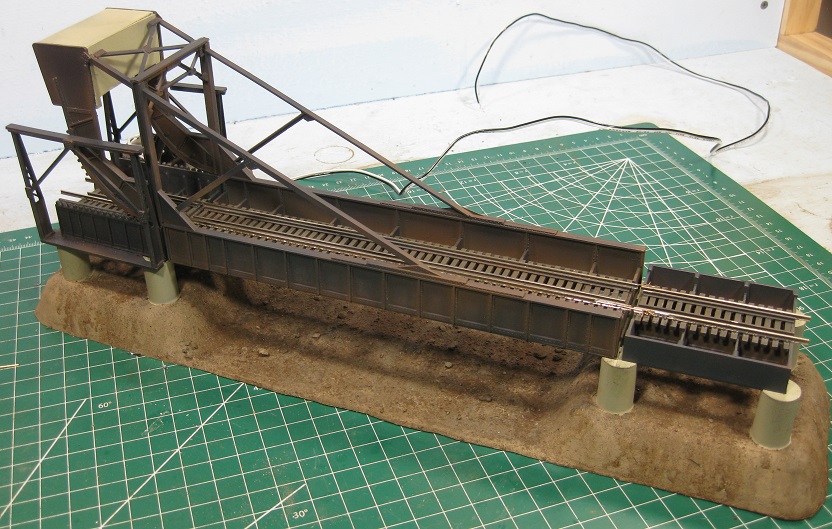
This model is well engineered, for a structure this complex it has very few parts. Even better everything fits together easily. My only complaint is that the instructions are rather vague on some points, specifically on how to get power to the running rails of the movable span. Two pieces of wire are included in the kit, but there is no direction on how to use them. Not that it mattered much, I didn't want to mar the appearance of the bridge with dangling wires anyway. I chose instead to fabricate contacts using phosphor bronze wire that would electrically connect the rails on the movable span to the rails on the approach pier when the bridge was lowered....
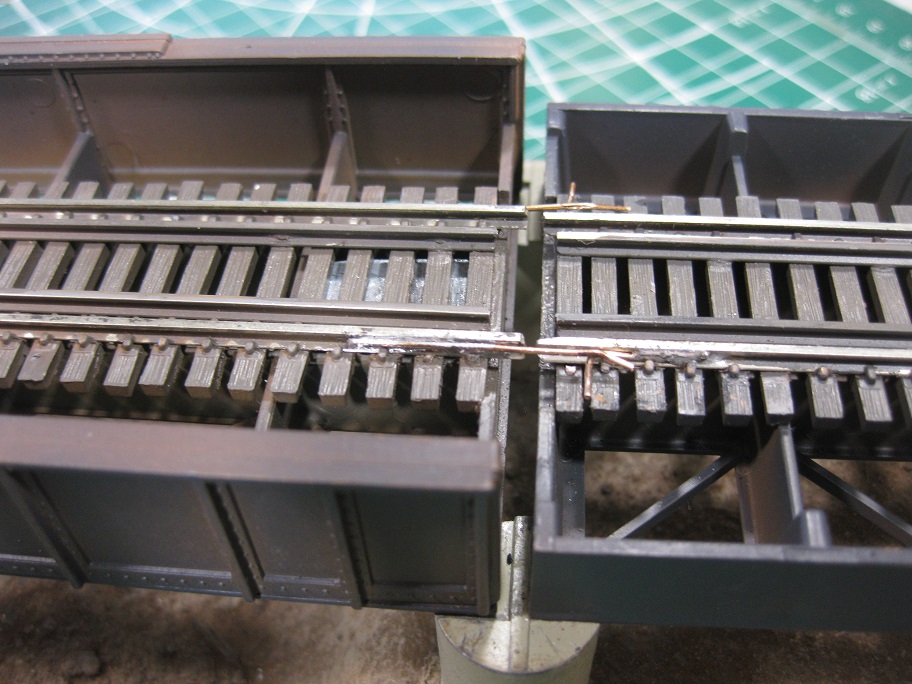
I also decide to replace the brass code 100 sectional track supplied with the kit with code 83 rail with closely spaced ties and guide rails. The close tie spacing really makes the model stand out, I did this by removing the tie strips from a length of code 83 flex track and then individually cementing each tie to the bridge deck.
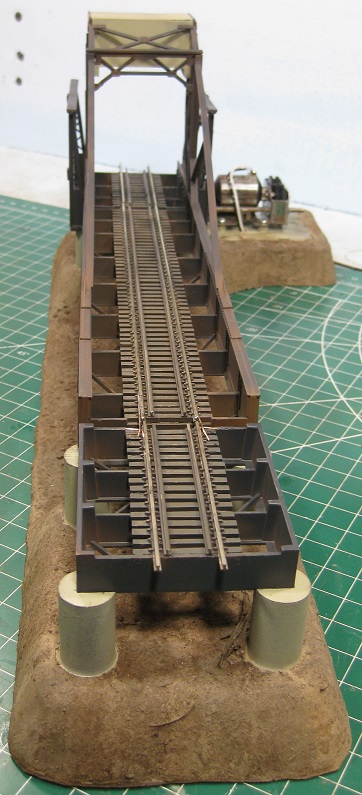
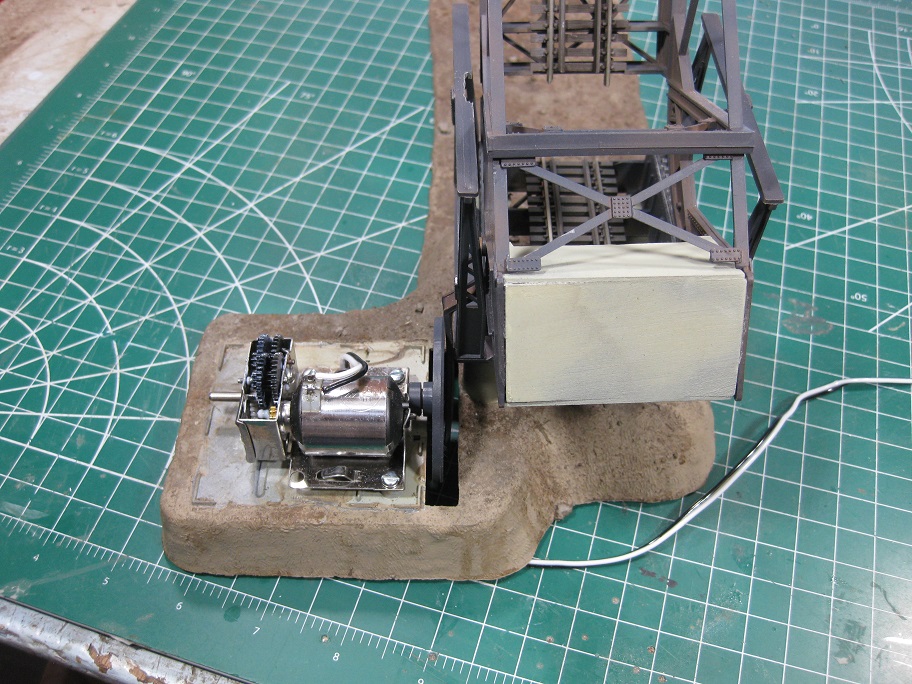
The most significant modification I made to this bridge was to increase the clearance underneath the concrete counter weight. I wanted my bridge to clear auto racks but as built the counterweight was too low. To fix this problem, a quarter inch deep notch must be cut from the bottom side of the counterweight and the subsequent hole filled in with styrene plastic. (After photographing the model I noticed that I will have to work on the seams of the counterweight to make it appear more like a solid block of concrete, oh well...)

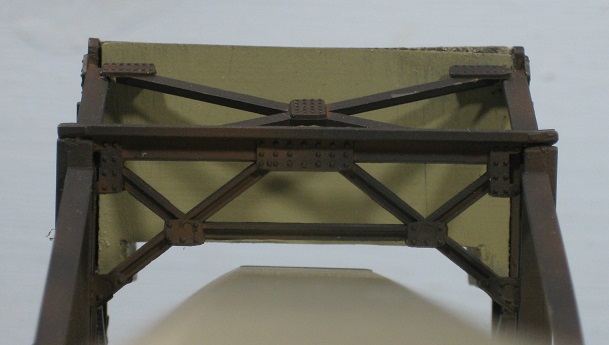
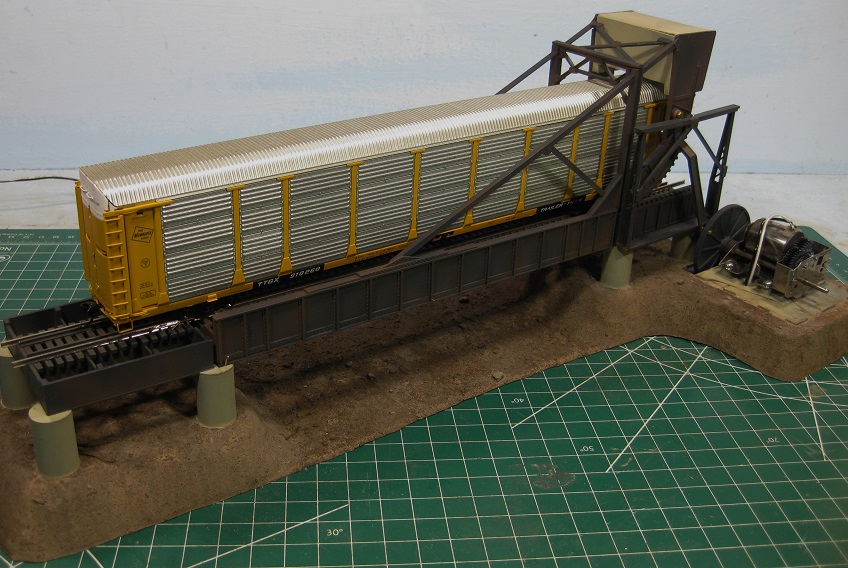
Before I assembled the bridge, I painted it with modelflex paints. The first coat was a gray primer followed by a coat of "rust red". I then lightly covered the model with "grimy black" and painted the ties "rail brown". The base was painted with an earth colored latex paint that was then coated with a fine dirt material.
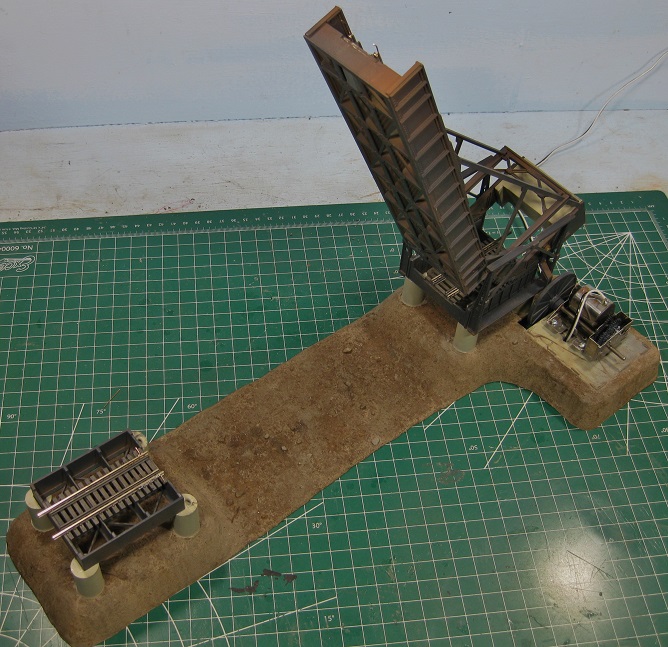
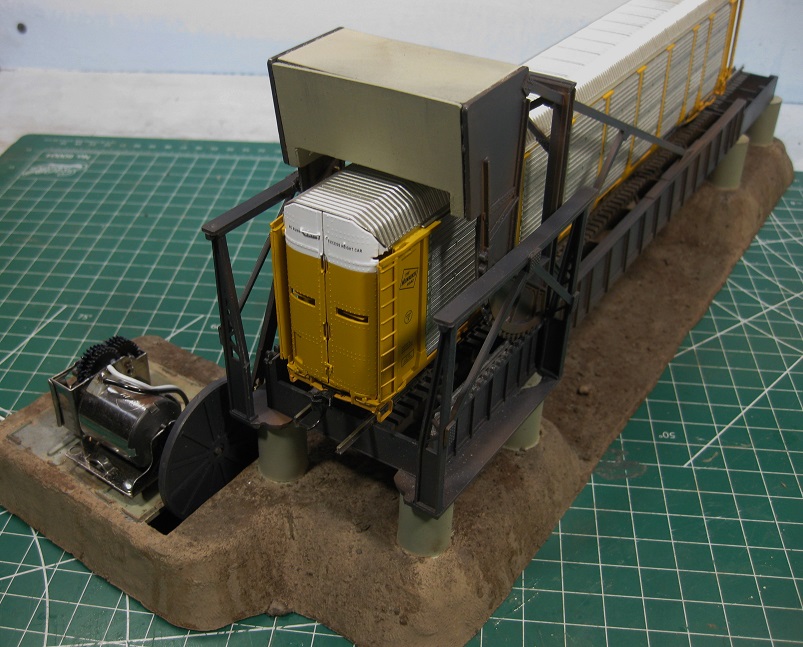
The bridge is operated by a variable speed DC electric motor coupled up to a gear box. The bridge movement is actually pretty realistic. I advise anyone who is interested in an operating model, motorized or not, to take their time to get this bridge to roll correctly on it's cogs. I found it necessary to use jewelers files to gently open up some tight clearances where the moving span interfaces with the motor pier. This is necessary not only to get the bridge to move properly but also to get the running rails to line up correctly when the moving span is lowered to accommodate train traffic.
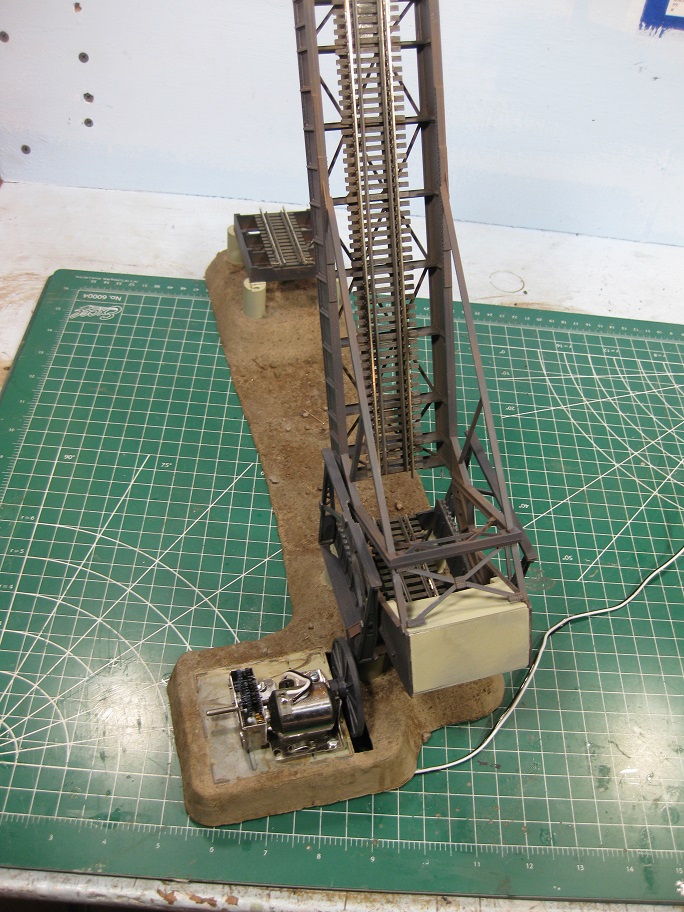
The motorizing kit includes a structure that looks like a dilapidated shed to sever as a cover for the electric motor and gear box, but I am not going to use it. Prototype railroad lift spans usually feature an observation tower to monitor the water way and the railroad from. This I plan on making a bridge tower by kitbashing two Tyco Signal Tower kits to create a proper workplace for my bridge tender!
The following video was made while I was bench testing my bridge. One of the draw backs to the motorizing kit is the noise, I am hoping that the tower structure which will cover the mechanism will cut the noise down somewhat. I apologize for the quality of the video, one of these days I need to get a better camera!
Proudly keeping Tyco Pluggers out of landfills since 2016
Edited by - Srenchin on December 14 2022 11:56:46 PM
|
Country:  USA ~
Posts: 821 ~
Member Since: December 26 2009 ~
Last Visit: June 26 2026 USA ~
Posts: 821 ~
Member Since: December 26 2009 ~
Last Visit: June 26 2026
|
 Alert Moderator
|
|
|
|
Posted - December 15 2022 : 09:15:57 AM
|
Great bridge and a good job getting it all together. Looking forward to seeing it on your layout.
Master Of Plasticville
|
|
Country: USA ~
Posts: 455 ~
Member Since: March 17 2015 ~
Last Visit: June 09 2026
|
Alert Moderator

|
|
|
|
Posted - December 15 2022 : 10:30:37 AM
|
  I did not know such a thing existed, by AHM, or otherwise. The adjustment to the counterweight is seamless, I did not know such a thing existed, by AHM, or otherwise. The adjustment to the counterweight is seamless,
one would not know it was modified had you not mentioned it. The roof top hobo will have a real bad
time of it, however. So would James Bond if he had to engage in hand-to-hand combat whilst underway.
That being said, have you settled on a water effect? A moving vessel, by some contrivance, would put the
cherry on the sundae?
Edited by - Chops124 on December 15 2022 10:35:40 AM
|
|
Country: USA ~
Posts: 11686 ~
Member Since: December 09 2013 ~
Last Visit: May 26 2026
|
Alert Moderator
|
|
|
|
Posted - December 15 2022 : 2:00:10 PM
|
quote: I did not know such a thing existed, by AHM, or otherwise. The adjustment to the counterweight is seamless,
one would not know it was modified had you not mentioned it. The roof top hobo will have a real bad
time of it, however. So would James Bond if he had to engage in hand-to-hand combat whilst underway.
That being said, have you settled on a water effect? A moving vessel, by some contrivance, would put the
cherry on the sundae?
Originally posted by Chops124 - December 15 2022 : 10:30:37 AM
|
Thanks Chops, I have toyed with some ideas for a moving boat, I'll have to get back to you on that . .
Proudly keeping Tyco Pluggers out of landfills since 2016
|
|
Country: USA ~
Posts: 821 ~
Member Since: December 26 2009 ~
Last Visit: June 26 2026
|
Alert Moderator
|
|
|
|
Posted - December 16 2022 : 10:33:23 PM
|
Nice model all around. I like what you did with the ties. Bridge ties generally are quite closely spaced and visibly bigger than ordinary ties.
Carpe Manana!
|
|
Country: USA ~
Posts: 2417 ~
Member Since: September 17 2013 ~
Last Visit: June 24 2026
|
Alert Moderator
|
|
|
|
 Posted - December 17 2022 : 10:16:42 AM Posted - December 17 2022 : 10:16:42 AM
|
I know! use fake water & use a ship with WHEELS on the bottom! 
|
|
Country: USA ~
Posts: 15029 ~
Member Since: February 23 2009 ~
Last Visit: June 26 2026
|
Alert Moderator
|
|
|
|
Posted - December 18 2022 : 9:48:36 PM
|
Very well done! Awesome job! The weathering work is very realistic
"Let your light so shine before men, that they may see your good works, and glorify your Father which is in Heaven." - Matthew 5:16
Youtube Channel: www.youtube.com/rpmodelrailroads
Instagram: https://www.instagram.com/rp_model_railroads/
|
|
Country: USA ~
Posts: 4669 ~
Member Since: August 11 2017 ~
Last Visit: July 20 2023
|
Alert Moderator
|
|