|
kb1857
Switcher
Status:
offline
| |
 Posted - March 22 2017 : 2:59:08 PM Posted - March 22 2017 : 2:59:08 PM


|
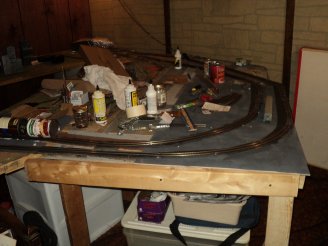
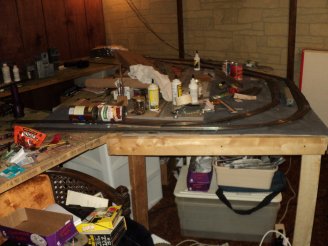
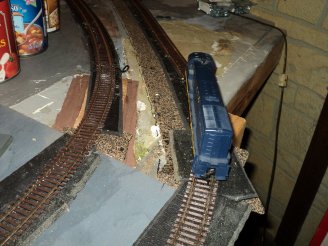
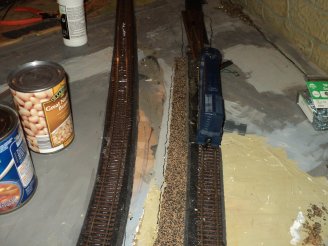
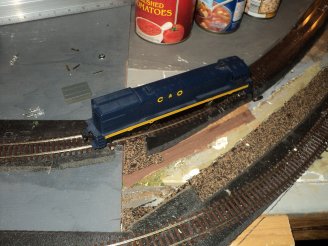
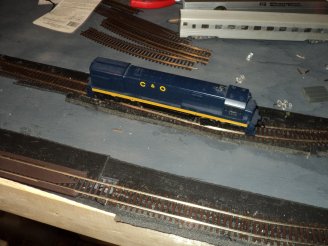
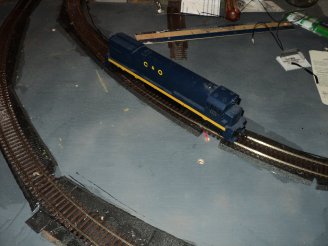
My layout is starting to pick up speed as Ive' been able to get two rows of mainline track laid at the front,resolving the electrical issue and feeders to the outside rails on both tracks with a little wiggling and using my noggin.Hooked up a terminal strip to both tracks and found no dead spots yet this is a picture of my atlas u boat running around the outside track on just power from the power pack .1_Dsc06689.jpg
[/img] [img]/tyco/forum/uploaded/kb1857/20170322142251_Dsc06690.jpg[/img] [img]/tyco/forum/uploaded/kb1857/20170322142346_Dsc06691.jpg[/img] [img]/tyco/forum/uploaded/kb1857/20170322142541_Dsc06692.jpg[/img] [img]/tyco/forum/uploaded/kb1857/20170322142713_Dsc06695.jpg[/img] [img]/tyco/forum/uploaded/kb1857/20170322142912_Dsc06698.jpg[/img]
Man those 22 inch curves make a world of difference,I was able to pull one of my larger passenger cars around on both tracks with no hangups or derailments so far so good.We will see what happens when the feeder wires are hooked to the juice.
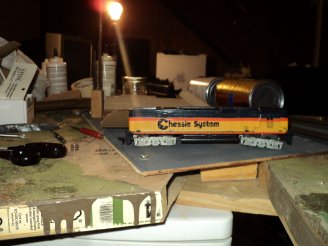
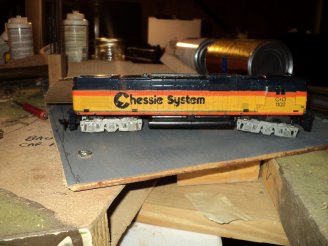
[img]/tyco/forum/uploaded/kb1857Scored this alco and a caboose for six bucks /20170322144110_Dsc06702.jpg[/img]
[img]/tyco/forum/uploaded/kb1857/20170322144314_Dsc06703.jpg[/img]
[img]/tyco/forum/uploaded/kb1857/20170322144807_Dsc06706.jpg[/img]
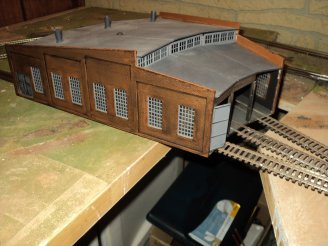
And i got this smaller round house for cheap all ready built just needs a couple scratch built doors and it doesn't take up as much room as the old home built one i had looks better too.
Edited by - toptrain on April 05 2017 5:54:41 PM
|
Country:  USA ~
Posts: 78 ~
Member Since: January 30 2007 ~
Last Visit: July 10 2024 USA ~
Posts: 78 ~
Member Since: January 30 2007 ~
Last Visit: July 10 2024
|
 Alert Moderator
|
|
|
kb1857
Switcher
Status:
offline
| |
Posted - March 22 2017 : 3:10:56 PM
|
Sorry the pictures didn't post here's what I meant to put up in the the message
Edited by - toptrain on April 05 2017 5:51:27 PM
|
|
Country: USA ~
Posts: 78 ~
Member Since: January 30 2007 ~
Last Visit: July 10 2024
|
Alert Moderator

|
|
|
|
Posted - March 22 2017 : 4:25:35 PM
|
| That roundhouse will add some interest. Be nice to see the pictures a bit bigger Ken. What did you take them with?
|
|
Country: USA ~
Posts: 2087 ~
Member Since: March 16 2013 ~
Last Visit: July 05 2018
|
Alert Moderator
|
|
|
kb1857
Switcher
Status:
offline
| |
Posted - March 22 2017 : 8:51:20 PM
|
| I used my digital camera but I had to shrink the pictures to 4x5 to get the uploader on this site to except them into the message anything any bigger and this site just waffles when I try and upload then i get a dumb error message so that's why their that small
|
|
Country: USA ~
Posts: 78 ~
Member Since: January 30 2007 ~
Last Visit: July 10 2024
|
Alert Moderator
|
|
|
|
Posted - March 22 2017 : 10:25:51 PM
|
| I've used a program (picasa; which I just learned Google is doing away with, though now maybe Google photos will do the same?) to drop photo size to 1200 pixels. These have uploaded OK, though it takes a moment. You may have noticed that some photos on this site, allow you to enlarge them a bit; those, I believe are the 1200 pixel ones. Probably many folks here who know more about this than me.
|
|
Country: USA ~
Posts: 2087 ~
Member Since: March 16 2013 ~
Last Visit: July 05 2018
|
Alert Moderator
|
|
|
|
Posted - March 24 2017 : 10:39:33 AM
|
| Lot going on, thanks for posting.
|
|
Country: USA ~
Posts: 11686 ~
Member Since: December 09 2013 ~
Last Visit: May 26 2026
|
Alert Moderator
|
|
|
kb1857
Switcher
Status:
offline
| |
Posted - March 30 2017 : 11:05:41 PM
|
I wanted to add some picture's updating what ive' done so far hopefully the pictures are bigger so you see my work and how it's progressing.Outside rail is in all the way to the back running the entire length of the table.I sorta struggled with this a bit but got er' done checked the current to it and that's good then got a portion of my inside rail layed and curved to the rear 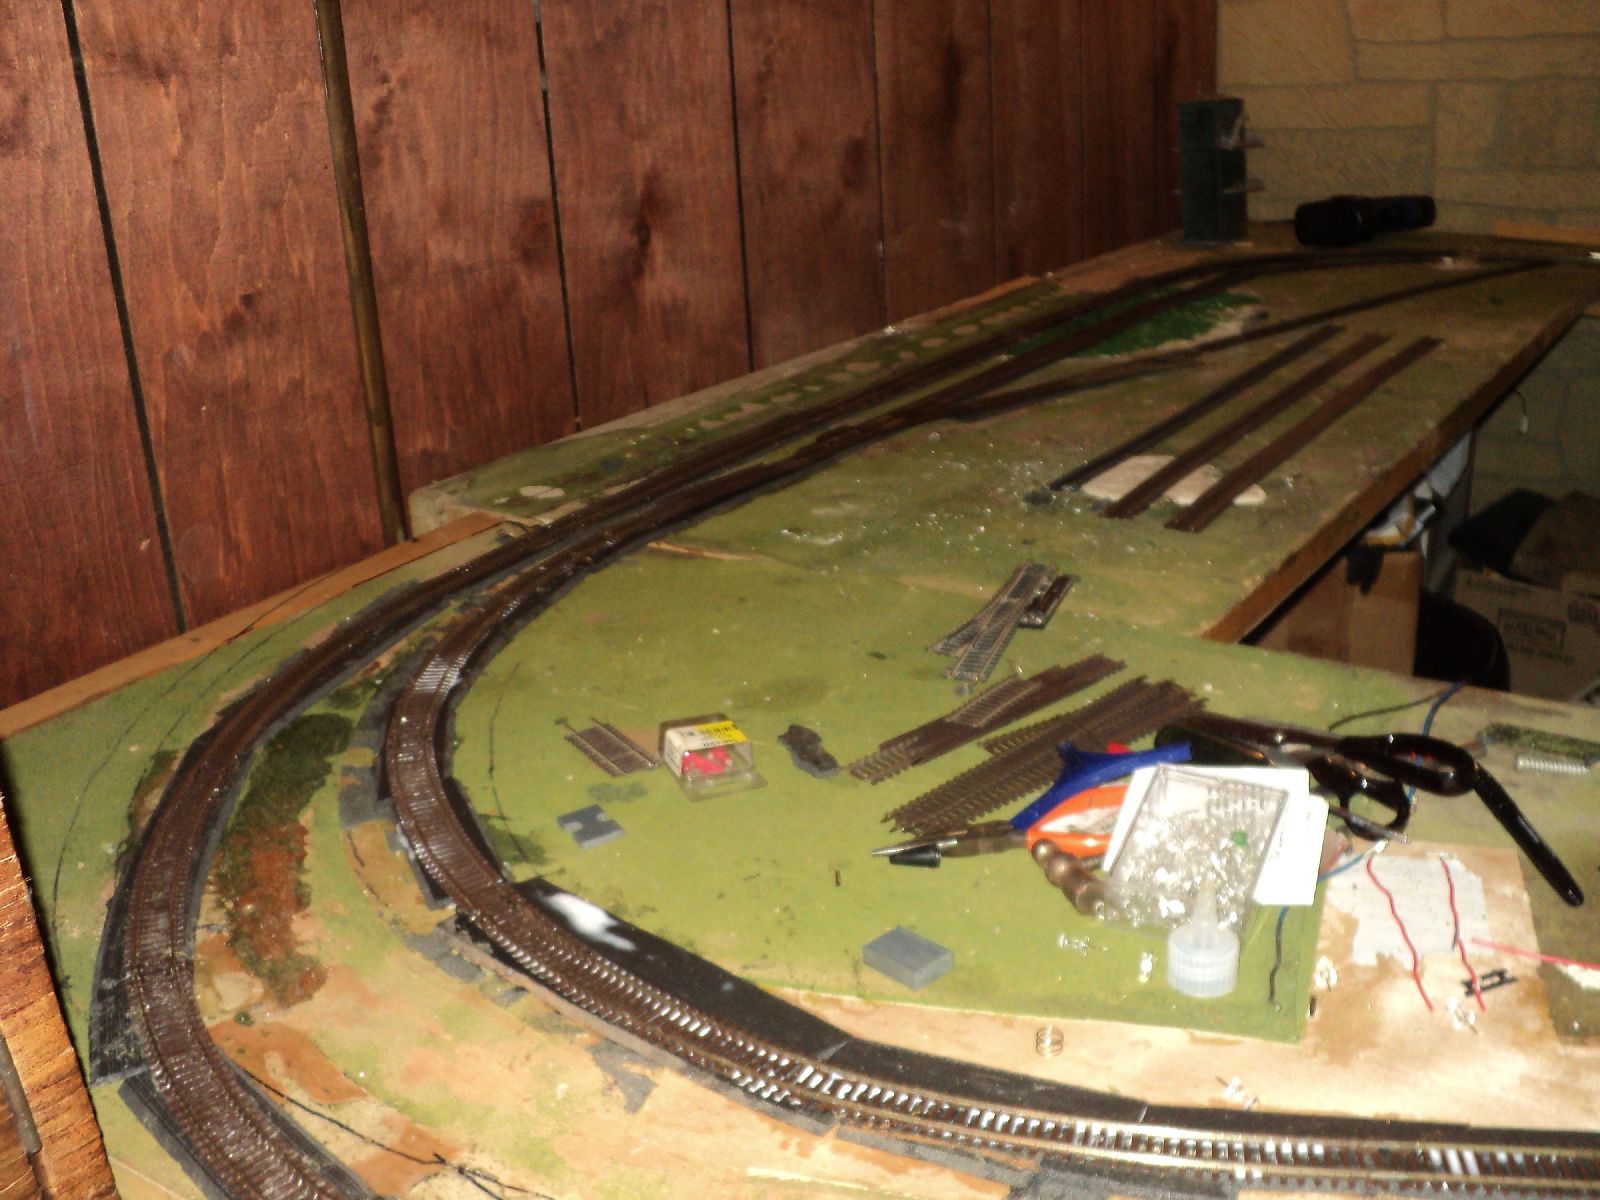 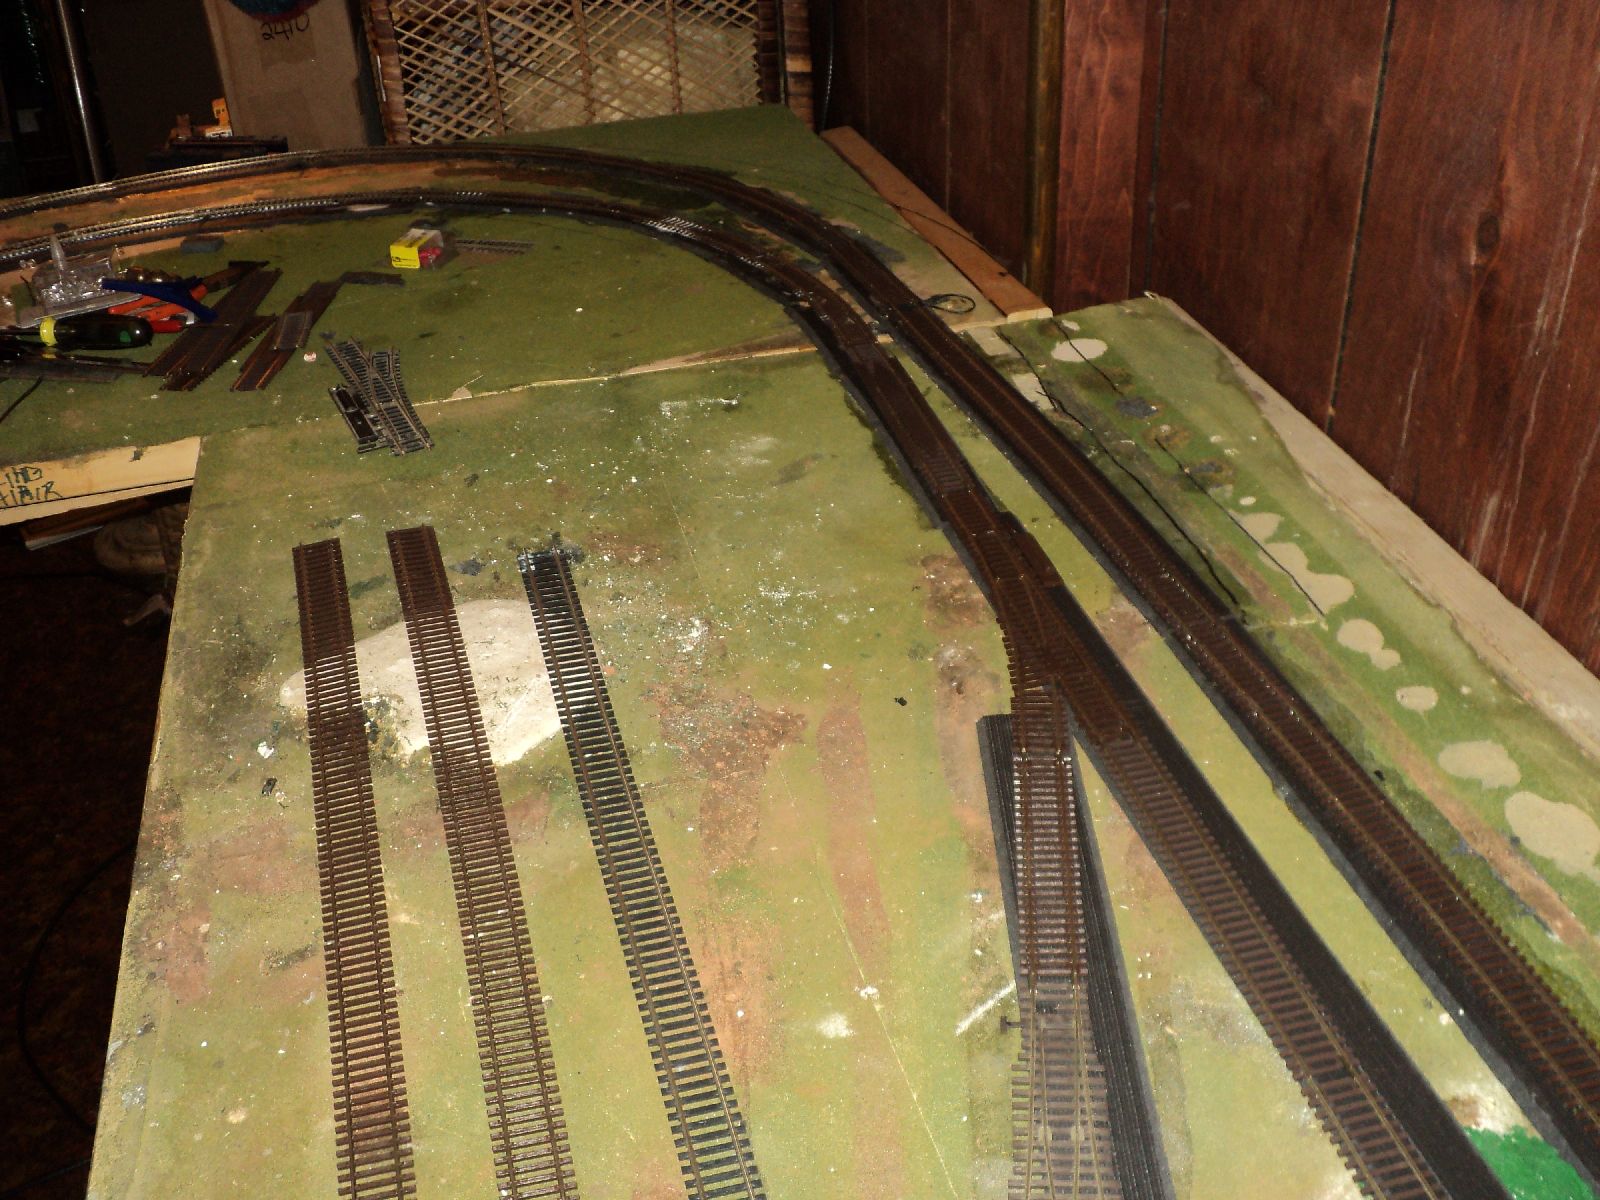 Also I got my first #6 switch installed but I wasn't too happy with the remote snap switch I bought at a local hobby store I just refuse to belive that little plastic lever's gonna trip that switch when i want it to so I rigged up something with some k & s 0.15 music wire through a piece of plastruct tubing the wire will be hooked to a ground through switch I can reach and throw Also I got my first #6 switch installed but I wasn't too happy with the remote snap switch I bought at a local hobby store I just refuse to belive that little plastic lever's gonna trip that switch when i want it to so I rigged up something with some k & s 0.15 music wire through a piece of plastruct tubing the wire will be hooked to a ground through switch I can reach and throw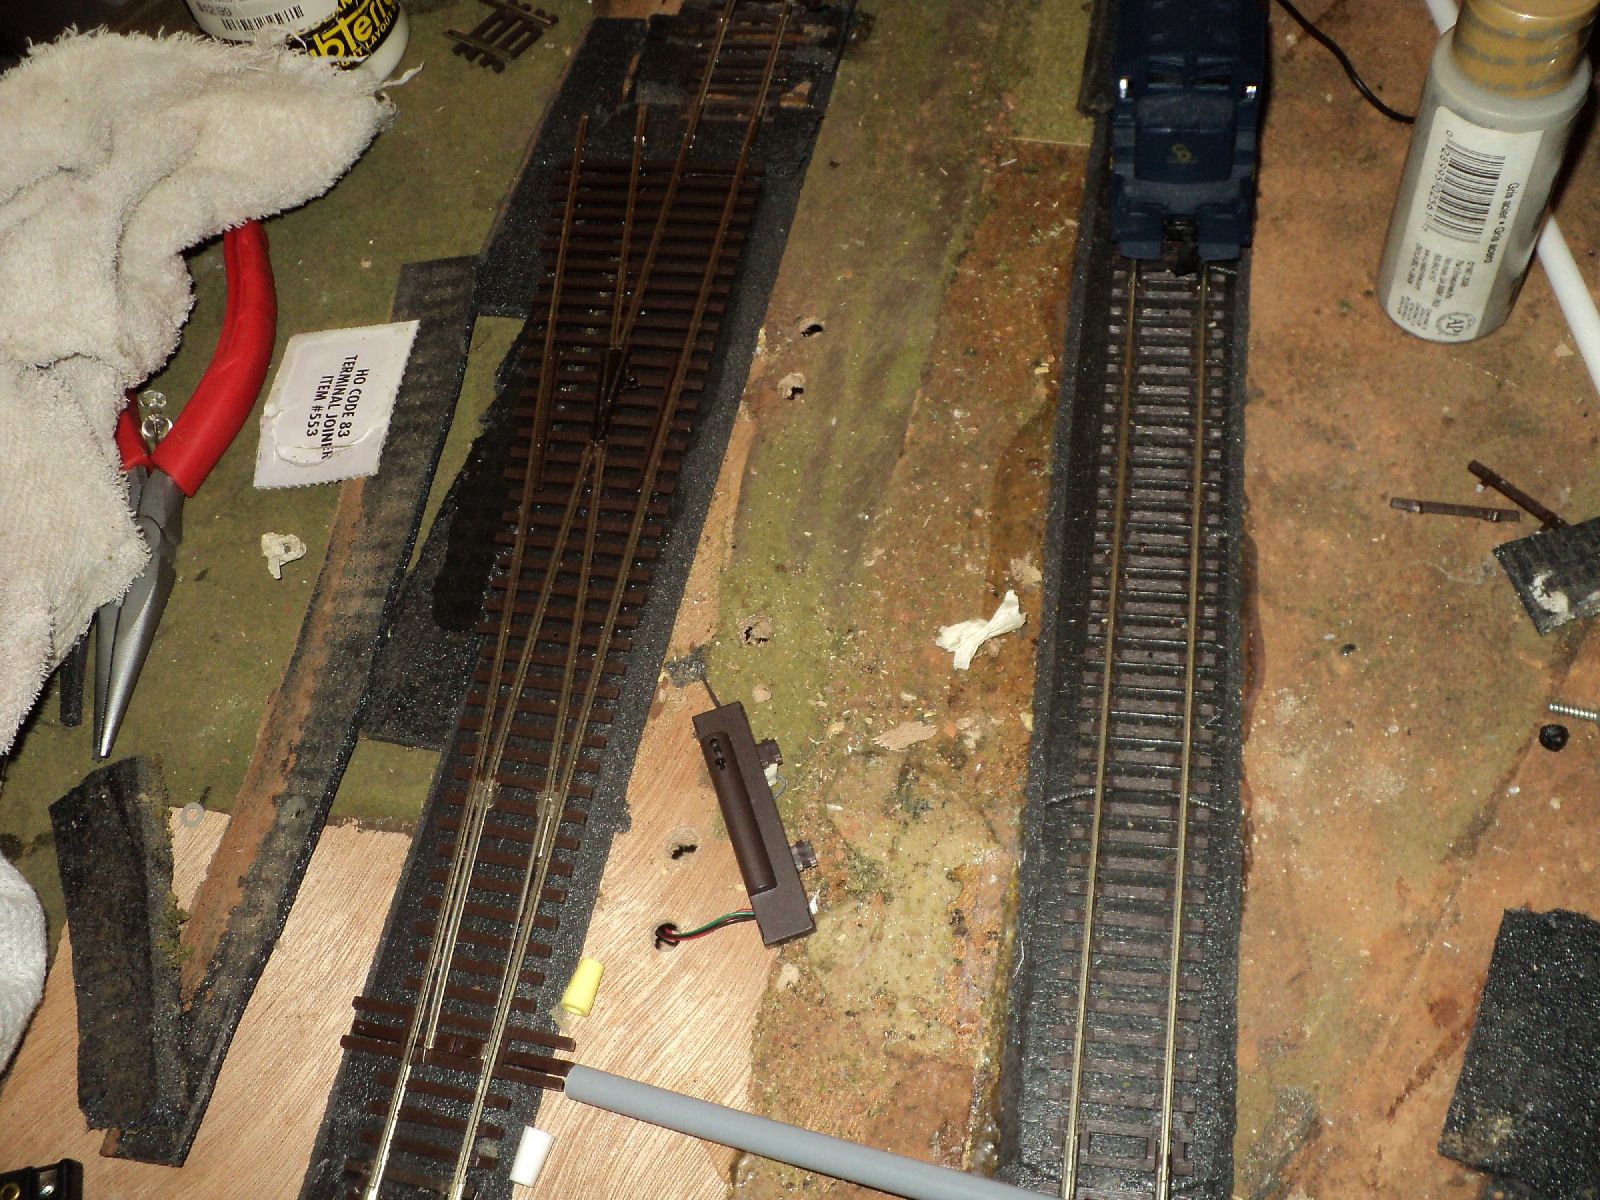 Saw a guy do this on you tube and it works ,more practical to me that those snap switches and the tubing protects the wire,keeps it from grounding or shorting anything plus you can make it look like a drainage pipe lol.Also i figured where my mountain and coal mining operation is gonna fit into the layout Saw a guy do this on you tube and it works ,more practical to me that those snap switches and the tubing protects the wire,keeps it from grounding or shorting anything plus you can make it look like a drainage pipe lol.Also i figured where my mountain and coal mining operation is gonna fit into the layout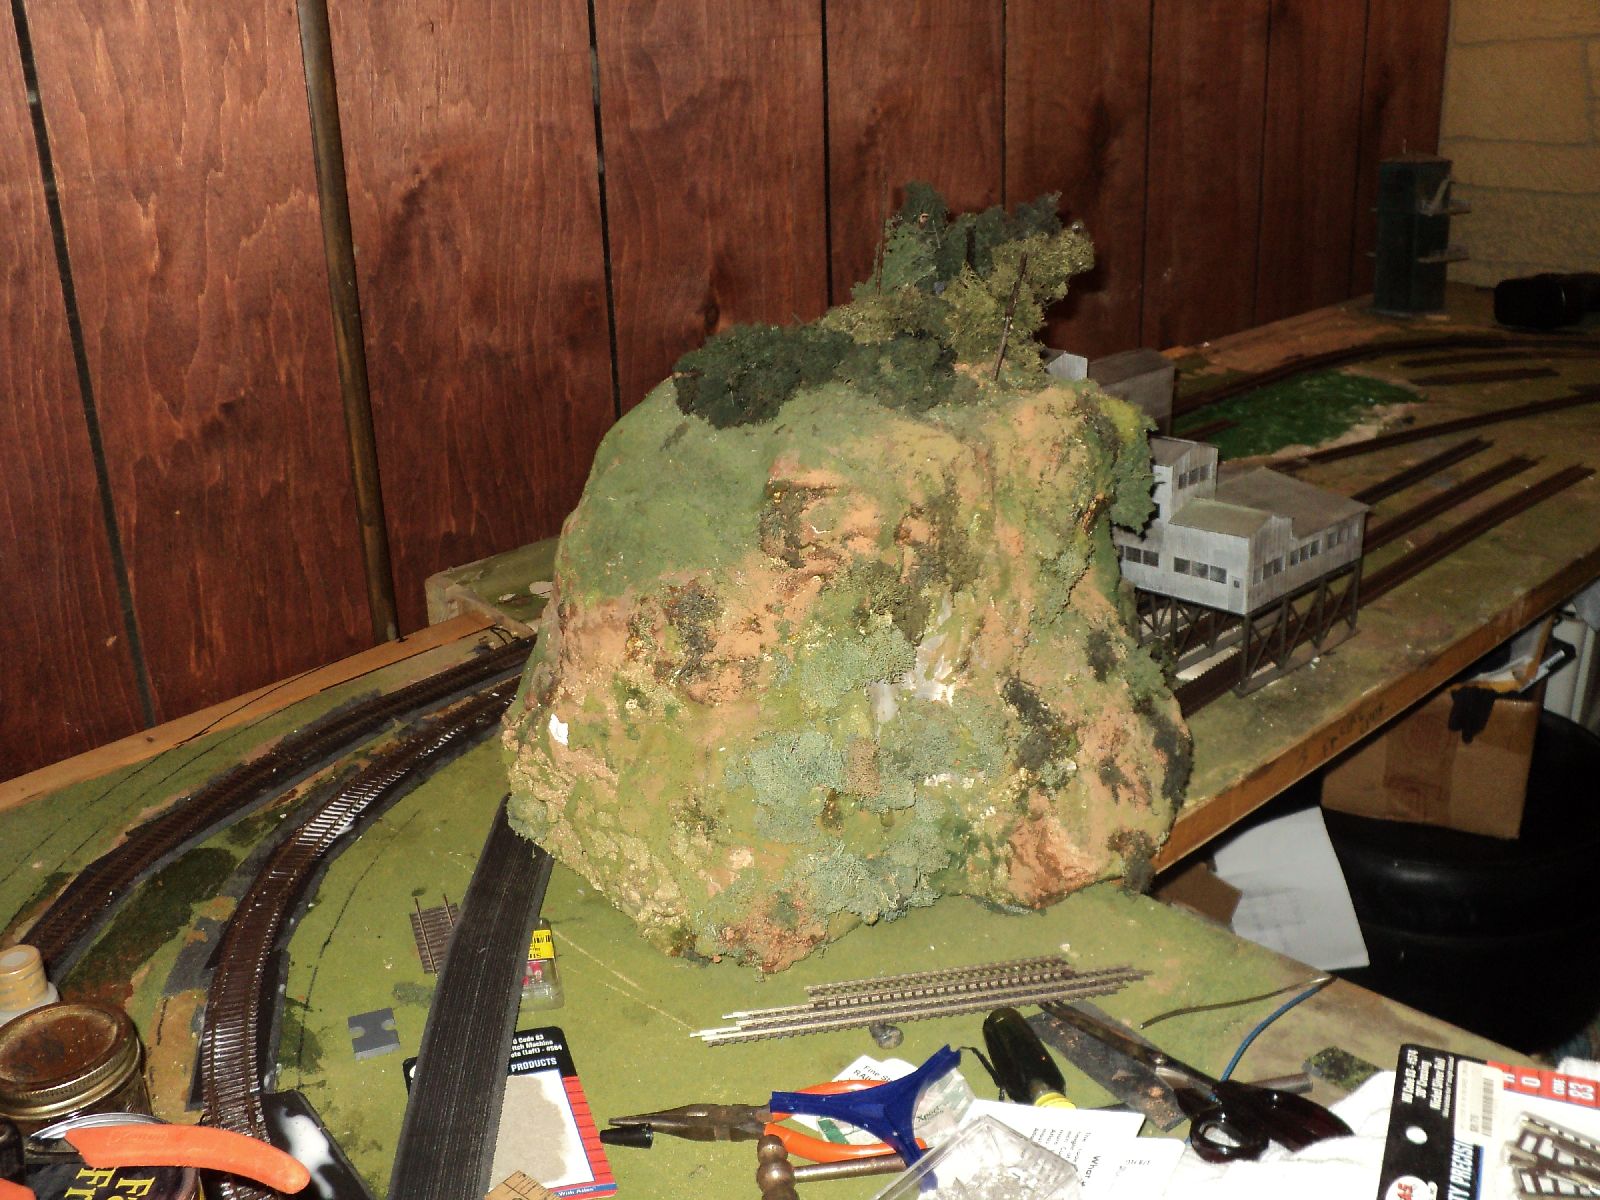 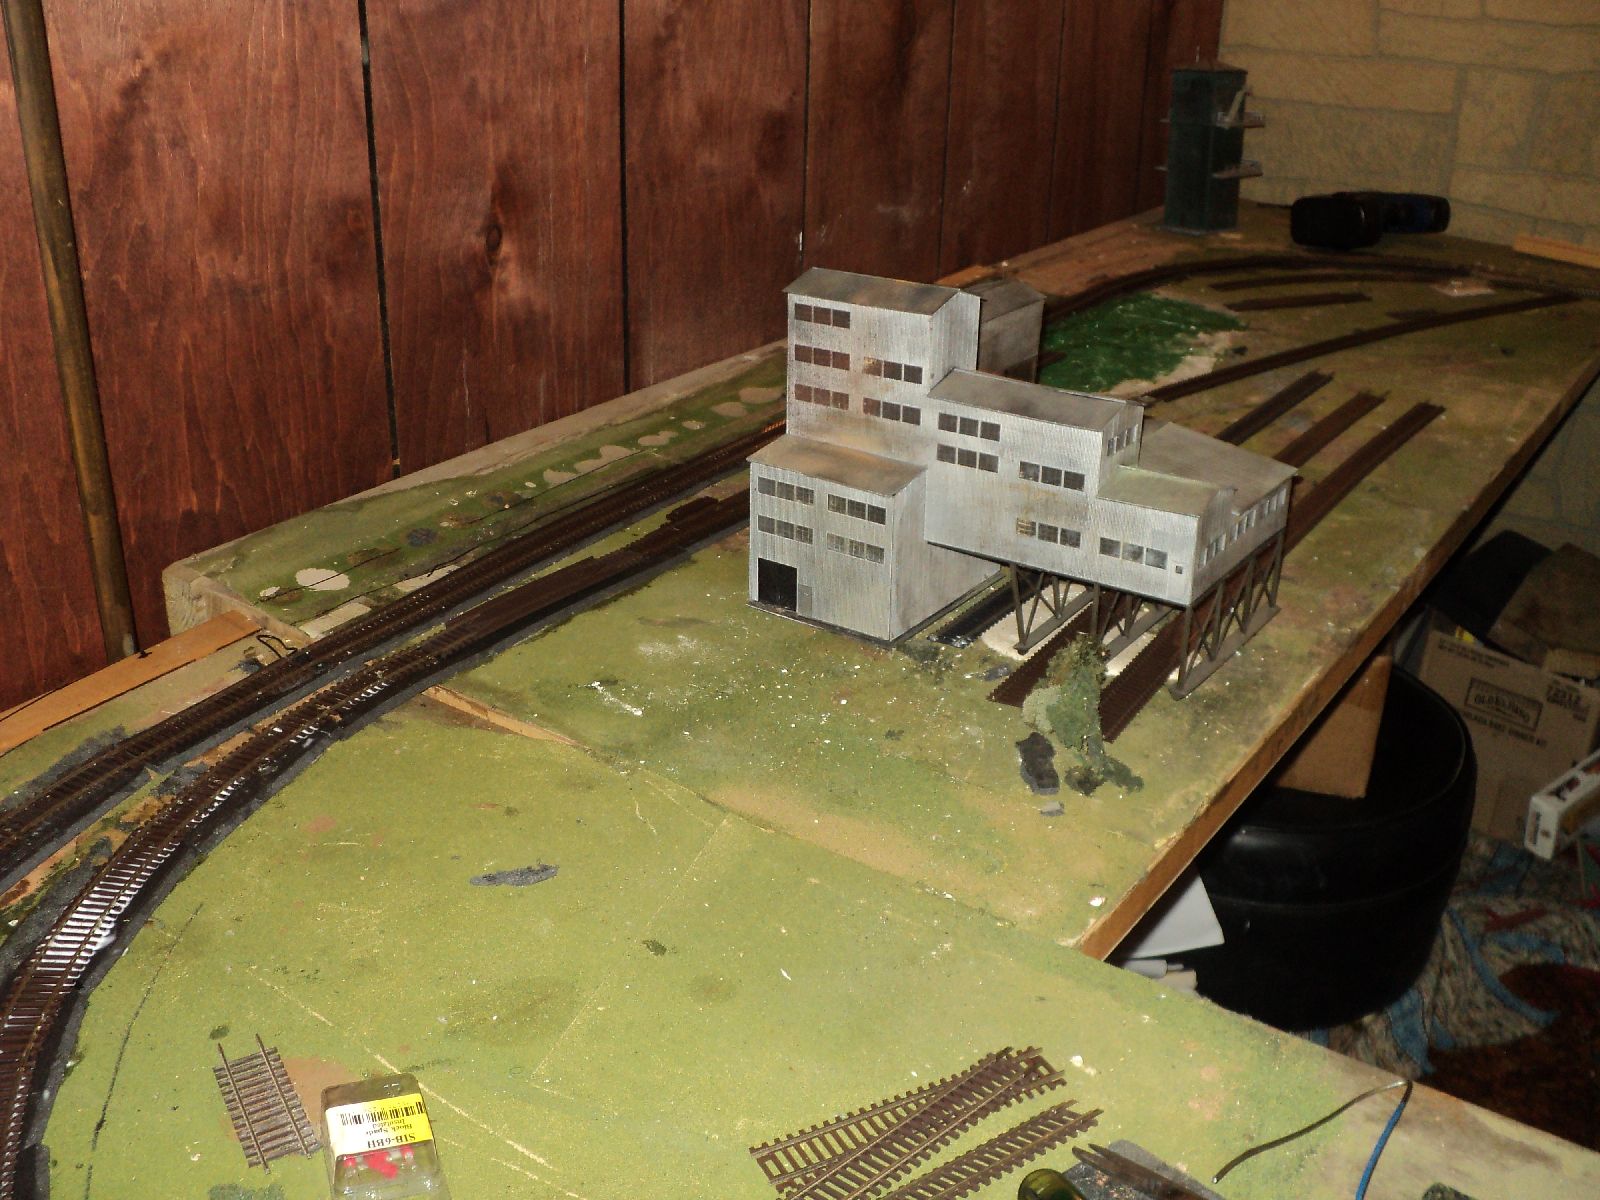 Installed the second switch on back inside track both switched i was able get my biggest club car rolling stock through with no hang ups in the flanges or frogs so that was a positive .thanks for looking Installed the second switch on back inside track both switched i was able get my biggest club car rolling stock through with no hang ups in the flanges or frogs so that was a positive .thanks for looking
|
|
Country: USA ~
Posts: 78 ~
Member Since: January 30 2007 ~
Last Visit: July 10 2024
|
Alert Moderator
|
|
|
|
Posted - March 30 2017 : 11:38:43 PM
|
| Hey Ken, Glad you were able to get you pictures bigger; more fun to look at now. That's a pretty good spread you got there. Be fun to run trains on.
|
|
Country: USA ~
Posts: 2087 ~
Member Since: March 16 2013 ~
Last Visit: July 05 2018
|
Alert Moderator
|
|
|
|
Posted - March 31 2017 : 8:14:13 PM
|
| Looks promising. I am enjoying seeing this. Keep us posted!
|
|
Country: USA ~
Posts: 11686 ~
Member Since: December 09 2013 ~
Last Visit: May 26 2026
|
Alert Moderator
|
|
|
kb1857
Switcher
Status:
offline
| |
Posted - April 05 2017 : 3:21:04 PM
|
Been laying some more track, finally got one entire circle of the outside rail connected all the entire length of the layout,feeders in but i haven't put the juice to it yet and installed my third ground throw switch .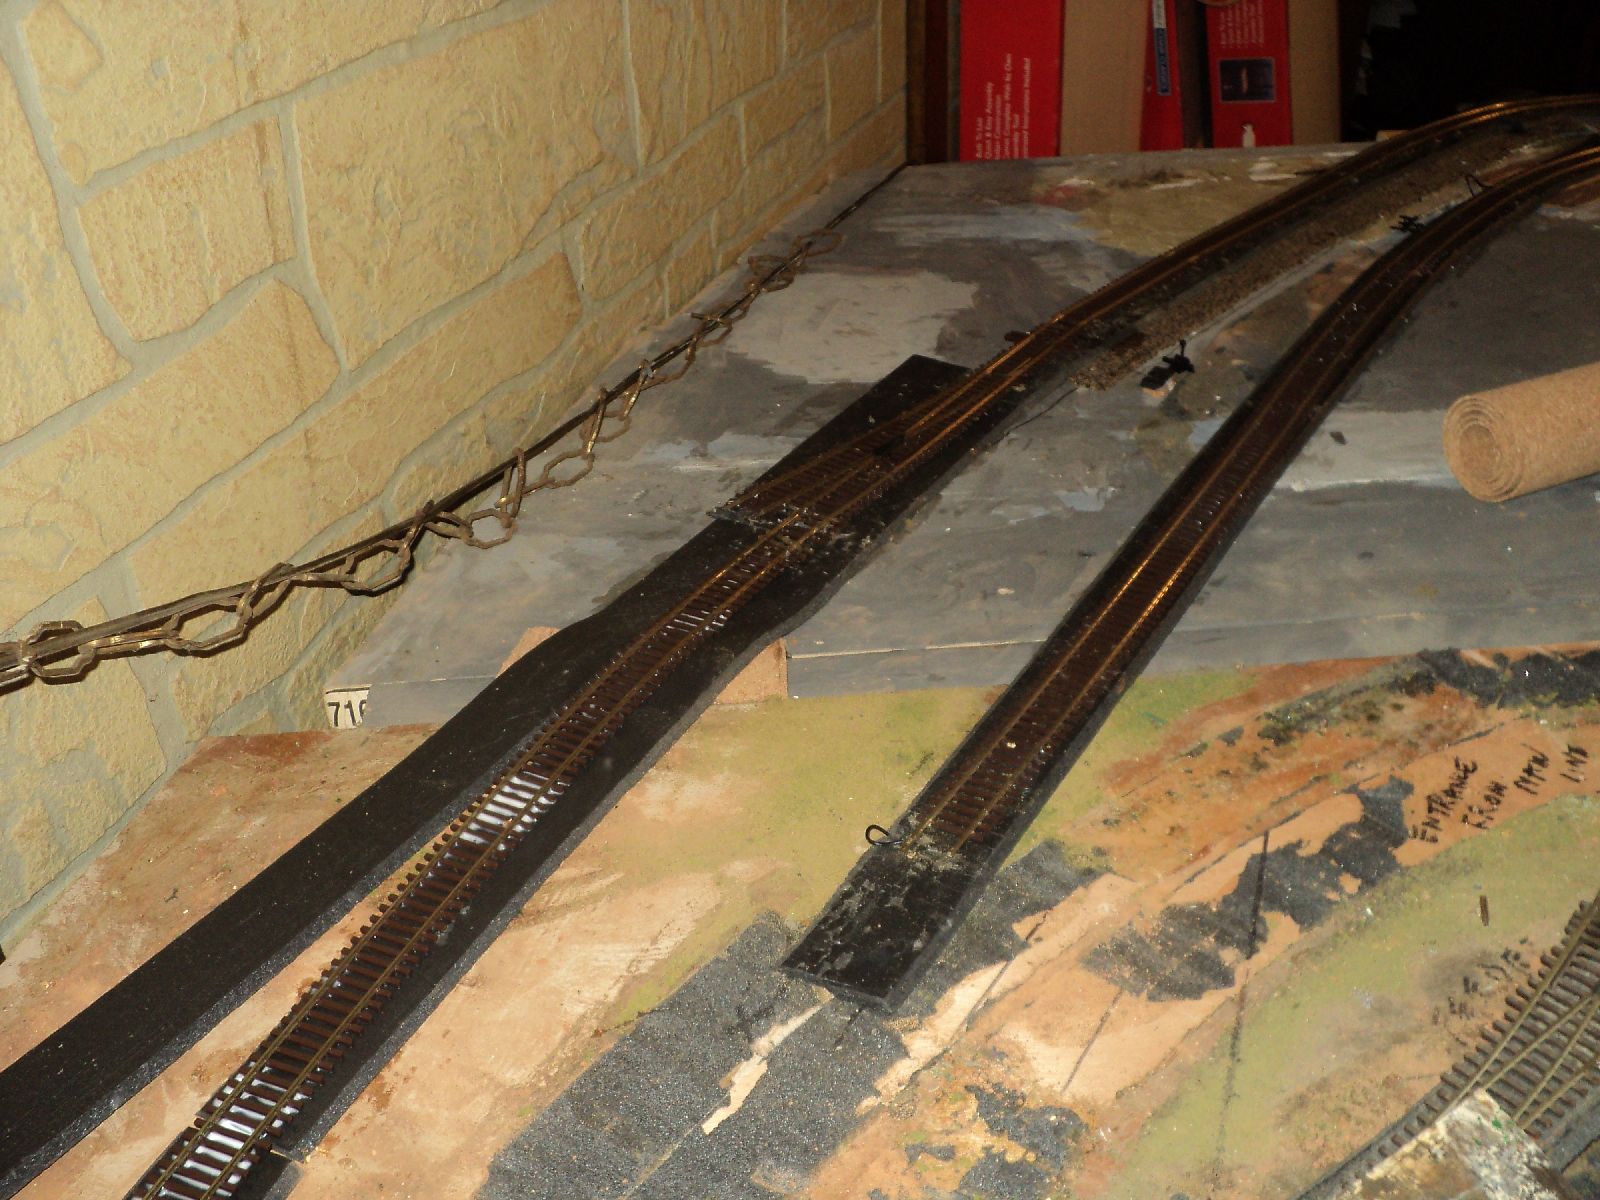 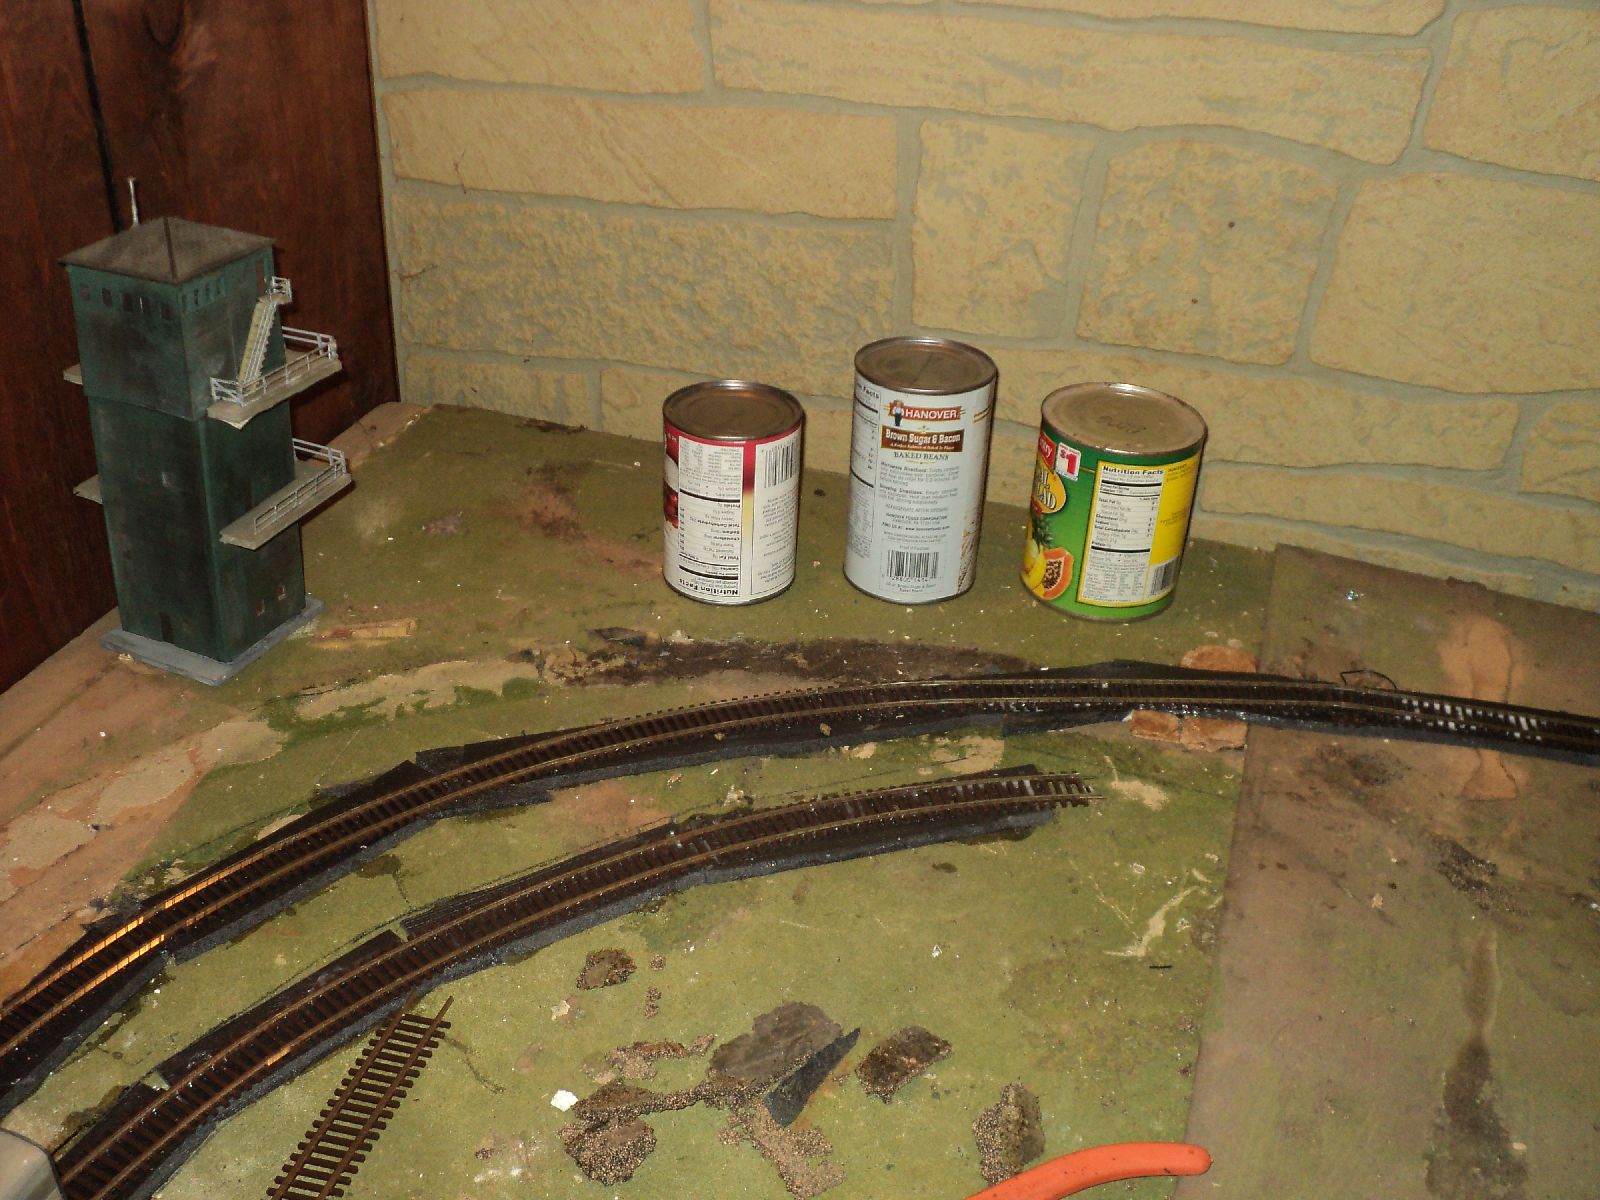 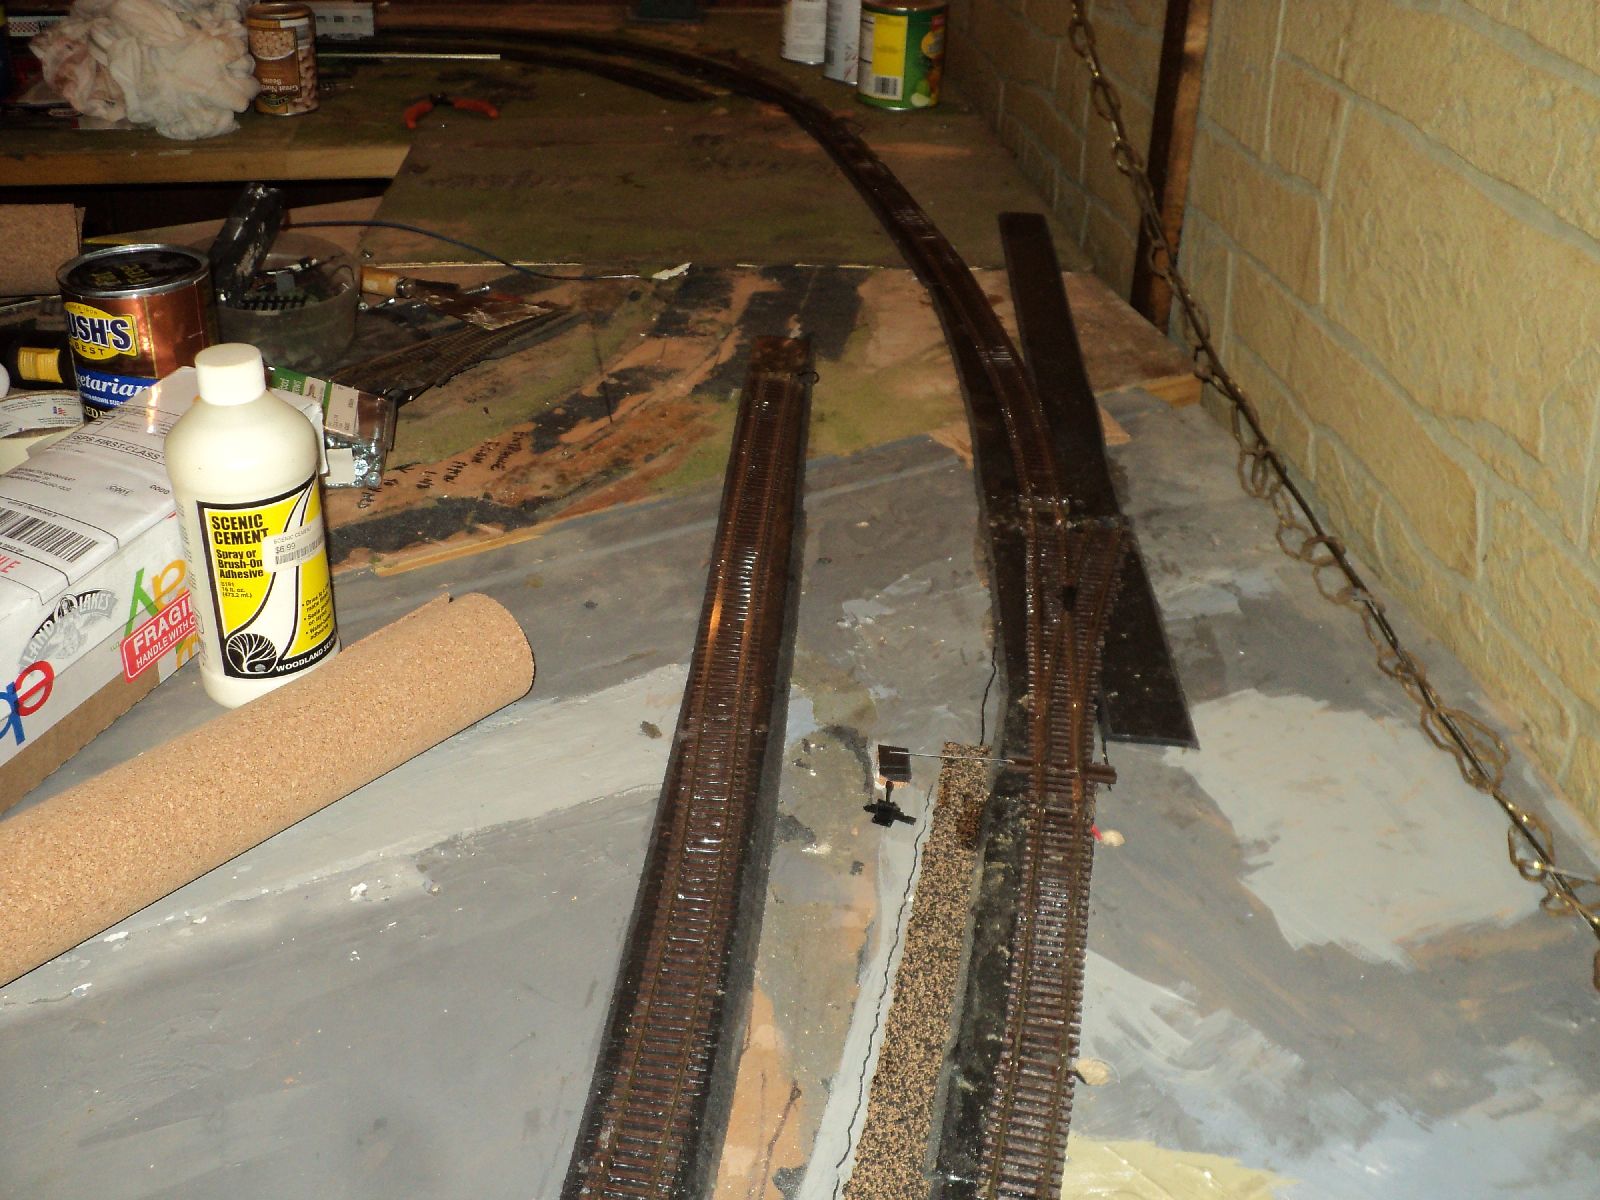 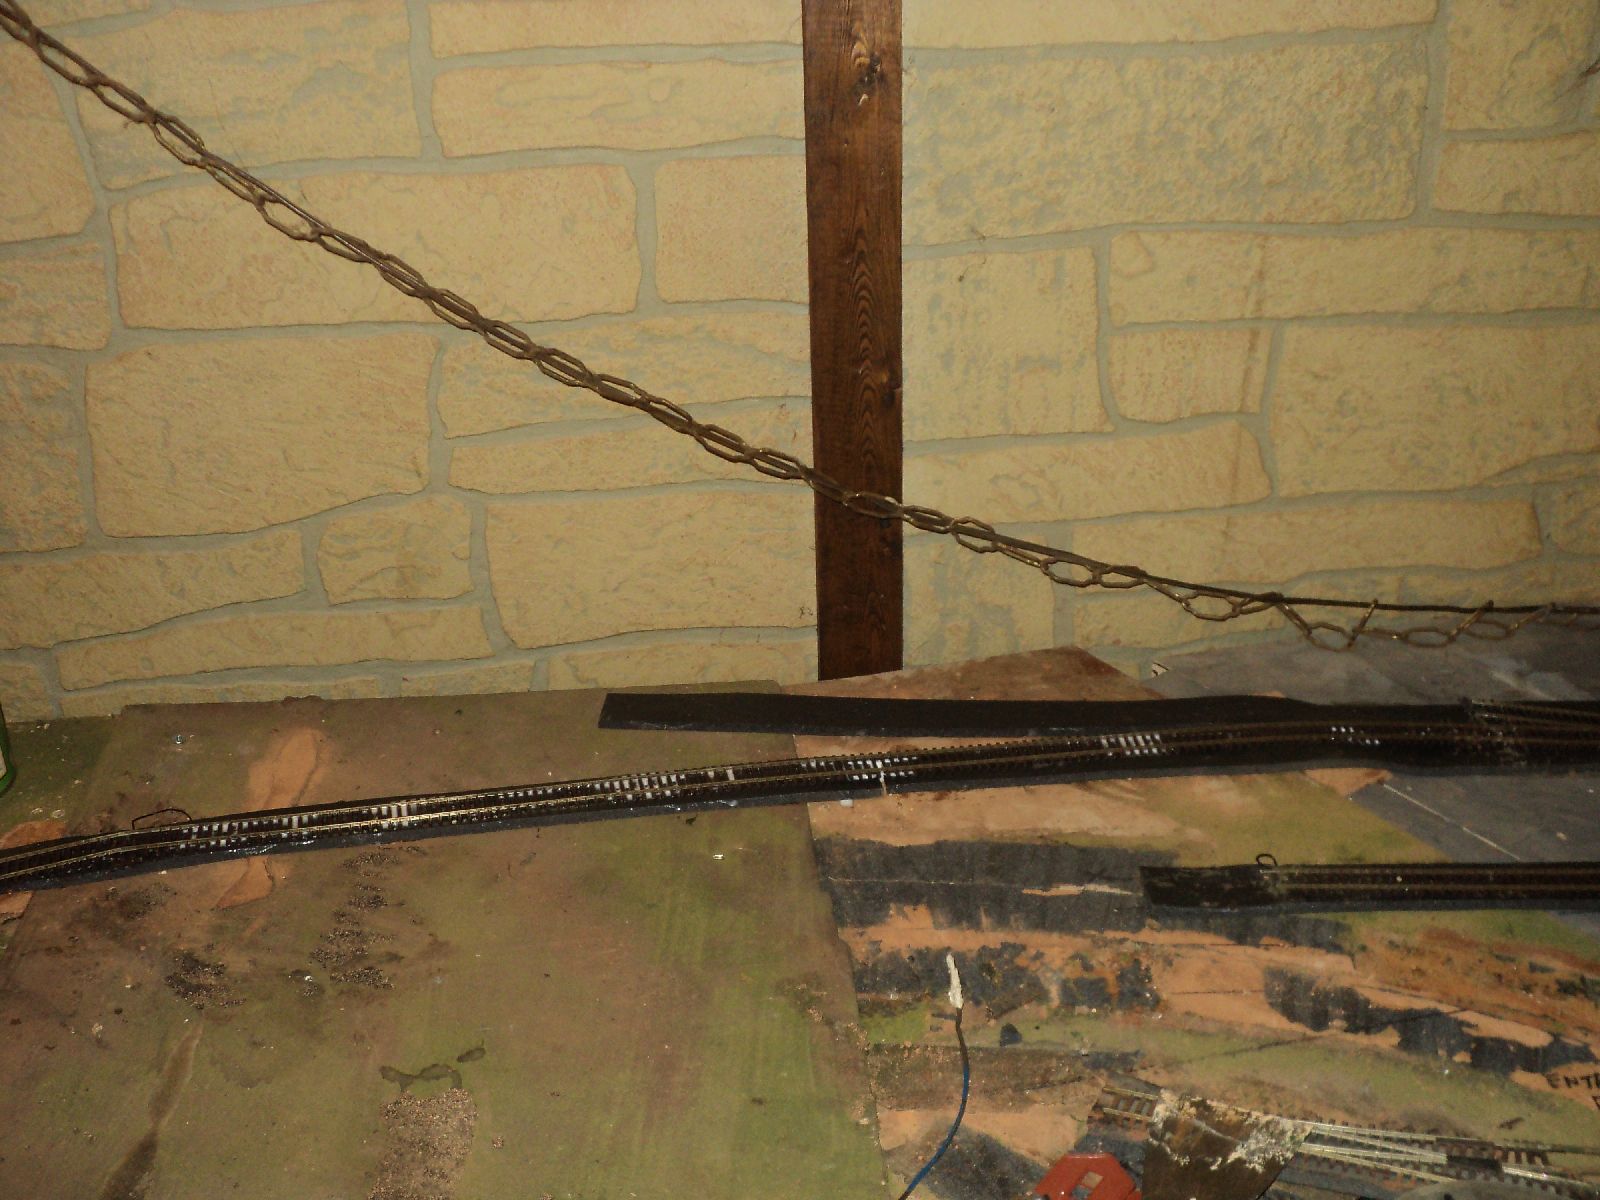 I struggled with this side for a couple days because of trying to get the flex track to fit right between the switch and the back end curve of the layout. I struggled with this side for a couple days because of trying to get the flex track to fit right between the switch and the back end curve of the layout.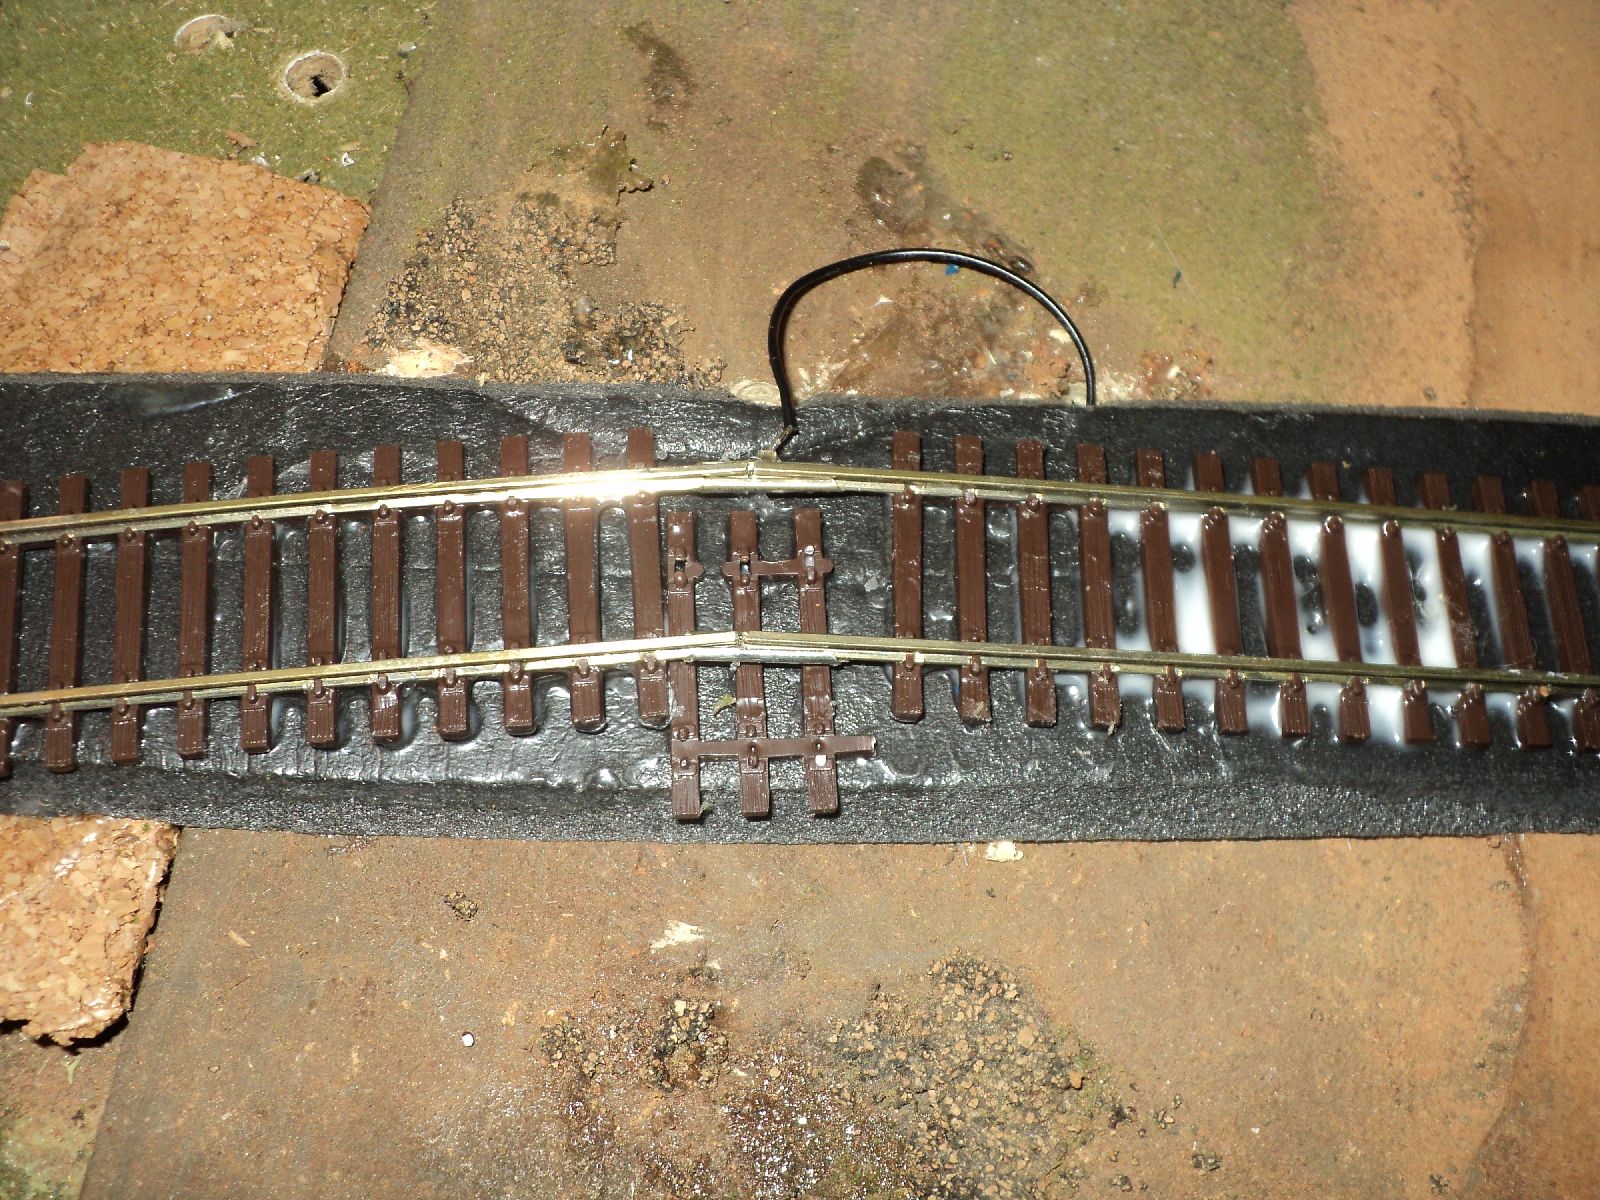 This I might end up redoing as I am seeing a possible derail or connection problem down the road but its coming together This I might end up redoing as I am seeing a possible derail or connection problem down the road but its coming together
|
|
Country: USA ~
Posts: 78 ~
Member Since: January 30 2007 ~
Last Visit: July 10 2024
|
Alert Moderator
|
|
|
|
Posted - April 05 2017 : 4:21:13 PM
|
Yeah, you're gonna want to redo that last bit. Full size mine carts might make it around shallow corners, but tiny HO scale cars , like most rail equipment need curves. Best to fix it now before you do anything else to that section. You'll need to trim a bit of rail off of the outside rail.
My Youtube Channel: http://www.youtube.com/user/weekendrailroader?blend=1&ob=video-mustangbase
|
|
Country: USA ~
Posts: 189 ~
Member Since: March 07 2012 ~
Last Visit: February 16 2026
|
Alert Moderator
|
|
|
|
Posted - April 06 2017 : 12:31:25 AM
|
Looks like you're using Shinora Flex track, and Shinora turn outs.
A good quality, to be sure. Yeah, any little kink in the joiners will give
you massive aggravation later on, particularly where it leads to a turn out.
My experience is to resist the urge to make anything too permanent too soon.
Changes in temperature and settling of the baseboards will affect rails in
surprising ways. Tack things down, to be sure, but hold off on the glue
for as long as possible.
Run a lot of trains and see where the problems keep recurring. Sometimes
just a spike or two will level things out to perfection, sometimes you will
need to replace an entire turnout or section until you smooth out the
invisible kinks.
Turnouts that are hard to reach (greater than 2 1/2 feet from the edge of a layout
are better not done at all. They will come back to haunt you.
Looks to be Code 83 rail, which has a more scale appearance. I think
Tyco wheel flanges will clear that, though some of the more dyed-in-the-
wool Tyco guys might be able to speak to that.
I tend to avoid the higher scale stuff- like Kadees, Kadee proto scale couplers,
Proto scale flanges, because I like to fool around with the vintage Tyco, vintage
Marx, vintage AHM (well it's all vintage now, isn't it...) and some of this high
scale stuff won't accommodate my old jalopies...a matter of taste, I represent
the shake-the-box crowd. I make no claim to having high-end skills.
My main objective is to keep it on the rails more than on the ground.
As far as juice goes, you will need to put in an insulator on the
inside rail of the section of turnout that branches away from the
main track (does that make sense?) and run a jumper wire
to that rail, if that is a passing siding. That's because those
Shinora, (and Peco's, and Hornbys, and some Mark V Atlas)
have power routing turn outs and throwing the turnout
will cause an automatic short circuit. They work good, but they
need an extra little electrical insulator or ZAP.
One error I've seen is modelers cutting into frogs and such. No
major surgery needed. Just drop in extra insulators and wire
it with a jumper. Simple.
Sorry, that was long winded, but bottom line, I like what you
are doing and want to see you succeed.
Edited by - Chops124 on April 06 2017 12:57:44 AM
|
|
Country: USA ~
Posts: 11686 ~
Member Since: December 09 2013 ~
Last Visit: May 26 2026
|
Alert Moderator
|
|
|
|
Posted - April 06 2017 : 1:54:11 PM
|
| Looks nice and dirty like a real railroad.
|
|
Country: USA ~
Posts: 2087 ~
Member Since: March 16 2013 ~
Last Visit: July 05 2018
|
Alert Moderator
|
|
|
kb1857
Switcher
Status:
offline
| |
Posted - April 07 2017 : 9:49:13 PM
|
This is for chops, do I need to put the plastic insulater where ive placed the square on the picture of the turnout and can i put the wire where ive put the arrow on the outside rail or does the feeder wire gotta be on the same rail in the square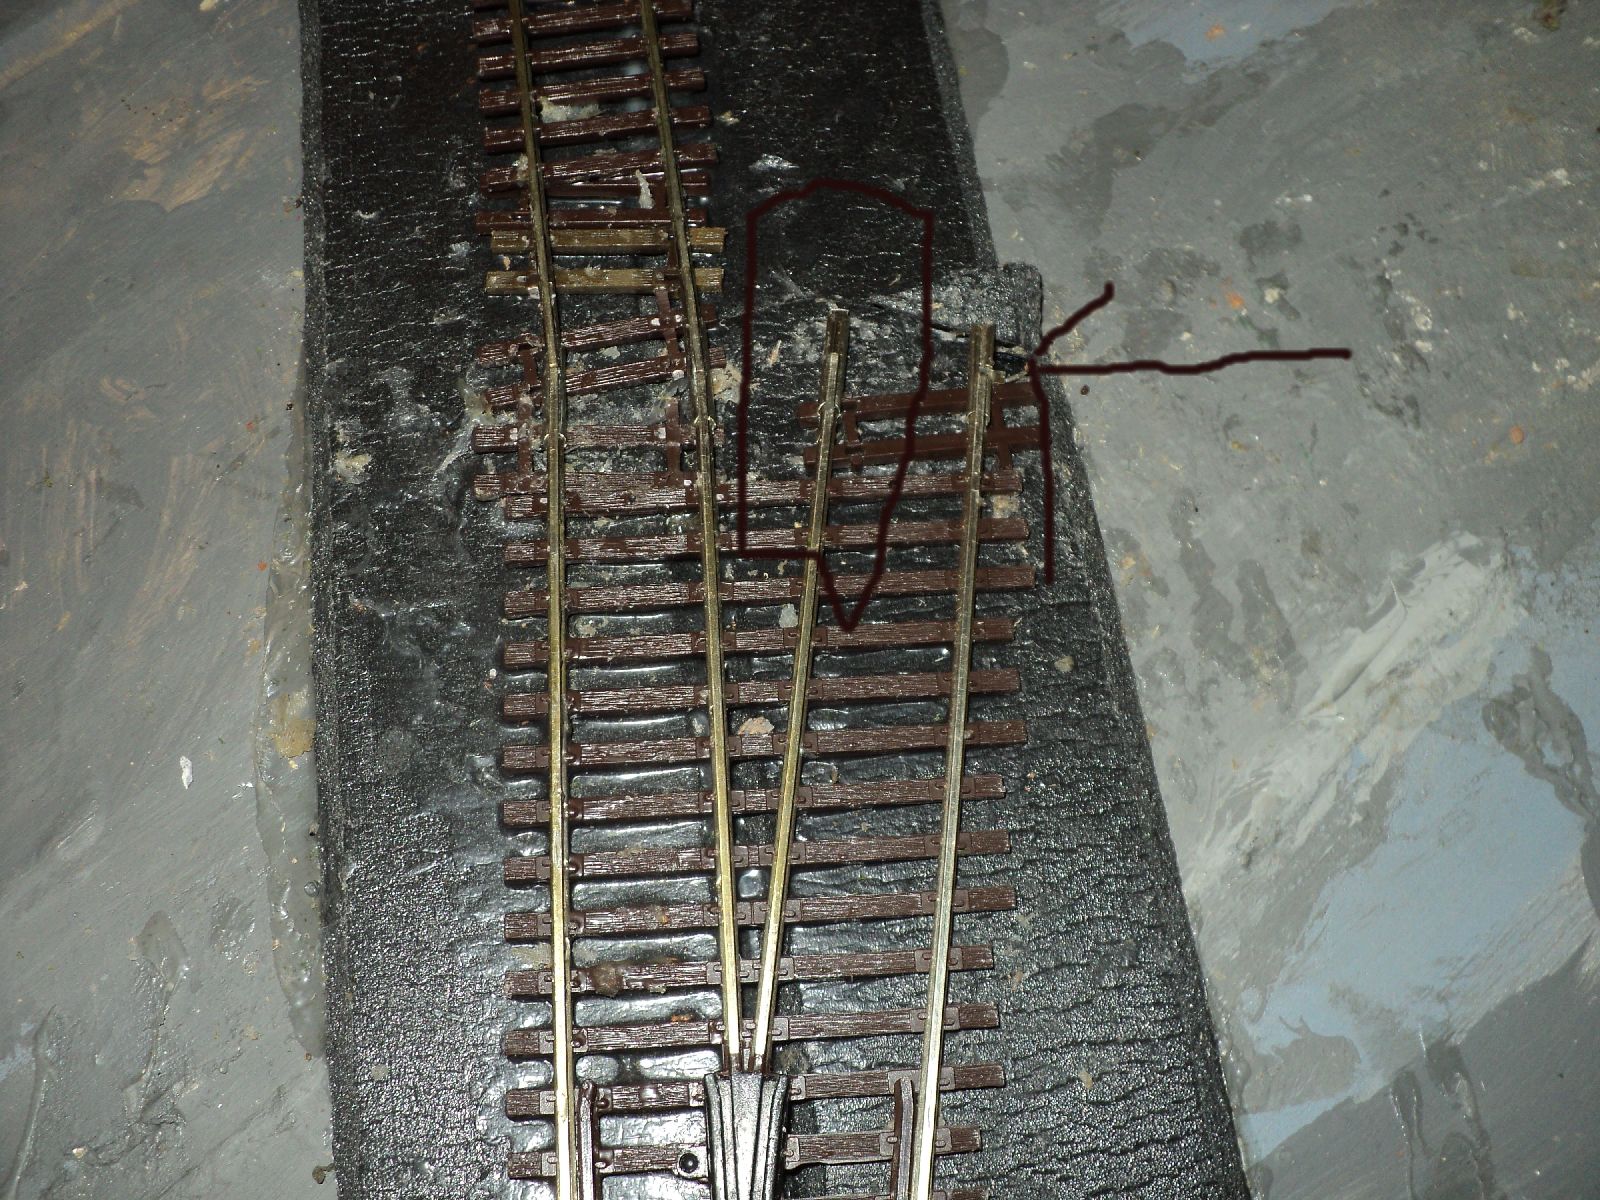 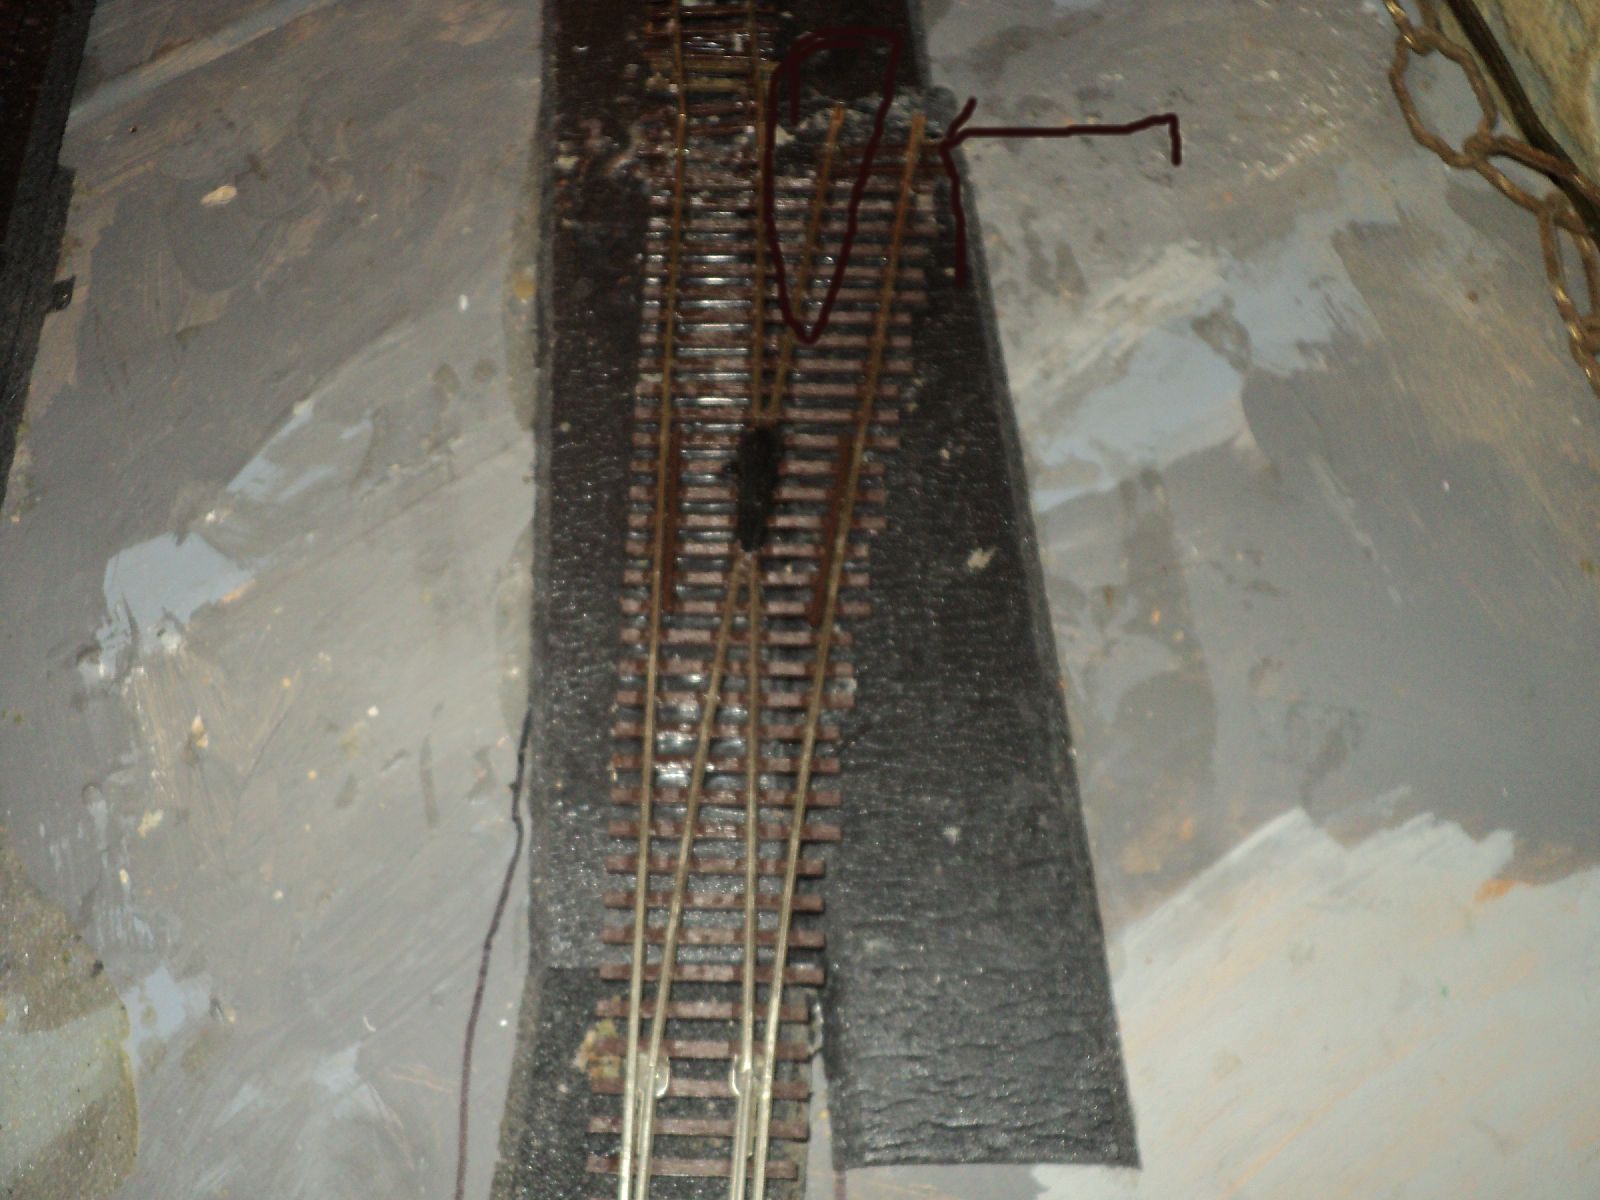 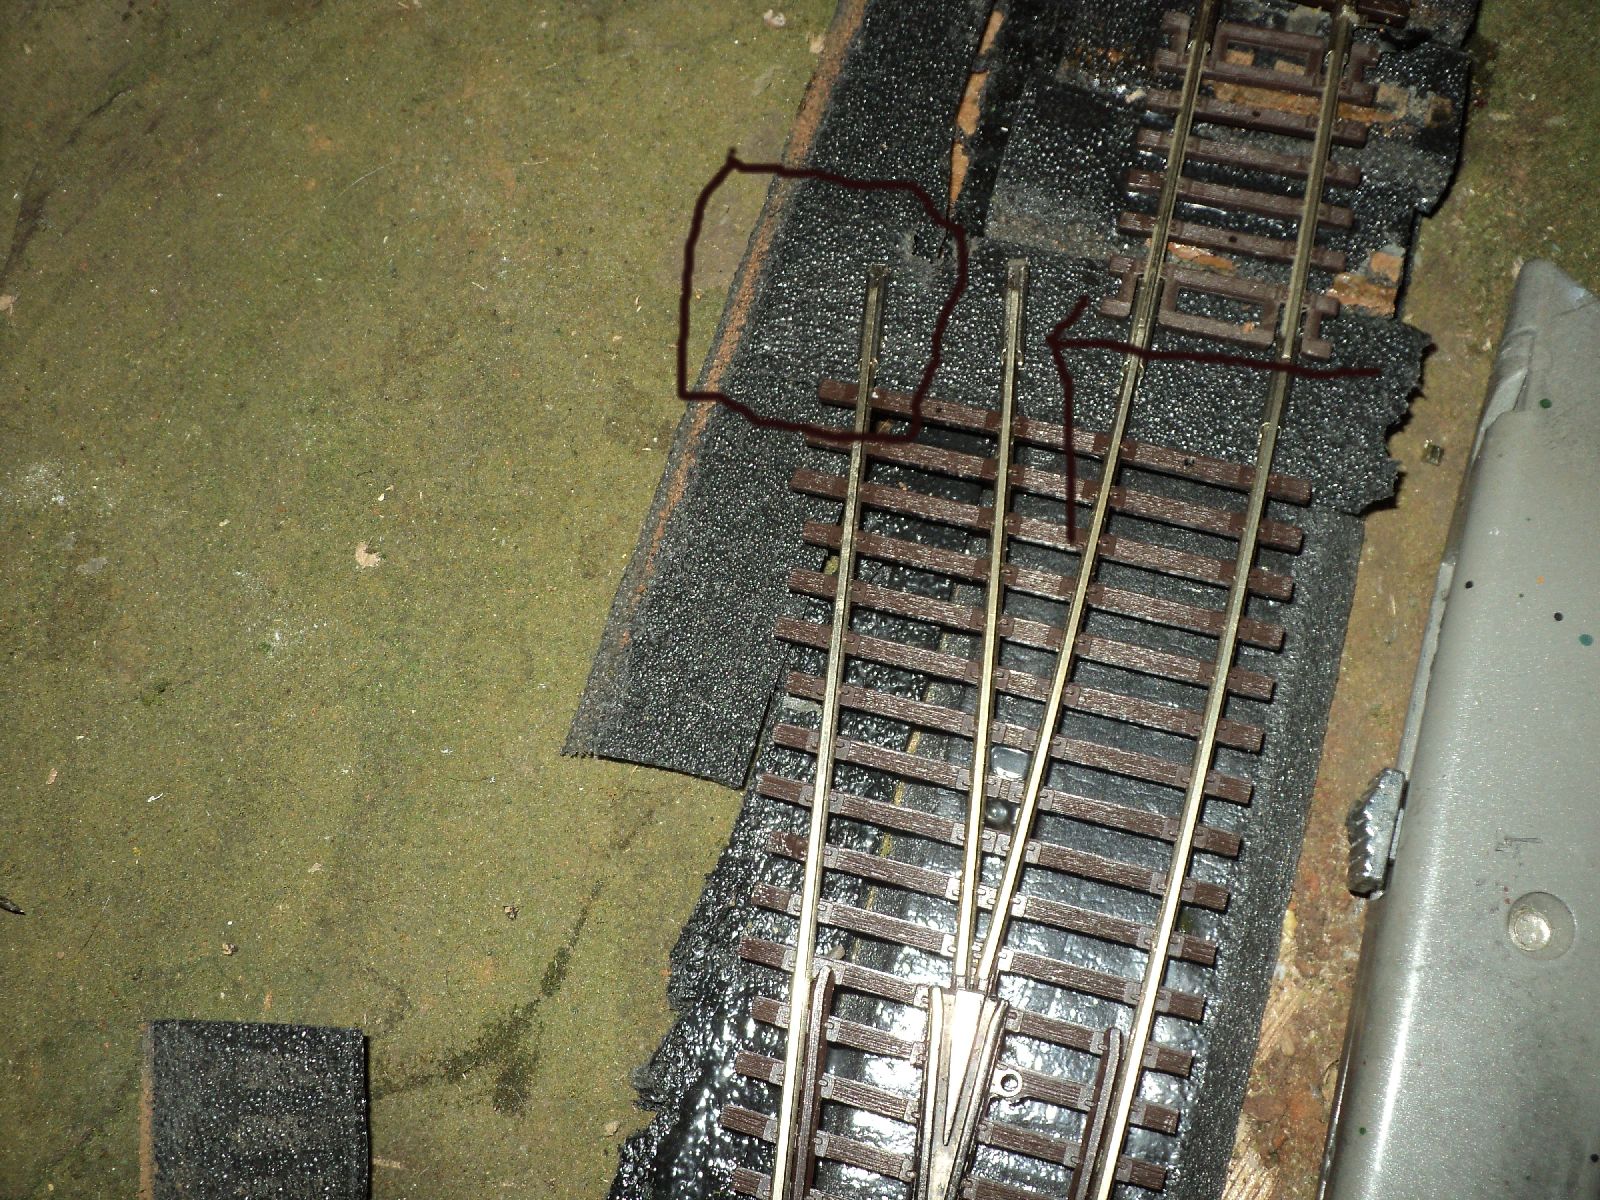 I wanta do this right and i do appreciate the input I wanta do this right and i do appreciate the input
|
|
Country: USA ~
Posts: 78 ~
Member Since: January 30 2007 ~
Last Visit: July 10 2024
|
Alert Moderator
|
|
|
|
Posted - April 08 2017 : 4:21:30 PM
|
This applies to two power routing (Shinora, in this case) turnouts that face each other. So I believe the TOP photo would show correct placement.
The BOTTOM photograph the insulator should be moved over to the right
one spot to be on that inner rail, in line with the frog, and the jumper wire moved to the outer rail.
Just to make sure, once you've connected up the track, you can run a test locomotive to make sure everything works right.
|
|
Country: USA ~
Posts: 11686 ~
Member Since: December 09 2013 ~
Last Visit: May 26 2026
|
Alert Moderator
|
|
|
|
Posted - April 08 2017 : 7:26:33 PM
|
looking gooood
I hope to do this when I move & I would like to do MR's Red Oak Line but in HO & a 1980s look
Like just after BN took over hehe
3 things that will be removed or replaced are the Al's General Store with a gas station instead
the cattle corrals or leave them but remove tracks
Bridge that goes over the tracks since it won't clear the doubles or piggy-backs hehe
course am gonna need those mags again since I recycled them  
Edited by - microbusss on April 09 2017 3:42:48 PM
|
|
Country: USA ~
Posts: 15031 ~
Member Since: February 23 2009 ~
Last Visit: July 07 2026
|
Alert Moderator
|
|
|
kb1857
Switcher
Status:
offline
| |
Posted - April 09 2017 : 1:41:54 PM
|
| Thanks chops,Its atlas code 83 not shinora but I got it right this time appreciate your help
|
|
Country: USA ~
Posts: 78 ~
Member Since: January 30 2007 ~
Last Visit: July 10 2024
|
Alert Moderator
|
|
|
|
Posted - April 09 2017 : 9:30:11 PM
|
You're work, KB, is getting me in the mood to start another
project. I look forward to seeing how yours comes along.
I'd like to see you get that running where you like it. Strange
hobby this: we seem to like creating problems we have to
fix...
|
|
Country: USA ~
Posts: 11686 ~
Member Since: December 09 2013 ~
Last Visit: May 26 2026
|
Alert Moderator
|
|
|
kb1857
Switcher
Status:
offline
| |
Posted - April 16 2017 : 7:48:58 PM
|
Well gents the complete circle of both outside and inside rail is done,now comes the hooking up of the terminal joiners to a barrier terminal strip wiring to the power source.Some of the rear outside rail had to be relaid as I found it slightly buckled or came out of joint in two spots its secure now. 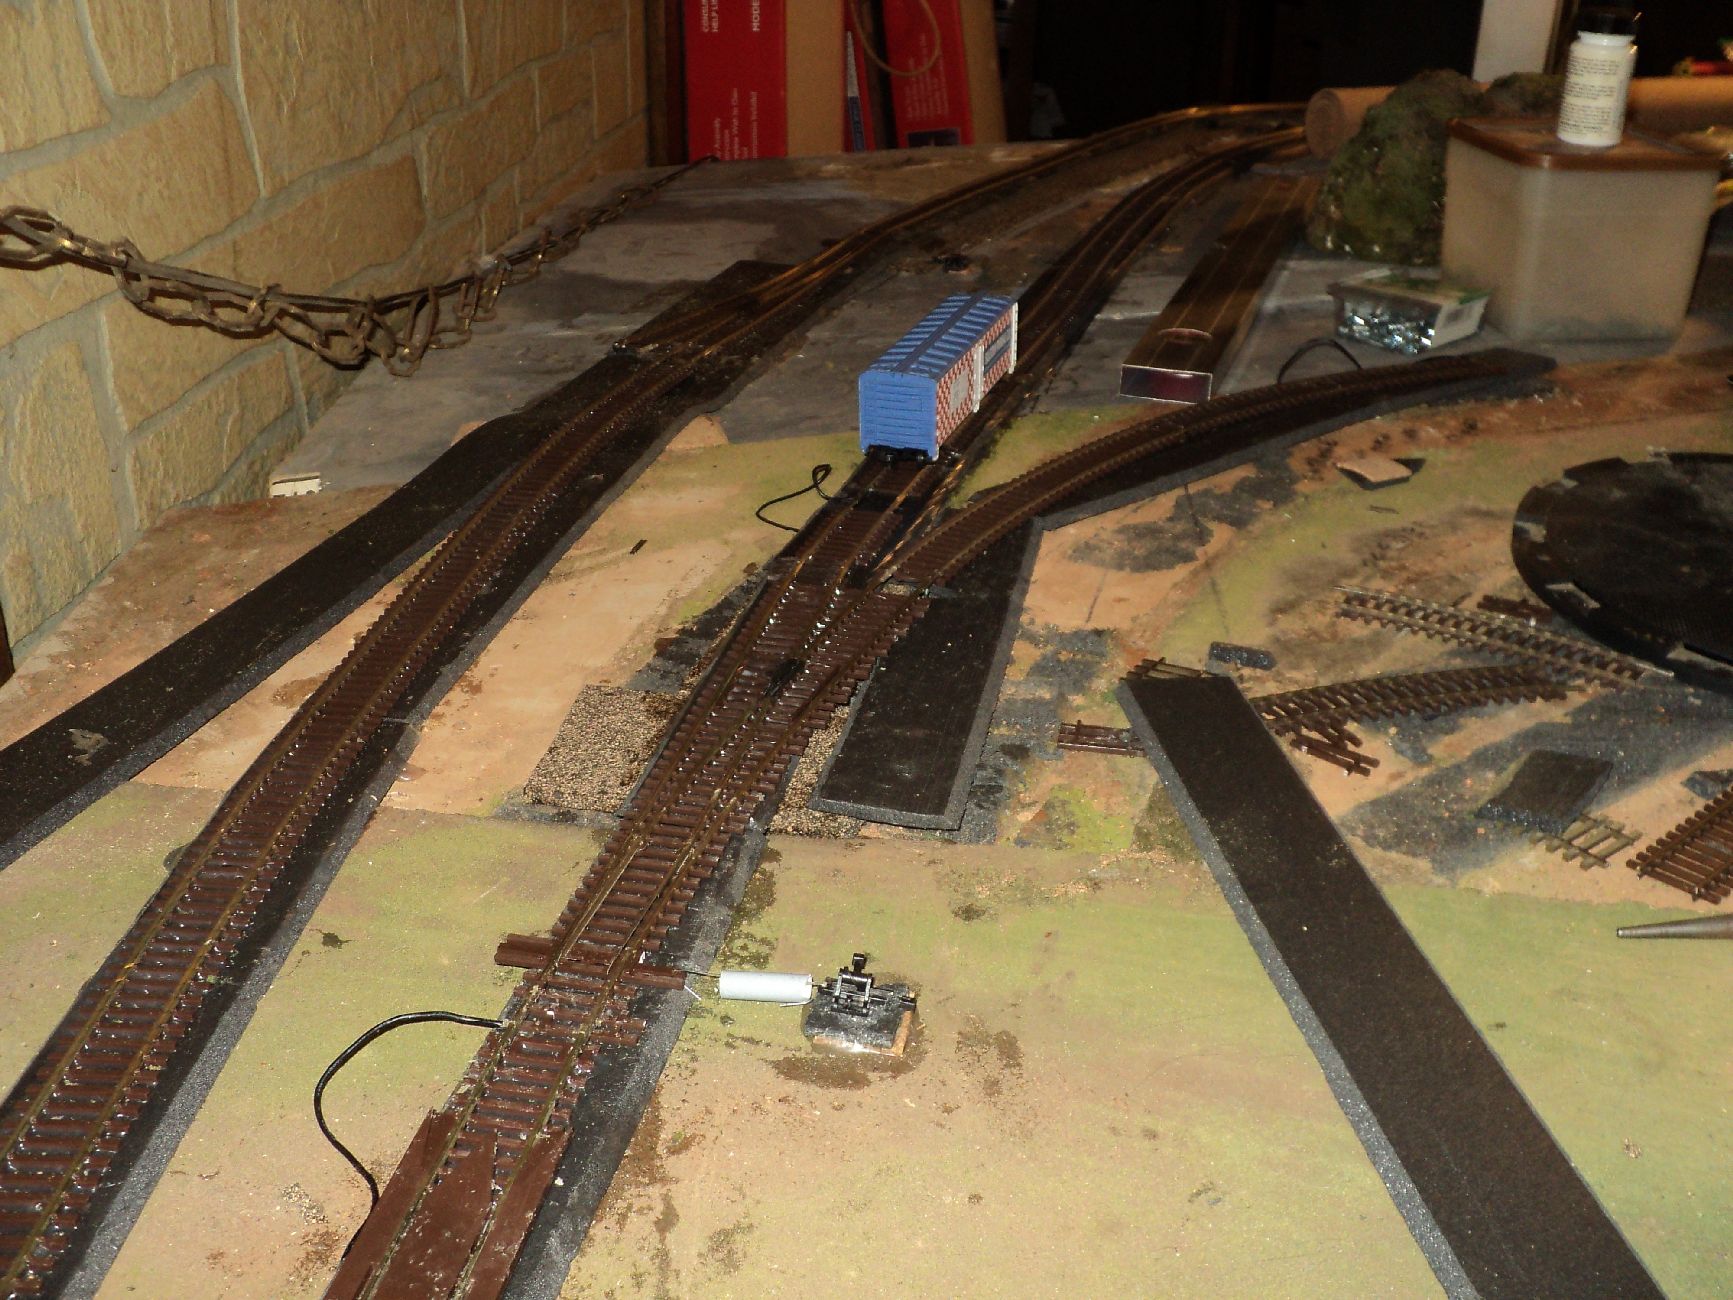 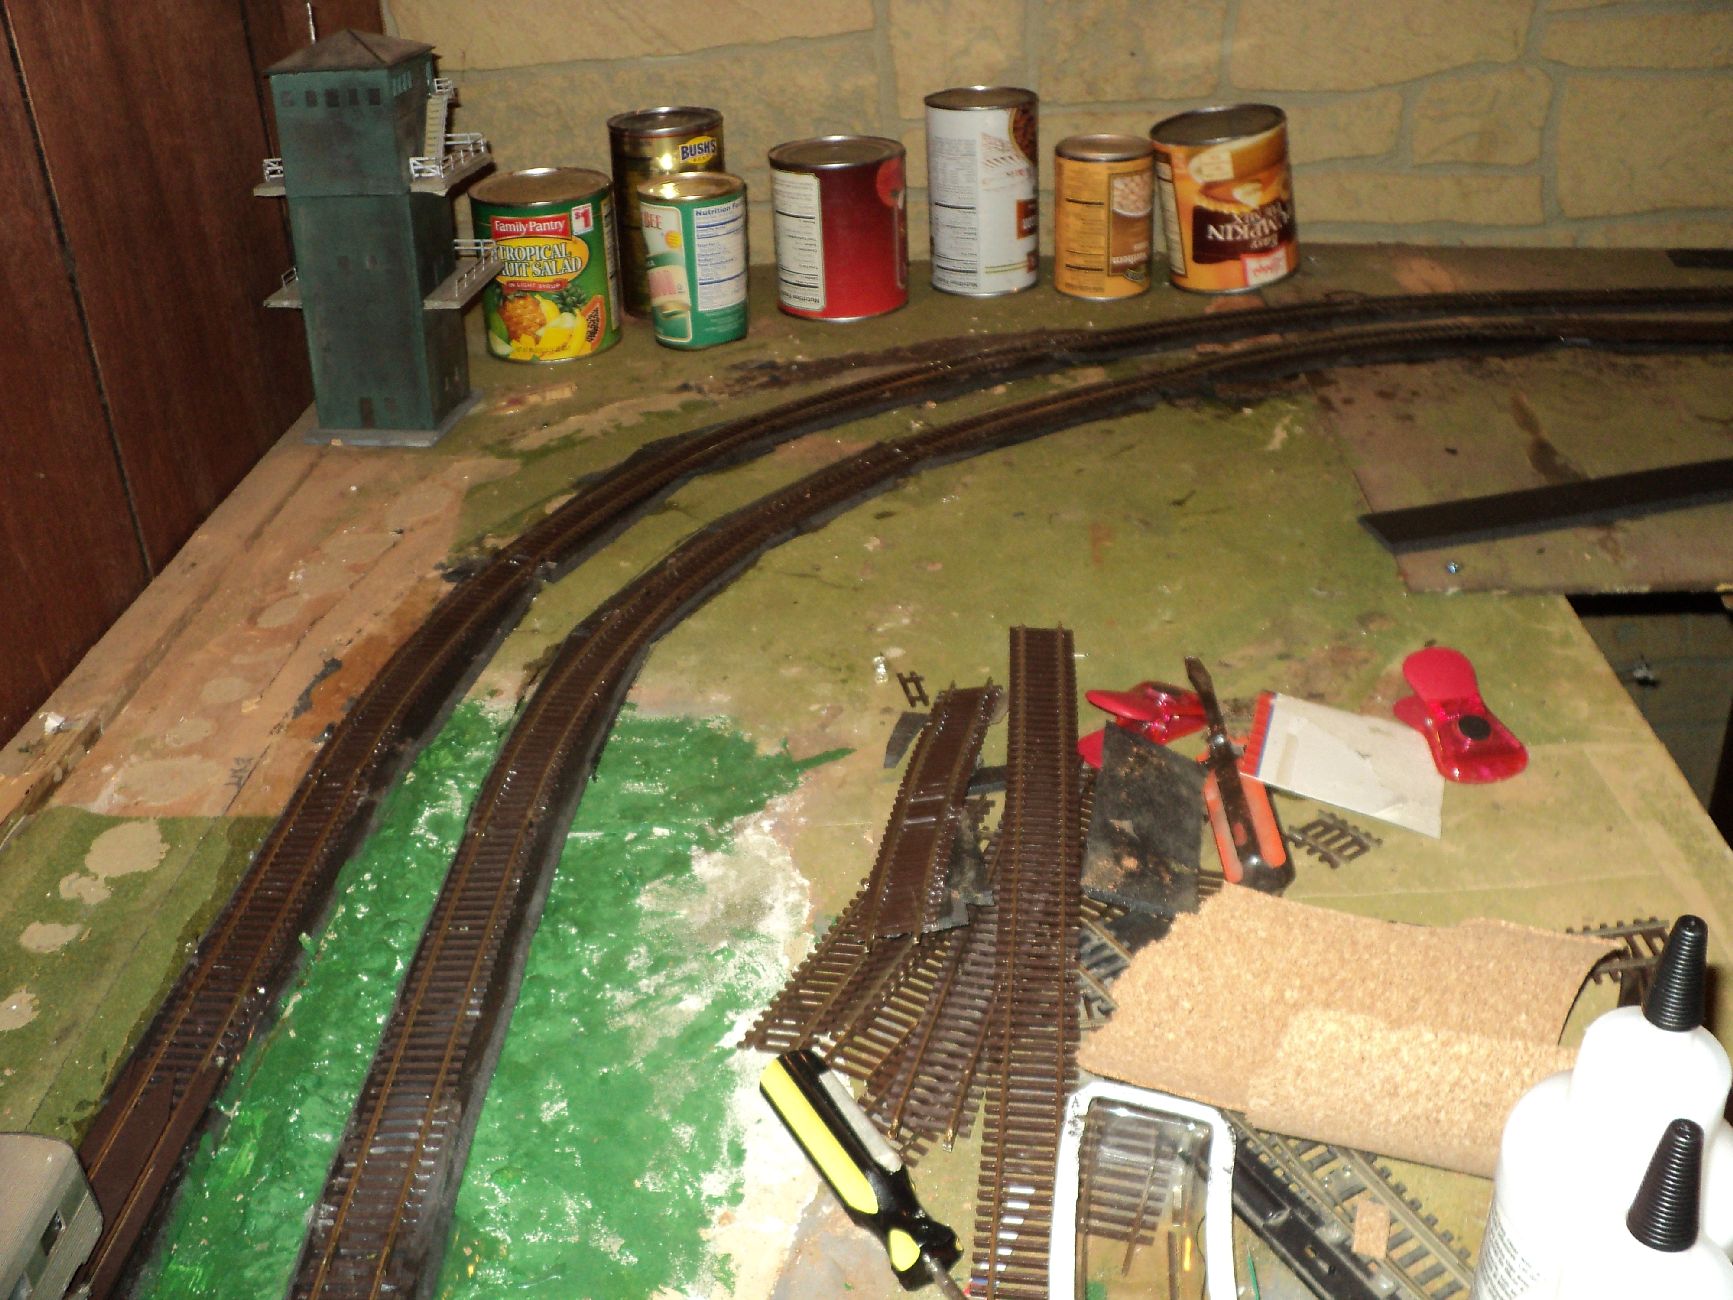 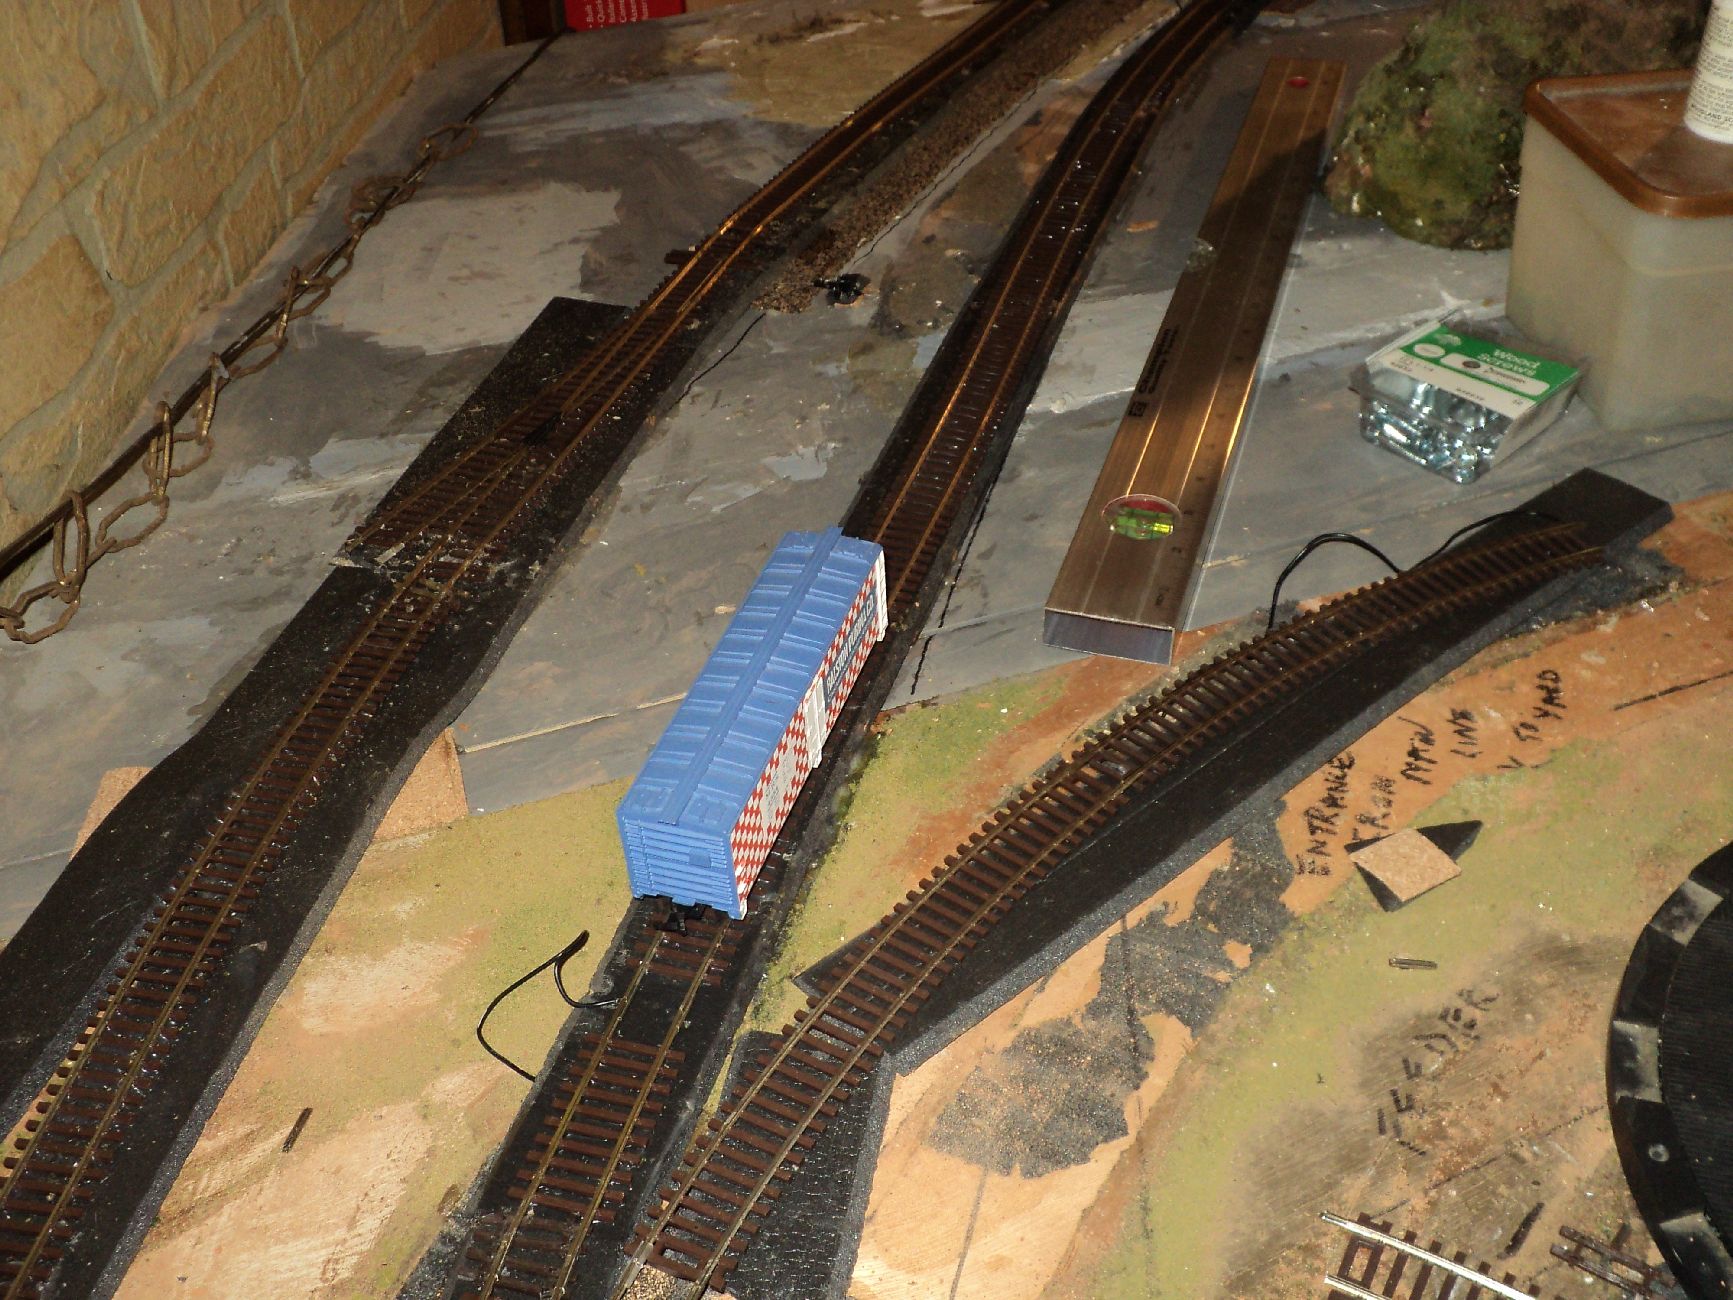 Ran an engine across it and so far no problems as well with short and long rolling stock.Switches have insulators in and feed wires connected so as far as the remainder of the layout construction such as the yard and the coal yard track laying goes that will be down the road at the moment I am gonna focus on getting juice to the entire layout and look for problems when and where I might find it Ran an engine across it and so far no problems as well with short and long rolling stock.Switches have insulators in and feed wires connected so as far as the remainder of the layout construction such as the yard and the coal yard track laying goes that will be down the road at the moment I am gonna focus on getting juice to the entire layout and look for problems when and where I might find it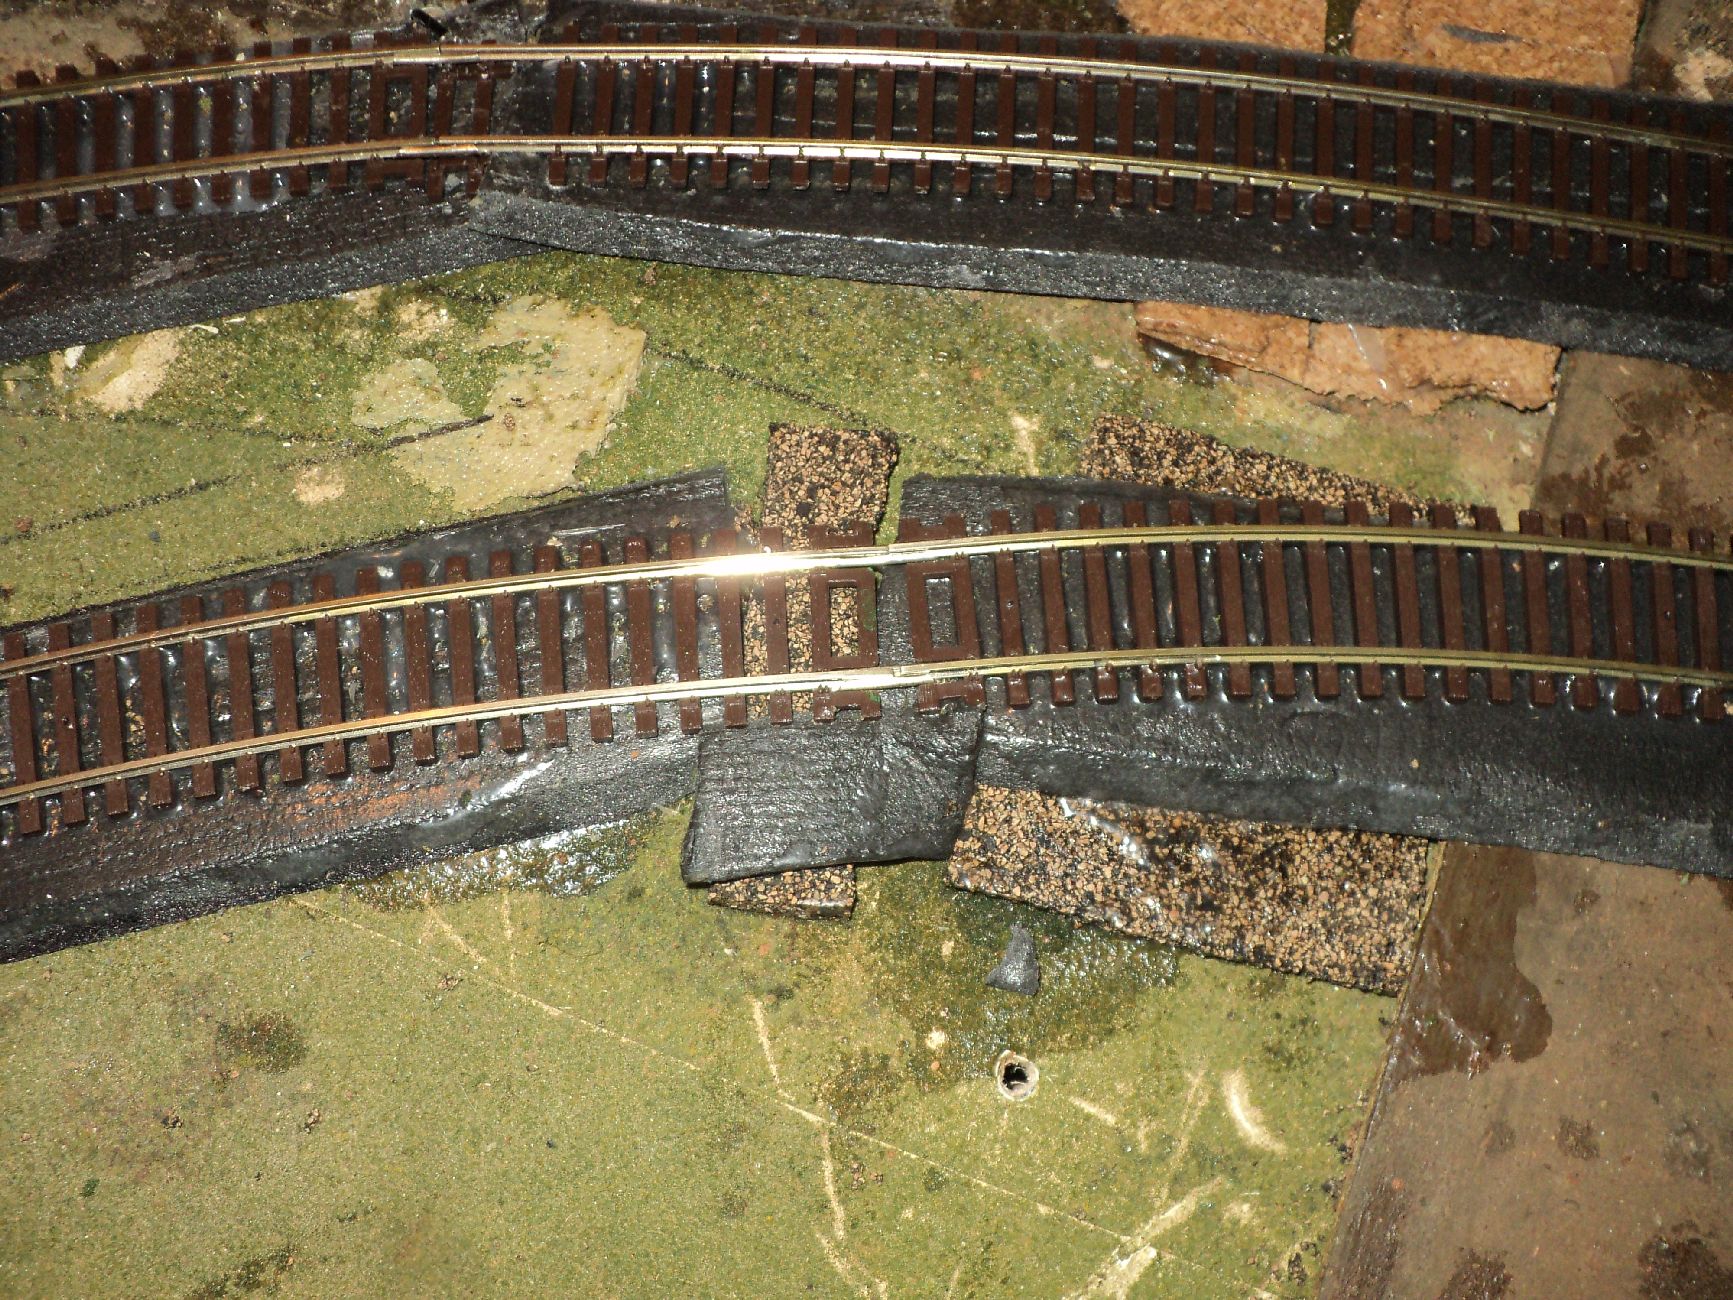  Then again it would not be railroading if there weren't lol but Iam having fun. Then again it would not be railroading if there weren't lol but Iam having fun.
|
|
Country: USA ~
Posts: 78 ~
Member Since: January 30 2007 ~
Last Visit: July 10 2024
|
Alert Moderator
|
|
|
|
Posted - April 16 2017 : 8:22:30 PM
|
I am keeping my fingers crossed. Hopefully it lights up like a
Christmas tree when you plug it in. It is motivating to see
someone else hard at it.
|
|
Country: USA ~
Posts: 11686 ~
Member Since: December 09 2013 ~
Last Visit: May 26 2026
|
Alert Moderator
|
|
|
|
Posted - April 27 2017 : 10:16:33 PM
|
Looking at KB's layout in progress made me want to start something new, so I pulled up the
Tyco Expander layout and am looking a different configuration. Trying to do something with this
spare Atlas Tru Track, which is really quite good stuff, but very hard to work with because is if
it isn't exactly so, then nothing will fit.
|
|
Country: USA ~
Posts: 11686 ~
Member Since: December 09 2013 ~
Last Visit: May 26 2026
|
Alert Moderator
|
|
|
kb1857
Switcher
Status:
offline
| |
Posted - May 07 2017 : 8:42:28 PM
|
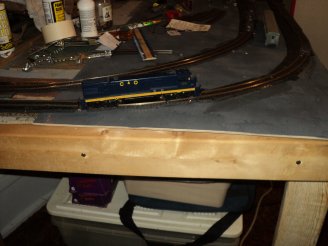
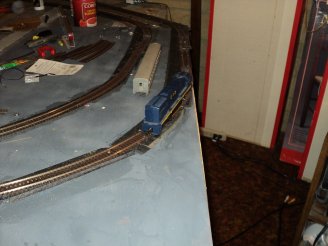
Well I am back at it. Ive' got 12 long wires running from track feeders all outside rail to where my terminal strip will be mounted underneath the table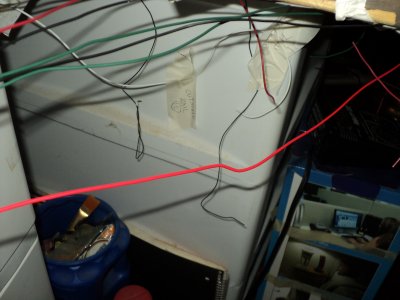 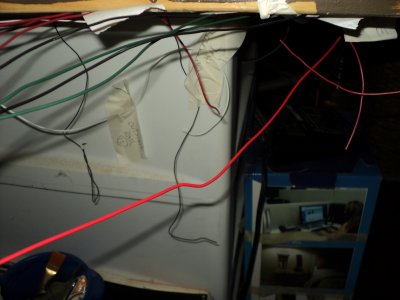  Its a mess but Ive' got em marked accordingly run out of 18 guage wire but I have some ordered boy do I miss radio shack. Layed some more track in the yard and put the spur track in the rear Its a mess but Ive' got em marked accordingly run out of 18 guage wire but I have some ordered boy do I miss radio shack. Layed some more track in the yard and put the spur track in the rear 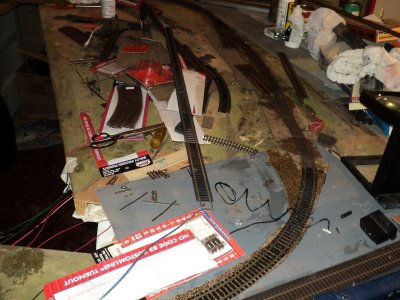 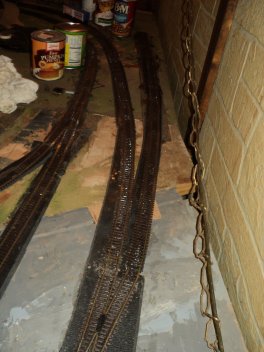 And i picked up this alco from evil bay that somebody detailed out nice in c&o livery And i picked up this alco from evil bay that somebody detailed out nice in c&o livery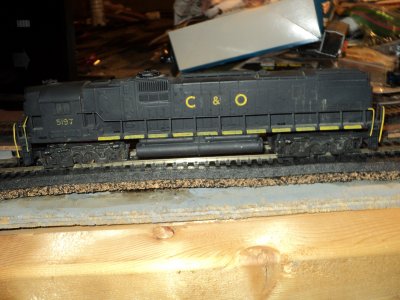 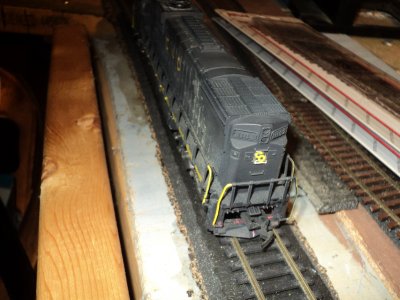 so thats were it stands no oh and this is for chops,you go getter buddy looks good just remember the old timers in those old model railroader magazines we read when we were kids didnt have cad they noodled everything out in theyr'e heads./tyco/forum/uploaded/kb1857 so thats were it stands no oh and this is for chops,you go getter buddy looks good just remember the old timers in those old model railroader magazines we read when we were kids didnt have cad they noodled everything out in theyr'e heads./tyco/forum/uploaded/kb1857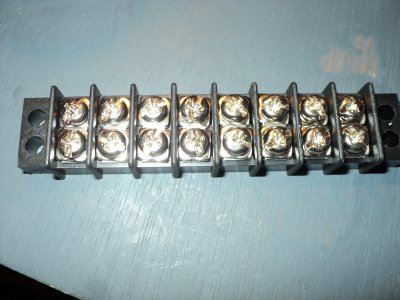
|
|
Country: USA ~
Posts: 78 ~
Member Since: January 30 2007 ~
Last Visit: July 10 2024
|
Alert Moderator
|
|
|
|
Posted - May 08 2017 : 11:31:50 AM
|
| Shaping up nice, KB. Got to wire in some tracks myself today.
|
|
Country: USA ~
Posts: 11686 ~
Member Since: December 09 2013 ~
Last Visit: May 26 2026
|
Alert Moderator
|
|
|
kb1857
Switcher
Status:
offline
| |
Posted - June 04 2017 : 4:26:58 PM
|
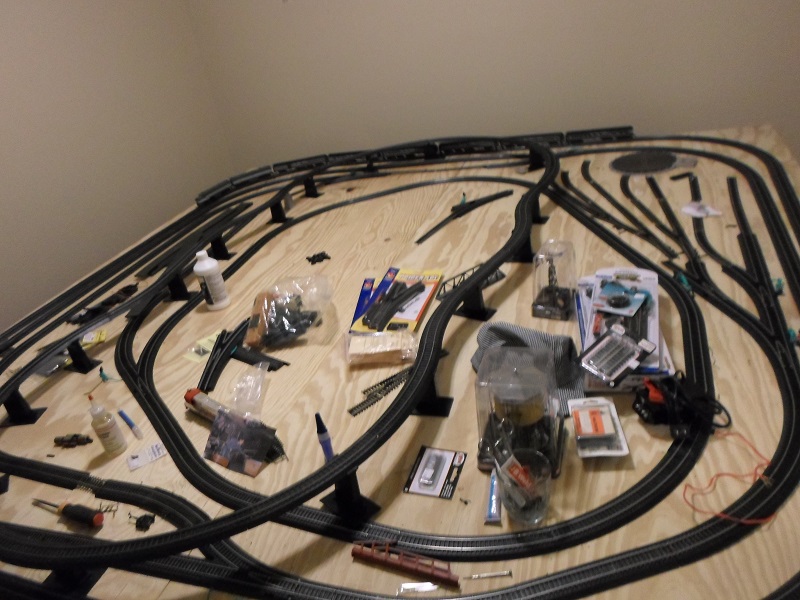
Well here's where the layout stands at this time,Ive hooked up all the feeders to terminal barrier strips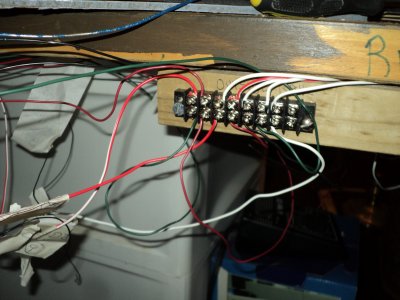  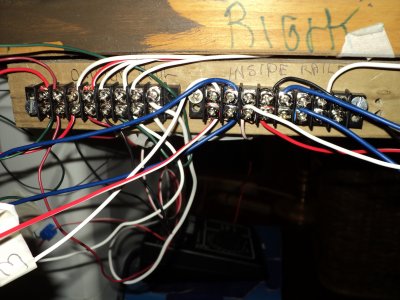 IT's been a royal pain in the you know what as I well anticipated it would be lol but nothing worth while is easy.Also had to crank up the soldering iron but my old one died r.i.p luckly I had a new one still in box from radio shack boy do I really miss those guys.Found a local mom and pop hardware store that sells 18 guage wire that i could buy so many feet at a time.got tied of buying spools on evil bay and having to wait 4 or 5 days to get here.Heres the track areas i had to soldier and yes i cleaned them up they look better than this IT's been a royal pain in the you know what as I well anticipated it would be lol but nothing worth while is easy.Also had to crank up the soldering iron but my old one died r.i.p luckly I had a new one still in box from radio shack boy do I really miss those guys.Found a local mom and pop hardware store that sells 18 guage wire that i could buy so many feet at a time.got tied of buying spools on evil bay and having to wait 4 or 5 days to get here.Heres the track areas i had to soldier and yes i cleaned them up they look better than this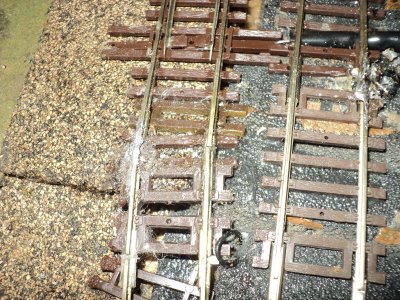 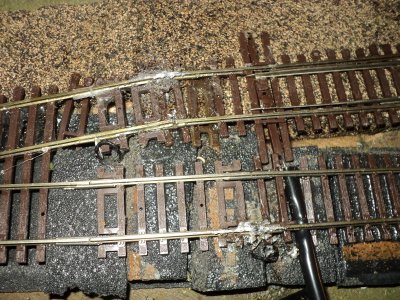 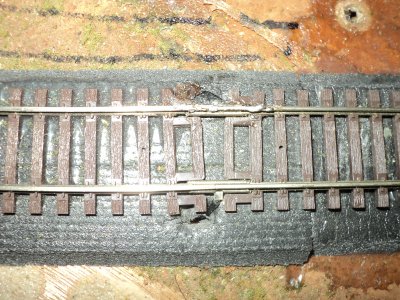 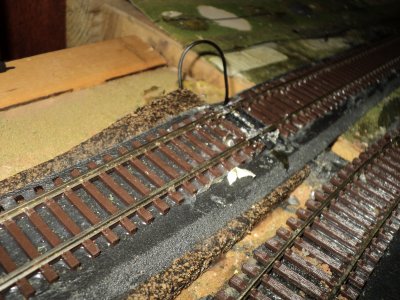 AND heres where Ive run into a stumbling block or a dead end that ive got to figure a way around and its got me very frustated.The entrance and exit to my yard,because i wanted a double stubbed yard and a mainline through it.but space is tight as i knew it would be.Its long enough to work trains around in it but too narrow to build a wye at to move trains into and out of AND heres where Ive run into a stumbling block or a dead end that ive got to figure a way around and its got me very frustated.The entrance and exit to my yard,because i wanted a double stubbed yard and a mainline through it.but space is tight as i knew it would be.Its long enough to work trains around in it but too narrow to build a wye at to move trains into and out of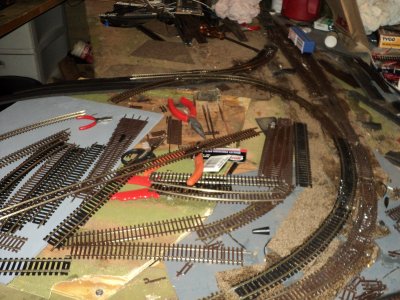 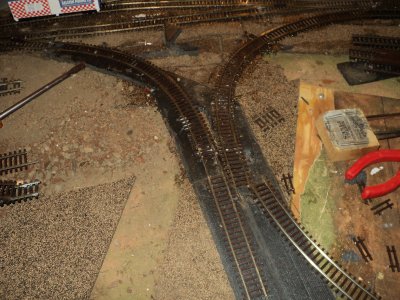 Once Ive got that figured out the only thing left is to install is three single pole switches to control the blocks of current every body have a good weekend Once Ive got that figured out the only thing left is to install is three single pole switches to control the blocks of current every body have a good weekend
|
|
Country: USA ~
Posts: 78 ~
Member Since: January 30 2007 ~
Last Visit: July 10 2024
|
Alert Moderator
|
|
|
kb1857
Switcher
Status:
offline
| |
Posted - June 28 2017 : 03:04:23 AM
|
Finally found a workable solution to my yard problems but it meant comprise Had to use the area I intended to put my coal mine in as an entrance into the yard and i used tyco steel track new in the pack to do it.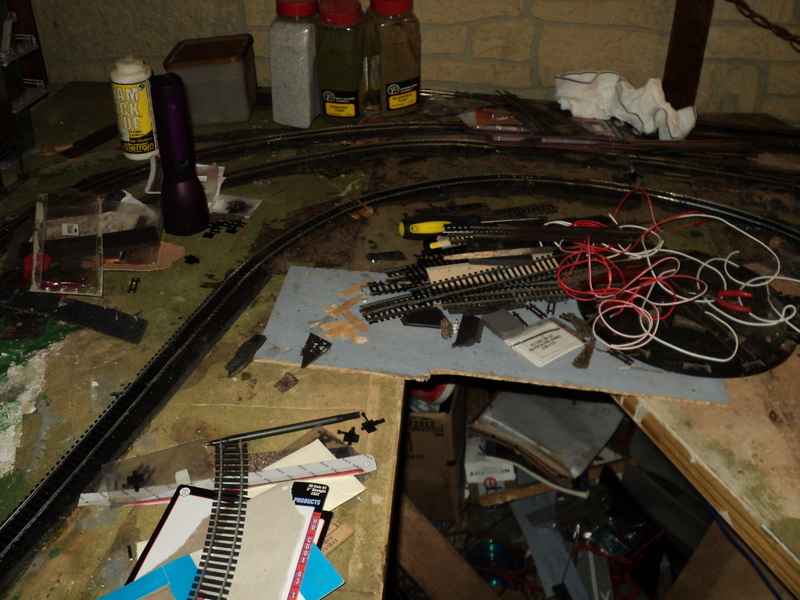 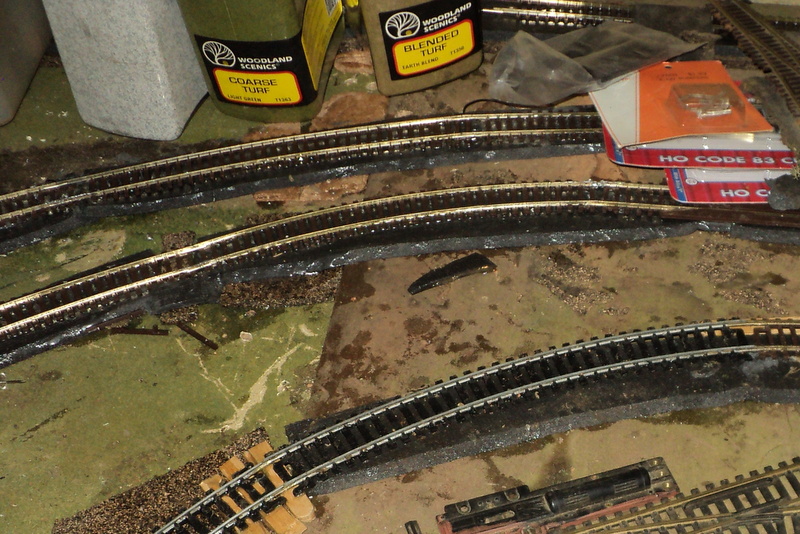 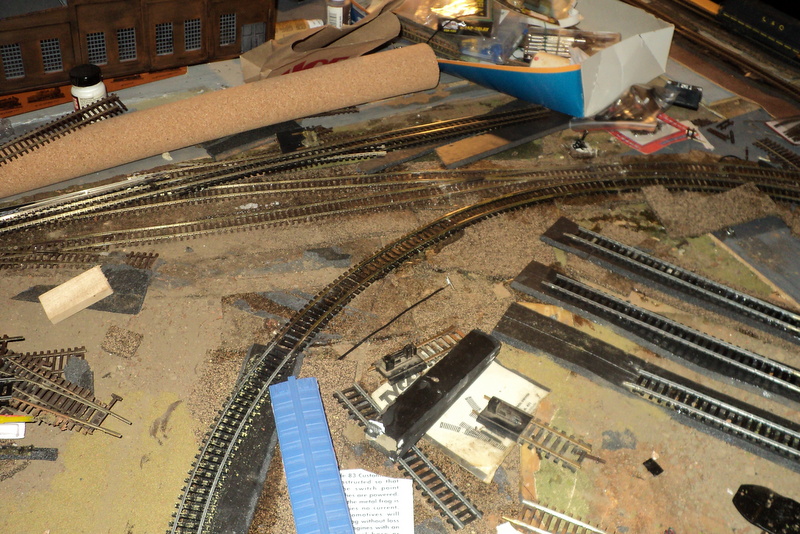 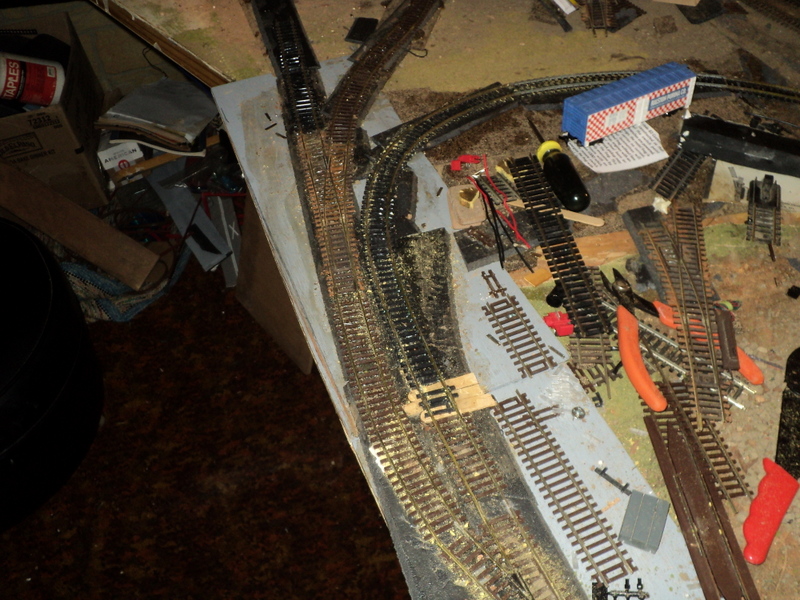 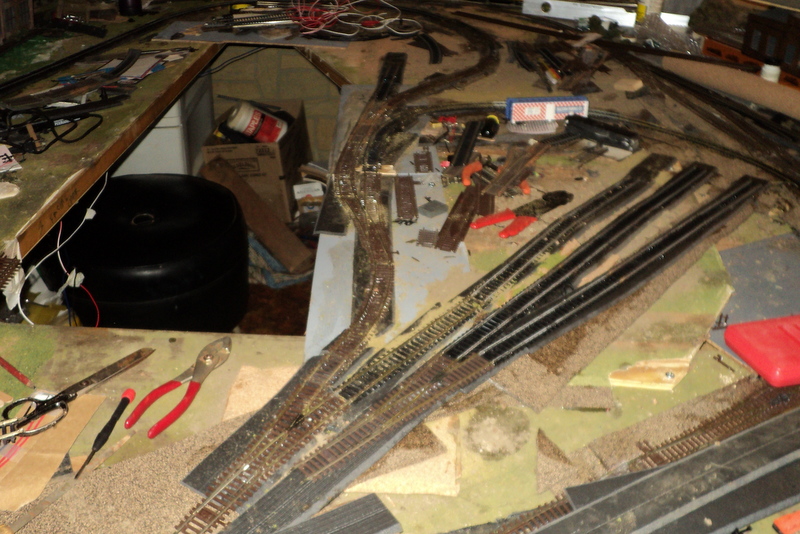 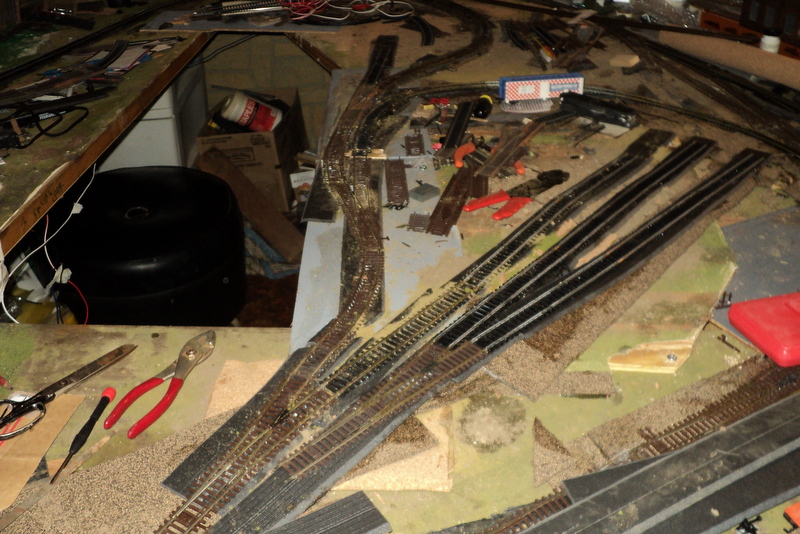 Also got three tracks down on the other side of the yard for classifying cars it now means the coal mine will just set on the layout as a dust ornament but lol life and model railroading is a series of compromises at least I will be able be able to get trains into and out of the yard reasonably Id tryed' to put a wye in the middle of it there just is not enough room.Been working six days days a week with only one day off so free time for layout has been scarce.hope to have it up and running before summers end everybody have a safe and happy 4th of july. Also got three tracks down on the other side of the yard for classifying cars it now means the coal mine will just set on the layout as a dust ornament but lol life and model railroading is a series of compromises at least I will be able be able to get trains into and out of the yard reasonably Id tryed' to put a wye in the middle of it there just is not enough room.Been working six days days a week with only one day off so free time for layout has been scarce.hope to have it up and running before summers end everybody have a safe and happy 4th of july.
|
|
Country: USA ~
Posts: 78 ~
Member Since: January 30 2007 ~
Last Visit: July 10 2024
|
Alert Moderator
|
|
|
kb1857
Switcher
Status:
offline
| |
Posted - August 23 2017 : 9:40:06 PM
|
Okay fella's I know its been a while since Ive' been on here was working six day a week schedule to chicago and after month and a half it took its toll on me phisically also give zero time to finish this layout.well now that ive got some time off hopefully its near its end.Seven months and counting to be exact.Recently purchased a nice second hand shimora 3-way switch 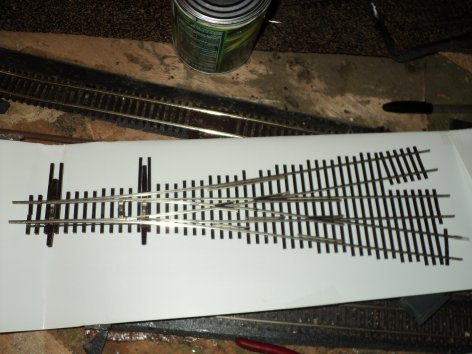 It was my only option to use one of these given the limited space to finish my yard tracks be done with the layout it self.Has anybody on this forum have any experience with these switches because ive got some dough tied up in this switch so i dont wanta short it out.The only info Ive been able to find is with fast tracks guides online which has building one of their 3 ways you would cut notches in the rail, I use the plastic rail joiners so i gotta figure 3 insulators It was my only option to use one of these given the limited space to finish my yard tracks be done with the layout it self.Has anybody on this forum have any experience with these switches because ive got some dough tied up in this switch so i dont wanta short it out.The only info Ive been able to find is with fast tracks guides online which has building one of their 3 ways you would cut notches in the rail, I use the plastic rail joiners so i gotta figure 3 insulators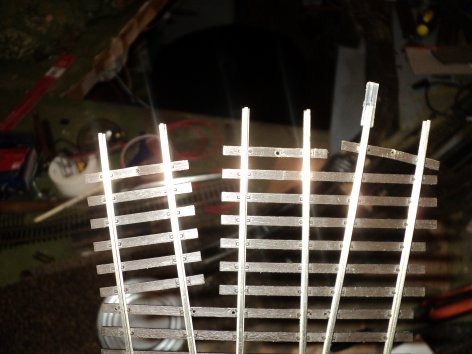 on the inside rails where they intersect and 3 power joiners or 3 feeds to each outside rail.I dont wanna fry this baby but its only way I can see to get to get power to all three rails anybody got any ideas? help would be much appreciated on the inside rails where they intersect and 3 power joiners or 3 feeds to each outside rail.I dont wanna fry this baby but its only way I can see to get to get power to all three rails anybody got any ideas? help would be much appreciated
|
|
Country: USA ~
Posts: 78 ~
Member Since: January 30 2007 ~
Last Visit: July 10 2024
|
Alert Moderator
|
|
|
|
Posted - August 24 2017 : 12:09:51 AM
|
Well, I'd be reluctant to give advice other than to suggest maybe
that three way would be a good yard throat, that way you could
power the single lead and the three positions are powered by
the direction of the switch points. My guess is that way there
would not be a shorting issue.
In arranging my powered frog Hornby turnouts, I'd typically
insulate the inner rail to the switch on facing turnouts, and
add back in power via a short jumper wire and test it for
shorts as I progressed- a bit of trial and error, but it worked
out well in the end.
I recently switched jobs and that has been a nightmare
I could have done without- rather slowed my involvement
in the hobby for the near term. Good luck on those six day
runs- sounds brutal.
|
|
Country: USA ~
Posts: 11686 ~
Member Since: December 09 2013 ~
Last Visit: May 26 2026
|
Alert Moderator
|
|
|
kb1857
Switcher
Status:
offline
| |
Posted - September 12 2017 : 12:32:39 AM
|
Okay finally got the three way switch wired in and the last section pieces of track down for my yard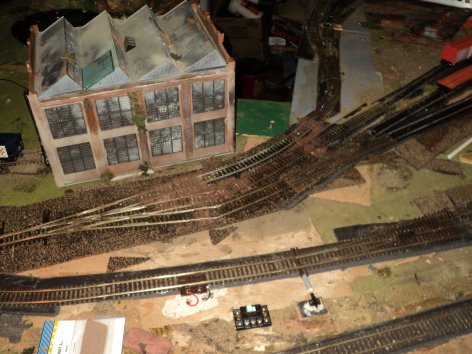 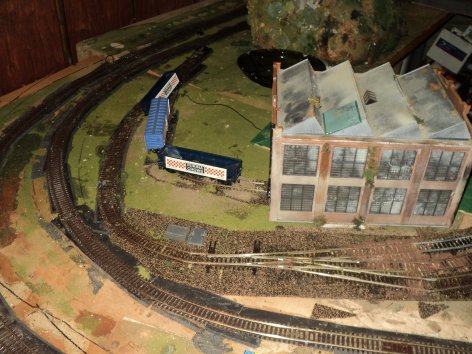 I more or less followed my gut and also found a few you tube videos from our train cousins across the pond (england) that worked with the peco and hornby switches got every thing wired up.then opted to use an atlas 215 selecter switch to divide my track blocks a.b.c.d into based again on a utube switch video i found. I more or less followed my gut and also found a few you tube videos from our train cousins across the pond (england) that worked with the peco and hornby switches got every thing wired up.then opted to use an atlas 215 selecter switch to divide my track blocks a.b.c.d into based again on a utube switch video i found.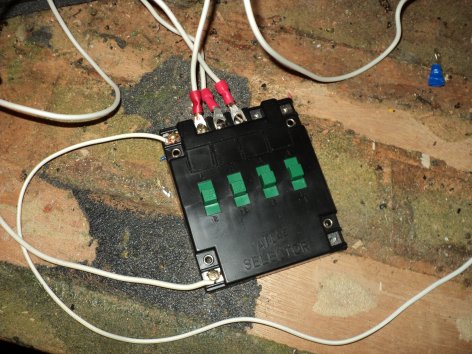  the way Ive got it hooked up is the way the guy in the video hooked his up. one wire running from the transformer to the 215 switch and one wire from where you have all your track feeders wired up to the 215 switch at the top. I am using using a Mrc tech two 1470 transformer and a railpower 1370 transformer.Initially i had the tech two 1470 uptop wired to the outside track.fired up the transformer with the 215 selecter switch in A cab (first switch or button in on switch postion)and I was able to run an athearn engine all the way around the outside loop no problems no hitches,But the inside loop was a different story all together. Fired up the 1370 which was setting underneath the track table with the B cab switch on A off and the only power I got was from the transformer its self which amounts to power only ten maybe fifteen feet each way from where the transformer is wired to the terminal track.nothing no power to the far side tracks.I have two different kinds of track light checkers that show if theres current in the rails so Iam pretty sure what was working and where it wasnt. A day l Later i tryed something different switching transformers around putting the tech two underneath for the inside track the 1370 uptop for the outside loop.Didn't make any difference of course but I did notice that the 215 switch seems to be causing the problem or one of the problems.So Ive gotta figure if Ive wired it up wrong to control the the four blocks,even though ive only hooked the outside and inside tracks not the yards yet to the switch.Did notice now if I use the switch now it draws the transformer down or it shuts off the transformer.IF I switch cab A and cab B to off the transformer comes back up or the light comes back up strong.So right at this point is where the great layout stands until figure what Ive done wrong lol atleast I havent shorted anything out or started a fire so thats a positive.Anybody got any ideas? thanks the way Ive got it hooked up is the way the guy in the video hooked his up. one wire running from the transformer to the 215 switch and one wire from where you have all your track feeders wired up to the 215 switch at the top. I am using using a Mrc tech two 1470 transformer and a railpower 1370 transformer.Initially i had the tech two 1470 uptop wired to the outside track.fired up the transformer with the 215 selecter switch in A cab (first switch or button in on switch postion)and I was able to run an athearn engine all the way around the outside loop no problems no hitches,But the inside loop was a different story all together. Fired up the 1370 which was setting underneath the track table with the B cab switch on A off and the only power I got was from the transformer its self which amounts to power only ten maybe fifteen feet each way from where the transformer is wired to the terminal track.nothing no power to the far side tracks.I have two different kinds of track light checkers that show if theres current in the rails so Iam pretty sure what was working and where it wasnt. A day l Later i tryed something different switching transformers around putting the tech two underneath for the inside track the 1370 uptop for the outside loop.Didn't make any difference of course but I did notice that the 215 switch seems to be causing the problem or one of the problems.So Ive gotta figure if Ive wired it up wrong to control the the four blocks,even though ive only hooked the outside and inside tracks not the yards yet to the switch.Did notice now if I use the switch now it draws the transformer down or it shuts off the transformer.IF I switch cab A and cab B to off the transformer comes back up or the light comes back up strong.So right at this point is where the great layout stands until figure what Ive done wrong lol atleast I havent shorted anything out or started a fire so thats a positive.Anybody got any ideas? thanks
|
|
Country: USA ~
Posts: 78 ~
Member Since: January 30 2007 ~
Last Visit: July 10 2024
|
Alert Moderator
|
|
|
kb1857
Switcher
Status:
offline
| |
Posted - September 15 2017 : 5:14:04 PM
|
| Well Ive found the source and cause of the problems with my layout and to say the least it has really discouraged me about ever getting this layout fully functioning someway some how ive shorted out the piece of terminal track that feeds power to my terminal barrier strip.After crawling around underneath and painstakingly pulling each wire lose from the barrier strip one by one to find out if one of the wires was the cause of the transformer shutting off after a few seconds.So now if iv'e shorted out this piece of track it worries me that ive damaged additional pieces of track and cant even figure out what could have possibly caused this. Just very discouraging to say the least.
|
|
Country: USA ~
Posts: 78 ~
Member Since: January 30 2007 ~
Last Visit: July 10 2024
|
Alert Moderator
|
|
|
kb1857
Switcher
Status:
offline
| |
Posted - September 21 2017 : 5:41:59 PM
|
| Okay Finally found what the problem was with My inside loop and boy do I feel dumb how I rue all these years sleeping through shop class during electrical current theory but then again the guy teaching the class had finger's missing on both hands so he didn't carry much credability with me at the time lol.What Ive done and not realized is that Ive unintentionally created a reverse loop situation but saying unitentionally is like saying i didnt intend to back my truck into the garage or pore hot coffee in my lap this morning.So with this situation iam gonna have to proably pull out a #6 switch off the main if its shorted out and replace it plus gap it correctly,hook up a dpdt switch here and there to isolate this section plus maybe have to cut a couple gaps elsewhere or fix those those tracks where this could cause a problem.Fortunatly It could have been worse had I hooked the 4th block up to the atlas switch and put the power to her id have shorted out the whole dang thing,I know realize why my first layout 8 years failed miserably.Hopefully in a couple days I'll have the problem straightened out and my trains will run atlast.
|
|
Country: USA ~
Posts: 78 ~
Member Since: January 30 2007 ~
Last Visit: July 10 2024
|
Alert Moderator
|
|
|
|
Posted - September 22 2017 : 12:24:03 PM
|
Always a learning curve, and electricity can do
the darnedest things. I once stuck my finger,
true story, into an electrical fuse box to check
for moisture. Never good on my feet, I was
soon doing a Micheal Jackson break dance
with the best of them. I still remember the pain.
Anyways, there is a super easy to install
automatic reverse loop device, I forget who
makes them. All that is required is that you
simply insulate the loop entirely and wire
in two wires to the loop and two wires to
the non-loop, and it flawlessly flips the
current and allows the train to run through.
I used it and found it worked perfectly with
either DC or DCC.
|
|
Country: USA ~
Posts: 11686 ~
Member Since: December 09 2013 ~
Last Visit: May 26 2026
|
Alert Moderator
|
|
|
kb1857
Switcher
Status:
offline
| |
Posted - September 23 2017 : 6:01:53 PM
|
| Yea Ive got a couple rough ideas as to what can be done one suggestion I had off another train board that was to install dpdt switches in the areas that i wanna isolate and install more plastic rail joiners to help cut of the areas i want isolated.Drove over to my local hardware today and picked up the last two switches they had.I post something when i figure this out.
|
|
Country: USA ~
Posts: 78 ~
Member Since: January 30 2007 ~
Last Visit: July 10 2024
|
Alert Moderator
|
|
|
|
Posted - September 23 2017 : 11:39:55 PM
|
DPDT switches are a major pain the neck. If you can figure out
how to wire them, then you have to remember which way to throw
them or you short out. Unless you enjoy wiring, which this will
give you plenty of. Being a lazy guy, I'd soon install an automatic
polarity changer.
|
|
Country: USA ~
Posts: 11686 ~
Member Since: December 09 2013 ~
Last Visit: May 26 2026
|
Alert Moderator
|
|
|
kb1857
Switcher
Status:
offline
| |
Posted - September 24 2017 : 8:32:35 PM
|
| where do you get an automatic polarity changer at?
|
|
Country: USA ~
Posts: 78 ~
Member Since: January 30 2007 ~
Last Visit: July 10 2024
|
Alert Moderator
|
|
|
|
Posted - September 25 2017 : 2:54:10 PM
|
http://www.traintekllc.com/mrc-ad520-auto-reverser/
I used the Model Rectifier brand as it is simple as can be
and it worked all the time without ever a problem.
You just fully insulate (both ends) of the loop and
then connect the reverser from one side of the insulated
joints to the other. Doesn't matter where, just either side
of the insulated gap.
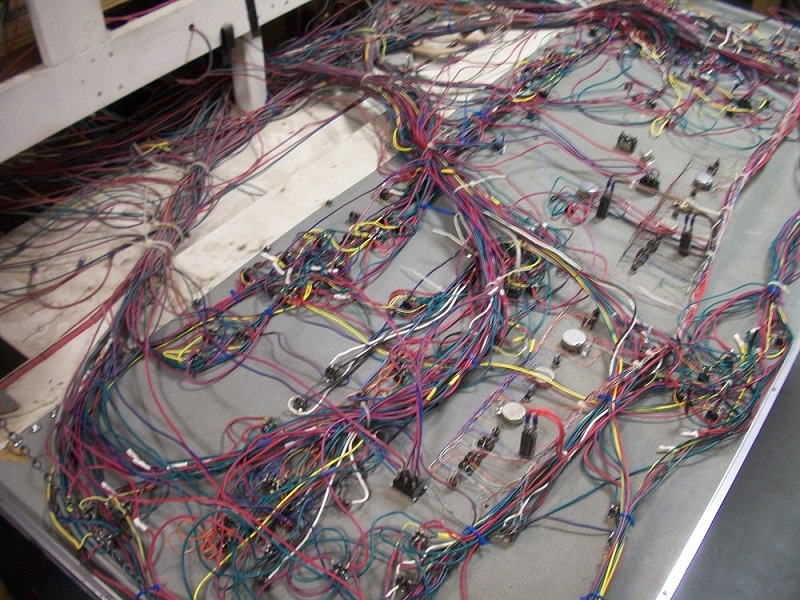
Below is the rear side of an actual control panel with
multiple DPDT switches at the Train Club. The few that
work are confusing and work poorly at best:
Now I just saw this disclaimer:
"Product Description
Automatically change polarity of your reverse loop or reversing section. Easy 4-wire hookup. Up to 5 amp output. Not for use on non-DCC layouts or with nondecoder equipped locomotives."
Well, I don't know about that. I used it on BOTH analogue and DCC simultaneously and it worked perfectly
with both, at the same time. I can't understand why they slipped that in there. Doesn't make a lick
of sense to me. Never gave me a moment's trouble and worked slick as all get out.
It is very tempting to get into all kinds of wild pretzels, but I stick to the K.I.S.S.
principle and have a better go of it (Keep It Super Simple).
Here's my British layout, note that three trains (including the camera car) are
running at once. I am terrible at wiring problems and have trouble conceptualizing
Watts vs. volts, AC vs. DC wavelengths and all the rest of it, but by keeping
it simple I have a pretty fun layout:
https://youtu.be/pZfePF_tClQ
Here again is my friend, Stan Ball's, layout. It has four mainlines,
but each one is completely electrically separated from the other
and uses four power packs. It runs just fine:
https://youtu.be/Q22DNvc_pqQ
Dual cab (Cab A and Cab B) was a hot thing back in the '60's and '70's,
and the late great Linn Wescott promoted the heck out of it, as did
John Armstrong. I've seen it done, and I've never seen it work
effectively. As soon as you forget which way a selector is thrown,
you're going to short. On my British OO layout, and on my Tycomania
VII layout, I simply block off each separate section of track entirely, such
as first oval, second oval, third oval and use a transformer for each. Lot
easier to understand to run. For reverse loops, I would only use an automatic
reverser. Otherwise, the likelihood is to end up with an electrical mess.
What we have at the train club is a layout built by committee, largely by
people who didn't even run model trains. As a result, with all those broken
DPDT toggles, pretty much all we can do is run trains in a big circle.
Edited by - Chops124 on September 25 2017 10:42:14 PM
|
|
Country: USA ~
Posts: 11686 ~
Member Since: December 09 2013 ~
Last Visit: May 26 2026
|
Alert Moderator
|
|
|
kb1857
Switcher
Status:
offline
| |
Posted - September 27 2017 : 7:27:57 PM
|
Your right chops it makes sense and i'll order one of these tomorrow.But tell me this and tell if iam right or going in the right directionLook at these pictures where ive marked the X'S and tell if this is where i gotta put the insulaters in.These are pictures of the three switches that run into this loop or wye.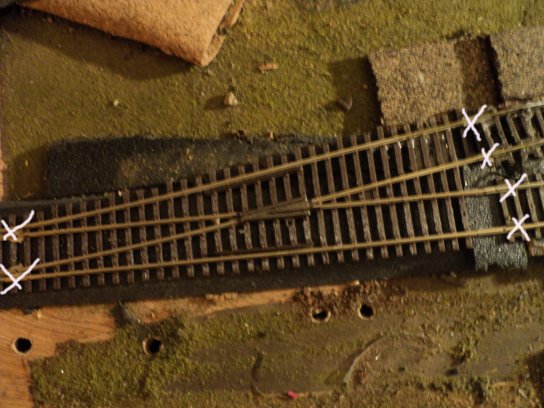 /tyco/forum/uploaded/kb1857 /tyco/forum/uploaded/kb1857  I am just pull them back up and install the plastic rail joiners i dont like cutting track to isolate rails.Also I guess these means I'll have to solder power feeders to these areas to get juice to them right? thank's for your help it is appreciated. I am just pull them back up and install the plastic rail joiners i dont like cutting track to isolate rails.Also I guess these means I'll have to solder power feeders to these areas to get juice to them right? thank's for your help it is appreciated.
|
|
Country: USA ~
Posts: 78 ~
Member Since: January 30 2007 ~
Last Visit: July 10 2024
|
Alert Moderator
|
|
|
|
Posted - September 27 2017 : 8:33:16 PM
|
If the two divergent sections of track (that which goes straignt and
that which goes right) connect into a loop, then you would only need
to insulate where you have the four "'x"'s in a row. It would no longer
be necessary to insulate at the base (the entrance) of the turnout.
Only one pair of wires (pos/neg) would connect anywhere inside the loop
and one pair outside the loop. For convenience sake, I would land the outer
pair of wires a few inches away from the turnout just to avoid solder
damage to it.
About the easiest wiring you'll ever do and the results are immediate
and fantastic.
Since I got your attention, I might suggest you try Wahl Hair Clipper
Oil (at most beauty supply stores, very cheap) to clean wheels and
track. Not only does it strip off dirt and oxide, and is safe on plastic,
but it leaves a micro coating on the rails that prevents oxide. I
only have to clean my track about every two or three months
using that stuff. Much, much better than anything I've ever
tried before, much, much cheaper, and fine for DC or DCC
or even 3 rail Lionel AC.
Edited by - Chops124 on September 27 2017 8:37:15 PM
|
|
Country: USA ~
Posts: 11686 ~
Member Since: December 09 2013 ~
Last Visit: May 26 2026
|
Alert Moderator
|
|
|
|
Posted - September 28 2017 : 03:24:55 AM
|
kb1857, I can basically say I've really enjoyed your thread and this
layout is going to get there where it will bring hours of peace and
even some joy. This deal you got going here has given me a
major shot in the arm to try some new things, along with a lot
of the great contributors at the TF.
PLEASE if you come out here to El Paso, bring some trains and
we will have you run them until treads start to thin down!
|
|
Country: USA ~
Posts: 11686 ~
Member Since: December 09 2013 ~
Last Visit: May 26 2026
|
Alert Moderator
|
|
|
kb1857
Switcher
Status:
offline
| |
Posted - October 10 2017 : 3:15:50 PM
|
Well I've put the plastic rail joiners insolating the loop from the main and installed auto reverser 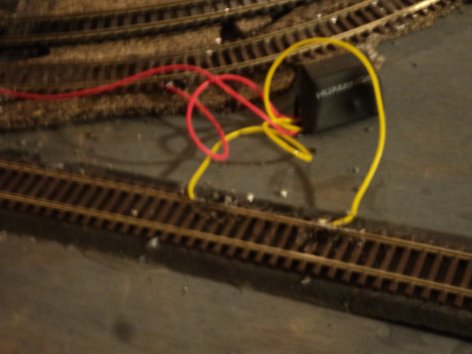 and now while the transformer stays on But I have no current in the track beyond a small area where the terminal bus feeds to.nothing beyond the loop or the rest of the inside loop.Chops how do you know if the reverser is working? Heck i probably soldered the it wrong to the track but I connected two red inside the loop two yellow to the main why am I not getting juice to the remaing track? and now while the transformer stays on But I have no current in the track beyond a small area where the terminal bus feeds to.nothing beyond the loop or the rest of the inside loop.Chops how do you know if the reverser is working? Heck i probably soldered the it wrong to the track but I connected two red inside the loop two yellow to the main why am I not getting juice to the remaing track?
|
|
Country: USA ~
Posts: 78 ~
Member Since: January 30 2007 ~
Last Visit: July 10 2024
|
Alert Moderator
|
|
|
|
Posted - October 10 2017 : 9:01:44 PM
|
It works so well you don't even know that it's working
as the locomotive enters and exits the reverse loop
without a hiccup.
I think you wiring is wrong. Should be one yellow and one
red on one rail each, and the the other red and yellow should
span the two insulators on the OTHER side, creating an
electrical bridge.
Looks like you soldered both negatives to one side and both
positives to another side. This will short.
Also, you should try to keep those wires at the other side
of the turnout that is attached to that straight piece, so
that if it's power routing then it will work right- BUT keep the
red and yellow connections SOUTH, or DISTAL, to the switch
mechanism.
Does that make sense???
|
|
Country: USA ~
Posts: 11686 ~
Member Since: December 09 2013 ~
Last Visit: May 26 2026
|
Alert Moderator
|
|
|
|
Posted - October 21 2017 : 9:44:18 PM
|
| Any luck KB?
|
|
Country: USA ~
Posts: 11686 ~
Member Since: December 09 2013 ~
Last Visit: May 26 2026
|
Alert Moderator
|
|
|
|
Posted - October 24 2017 : 07:26:23 AM
|
| KB?
|
|
Country: USA ~
Posts: 11686 ~
Member Since: December 09 2013 ~
Last Visit: May 26 2026
|
Alert Moderator
|
|
|
kb1857
Switcher
Status:
offline
| |
Posted - November 05 2017 : 4:44:15 PM
|
| Sorry That I had not gotten back to you chops ,Tryed moving the automatic reverser to another spot on the layout and installed the wiring the way you said and it still wont work.So I pulled it off and put it into a box.Went and installed two dpdt switches because I was frustrated with this after all this work Ive put into this.Buddy you were'nt kidding about all the wiring involved but got them hooked to the power pack and one switch seems to work Iam able to get current on the main line past the insulated area maybe 30 or 40 feed but still cant get anything in the other direction or any current into my yard area or the inner loop thats insulated.I cant even get the current to switch direction's either by changing the switch or the direction on the power pack its self.IF I could understand how to read a volt meter(I have one of those cheap one's from harbor freight )I would put the power to her and check all the voltage at each connection including where ive got barrier terminals to see if iam truly getting power.But Iam afraid i will ground something or short out something worse and i dont know what i looking for in voltage readings .Is there any way to cut down on all those wires going to the power pack feed? its a royal pain any way Ive been working on some of my kits for new buildings that i wanna put on the layout.
|
|
Country: USA ~
Posts: 78 ~
Member Since: January 30 2007 ~
Last Visit: July 10 2024
|
Alert Moderator
|
|
|
|
Posted - November 05 2017 : 10:11:18 PM
|
Wiring the automatic reverser is about as hard as screwing in
a light bulb- which is about my rated speed. Just insulate your
loop on both ends, both positive and negative. Then keep one
wire of the automatic reverser on side of the insulator, and the
SAME color wire on the other side of the insulator. Repeat
on the next rail. That's it. It's a five minute job.
Look at the schematic of the track on this link.
http://www.digitrax.com/media/apps/products/autoreversing/ar1/documents/AR1.pdf
I do not think whether you use power routing Peco's, Hornby's, or Shinora
(all excellent) should make any difference whatsoever as the track
schematic.
Edited by - Chops124 on November 05 2017 10:13:42 PM
|
|
Country: USA ~
Posts: 11686 ~
Member Since: December 09 2013 ~
Last Visit: May 26 2026
|
Alert Moderator
|
|
|
|
Posted - November 05 2017 : 10:30:09 PM
|
quote:
This, off the cuff, looks like trouble- unless you got it all figured out. Myself, I try to keep it super simple.
Some of these old Atlas Connectors and the like were not really so simple, and my impression is that they
were 1960's state-of-the-art, just one step ahead of vacuum tubes. A lot of this Cab A - Cab B nonsense
was a forerunner to DCC.
I'm no expert at all, but I know what I like, which are simple on/off switches. I will even use separate
power packs to power separate blocks if that makes it simpler. If the block is very, very short, I will
use a $2 toy power pack just to power it and block it off from all the surrounding tracks. I did this,
and it worked superbly, on a crossover once.
Please keep me posted, I really, really want your train dreams to come true!!!
Edited by - Chops124 on November 05 2017 10:33:19 PM
|
|
Country: USA ~
Posts: 11686 ~
Member Since: December 09 2013 ~
Last Visit: May 26 2026
|
Alert Moderator
|
|
|
|
Posted - November 12 2017 : 5:10:15 PM
|
I'm not trying to be ignorant or anything, but you REALLY should stick with sectional track until your tracklaying skills improve. At the very least, use a straightedge to align your rail joints. Trust me, you'll have enough trouble trying to find the track problems you CAN'T see. Not fixing the ones you CAN see as you lay the track the first time will cause you unnecessary aggravation.
Also, you might want to completely rethink your yard area. What radius is that 90 degree turn on the yard lead? You'll be lucky if your cars make it around that turn, let alone locomotives. Just because flew track will bend that sharp of a turn doesn't make it a good idea. You really should use standard curve sections in this area.
As the layout is depicted in the photos, you are going to have nothing but derailment problems. Better to redesign something that will work before you start to lay track. This is why I highly recommend building a published plan as your first layout. Somebody else has already done the engineering for you, and you can concentrate on getting the track down and wired according to their instructions. Once you are familiar with how to lay track and wire, then you can move on to your own design.
I know this will come across as harsh, but if it keeps you from being frustrated with a layout that will not function as you intended it to, then I've done my job.
|
|
Country: USA ~
Posts: 621 ~
Member Since: December 22 2013 ~
Last Visit: July 06 2026
|
Alert Moderator
|
|
|
|
Posted - November 12 2017 : 9:08:38 PM
|
JWARD, I was thinking some of the same thing. My track laying skills
never really improved, but my experience definitely has. I've done
layouts with sectional Tru Track and my derailment problems vanished.
The problem with roadbed cast in track is that it limited the things
I wanted to do. That being said, I think there will be a lot of issues
with some of the radii.
I'm not into CAD, nor do I plan terribly well, but I've had a lot of
success by laying down a larger outer loop and working in, a bit
at a time, testing, pulling it up, trying again.
The layout below, which is British OO, that I adore, was to have started
out as a prefab factory double figure 8, but then I lost the track plan
and could not find it again. So I started with what I had and worked
inward. I had a lot of fun doing it, and British OO, which is naturally
short wheelbase, tolerates some of these fifteen inch curves without
a hiccup. Some of the longer wheel based pieces work, once I had
taken measures to completely flatten out the rail ends and level
the track.
This three line whipper snapper is a lot of fun to operate. It requires
the operator(s) to pay attention or it can be run in three non-intersecting
loops. The wiring took a bit of trial and error, and for this I used jumper
wires to configure the many facing power point turnouts.
https://youtu.be/pZfePF_tClQ
|
|
Country: USA ~
Posts: 11686 ~
Member Since: December 09 2013 ~
Last Visit: May 26 2026
|
Alert Moderator
|
|
|
|
Posted - November 13 2017 : 7:30:16 PM
|
I do agree that sectional track can limit what you are trying to do, depending on which brand you use. There seems to be a lot more sections available in Atlas than anything else, but most of it doesn't have roadbed. It has the added advantage of having a series of layout plan books with complete instructions for building each layout. All of them have been built by the authors of those books, and are known to be workable plans. Another good book is The HO Railroad that Grows, which is out of print. You can often find copies at rain shows, or on Amazon or ebay.
Having numerous years of experience, I have an idea what won't work, and here are the issues I see with the OP's layout:
The curve on tha yard lead is way too sharp. It really helps to have minimum standards, and to not deviate from them. For example, I recommend from experience not using any curve sharper than 18" radius, no matter what. The only possible exception would be for a trolley line, where only single trolleys will run.
One of the locomotives on the layout is a C&O U30C. Those are larger, six axle locomotives. They can be tough on trackwork. While it is possible to get one to run on 18" radius curves, the ends of the unit will tend to swing out on curves that sharp, dragging whatever freight car is coupled to them off the track. Much better to keep that locomotive on 22" radius or larger.
Misaligned rail joints, or kinked rail joints are a major problem. That U30C, or any other long wheelbase engine, will tend to derail on those kinks. And Steam locomotives are even pickier on track, a locomotive like a 4-8-4 would definitely have a lot of trouble on the OP's trackwork as shown in the photos.
The inclusion of a reversing section on the layout is a mistake. If you don't understand electrical theory well enough to wire one, leave it out. It isn't worth the frustration it will cause. Autoreverse units meant for dcc to not work as intended on a dc layout. There are a number of ingenious solutions to the wiring problems, including a bridge rectifier between the power supply and the rails on the section, or wiring those rails to the contacts of a snap relay so that the track polarity switches when the relay is thrown. The subject of reversing sections is covered in most books on model railroad wiring.
|
|
Country: USA ~
Posts: 621 ~
Member Since: December 22 2013 ~
Last Visit: July 06 2026
|
Alert Moderator
|
|
|
|
Posted - November 13 2017 : 10:06:39 PM
|
Useful points. I talked him into a reversing unit. I had used
two on a layout in the past, and it didn't seem to care
if I was running analog or DCC at the time.
The number of those who abandoned model railroading
from these kinds of issues must be legion.
|
|
Country: USA ~
Posts: 11686 ~
Member Since: December 09 2013 ~
Last Visit: May 26 2026
|
Alert Moderator
|
|
|
|
Posted - November 14 2017 : 09:21:00 AM
|
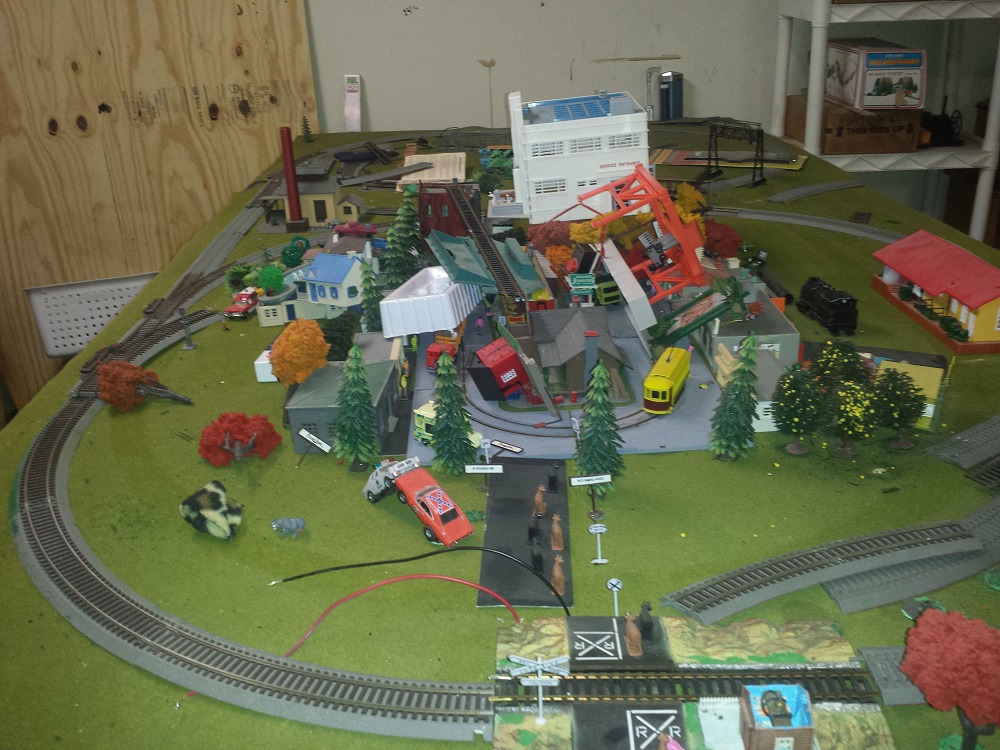
* Well Ken, I'll start off by saying hello. Now the big question is, Have you learned how to layout your track and install it on your train table in a way that the turns are uniform and look OK, and it operates well. You have shown no photos of your finished layout. So for me to say at-a-boy, I just can't do.
The thing I noticed the most is in your hand laying of sectional, and flex track is you used no plan. You did not make a tool for drawing curves of different radius. You did not make any track templates for anything. You just winged it with your hands and eyes. Usually a layout with a problem or two is how it will come out once done. Good luck with your layout.
There is a published book that shows a railroad of a common ancestry with yours. It was made in kind of the same manner of construction as yours. It is Fiddletown and Copperopolus by Carl Fallberg . It is a good read. A lot of fun,
Happy Railroading.
Frank
toptrain
" It's a Heck of a Day " !!!
Edited by - toptrain on November 14 2017 09:37:41 AM
|
|
Country: USA ~
Posts: 7539 ~
Member Since: August 07 2008 ~
Last Visit: June 22 2026
|
Alert Moderator
|
|
|
|
Posted - November 23 2017 : 11:43:46 AM
|
TopTrain makes a useful point, e.g.: planning is good, winging it is hazardous. There is so
much available in model trains that it is easy for the Pilgrim to get swamped in a mass of
ideas and concepts. Such was the case with my friend Jimmy, who got back into the hobby
having shelved it to pursue a career in the oil industry for forty years. Now he's back. A lot
has changed.
He got into a lot of different concepts, but lucky for us, he is using primarily Bachmannn EZ
track, and a heavy dose of Life Like Power Loc. So we have been able to organically create
a four track line using what we have on hand while we repair and rebuild his childhood Tyco
and AHM.
My questions to Jimmy were: are you a guy that likes to fiddle with tiny projects that require
frequent tune ups (like Kadee Couplers), or are you the kind of guy that likes to get things
up and running with a minimum of fuss (like horn hooks)? Do you do like to let 'em run,
do like to switch and compile trains, or a mixture of both? Do you favor a specific era and road, or
do you prefer a complilation of memories and things that interest you on the spot?
Jimmy is much like me, in that he likes to get it up and moving, and likes to compile memories
and intrigues, while I like a little operation mixed into running.
I wish like heck that Power Loc and True Trak and EZ Track was available when I was eleven. For me
it was fiber tie and Atlas. And it was a real learning curve and a lot of frustration.
So planning is good, but I prefer a more organic approach of evolving a track plan. I've done both, and
I prefer the latter. It's tricky, but it can be done. I find that if I start from the outside and work inwards,
I can get things to happen. Preformed roadbed is a bit solid, and doesn't allow for too many frills, but
that is not necessarily a bad thing. The good thing, is that it works and compensates for an uneven surface.
In short, there is more than one way to skin a cat.
Edited by - Chops124 on November 23 2017 11:45:34 AM
|
|
Country: USA ~
Posts: 11686 ~
Member Since: December 09 2013 ~
Last Visit: May 26 2026
|
Alert Moderator
|
|