|
|
 Posted - October 07 2012 : 5:53:27 PM Posted - October 07 2012 : 5:53:27 PM


|
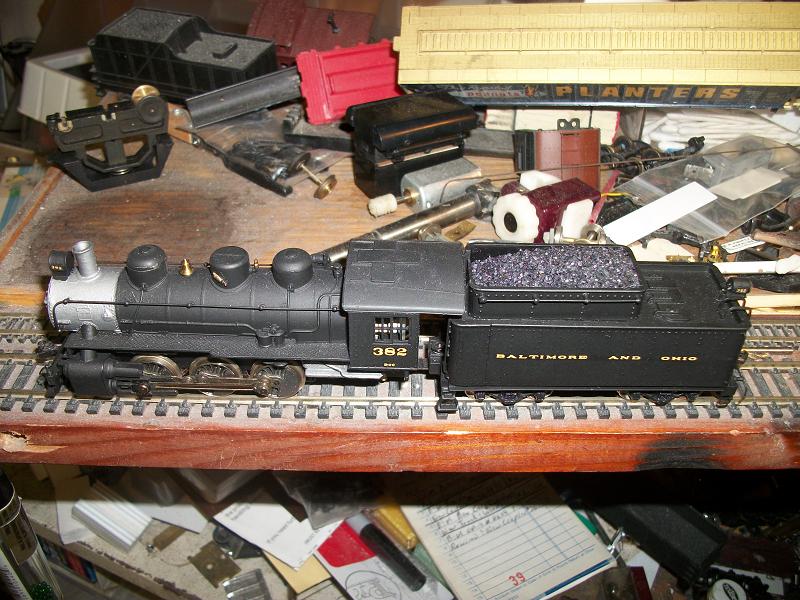
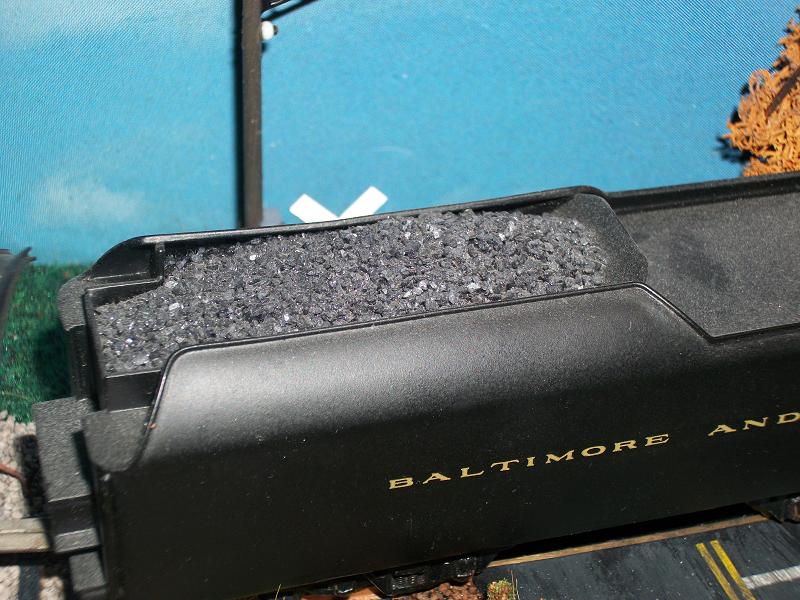
I finally got around to this Athearn BB kit and decided to try my hand at making a coal load for it. I fit a 3/16" thick plank of balsa to the interior, then glued a slightly smaller (length +width) pice on top. After the glue dried, I sanded the ends and sides with a beveled angle, and then marked and cut bevels to represent three coal mounds. I painted the wood flat black- hand painted, not sprayed, let it dry then coated with glue and liberally sprinkled black coarse decorative sand (from Michaels Crafts- a 2 lb bag for about $3.00) into the wet glue. After it set up, I gently brushed the loose material off and cleaned up the edges, then inserted it into the hopper. I previously placed the weights (+ additional lead weight for NMRA standards) in the interior slopes, using double stick foam tape. If any of you follow MR, you may have noted my question about doing this versus painting the weights. Most replies were to leave the weights outside, but how to match the color? So, I did what I originally planned and put them inside. Metal wheels (Intermountain 33") and Kadee#5s. I left the hopper underside in the orgiginal color, only painting the air tank, etc and bottom frame flat black.
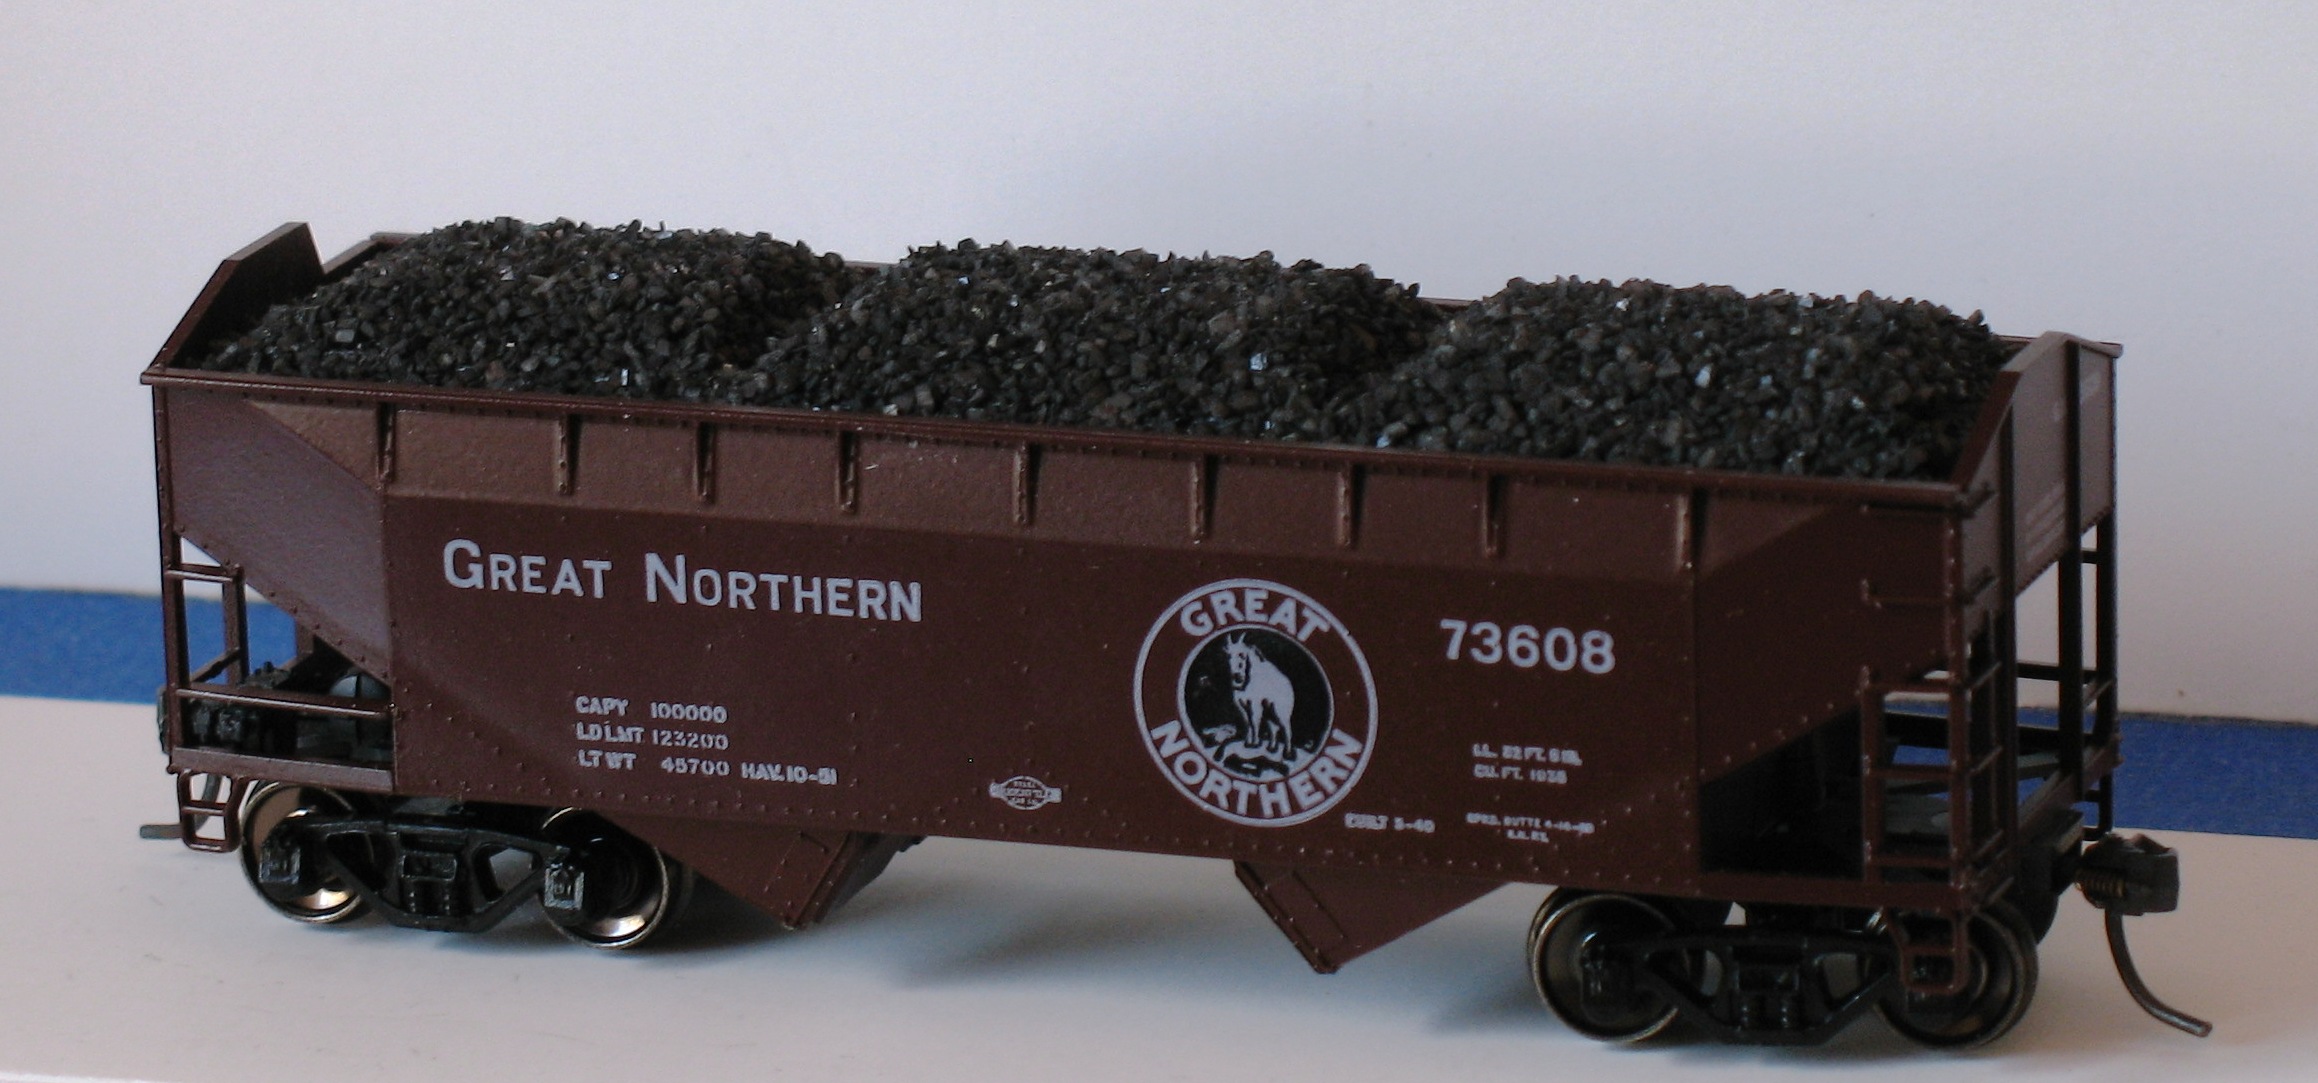
I dont know if this represents "mine-run" coal or another type, but it looks like coal to me!
Siouxlake/Ron
|
Country:  USA ~
Posts: 510 ~
Member Since: September 21 2011 ~
Last Visit: December 21 2014 USA ~
Posts: 510 ~
Member Since: September 21 2011 ~
Last Visit: December 21 2014
|
 Alert Moderator
|
|
|
|
Posted - October 07 2012 : 6:10:00 PM


|
Ron,
I been using that craft black sand for a LONG time as it does look like real coal with a shine depending on the light, AND you don't have to paint it after all of it dried to have that shine either!
That car, looks REALLY good. Thing is for me alot of my coal cars are black which isn't difficult to match, and those that aren't, I custom painted anyway so I have the matching color....
ONCE I'm done even the factory painted black ones, I dullcote them, anyway!
VERY nice work!
~John
Many have tried to, and failed, ya just can't repair stupid... 
Do NOT try to Idiot-Proof anything!!!! God, will simply create a better......IDIOT!
|
|
Country: USA ~
Posts: 2911 ~
Member Since: March 26 2012 ~
Last Visit: January 14 2014
|
Alert Moderator

|
|
|
|
Posted - October 07 2012 : 6:47:17 PM
|
I use a pc of cardboard to mount my coal on...in the short cars I'd have one lg hump or 2 smaller ones...still looks good though...didn't know about the black "craft sand"...I'll have to look into that
caboose 1
|
|
Country: USA ~
Posts: 352 ~
Member Since: November 09 2010 ~
Last Visit: January 21 2013
|
Alert Moderator
|
|
|
|
Posted - October 07 2012 : 8:42:05 PM
|
In my MR thread on coal loads, twcenterprises responded with several photos of his method of work. In one image of his materials, the bag of "coal and coke" from a supplier in Sullivan IN looks exactly like the bag and paper label that is on my bag of " black coarse sand" from Michael's Crafts. Just couldn't be the exact same thing, relabeled, right
At any rate, on a longer hopper, a triple hopper from Accurail, I am building another load, using the same balsa plank and a piece of carved beaded styrofoam, glued together. We will see how this turns out during the week. I tried for a gradual inverted elliptical mound this time.
John, you are right about that sparkle- it sets things off nicely- and naturally, without a coat of paint.
As far as the car color, the GN was in brown, the next one is in Soo Line dull boxcar red, and I am sure I have a black one somewhere. But that sand still stands out with the facets reflecting light!
I am not doing any weathering or detailing of these cars, except for installing weathered floors in the box
cars, so that I can have something to look forward to after I gain more experience. That is why I did not DullCote this hopper yet.
Siouxlake Ron
|
|
Country: USA ~
Posts: 510 ~
Member Since: September 21 2011 ~
Last Visit: December 21 2014
|
Alert Moderator
|
|
|
|
Posted - October 07 2012 : 9:07:25 PM
|
Ron,
I agree. Question, do you plan to "unload" those hoppers in the future at any time?
I have a BETTER way to get the load to look the same, and then weight up, all at the same time! (I'd take a guess to say you don't plan to have them unloaded with the way you have the weight but, I might be wrong)
I'll make that for another night as its a long process to do but is a good way as well!
~John
Many have tried to, and failed, ya just can't repair stupid...
Do NOT try to Idiot-Proof anything!!!! God, will simply create a better......IDIOT!
|
|
Country: USA ~
Posts: 2911 ~
Member Since: March 26 2012 ~
Last Visit: January 14 2014
|
Alert Moderator
|
|
|
|
Posted - October 08 2012 : 12:02:57 AM
|
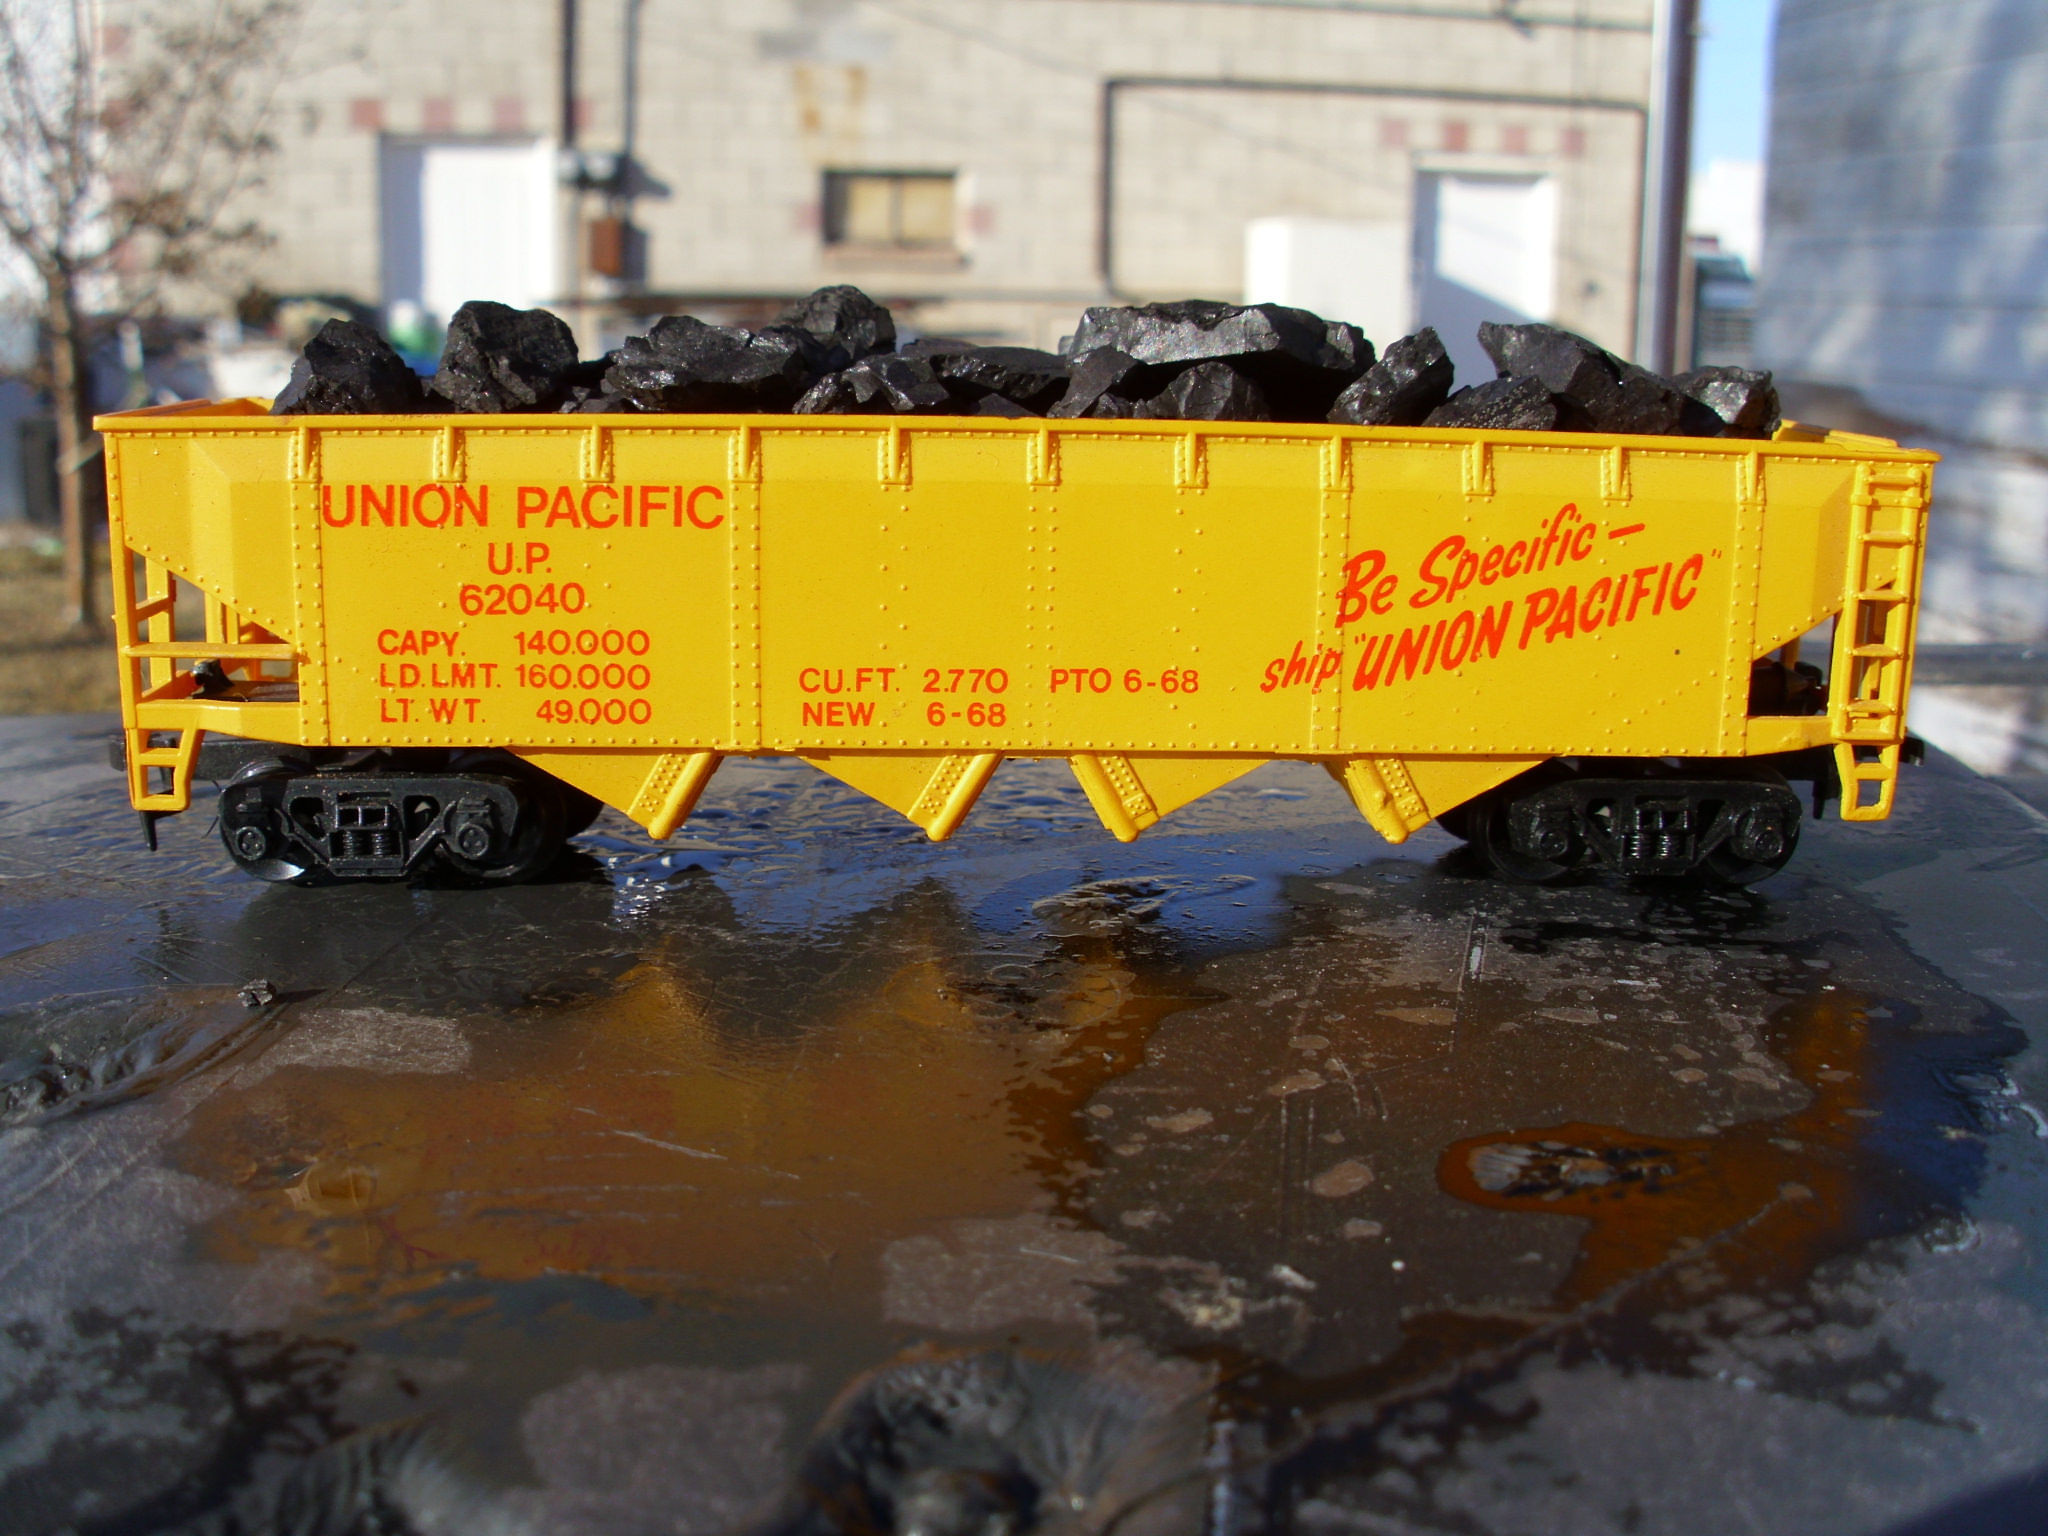
looks good But I'll stick with REAL coal loads
Edited by - microbusss on October 08 2012 10:12:20 AM
|
|
Country: USA ~
Posts: 15034 ~
Member Since: February 23 2009 ~
Last Visit: July 30 2026
|
Alert Moderator
|
|
|
|
Posted - October 08 2012 : 04:42:50 AM
|
John- I don't plan to move the loads, but can easily pry them out with a flat xacto blade. Since I have no mine on my switching layout, these are cars "passing through" from elsewhere.
Ben- you're kidding, right? What do you do to unload- use a large crane?
Ron
|
|
Country: USA ~
Posts: 510 ~
Member Since: September 21 2011 ~
Last Visit: December 21 2014
|
Alert Moderator
|
|
|
|
Posted - October 08 2012 : 07:40:44 AM
|
Ron,
When I'm home from my regular job, I'll make a reply to how I load my cars as well, as some of mine will be loaded others will be empties, BUT, I will have a small mine on my own layout but I am not going through the "unloading" process! I'm just modeling ALOT of the same cars, with the same road numbers one unloaded, one loaded.
Ben,
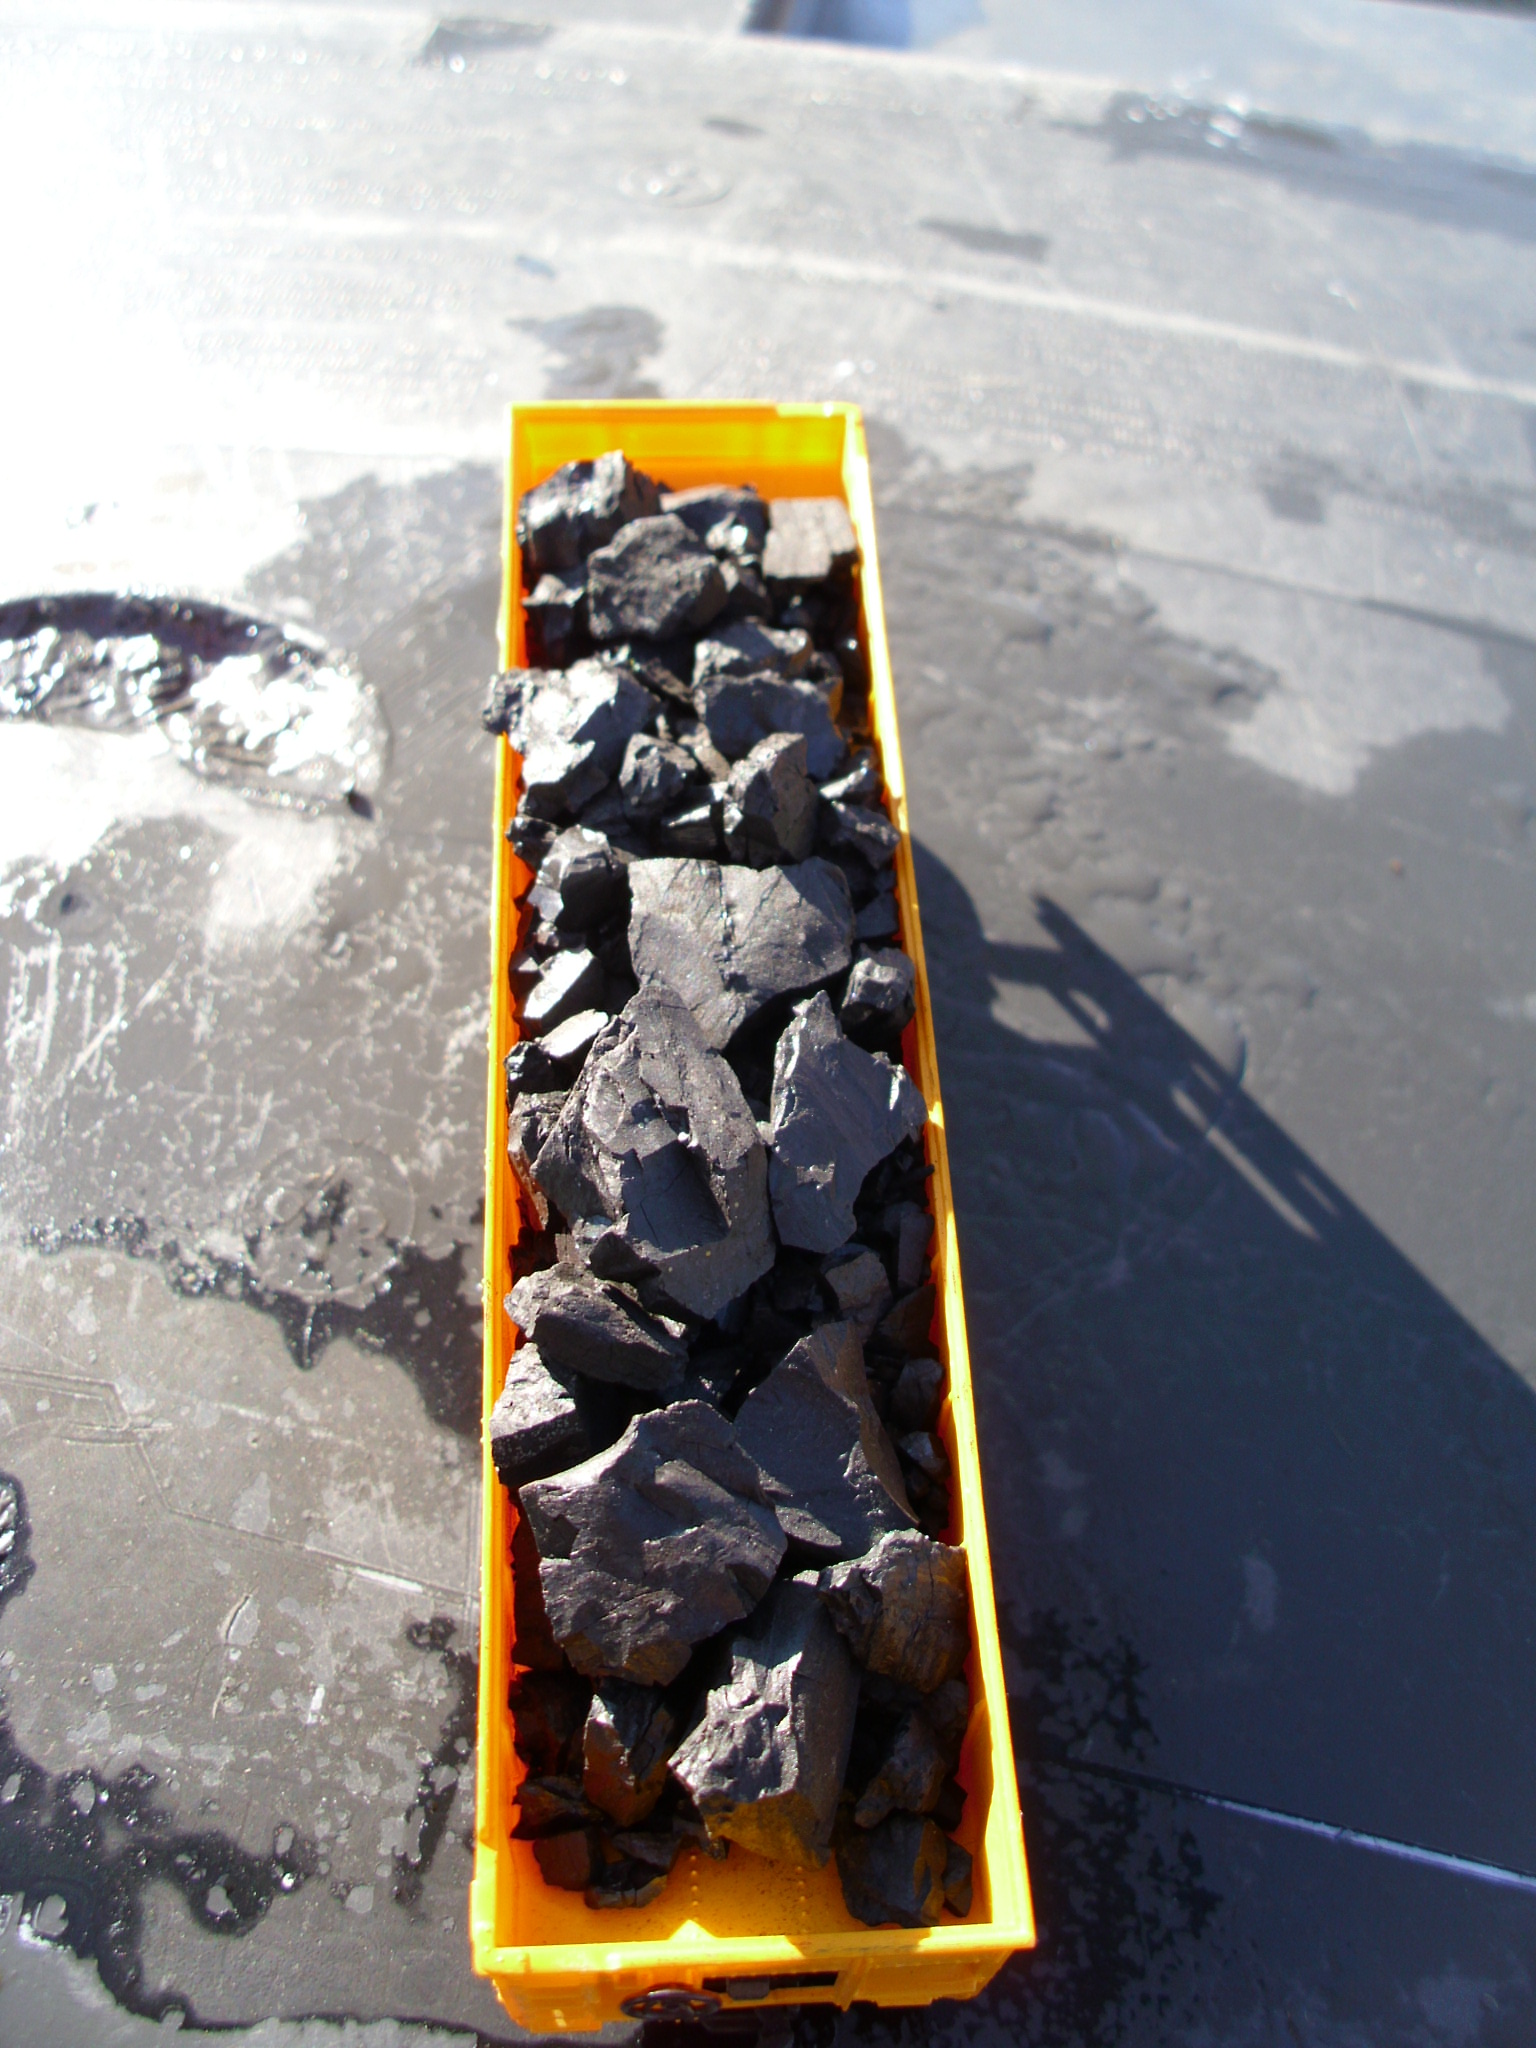
You my friend needs to take that coal out of those cars, put it in a bag and then put that bag into another bag (heavy freezer zip lock bags)......and the beat the ever loving coal dust out of it with a large hammer, a sledge would be your best friend in this!........till that coal is ALOT smaller in size as that coal load wouldn't go through the hopper chutes, it have to be lifted out of the car with a chain, and a large crane hook!
~John
Many have tried to, and failed, ya just can't repair stupid...
Do NOT try to Idiot-Proof anything!!!! God, will simply create a better......IDIOT!
|
|
Country: USA ~
Posts: 2911 ~
Member Since: March 26 2012 ~
Last Visit: January 14 2014
|
Alert Moderator
|
|
|
|
Posted - October 08 2012 : 10:14:57 AM
|
| I knows that guys I was just demo-ing how real coal looks in coal hoppers hehe
|
|
Country: USA ~
Posts: 15034 ~
Member Since: February 23 2009 ~
Last Visit: July 30 2026
|
Alert Moderator
|
|
|
|
Posted - October 08 2012 : 12:53:51 PM
|
As for making a blue-box hopper have appropriate weights, I usually spray Kyrlon rust-colored primer for the more red cars, and then spray on some Ford flat-dull black for the black hoppers.
Anyone have a better idea on how to hide the weights (in plain sight)?
|
|
Country: USA ~
Posts: 182 ~
Member Since: April 30 2011 ~
Last Visit: March 04 2023
|
Alert Moderator
|
|
|
|
Posted - October 08 2012 : 3:30:08 PM
|
That suggestion was offered over in the MR forum, but the color of the GN didn't really match a Rustoleum brown I have, and so I did the hidden thng. Now that Athearn BB larger Soo Line hopper provides for the weights to be covered by a plastic piece, so no issue. Had it been a plain black colored hopper, I wouldn't have thought twice about just painting the weights and leaving them on the outside.
Ben- save that coal, man! Winter this year promises to be a bad one- it already snowed once up in Duluth, MN!
Of course, I am 1500 miles away, so I'll just grab my sweat shirt and pants if it chills down to, say, 40 or so....
Ron
|
|
Country: USA ~
Posts: 510 ~
Member Since: September 21 2011 ~
Last Visit: December 21 2014
|
Alert Moderator
|
|
|
|
Posted - October 08 2012 : 7:25:05 PM
|
| nopes Coal is in a Baggie & being saved for a future layout
|
|
Country: USA ~
Posts: 15034 ~
Member Since: February 23 2009 ~
Last Visit: July 30 2026
|
Alert Moderator
|
|
|
|
Posted - October 14 2012 : 6:54:36 PM
|
Ron,
Heres are the first places I used that "coal" decortive sand from Michael's or Jo-Ann Fabrics, as they have it too for an even slightly less price but only a few cents!
Then I used it here:

and then last but not least THEE VERY FIRST place I used that same materials:
Then I seen just how realistic it looked and began loading ALL of my hoppers with it!
~John
Many have tried to, and failed, ya just can't repair stupid...
Do NOT try to Idiot-Proof anything!!!! God, will simply create a better......IDIOT!
|
|
Country: USA ~
Posts: 2911 ~
Member Since: March 26 2012 ~
Last Visit: January 14 2014
|
Alert Moderator
|
|
|
|
Posted - October 15 2012 : 12:31:14 AM
|
The close up shots do that "coal" even more justice as a modeling "medium".
Very nice indeed!
I also found that there is some "modeling sand", either in the craft aisles or in the floral aisles (where I found the black "coal" sand) that I have used for the tan or brownish (sable?) colored sand in the sandbox of the Walthers Cornerstone Sandhouse facility, where I used a shaved and carved piece of styrofoam, on which I brushed glue and then sprinkled the sand. The sand was finer, so I think I got it in the crafts aisle (crafting sand), so as to scale a bit better in HO.
John- did you apply the coal sand to a base support form in an EMPTY tender, or apply OVER the existing plastic coal load???
Siouxlake Ron
|
|
Country: USA ~
Posts: 510 ~
Member Since: September 21 2011 ~
Last Visit: December 21 2014
|
Alert Moderator
|
|
|
|
Posted - October 15 2012 : 07:42:12 AM
|
Ron,
Thanks for the compliments.....
As for your comment on how I did it. I took the tenders and simply made a "flat bottom" in them, piled the sand high to look like it was poured as you see it, and then soaked it with "wet water" "water and alcohol 50/50 mix, and then used the watered down glue 2/3rd water to 1/3 glue and then added that.....left it to settle and evaporate out for awhile and added in more glue and water....I did this 3 times!
On the 3rd time and left it dry hard. Its as hard as a solid rock now!
On my coal hoppers, I took a piece of plastic sheet, glued it to the inside of the cars, on ALL 4 sides. Sealed it completely on all 4 sides to make it water proof, and then done the exact same thing! With this application, you don't have to add any more weight to the car, the load does it by itself! Plus it makes the car way more stable in running capabilities....
I used a thin bead of gel type super glue to water seal the sheet plastic and then once dry began to pile the coal in on top of the sheet plastic. The plastic sheet needless to say sits right on top of the slope sheet on each end of the car....Center bracing, may need trimmed to fit it in, but once done that acts as a support if needed!
Needless to say each load is 100% different then the other so.....That makes them look realistic!
~John
Many have tried to, and failed, ya just can't repair stupid...
Do NOT try to Idiot-Proof anything!!!! God, will simply create a better......IDIOT!
|
|
Country: USA ~
Posts: 2911 ~
Member Since: March 26 2012 ~
Last Visit: January 14 2014
|
Alert Moderator
|
|