|
|
 Posted - March 13 2016 : 1:36:25 PM Posted - March 13 2016 : 1:36:25 PM


|
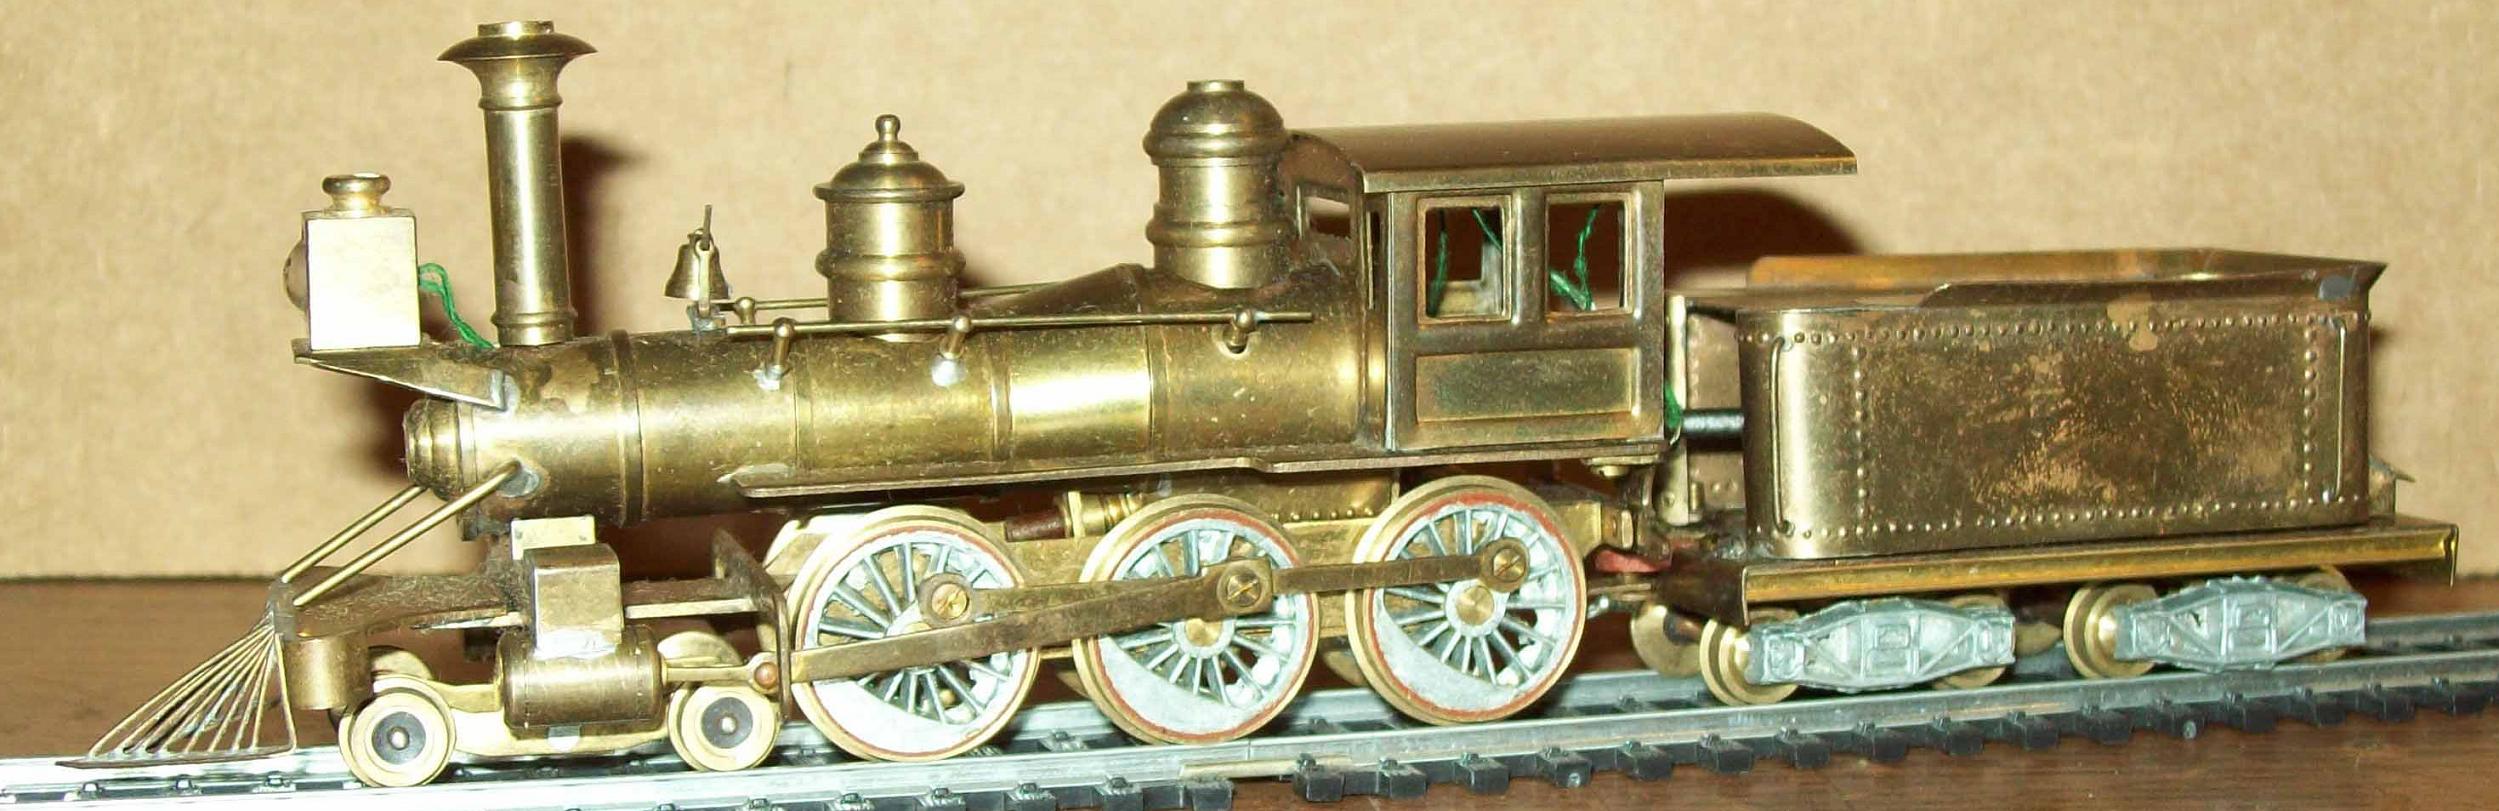
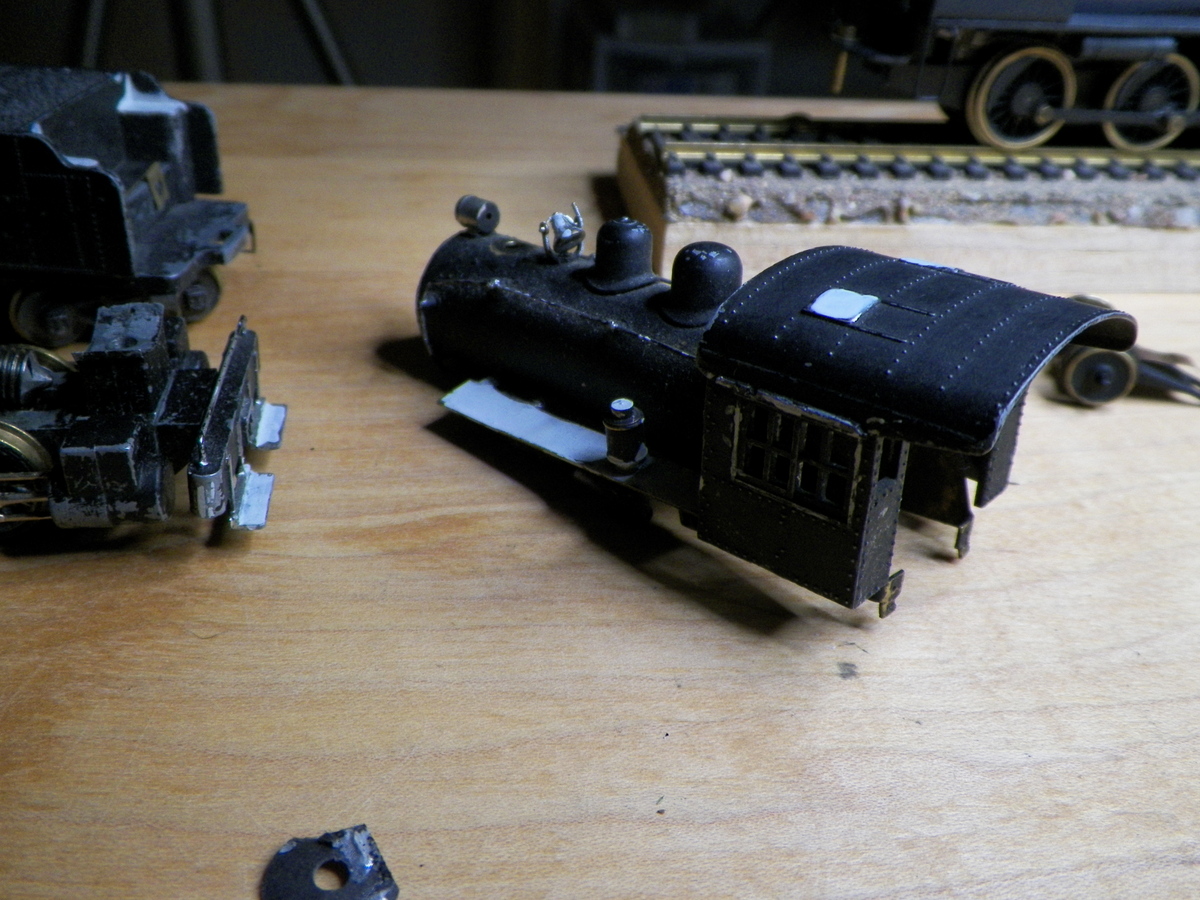
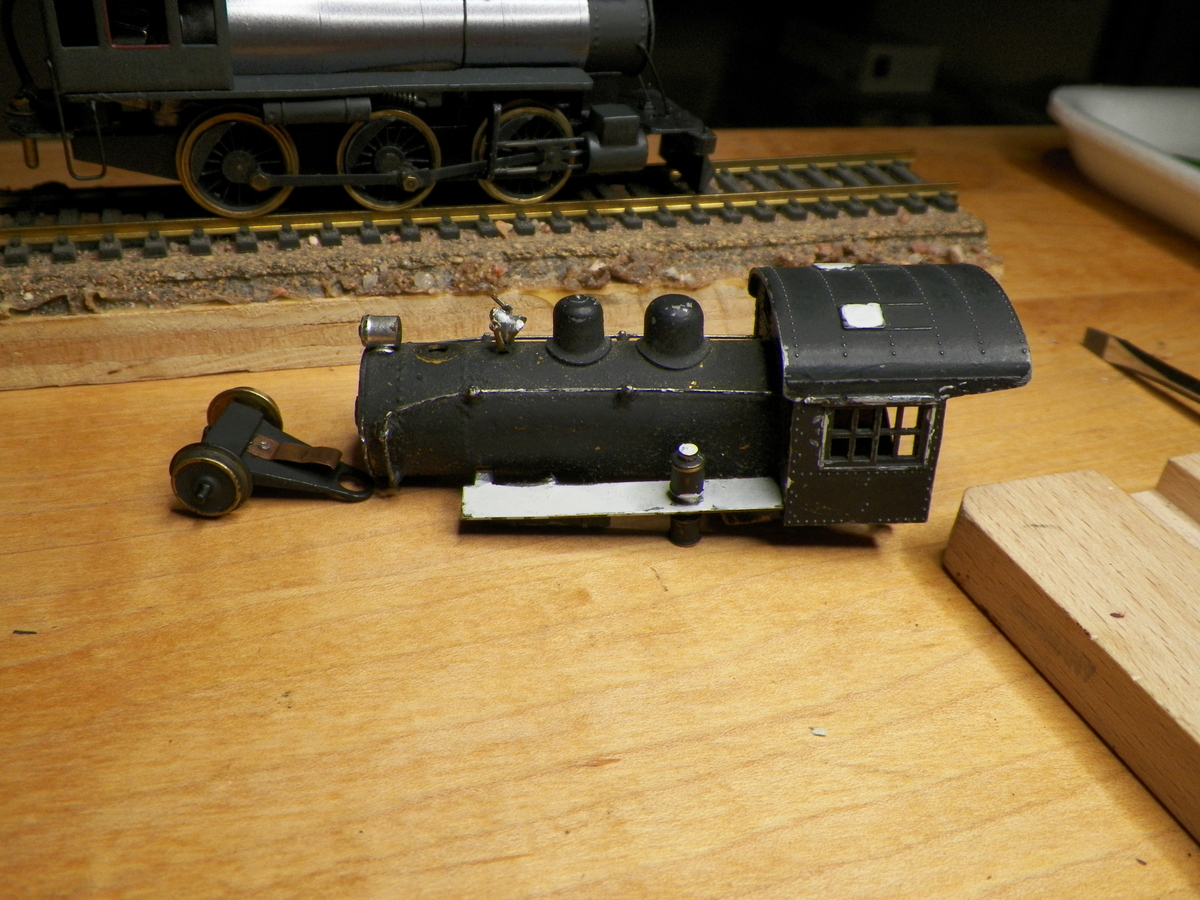
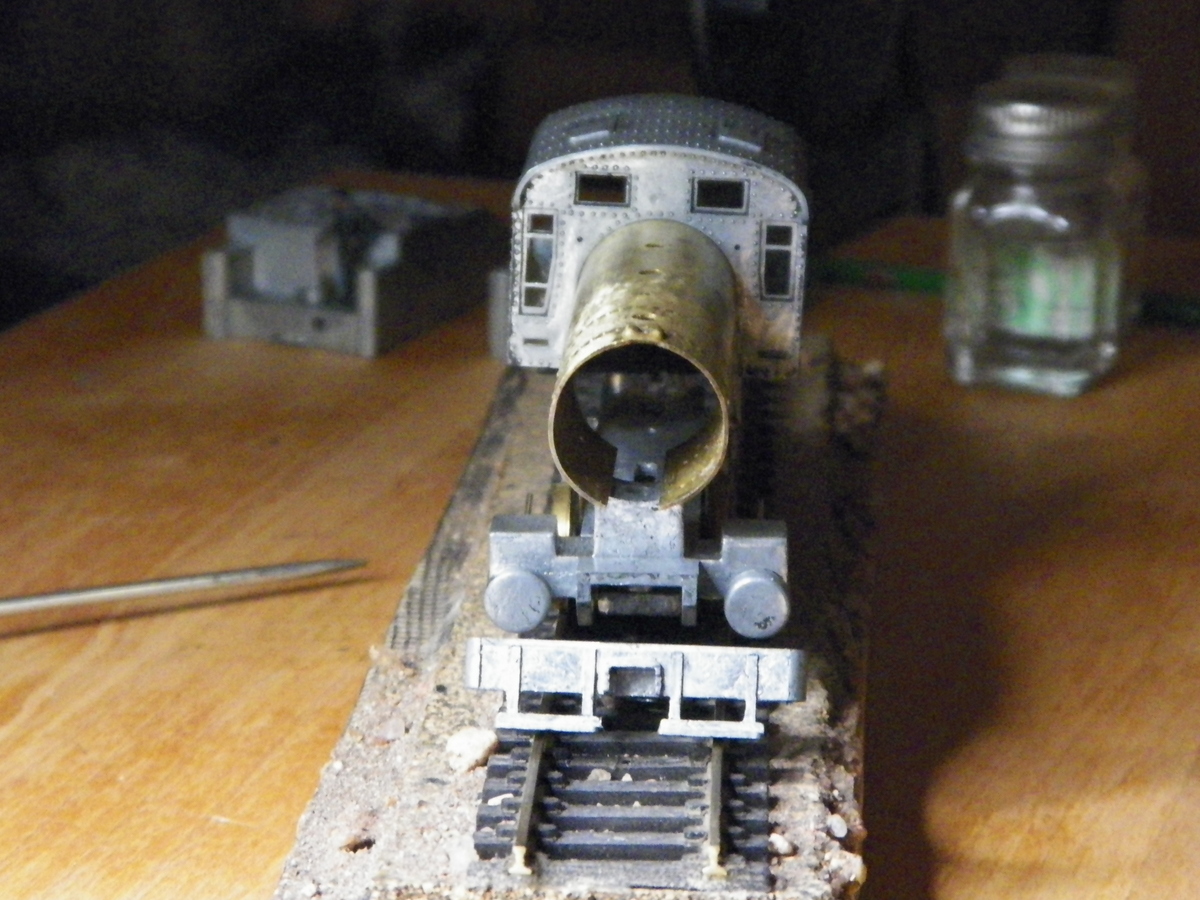
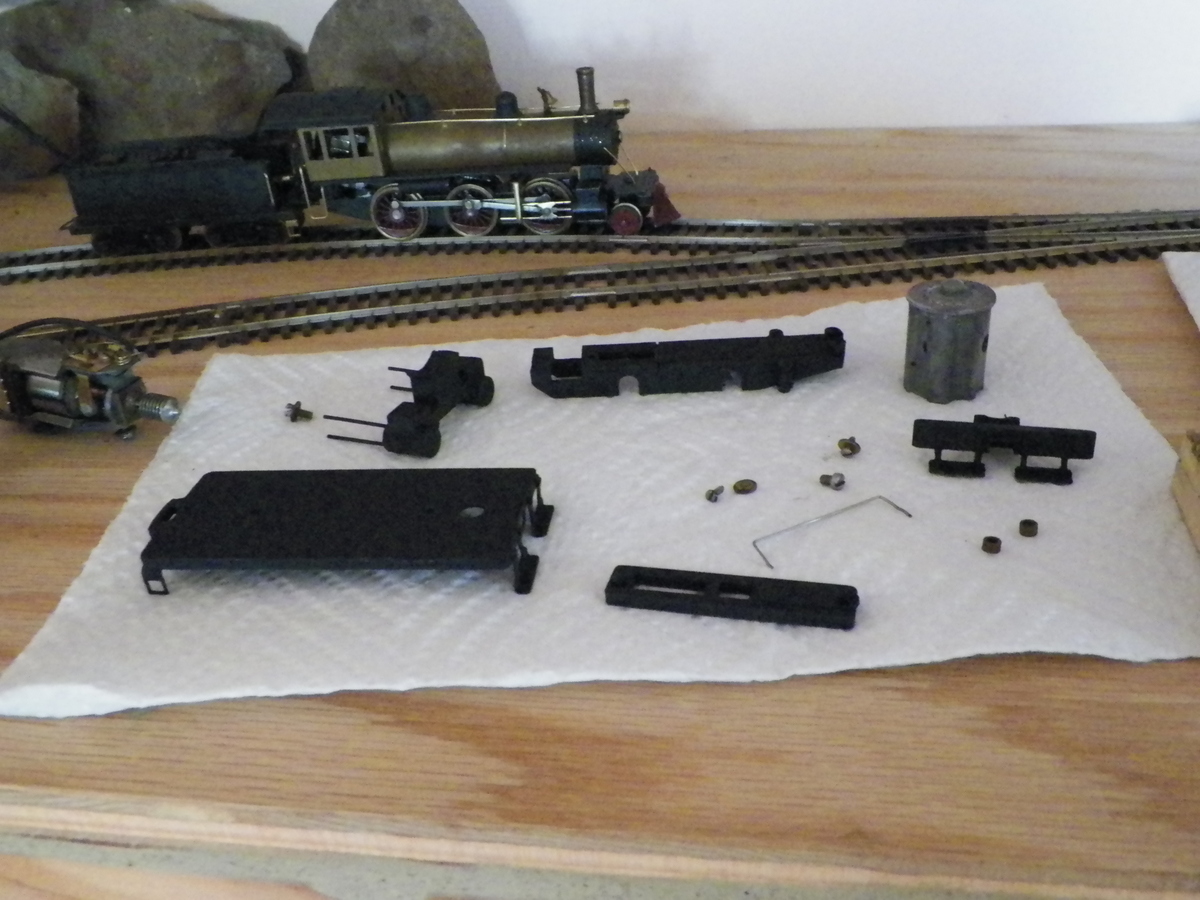
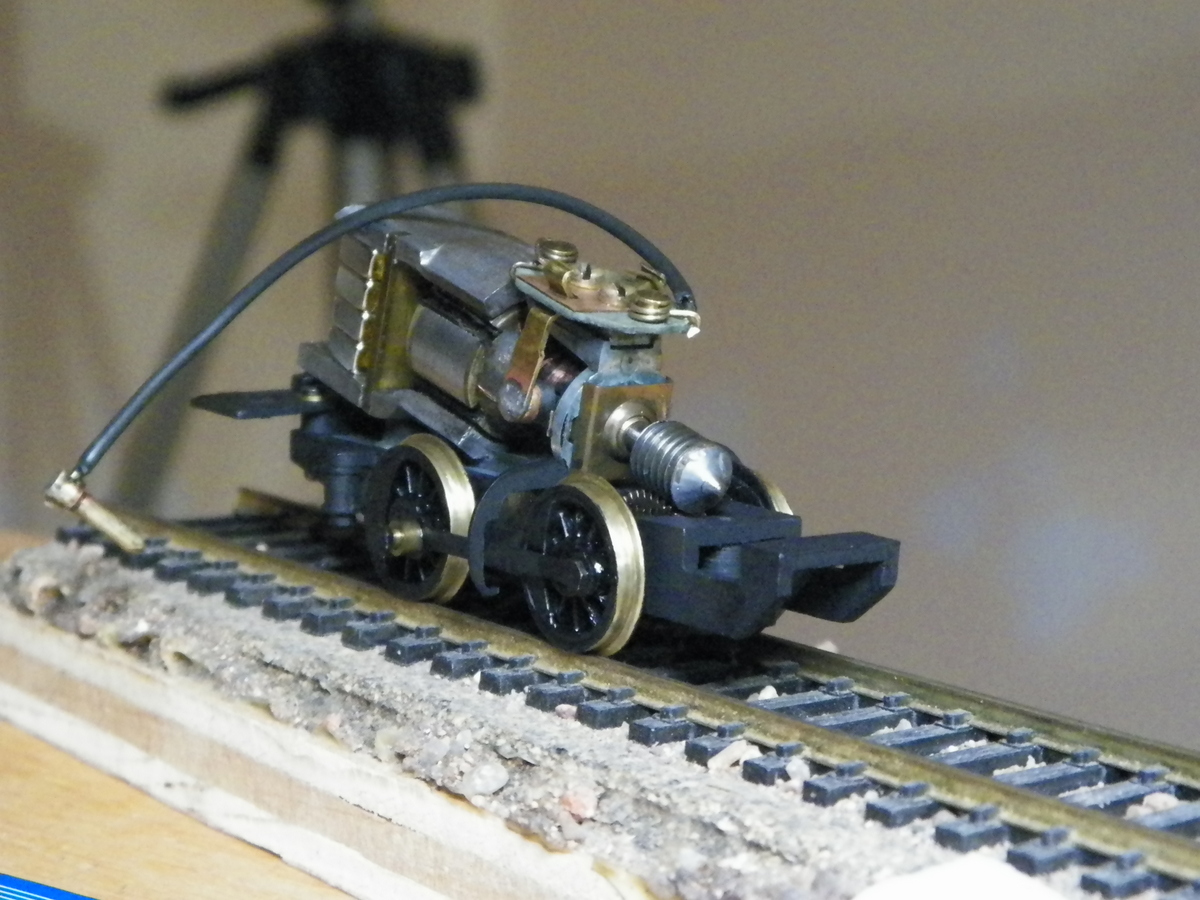
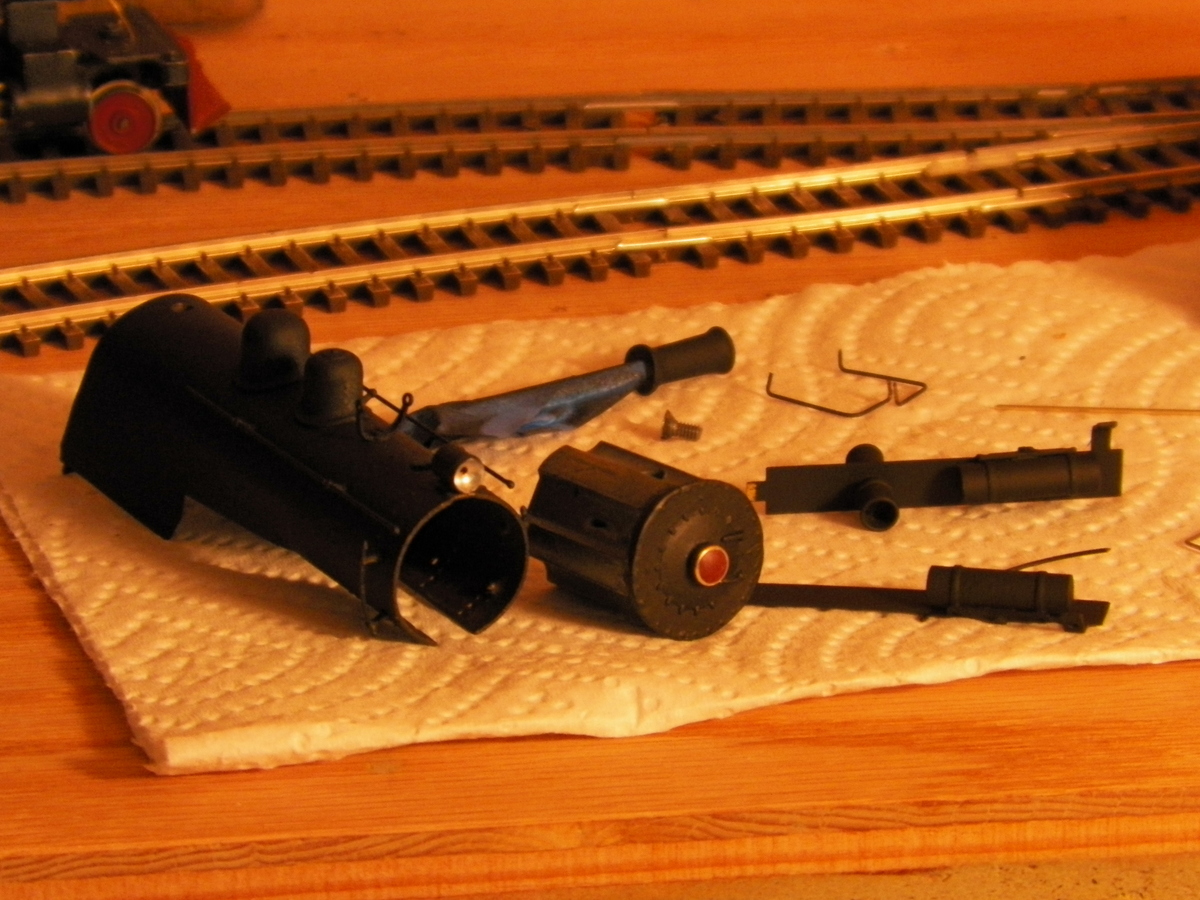
I've been eyein' these Mantua Mighty Mite locomotives for a while and recently went for it and acquired one . . . prebuilt and rough, but seeming serviceable. The first photo is of the locomotive as it appeared in the posting . . .
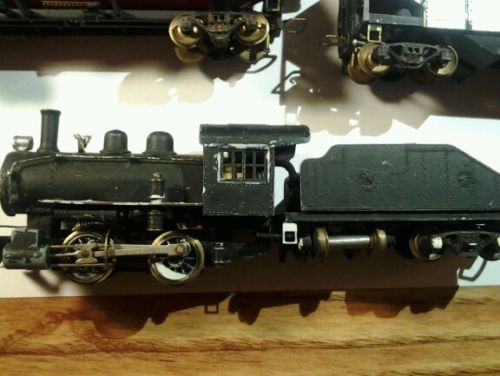
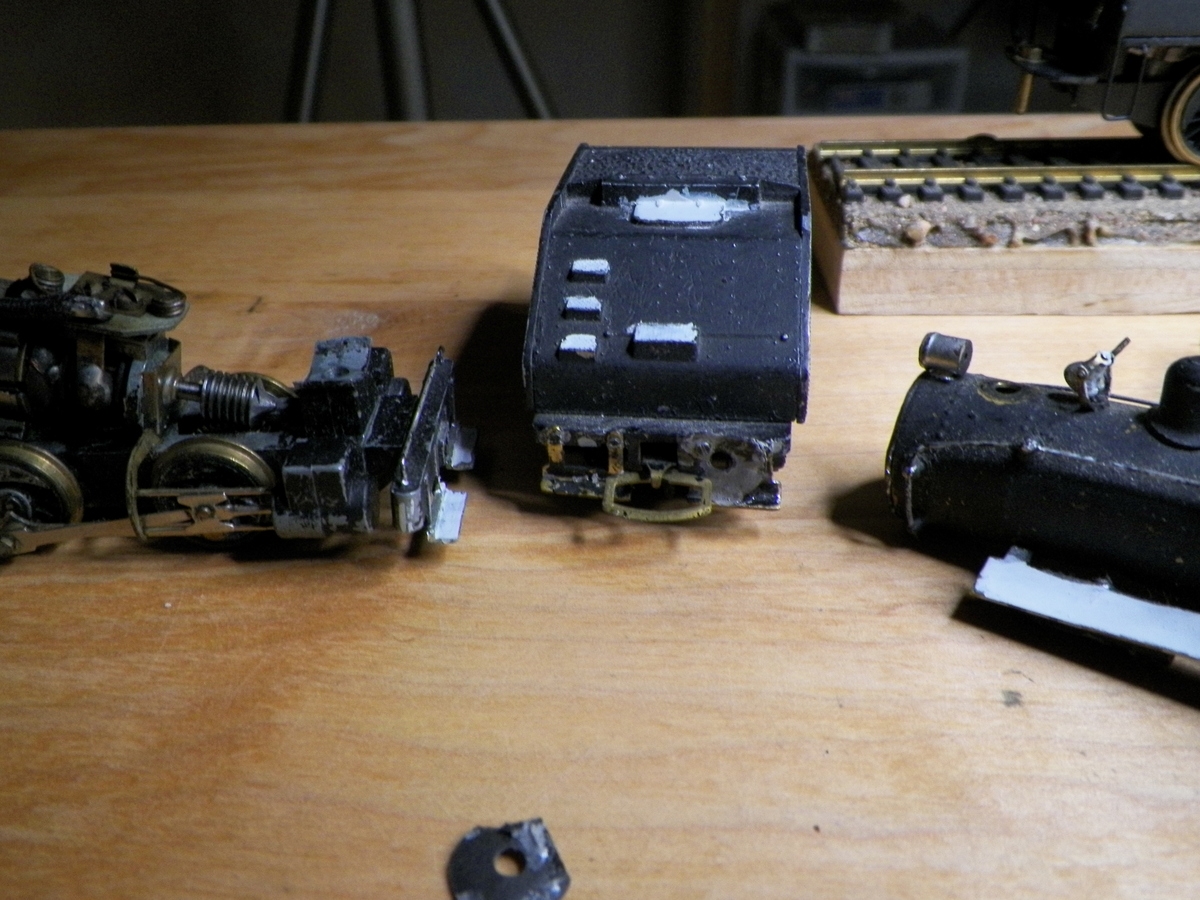
and here are a few more I took after beginning disassembly and inspection . . .
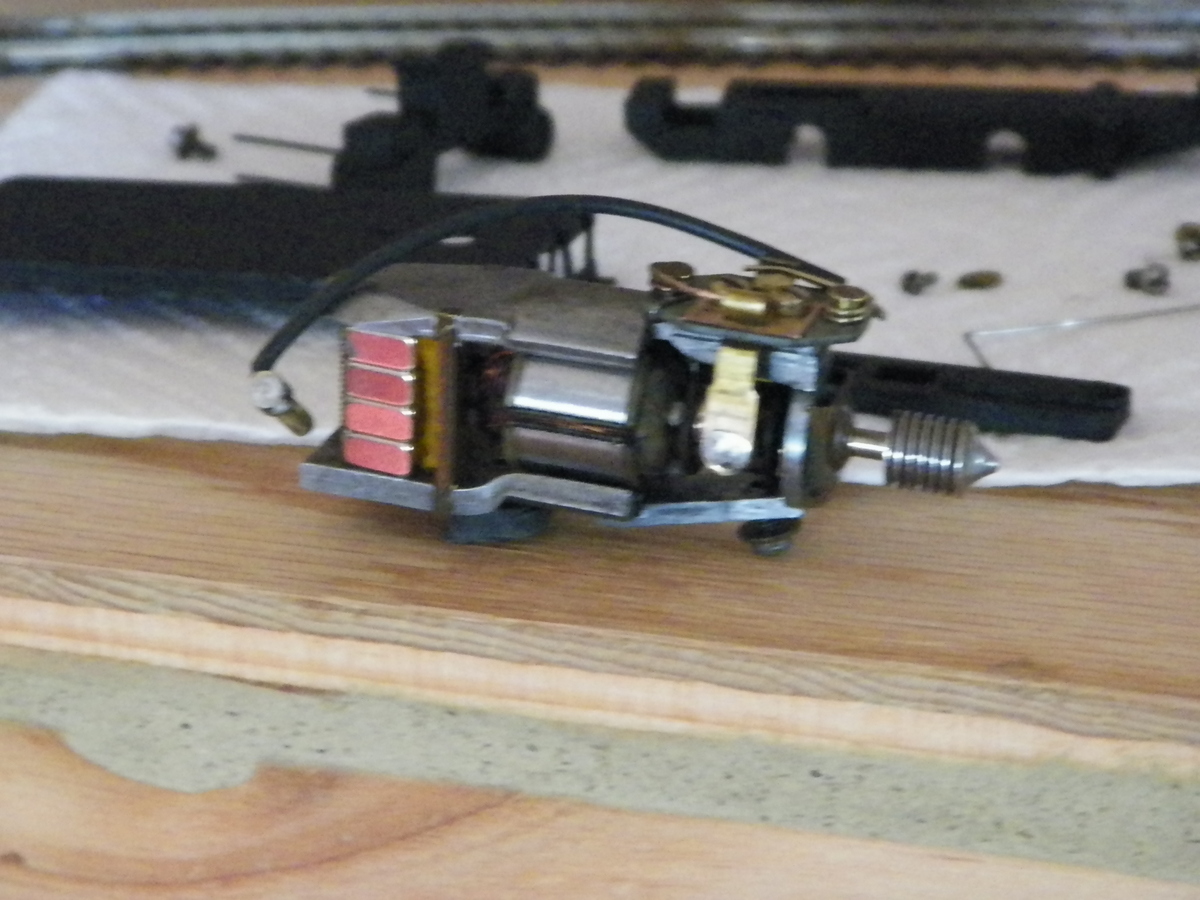
and a couple of the motor . . . I did try running this before I did anything to it, and
amazingly it did try to run. But if you look and see that the lead wire is soldered to the right hand brush (opposite of what it should be by my knowledge) . . . and the drivers would not all sit flat on the rails . . .
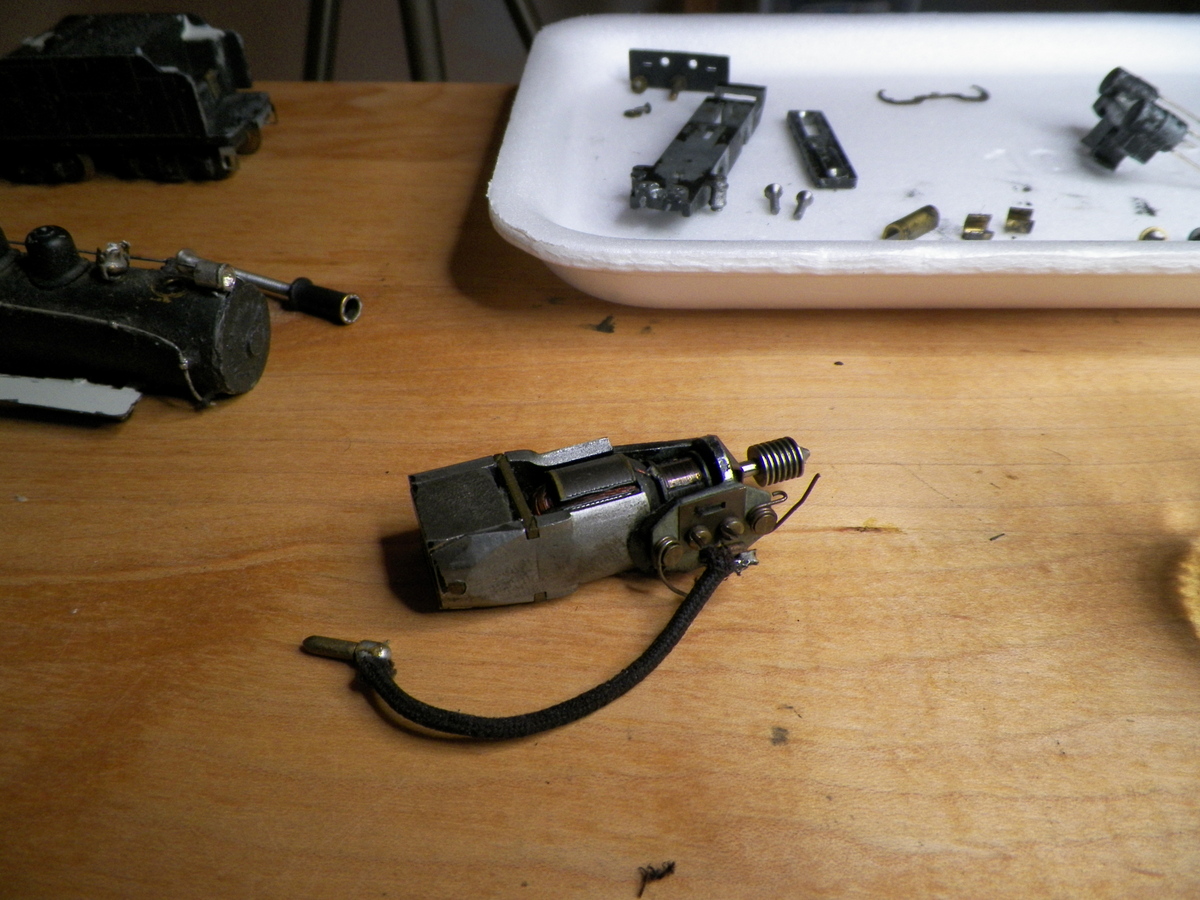
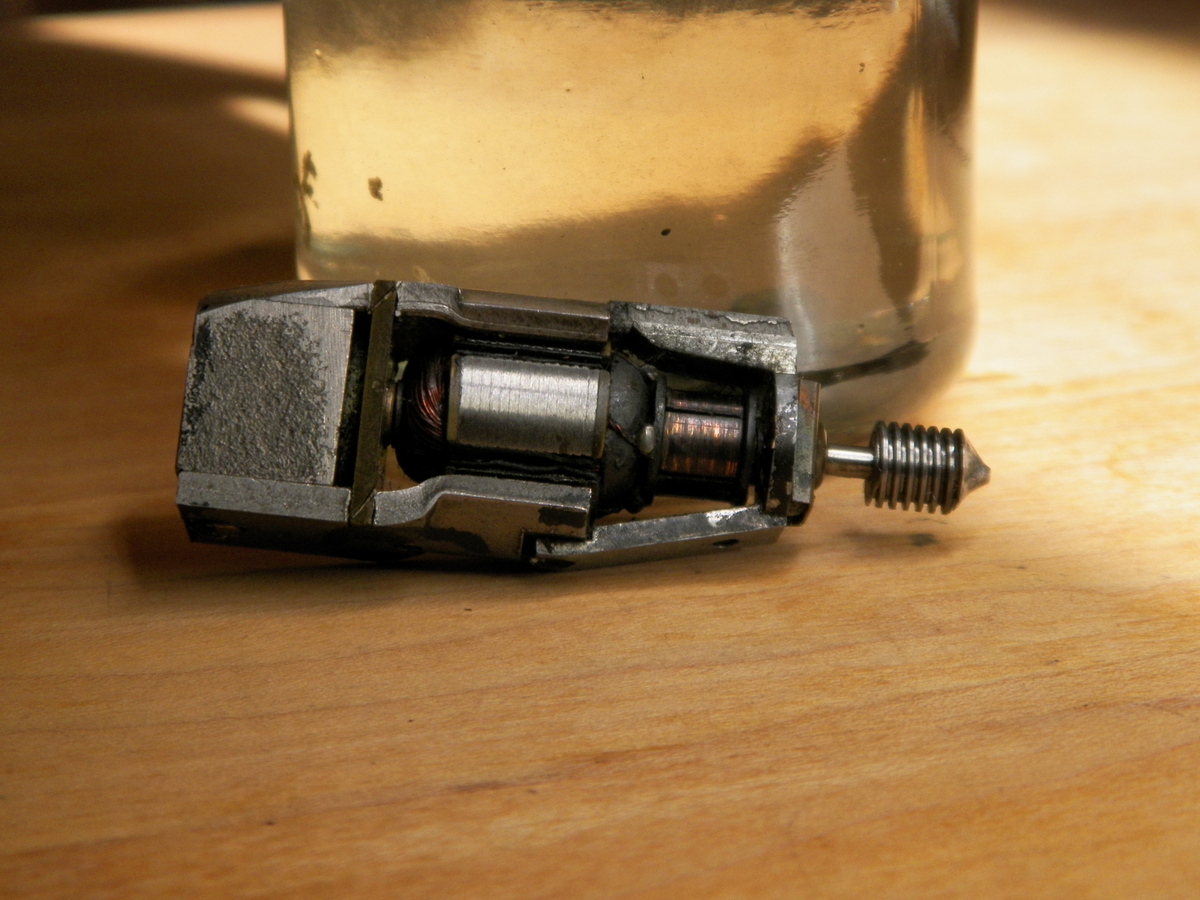
I didn't get a photo of the brushes, but the brush on the right side (soldered wire side) was worn pretty darn close to the arm and not suited (by me) to take a chance on mussing the commutator. I had some Tyco/Mantua brushes which I had tried at another time to use on an older Mantua motor and they didn't fit well. On the basis of that, I figured I'd have to replace the carbon myself (or wait who knows how long to find the right brush). I went about assembling the carbon and wire glue to attempt that replacement, but then I also tried the Tyco/Mantua brushes and voila!, they worked. No photo, but the motor seems to run fine now with the lead wire "pinched" between the left hand brush spring wire, etc.
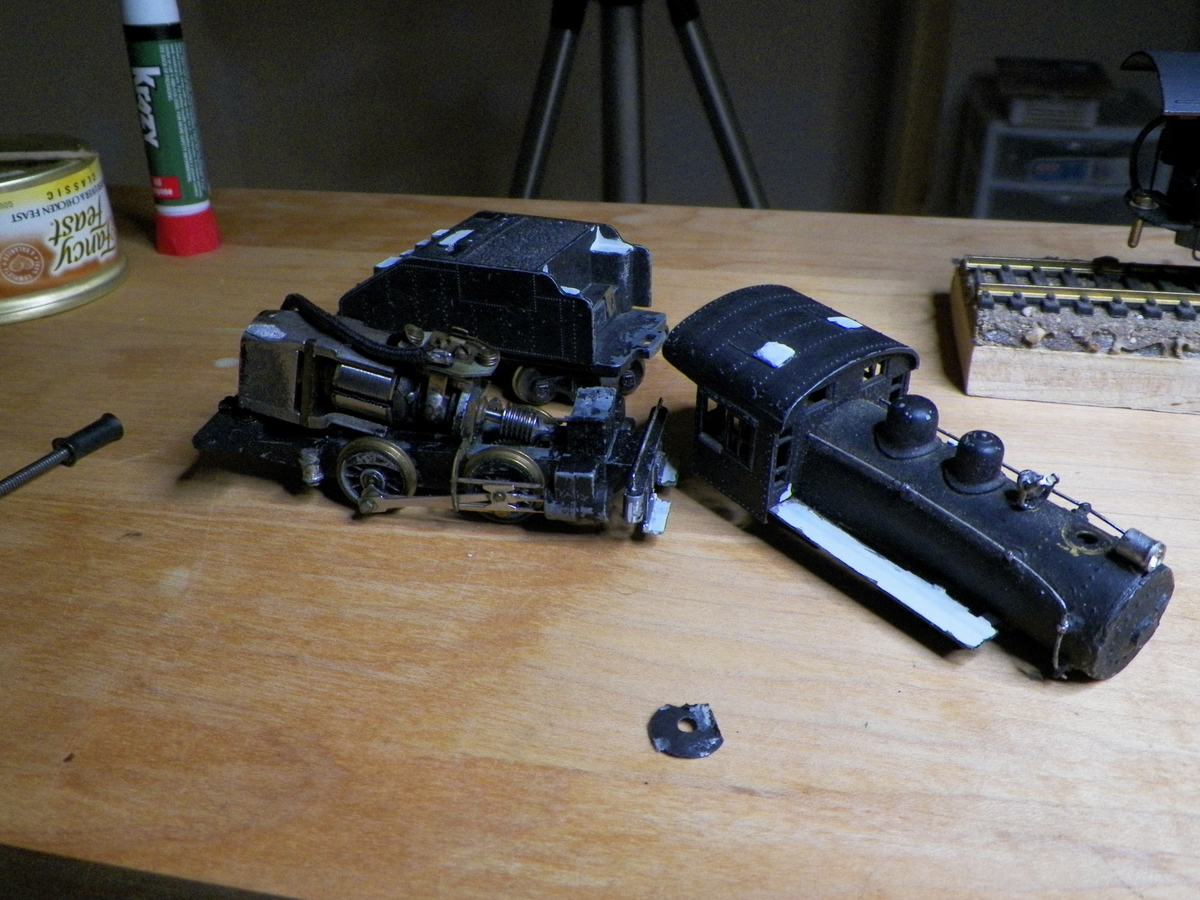
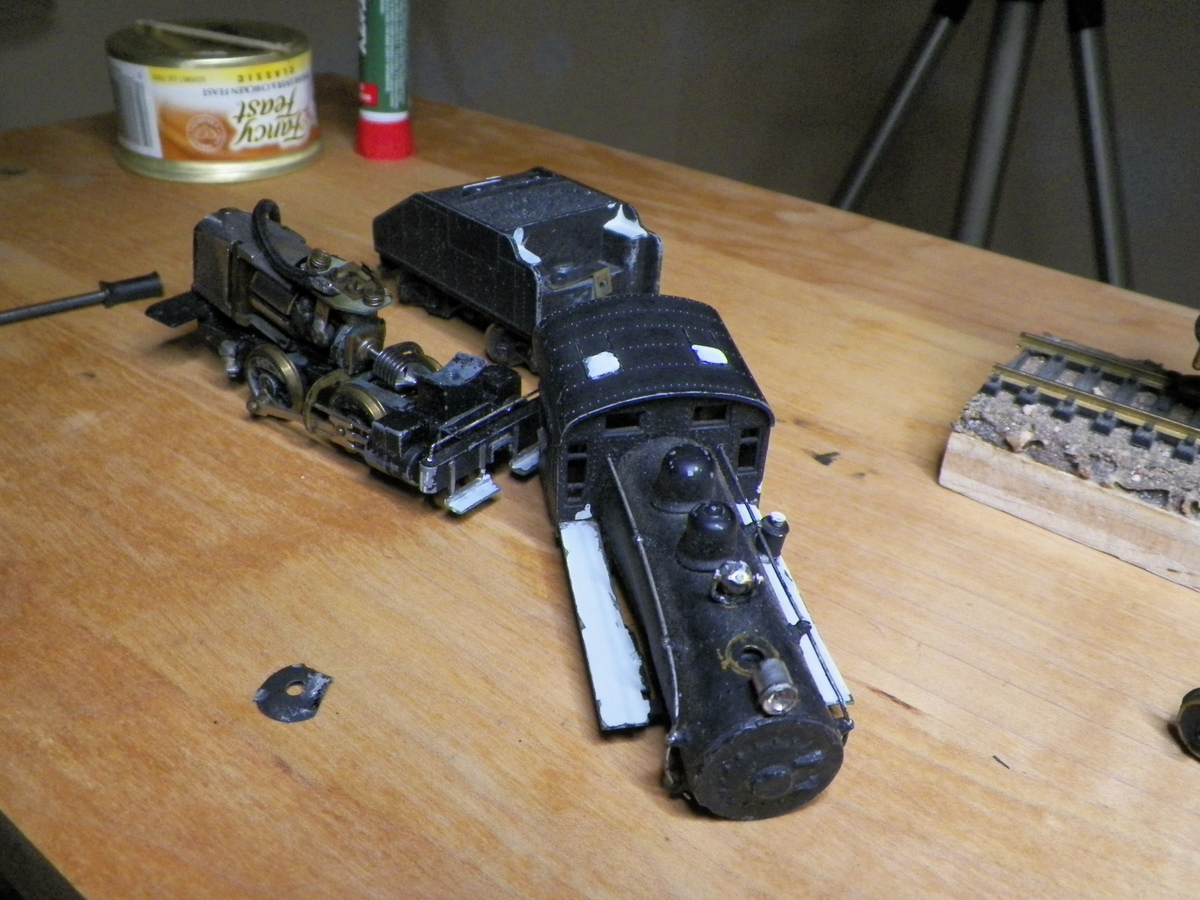
Bottom line, is that this locomotive had suffered some accidents (likely dropped and drivers knocked out of alignment; not sitting flat on rails) and some less than careful modeling techniques (big gobs of solder holding the handrail stanchions in place), but now I've got most of that cleaned up.
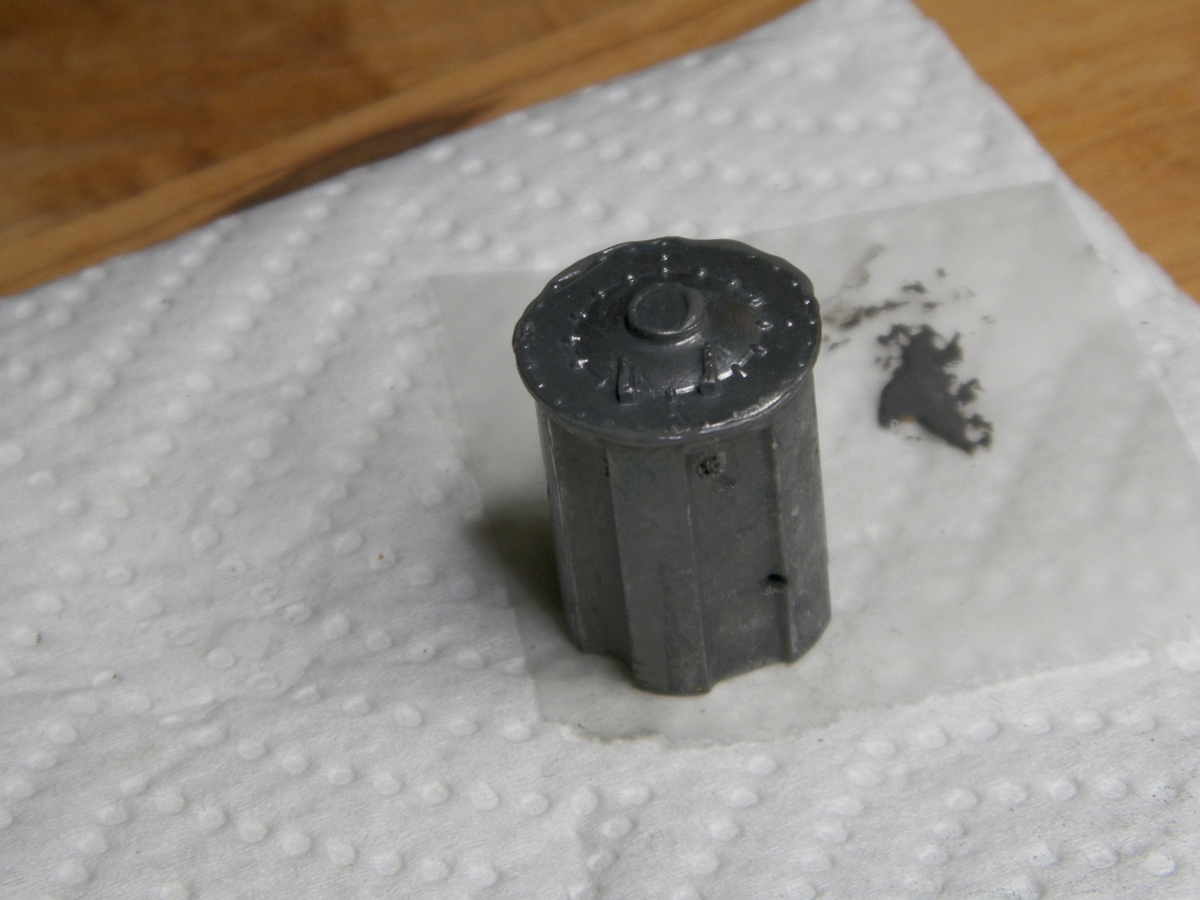
Worst damage seems to have been to the smoke box cover. I think when the handrail stanchions were soldered, the soldering locked the combination smoke box cover/boiler weight in place and then at some point, someone tried to removed it by prying on the edges of the smoke box cover and chipping away some pieces. Presently, I've got some JB weld in those chips and I'm hoping to be able to whittle away at that and diminish the evidence of those chips.
I did, by the way, get it to sit flat on the rails, just by cleaning up and reassembling. Looks like the frame and drivers are in OK shape.
I don't have a photo of this next to the Mogul, but it surprised me to see that this little locomotive sits higher than the Mogul. Also, the extent to which the boiler/fire box occupies the cab . . . there's no way for the engineer to get to a seat without crawling over the fire box . . . or maybe through the window! Ha!
I'm thinking about color schemes now and considering the "dull black" suggested by the instructions.
I'm interested in seeing photos of Mighty Mites that other folks have. I believe Sean probably has a bunch of them. So . . . here for your Sunday grins.
|
Country:  USA ~
Posts: 2087 ~
Member Since: March 16 2013 ~
Last Visit: July 05 2018 USA ~
Posts: 2087 ~
Member Since: March 16 2013 ~
Last Visit: July 05 2018
|
 Alert Moderator
|
|
|
|
Posted - March 13 2016 : 8:43:54 PM
|
Good buy! I was a little shy about bidding on the lot.
" Heck with counting 'em rivets, TRAINS ARE FOR FUN! Not called the Mad Scientist for nothing either!"
|
|
Country: USA ~
Posts: 3145 ~
Member Since: May 07 2007 ~
Last Visit: April 04 2024
|
Alert Moderator

|
|
|
|
Posted - March 13 2016 : 10:27:07 PM
|
If that little guy is like most of the Mantuas I've got, it should be one heck ofa nice little runner.
Good score.
|
|
Country: USA ~
Posts: 865 ~
Member Since: September 23 2014 ~
Last Visit: May 01 2023
|
Alert Moderator
|
|
|
|
Posted - March 13 2016 : 10:44:13 PM
|
| I tried to post a photo of mine, but it didn't work.
|
|
Country: USA ~
Posts: 293 ~
Member Since: January 17 2010 ~
Last Visit: September 29 2023
|
Alert Moderator
|
|
|
|
Posted - March 13 2016 : 11:57:00 PM
|
| A remarkable restoration project. Great stuff.
|
|
Country: USA ~
Posts: 11193 ~
Member Since: December 09 2013 ~
Last Visit: April 19 2024
|
Alert Moderator
|
|
|
|
Posted - March 14 2016 : 11:15:23 AM
|
Try again 59Chevy
quote:I tried to post a photo of mine, but it didn't work.
Originally posted by 59Chevy - March 13 2016 : 10:44:13 PM
|
|
|
Country: USA ~
Posts: 2087 ~
Member Since: March 16 2013 ~
Last Visit: July 05 2018
|
Alert Moderator
|
|
|
|
Posted - March 14 2016 : 12:57:38 PM
|
| Is that a 6 volt or 12 volt motor? Some of the earlier Mantuas had a 6 volt in them. They would screem at 12 volt but eat the brushes. A later 12 volt motor will swap in no issue.
|
|
Country: USA ~
Posts: 332 ~
Member Since: August 28 2010 ~
Last Visit: April 23 2020
|
Alert Moderator
|
|
|
|
Posted - March 14 2016 : 1:20:44 PM
|
Love seeing the progress Barry!
Sean
"If everything seems under control, you're not going fast enough!" - Mario Andretti!
|
|
Country: USA ~
Posts: 1729 ~
Member Since: June 15 2011 ~
Last Visit: June 26 2021
|
Alert Moderator
|
|
|
|
Posted - March 14 2016 : 1:53:52 PM
|
Looks like another fun project to watch unfold.  Keep us posted. Keep us posted.
Carpe Manana!
|
|
Country: USA ~
Posts: 2353 ~
Member Since: September 17 2013 ~
Last Visit: April 18 2024
|
Alert Moderator
|
|
|
|
Posted - March 14 2016 : 11:40:10 PM
|
I wasn't certain myself (about the motor), but a set of instructions came with it and the advertisement on hoseeker (from circa 1950) said 12 volt, so I now feel pretty confident that this one is 12 volt. I do wonder what years 6 volts were used.
quote:Is that a 6 volt or 12 volt motor? Some of the earlier Mantuas had a 6 volt in them. They would screem at 12 volt but eat the brushes. A later 12 volt motor will swap in no issue.
Originally posted by tkruger - March 14 2016 : 12:57:38 PM
|
|
|
Country: USA ~
Posts: 2087 ~
Member Since: March 16 2013 ~
Last Visit: July 05 2018
|
Alert Moderator
|
|
|
|
Posted - March 15 2016 : 09:36:04 AM
|
This is from an article about Mantua's history:
"Mantua issued a catalog in 1947, the first since
1942. The entire line was back with some additions and changes.
The biggest change was a new motor voltage. 12 Volts DC had become
the standard voltage instead of 6 volts."
So it looks like 12v became the standard after the war.
rich p
|
|
Country: USA ~
Posts: 190 ~
Member Since: December 26 2010 ~
Last Visit: October 02 2023
|
Alert Moderator
|
|
|
|
Posted - March 15 2016 : 7:06:04 PM
|
| That's a nice bit of information Rich.
|
|
Country: USA ~
Posts: 2087 ~
Member Since: March 16 2013 ~
Last Visit: July 05 2018
|
Alert Moderator
|
|
|
waw47
Hudson

Status:
offline
| |
Posted - March 15 2016 : 9:33:57 PM
|
| In general, all Pre-War American HO was 6 volts, all Post -War is 12 volts. This would Mantua, Varney and American Flyer (Gilbert).
|
|
Country: USA ~
Posts: 466 ~
Member Since: August 09 2010 ~
Last Visit: April 17 2024
|
Alert Moderator
|
|
|
|
Posted - March 15 2016 : 10:08:48 PM
|
Work of past few days (if I were more patient, I would retake some of these photos, but I think you'll get the idea) . . .
Motor (original I believe) with Tyco/Mantua 785 brushes (foggiest photo I think) . . .
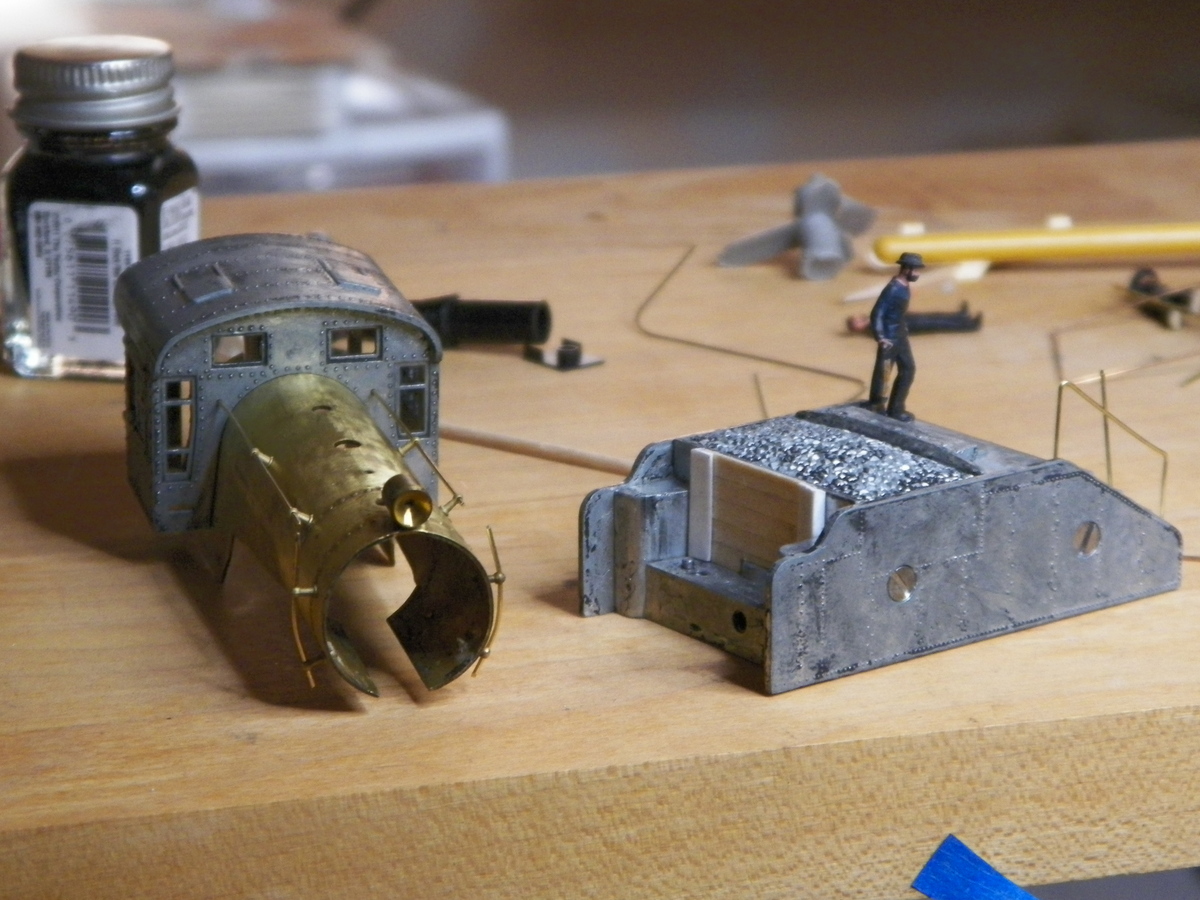
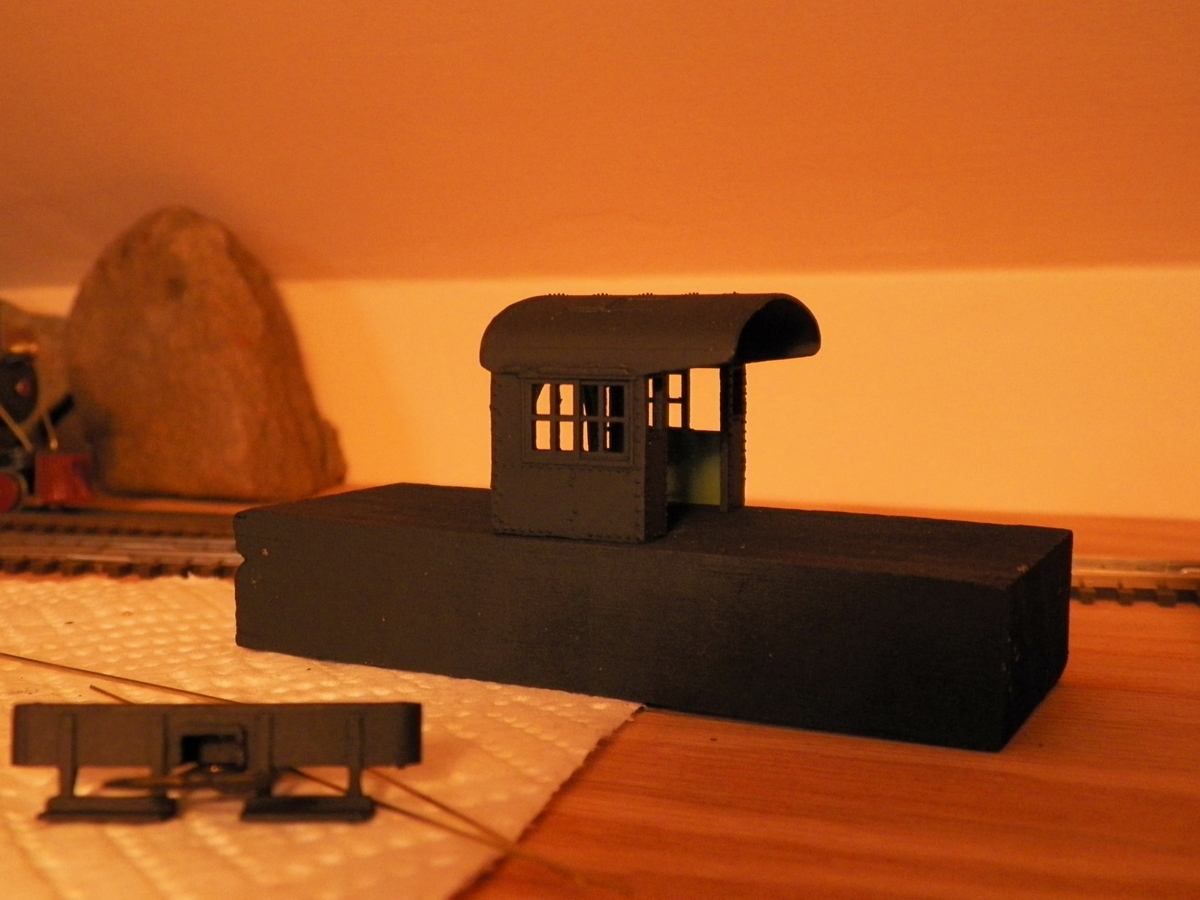
Started some painting. Believe I've decided to go with the "dull black" . . . ghost loco!
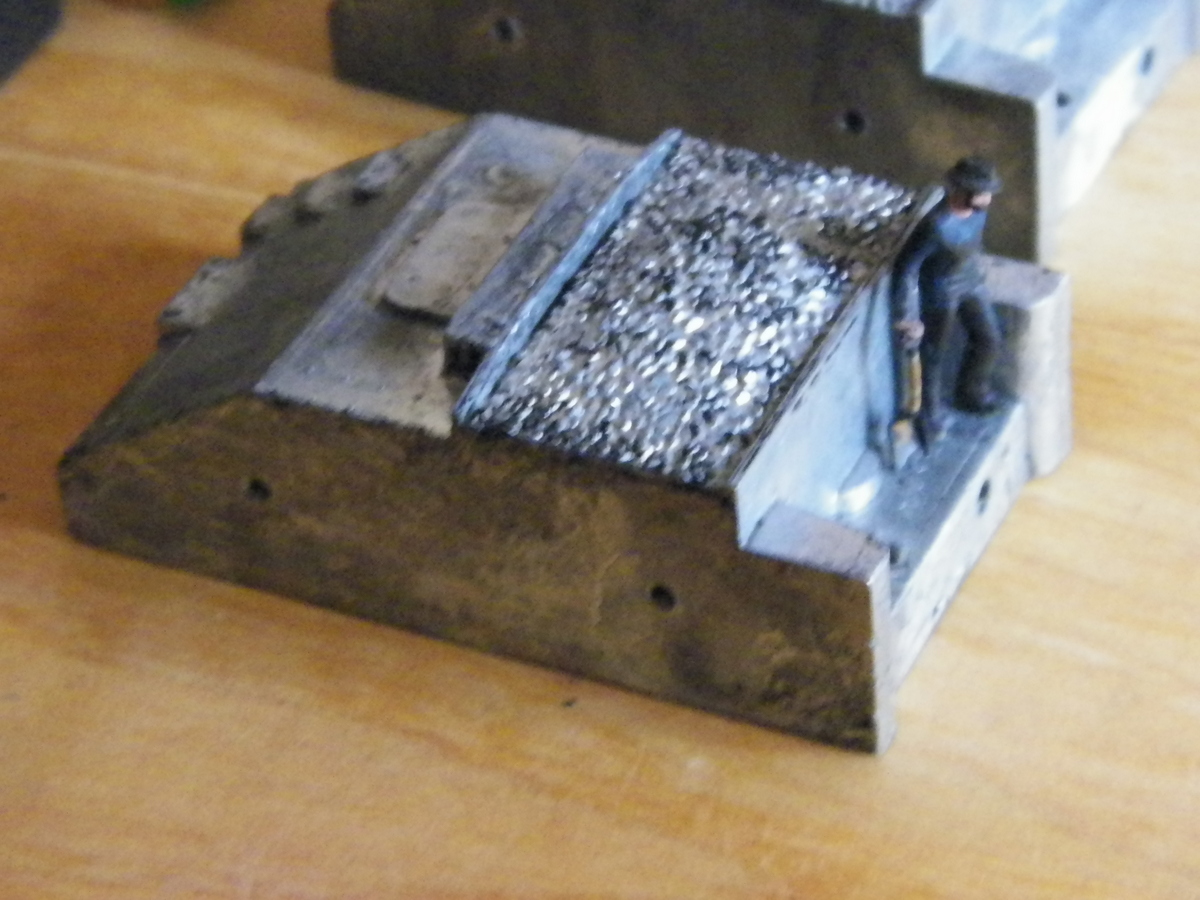
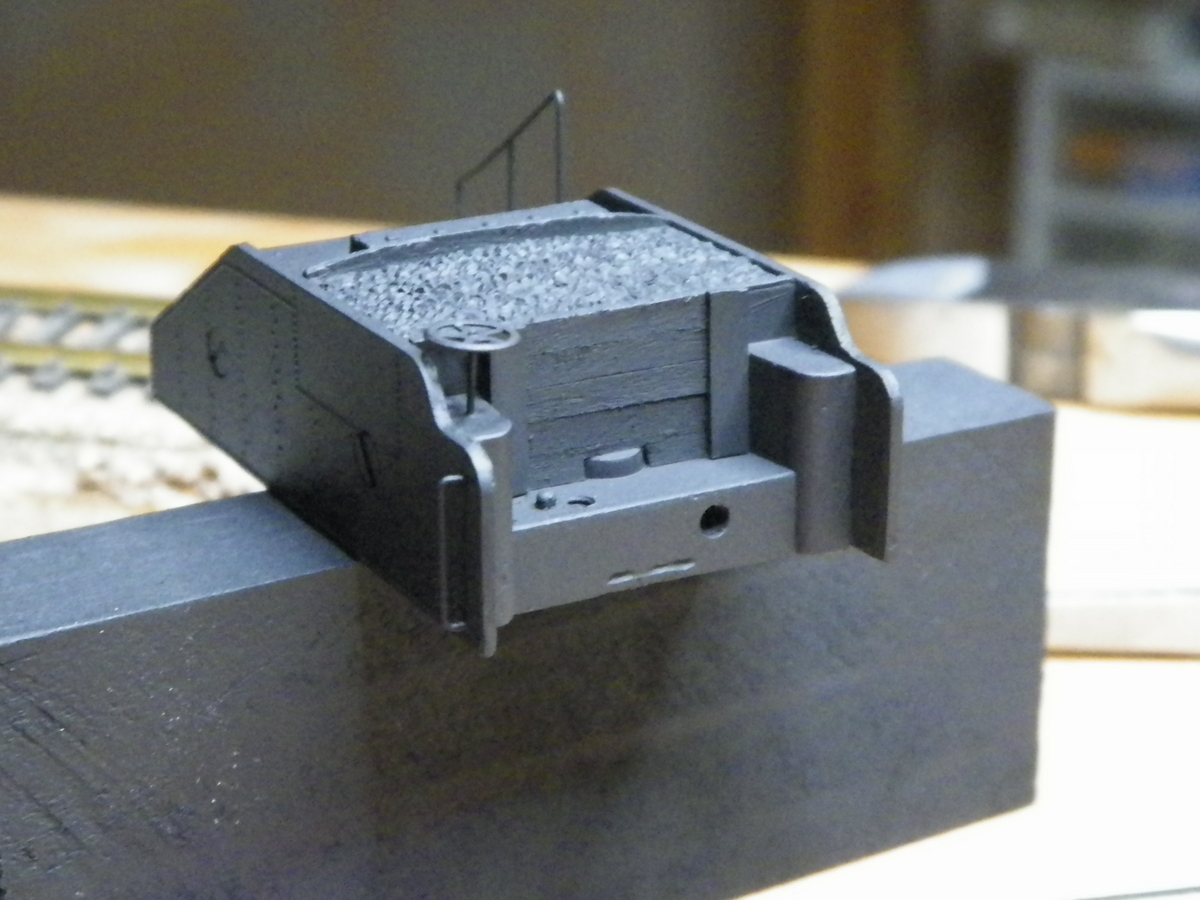
Experimenting with some tender details . . .
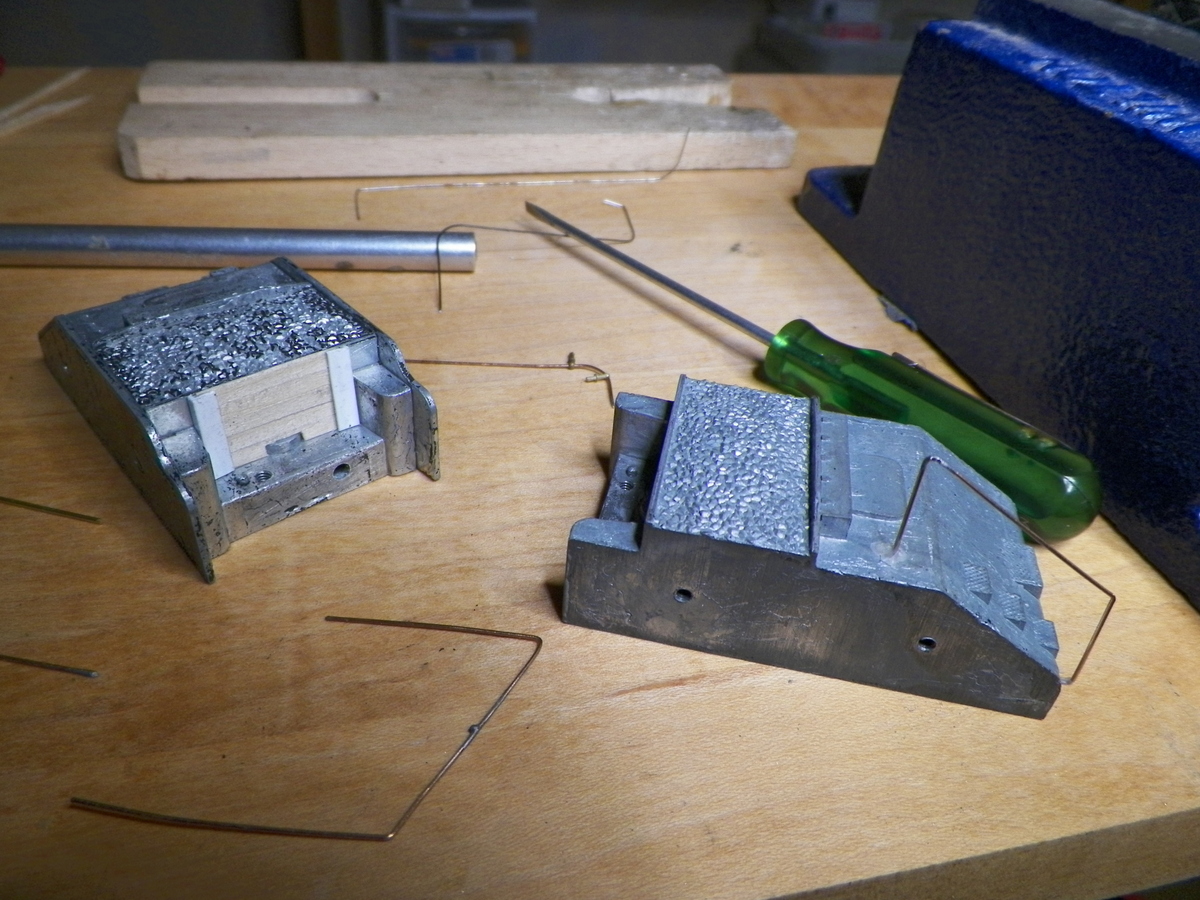
Continuing to try cosmetic work on the smoke box. We'll see how that works out . . .
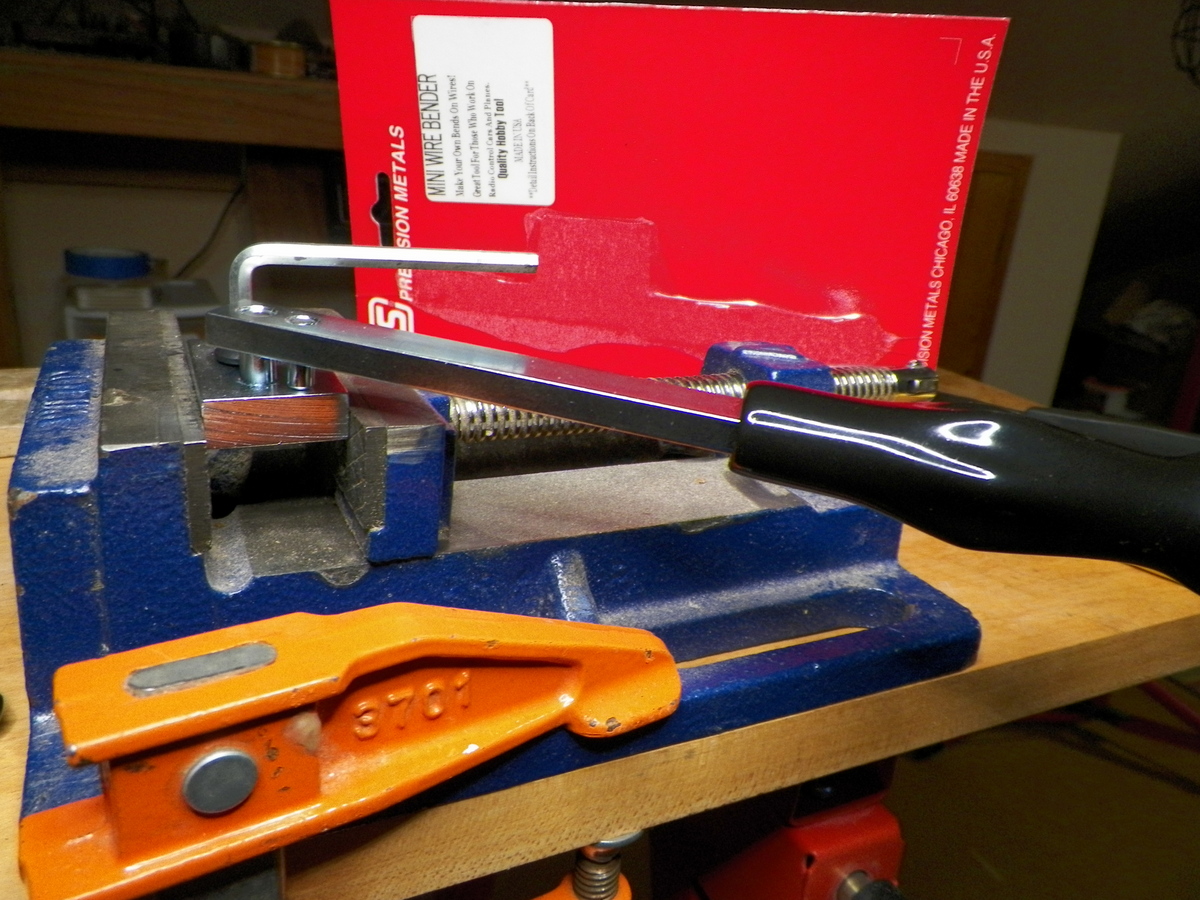
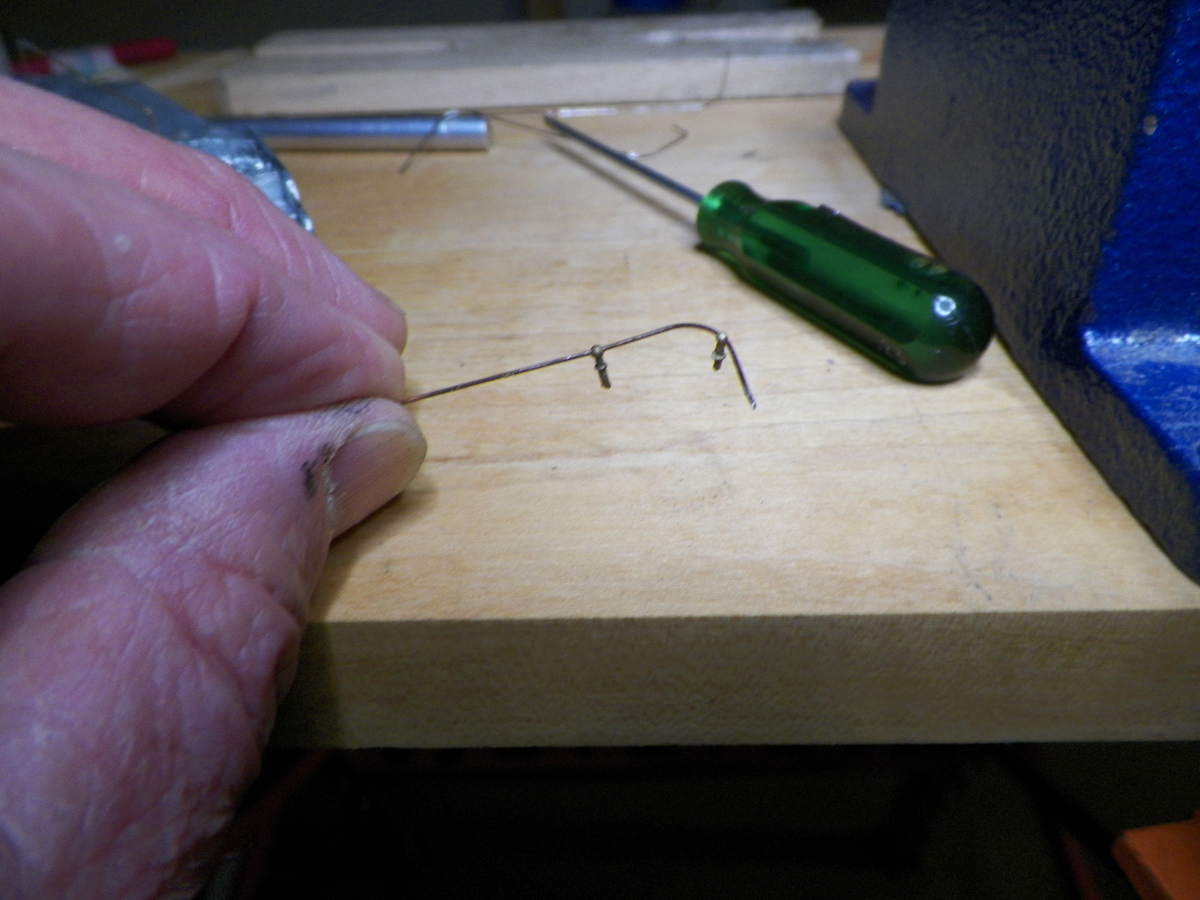
Trying out the "Mini Wire Bender" I got from K&S in order to complete the $25 minimum. I suppose I need to mess with this more, but it seems the minimum radius with this is relatively large. Here's a photo of the wire bender and then a photo of the minimum curve as it might be applied to the boiler hand rails for the Mighty Mite . . .
|
|
Country: USA ~
Posts: 2087 ~
Member Since: March 16 2013 ~
Last Visit: July 05 2018
|
Alert Moderator
|
|
|
|
Posted - March 16 2016 : 10:05:10 AM
|
Very nice Barry. I wish I had the talent, time , and patience to do what you do.
rich p
|
|
Country: USA ~
Posts: 190 ~
Member Since: December 26 2010 ~
Last Visit: October 02 2023
|
Alert Moderator
|
|
|
|
Posted - March 16 2016 : 10:17:32 AM
|
| Rich, that's only because I spend time and money on this when I should be spending time and money on painting the house trim or cleaning up the car and so forth.
|
|
Country: USA ~
Posts: 2087 ~
Member Since: March 16 2013 ~
Last Visit: July 05 2018
|
Alert Moderator
|
|
|
|
Posted - March 17 2016 : 8:25:23 PM
|
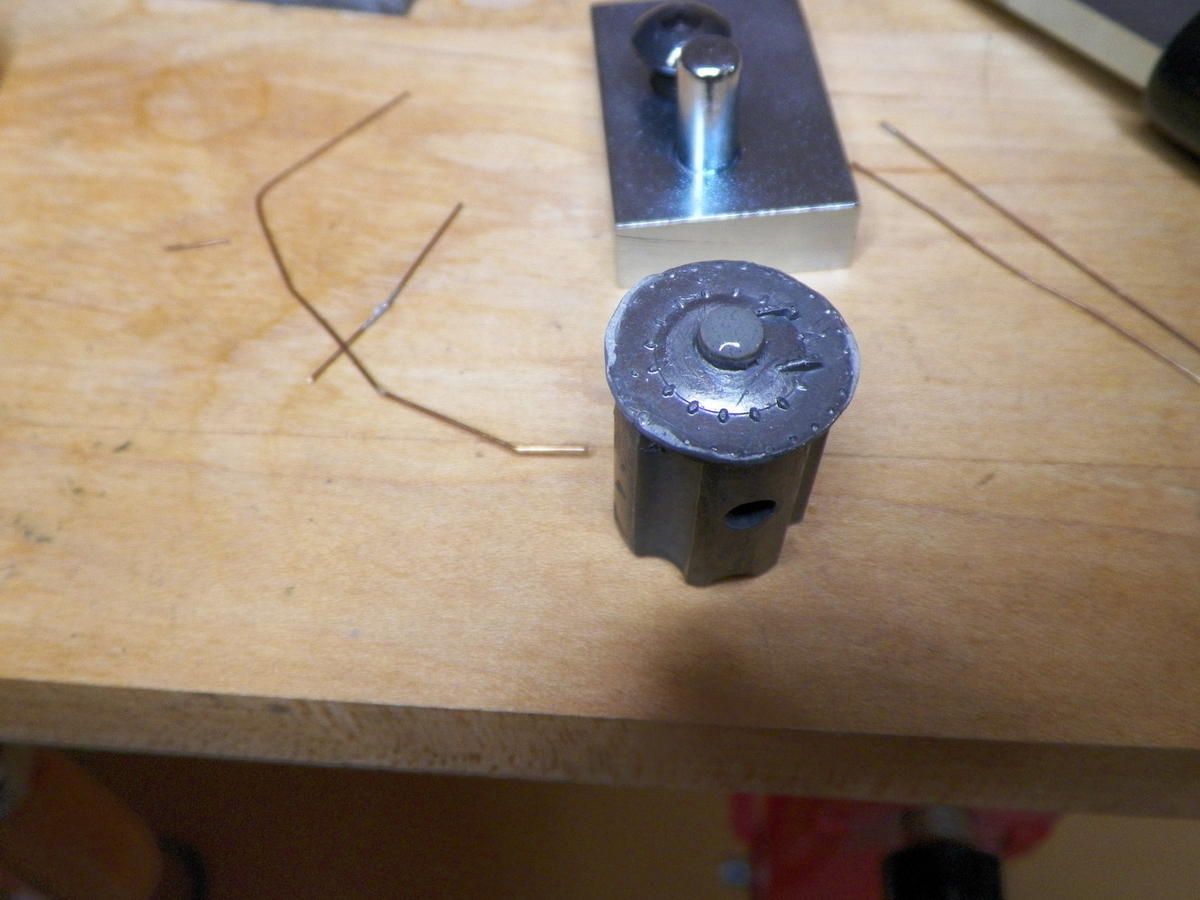
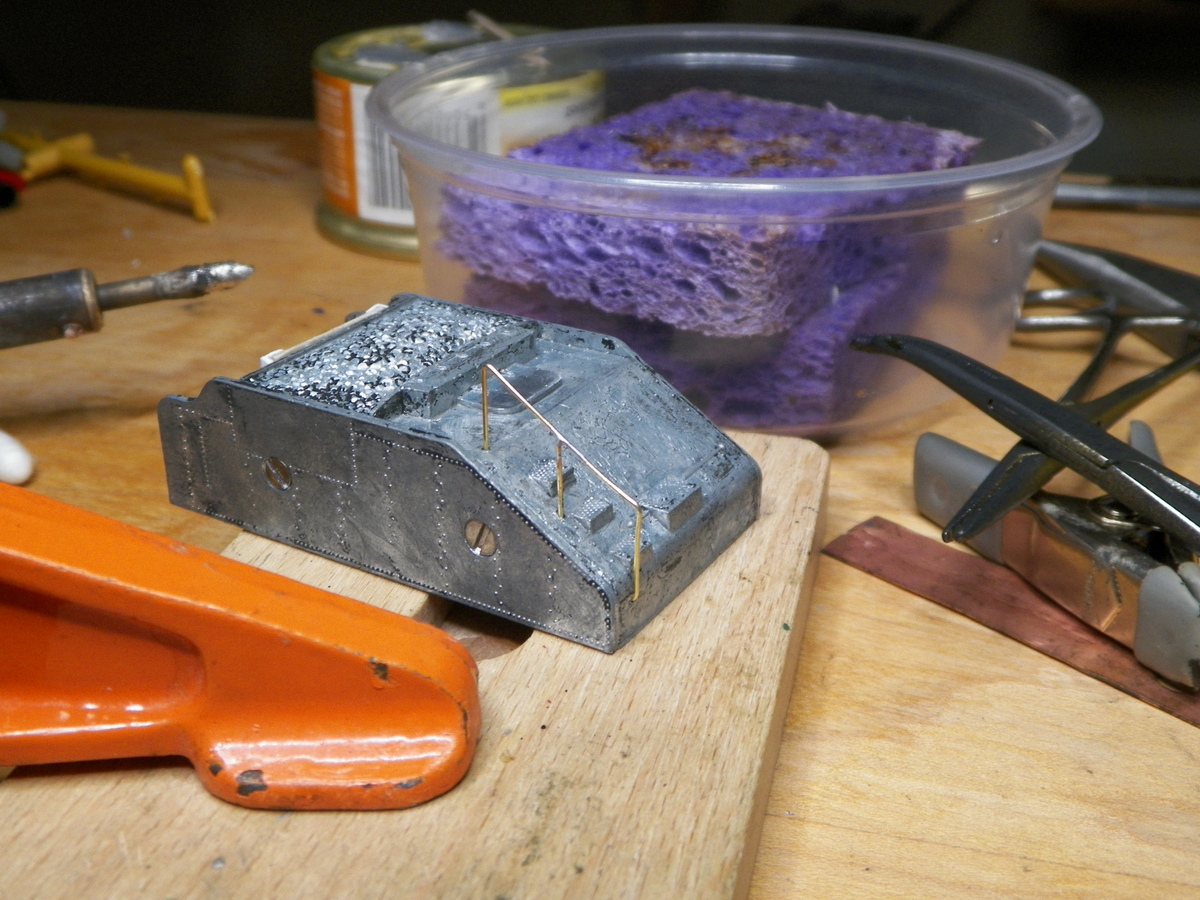
Bending some wire (with the needle nose; not the "Mini Wire Bender") and some hand rail work . . .
|
|
Country: USA ~
Posts: 2087 ~
Member Since: March 16 2013 ~
Last Visit: July 05 2018
|
Alert Moderator
|
|
|
|
Posted - March 17 2016 : 10:33:32 PM
|
Between my shaky hands and the nice fat soldering tip, I think I lucked out on this.
|
|
Country: USA ~
Posts: 2087 ~
Member Since: March 16 2013 ~
Last Visit: July 05 2018
|
Alert Moderator
|
|
|
|
Posted - March 28 2016 : 11:47:22 PM
|
Had a little road trip (which included a stop at the railway museum in Ely, Nevada; well worth the stop), and now getting some more licks in on this project . . .

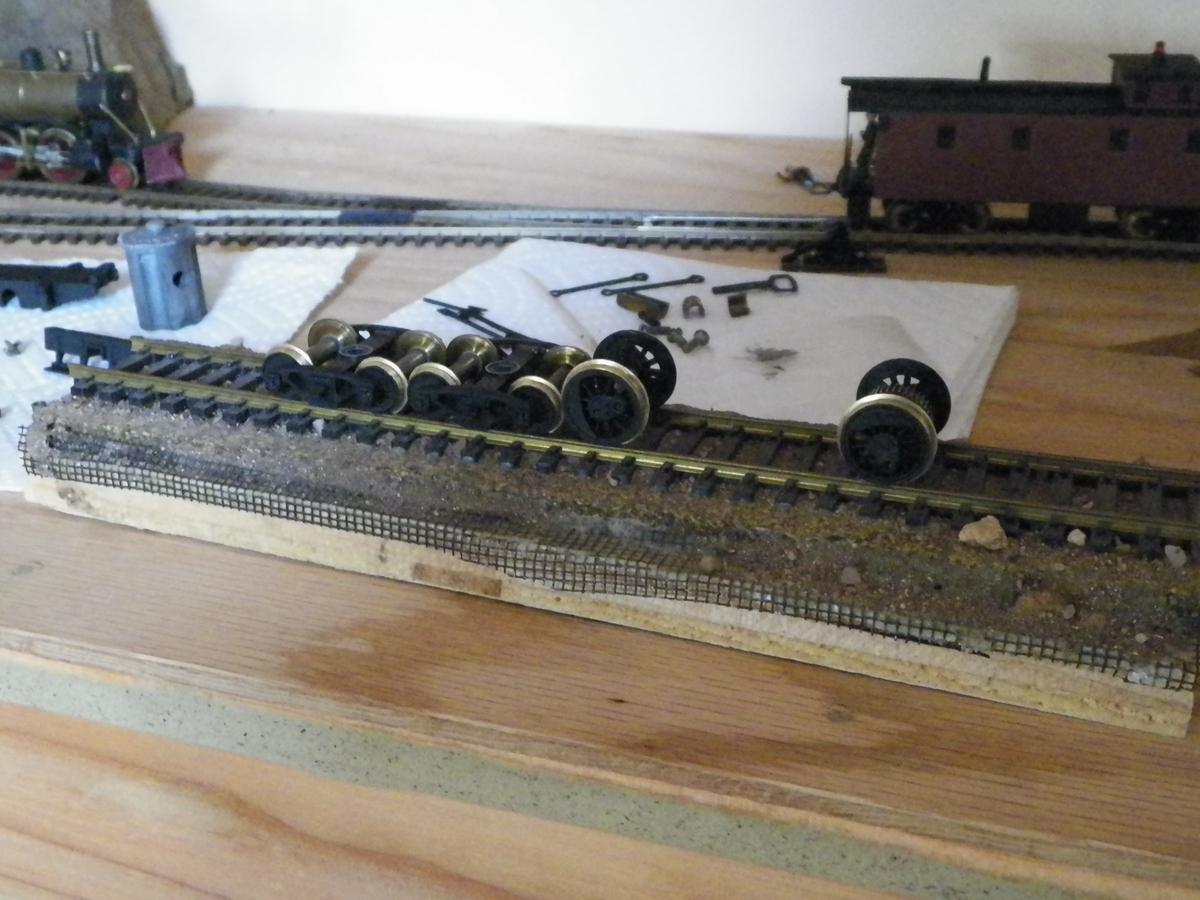
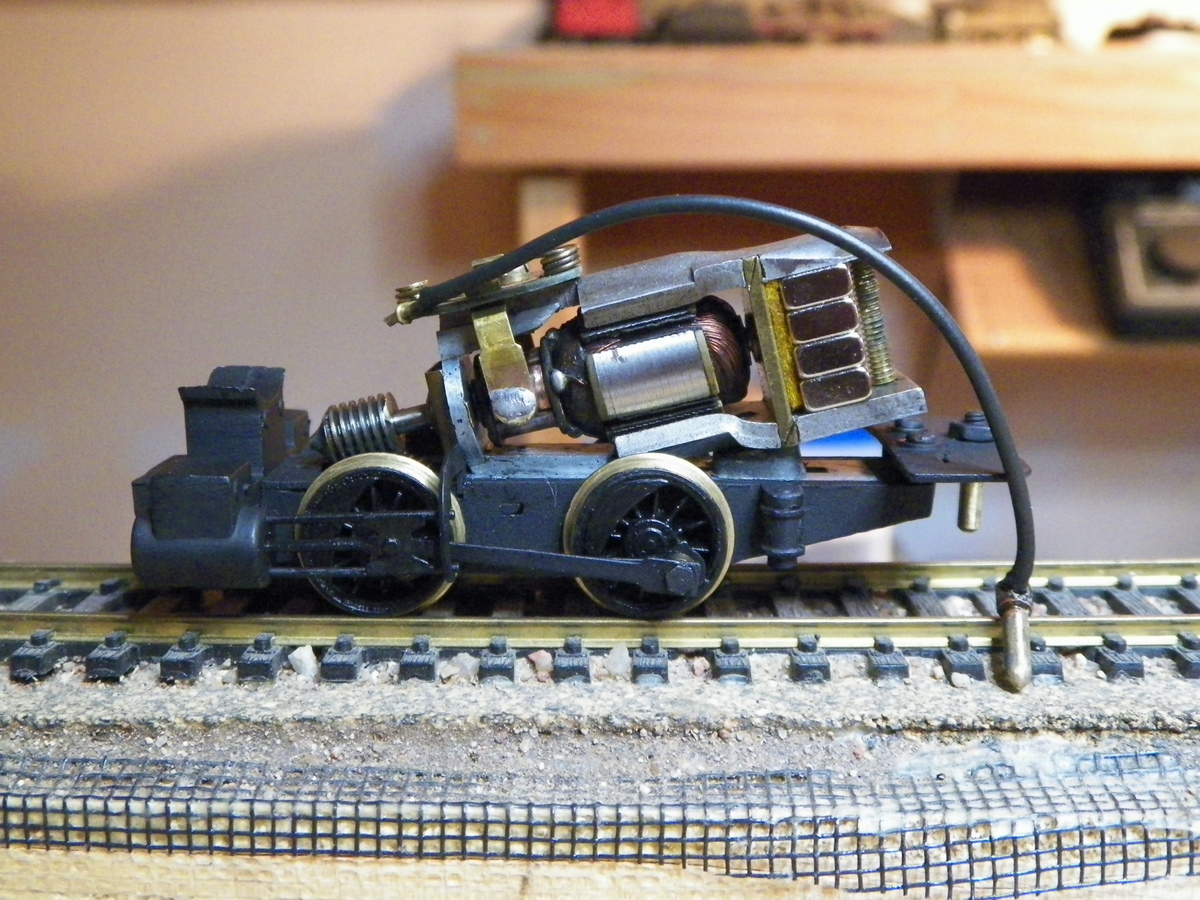
Motor and drive train work together just fine this far . . .
Just sprayed the tender body this afternoon. The brake wheel is Mantua.

|
|
Country: USA ~
Posts: 2087 ~
Member Since: March 16 2013 ~
Last Visit: July 05 2018
|
Alert Moderator
|
|
|
|
Posted - March 29 2016 : 12:25:28 AM
|
| Looking good. Like the extra little details.
|
|
Country: USA ~
Posts: 865 ~
Member Since: September 23 2014 ~
Last Visit: May 01 2023
|
Alert Moderator
|
|
|
|
Posted - March 29 2016 : 08:38:06 AM
|
That little engine cleans up pretty good! That's going to be a sweet looking little engine when you're through with it.
Also, I like that compact little drive arrangement.
Carpe Manana!
|
|
Country: USA ~
Posts: 2353 ~
Member Since: September 17 2013 ~
Last Visit: April 18 2024
|
Alert Moderator
|
|
|
|
Posted - March 31 2016 : 1:33:34 PM
|
It's coming along . . .
The smoke box may not look to bad from several feet away (e.g., repair of gouges around the perimeter) . . .
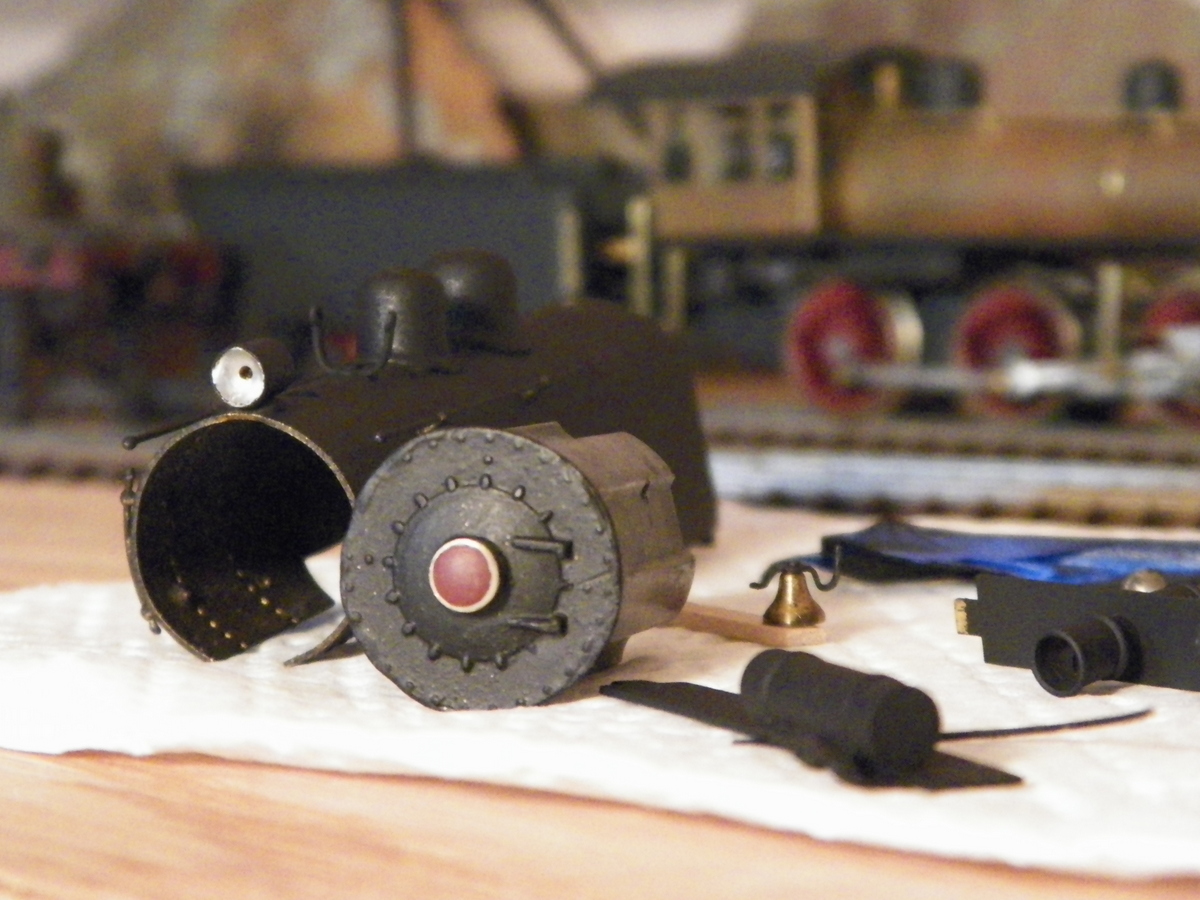
I was tossing around various ideas for painting the handrails on the boiler. I decided to assemble them first and then "fight" with sliding them back into the cab. I've tested and they move about a 1/32" or less. I'm considering using a toothpick and putting just a smidgen of oil on them near the stanchions to see if that will let them slide. Reason I assemble first, is that I thought I might buggar up a painted boiler if I tried to install the stanchions after painting it. Six of one and half-dozen of the other I guess.
Interior of cab is olive green, though it appears not much of that paint work will ever show.

The "mechanism" has been tested and seems to work fine, though needing the weight of the boiler and smoke box weight to tell better.
This will be the first Mantua locomotive I've run that uses the "plug-in" connector between the motor and the tender. It seems to me to fit a bit loose, but I like the concept. I suppose I could run a little solder around the pin to increase the diameter?
So . . . maybe a few more days.
|
|
Country: USA ~
Posts: 2087 ~
Member Since: March 16 2013 ~
Last Visit: July 05 2018
|
Alert Moderator
|
|
|
|
Posted - March 31 2016 : 6:47:37 PM
|
quote:The smoke box may not look to bad from several feet away (e.g., repair of gouges around the perimeter) . . .
Originally posted by Barry - March 31 2016 : 1:33:34 PM
|
Any imperfections you're forced to live with in a smokebox cover will just make the engine look a little more like a veteran. Smoke boxes on the real thing get buildups of paint on them that make them look a little less than brand new and tidy. I'm so used to gobbed up old smoke box fronts that a nice, neat one is a little jarring to me.
My cousin has a picture of the front of UP 844 and I was joking with him that it looked unprototypical because the nuts on the smokebox door dogs were all the same size. 
Carpe Manana!
|
|
Country: USA ~
Posts: 2353 ~
Member Since: September 17 2013 ~
Last Visit: April 18 2024
|
Alert Moderator
|
|
|
|
Posted - April 02 2016 : 3:28:48 PM
|
Pretty remarkable work. Myself, I rather like the
way the smoke box came out. It speaks a
gritty, authentic feel.
|
|
Country: USA ~
Posts: 11193 ~
Member Since: December 09 2013 ~
Last Visit: April 19 2024
|
Alert Moderator
|
|
|
|
Posted - April 02 2016 : 4:33:07 PM

|
love it barry,cannot wait to see another great job,proving its worth it in end,ken
catfordken
if you cannot see the light at the end of the tunnel,try turning around
|
Country:  United Kingdom ~
Posts: 8294 ~
Member Since: September 28 2006 ~
Last Visit: October 20 2021 United Kingdom ~
Posts: 8294 ~
Member Since: September 28 2006 ~
Last Visit: October 20 2021
|
Alert Moderator
|
|
|
|
Posted - April 02 2016 : 4:48:32 PM
|
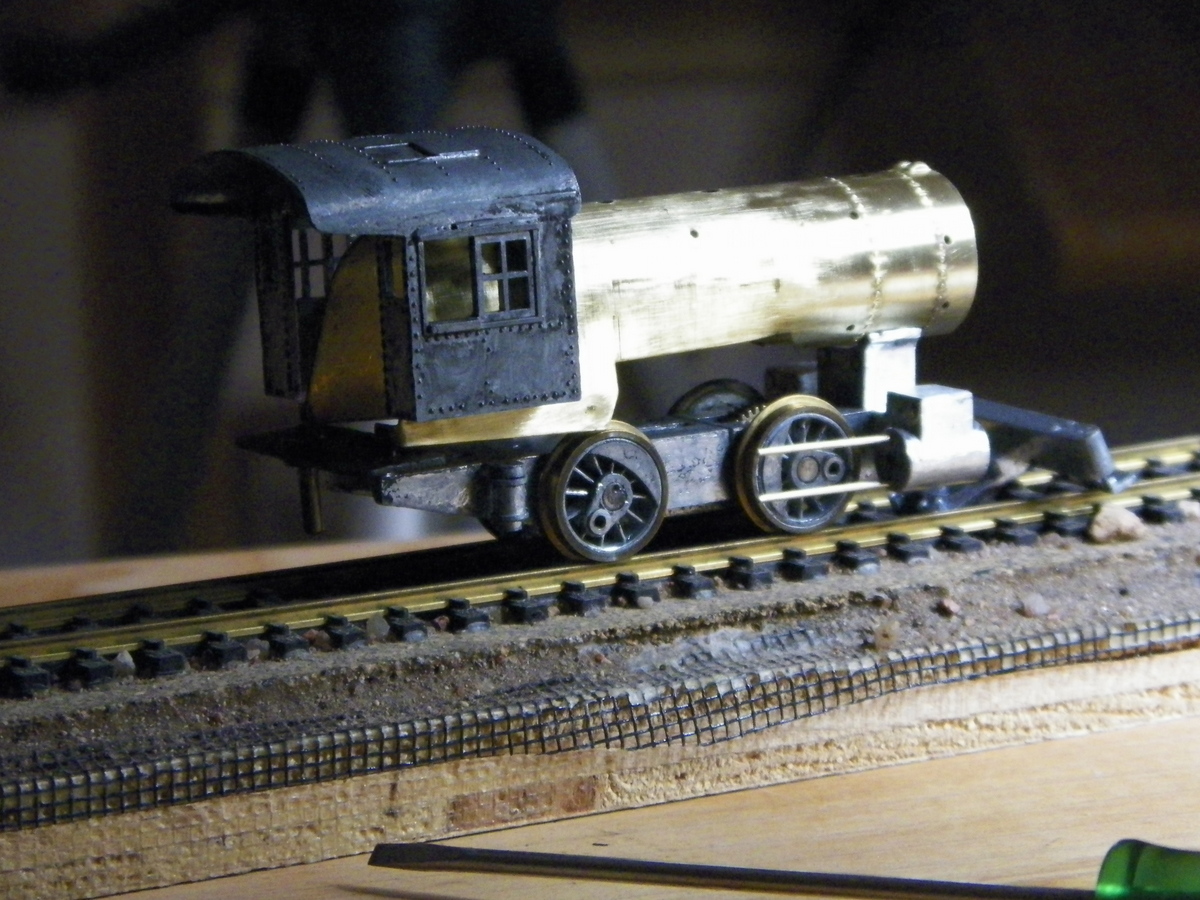
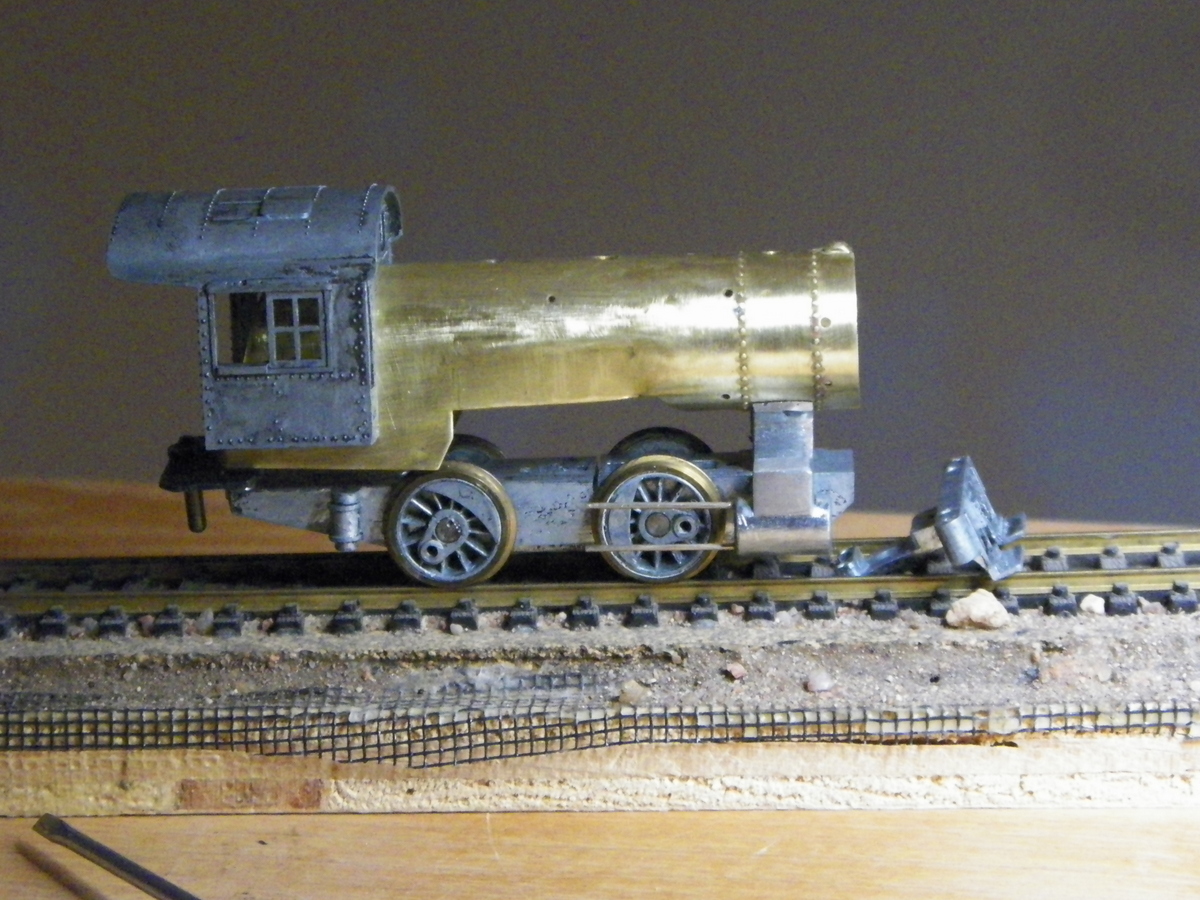
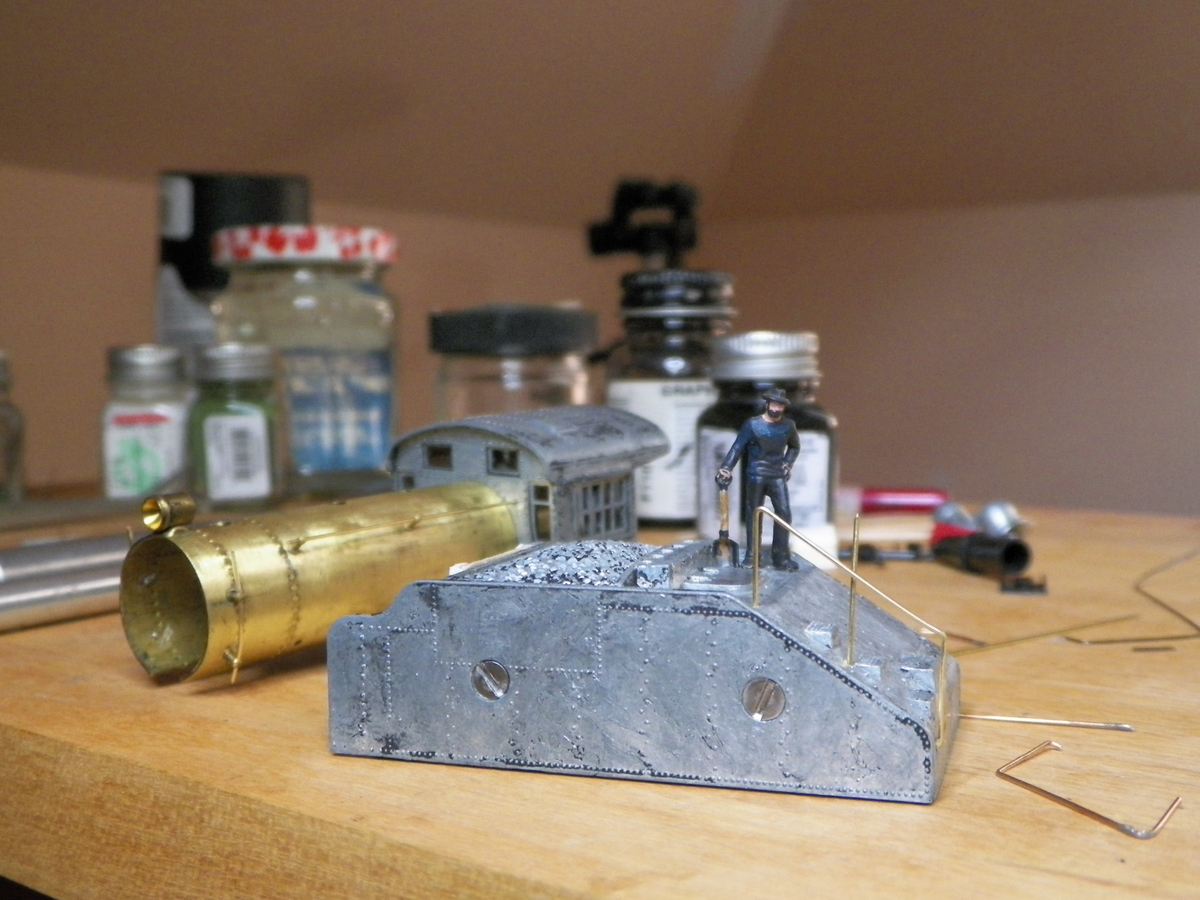
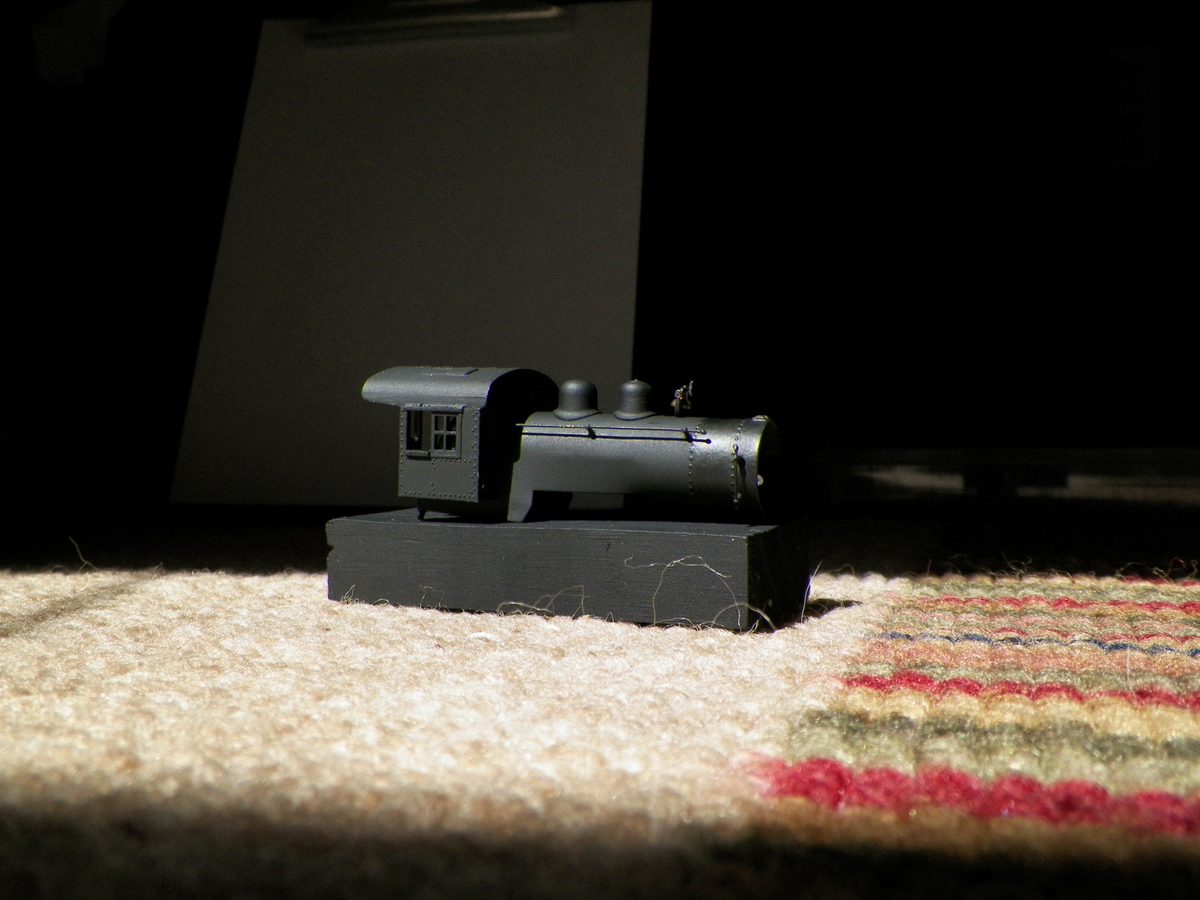
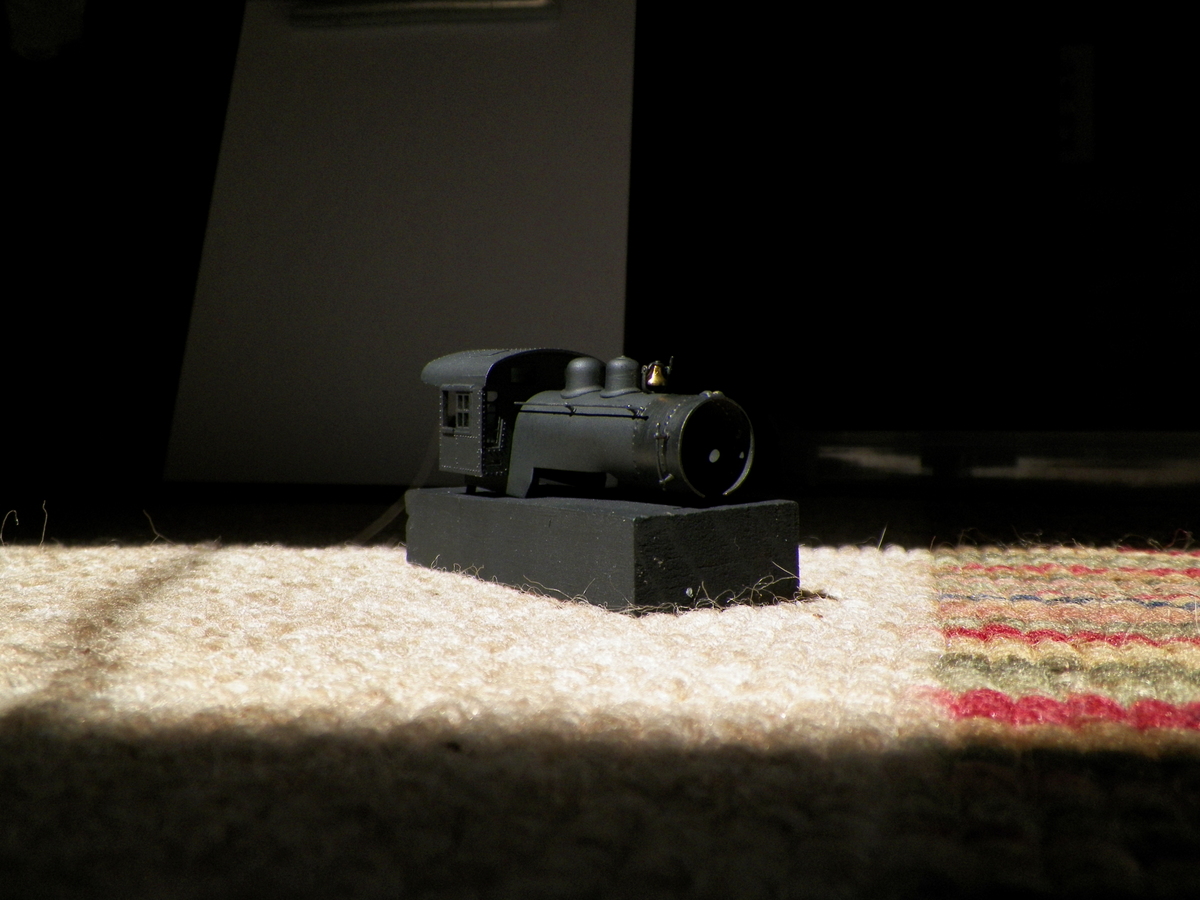
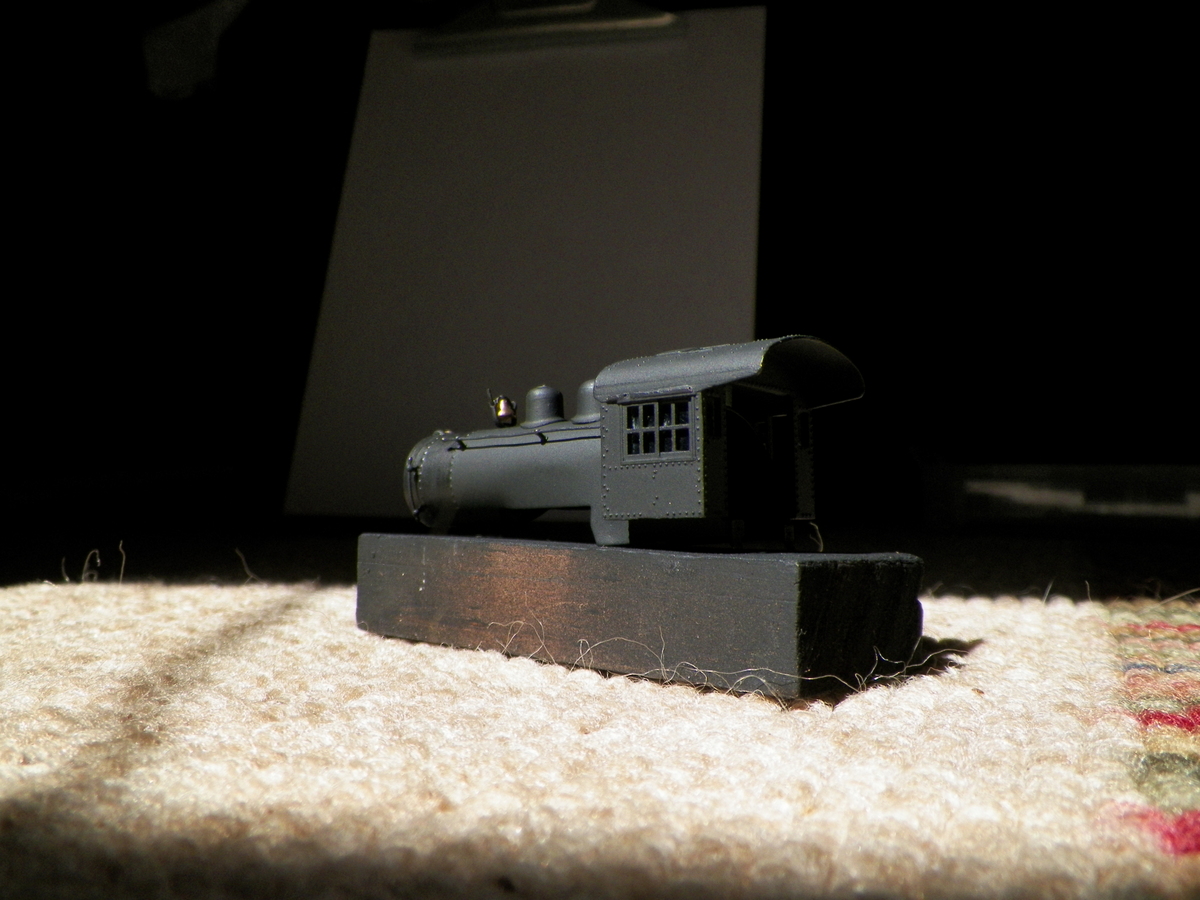
This modeling is an interesting thing for me; the mix of having patience and then not having patience, of deciding when to "settle for something" or take it apart and do it over, whatever. It is certainly an exercise of sorts. Most recently my exercise was "wrestling" (?rasslin"?) the boiler hand rails into the cab. Looking back, I should have used a smaller gauge wire. So the question becomes, take it apart and repaint the whole thing, or try to fix it? Also, I laid the graphite on the smoke box a bit thicker than I wanted. My technique with that thick paint and with the handrail scrapes has thus far been to sand with 1500. I've recoated the smoke box and it may be passable ["step back from the model, step back . . . "]. Hand rails and other need touch up yet. Here's a few shots of the cab and boiler assembly in a nice little patch of sunlight we had a few minutes ago. Ought to give me an idea of what I need to get after.
|
|
Country: USA ~
Posts: 2087 ~
Member Since: March 16 2013 ~
Last Visit: July 05 2018
|
Alert Moderator
|
|
|
|
Posted - April 02 2016 : 5:08:09 PM
|
only you will know the standard you want,but looks great to me
catfordken
if you cannot see the light at the end of the tunnel,try turning around
|
|
Country: United Kingdom ~
Posts: 8294 ~
Member Since: September 28 2006 ~
Last Visit: October 20 2021
|
Alert Moderator
|
|
|
|
Posted - April 02 2016 : 6:50:25 PM
|
Looking really nice. Keep the updates coming.
Carpe Manana!
|
|
Country: USA ~
Posts: 2353 ~
Member Since: September 17 2013 ~
Last Visit: April 18 2024
|
Alert Moderator
|
|
|
|
Posted - April 03 2016 : 3:30:56 PM
|
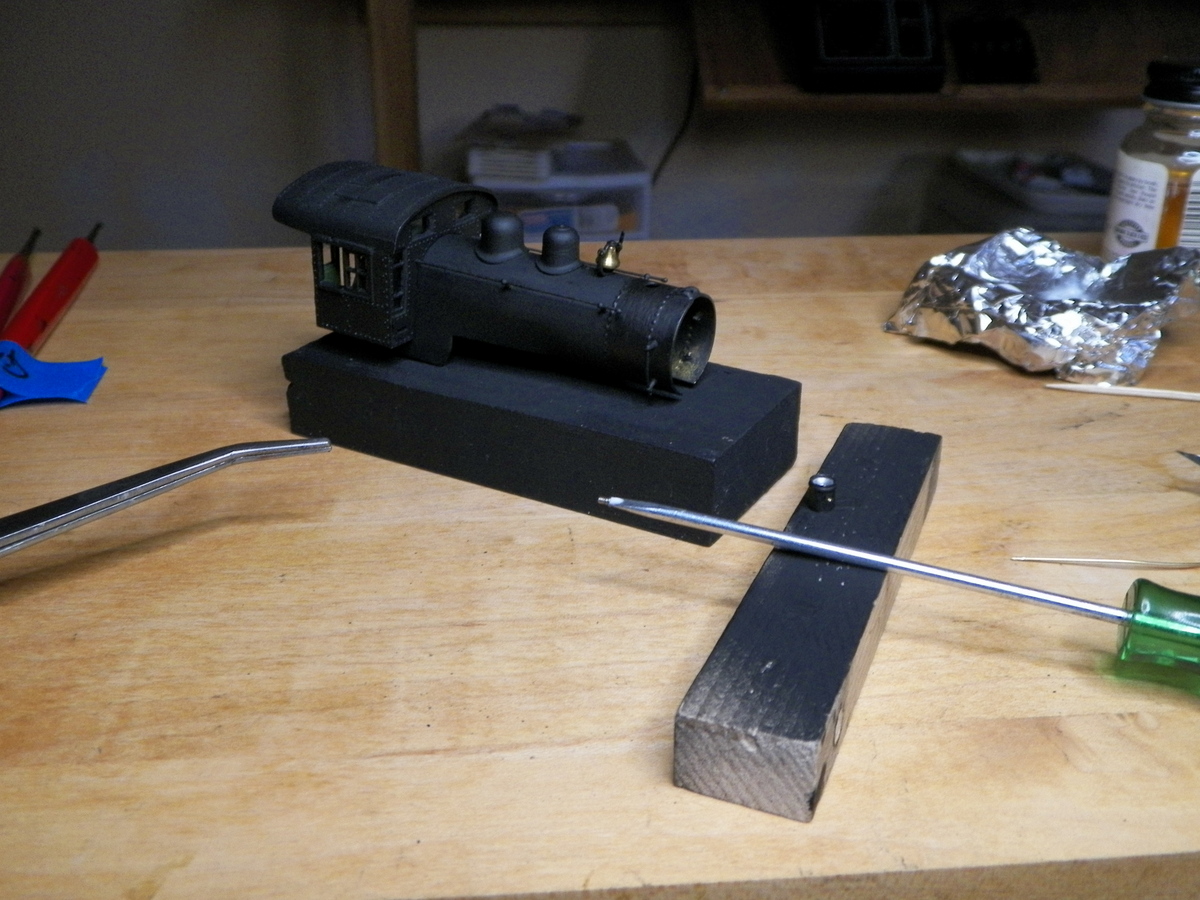
I think these are #90 screws that are used to hold the headlight and other things on. I used Elmer's glue to hold the screw to the screwdriver blade. It wasn't fool proof, but it helped. I've searched more than one of these out that fell to the floor.
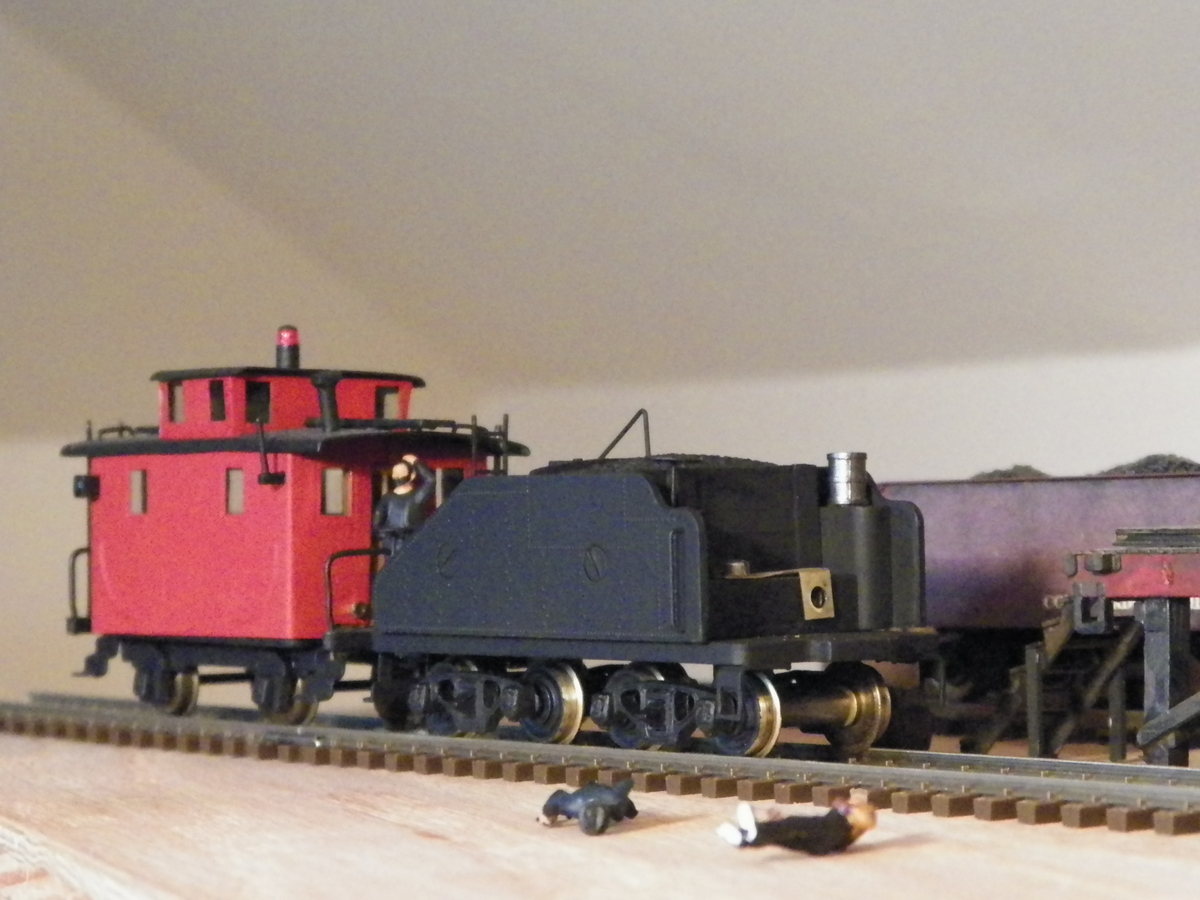
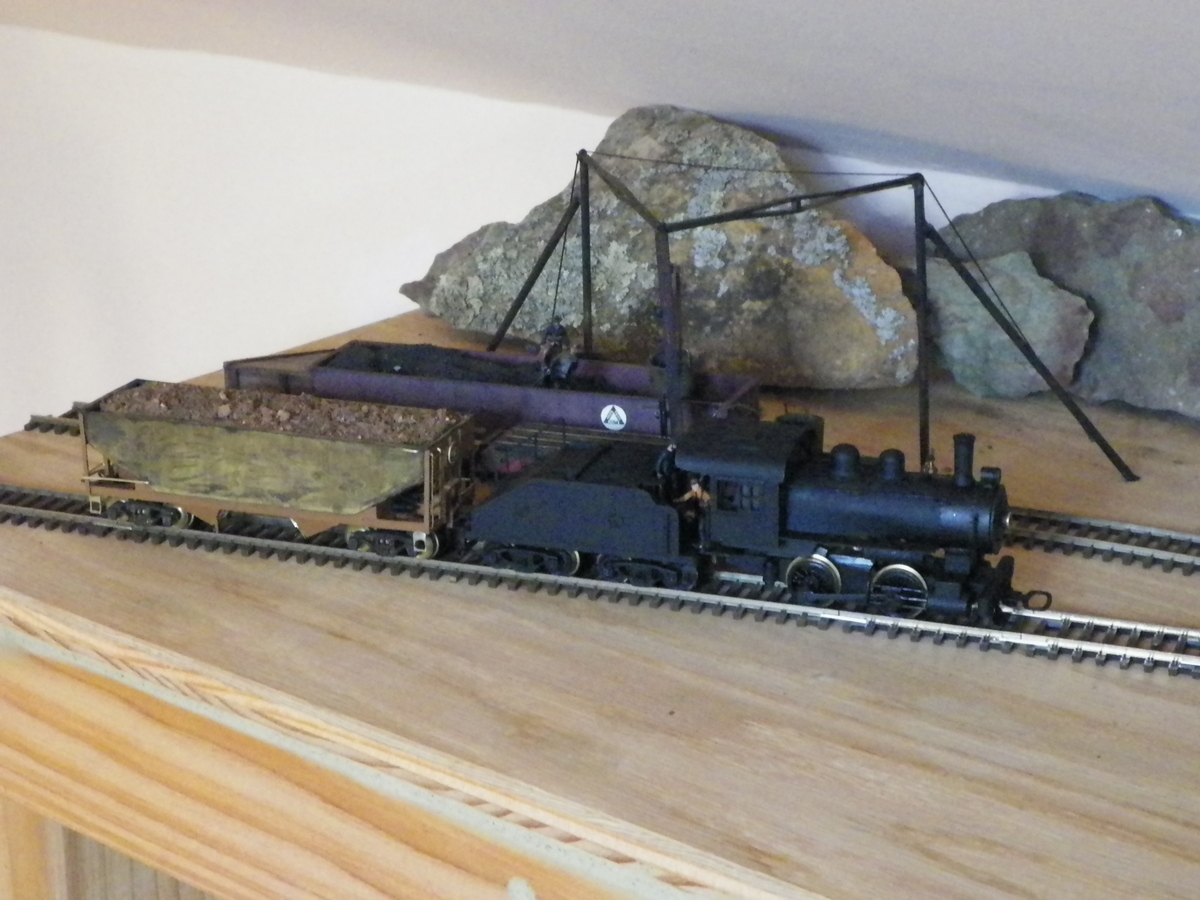
Fine sunny day here, but I had to spend a couple of hours (goes by quick) puttin' this thing together this morning. Still needs touch up, but it's up and running. Noisy little thing. This little shelf may be OK for a crude test, but it sure would be fun to run this Mighty Mite around a regular layout for an hour or so.
|
|
Country: USA ~
Posts: 2087 ~
Member Since: March 16 2013 ~
Last Visit: July 05 2018
|
Alert Moderator
|
|
|
|
Posted - April 03 2016 : 7:30:57 PM
|
Looks pretty nice. I like the smoke box color you settled on.
I was looking at the planks at the front of the coal bunker. They really look like separate boards. Are those separately applied or were they cast in looking that convincing?
Carpe Manana!
|
|
Country: USA ~
Posts: 2353 ~
Member Since: September 17 2013 ~
Last Visit: April 18 2024
|
Alert Moderator
|
|
|
|
Posted - April 03 2016 : 9:35:39 PM
|
| The smoke box is Floquil graphite. Everything else is Testors flat black. On the tender, the front of the coal bin is 2 X scale lumber framed on each side with plastic angle. There's a photo of it pre-paint earlier in the thread. This was the prototype build for me, I think I have a chance of doing it more smoothly "next time", Ha!
|
|
Country: USA ~
Posts: 2087 ~
Member Since: March 16 2013 ~
Last Visit: July 05 2018
|
Alert Moderator
|
|
|
|
Posted - April 03 2016 : 9:36:33 PM
|
Edit
Edited by - Barry on April 03 2016 9:39:13 PM
|
|
Country: USA ~
Posts: 2087 ~
Member Since: March 16 2013 ~
Last Visit: July 05 2018
|
Alert Moderator
|
|
|
|
Posted - March 13 2017 : 9:47:51 PM
|
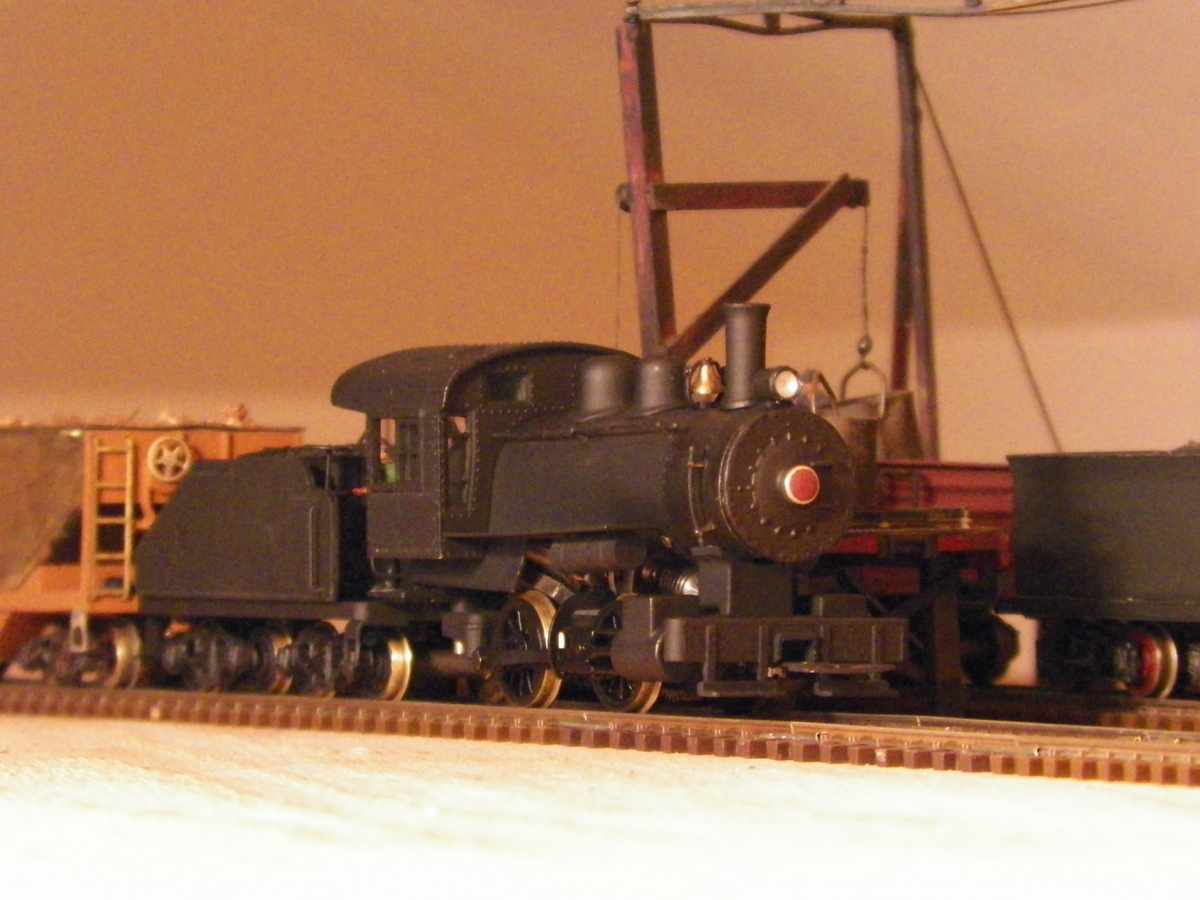
Here it is, nearly a year and I believe I've finally got this thing to run in a half-way acceptable manner. A year ago, my only track to run on was a shelf just a few feet long. So I never really got to see how well this Mighty Mite worked. As it turned out, it did not work very well. Now, though, after a few months just sitting in a shadow box, and then time on the bench getting after an array of little problems . . . well now it seems to be running pretty reliably, though a bit rough at low speed. I'm hoping it will "break in" to cure that some.
|
|
Country: USA ~
Posts: 2087 ~
Member Since: March 16 2013 ~
Last Visit: July 05 2018
|
Alert Moderator
|
|