|
|
 Posted - August 26 2015 : 11:09:26 PM Posted - August 26 2015 : 11:09:26 PM


|
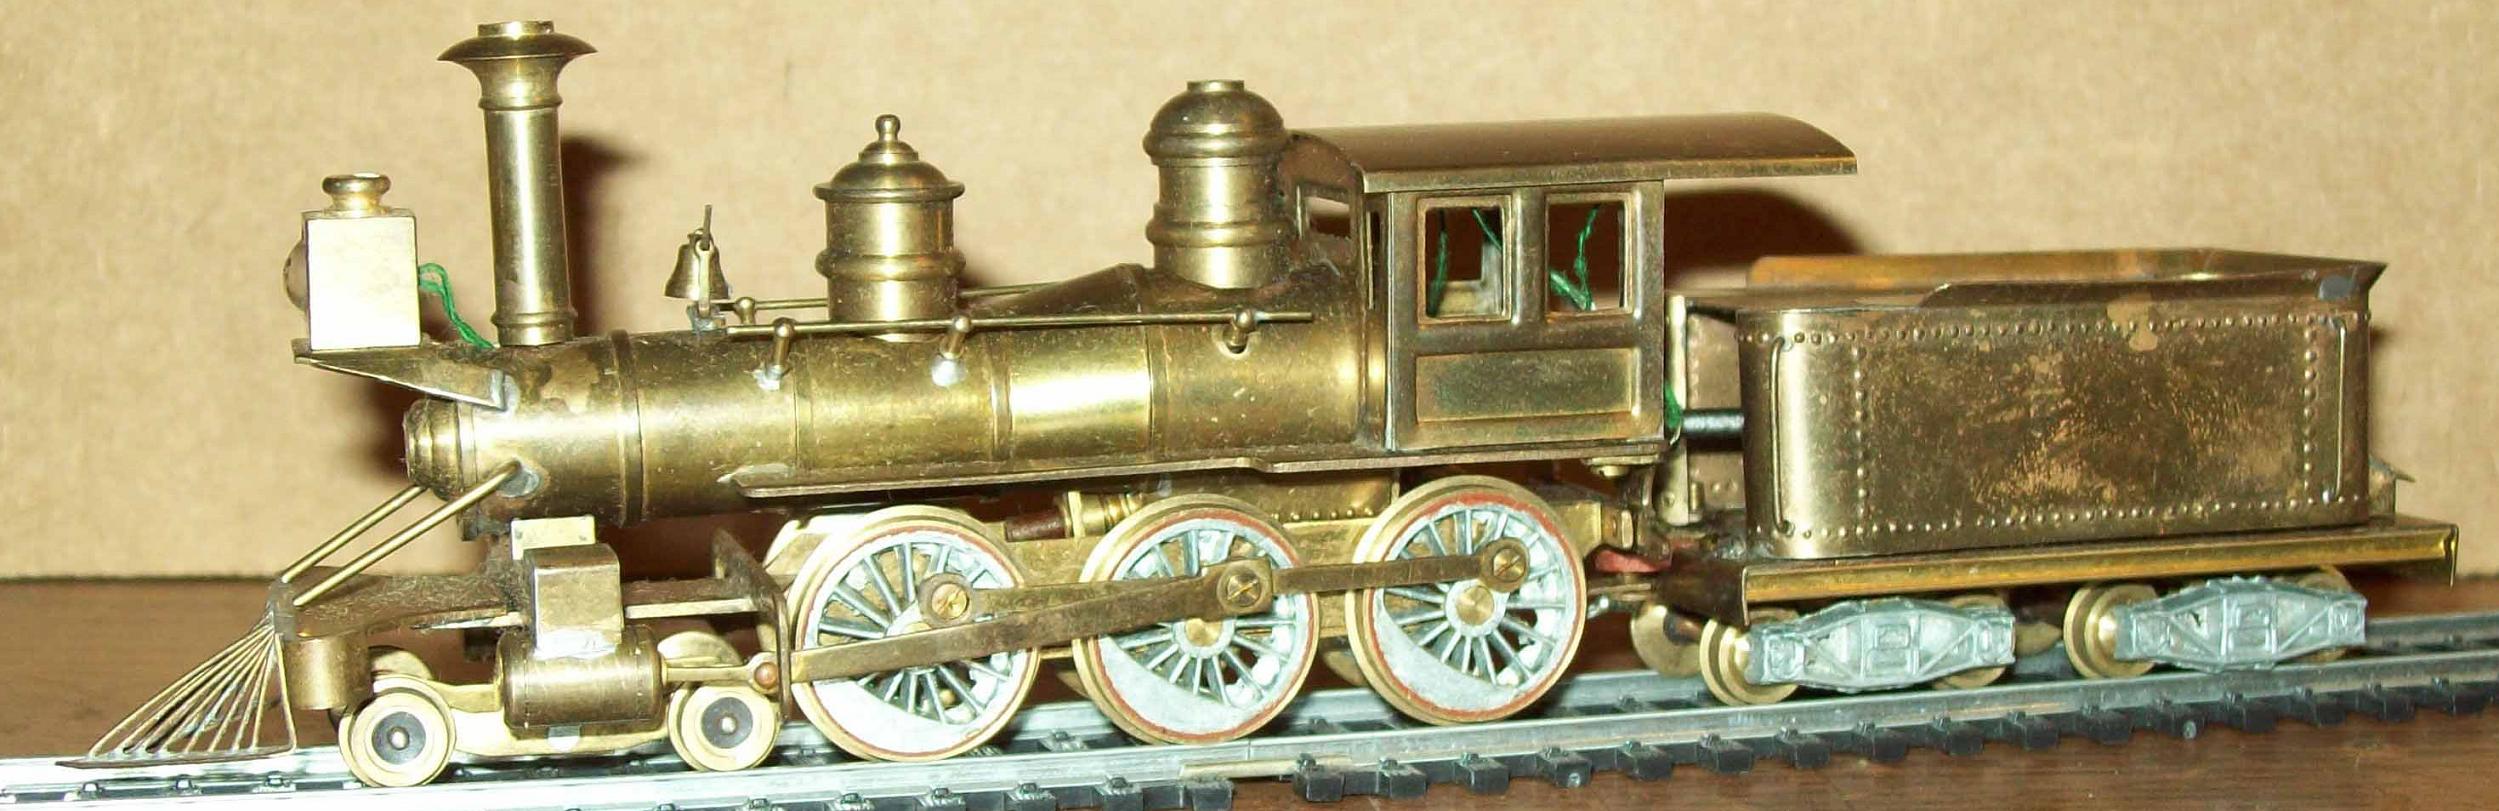
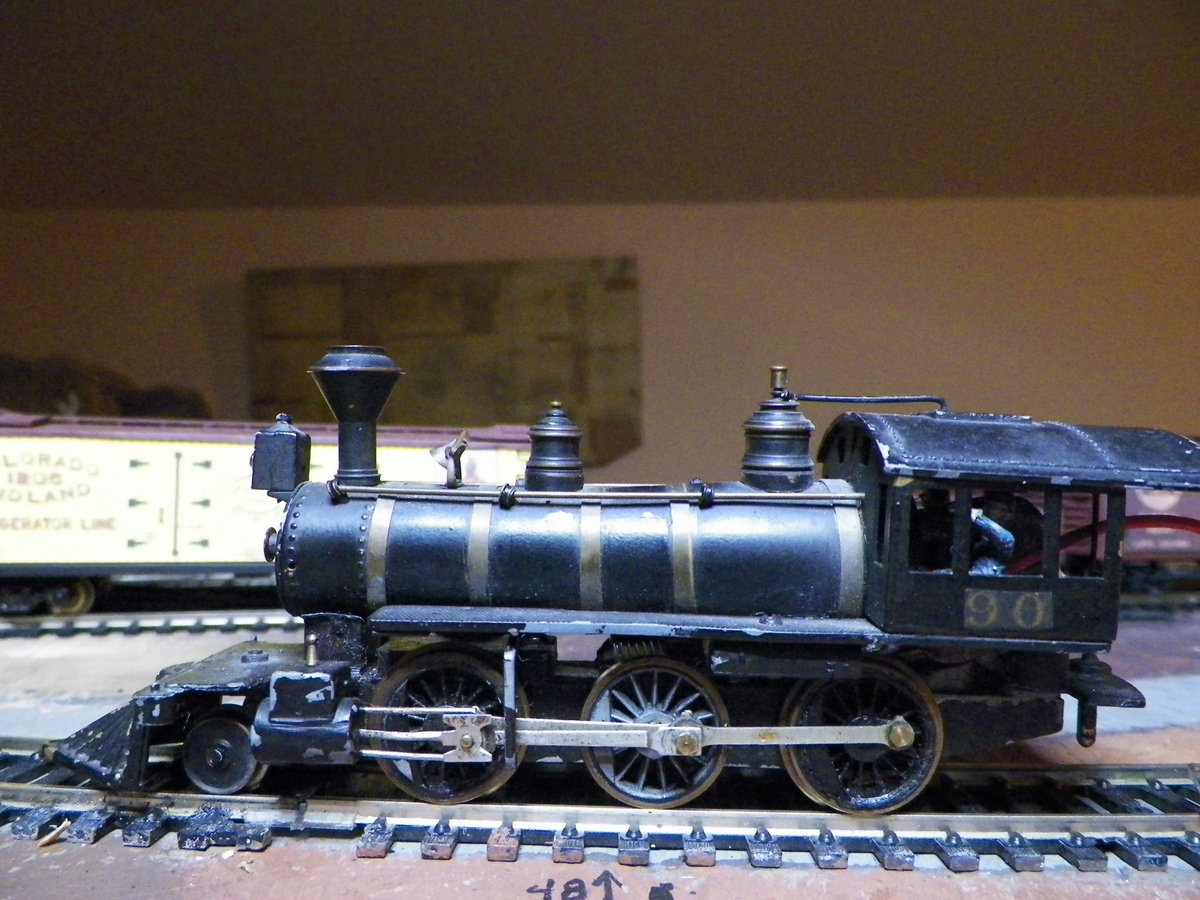
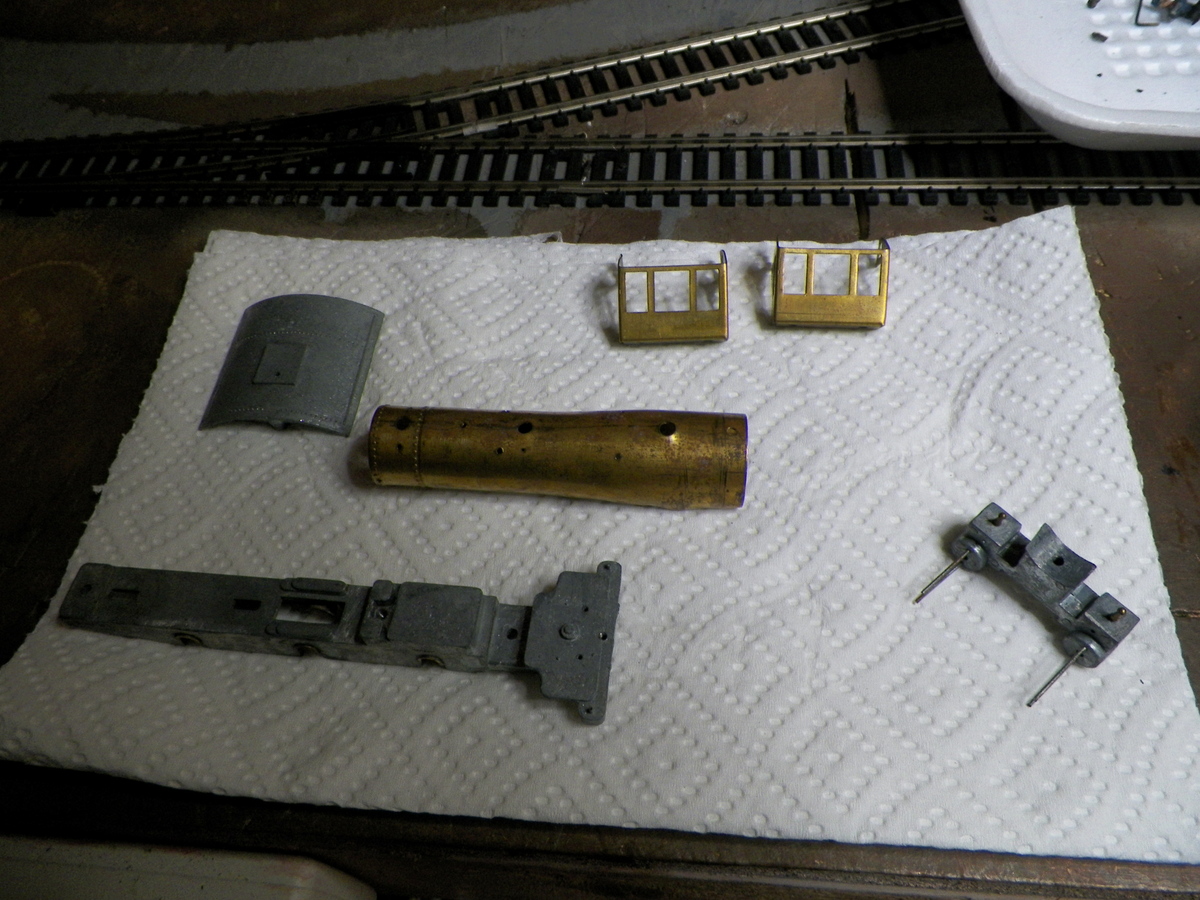
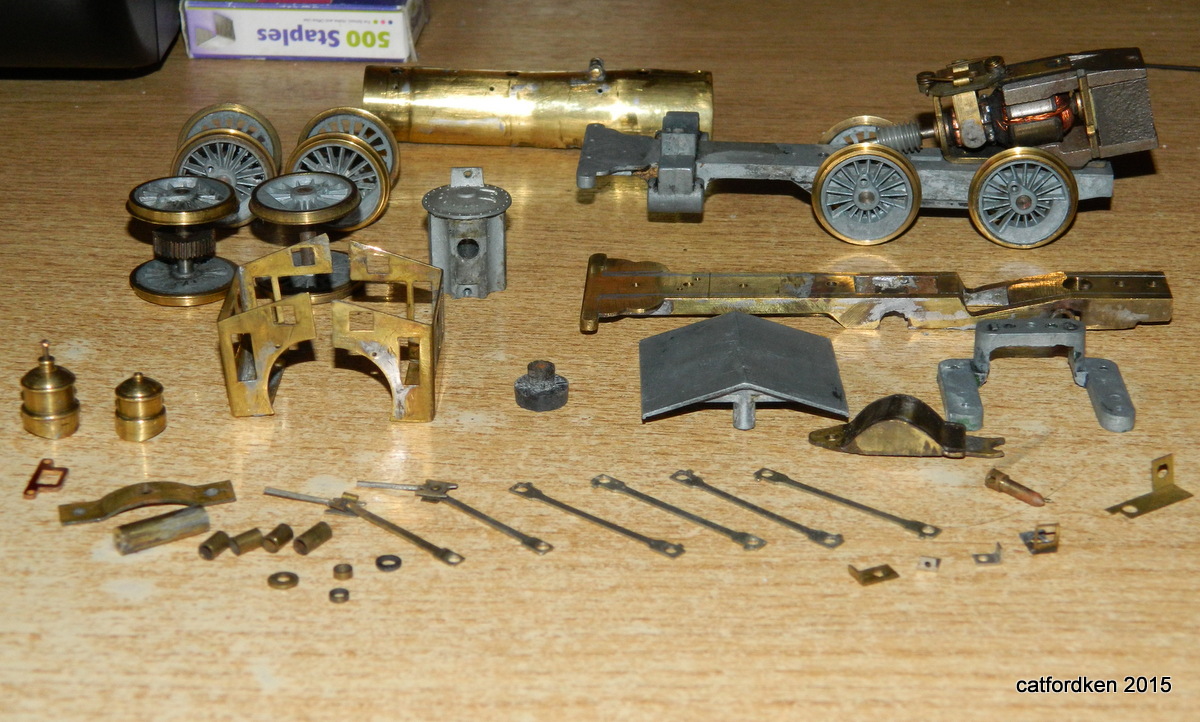
Couldn't control myself and jumped on this Mantua Metal Products 2-6-0 with the old style accoutrements; stack, light, domes. Even came with a couple old Weston crew members. I haven't done a thing to it yet; this is just the way it came. No tender, but I had one. Not sure whether Mantua made a 2-6-0 with these things or maybe the builder grabbed some parts from the Belle? One thing I want to decide is whether to render it as a wood burner or a coal burner. Plenty in store for this winter; see what gets done.

|
Country:  USA ~
Posts: 2087 ~
Member Since: March 16 2013 ~
Last Visit: July 05 2018 USA ~
Posts: 2087 ~
Member Since: March 16 2013 ~
Last Visit: July 05 2018
|
 Alert Moderator
|
|
|
|
Posted - August 27 2015 : 9:07:03 PM
|
| After looking on hoseeker, it looks like the old time parts came from the Belle 4-4-0. Now I'm leaning to replacing the stack and making it a coal burner. And probably ditching the bands on the boiler, which seem a little wide to me.
|
|
Country: USA ~
Posts: 2087 ~
Member Since: March 16 2013 ~
Last Visit: July 05 2018
|
Alert Moderator

|
|
|
|
Posted - August 29 2015 : 1:36:41 PM
|
I'm looking forward to seeing how it turns out. Your other moguls look pretty good, so I imagine this'll clean up pretty good, too, at your hands.
Carpe Manana!
|
|
Country: USA ~
Posts: 2353 ~
Member Since: September 17 2013 ~
Last Visit: April 24 2024
|
Alert Moderator
|
|
|
|
Posted - August 31 2015 : 11:27:34 PM
|
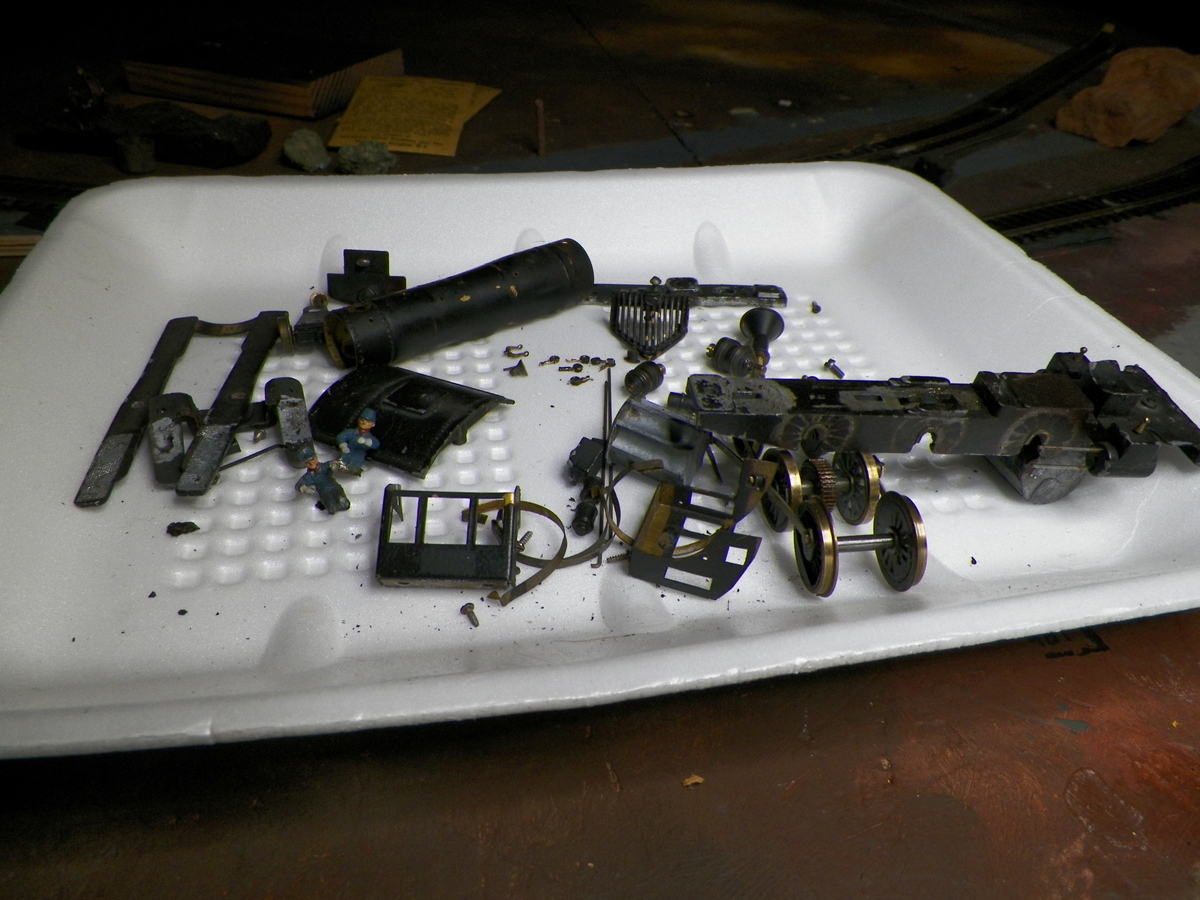
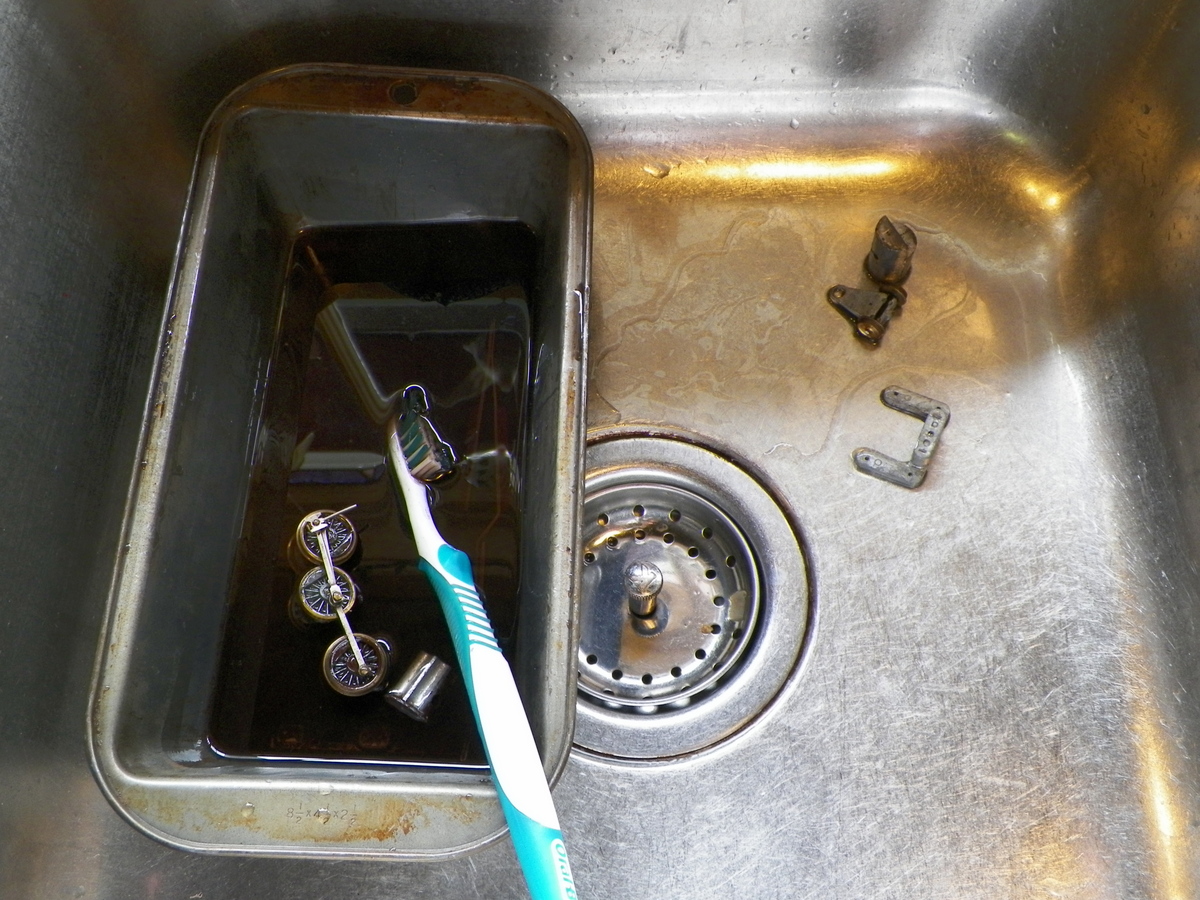
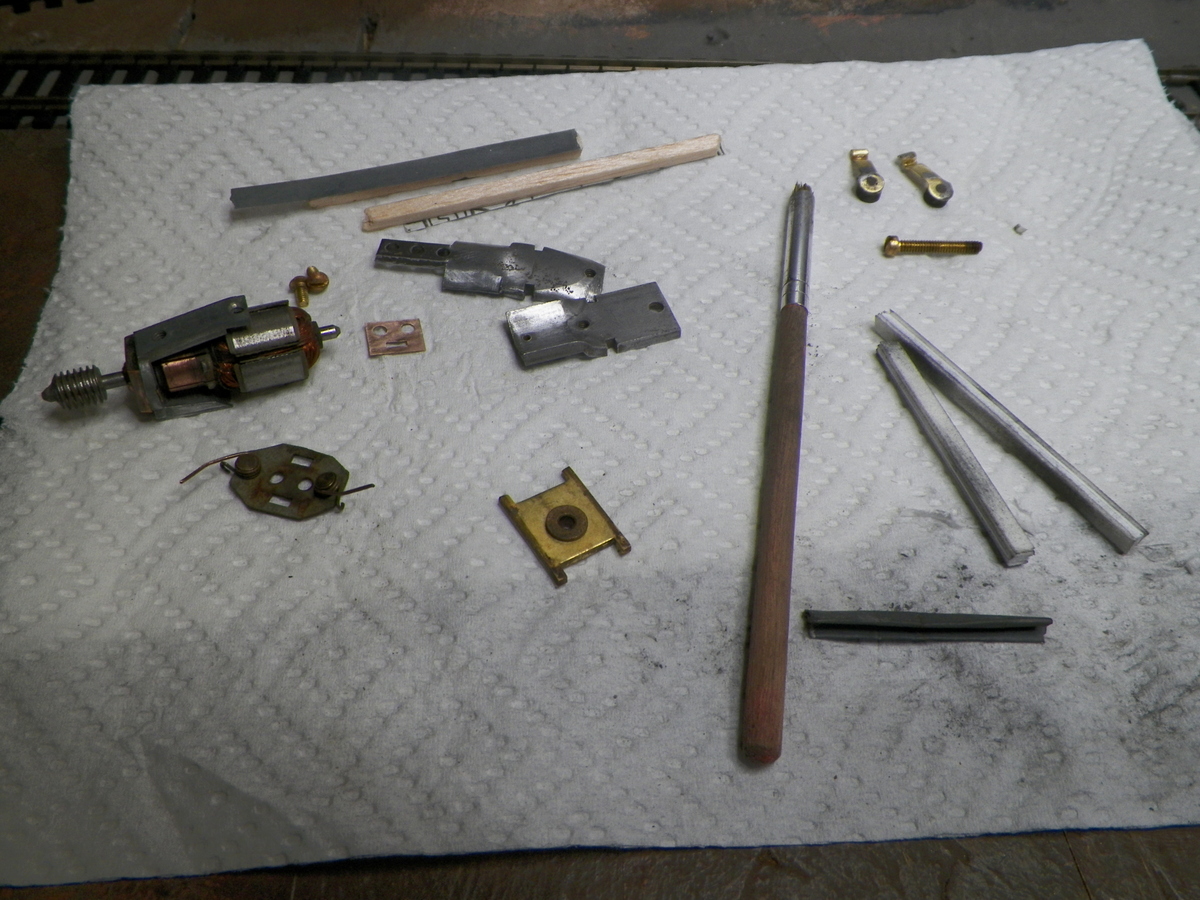
Actually got into it a bit this evening and took it apart. Was tempted to run the motor, but thought the best of that figuring it needed cleaning anyway. Looks like this model's been around the block; there's a pretty good array of screw types. And one incarnation, the frame must have been sprayed with the wheels on. Some interesting parts. Now I'm kind of leaning toward just changing the stack and making it a coal burner.
|
|
Country: USA ~
Posts: 2087 ~
Member Since: March 16 2013 ~
Last Visit: July 05 2018
|
Alert Moderator
|
|
|
|
Posted - September 01 2015 : 8:58:07 PM
|
Some paint removal. Pleased to find that brake fluid worked pretty well. Gonna need to spend some time with that motor. Found the cylinders cut for a 4-wheel pilot truck; a little more evidence of parts on this 4-6-0 were taken from a Belle. Now I guess I'll wait and see what it wants to be when I get it all cleaned up.
|
|
Country: USA ~
Posts: 2087 ~
Member Since: March 16 2013 ~
Last Visit: July 05 2018
|
Alert Moderator
|
|
|
|
Posted - September 02 2015 : 05:26:52 AM

|
looking good barry
|
Country:  United Kingdom ~
Posts: 8294 ~
Member Since: September 28 2006 ~
Last Visit: October 20 2021 United Kingdom ~
Posts: 8294 ~
Member Since: September 28 2006 ~
Last Visit: October 20 2021
|
Alert Moderator
|
|
|
|
Posted - September 03 2015 : 7:48:16 PM
|
Why did you remove the magnet? :o
The motor may be critically weakened now.
The Tyco Depot
|
|
Country: USA ~
Posts: 3927 ~
Member Since: June 20 2007 ~
Last Visit: November 19 2015
|
Alert Moderator
|
|
|
|
Posted - September 03 2015 : 10:57:28 PM
|
| I've got some neodymium magnets that I'm replacing the original with.
|
|
Country: USA ~
Posts: 2087 ~
Member Since: March 16 2013 ~
Last Visit: July 05 2018
|
Alert Moderator
|
|
|
|
Posted - September 04 2015 : 10:42:38 AM
|
A little more paint removal (doing what can be done in short periods of time presently). Quite pleased that the brake fluid is doing the job (don't much care for the way acetone turns the paint into ink that stains everything . . . though that could be a nice way to produce some good stains). Some of the tiny screws on this thing had their slots pretty worn out, like the one holding the headlight to the smoke box bracket. Need to play with that more to see if I can get it out without making a mess of it. I'm likin' the pilot truck; looks like both wheels are brass (hope the insulation's good yet).
|
|
Country: USA ~
Posts: 2087 ~
Member Since: March 16 2013 ~
Last Visit: July 05 2018
|
Alert Moderator
|
|
|
|
 Posted - September 04 2015 : 7:57:51 PM Posted - September 04 2015 : 7:57:51 PM
|
quote:I've got some neodymium magnets that I'm replacing the original with.
Originally posted by Barry - September 03 2015 : 10:57:28 PM
|
Whew... you had me worried there.
The Tyco Depot
|
|
Country: USA ~
Posts: 3927 ~
Member Since: June 20 2007 ~
Last Visit: November 19 2015
|
Alert Moderator
|
|
|
|
Posted - September 07 2015 : 12:42:33 PM
|
Wrapping up the paint removal . . .
Still need to get after the motor, but so many outdoor things to be done while this summer lingers.
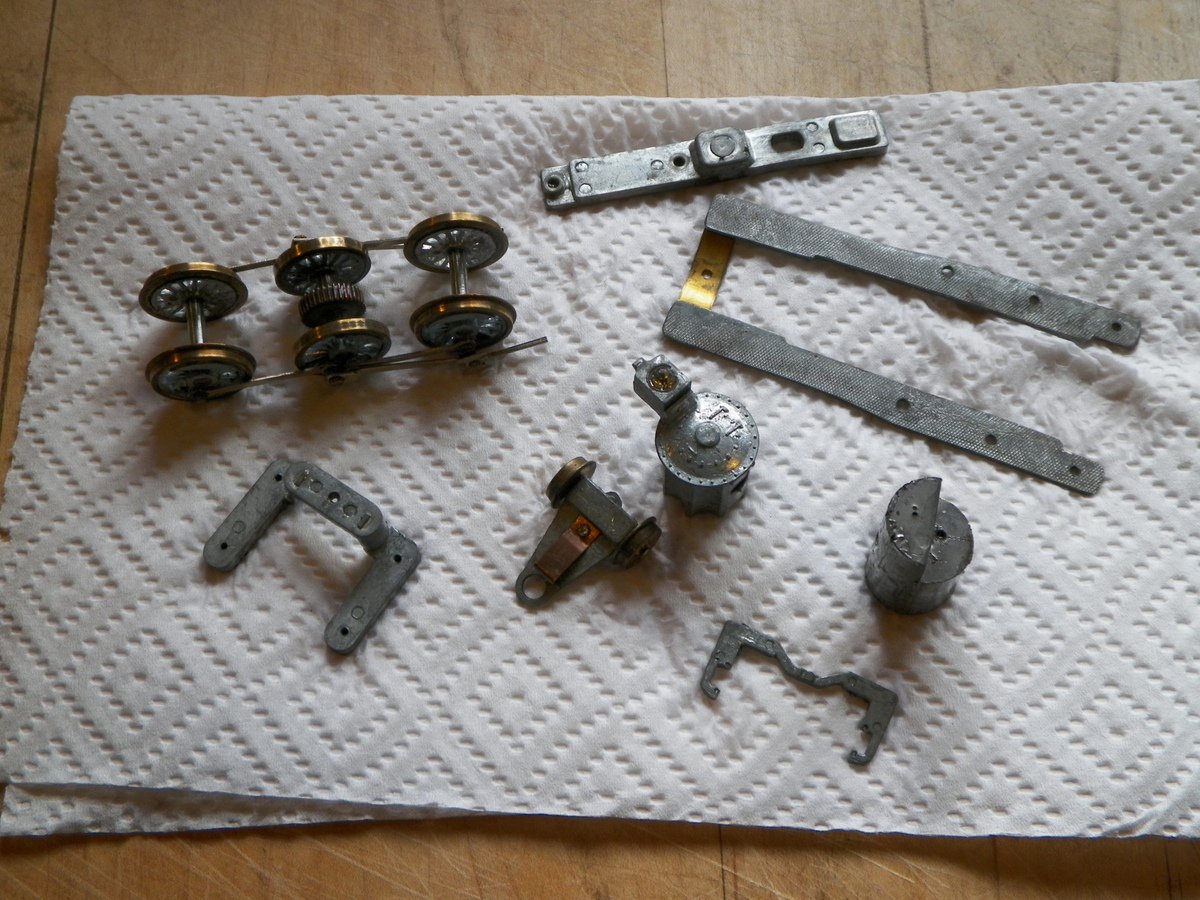
A nice selection of Belle of the Eighties parts. Now I'm thinkin' maybe I want to chase down a frame and the few other parts that could complete a Belle model. That should only take a few months, hey? I could dig a Belle pullin' a consist of High Ballers old time coaches and combine. We'll see what happens with that.
|
|
Country: USA ~
Posts: 2087 ~
Member Since: March 16 2013 ~
Last Visit: July 05 2018
|
Alert Moderator
|
|
|
|
Posted - September 07 2015 : 8:12:27 PM
|
quote:Now I'm thinkin' maybe I want to chase down a frame and the few other parts that could complete a Belle model.
Originally posted by Barry - September 07 2015 : 12:42:33 PM
|
Ooh! Tough decision. A Belle would sure be nice but on the other hand, the Mogul you have would be tough to give up. It's a real honey!
Carpe Manana!
|
|
Country: USA ~
Posts: 2353 ~
Member Since: September 17 2013 ~
Last Visit: April 24 2024
|
Alert Moderator
|
|
|
|
Posted - September 08 2015 : 09:21:04 AM
|
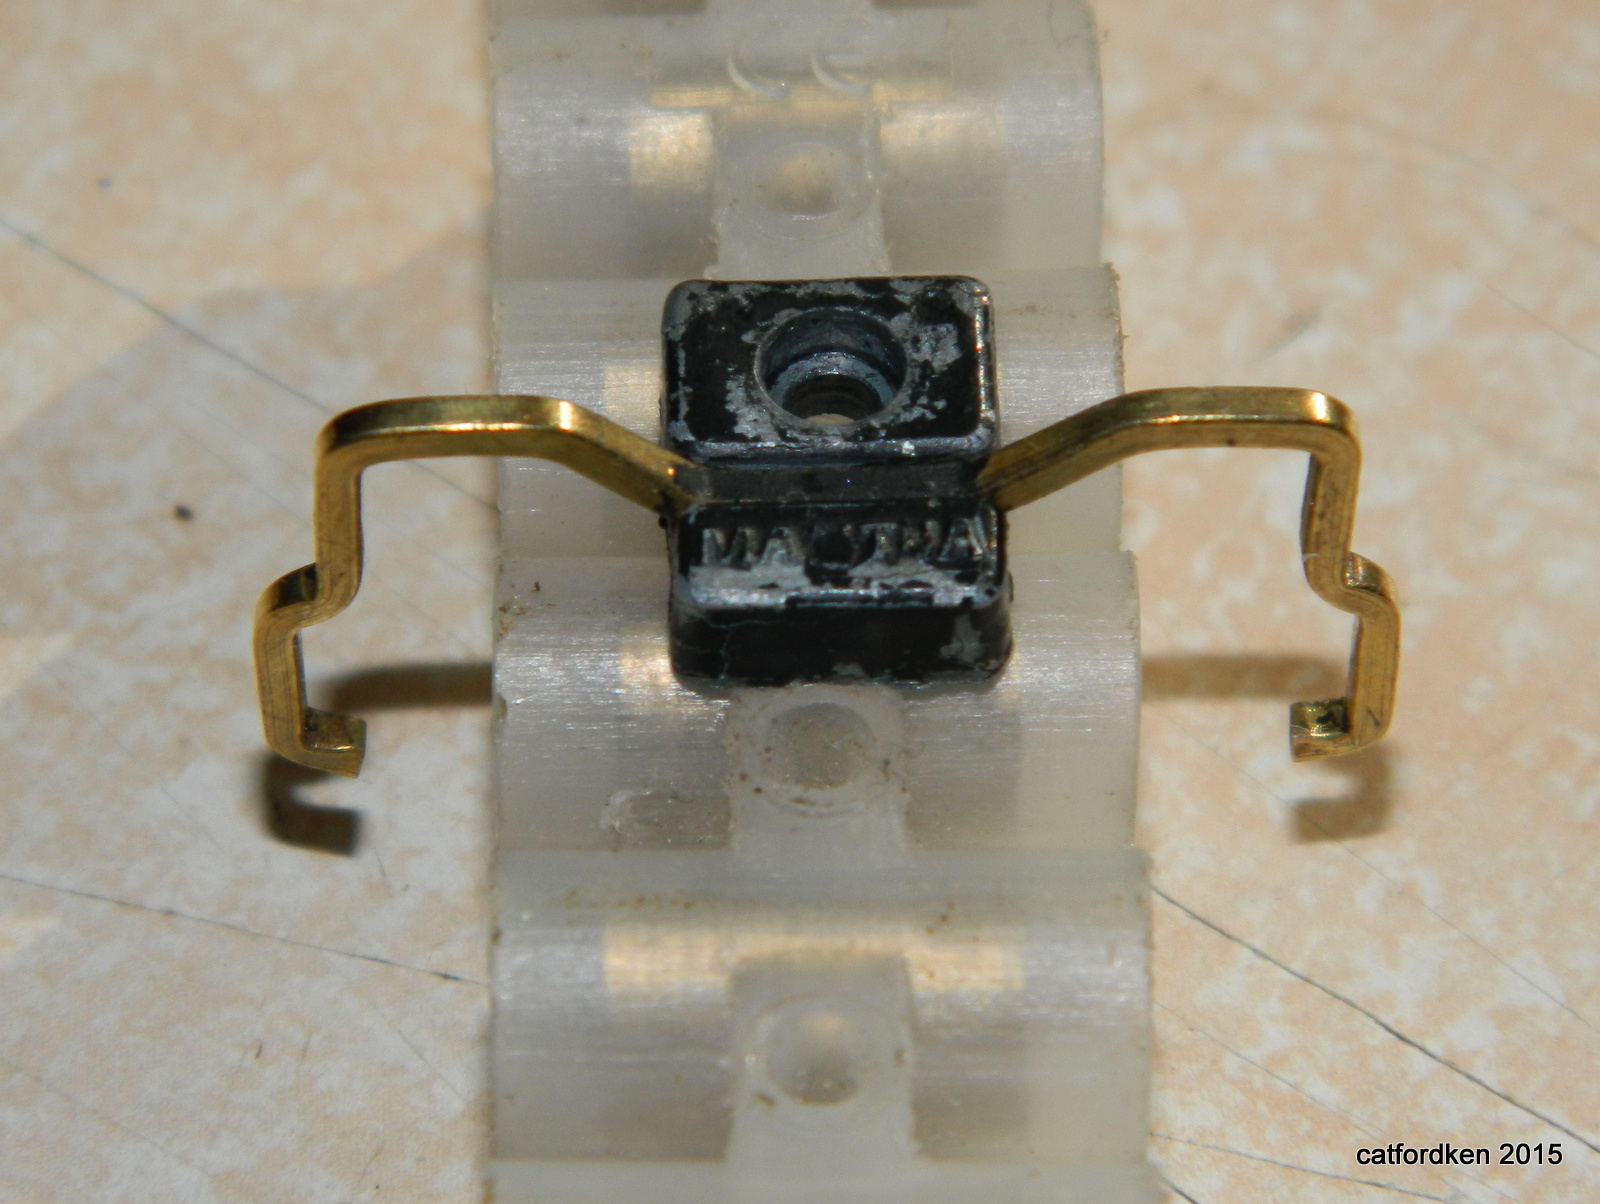
what bits do you need barry pm me got a few spares,picture shows a few
Edited by - catfordken on September 08 2015 09:53:02 AM
|
|
Country: United Kingdom ~
Posts: 8294 ~
Member Since: September 28 2006 ~
Last Visit: October 20 2021
|
Alert Moderator
|
|
|
|
Posted - September 12 2015 : 5:26:58 PM
|
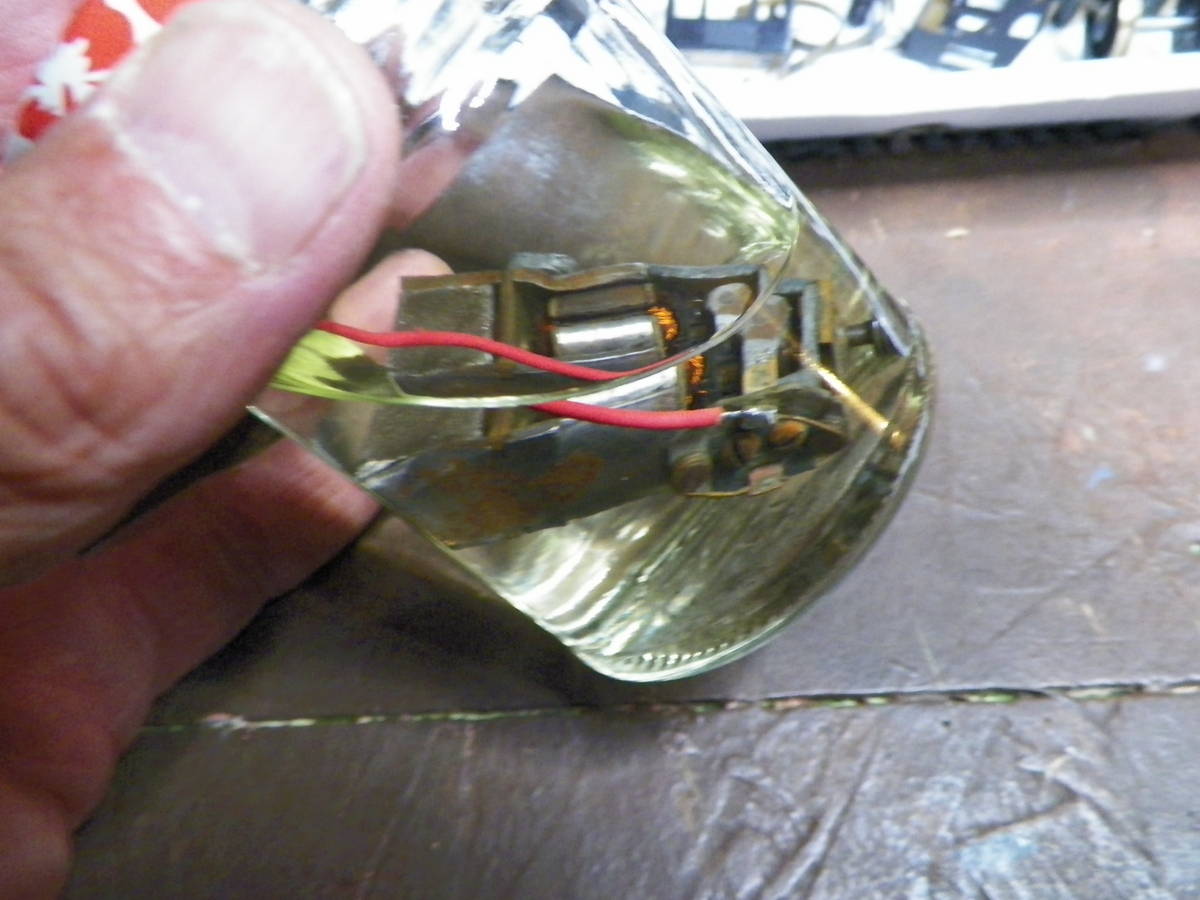
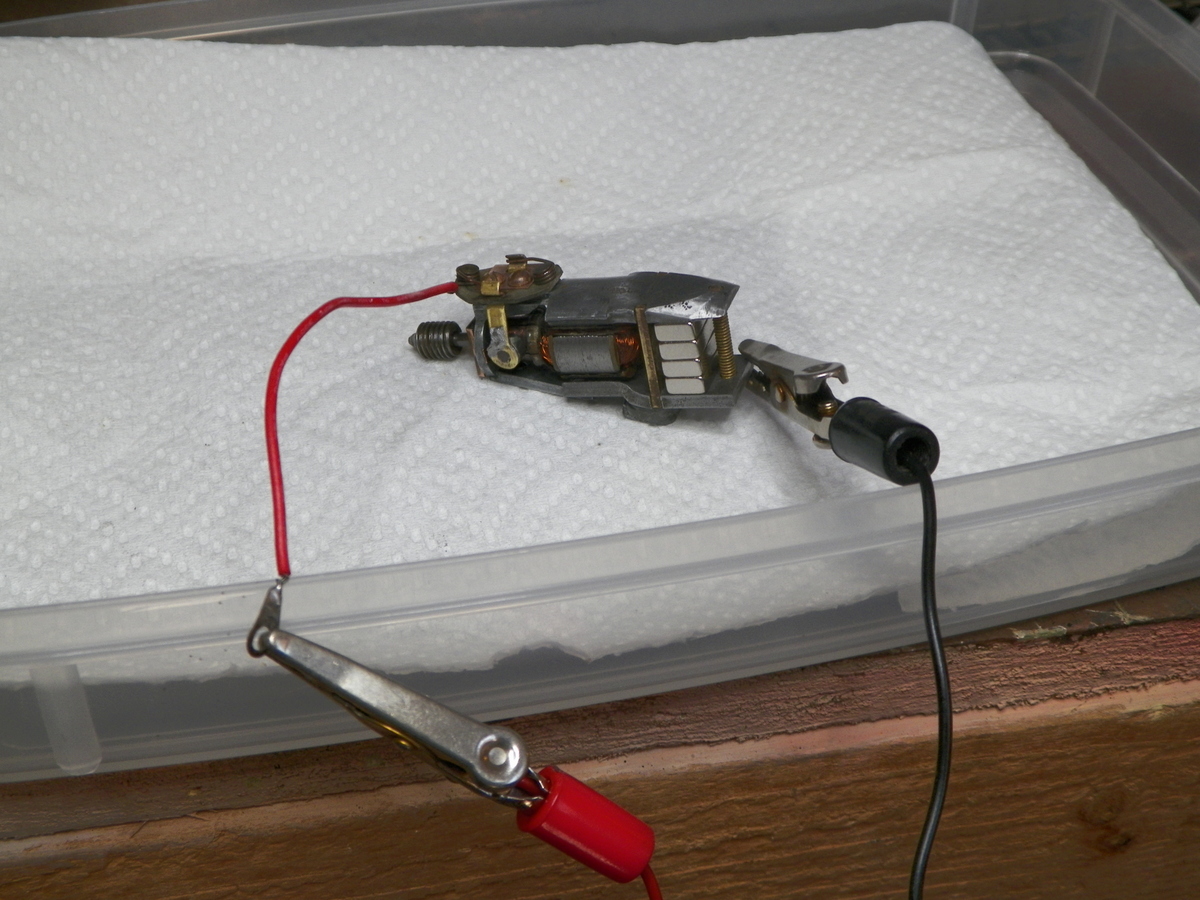
Well, I talked with Ken and we're doing a swap which will enable me to build the Belle of the 80's. In the meantime, I've cleaned and tested the motor. Now I'm thinking about possible paint schemes (Be sweet to go to the LHS and find some Floquil, but I do have some bits of it; we'll see what colors come to mind.)
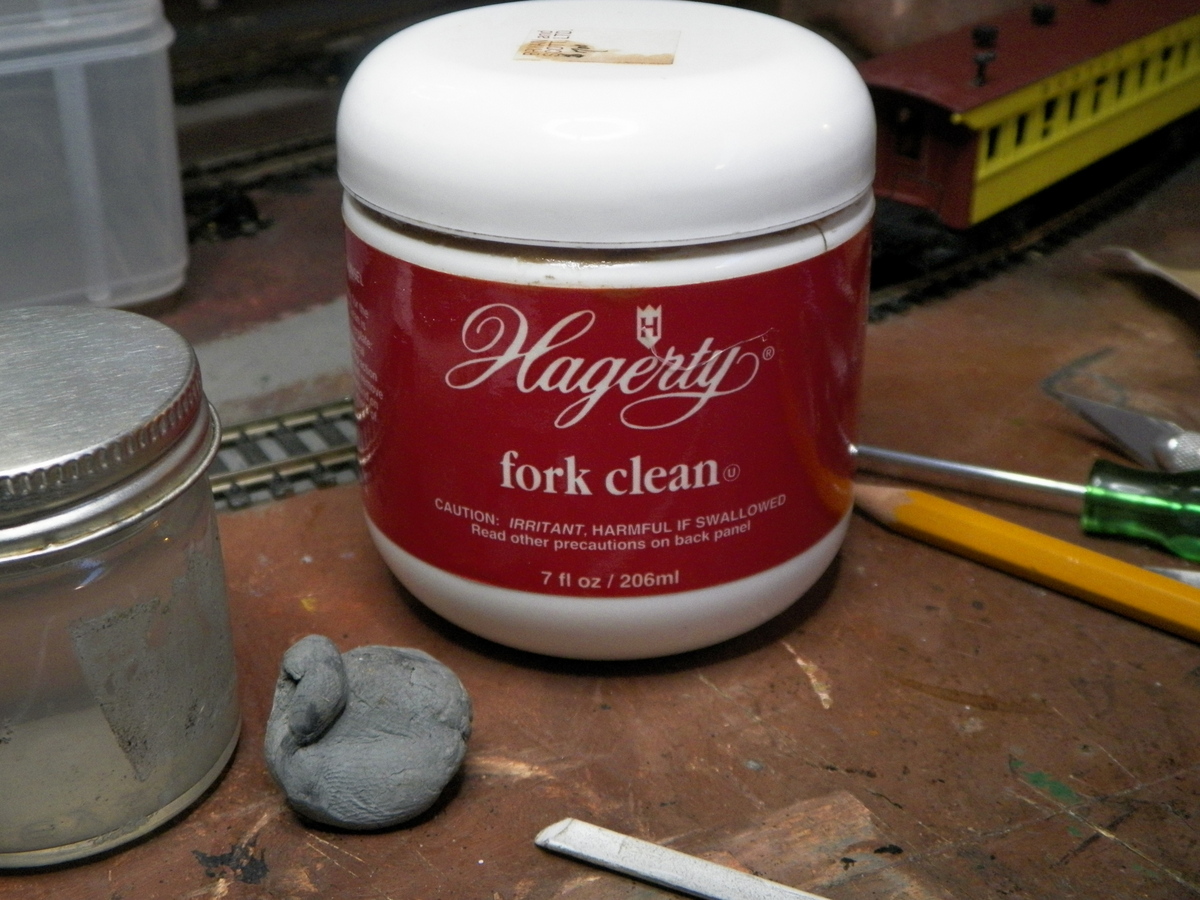
This jar of "Hagerty Fork Clean" is something that I got years ago at a jewelry store to clean the brass reeds on harmonicas. It works real nice for cleaning brass, but you don't want to leave things sit in it overnight or anything long. Supposedly it will "eat them up". I usually go up to a minute and then maybe re-dip. Rinse well after. Cleans brass up pretty nicely.
|
|
Country: USA ~
Posts: 2087 ~
Member Since: March 16 2013 ~
Last Visit: July 05 2018
|
Alert Moderator
|
|
|
|
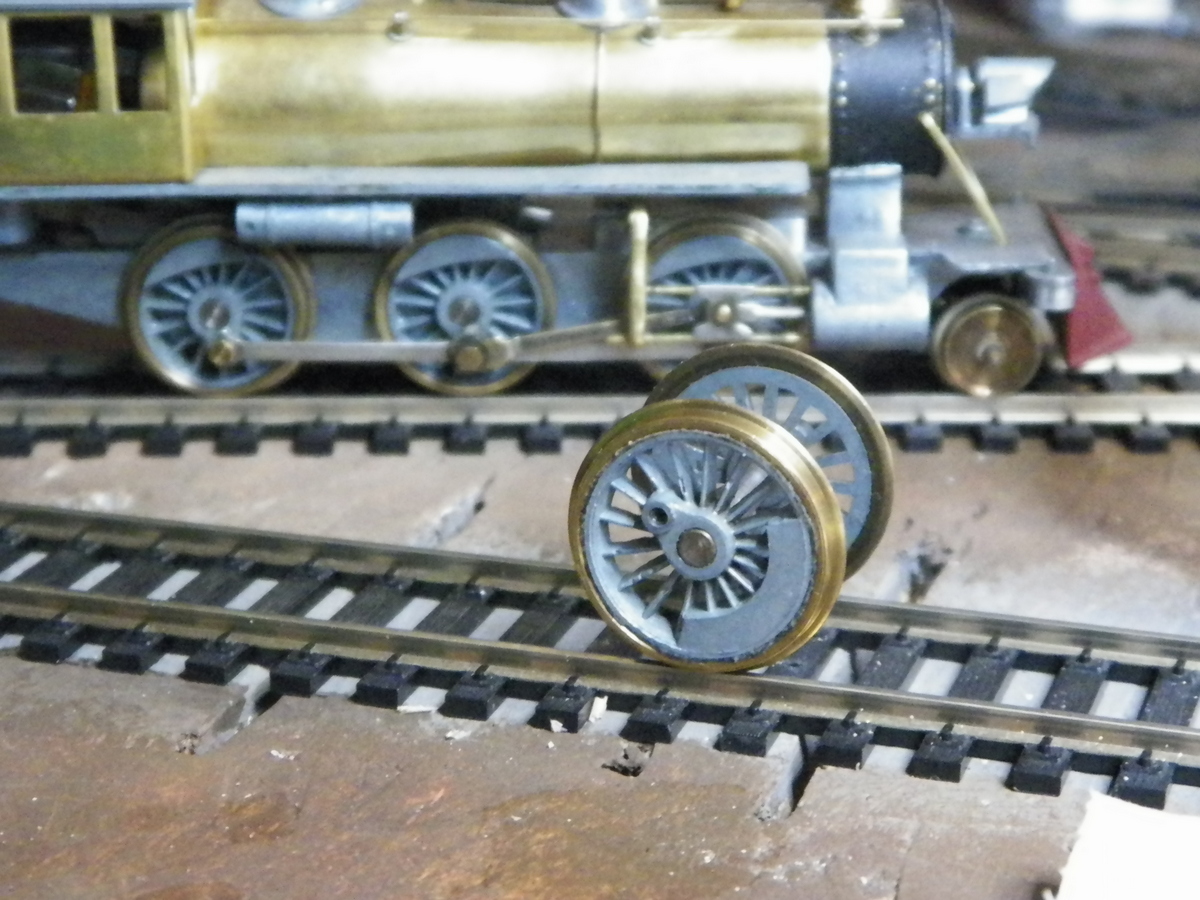
Posted - October 05 2015 : 7:24:45 PM
|
So it's been a few weeks. In the while, Ken and I did a swap and I now have the pieces to complete this model as a Belle of the Eighties . . . and now the title for this thread is going to be incorrect, but I'm going to continue here to do this photo story in one thread. I'm diggin' the idea of building a Belle. Also been busy with household chores, though, so this is going to be a slow build . . . unless I adopt a Devil-May-Care attitude, hey? I like that the drivers on the Belle are 72" (I haven't measured the Mogul drivers, but I'm guessing like 60"?). This locomotive has some potential to strut some muscle.
Here's a couple photos. Getting the steam chest mold marks cleaned up and thinking about getting the frame and running gear together and motoring this thing up.
|
|
Country: USA ~
Posts: 2087 ~
Member Since: March 16 2013 ~
Last Visit: July 05 2018
|
Alert Moderator
|
|
|
|
Posted - October 06 2015 : 07:45:05 AM
|
good guess barry very close,61-1/2 inch drivers,ken
catfordken
if you cannot see the light at the end of the tunnel,try turning around
|
|
Country: United Kingdom ~
Posts: 8294 ~
Member Since: September 28 2006 ~
Last Visit: October 20 2021
|
Alert Moderator
|
|
|
|
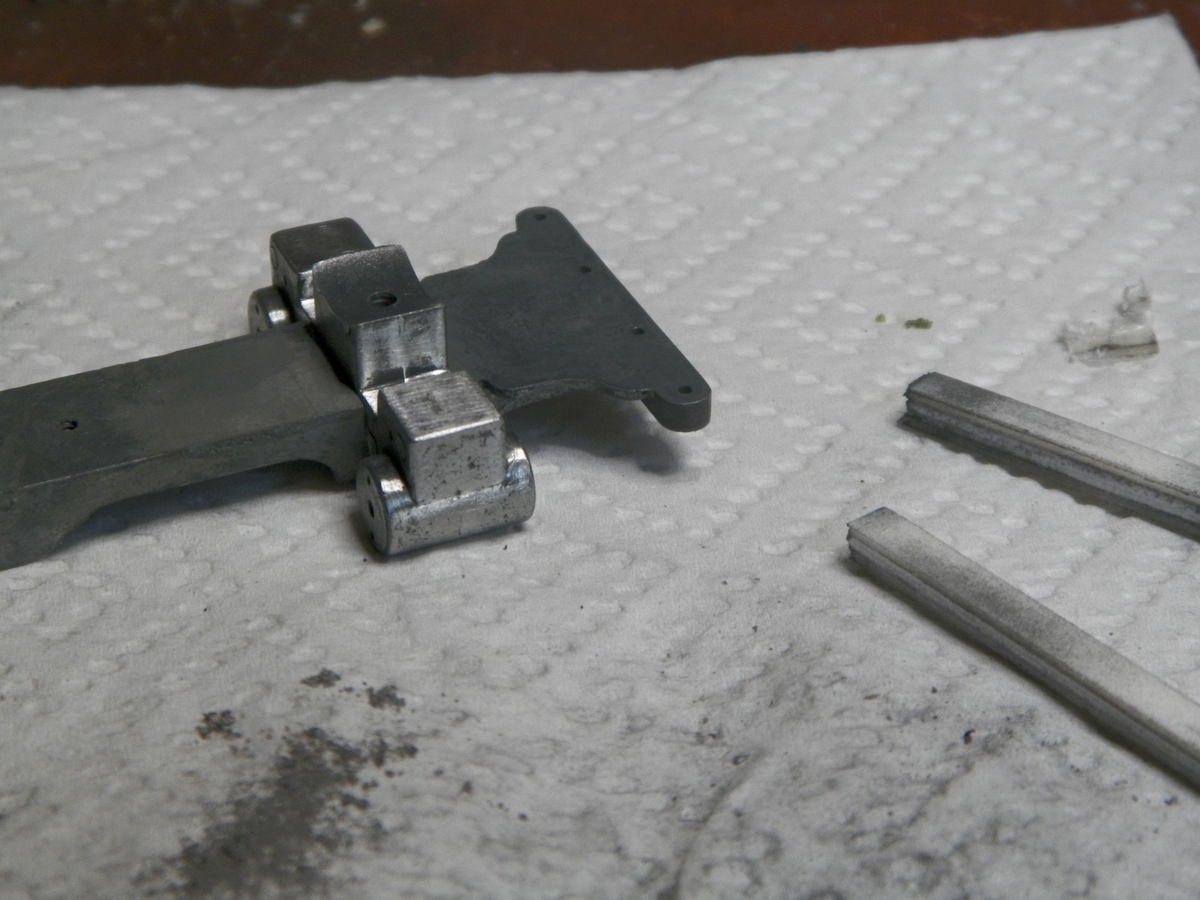
Posted - October 07 2015 : 10:11:25 PM
|
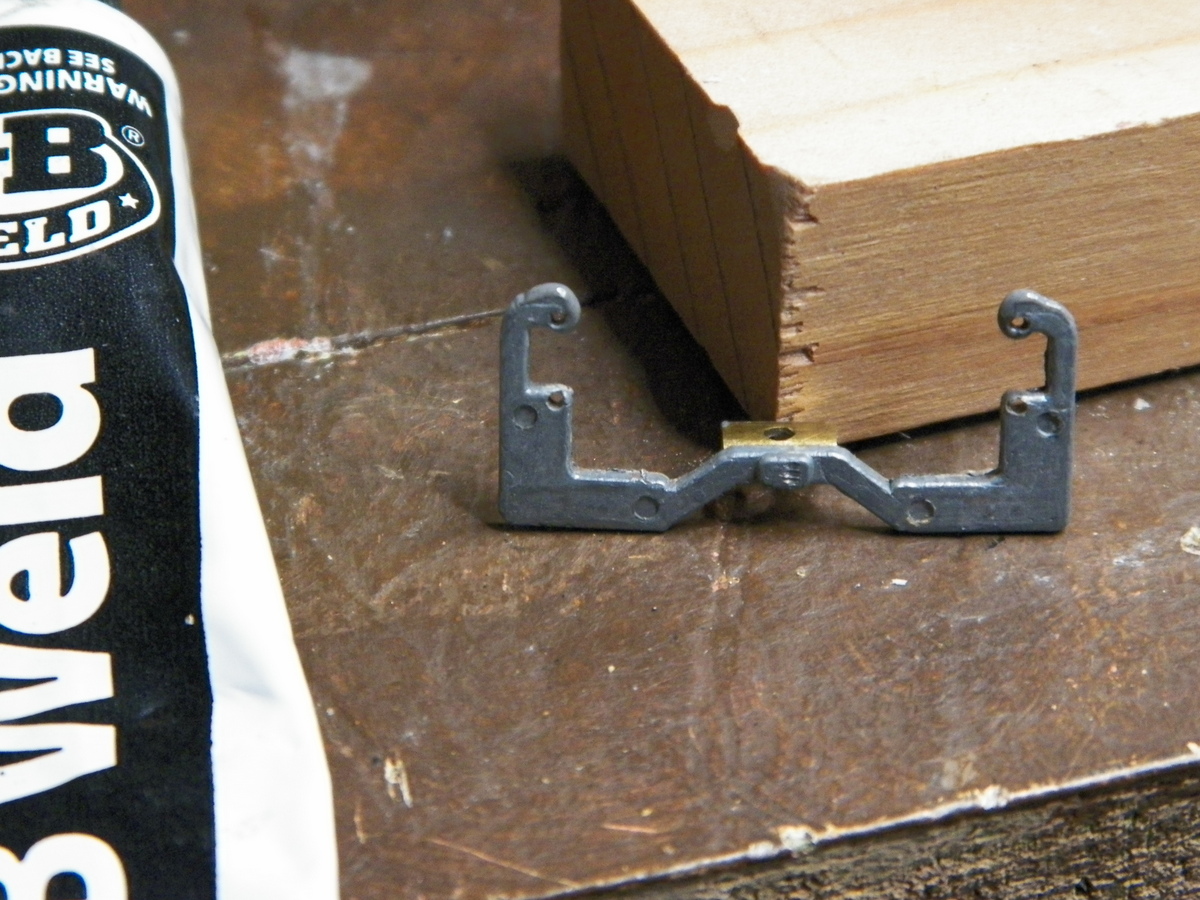
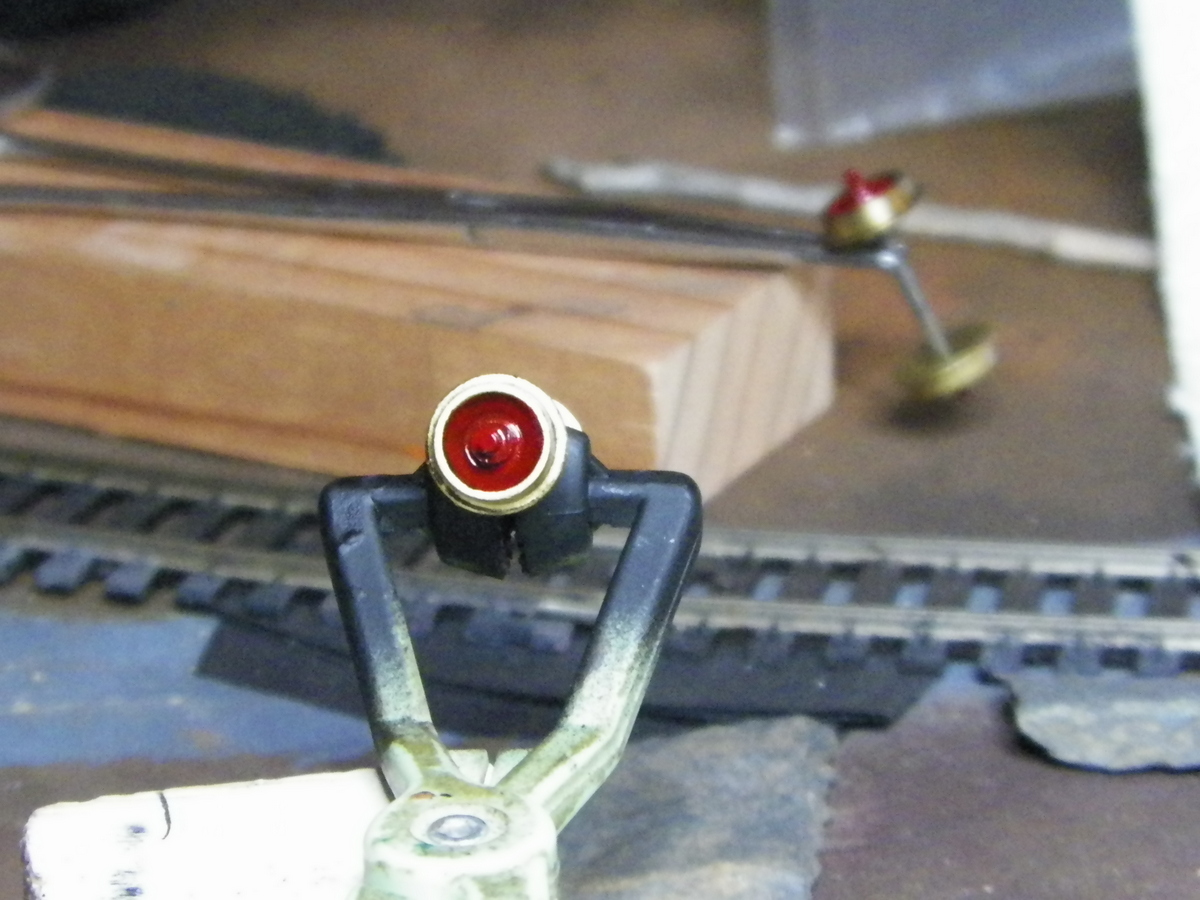
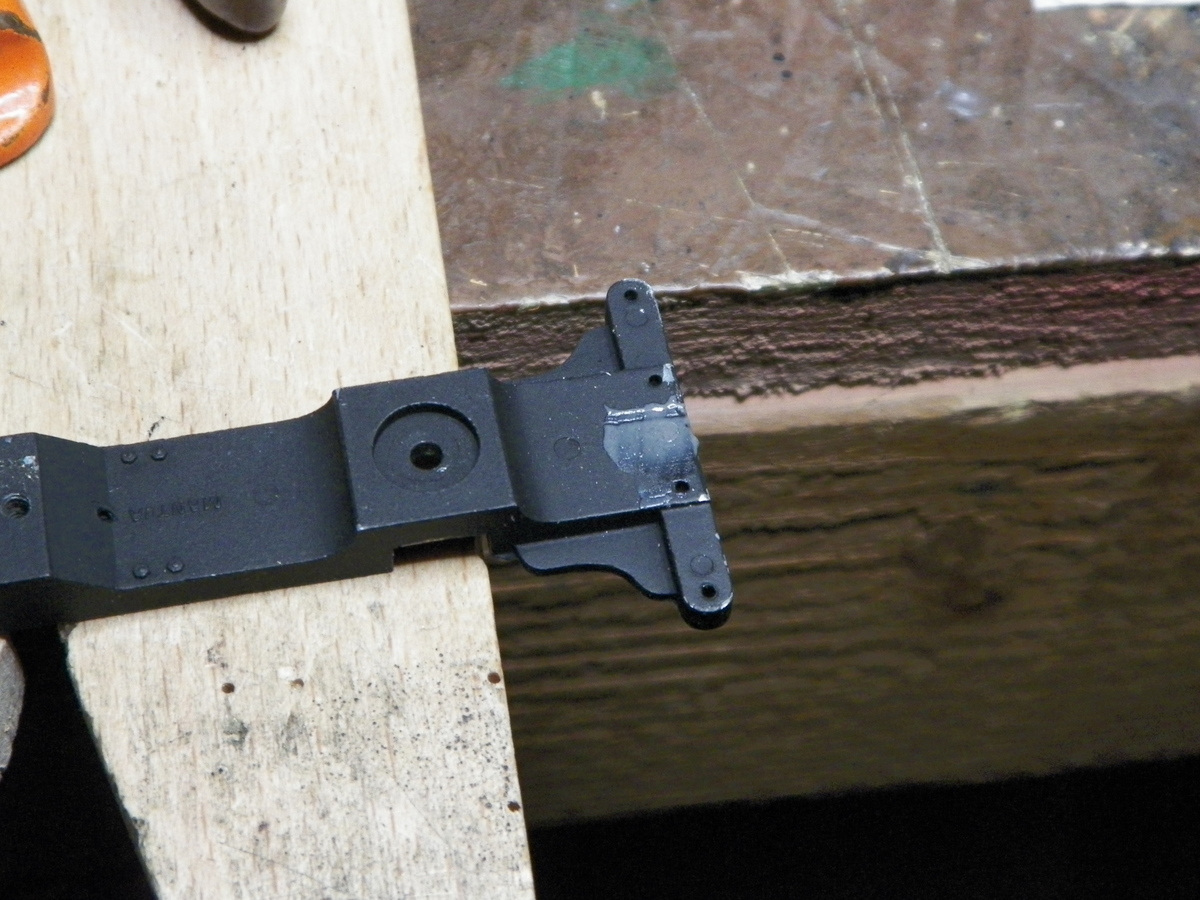
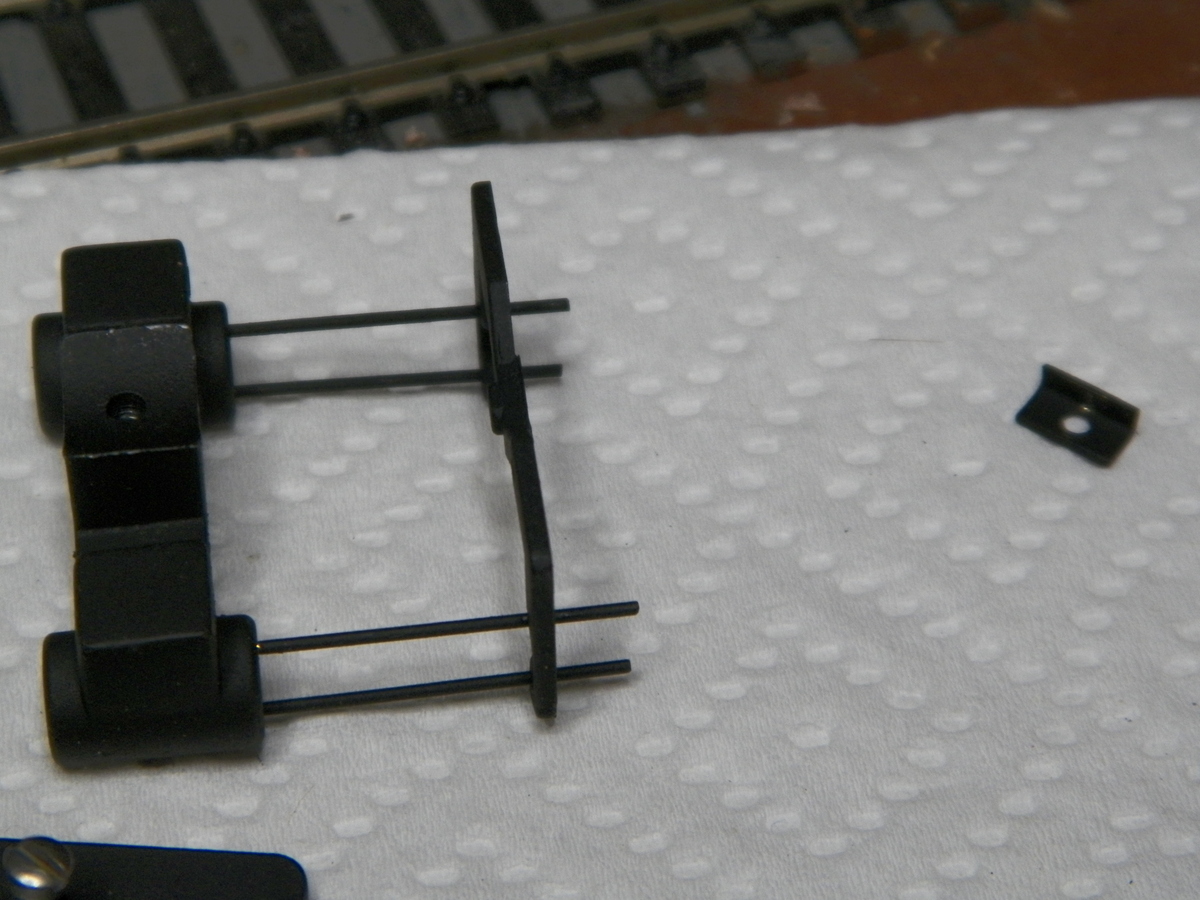
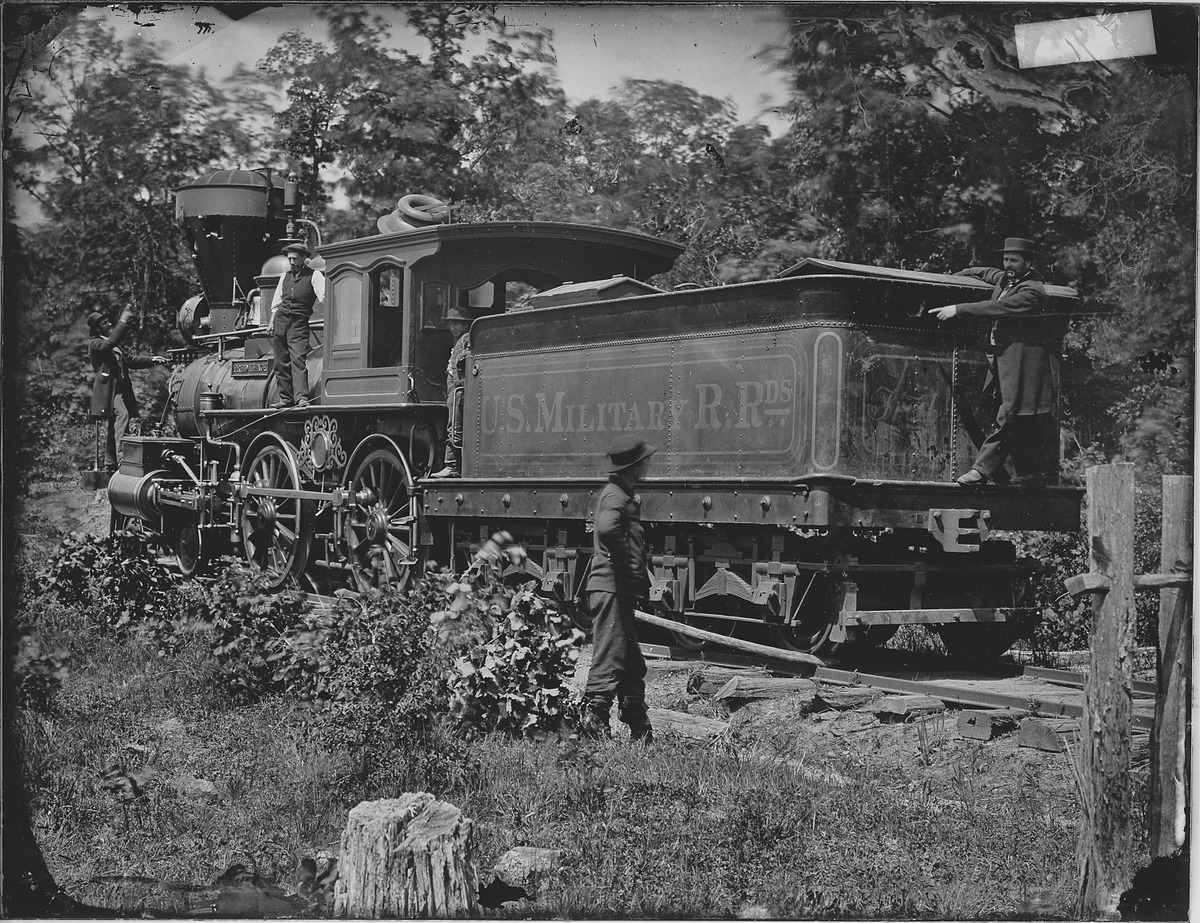
Need to do a little work to the guide bar yoke. (These little cast yokes are really fragile. I guess that's why many times, you get a Mogul or a Belle with a missing one. The one's I've cut from brass aren't as precision, but you have to put a little more thought into breaking one.) It's one I had from the Mogul. The alignment with the guide bars seems the same, but the method of mounting it is different. The Belle frame doesn't have a "slot" that the yoke fits in (whereas the Mogul does). So the photo of the little brass piece (from a Mantua couple set), that's what I'm going to trim up and then super glue to the yoke. That's my plan so far. If it looks real pretty, I'll post a photo of it. Then there's a few different colors of green I'm lookin' at for the cab and boiler ? ? ?

|
|
Country: USA ~
Posts: 2087 ~
Member Since: March 16 2013 ~
Last Visit: July 05 2018
|
Alert Moderator
|
|
|
|
Posted - October 08 2015 : 07:42:27 AM
|
hi barry this one came with the belle parts box i received ken
catfordken
if you cannot see the light at the end of the tunnel,try turning around
|
|
Country: United Kingdom ~
Posts: 8294 ~
Member Since: September 28 2006 ~
Last Visit: October 20 2021
|
Alert Moderator
|
|
|
|
Posted - October 08 2015 : 09:27:37 AM
|
Barry, Kenny, your work, careful, and through, viewed and read here is excellent. I love these old trains. Seeing this work being done at the same time by two people separated by a giant pond and handling the problems this rebuild brings is a education on how a restoration of a old train should be done. I really like this post.
frank
toptrain
" It's a Heck of a Day " !!!
|
|
Country: USA ~
Posts: 7504 ~
Member Since: August 07 2008 ~
Last Visit: February 24 2024
|
Alert Moderator
|
|
|
|
Posted - October 08 2015 : 09:50:03 AM
|
frank i agree,its great working with someone,who has the passion,to want to rebuild these pioneer model trains,most who had no one to copy from,all trying one way or other to solve a problem,like barry is doing with his homemade yokes,also i will say frank,i have learnt a lot from you,in your kitbashed camel locos etc,all ideas that can be reused by others,ken
catfordken
if you cannot see the light at the end of the tunnel,try turning around
|
|
Country: United Kingdom ~
Posts: 8294 ~
Member Since: September 28 2006 ~
Last Visit: October 20 2021
|
Alert Moderator
|
|
|
|
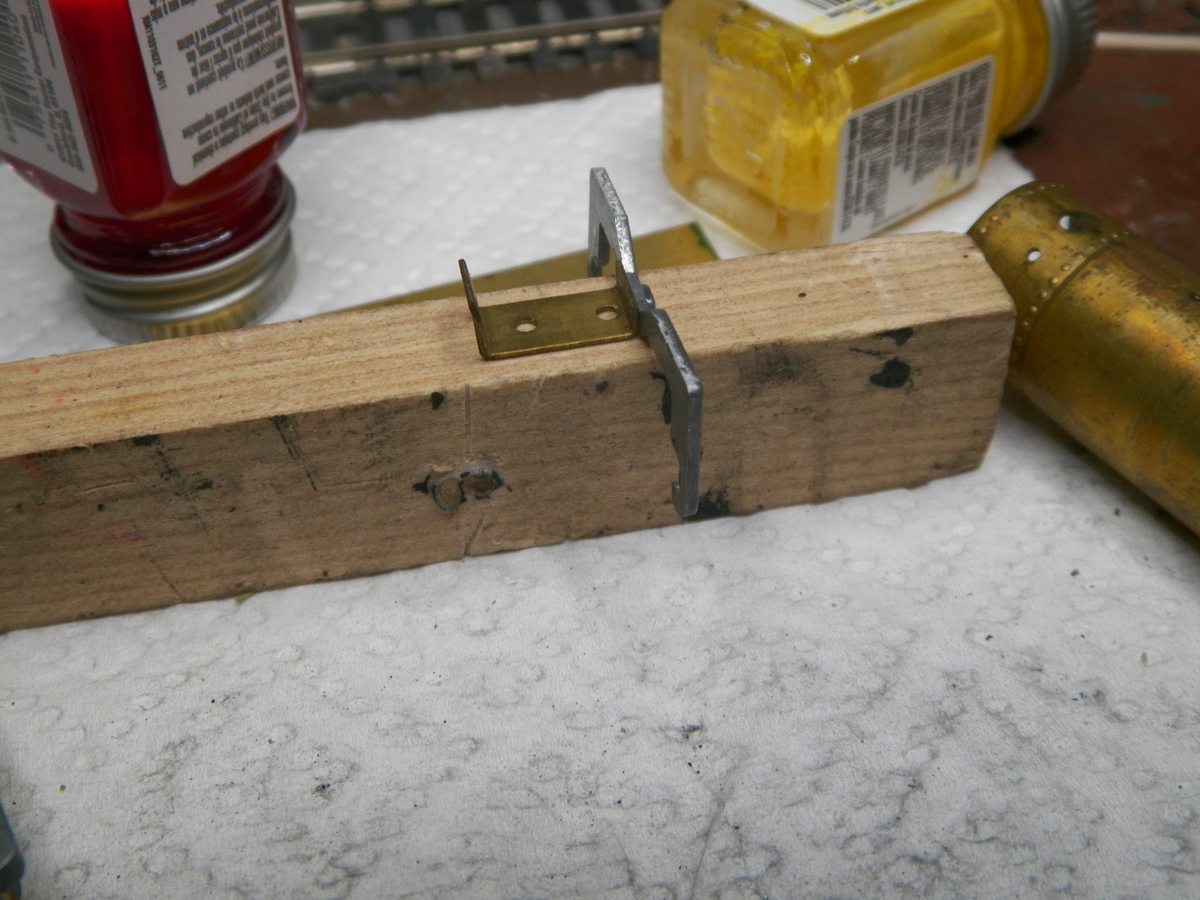
Posted - October 08 2015 : 11:33:28 AM
|
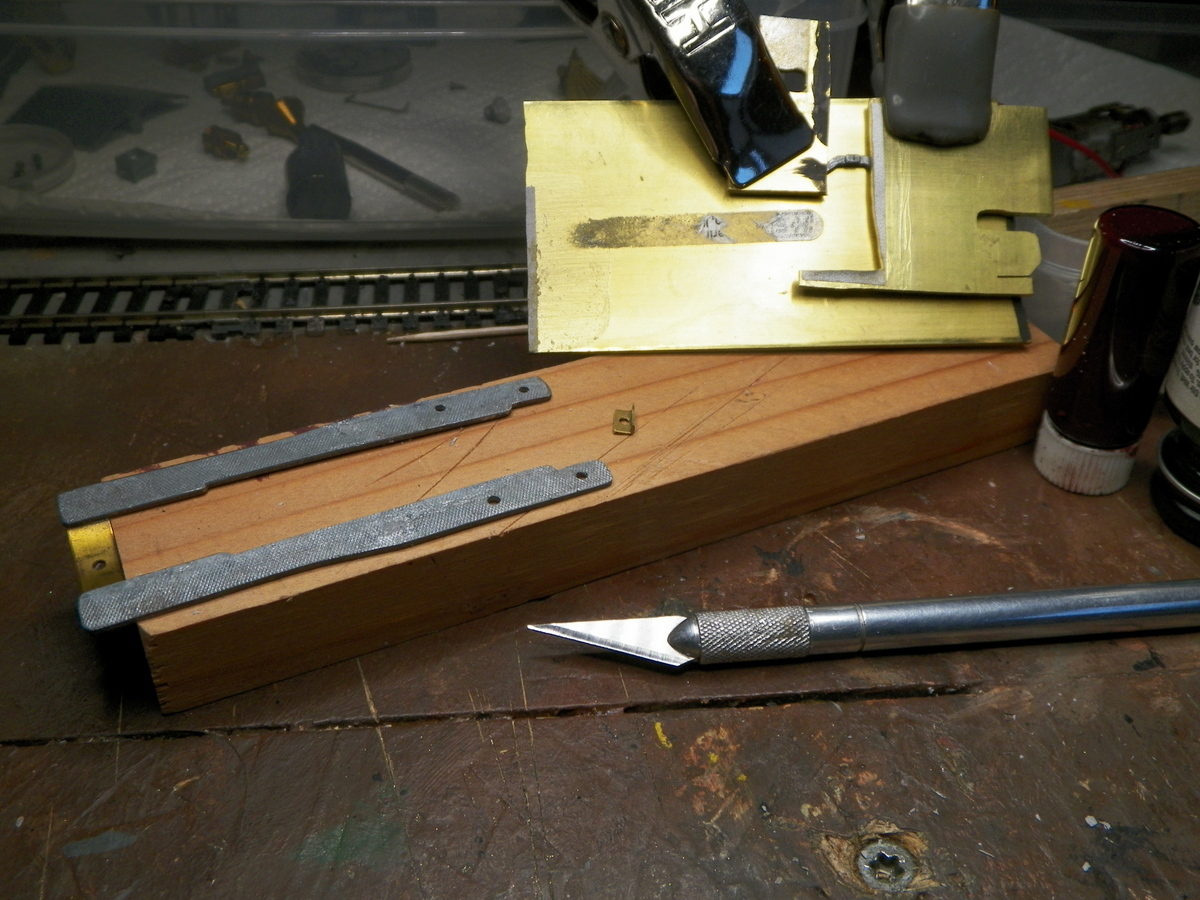
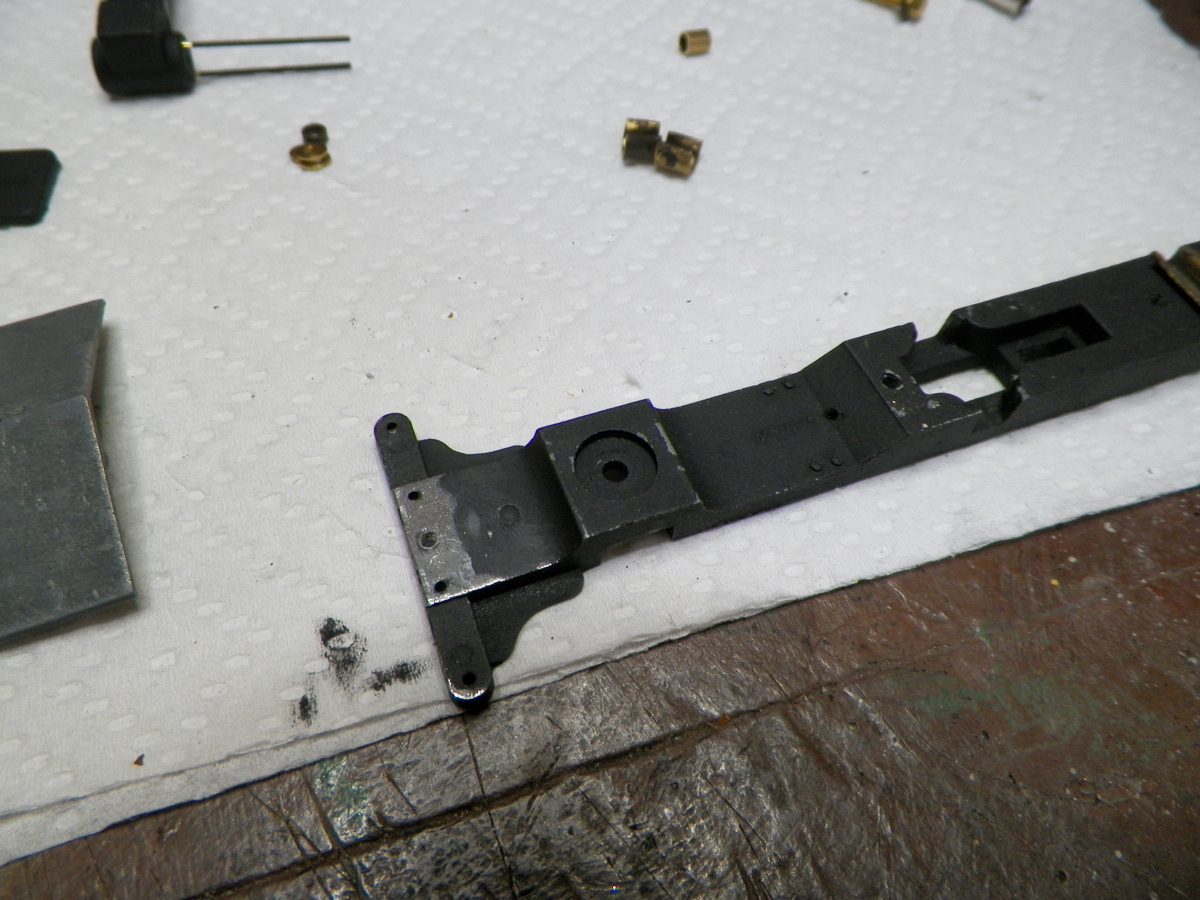
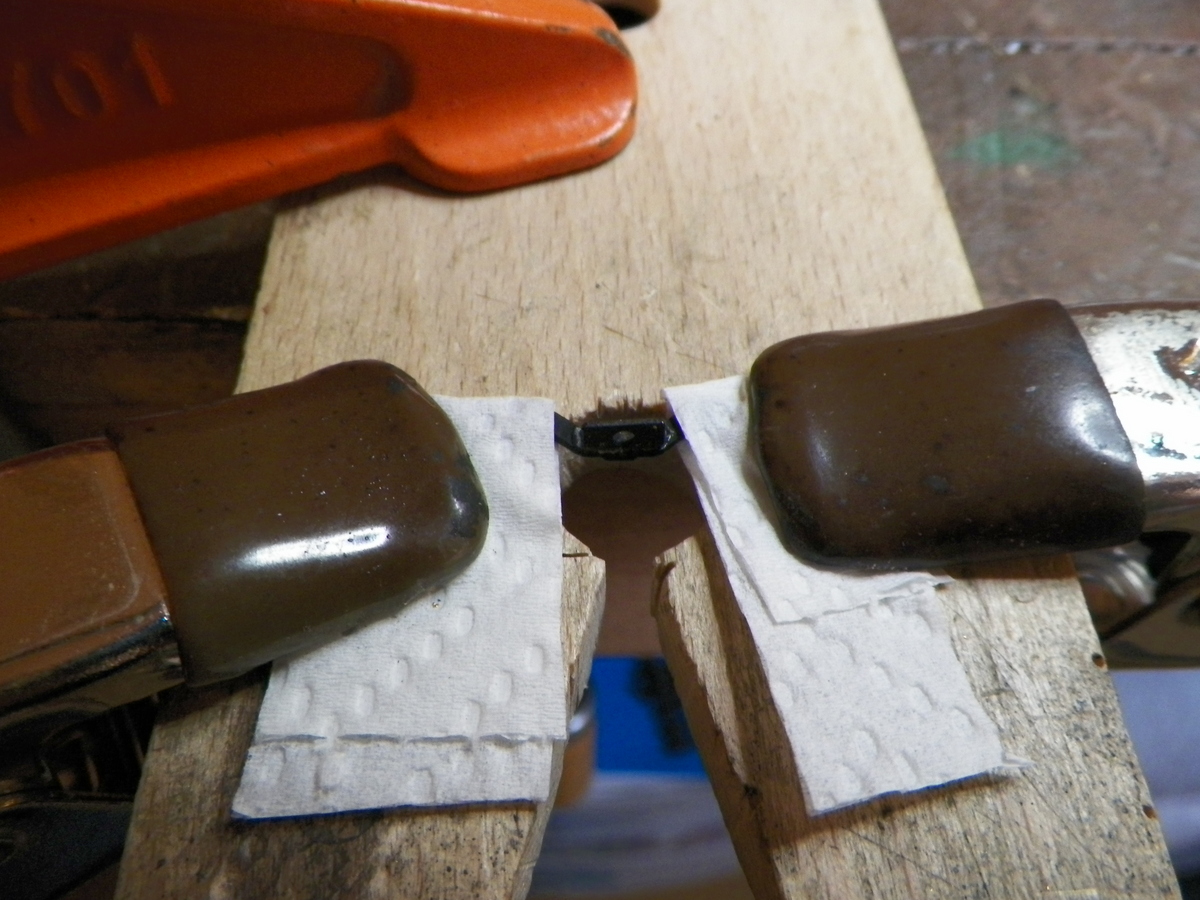
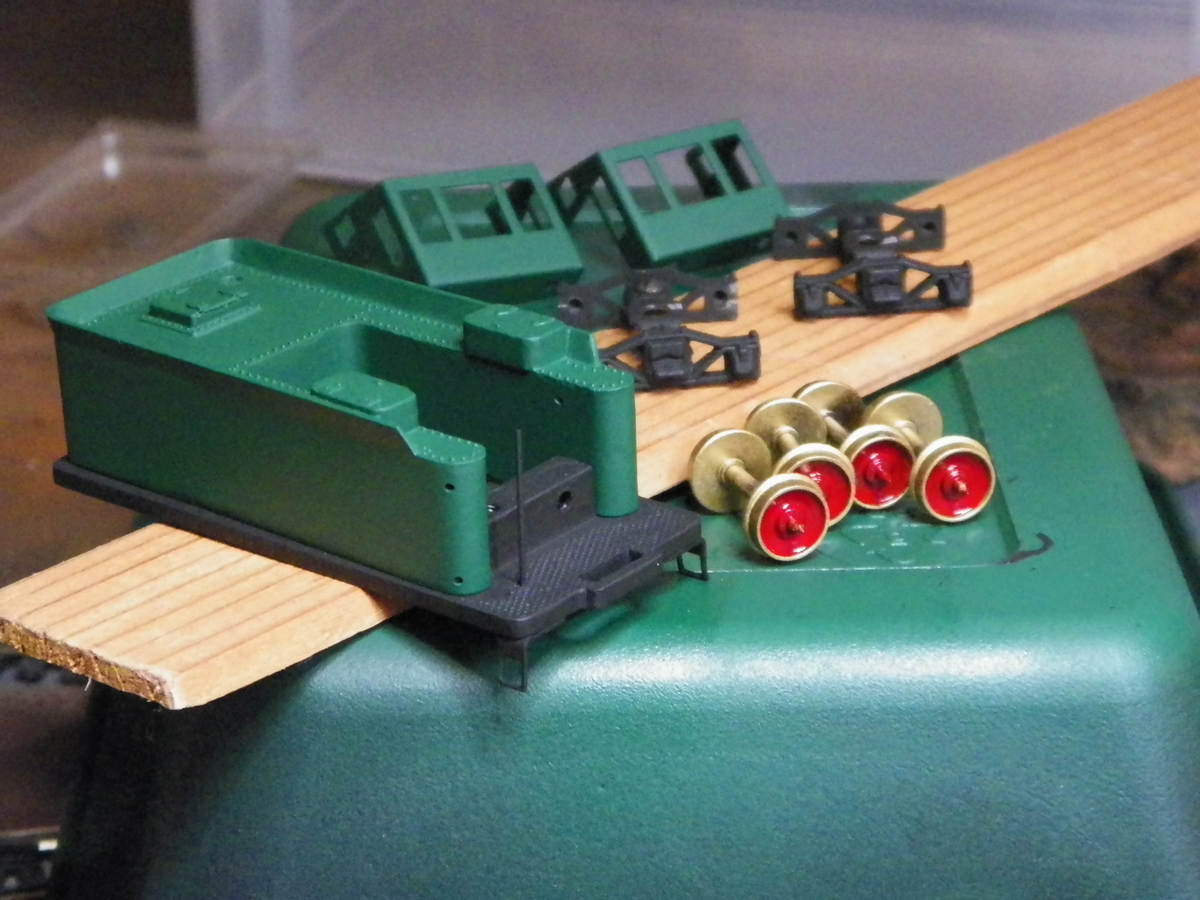
Wow. That's quite a mounting lug on that yoke Ken. This photo shows what I came up with for the mounting lug that I'll super glue to the yoke (if that glue doesn't hold, maybe I'll try a tiny brass pin with it?). Then, the other things in this photo are the running boards from the Mogul that have mounting holes for Mogul equipment filled in with JB Weld. I briefly considered leaving them and mounting the equipment on the Belle, but I decided to leave it "stock" as much as possible presently. The clamps are holding the yoke which is slightly warped. We'll see if this works. I figured about the time I applied enough pressure to bend it, I'd break it. Maybe apply some heat? The dark red is what I'm considering for the drivers presently.
|
|
Country: USA ~
Posts: 2087 ~
Member Since: March 16 2013 ~
Last Visit: July 05 2018
|
Alert Moderator
|
|
|
|
Posted - October 08 2015 : 11:38:25 AM
|
| I've been searching for early locomotive color schemes and came across this content regarding Baldwin Locomotive paint work circa 1860-70 . . . http://www.pacificng.com/template.php?page=/ref/locobuilders/blw/style/baldwinstyles2.htm . . . wish I had the skill to do some miniature pin striping.
|
|
Country: USA ~
Posts: 2087 ~
Member Since: March 16 2013 ~
Last Visit: July 05 2018
|
Alert Moderator
|
|
|
|
Posted - October 08 2015 : 11:48:37 AM
|
i am like you barry,so i cheat and use pin strip/lining decals,ken
catfordken
if you cannot see the light at the end of the tunnel,try turning around
|
|
Country: United Kingdom ~
Posts: 8294 ~
Member Since: September 28 2006 ~
Last Visit: October 20 2021
|
Alert Moderator
|
|
|
|
Posted - October 08 2015 : 7:21:55 PM
|
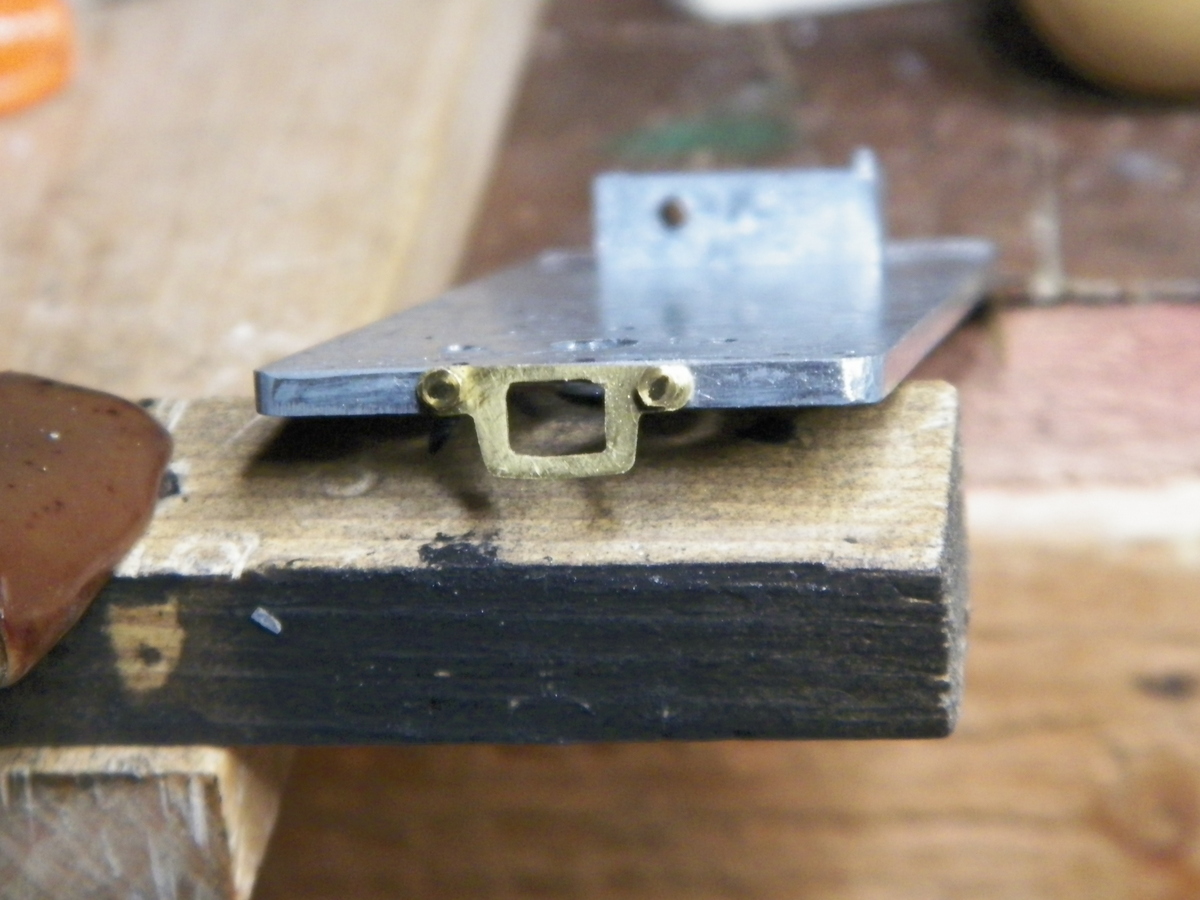
Got the mounting lug fastened (though should cure more) and went to drill more cleanly through lower guide bar hole and the fine edge wall cracked, so aborted the drilling to reinforce the wall of the hole with some JB Weld. These things reminding me to be patient and that another reason for missing yokes is that they broke before the model got assembled? Pluggin' away at it . . .


Looks like maybe I should fill in those mold depressions on the yoke while I'm at it.
|
|
Country: USA ~
Posts: 2087 ~
Member Since: March 16 2013 ~
Last Visit: July 05 2018
|
Alert Moderator
|
|
|
|
Posted - October 08 2015 : 7:26:12 PM
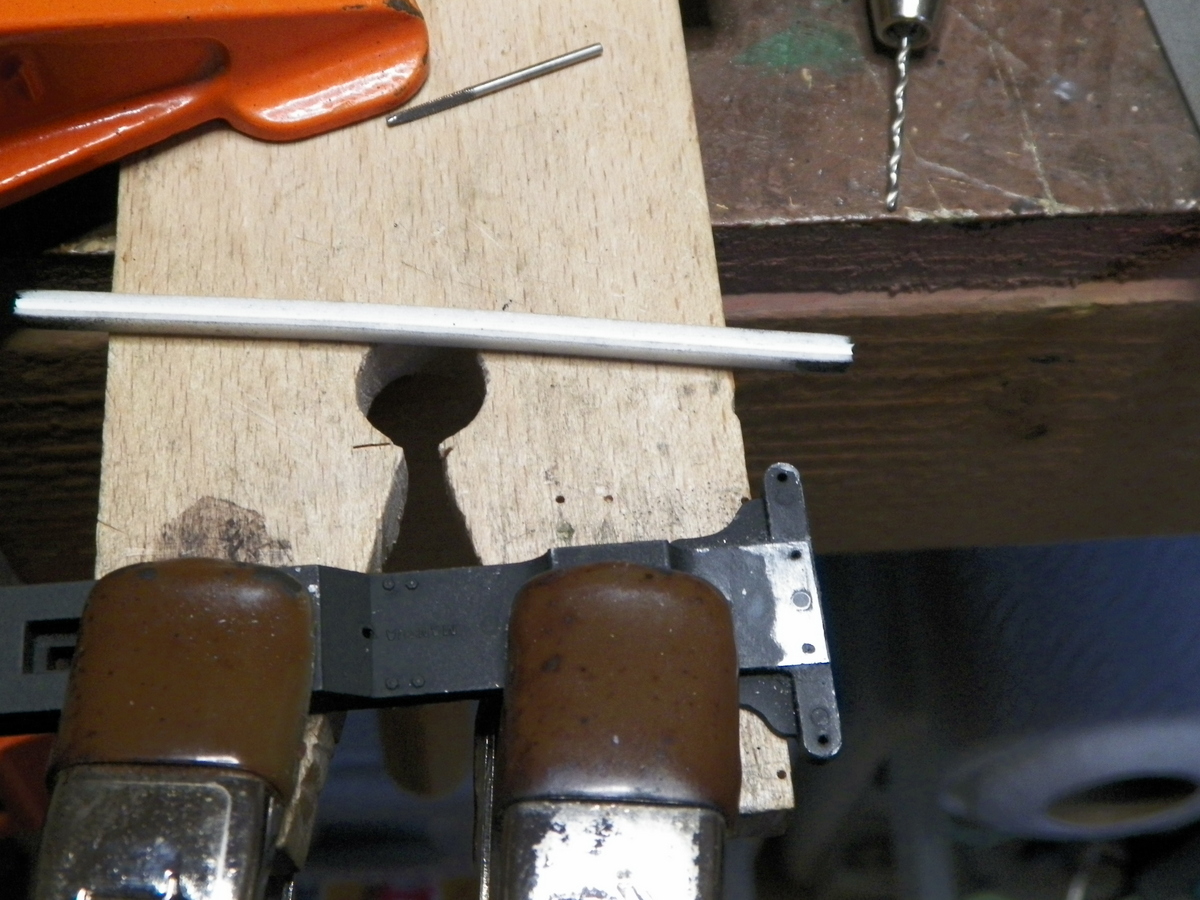
|
| By the way, I put that yoke in the oven while it was still clamped between the metal plates as in the earlier photo; preheated to about 300 and then turned the oven off as soon as I put the package in and left it maybe a half-hour. Maybe it was sheer luck, or a coincidence, or whatever, but the warp is out of the yoke. I'd like to think heat facilitated that?
|
|
Country: USA ~
Posts: 2087 ~
Member Since: March 16 2013 ~
Last Visit: July 05 2018
|
Alert Moderator
|
|
|
|
Posted - October 14 2015 : 3:13:02 PM
|
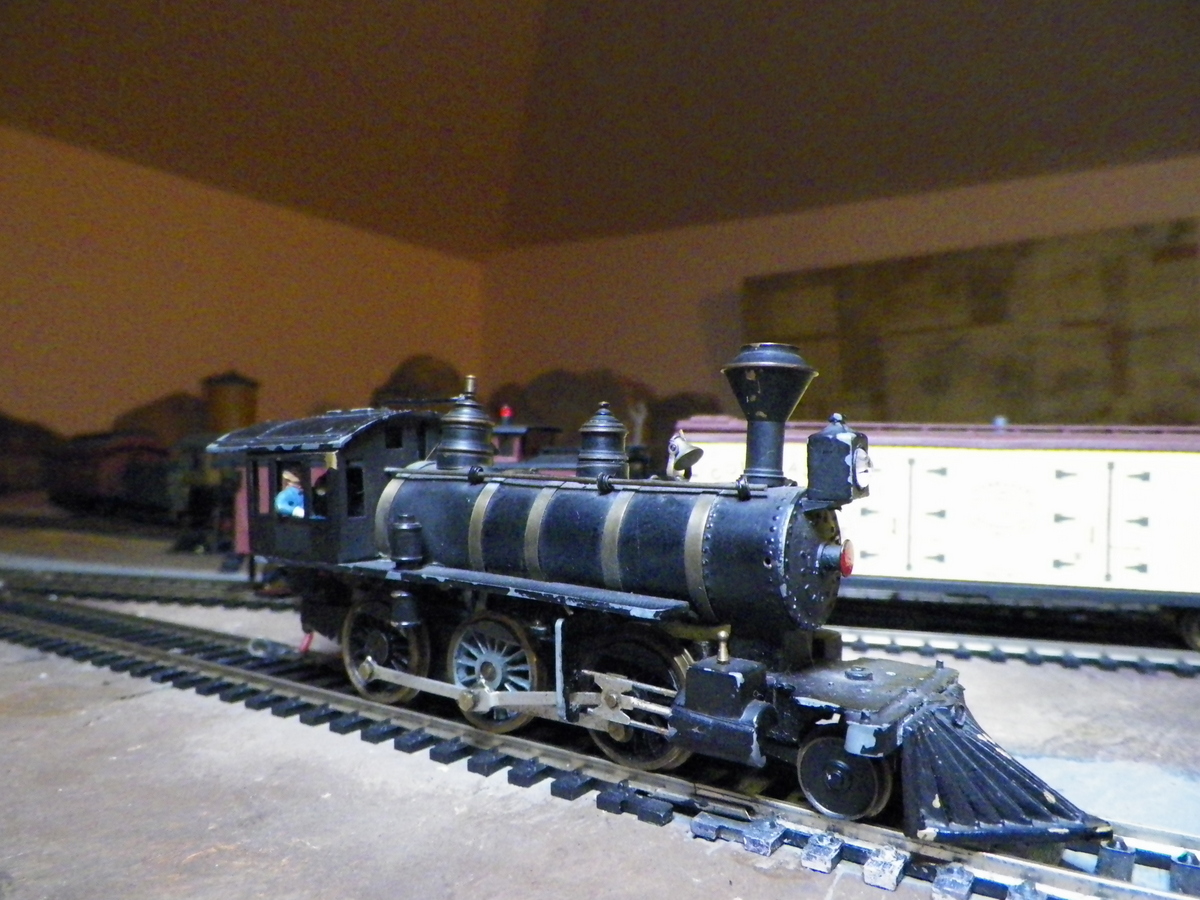
I decided it was time to do something, being yet undecided about paint scheme. So I went for good old black for the frame and such. This needs another spray yet. Basic Testors flat black.
|
|
Country: USA ~
Posts: 2087 ~
Member Since: March 16 2013 ~
Last Visit: July 05 2018
|
Alert Moderator
|
|
|
|
Posted - October 14 2015 : 3:22:44 PM
|
looking good barry got me drooling like a bulldog,ken
catfordken
if you cannot see the light at the end of the tunnel,try turning around
|
|
Country: United Kingdom ~
Posts: 8294 ~
Member Since: September 28 2006 ~
Last Visit: October 20 2021
|
Alert Moderator
|
|
|
|
Posted - October 14 2015 : 9:53:45 PM
|
That black on the frame has a nice graphite shade that really looks good on the parts. It's been fun watching this project come together. Keep the pictures coming. 
Carpe Manana!
|
|
Country: USA ~
Posts: 2353 ~
Member Since: September 17 2013 ~
Last Visit: April 24 2024
|
Alert Moderator
|
|
|
|
Posted - October 15 2015 : 8:41:00 PM
|
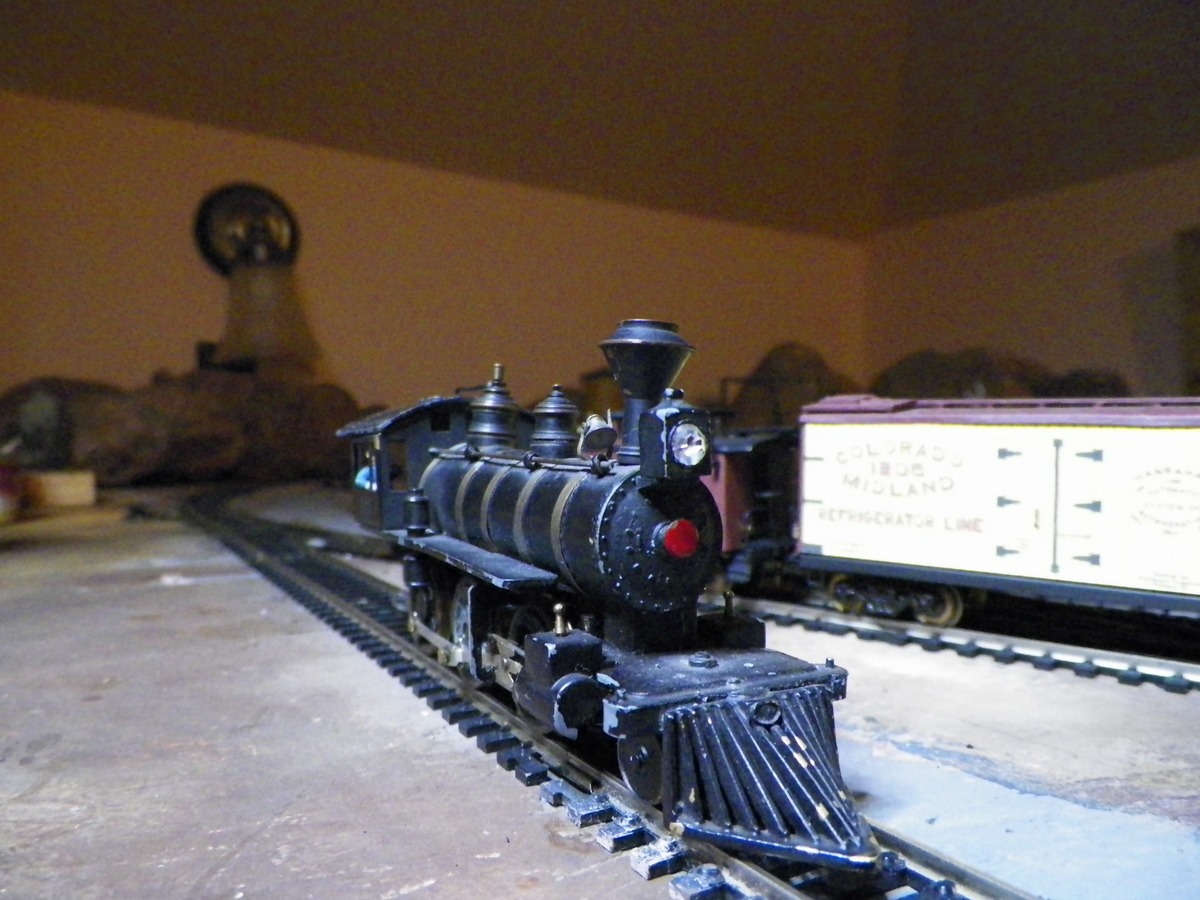
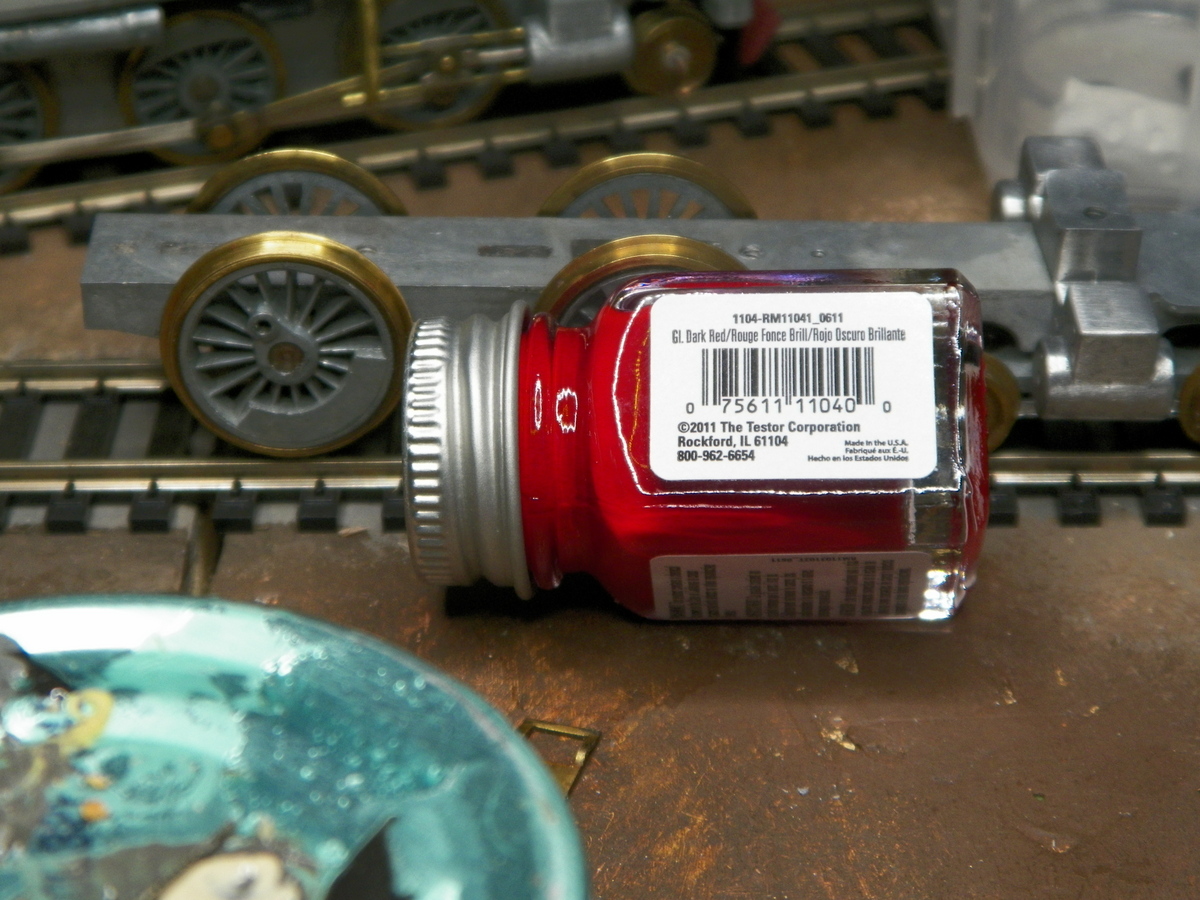
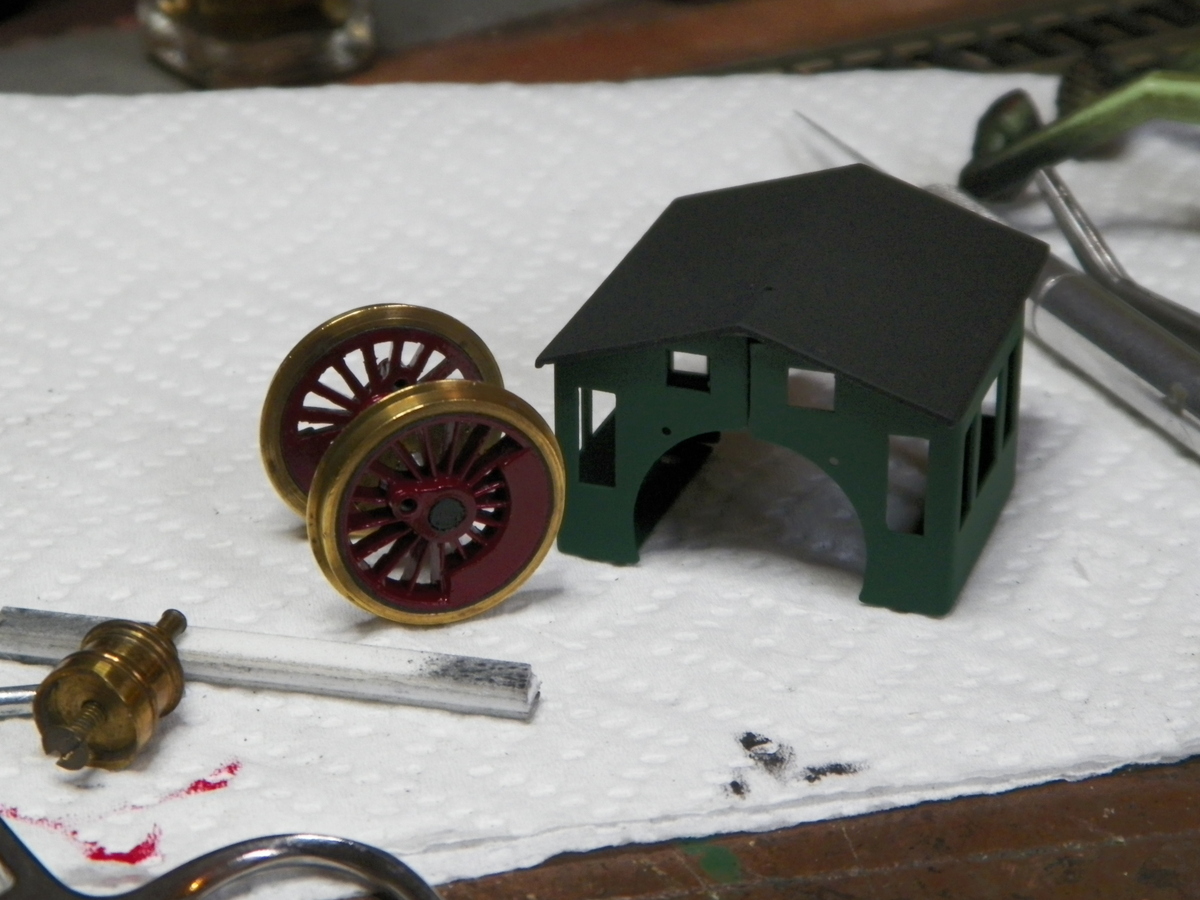
Temptation got the best of me today and I busted open the bottle of Testors dark red thinking worse case scenario, I could remove it. Now I'm kind of liking it.
|
|
Country: USA ~
Posts: 2087 ~
Member Since: March 16 2013 ~
Last Visit: July 05 2018
|
Alert Moderator
|
|
|
|
Posted - October 15 2015 : 10:08:00 PM
|
That particular shade of red (bordering on maroon) is a color that some railroads used on crack passenger cars. It'll make the new engine look like the queen of the fleet. That's appropriate to the name "Belle of the 80's."
It looks like you're going to dress the old girl up in regal fashion.
Carpe Manana!
|
|
Country: USA ~
Posts: 2353 ~
Member Since: September 17 2013 ~
Last Visit: April 24 2024
|
Alert Moderator
|
|
|
|
Posted - October 16 2015 : 12:48:44 PM
|
Yeah Don. I was thinkin' it could look pretty fine if the driver's had a little pin-striping; maybe even whitewalls, but I'm a bit skeptical of making a mess out of them. I am going to try to have it exude the flavor of an 1860's locomotive, just maybe not one that Baldwin really dressed up. Put some brass paint on the plastic pilot wheels (one side actual brass/one side plastic). Looks a bit funky to me presently, but I'm thinkin' when that paint has hardened good, I can sand it off a bit, and then with the accumulation of a little rail dirt . . .
|
|
Country: USA ~
Posts: 2087 ~
Member Since: March 16 2013 ~
Last Visit: July 05 2018
|
Alert Moderator
|
|
|
|
Posted - October 18 2015 : 11:26:17 AM
|
barry have you got the complete belle,ie any bits you still need,ken
catfordken
if you cannot see the light at the end of the tunnel,try turning around
|
|
Country: United Kingdom ~
Posts: 8294 ~
Member Since: September 28 2006 ~
Last Visit: October 20 2021
|
Alert Moderator
|
|
|
|
Posted - October 18 2015 : 8:10:33 PM
|
Ken, I guess I'll find out what I'm missing as I assemble it. Initially, I thought I would assemble it without any paint or finish work, then one thing led to another, you know?
I know I don't have the ornamental piece that goes under the headlight, but I'm thinking that's OK right now. I've got a tender, but I need to figure out what to do for trucks. I have some nice Precision Scale brass trucks (which I like for the way they conduct; with the steel wheels), but they're Bettendorf style. I've got some other arch bar trucks which are not as good conductors, but may end up using them to start ? ? ? We'll see. Got a bit more paint work done (seems like I've been getting a bunch done past few days; probably going to get bombed with household obligations pretty quick). Those pilot wheels are going to require some TLC to get them looking decent.
|
|
Country: USA ~
Posts: 2087 ~
Member Since: March 16 2013 ~
Last Visit: July 05 2018
|
Alert Moderator
|
|
|
|
Posted - October 22 2015 : 10:46:33 PM
|
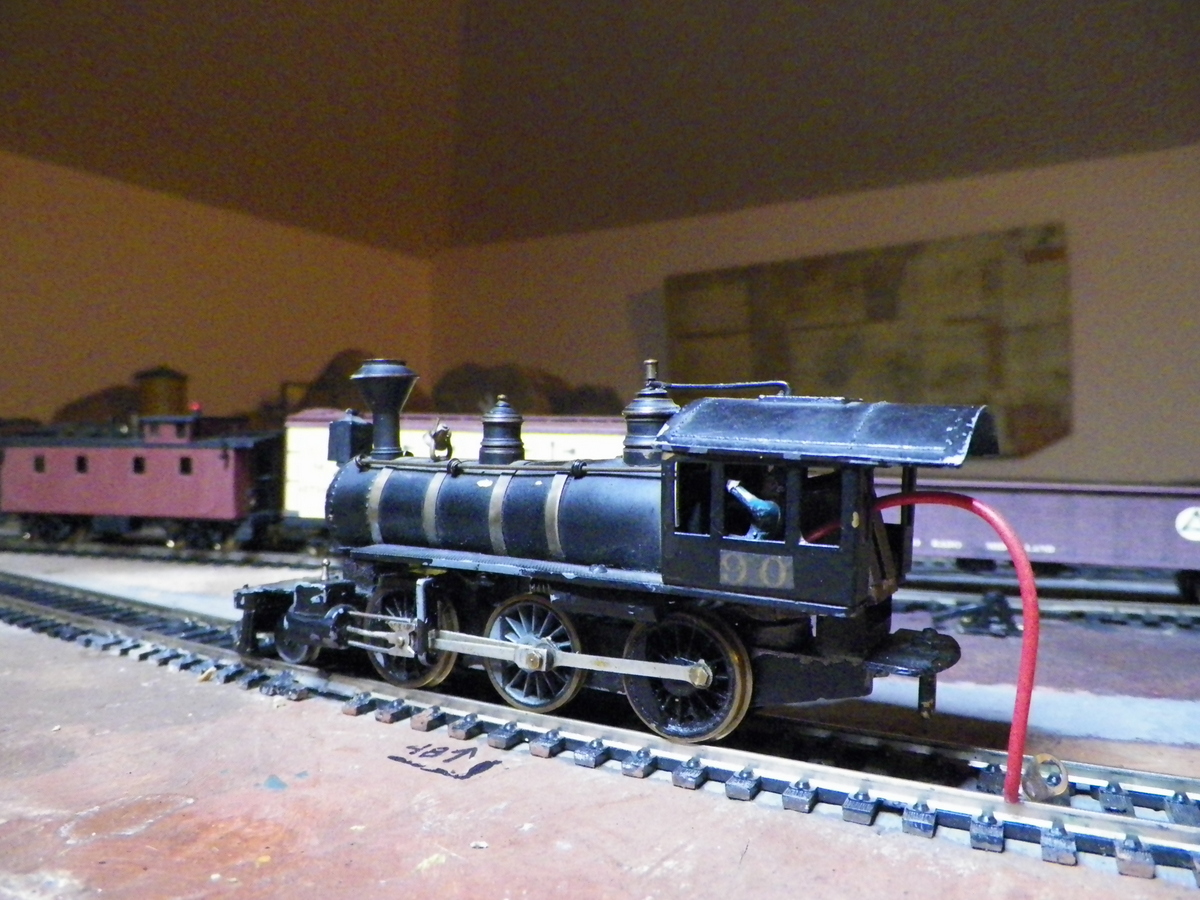
A bit of assembly. It's going slow because of other projects, but I should enjoy this like a fine cigar or glass of whiskey.
|
|
Country: USA ~
Posts: 2087 ~
Member Since: March 16 2013 ~
Last Visit: July 05 2018
|
Alert Moderator
|
|
|
|
Posted - October 23 2015 : 09:21:22 AM
|
Ooh, that looks good. Definitely the crack locomotive of the fleet.
-Peter
|
|
Country: USA ~
Posts: 97 ~
Member Since: June 11 2015 ~
Last Visit: April 07 2024
|
Alert Moderator
|
|
|
|
Posted - October 23 2015 : 8:52:35 PM
|
A bit of a set back, though I did need to take it apart again which I was not looking forward to. Got a reminder about "checking fit and assembly before painting", Ha! Anyway, pilot was mounting crooked with the way the mounting hole was, so filled the hole for re-drill. And, the mounting lug that I had super-glued to the guide bar yoke came off during this take apart. Ken, I'll tell you, that steam chest fits in the frame like a fine leather glove; you have to give it just the right little "pop" to get it out.
Also had been looking at (scrutinizing) the hubs and jumped ahead and painted them black. Considered brass, but I didn't think I could get it to match the brass in the drivers.

|
|
Country: USA ~
Posts: 2087 ~
Member Since: March 16 2013 ~
Last Visit: July 05 2018
|
Alert Moderator
|
|
|
|
Posted - October 23 2015 : 11:19:16 PM
|
I wonder if a mounting lug that wrapped over three sides of the yoke would make for a more sturdy gluing surface.
Carpe Manana!
|
|
Country: USA ~
Posts: 2353 ~
Member Since: September 17 2013 ~
Last Visit: April 24 2024
|
Alert Moderator
|
|
|
|
Posted - October 24 2015 : 12:34:14 AM
|
That color scheme you have going there is really awesome. I most
assuredly have to see this build when you're finished with it.
|
|
Country: USA ~
Posts: 865 ~
Member Since: September 23 2014 ~
Last Visit: May 01 2023
|
Alert Moderator
|
|
|
|
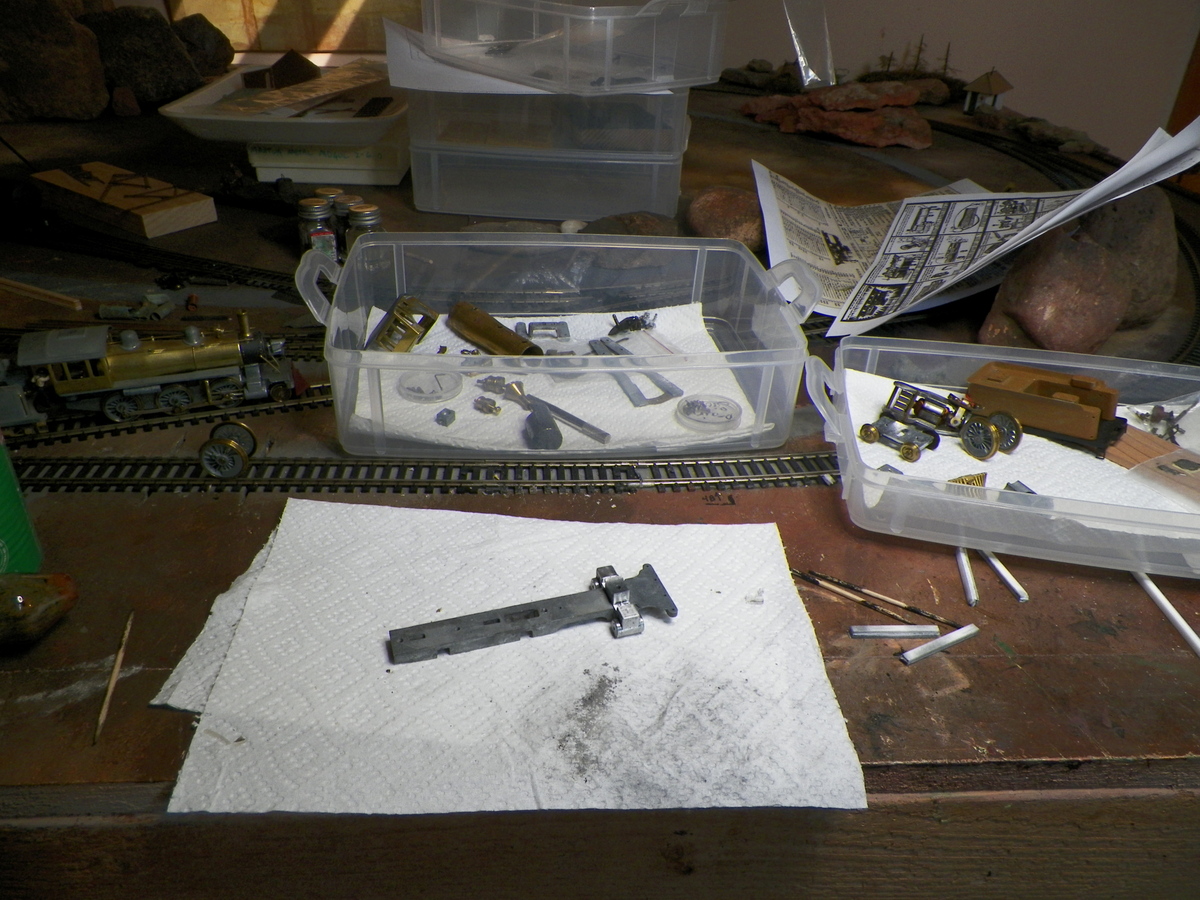
Posted - October 26 2015 : 12:34:36 PM
|
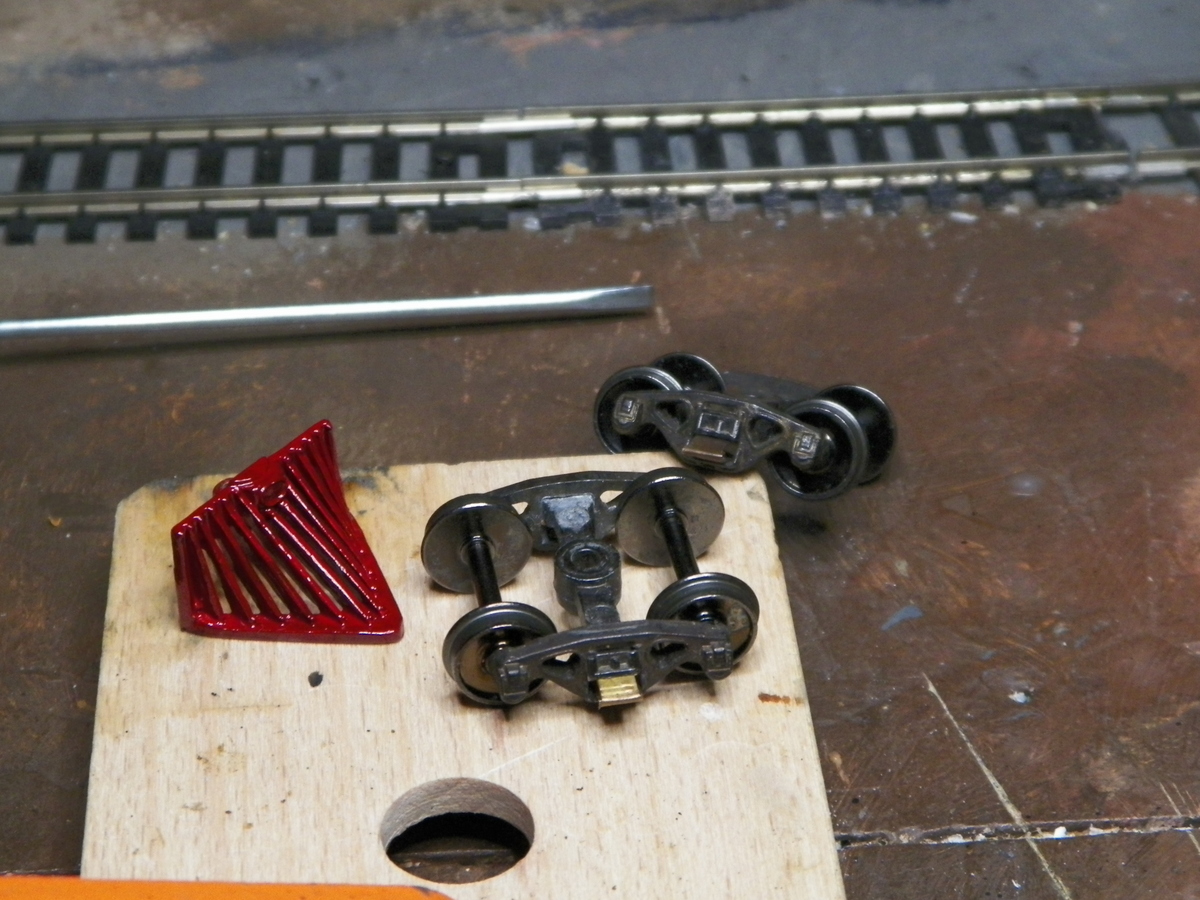
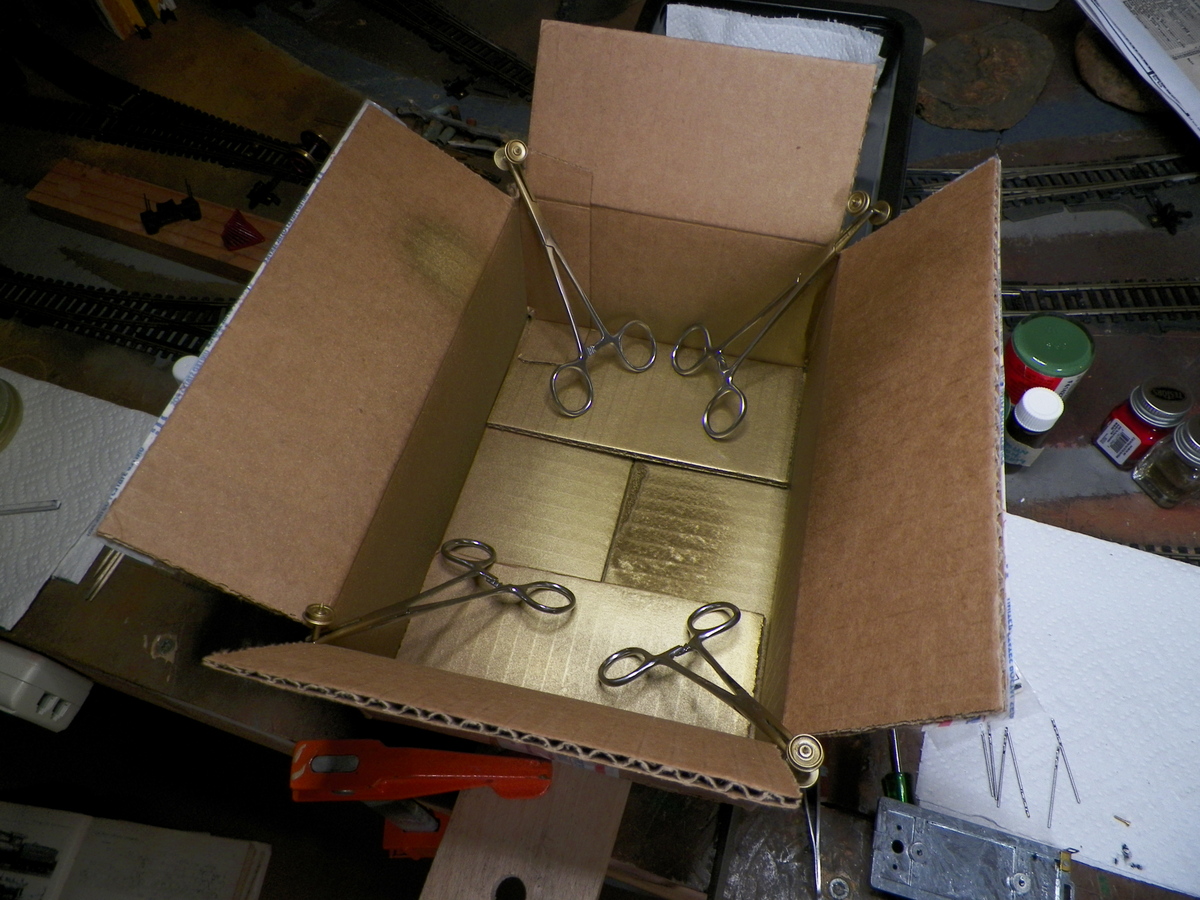
Some progress with the repair. Re-drilling the filled hole worked despite the fact that the drill migrated to the original hole. But it did take out a bit of metal along the way and the path is straighter and the pilot hangs straighter and the new threads work smoothly. Regluing the mounting lug to the guide bar yoke (after scoring the surfaces to be joined a bit more methodically) seems to have worked; strong enough to allow me to file the mounting hole out a bit since my alignment of this tiny part was less than perfect.
Looking through what trucks I have (that will conduct electricity well). I came across these that I may use to start ? ? ?
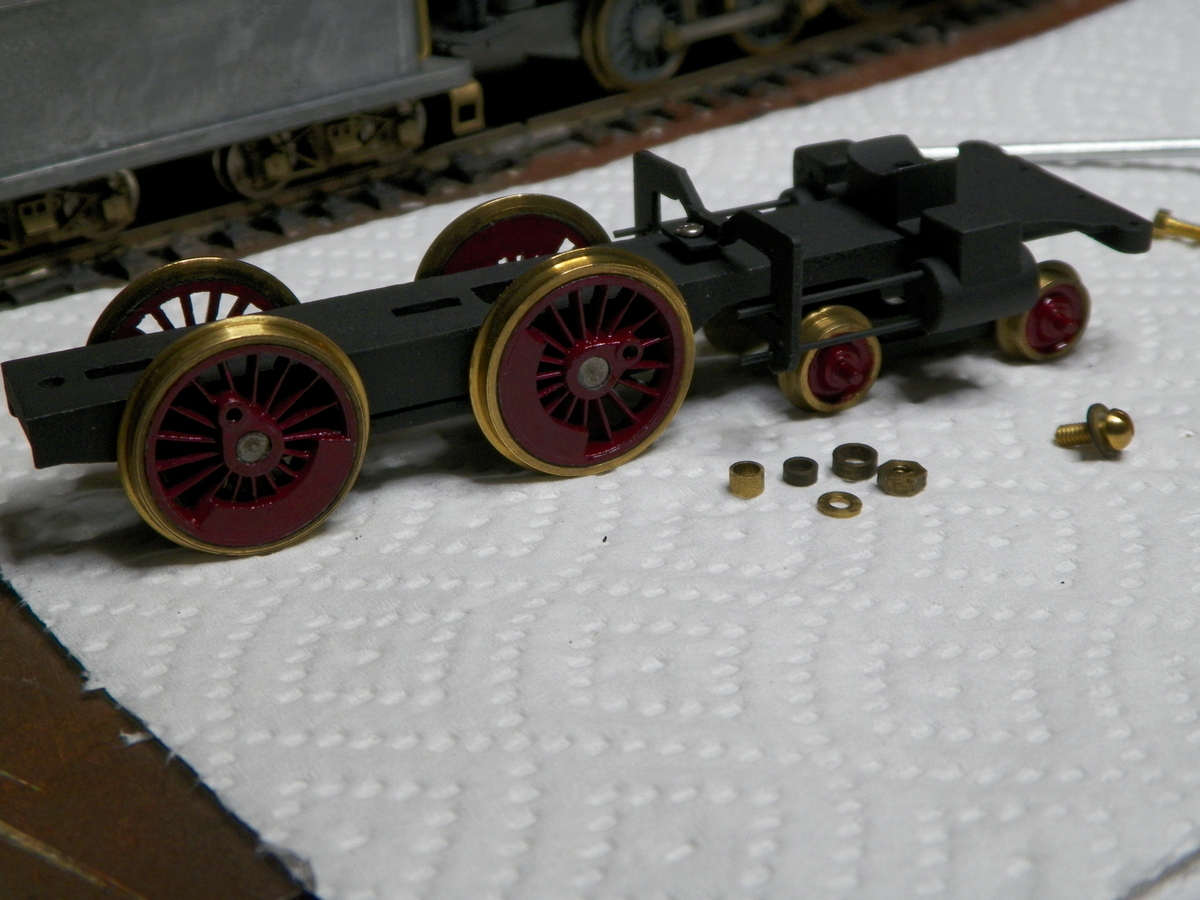
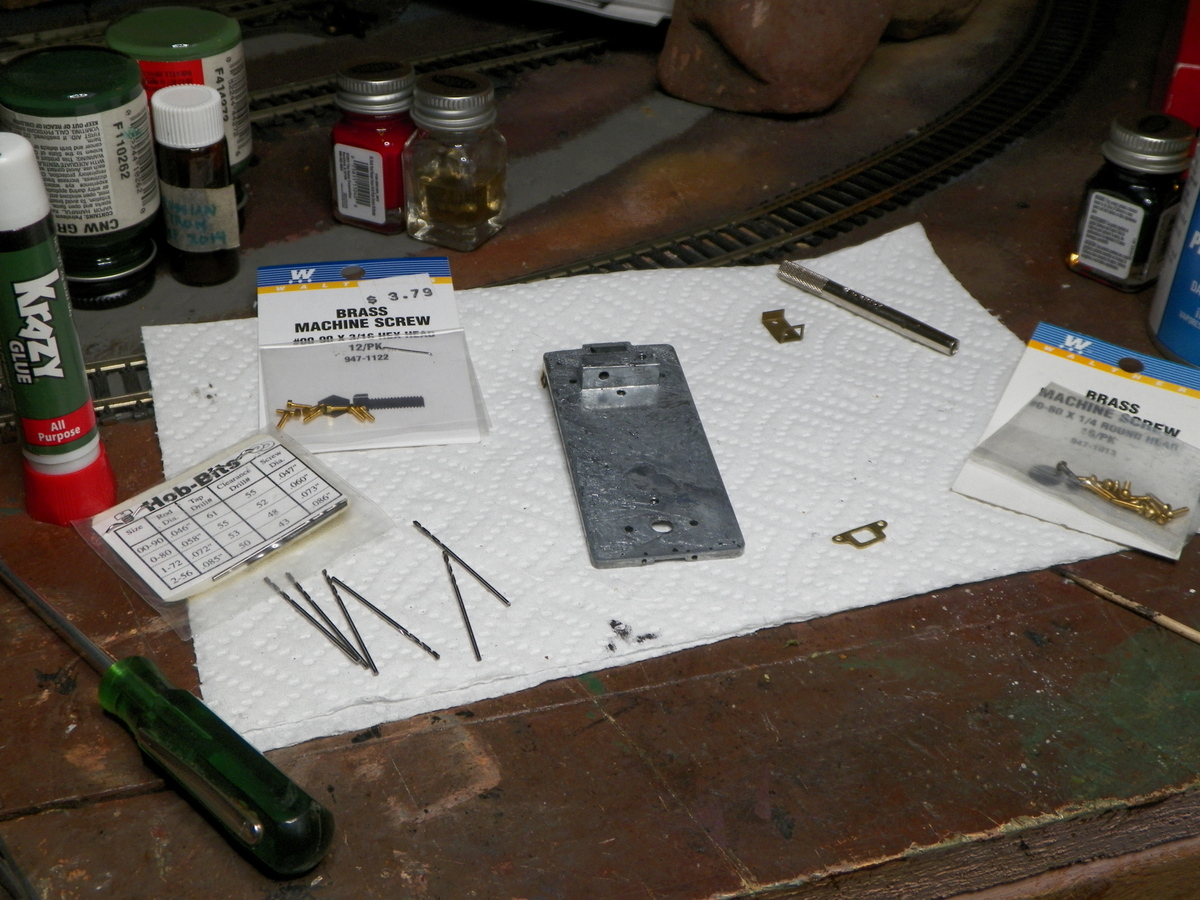
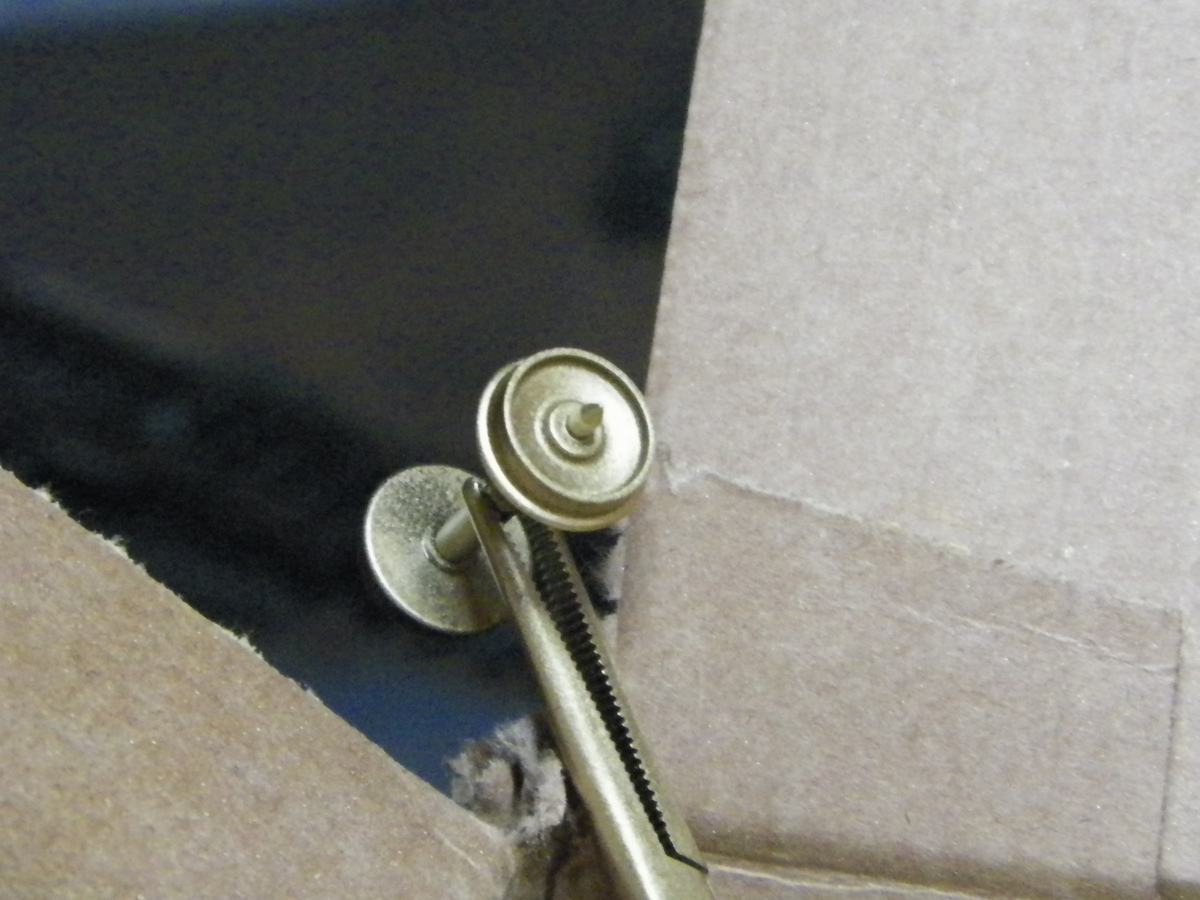
The tender frame needs a bit of work. The mounting hole on the right for the frame that hangs around the coupler (one I made earlier from some thin brass) is not quite in the right place and is stripped. Since this photo I've filled that with JB Weld for redrilling (we'll see how this one works out) . . . #90 hex head screws.
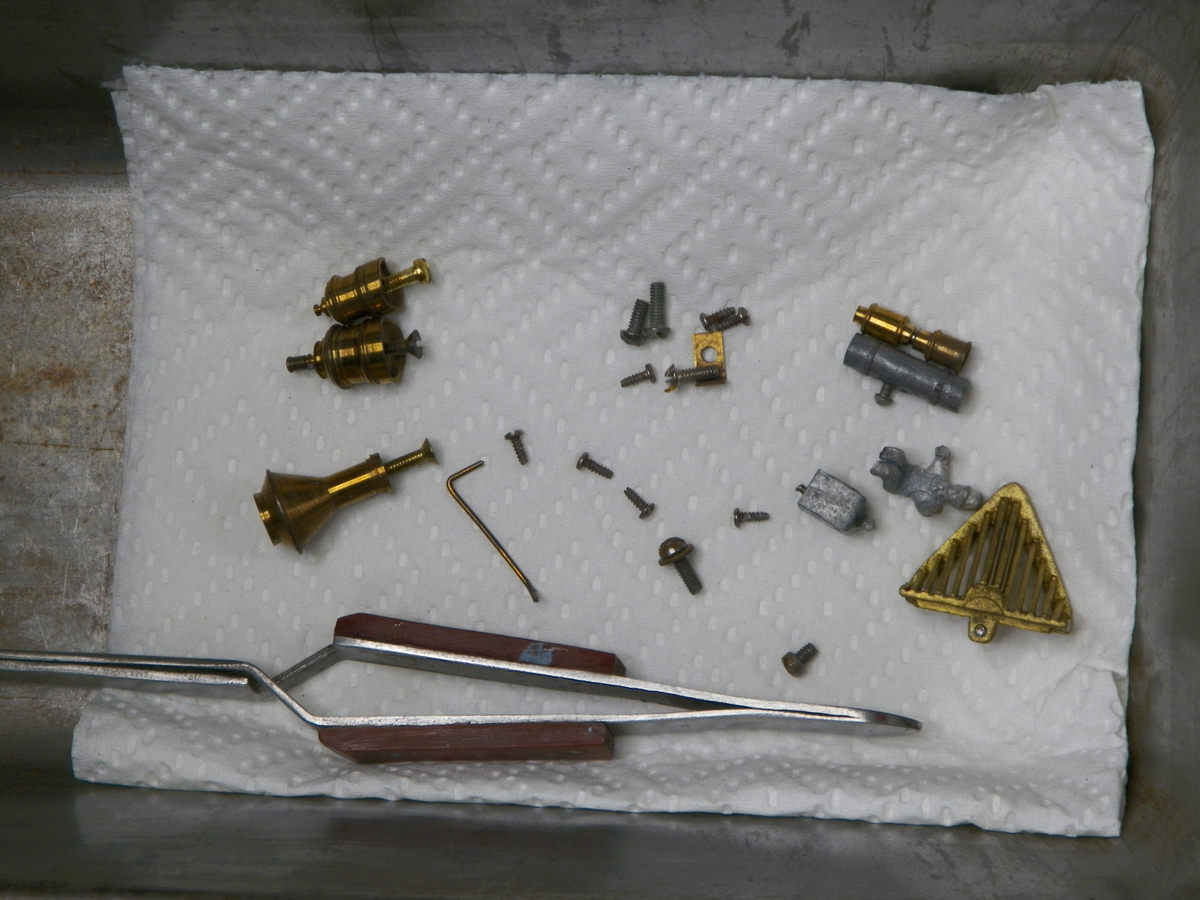
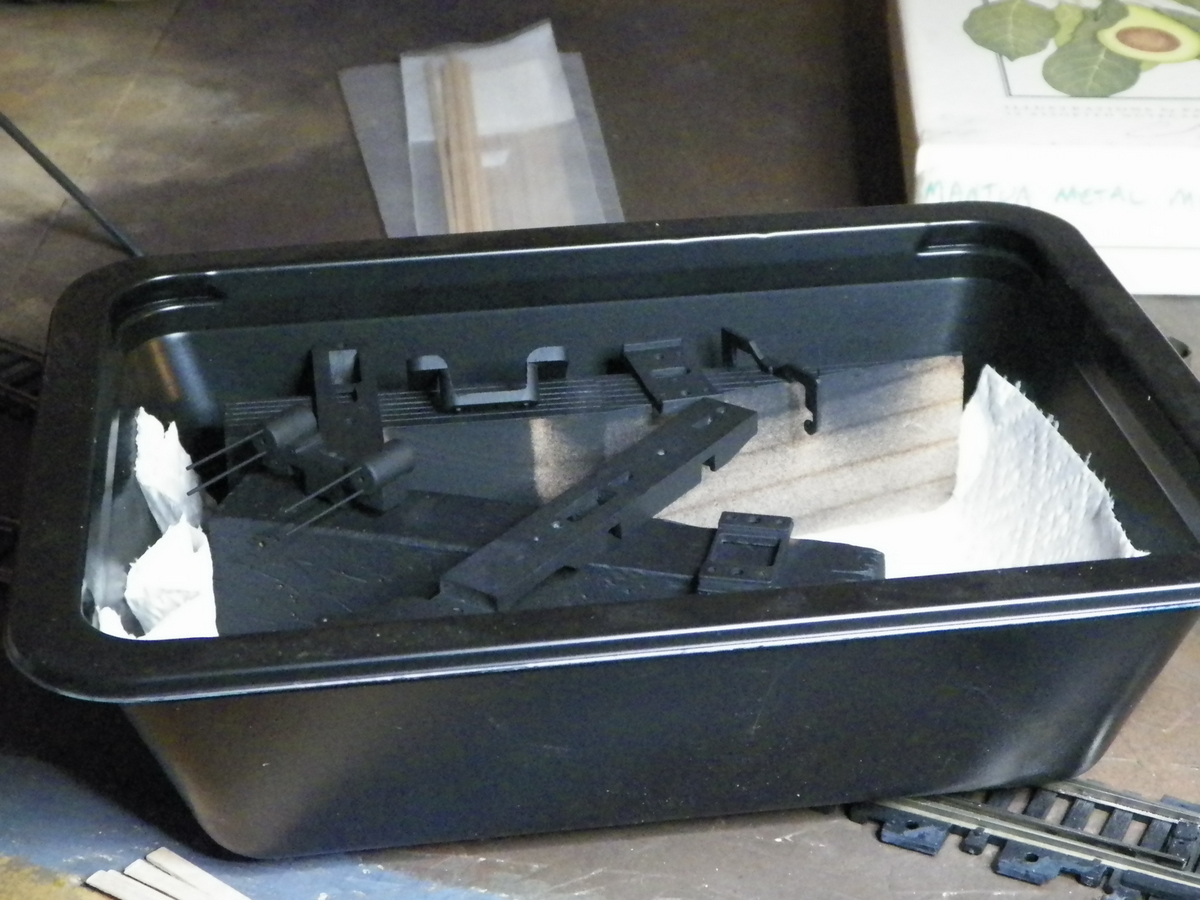
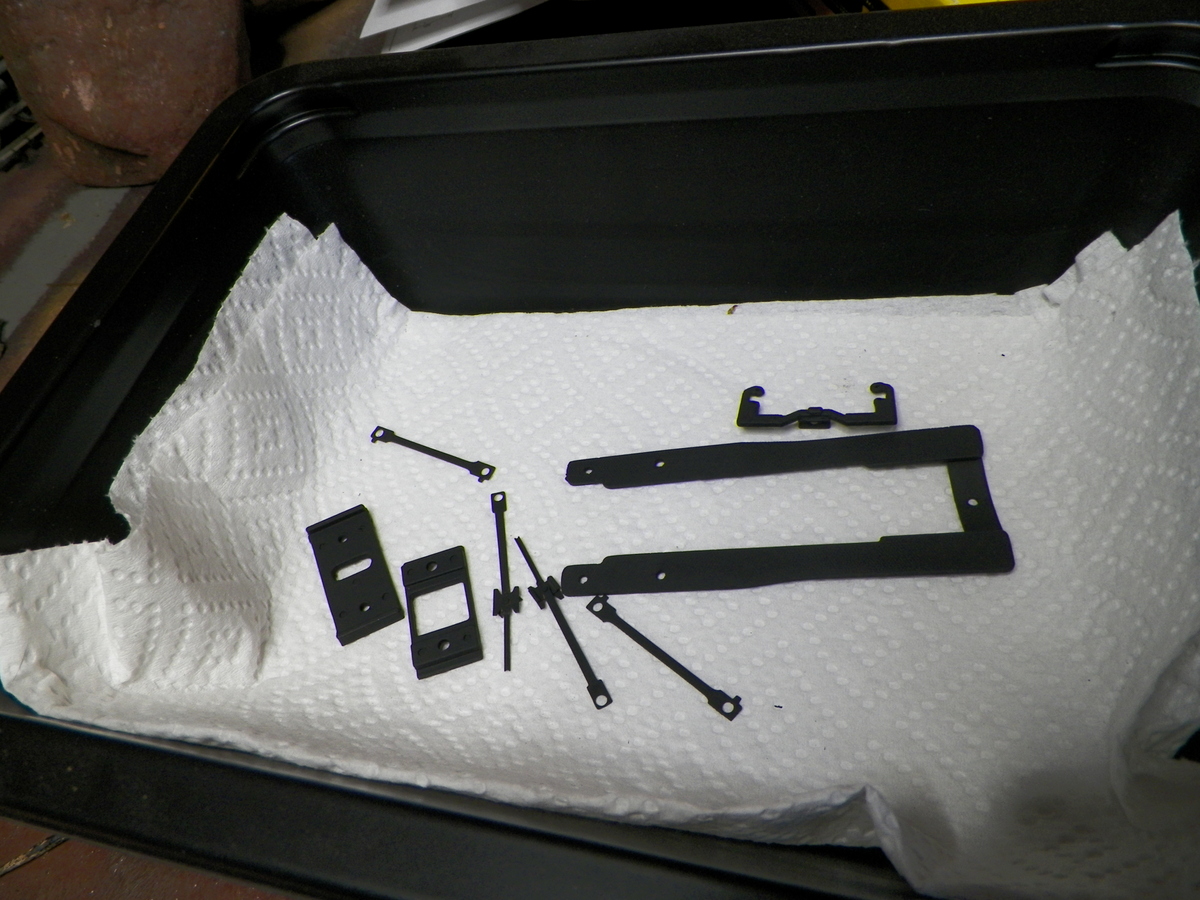
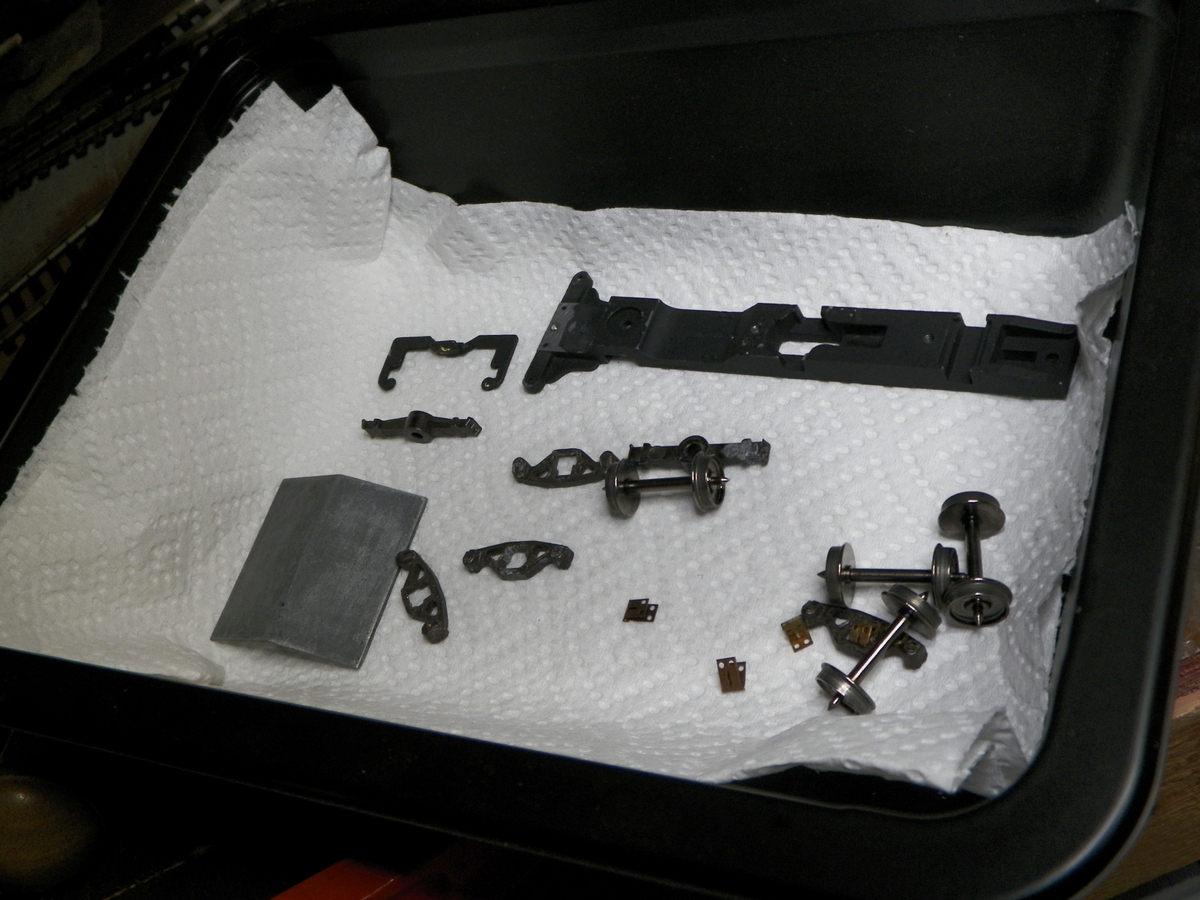
And here's a tray of parts ready for painting. We're in a bit of a cool spell today, I'd like it at least to be around 70 outside. These parts will all be flat black.
Here's the shop . . .
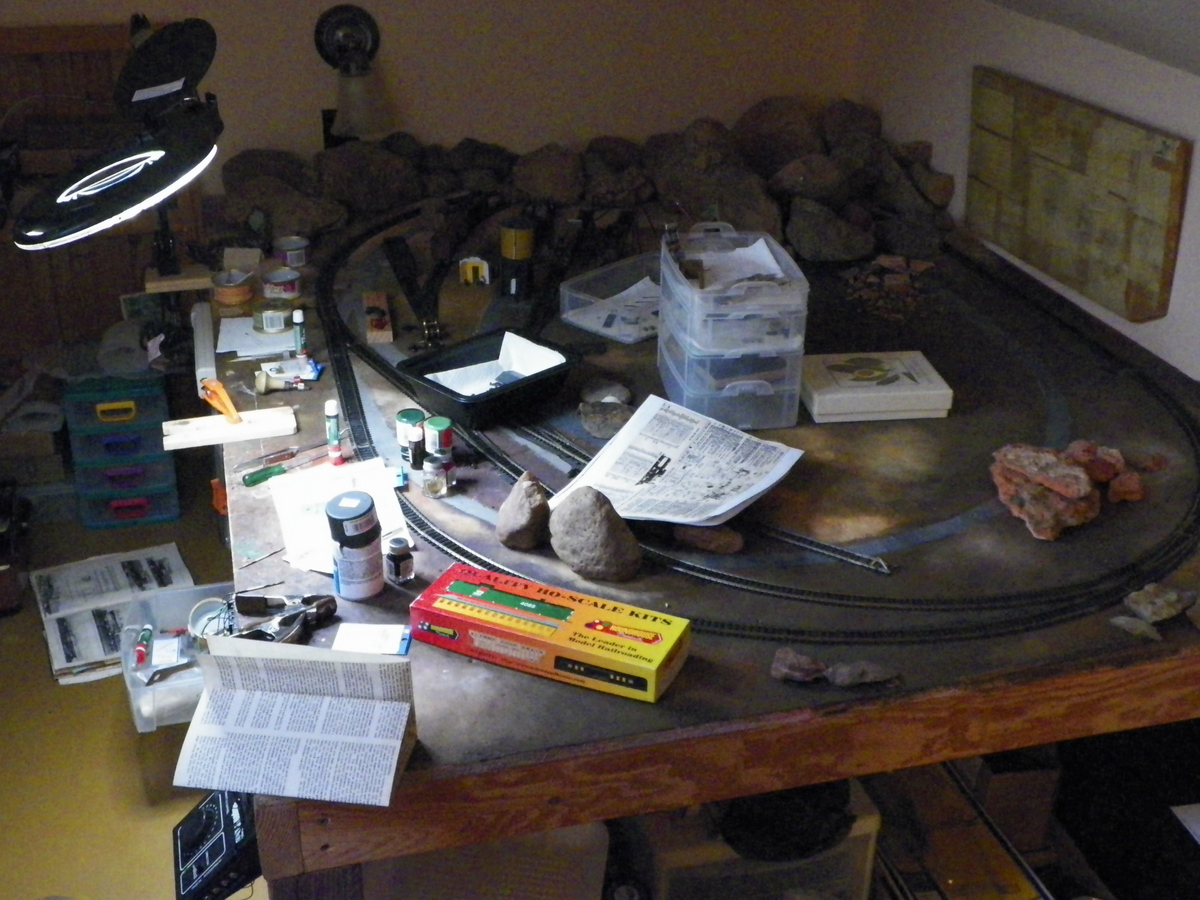
Happy Monday.
|
|
Country: USA ~
Posts: 2087 ~
Member Since: March 16 2013 ~
Last Visit: July 05 2018
|
Alert Moderator
|
|
|
|
Posted - October 26 2015 : 12:37:51 PM
|
| [The wheels in the parts to be painted tray wont be flat black. I'm going to see what "Rub n Buff" brass will do on the wheels and then go for the dark red in the center. I'm hoping the Rub n Buff will be a bit less 'granular' in appearance than brass paint ? ? ?]
|
|
Country: USA ~
Posts: 2087 ~
Member Since: March 16 2013 ~
Last Visit: July 05 2018
|
Alert Moderator
|
|
|
|
Posted - October 26 2015 : 6:40:21 PM
|
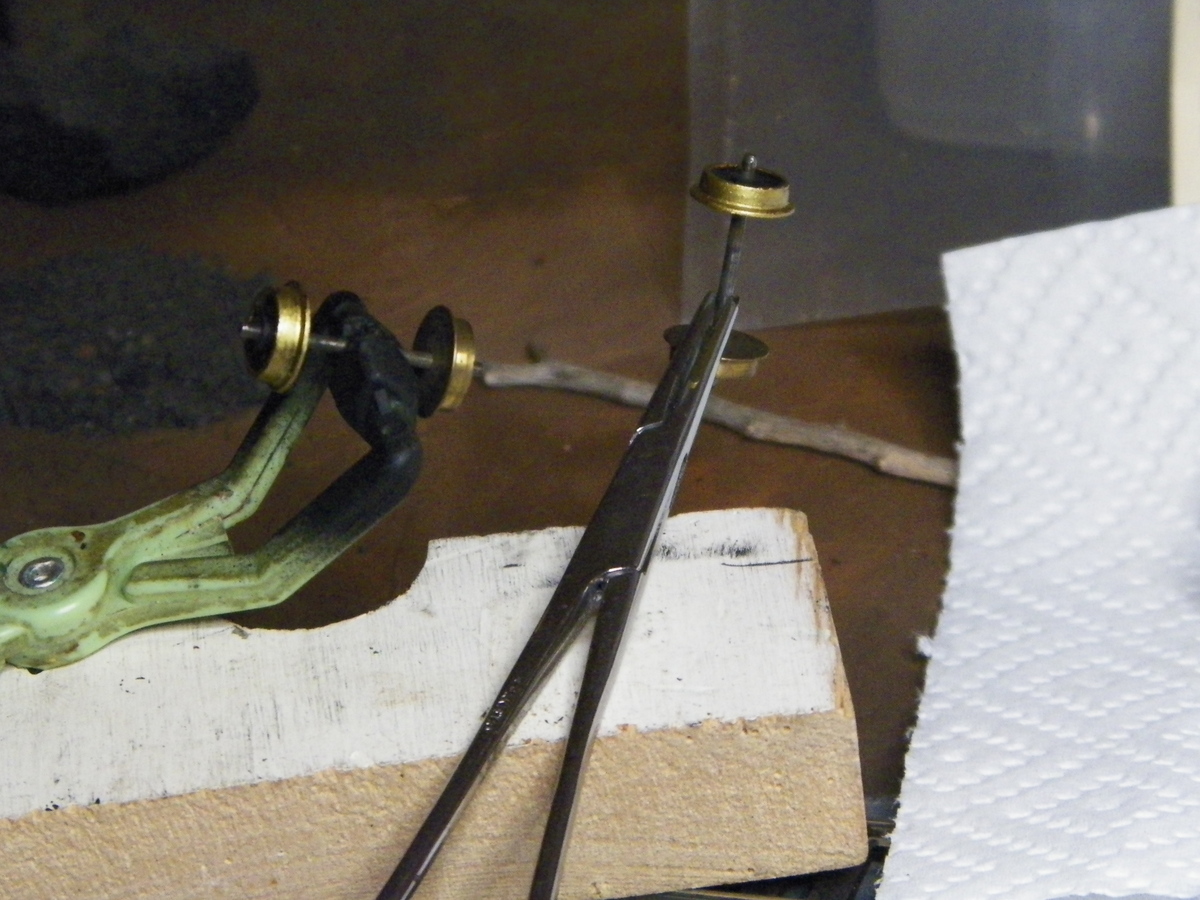
Didn't find Rub n Buff brass at the local supply, but did recall having some brass spray . . . took a chance and sprayed these wheels. We'll see how that works out; realizing I'm going to have to clean the needle tips and the rims.
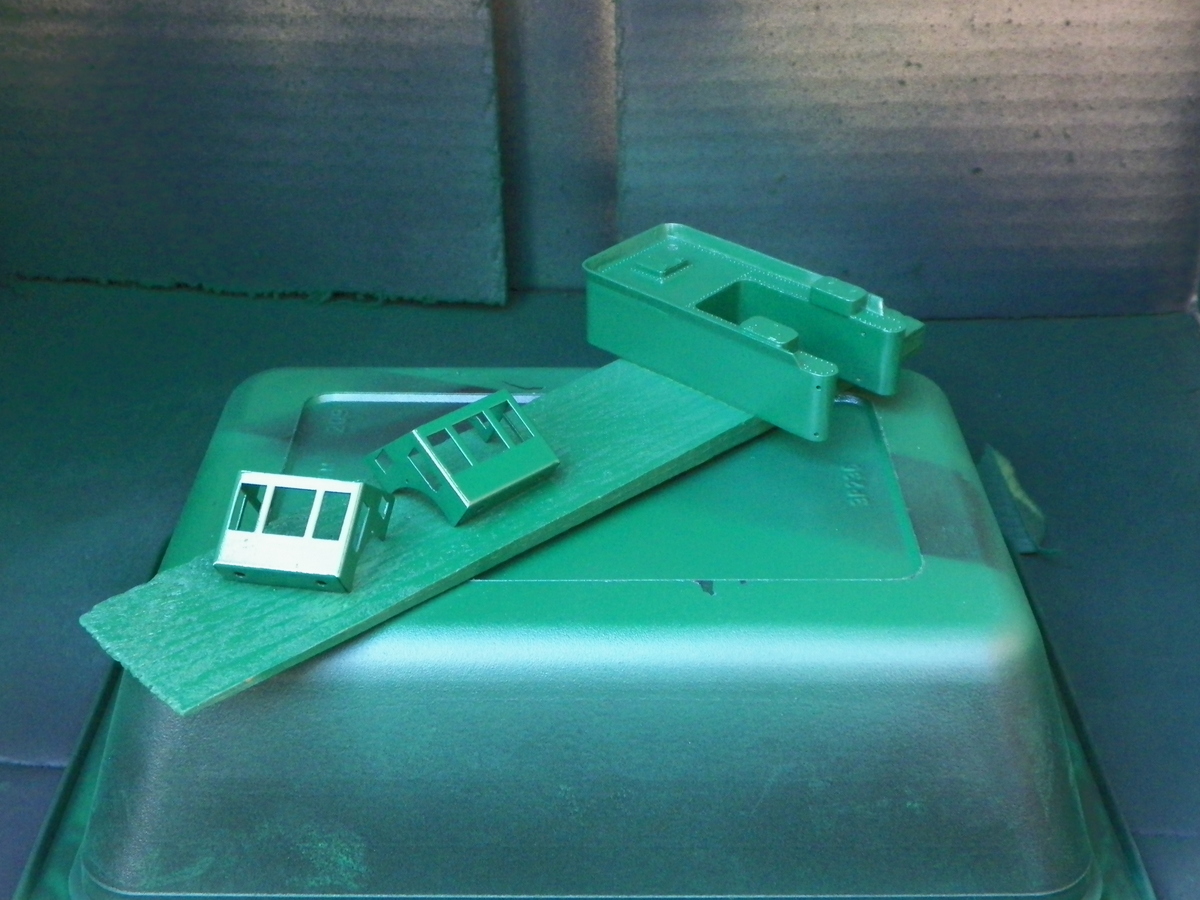
I did find some paint to try; a spray the dark green near to the railroad paint I had. This will be the first locomotive I spray, but I'm thinking there is a remote possibility I will leave it glossy rather than dull coat like I've done everything in the past. There's always paint remover, hey?
|
|
Country: USA ~
Posts: 2087 ~
Member Since: March 16 2013 ~
Last Visit: July 05 2018
|
Alert Moderator
|
|
|
|
Posted - October 26 2015 : 7:02:53 PM
|
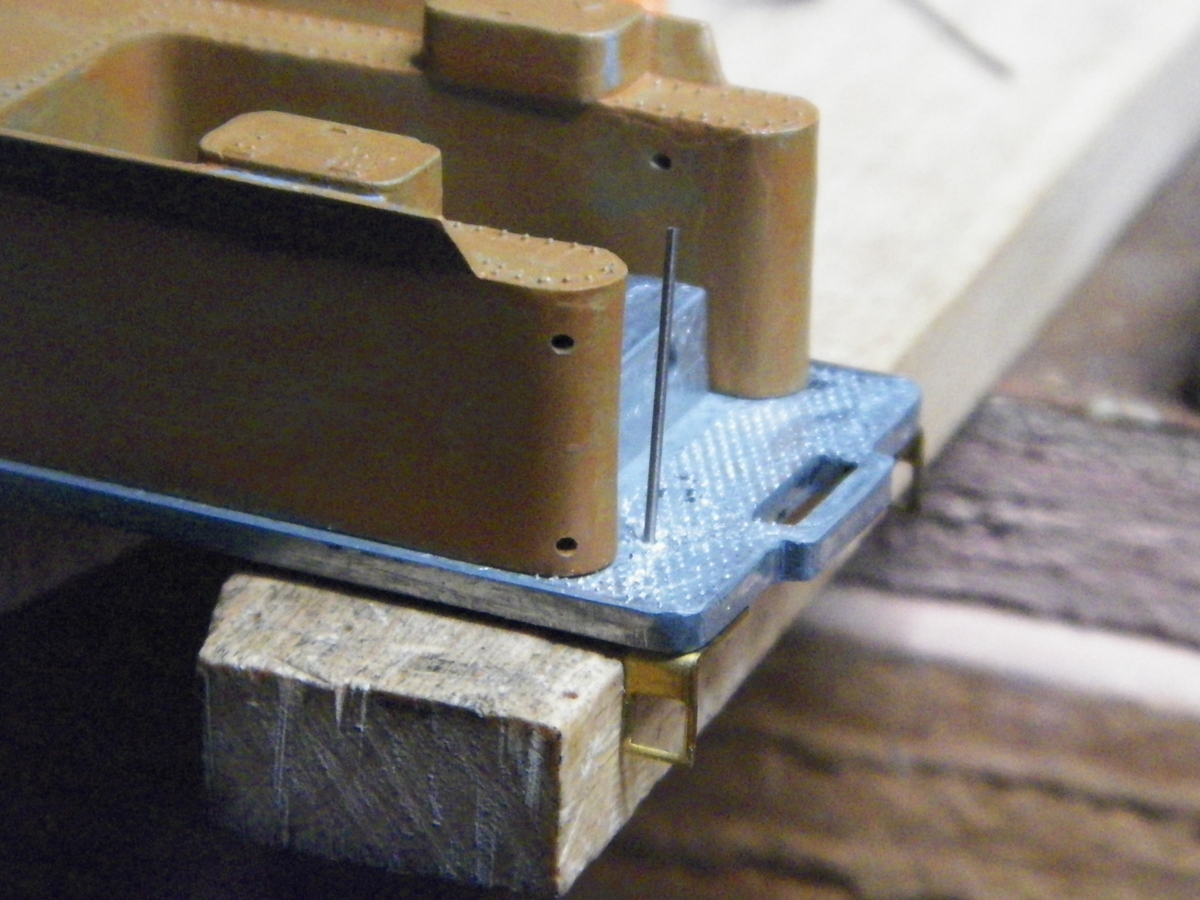
http://earthspotter.com/railroad-workers-pointing-at-damage-caused-by-artillery-fire-on-the-steam-locomotive-named-fred-leach-and-its-tender-during-the-american-civil-war/
I found this photo while looking for good pictures of an 1860 era locomotive and tender. If you follow the link above, you can click on the image and make it even larger, and if you save it to your computer and then enlarge it in your .jpg viewer . . . the resolution is incredible.
|
|
Country: USA ~
Posts: 2087 ~
Member Since: March 16 2013 ~
Last Visit: July 05 2018
|
Alert Moderator
|
|
|
|
Posted - October 26 2015 : 7:06:51 PM
|
| You don't even need to save it to your computer. You can enlarge it right at the web site. Check out what appears to be a young boy on the tender . . . maybe a young lad, off to war, serving as a fireman ?
|
|
Country: USA ~
Posts: 2087 ~
Member Since: March 16 2013 ~
Last Visit: July 05 2018
|
Alert Moderator
|
|
|
|
Posted - October 27 2015 : 12:39:52 PM
|
Got the coupler housing bracket re-drilled, tapped and mounted. Once again, the drill wanted to migrate to the original hole [a mini drill press would be useful], but also again, the rethreading of a previously overstretched hole ended up improving the overall alignment of the thing and with a little filing . . .
I don't think I want to try and really detail this locomotive out (e.g., looking at photographs of locomotives of the 1860-1870 era, there is a lot of "decoration"), and I really don't want to stray far from what Mantua produced. Although, when it comes down to it, I believe most manufacturers of the early models encouraged detailing. So I am going to add a brake wheel to the tender; as I have seen in photos of these.
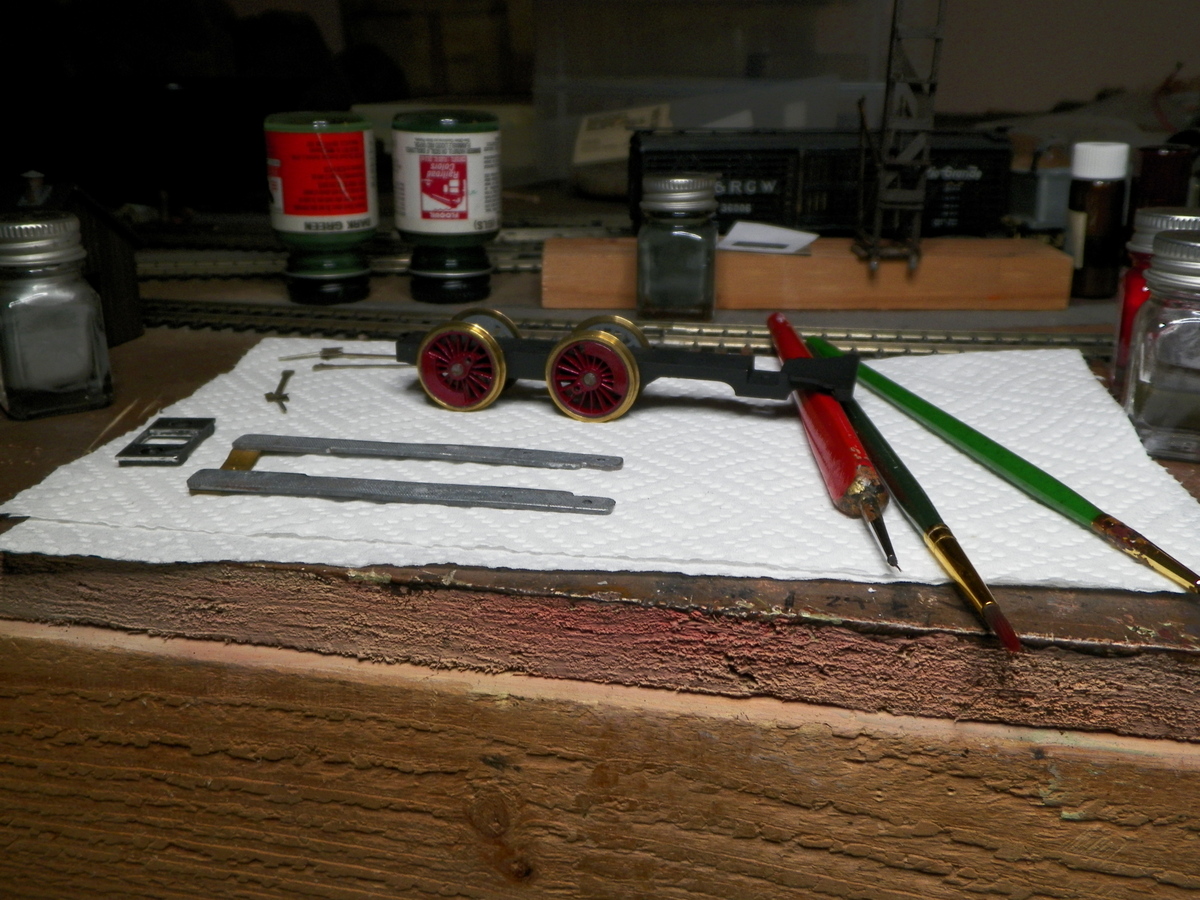
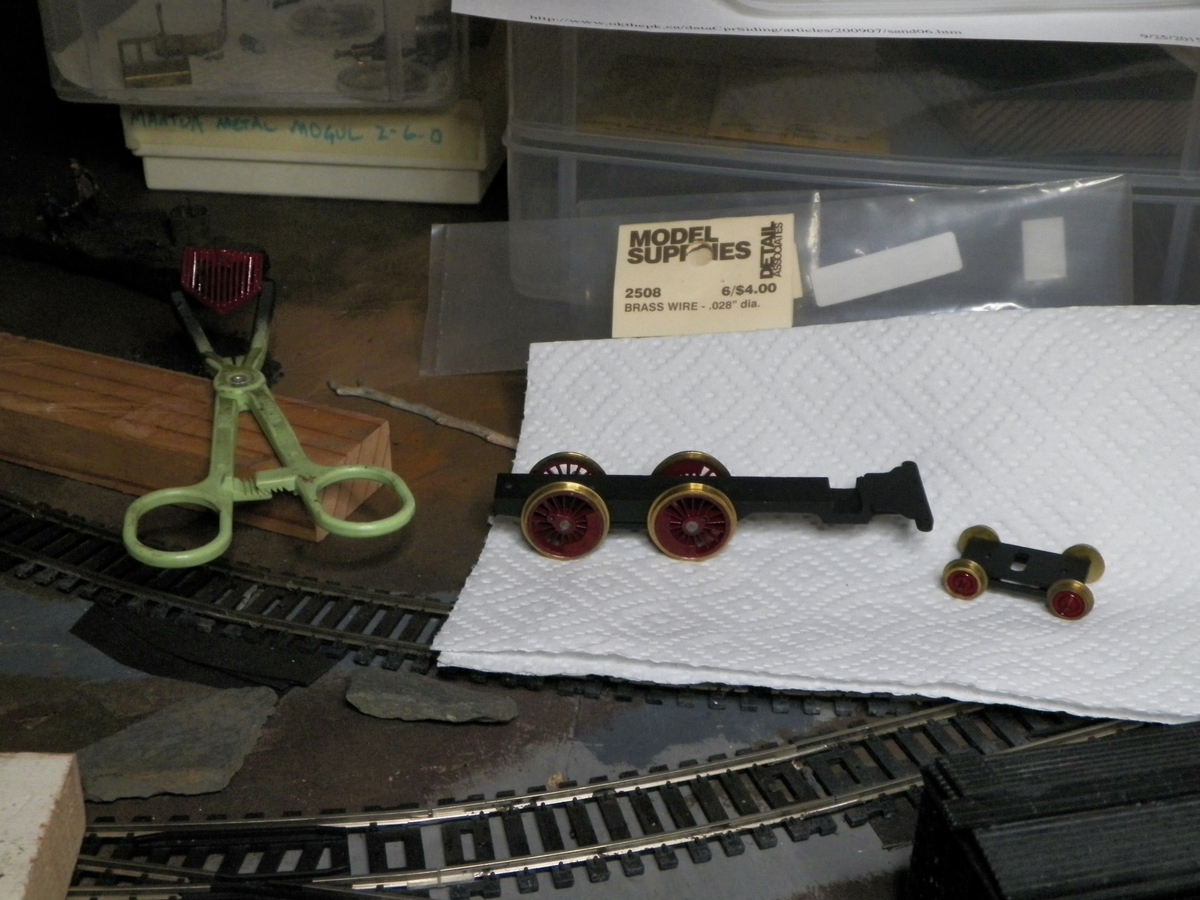
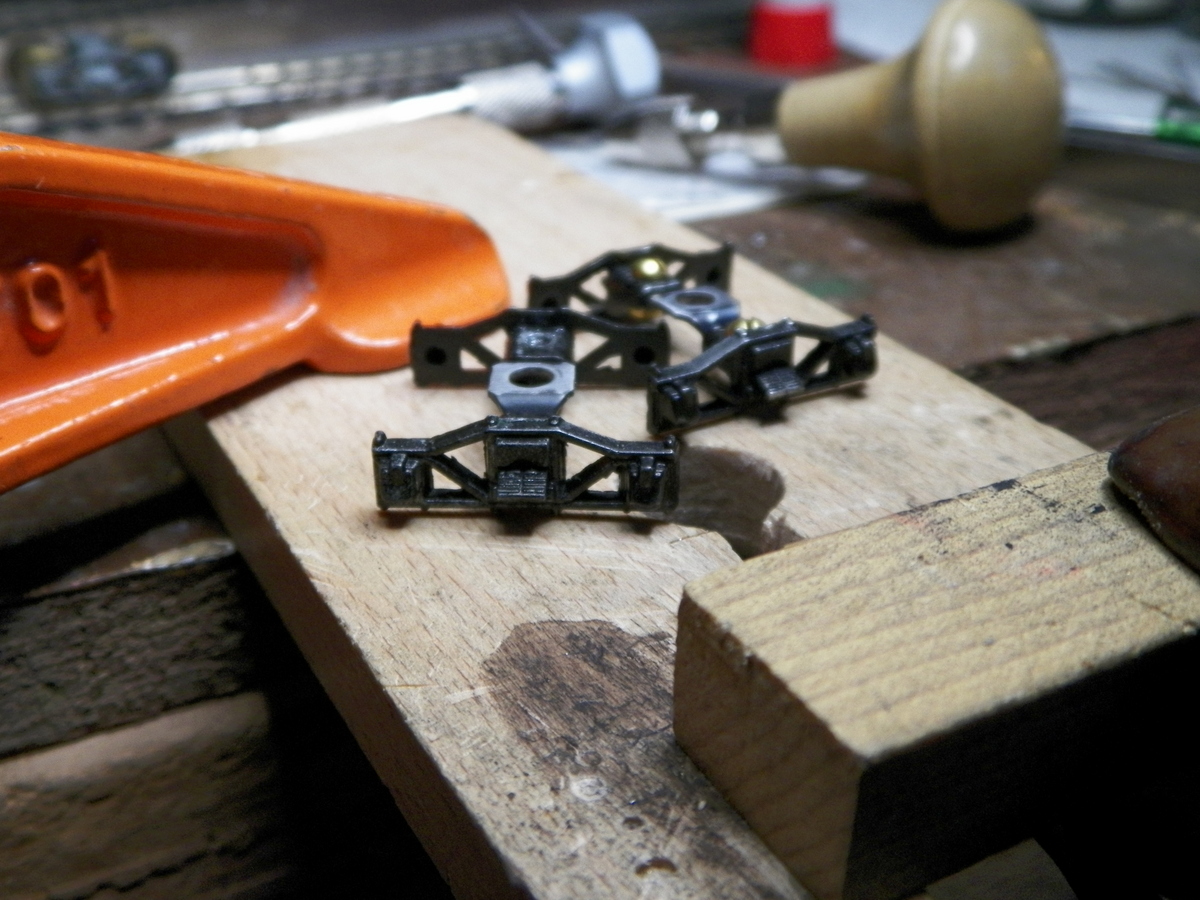
Also, looking further at my previous choice of tender trucks (?temporary?), I think I'm going to go with some Mantua/Tyco tender trucks from the 4-6-0, 4-8-0 era. There side frames pretty much match some of the side frames I think might have come with some of the Belles ? ? ?
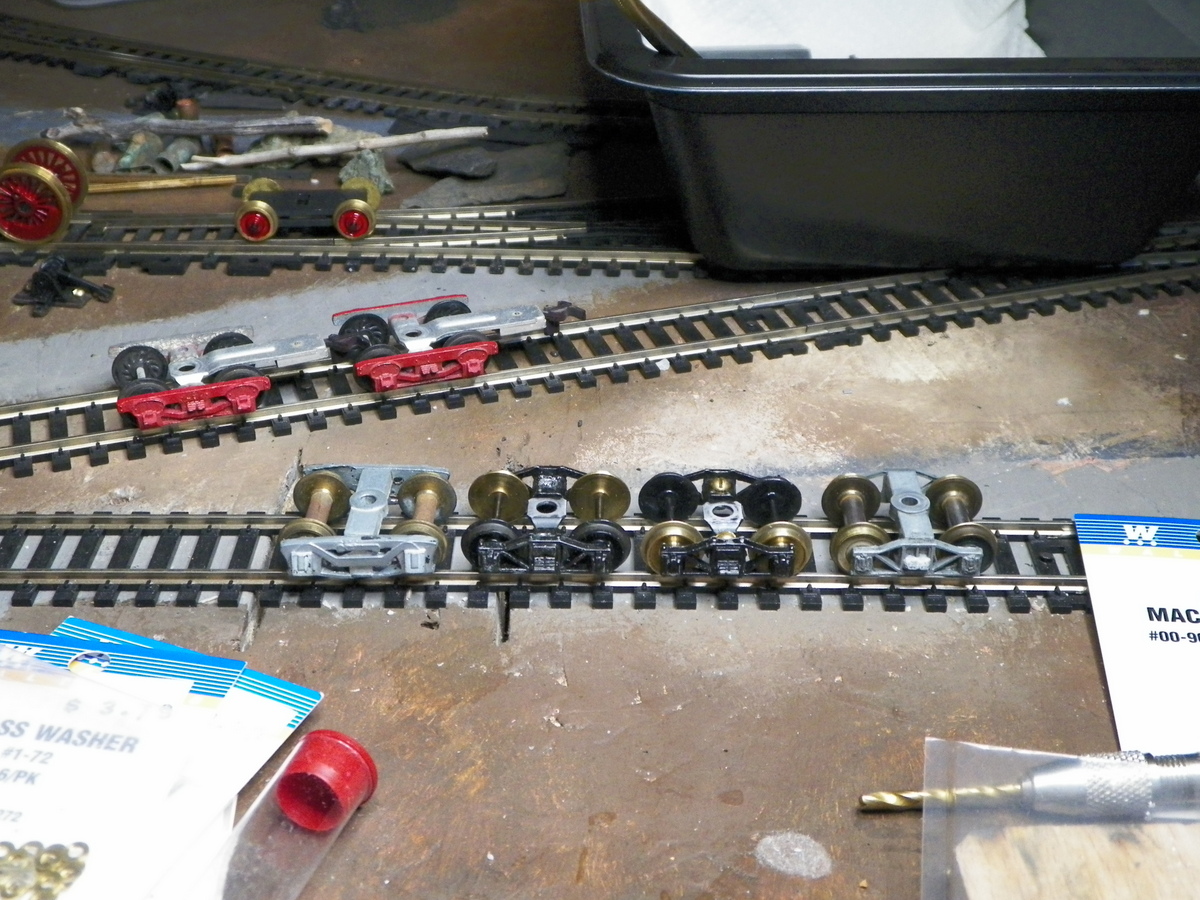
In the photo above, the side frames on the unpainted trucks to the left are what I would use, but I don't have a second one presently. The center ones are what I'm going to use; replacing the original wheels with the steel wheels I painted brass color. ?Why did I paint the wheels brass? Guess I wanted them to match the locomotive wheels and I really didn't want to get into painting the drivers black or some form of iron color (though that could be fun to try sometime). The screws in the side frames I'm going to use are from a previous repair . . . before I realized you could gently bend the yoke to remove the wheelsets.
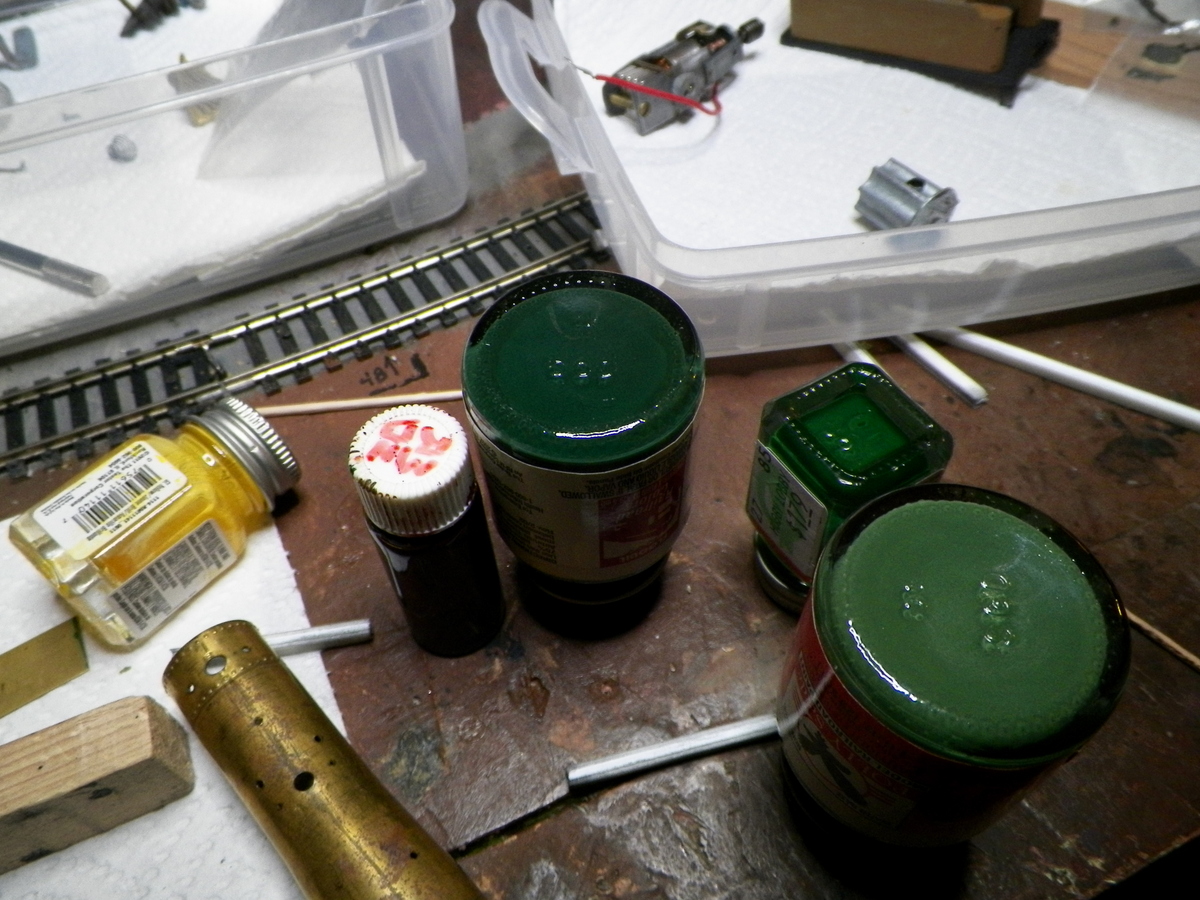
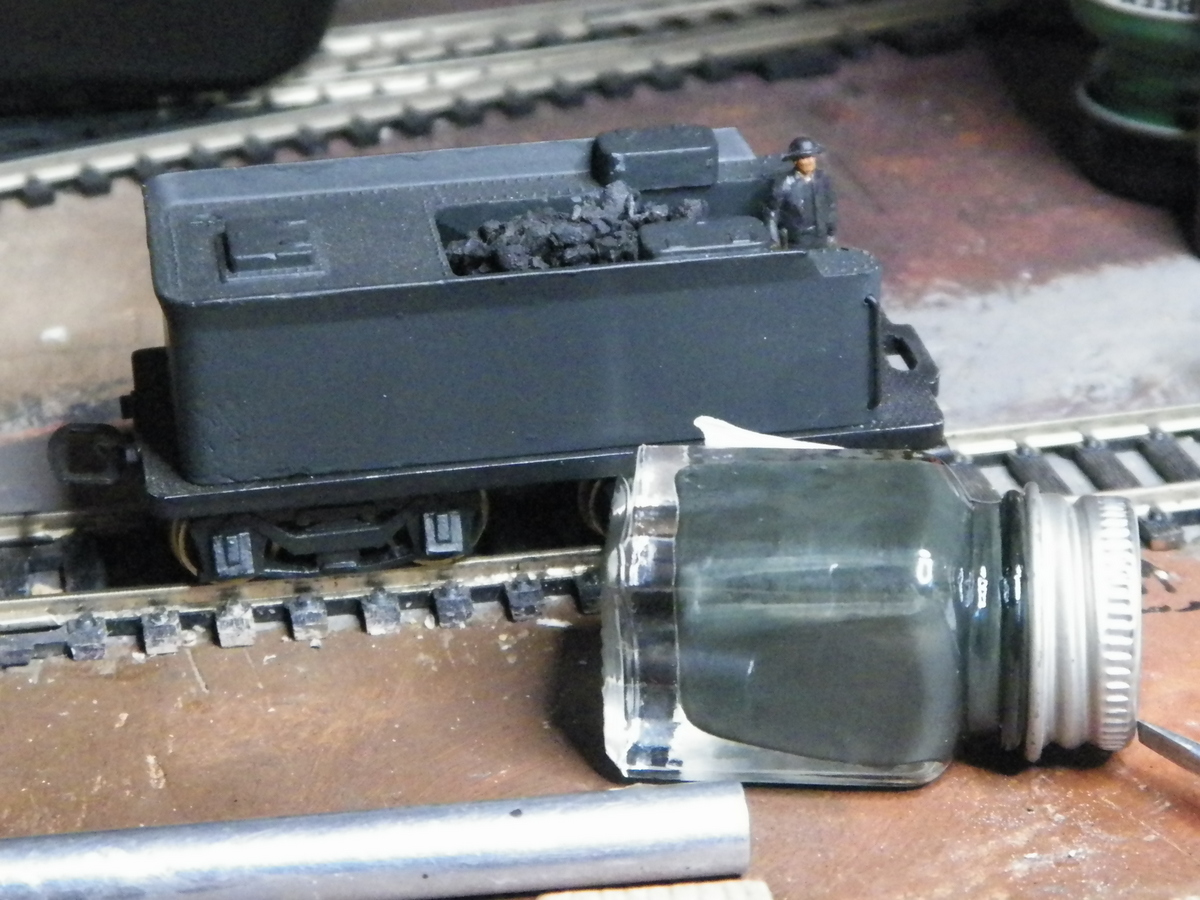
In the photo below, you see a couple of things. One is, that the tender (being used with a Mogul previously posted on this site) is painted "locomotive green". It's formula, from Daryl Ryder, is 1/2 Brunswick Green and 1/2 Pullman Green . . . tones it down a hair from almost black to a wee bit green . . . or something like that. That is the color in the small bottle lying on it's side.
The other thing on this tender are the earlier type trucks (which I could "borrow", but I would much prefer not to . . . or permanently switch between the two, but you know the dangers of handling models more than necessary . . . one mod leading to a couple of repairs ?).
|
|
Country: USA ~
Posts: 2087 ~
Member Since: March 16 2013 ~
Last Visit: July 05 2018
|
Alert Moderator
|
|
|
|
Posted - October 27 2015 : 1:27:01 PM
|
see you have gone for the reading trucks,looks good,but the ones in photo above the last,look more like the original ken
catfordken
if you cannot see the light at the end of the tunnel,try turning around
Edited by - catfordken on October 27 2015 1:57:42 PM
|
|
Country: United Kingdom ~
Posts: 8294 ~
Member Since: September 28 2006 ~
Last Visit: October 20 2021
|
Alert Moderator
|
|
|
|
Posted - October 27 2015 : 5:02:28 PM
|
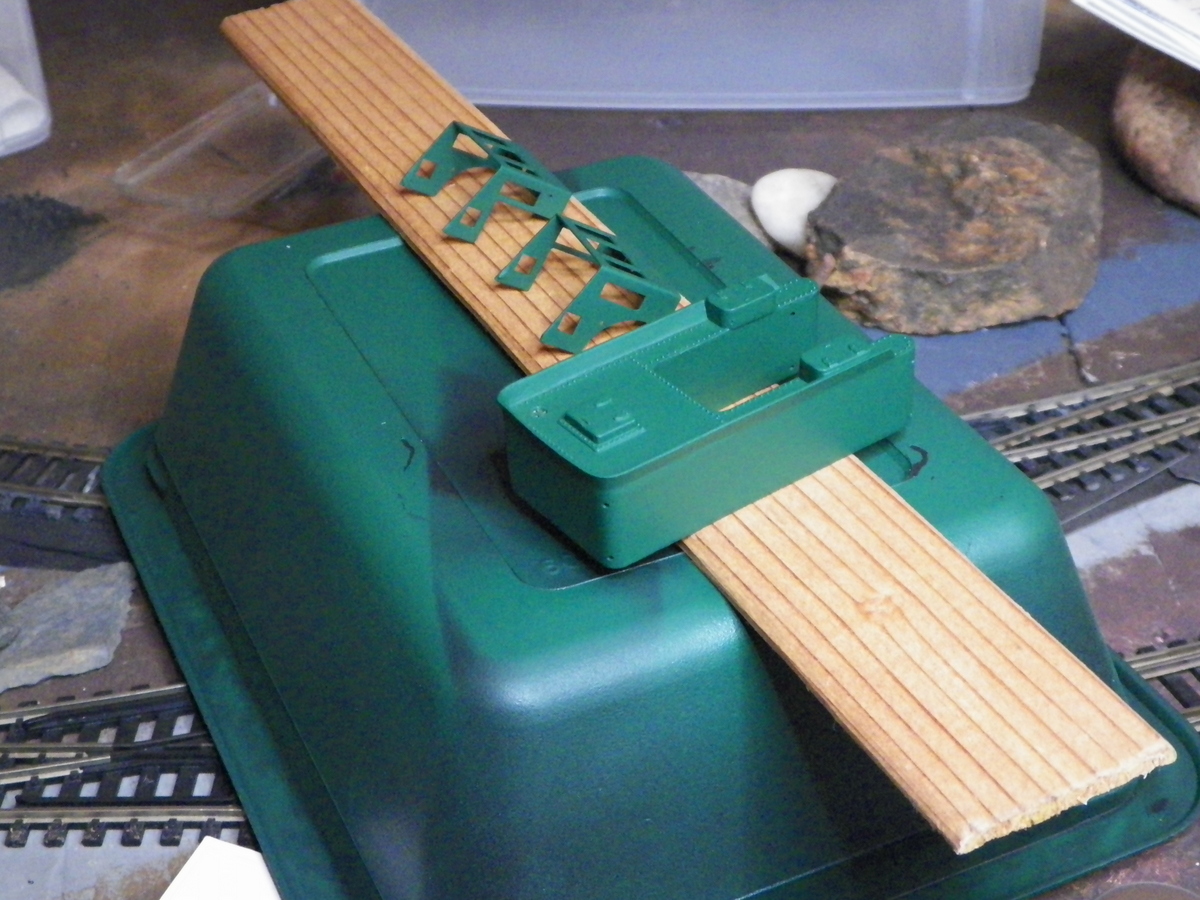
I think we might be talking about the same ones Ken; the ones without the wheels in the second to last photo are the ones I'm going to use . . . until something better comes along. "Surf was up" today, with sunshine and warm enough, so I stole more time for my vice and did some spray painting. I ended up spraying dull coat on the green and I'm still not quite sure what to think of it.

|
|
Country: USA ~
Posts: 2087 ~
Member Since: March 16 2013 ~
Last Visit: July 05 2018
|
Alert Moderator
|
|
|
|
Posted - October 27 2015 : 7:09:12 PM
|
love that green,looks good to me
catfordken
if you cannot see the light at the end of the tunnel,try turning around
|
|
Country: United Kingdom ~
Posts: 8294 ~
Member Since: September 28 2006 ~
Last Visit: October 20 2021
|
Alert Moderator
|
|
|
|
Posted - October 27 2015 : 7:16:39 PM
|
quote:The center ones are what I'm going to use; replacing the original wheels with the steel wheels I painted brass color. ?Why did I paint the wheels brass? Guess I wanted them to match the locomotive wheels and I really didn't want to get into painting the drivers black or some form of iron color (though that could be fun to try sometime).
Originally posted by Barry - October 27 2015 : 12:39:52 PM
|
I've been looking at pictures of 1860's locomotives as they are reproduced, today. Jupiter, Leviathan and U.P. 119 have all wheels painted red. Some foreign countries, such as China, Russia and Germany kept red wheels into the late steam era. I'm told that a red wheel is easier to inspect for cracks than a black one.
Not saying that there's anything wrong with a brassy color, just that red, like on your drivers and pilot wheels, would be pretty typical.
Carpe Manana!
Edited by - scsshaggy on October 27 2015 7:18:03 PM
|
|
Country: USA ~
Posts: 2353 ~
Member Since: September 17 2013 ~
Last Visit: April 24 2024
|
Alert Moderator
|
|
|
|
Posted - October 28 2015 : 12:42:03 PM
|
barry i know its a british 4-4-0 but it contains a green red like yours does,but also black and white,so you can use those last to colours with yours,or even gold

catfordken
if you cannot see the light at the end of the tunnel,try turning around
|
|
Country: United Kingdom ~
Posts: 8294 ~
Member Since: September 28 2006 ~
Last Visit: October 20 2021
|
Alert Moderator
|
|
|
|
Posted - October 28 2015 : 2:20:01 PM
|
Barry, in your second post you show the motor immersed in a cleaning fluid. Just what do you use?
|
Country:  Canada ~
Posts: 265 ~
Member Since: March 07 2014 ~
Last Visit: June 26 2018 Canada ~
Posts: 265 ~
Member Since: March 07 2014 ~
Last Visit: June 26 2018
|
Alert Moderator
|
|
|
|
Posted - October 28 2015 : 3:02:25 PM
|
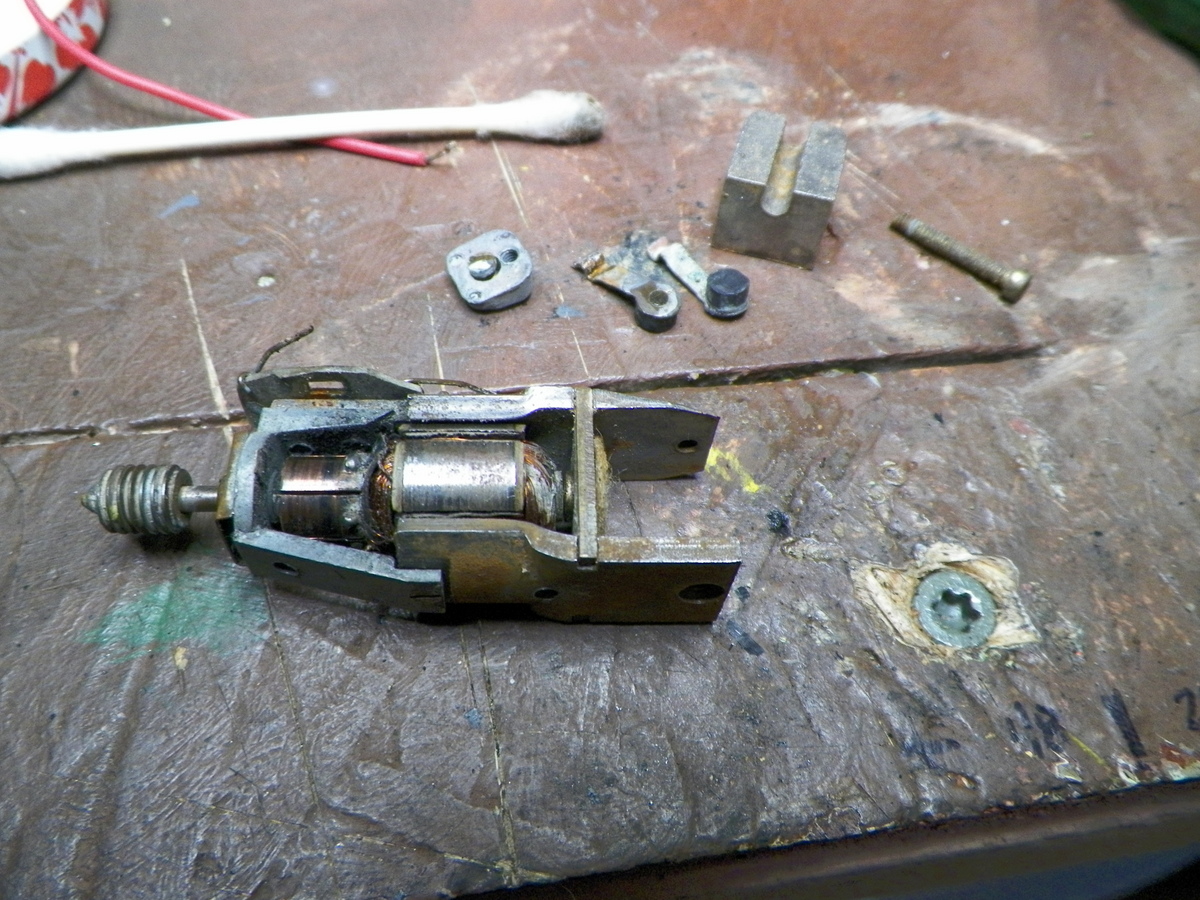
Hi Alex, the cleaning fluid is rubbing alcohol (98%, I believe; it comes in a lower strength as well, but since the whole idea is less water, I go for the 98%) from the grocery store. You really have to add elbow grease applied with a toothpick or fragment of something or other, to get to the nooks and crannies. One thing nice about these older motors is that they are mostly screwed together instead of riveted, so you can get them apart to clean them. On this particular motor, which had some surface rust on it (you can still see a stain in the metal), I also used a sanding stick and knife to get things clean. And a soldering iron to remove old solder. I prefer not to solder the wire to the motor; I trap it under the brush spring.
So today so far (see how much more time I can steal from neglected duties; I'm obsessed nowJ) I'm examining the paint work to see what I think. Yeah, Ken, I dig the colors on those UK locomotives. Although I've only seen photographs, it looks to me like the British are a bit more adept at locomotive restoration . . . perhaps due to the monarchy?
I dig the pin-striping on the wheels. I was noting that yesterday on a stagecoach here in town. At this point, I'm not ready to attempt that, but maybe I should get a tiny brush and play on some scrap ? ? ?
Thinkin' about what color the cab interior might be?
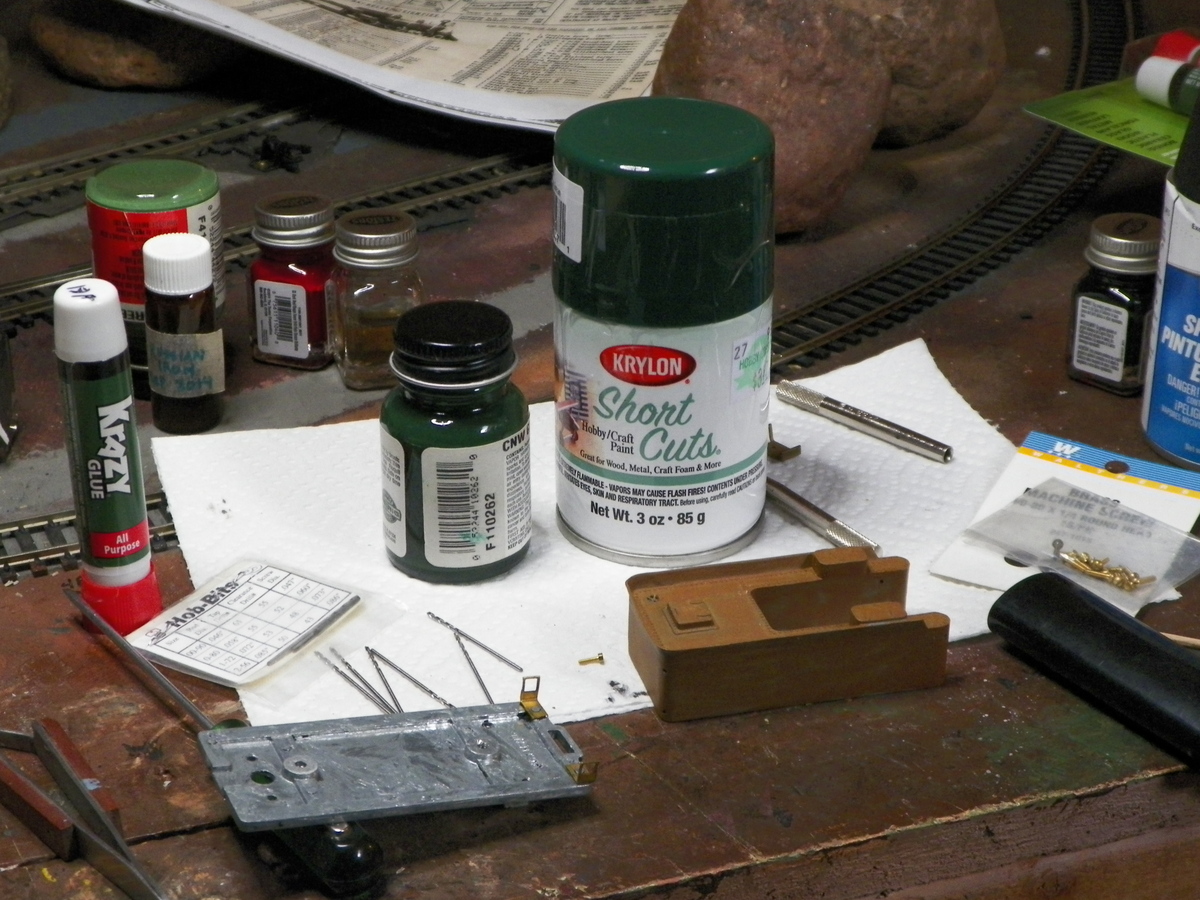
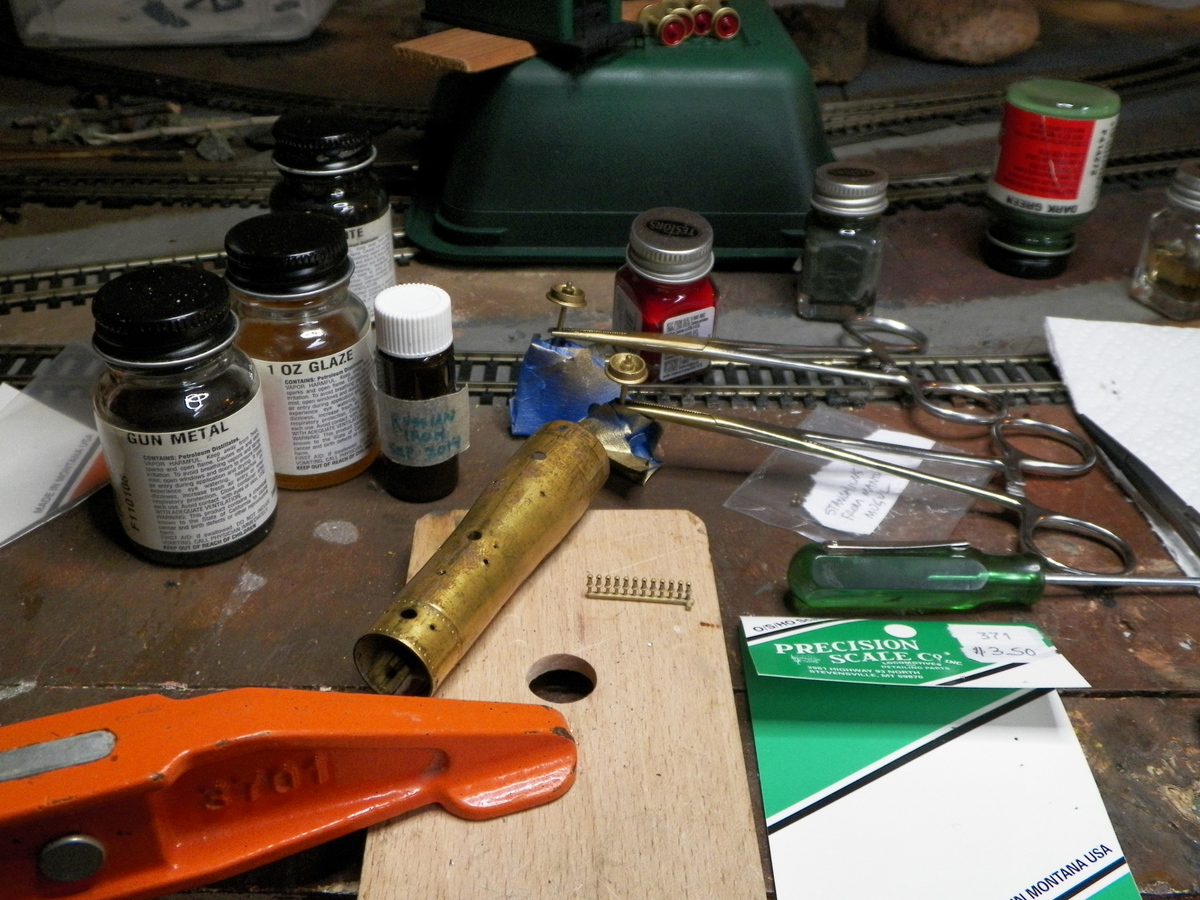
Layin' out some things for boiler hand rail stanchions and some paint work. The Russian Iron is 50/50 Gun Metal/Glaze (per Daryl Ryder; he's a model builder and painter and decal maker who's done a bunch of Colorado Midland work). The Russian Iron works pretty fair if you get it applied in a good manner and don't have to mess with it after. I'm thinkin' the smoke box is going to be graphite. The wheels next to the boiler are the pilot wheels. I decided the sprayed brass looked better than my previous brush work (which I had also coated with glaze; thinking it would make the brass look more real . . . it didn't by me), so I removed the previous paint from the pilot wheels and sprayed them brass.
|
|
Country: USA ~
Posts: 2087 ~
Member Since: March 16 2013 ~
Last Visit: July 05 2018
|
Alert Moderator
|
|